General welding techniques
|
|
General welding techniques
|
This section first describes the general welding and thermoforming techniques, and then gives examples of repairs to a number of common plastic parts.
There are a number of common step-for-step measures that in principle should always be followed when welding thermoplastics.
|
1.
|
Always start by cleaning the part of dirt and grease using lukewarm water and a mild detergent. If necessary a pressure washer can be used, for example on bumpers. It is essential that no grit or other particles remain in the area to be welded. This area, where the joint is to be made, is then cleaned with Teroson FL cleaner.
|
|
2.
|
Identify the type of plastic of which the part is made. First, look for a stamp, such as >PP/EPDM<. See
 or
or
|
|
3.
|
If a crack is to be repaired, the ends must be drilled with a 3.5 mm bit.
|
|
4.
|
Set the correct working temperature on the gun.
|
Important
|
|
It is essential that the temperature of the welding gun agrees with the type of plastic. See
|
|
|
|
|
5.
|
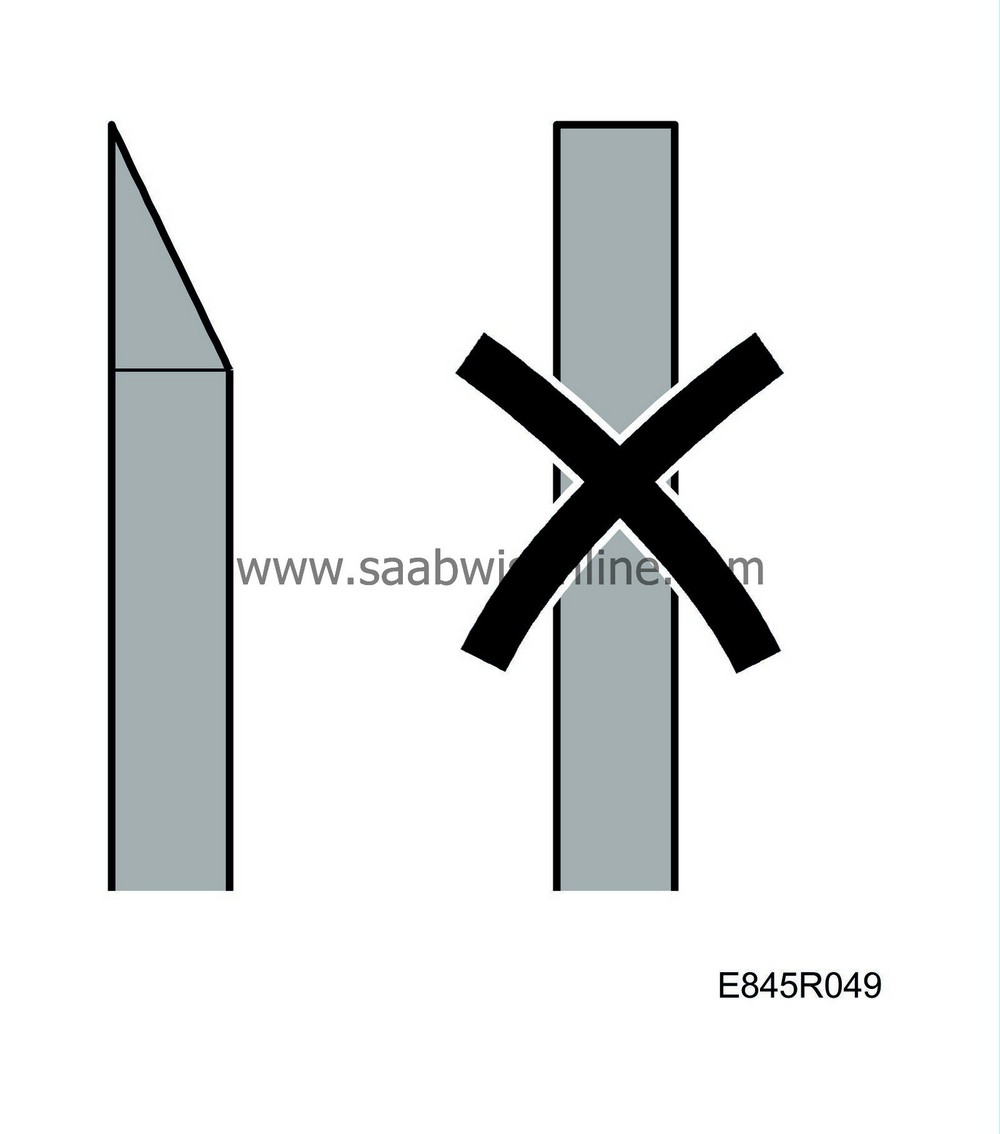
Shave the welding rod with a knife so that it is thinner at the end to be used when starting to weld. The rod then melts more easily and facilitates starting the join. When welding using a tube welding tip, the base of the tip should be held against the part being repaired, and the welding rod is fed manually through the hole in the welding tip.
|
|
6.
|
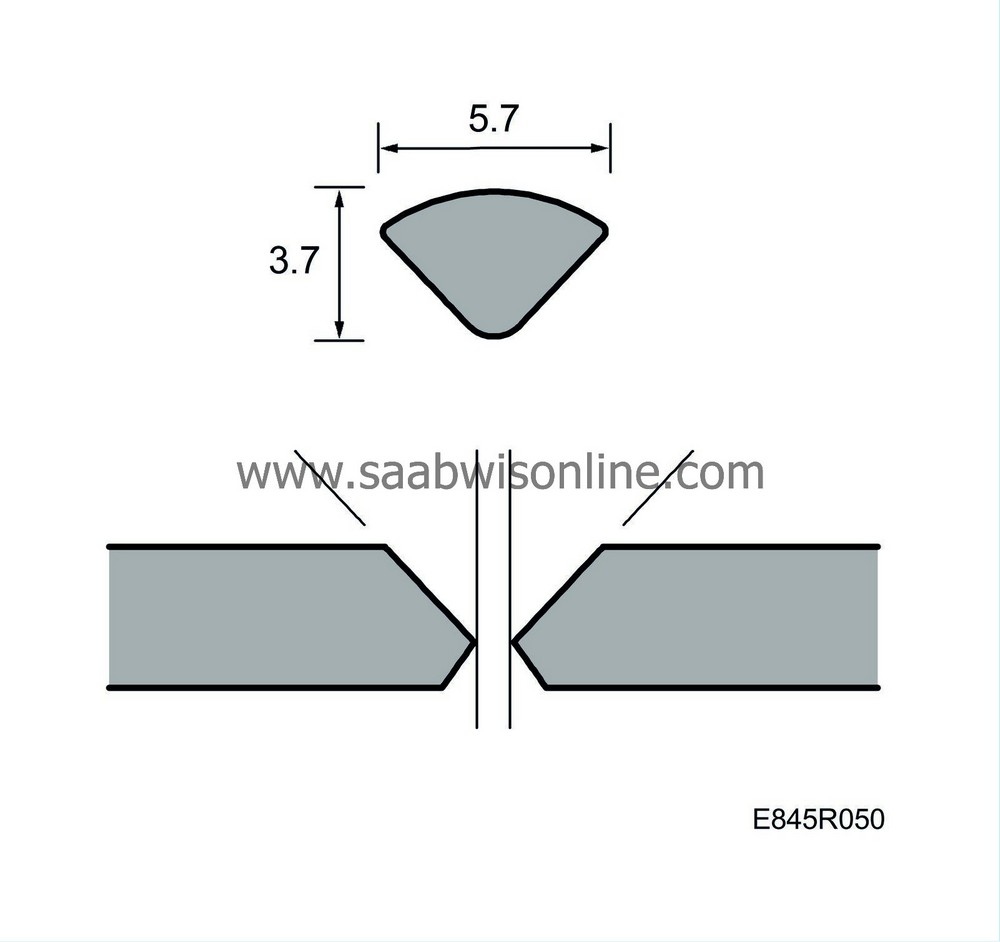
If the thickness of the material is greater than that of the welding rod, i.e. just less than 4 mm, a 90° V-shaped groove should be milled on the reverse of the damaged area. Set the grinder to a low speed so that the plastic part does not overheat, as this could mean that the repair does not attain the required strength even if welding is performed correctly. Then weld the reverse of the damaged area/crack with welding filler.
All finishing work must be performed with low speed machinery (grinder, etc.)
|
|
7.
|
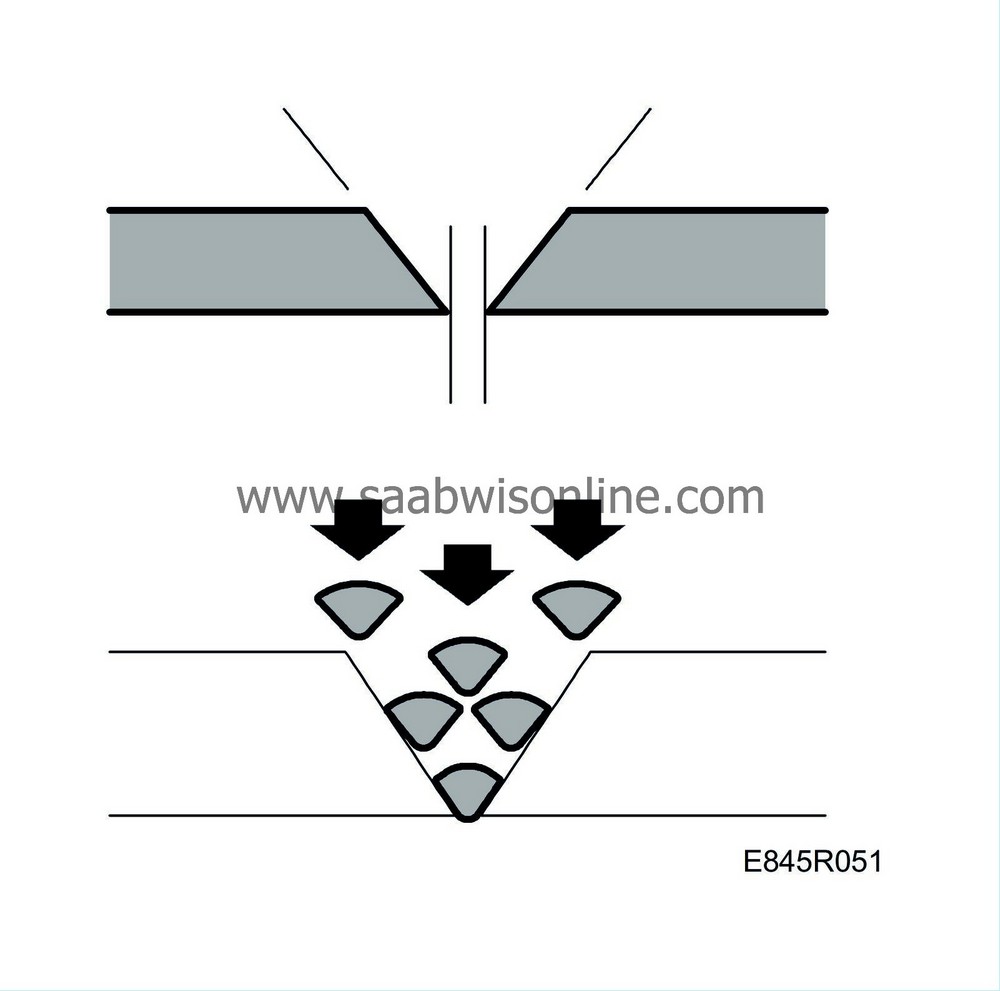
If the material is thin (max. 3.5 mm) it is sufficient to tack together the plastic parts/crack on the reverse and then weld using welding filler. If required a reinforcement weld can be made. Certain parts, for example washer fluid reservoirs, cannot be welded from the “reverse”. In such cases a V-shaped groove must be milled from the outside and then welded, possibly in several layers.
|
|
8.
|
Mill a similar 90° V-shaped groove on the front/outside.
|
|
9.
|
Grind off any paint from around the damaged area/crack.
|
|
10.
|
Check that the correct welding temperature is set on the gun.
|
|
11.
|
Weld the front/outside with welding filler.
|
|
12.
|
Allow the welded area to cool.
|
|
13.
|
Grind away any excess welding material so that the surface is even.
|
|
14.
|
This is where work to restore the finish of the part starts.
|
Important
|
|
It is essential that the welding gun is set to the correct temperature. If the temperature is too high, the material will become weak and brittle and easily crack along the joint. See also
|
|
|
|
Useful tips: Welding plastic is generally simpler than welding metal, but there are a number of differences between these methods. Before working on a customer car for the first time it is a good idea to practice welding on plastic components that have been scrapped.
Always remember to use a tube welding tip when the shape of the part and the type of damage allow this. A tube welding tip simplifies work considerably and usually produces a more attractive weld.
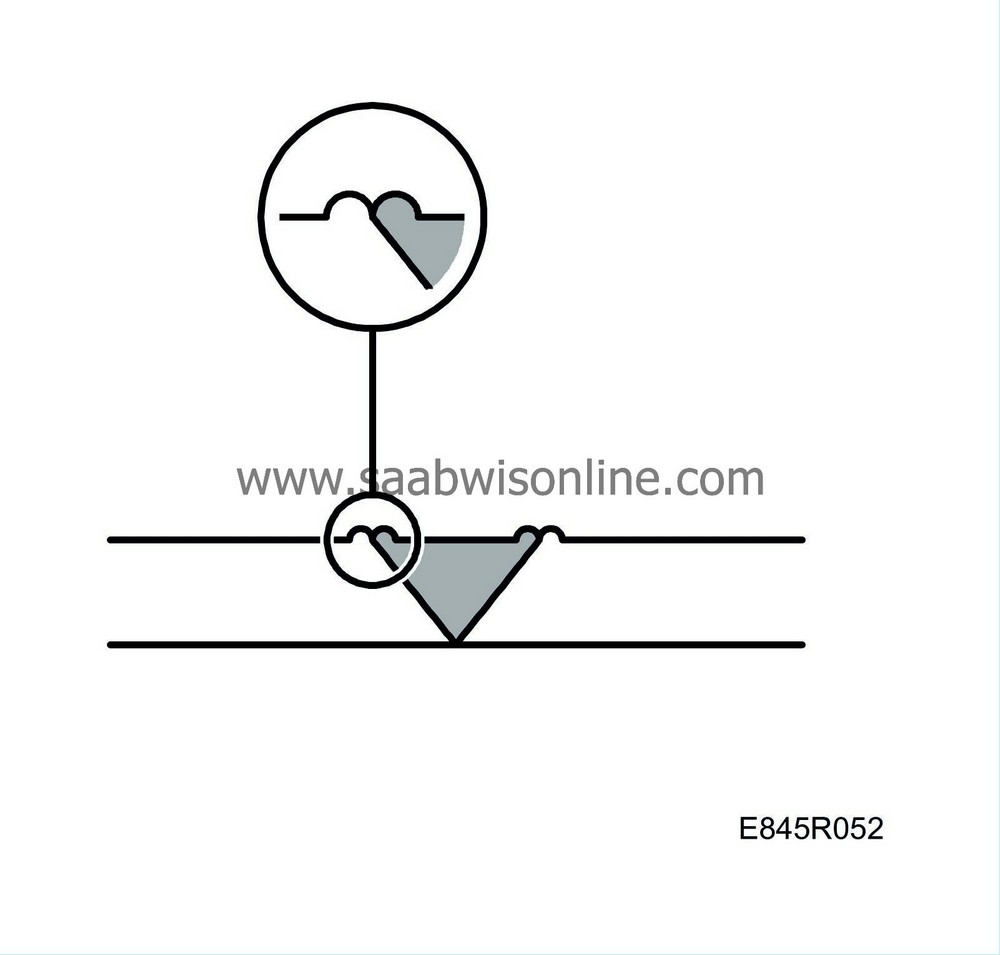
To test whether a weld has fused correctly make a visual inspection. Two small raised lines should have formed on both sides of the weld. These appear as small “waves” in the melted plastic. The outer wave is from the repair object and the inner wave from the filler. See illustration.