Timing cover with gear transmission
|
|
Timing cover with gear transmission
|
 Warning
|
|
Removal of the fuel rail involves partial dismantling of the car's fuel system. The following points must therefore be observed in connection with this work:
|
|
•
|
Make sure a class BE fire extinguisher is close to hand! Consider the risk of sparking, e.g. when breaking circuits, short-circuits etc.
|
|
•
|
Absolutely No Smoking!
|
|
•
|
Ensure that there is a good exchange of air. If approved ventilation for the extraction of fuel fumes is available, this should be used.
|
|
•
|
Wear protective gloves! Prolonged exposure of the hands to fuel can cause irritation to the skin.
|
|
•
|
Wear protective goggles.
|
|
|
|
|
|
|
Important
|
|
Be particulary observant regardning cleanliness when working on the fuel system. Loss of function may occur due to very small particles. Prevent dirt and grime from entering the fuel system by cleaning the connections and plugging pipes and lines during disassembly. Use 82 92 948 Plugs, A/C system assembly. Keep components free from contaminants during storage.
|
|
|
|
1.
|
Undo the cap on the expansion tank.
|
|
2.
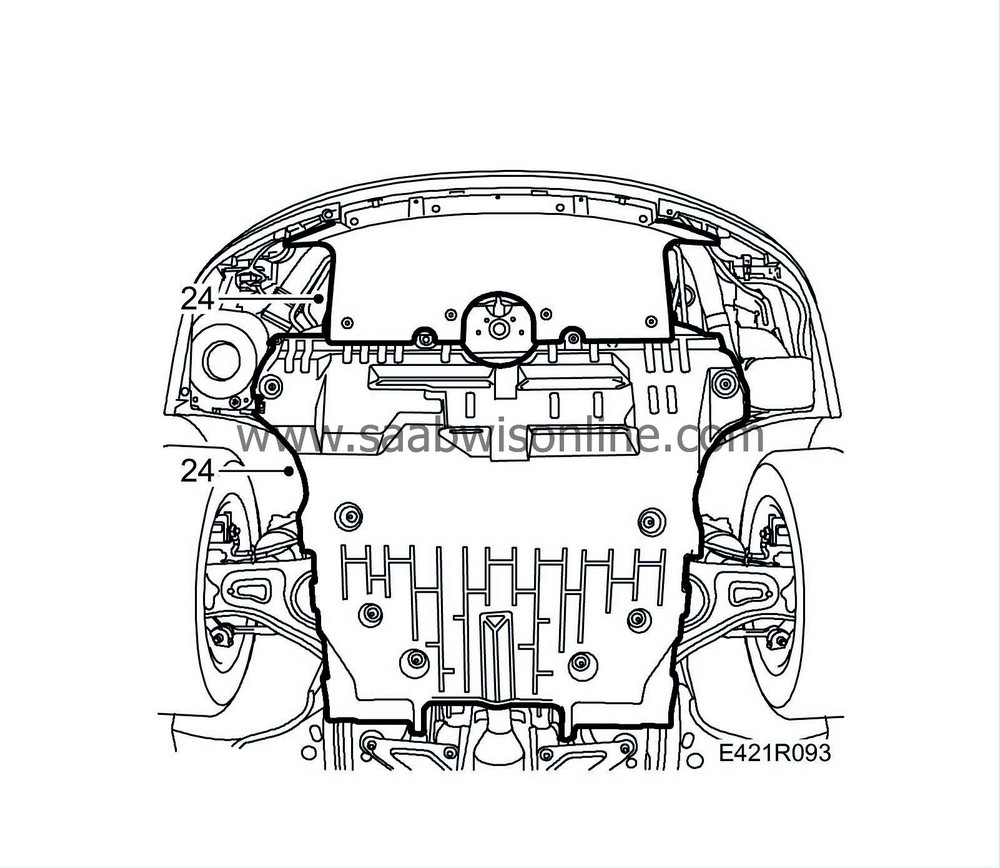
|
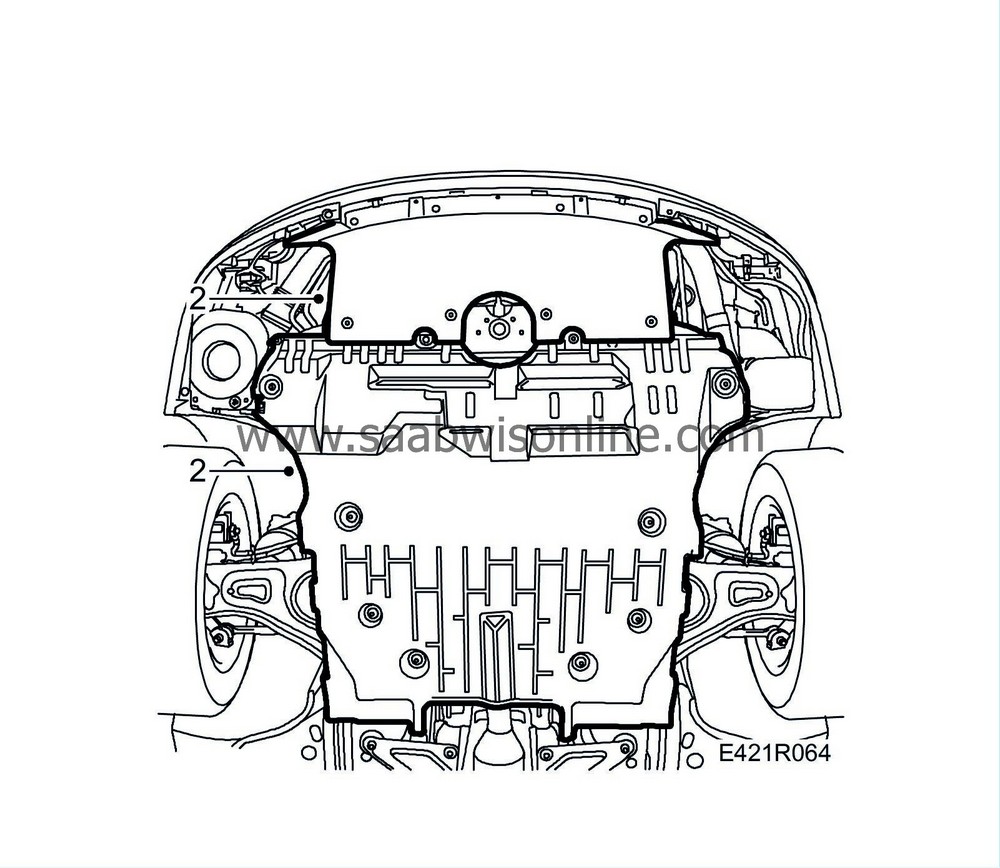
Raise the car and remove the lower engine cover.
|
|
3.
|
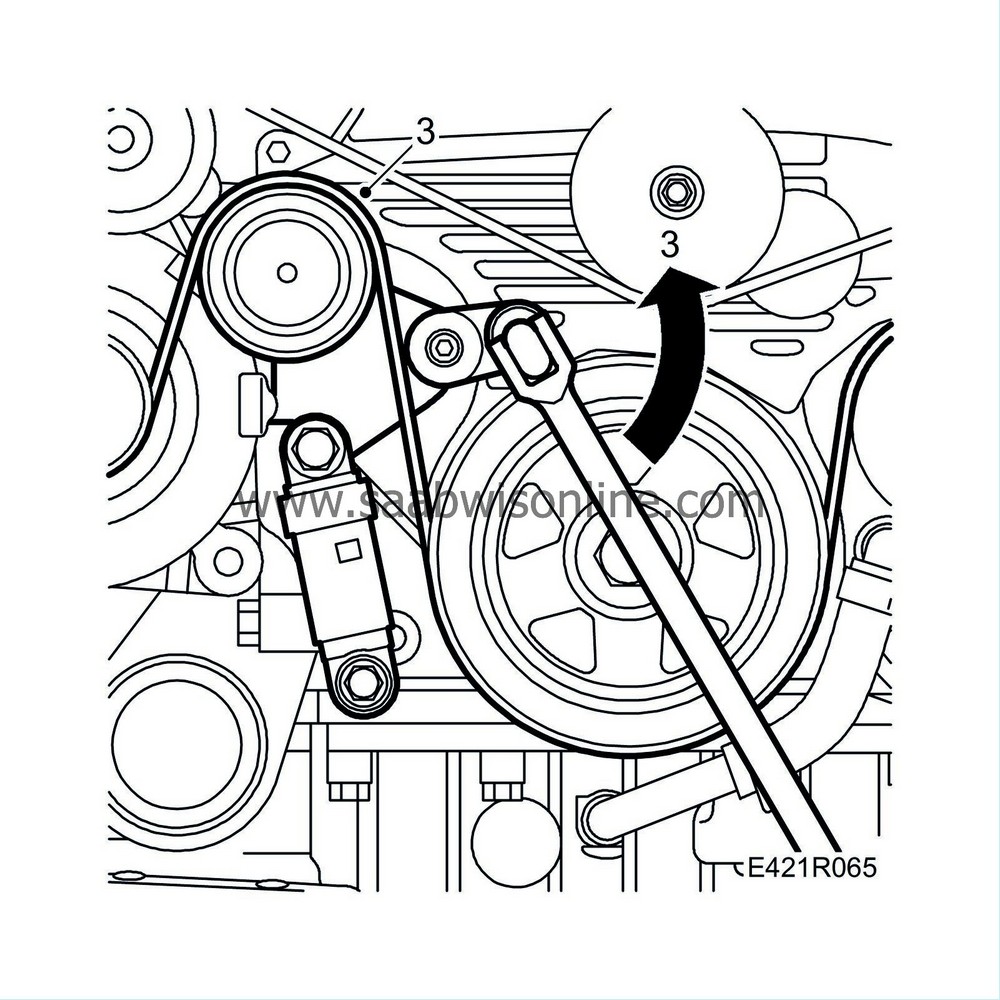
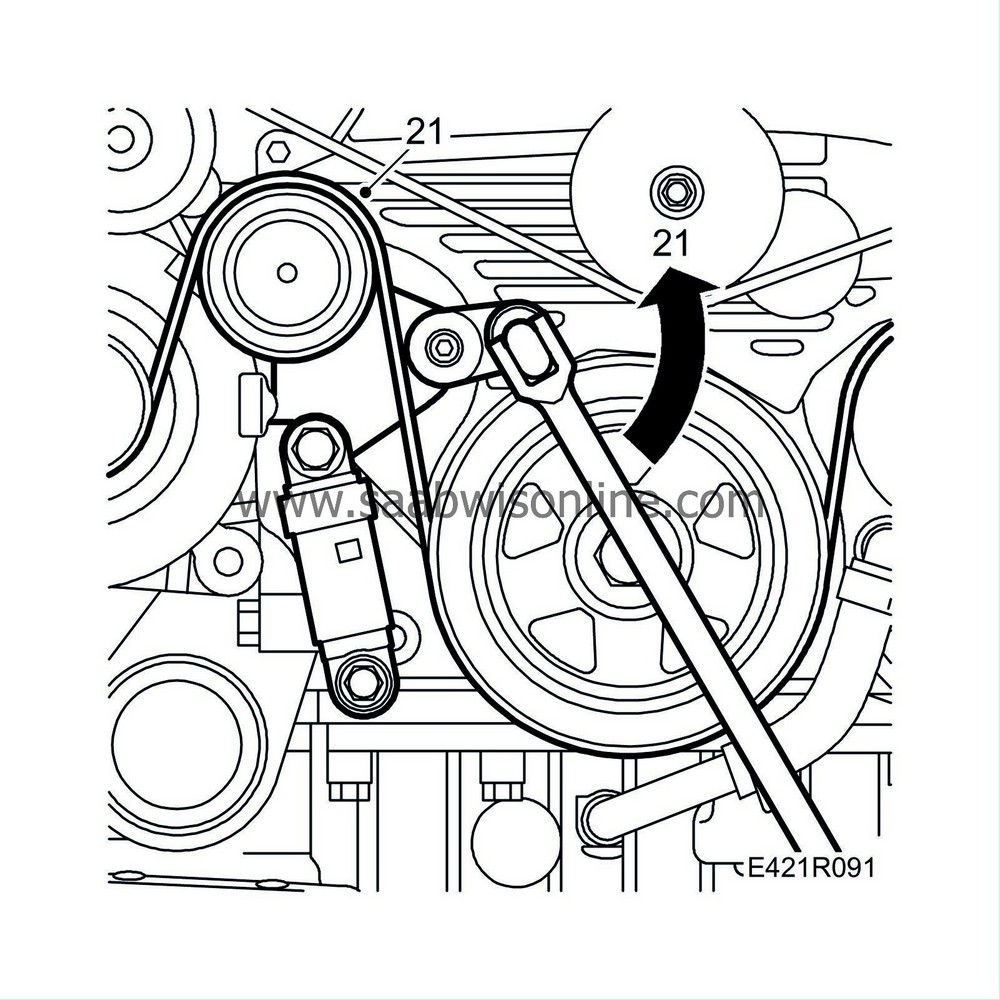
Carefully and slowly release the tension of the belt tensioner. Remove the multigroove V-belt. Remove the belt tensioner.
|
|
4.
|
Place a suitable receptacle under the car and drain the radiator.
|
|
5.
|
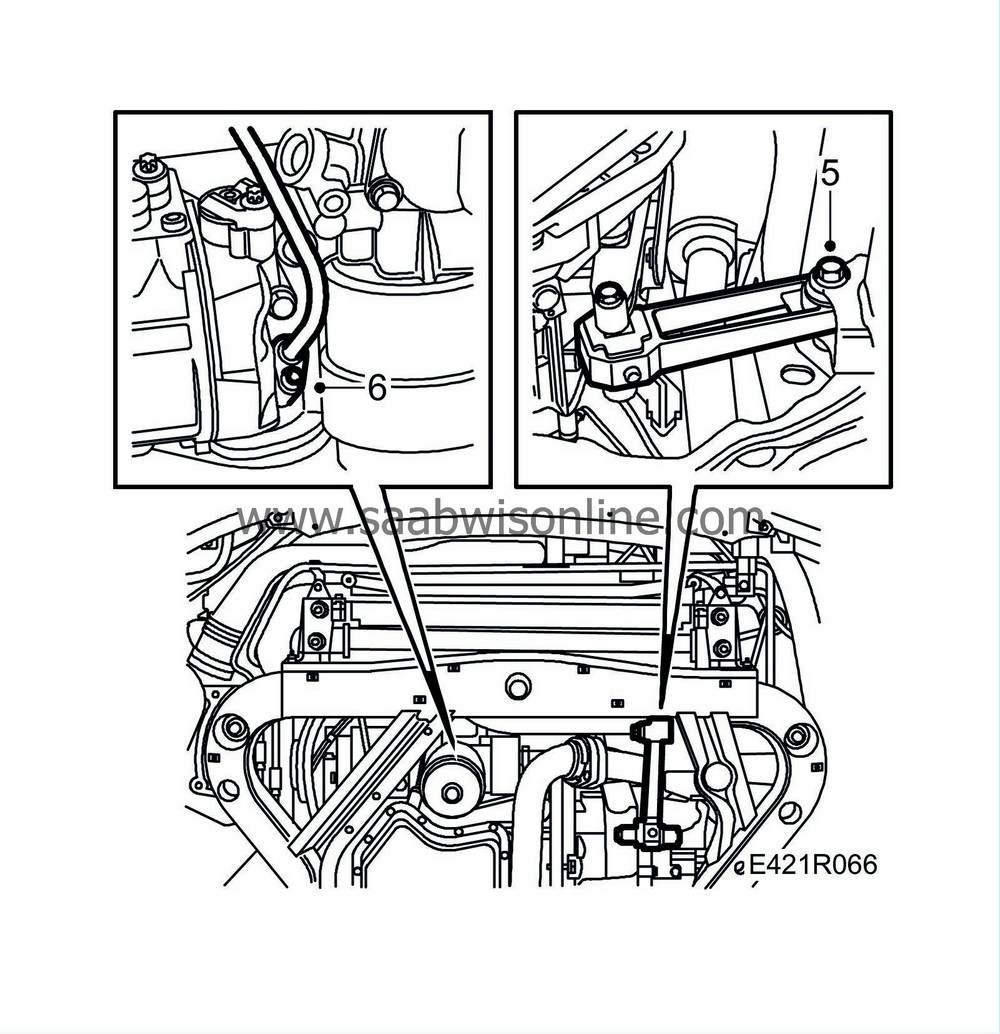
Undo the front bolt on the front torque arm.
|
|
6.
|
Remove the lower bolt securing the dipstick pipe.
|
|
7.
|
Lower the car and remove the intake manifold with mass air flow sensor from the turbocharger.

|
|
8.
|
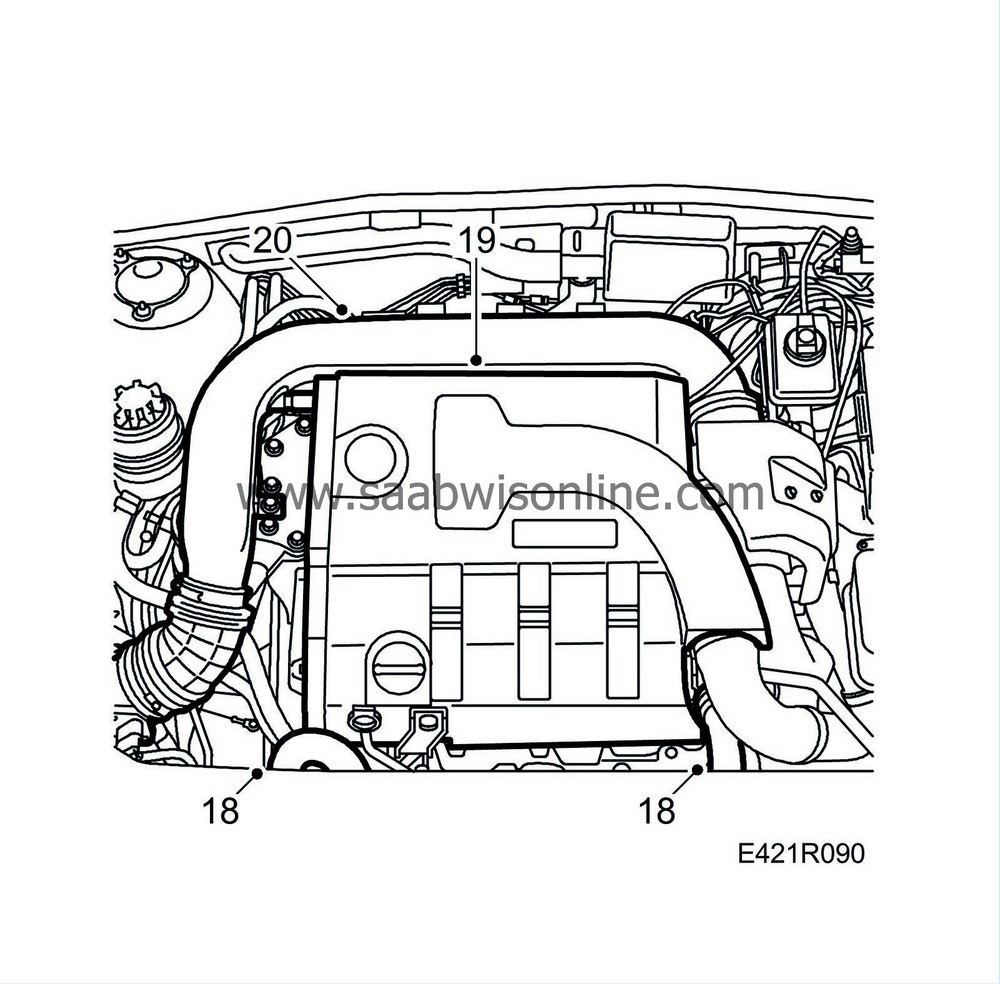
Remove the upper engine cover.
|
|
9.
|
Remove the upper radiator hose.
|
|
10.
|
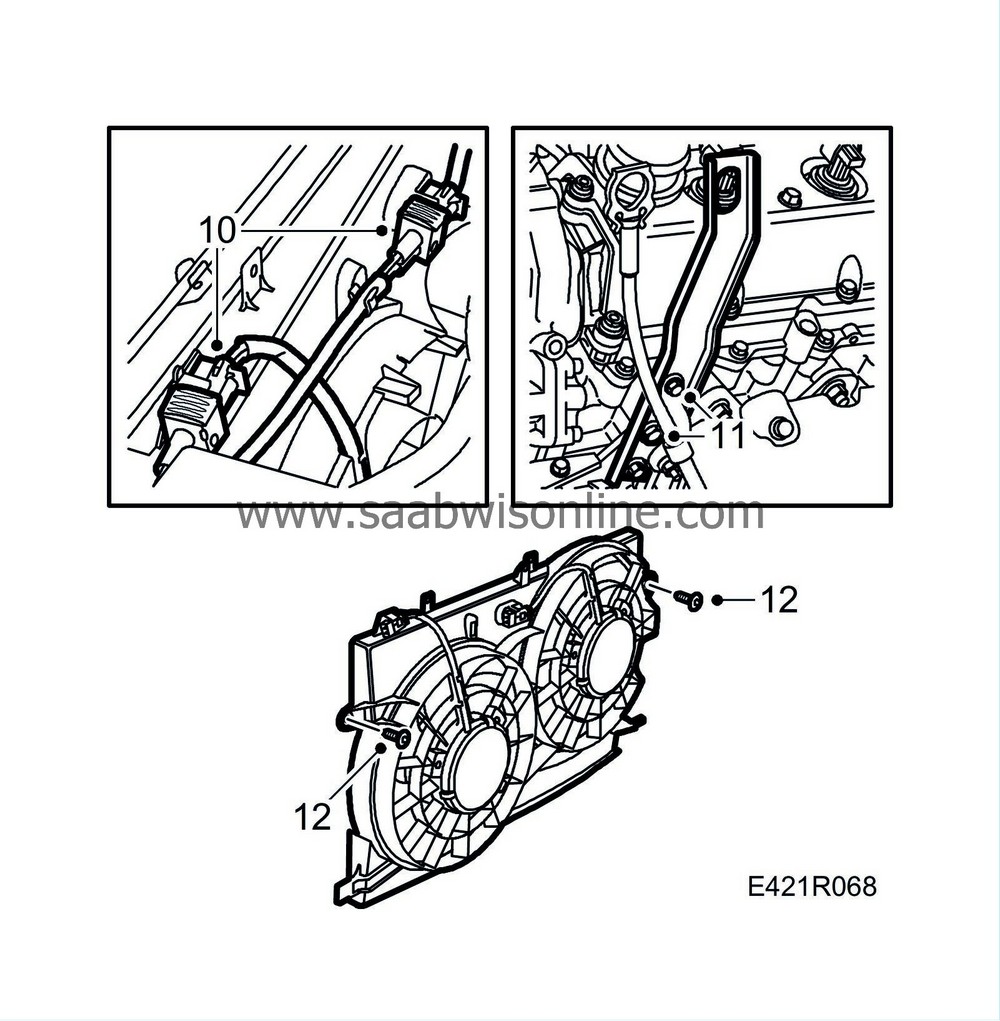
Unplug the fan connectors.
|
|
11.
|
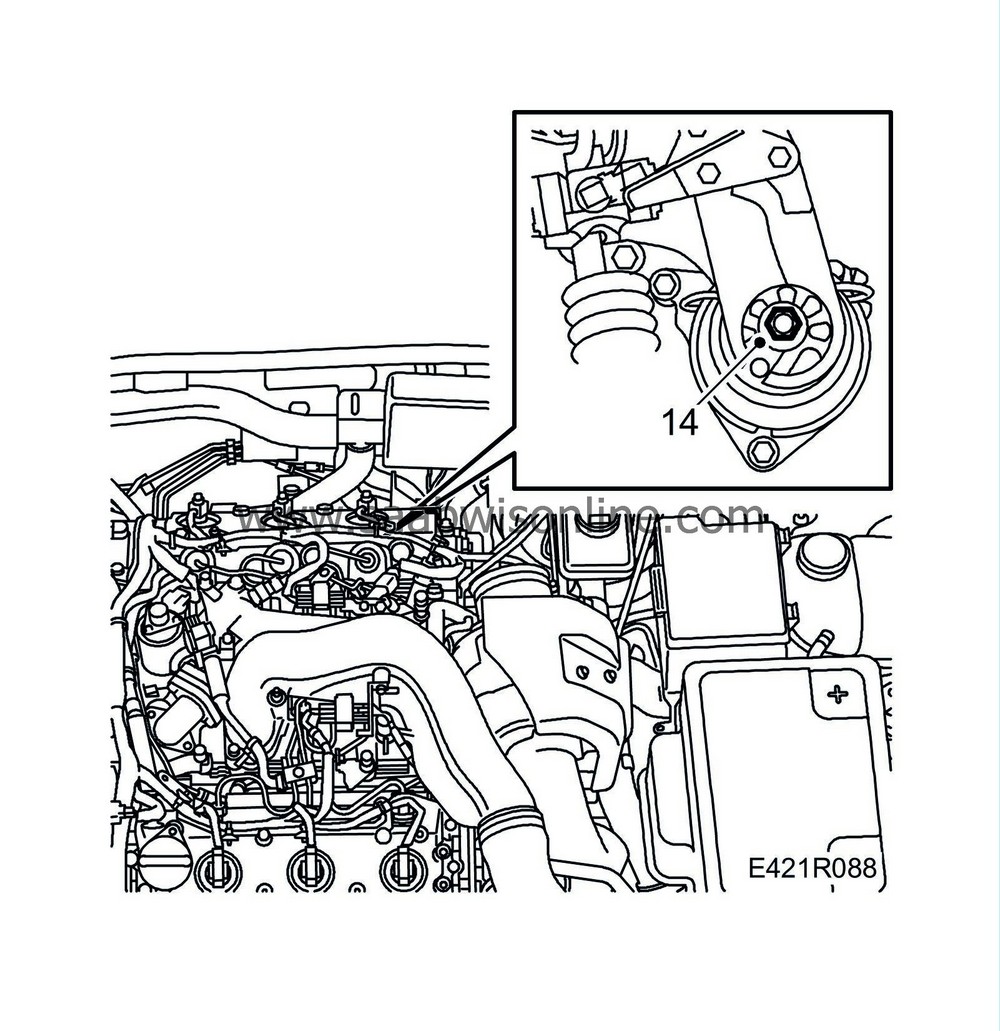
Remove the upper bolt securing the lifting eye and remove the dipstick pipe from the lifting eye.
|
|
12.
|
Move aside the lifting eye and remove the fan cowling.
|
|
13.
|
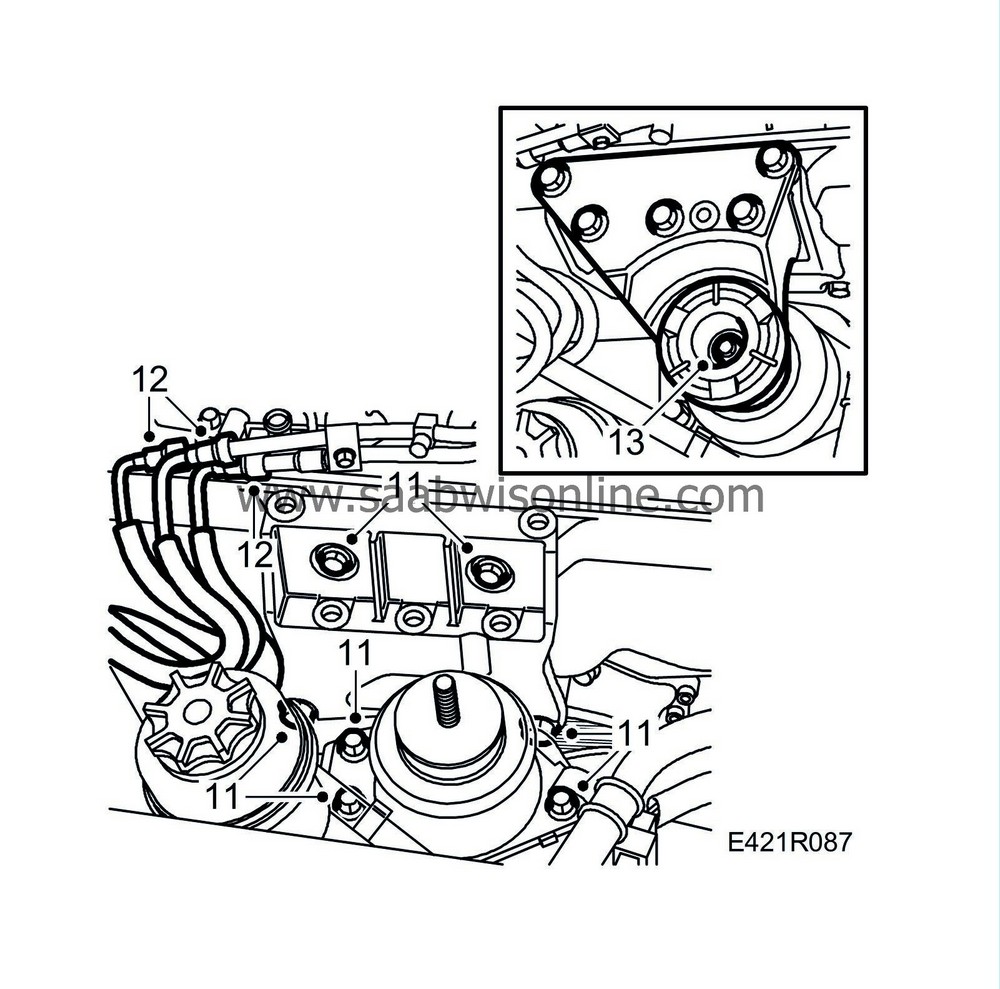
Remove the nut on the rear engine mounting.

|
|
14.
|
Undo the quick-release couplings on the fuel lines. Use a cloth to catch any fuel spill.

|
|
15.
|
Take up the weight of the engine using a jack. Remove the right-hand engine mounting with the bracket and engine pad. Raise the engine slightly and remove the engine bracket bolts. Remove the lower engine bracket.
|
|
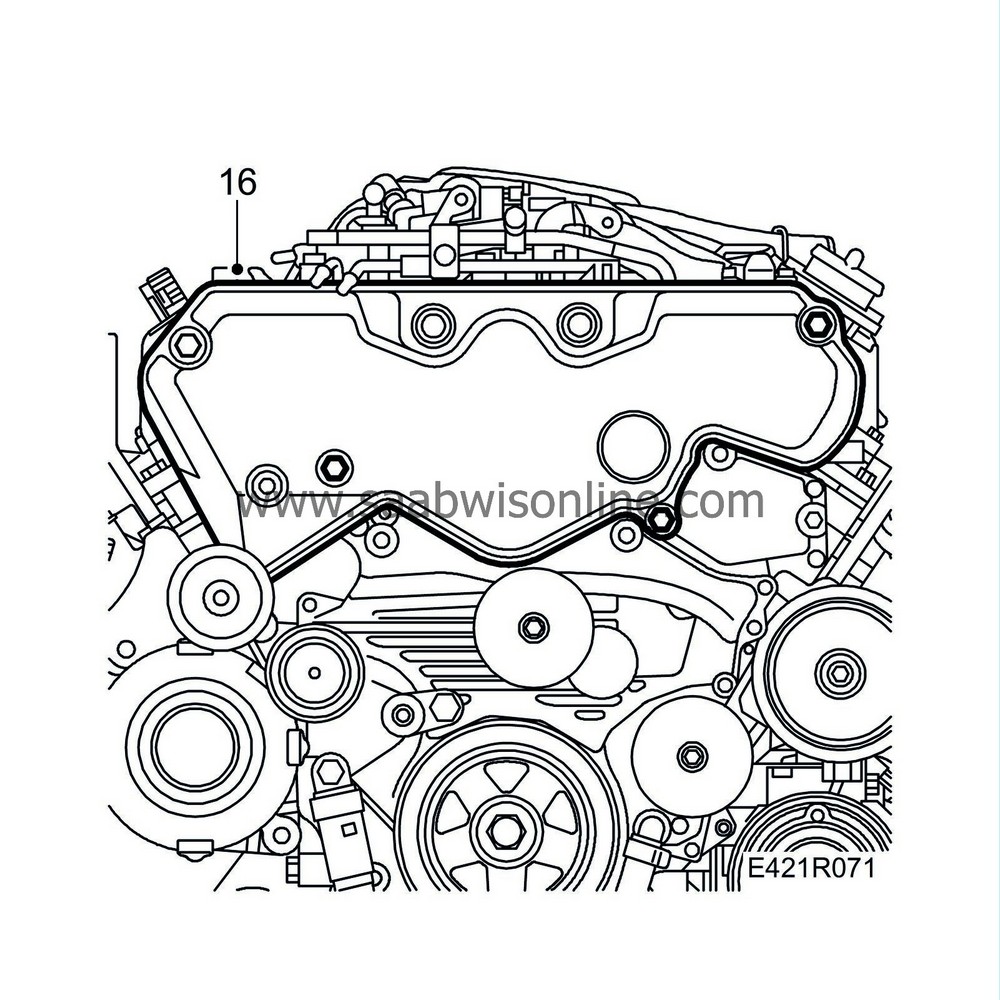
16.
|
Remove the timing belt cover.
|
|
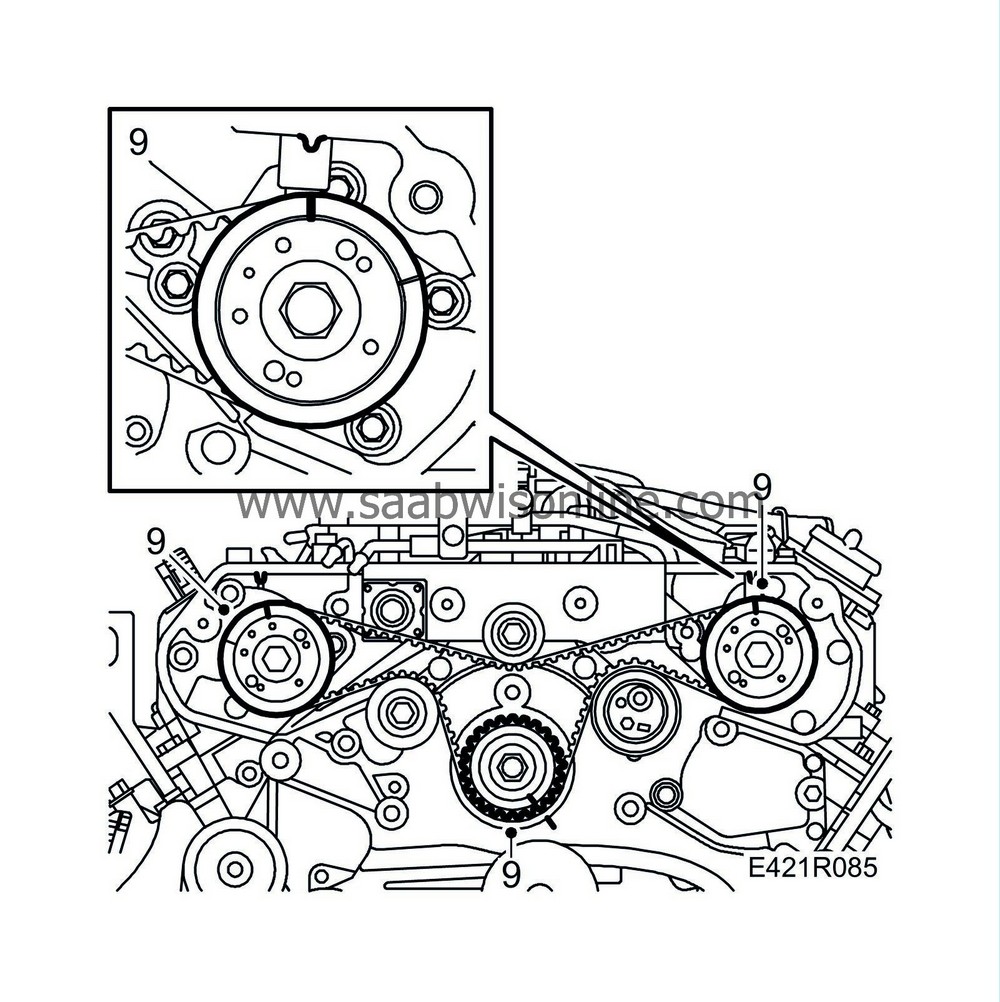
17.
|
Zero the engine, aligning the crankshaft pulley, camshaft pulleys and fuel pump pulley with the markings on the engine.

|
|
18.
|
If the markings on the belt are unclear, remark the belt to correspond with the marks on the pulleys.
|
|
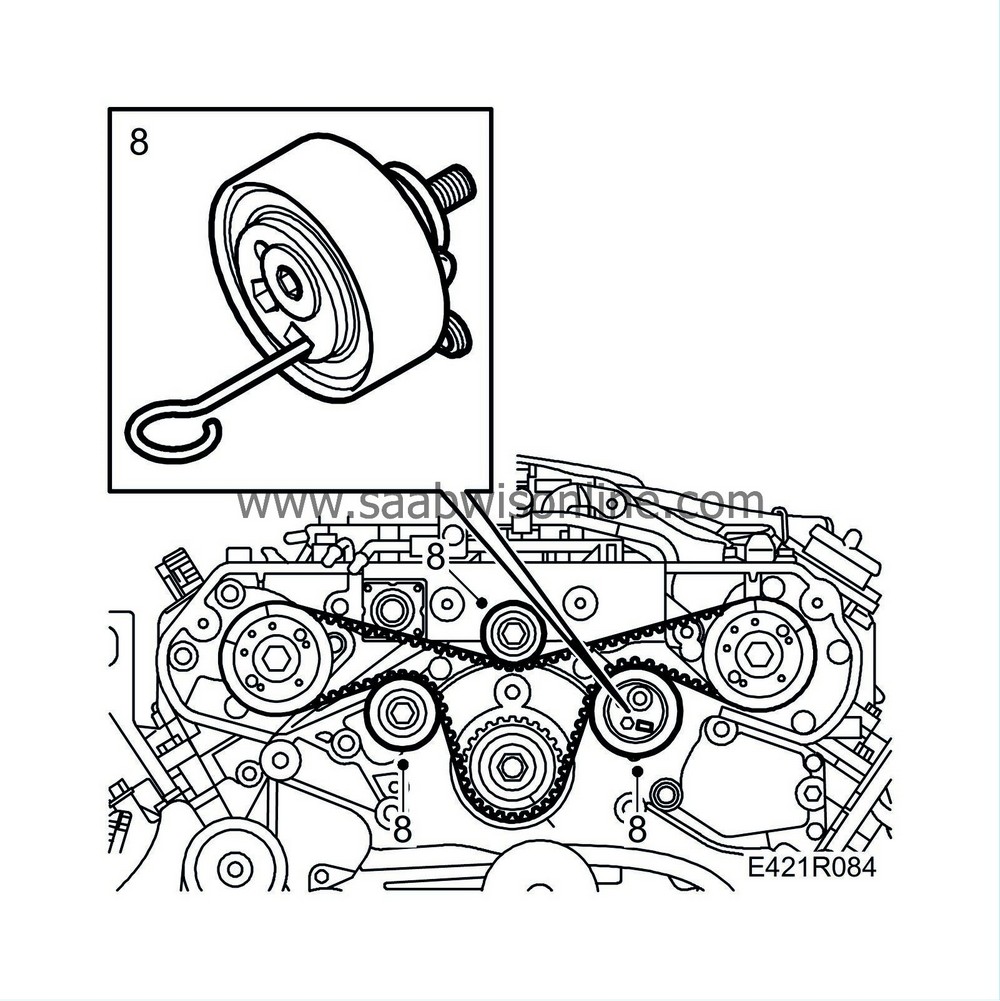
19.
|
Insert a 6 mm drill bit or similar into the hole in the tensioner pulley and turn it slowly and carefully to relieve the pressure. Remove the tensioner pulley by undoing the bolt and simultaneously withdrawing the pulley.

|
|
20.
|
Remove the timing belt and idler pulley. If the markings on the belt are unclear, remark the belt to correspond with the marks on the pulleys.
|
|
21.
|
Remove the plug above the fuel pump pulley. Screw an M6 bolt into the pulley to lock it in position.

|
|
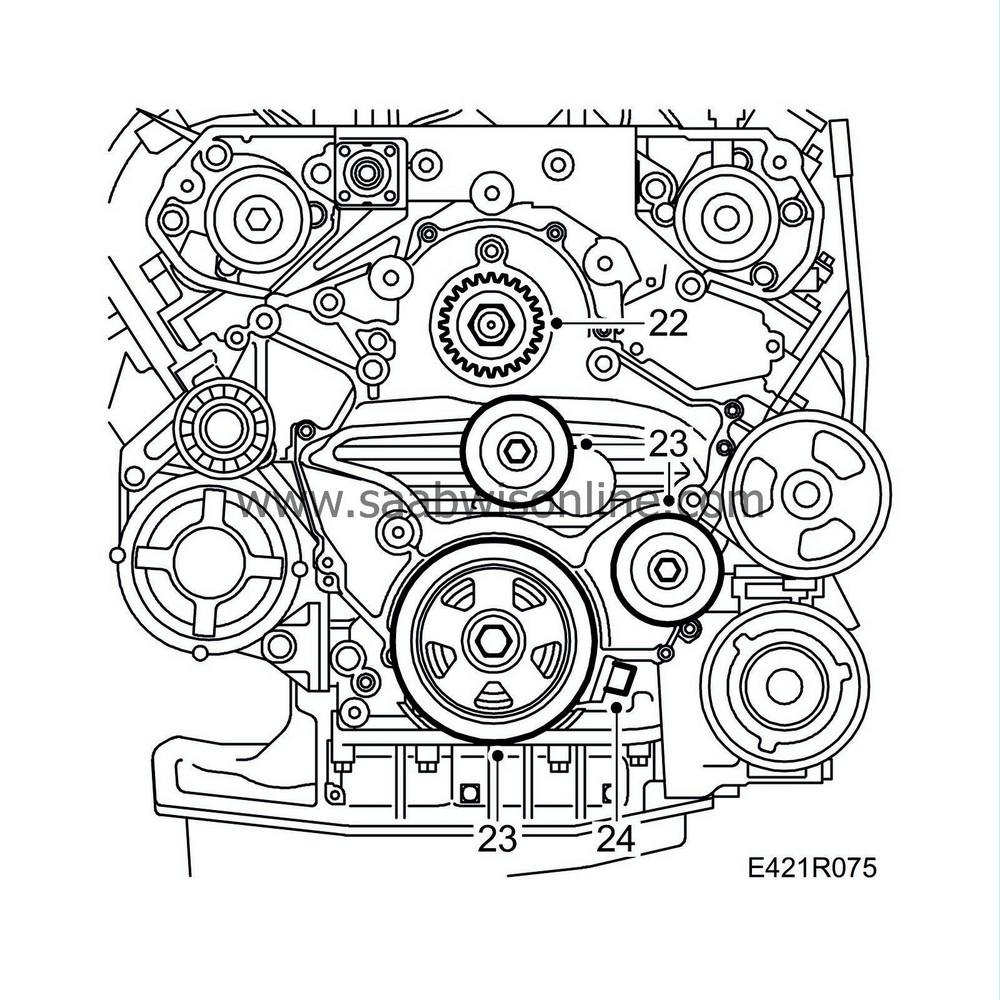
22.
|
Remove the fuel pump pulley.
|
|
23.
|
Remove the crankshaft pulley.
|
|
24.
|
Unplug the connector for the timing sensor.
|
|
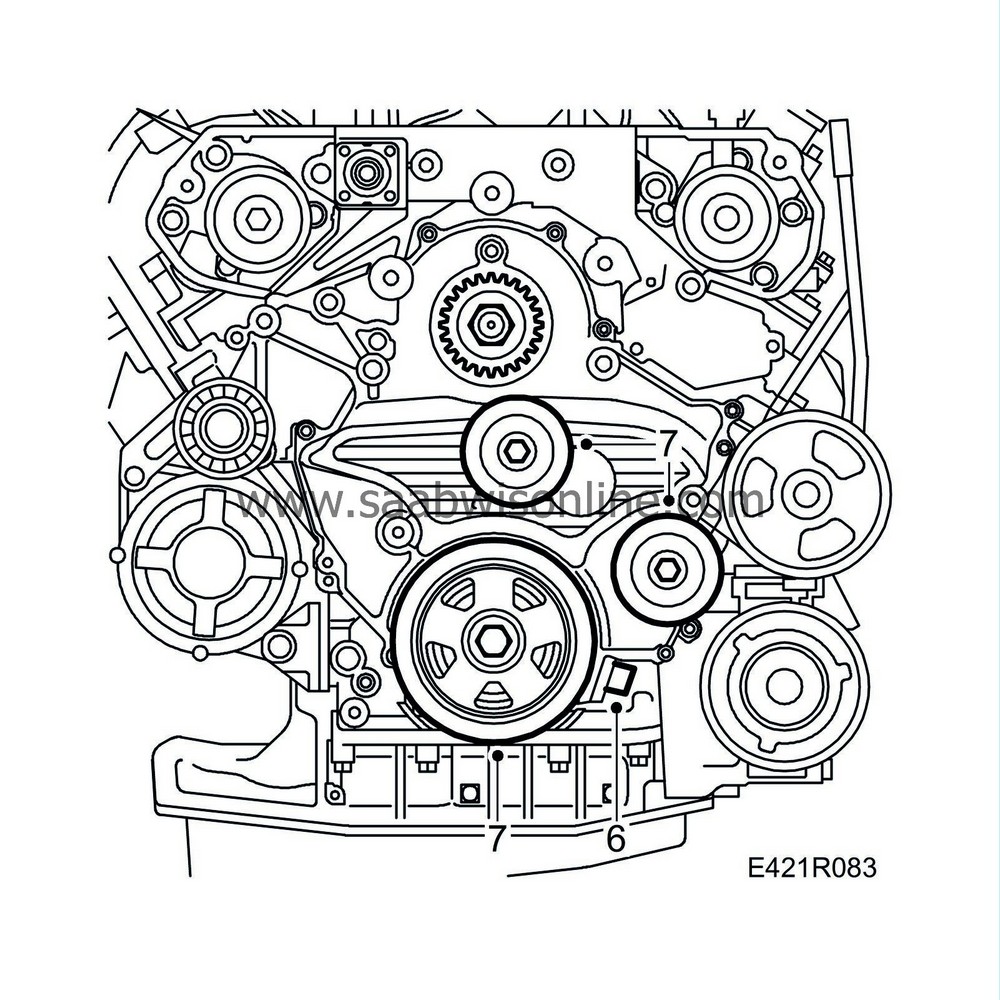
25.
|
Remove the timing cover. Remove the seals and clean the sealing surfaces of the cover of gasket remains.

|
|
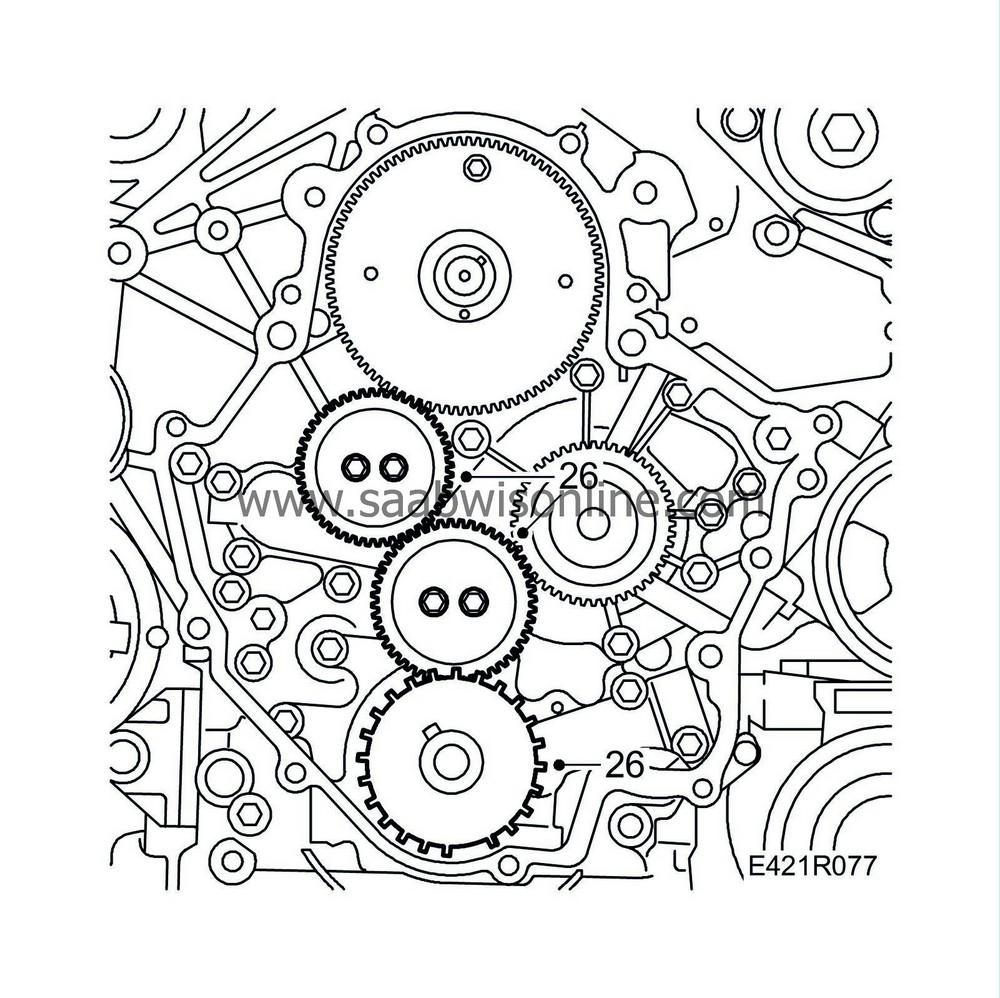
26.
|
Remove the timing sensor's toothed wheel and the two idler gears of the pump transmission.
|
|
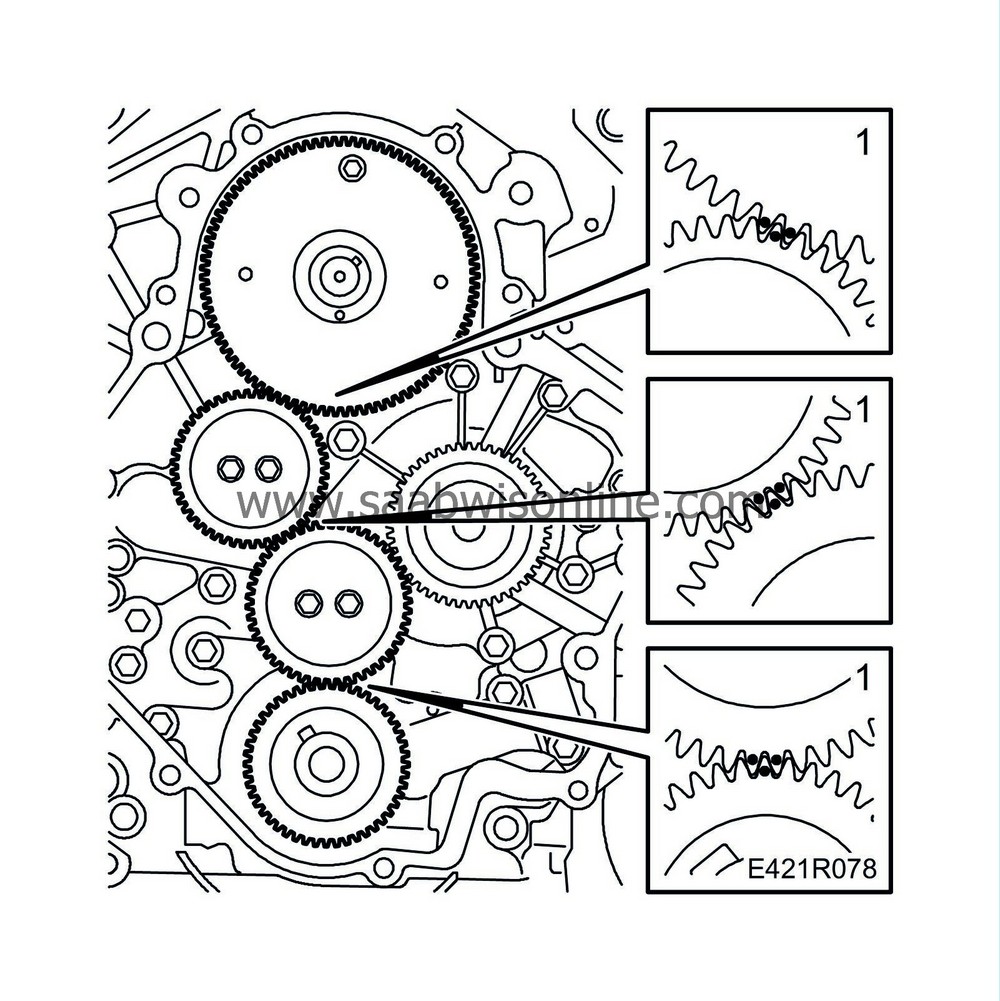
1.
|
Fit the timing sensor's toothed wheel and the two idler gears of the pump transmission. Make sure that the markings are aligned.
Tightening torque, intermediate gear 35 Nm (26 lbf ft)
|
|
5.
|
Fit the camshaft pulley to the fuel pump shaft.
Tightening torque: 160 Nm (118 lbf ft)

|
|
6.
|
Plug in the timing sensor connector.
|
|
7.
|
Fit the crankshaft pulley.
Tightening torque: 235 Nm (173 lbf ft)
|
|
8.
|
If the belt tensioner has been triggered, slowly and carefully relieve the tension in a vice and fit the locking pin. Fit the belt tensioner. Position the belt so that the markings align with the belt pulleys. Fit the idler pulleys and remove the locking pin.
|
|
9.
|
Turn over the engine twice and check that the markings on the pulleys are aligned with those on the covers.
|
|
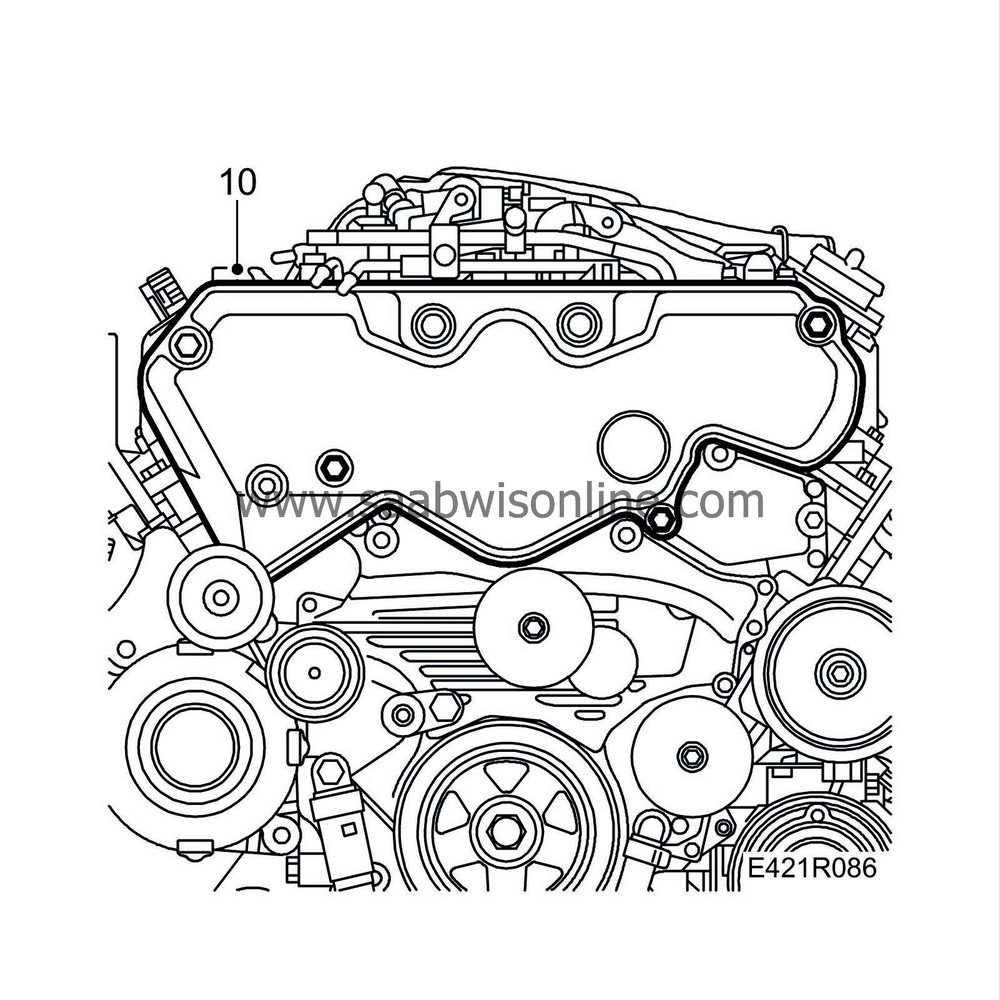
10.
|
Fit the timing belt cover.
|
|
11.
|
Fit the right-hand engine mounting with bracket and engine pad. Raise the engine slightly to insert the engine bracket bolts.
Tightening torque: 47 Nm (35 lbf ft)
|
|
12.
|
Fit the quick-release couplings on the fuel lines.
|
|
13.
|
Lower the engine and remove the jack. Fit the nut to the right-hand engine mounting.
Tightening torque: 47 Nm (35 lbf ft)
|
|
14.
|
Fit the nut of the rear engine pad.
Tightening torque: 47 Nm (35 lbf ft)
|
|
15.
|
Move aside the lifting eye and fit the fan cowling.

|
|
16.
|
Fit the upper bolt securing the lifting eye and secure the dipstick pipe to the lifting eye.
|
|
17.
|
Plug in the fan connectors.
|
|
18.
|
Fit the upper radiator hose.
|
|
19.
|
Refit the upper engine cover.
|
|
20.
|
Fit the intake manifold with mass air flow sensor. Plug in the mass air flow sensor connector.
Tightening torque, mass air flow sensor: 3.5 Nm (2.5 lbf ft)
|
|
21.
|
Slowly and carefully relieve the tension on the belt tensioner and fit the multigroove V-belt.
|
|
22.
|
Raise the car and tighten the bolt securing the dipstick pipe.

|
|
23.
|
Fit the front bolt to the torque arm.
Tightening torque: 90 Nm + 90° (66 lbf ft + 90°)
|
|
24.
|
Fit the lower engine cover and lower the car.
|


