PRE-RELEASE
Coolant pump, V6
| Coolant pump, V6 |
| To remove |
|
||||||||||||||||||||||
| 1. |
Undo the cap on the expansion tank.
|
|
| 2. |
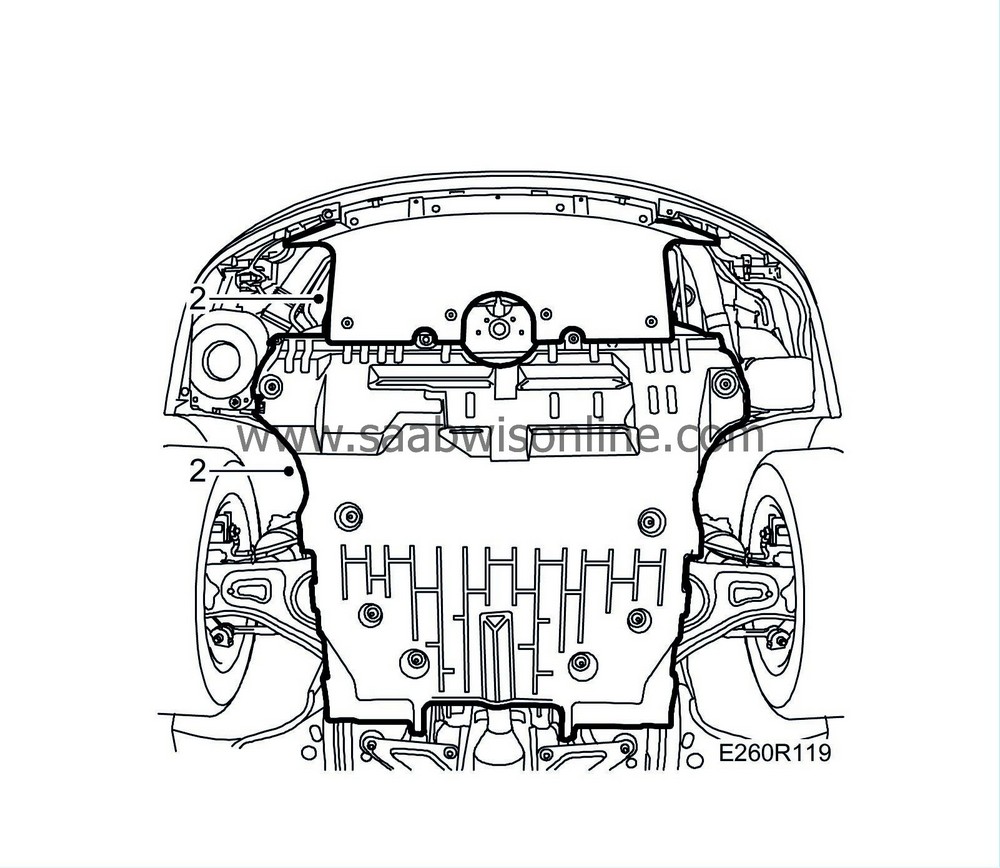
Raise the car and remove the lower engine cover.
|
|
| 3. |
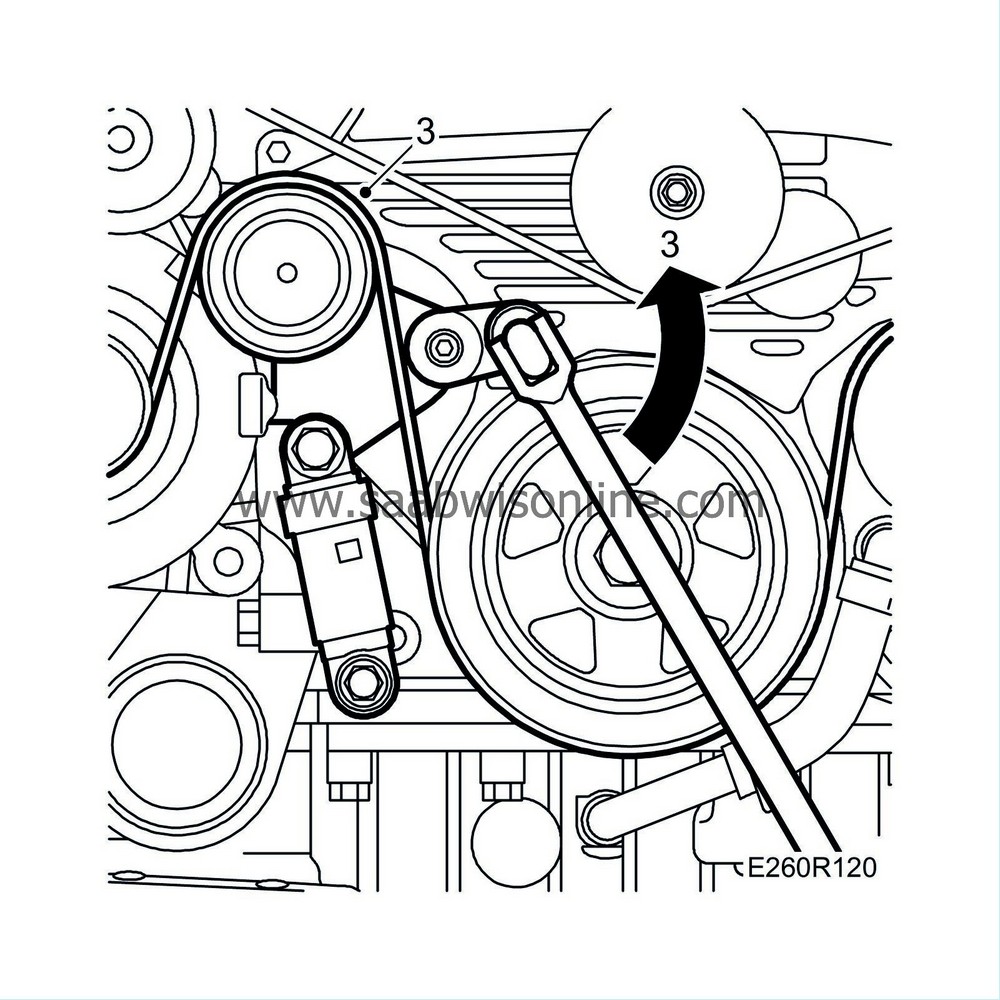
Detension and remove the multigroove V-belt. Remove the belt tensioner.
|
|
| 4. |
Place a suitable receptacle under the car and drain the radiator.
|
|
| 5. |
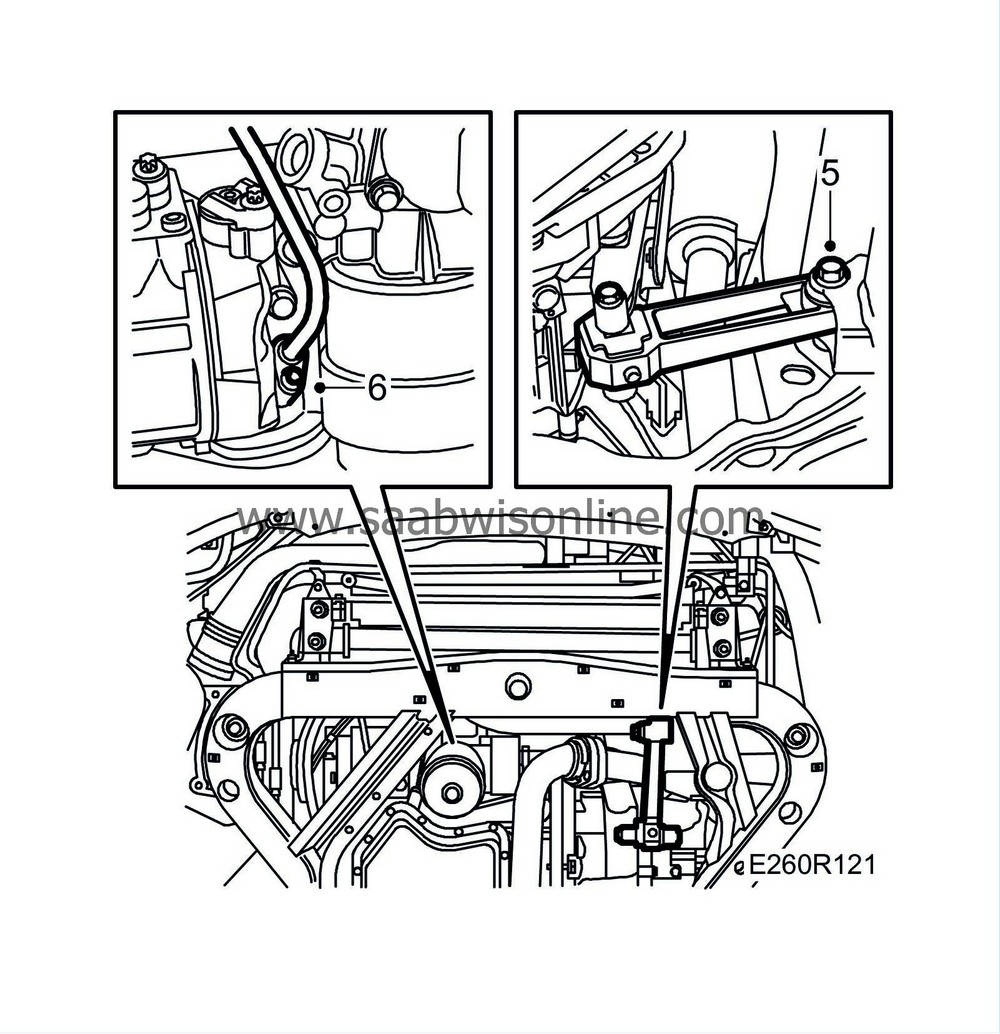
Undo the front bolt on the front torque arm.
|
|
| 6. |
Remove the lower bolt securing the dipstick pipe.
|
|
| 7. |
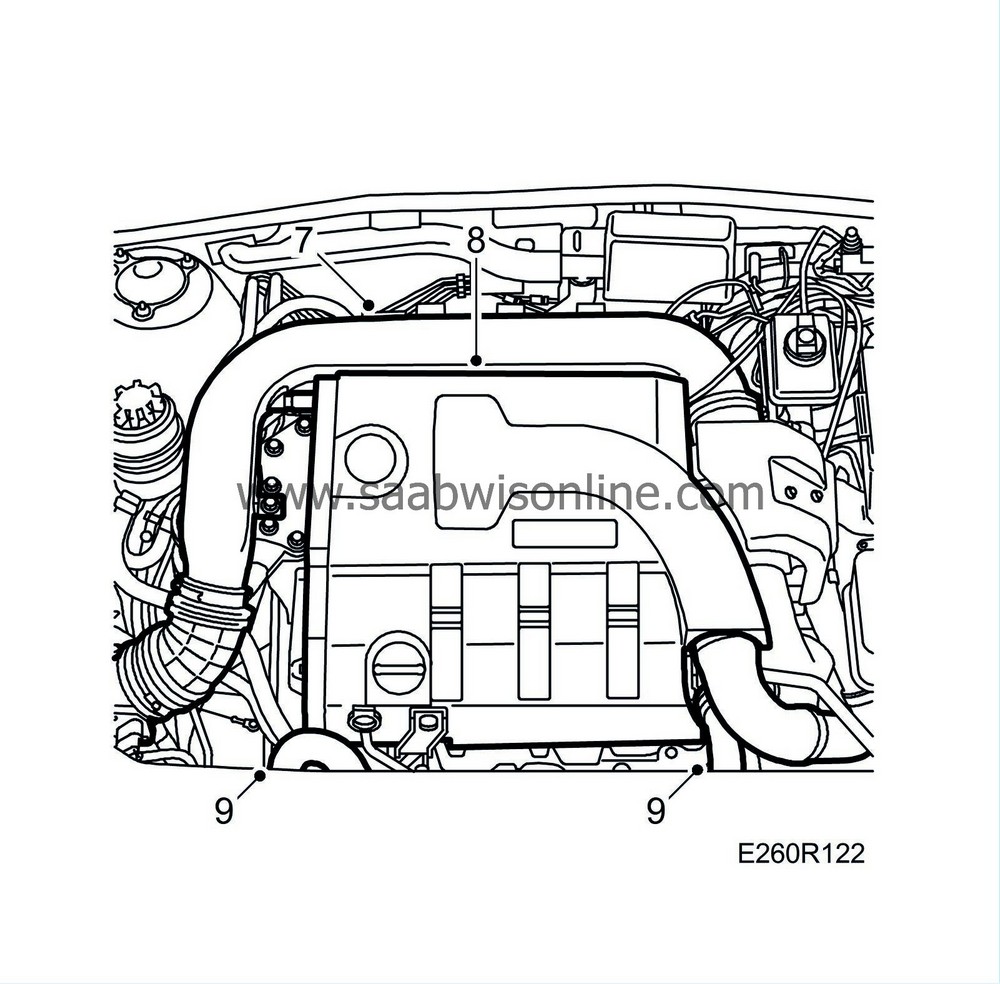
Lower the car and remove the intake pipe with mass air flow sensor from the turbocharger.
|
|
| 8. |
Remove the upper engine cover.
|
|
| 9. |
Disconnect the upper radiator hose.
|
|
| 10. |
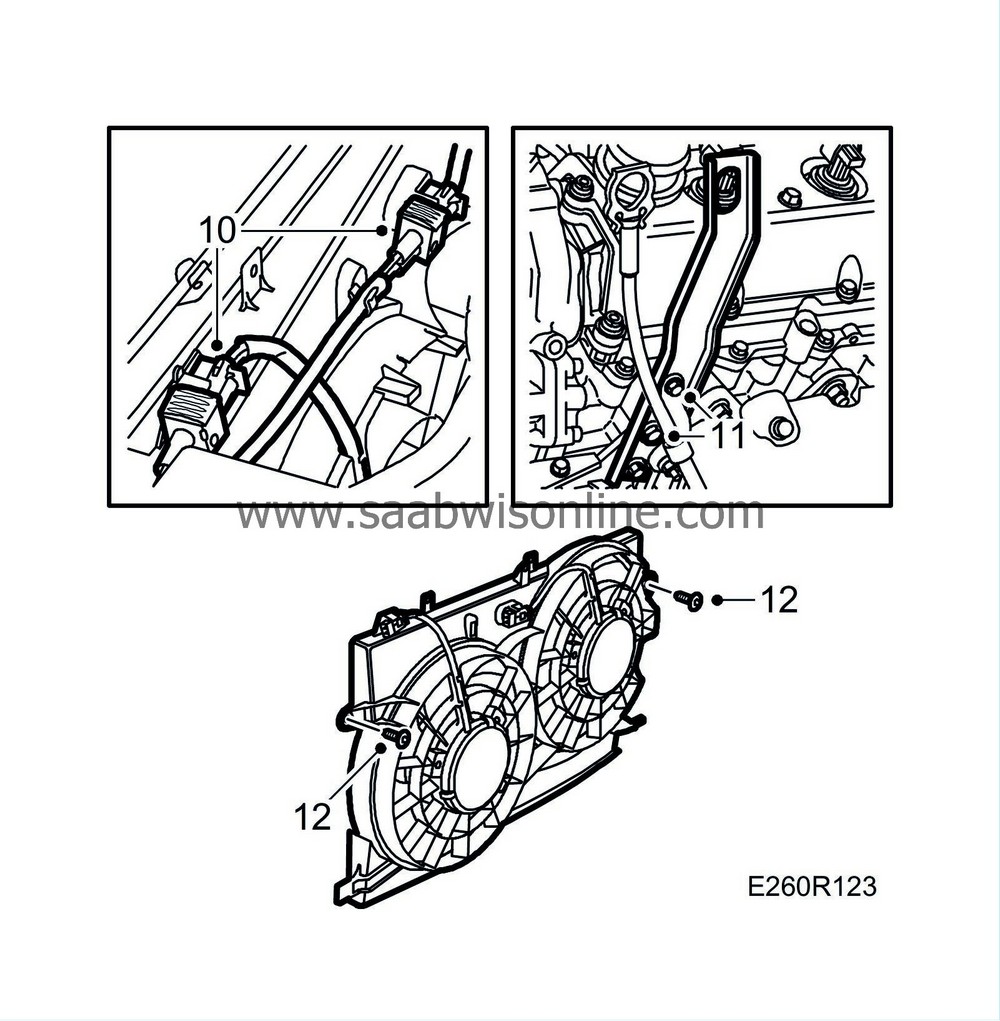
Unplug the fan connectors.
|
|
| 11. |
Remove the upper bolt securing the lifting eye and remove the dipstick pipe from the lifting eye.
|
|
| 12. |
Move aside the lifting eye and remove the fan cowling.
|
|
| 13. |
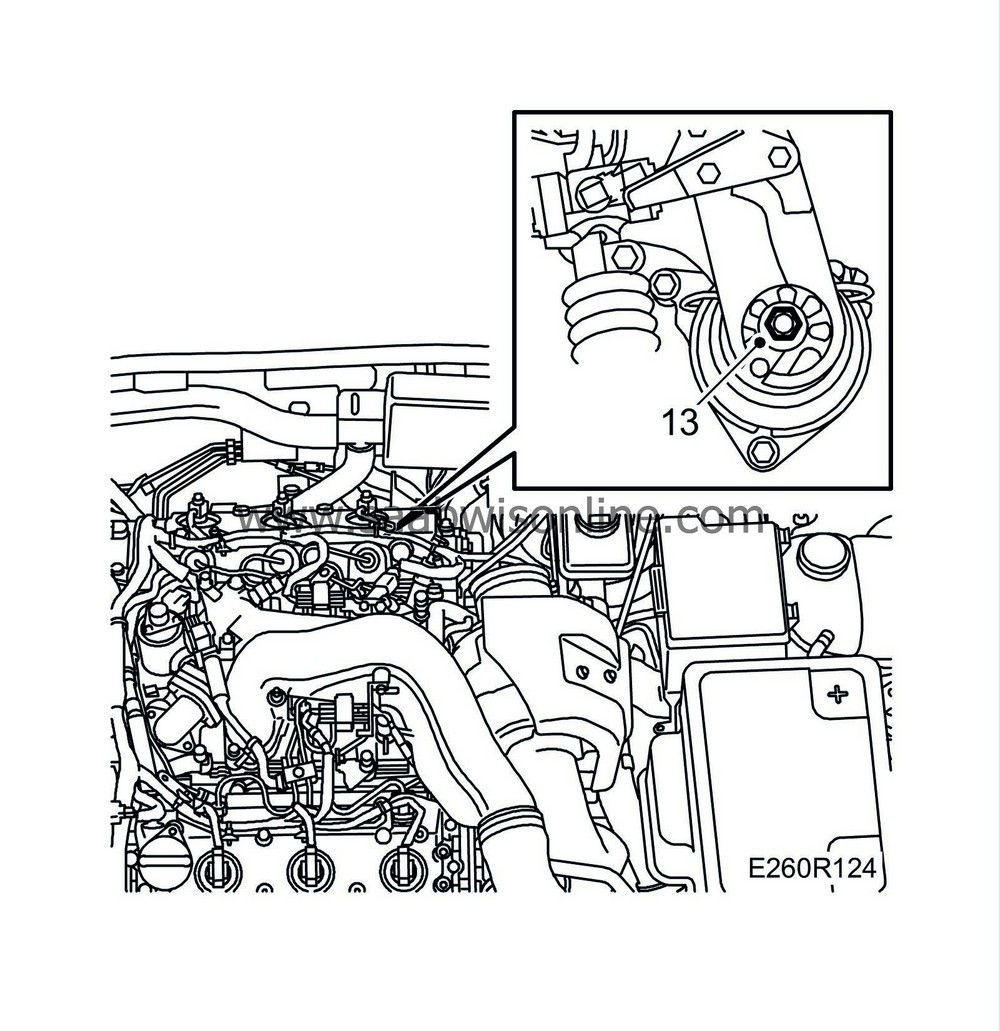
Remove the nut for the rear engine mounting.
|
|
| 14. |
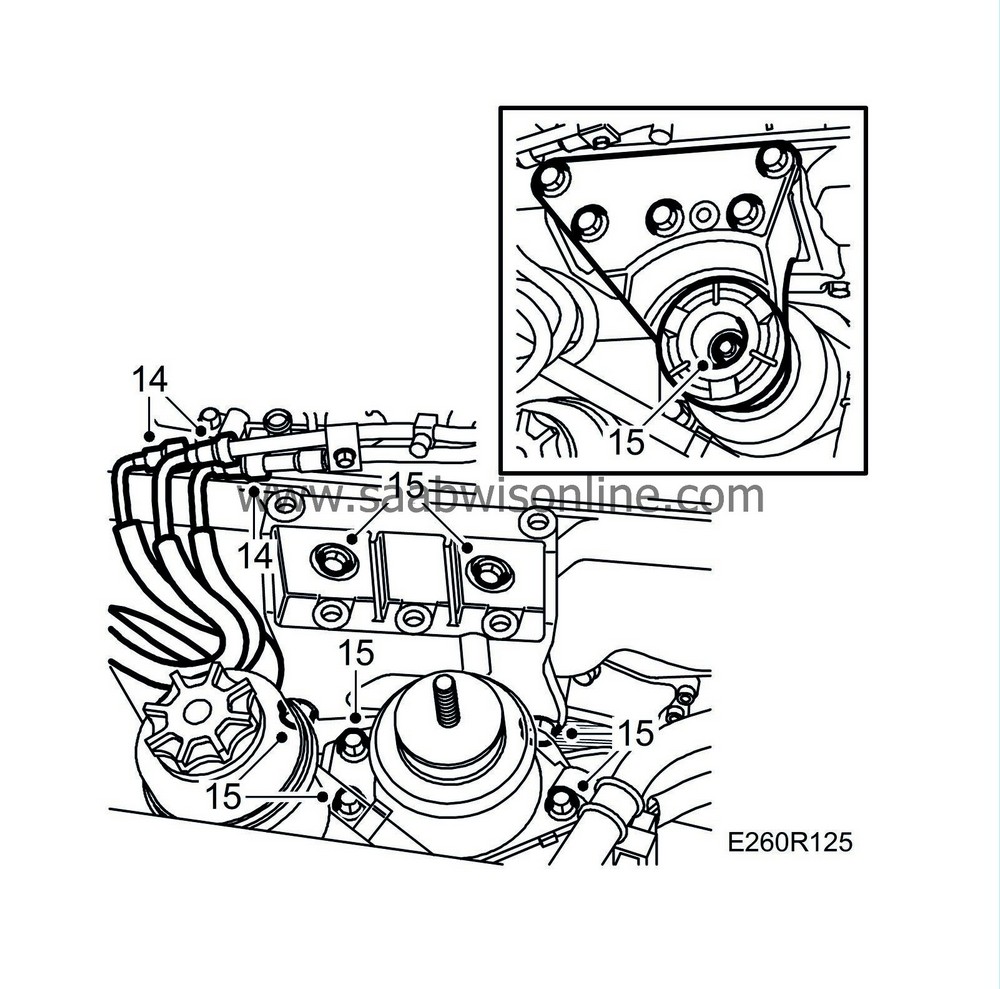
Undo the quick-release couplings on the fuel lines. Use a rag to catch any fuel.
|
|
| 15. |
Take up the weight of the engine using a jack. Remove the right-hand engine mounting with the bracket and engine pad. Raise the engine slightly and remove the engine mounting bolts. Remove the lower engine bracket.
|
|
| 16. |
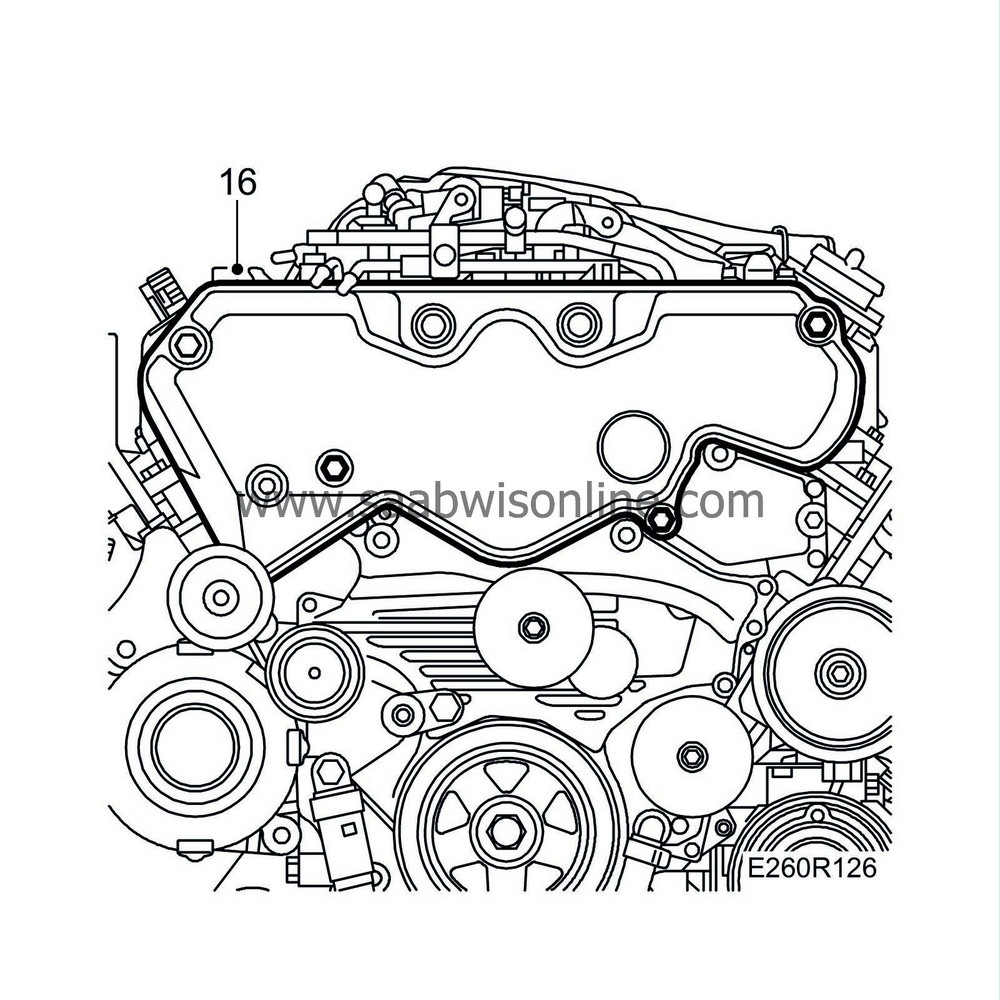
Remove the timing belt cover.
|
|
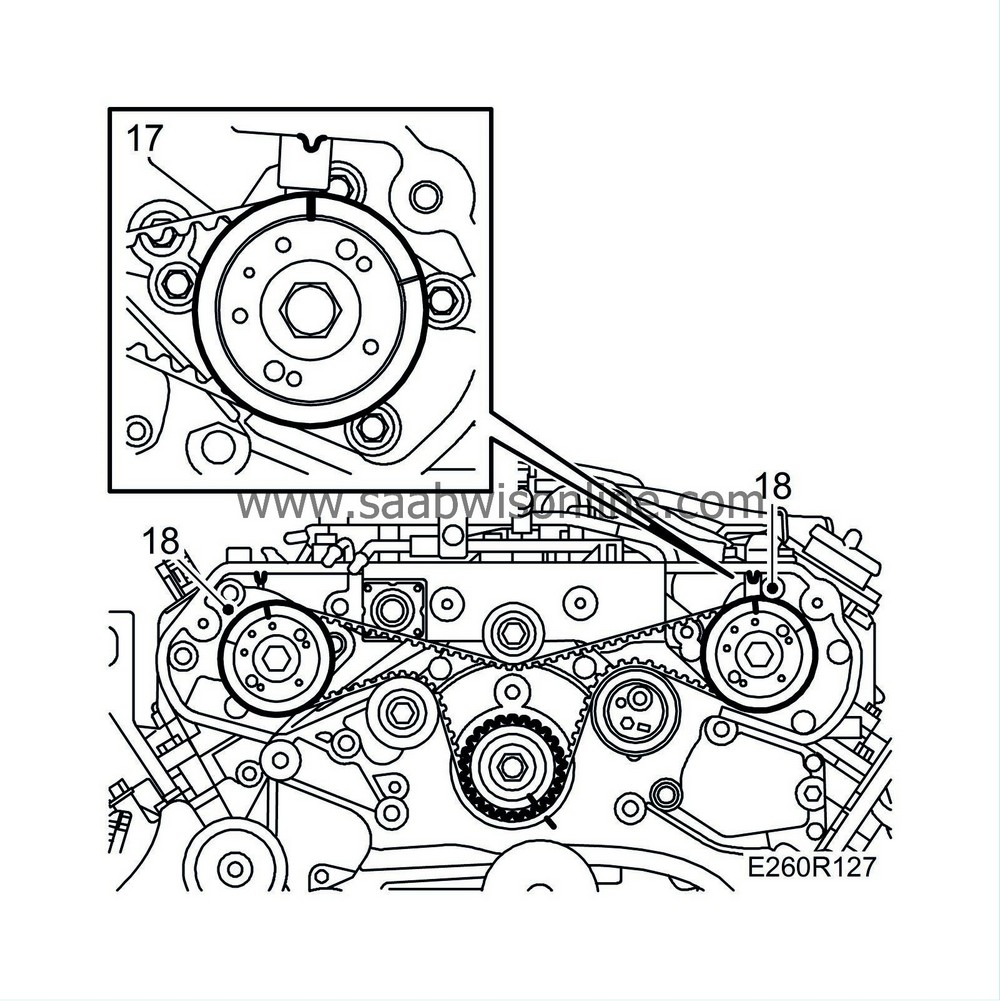
| 17. |
Zero the engine, aligning the crankshaft pulley, camshaft pulleys and fuel pump pulley with the markings on the engine.
|
|
| 18. |
If the markings on the belt are unclear, remark the belt to correspond with the marks on the pulleys.
|
|
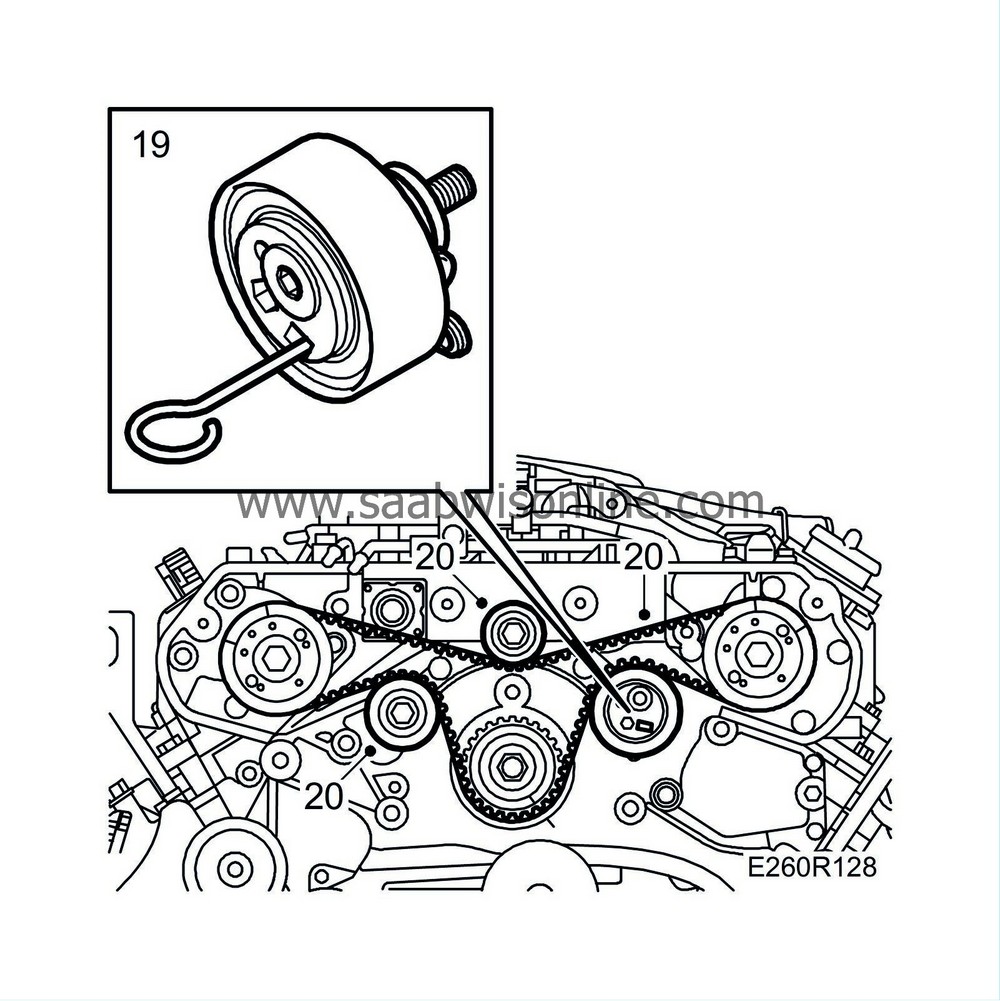
| 19. |
Insert a 6 mm drill bit or similar into the hole in the tensioner pulley to relieve the pressure. Remove the tensioner pulley by undoing the bolt and simultaneously withdrawing the pulley.
|
|
| 20. |
Remove the timing belt and idler pulley. If the markings on the belt are unclear, remark the belt to correspond with the marks on the pulleys.
|
|
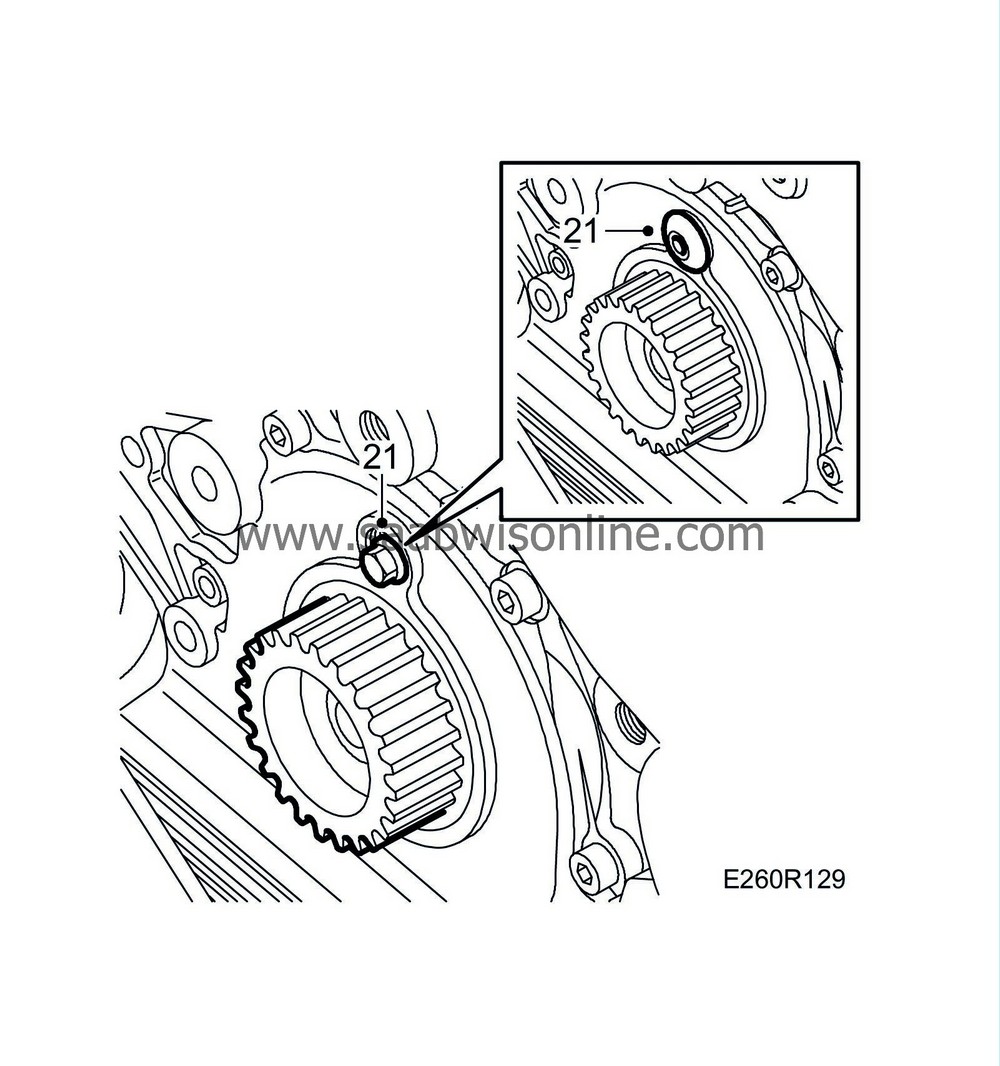
| 21. |
Remove the plug above the fuel pump pulley. Screw an M6 bolt into the pulley to lock it in position.
|
|
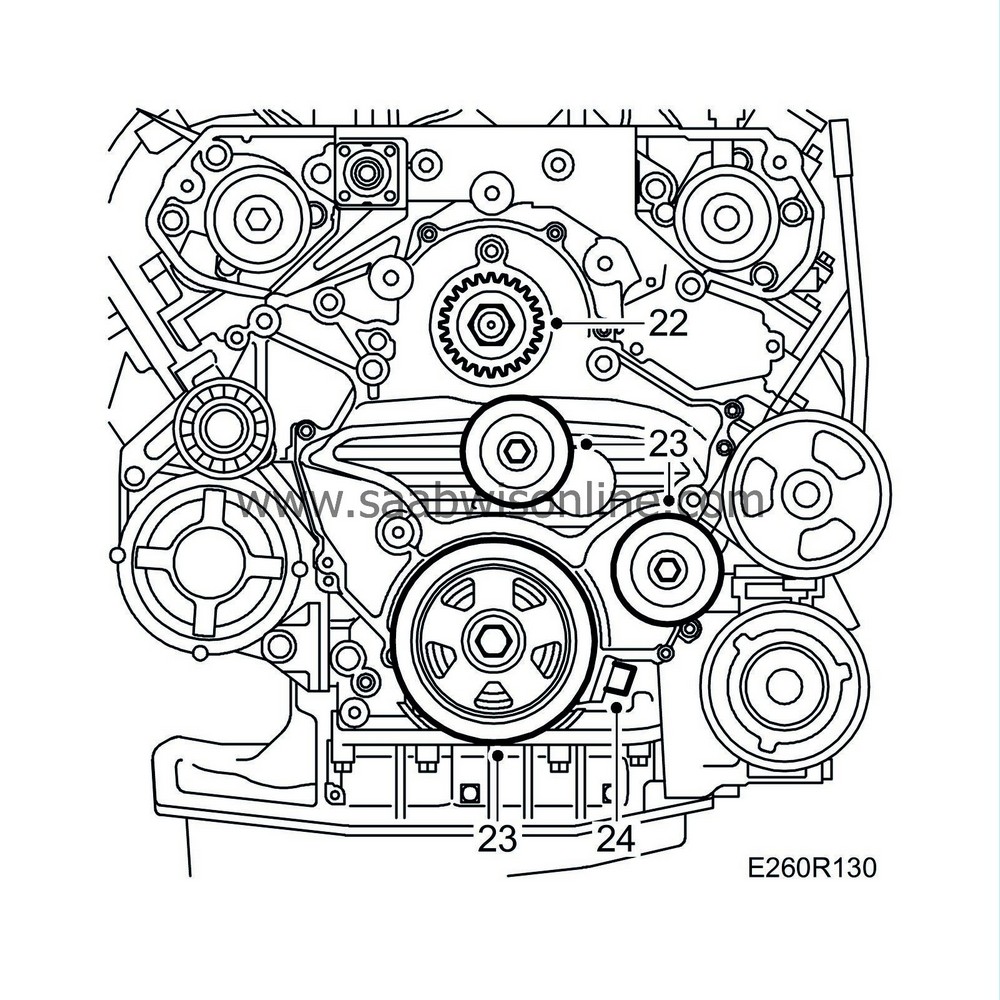
| 22. |
Remove the fuel pump pulley.
|
|
| 23. |
Remove the crankshaft pulley and idler pulley.
|
|
| 24. |
Unplug the connector for the timing sensor.
|
|
| 25. |
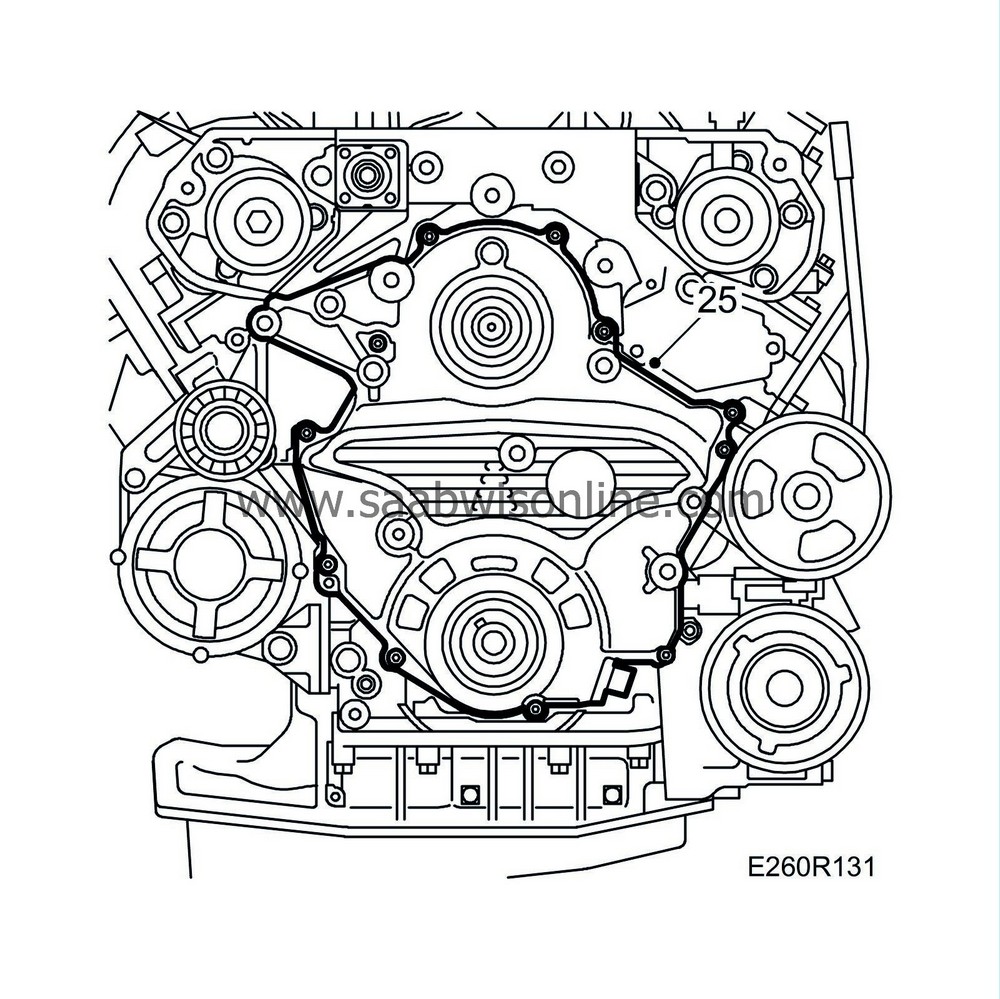
Remove the timing cover. Remove the seals and clean the sealing surfaces of the cover of gasket remains.
|
|
| 26. |
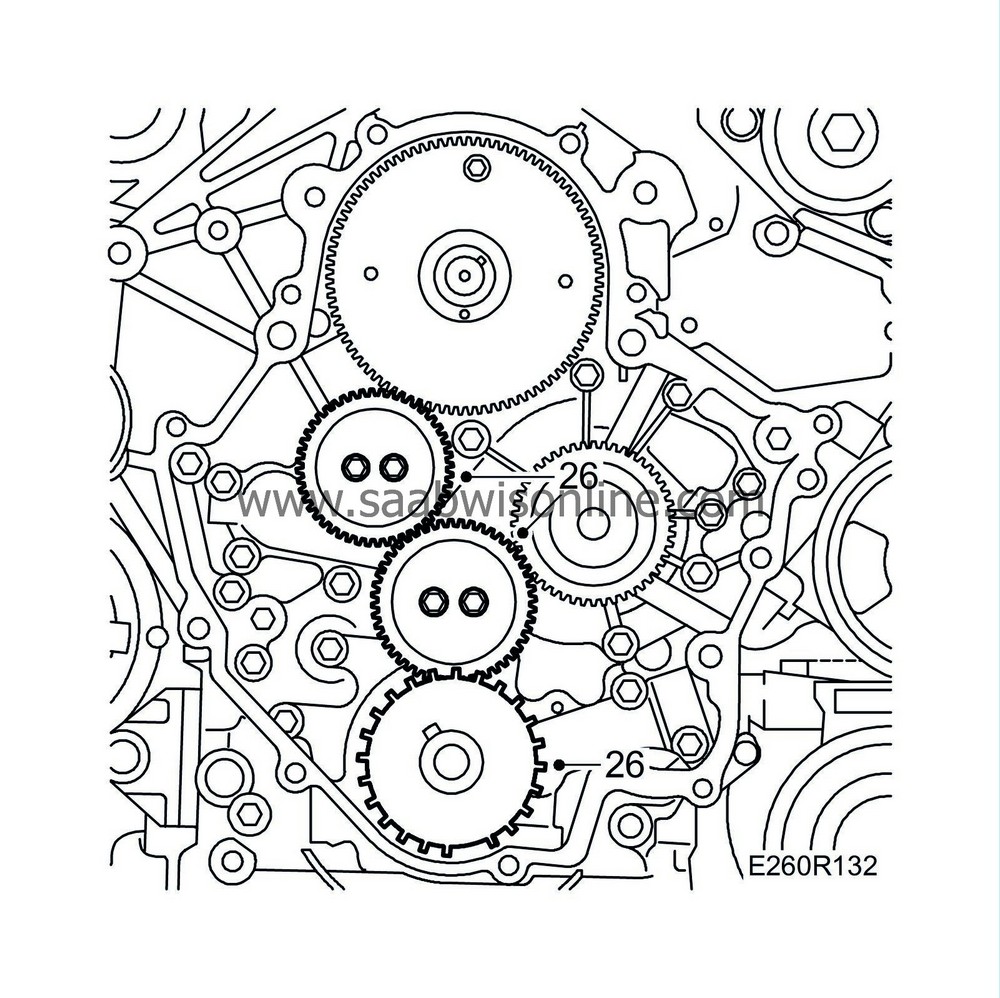
Remove the timing sensor's toothed wheel and the two idler gears of the pump transmission.
|
|
| 27. |
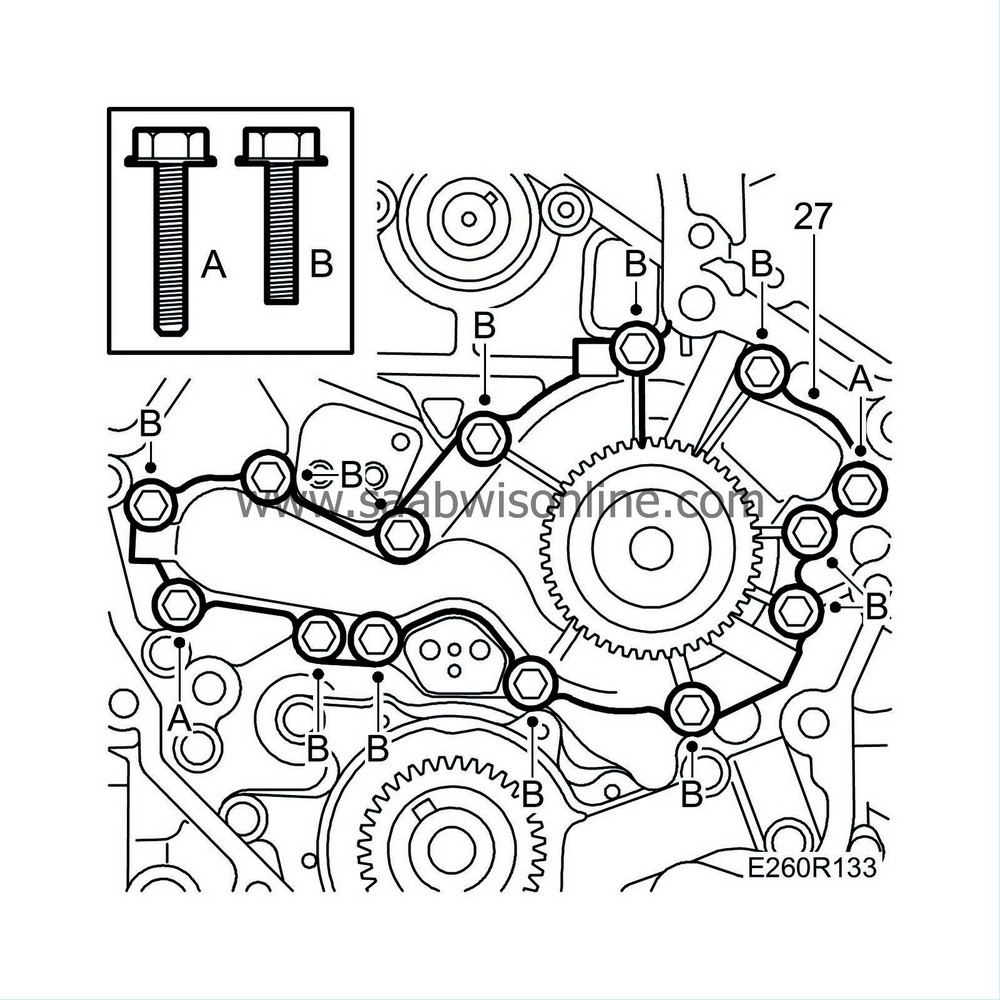
Remove the coolant pump.
|
|
| To fit |
| 1. |
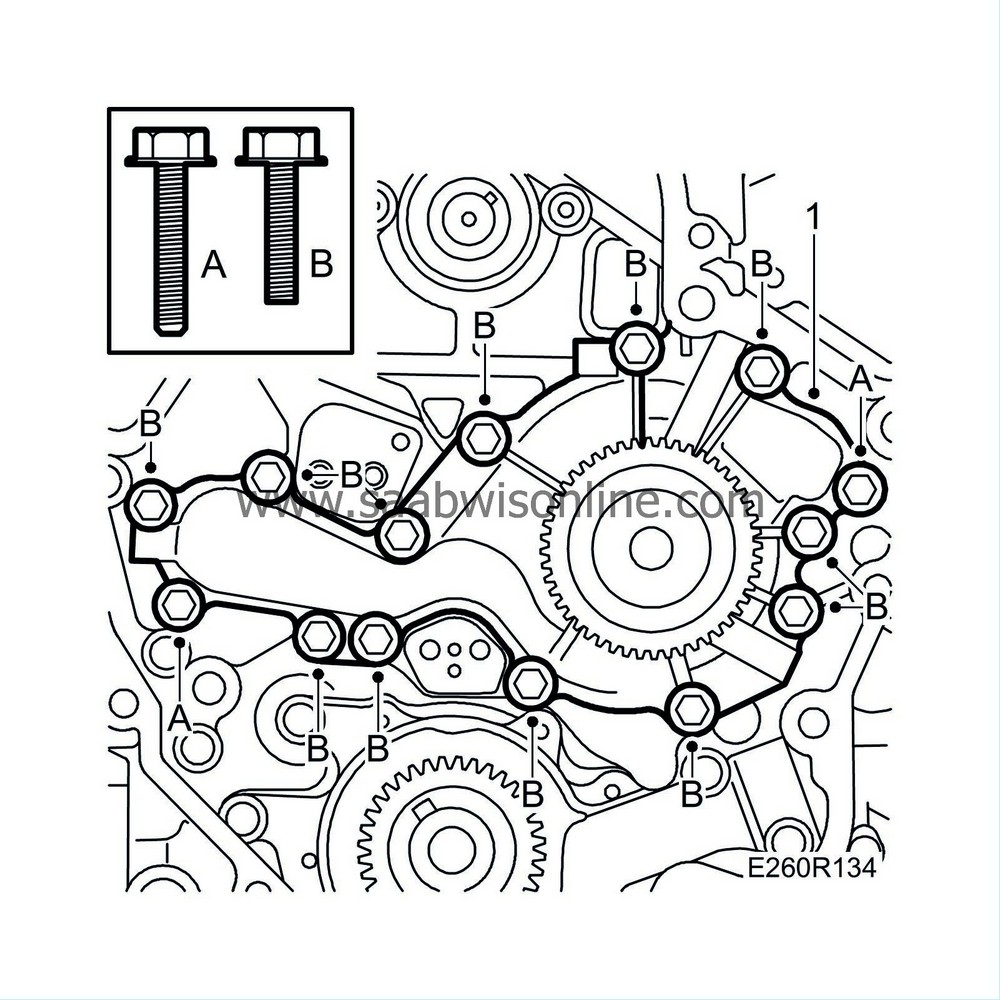
Fit the coolant pump. Use a new gasket. Make sure the two long bolts are in the correct position.
|
|
| 2. |
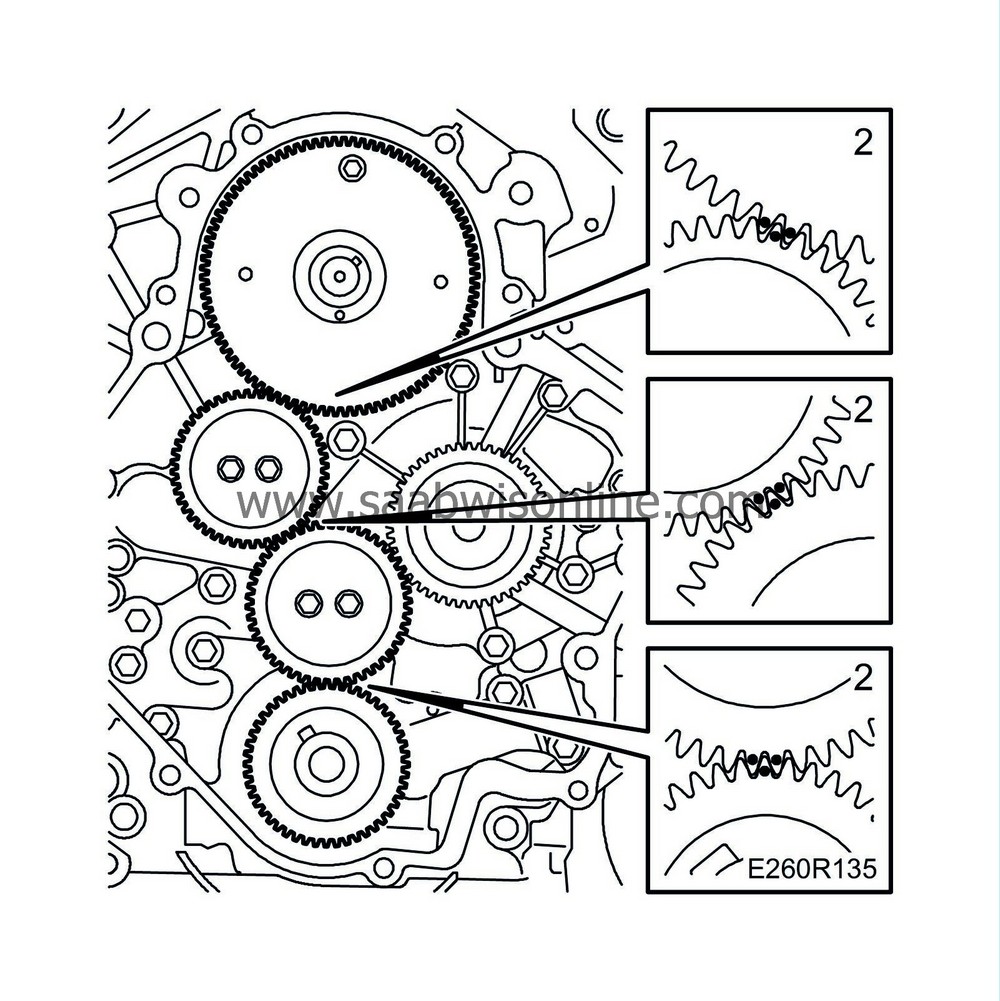
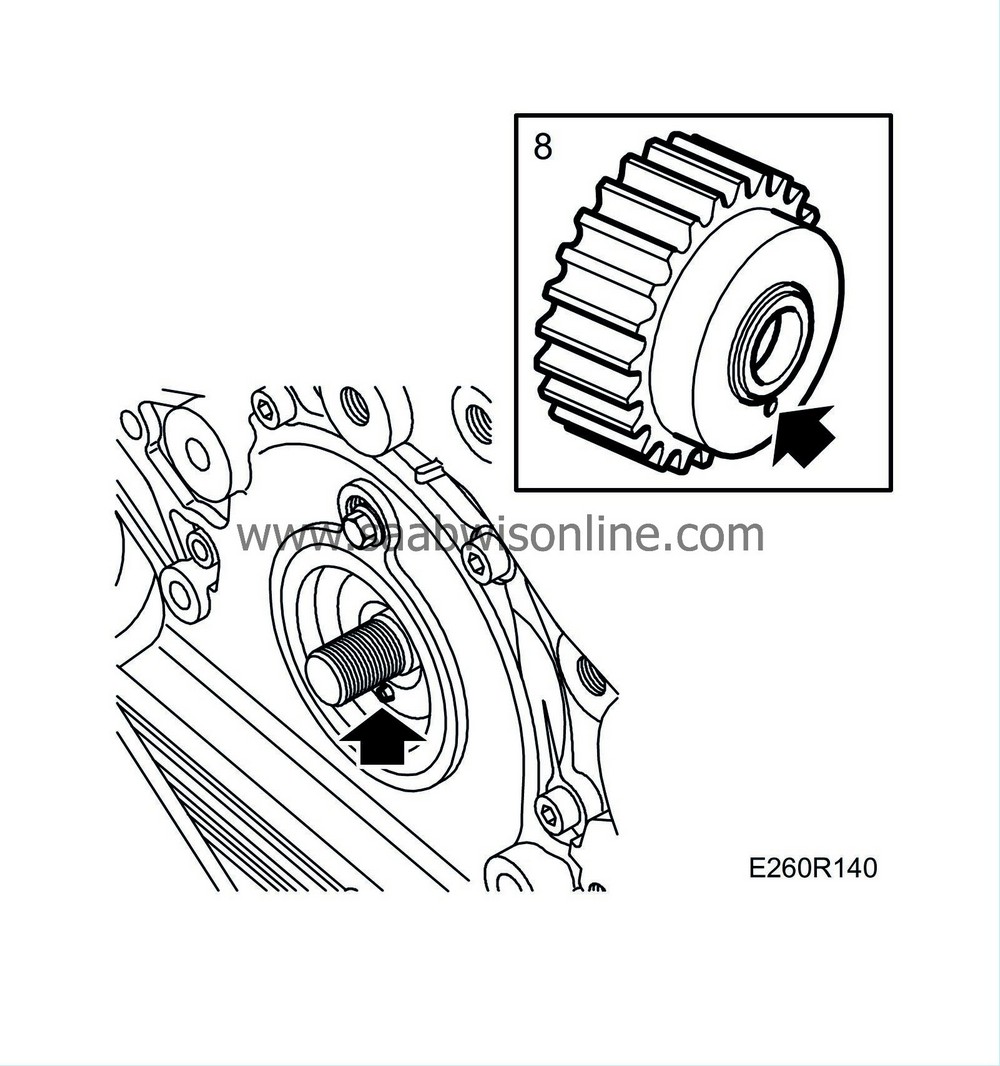
Fit the timing sensor's toothed wheel and the two idler gears of the pump transmission. Make sure that the markings are aligned.
|
|
| 3. |
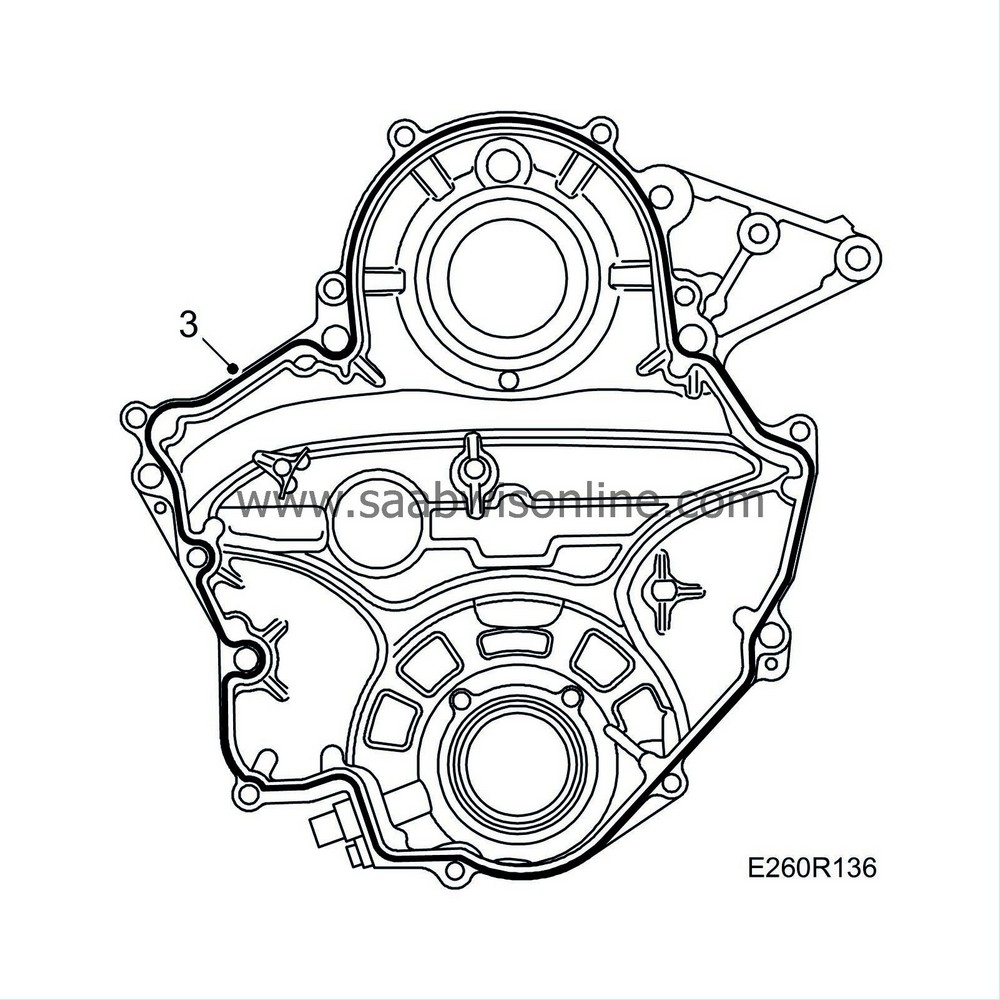
Fit the timing cover. Apply a bead of flange sealant, part no. 87 81 841, into the recess around the cover .
|
|
| 4. |
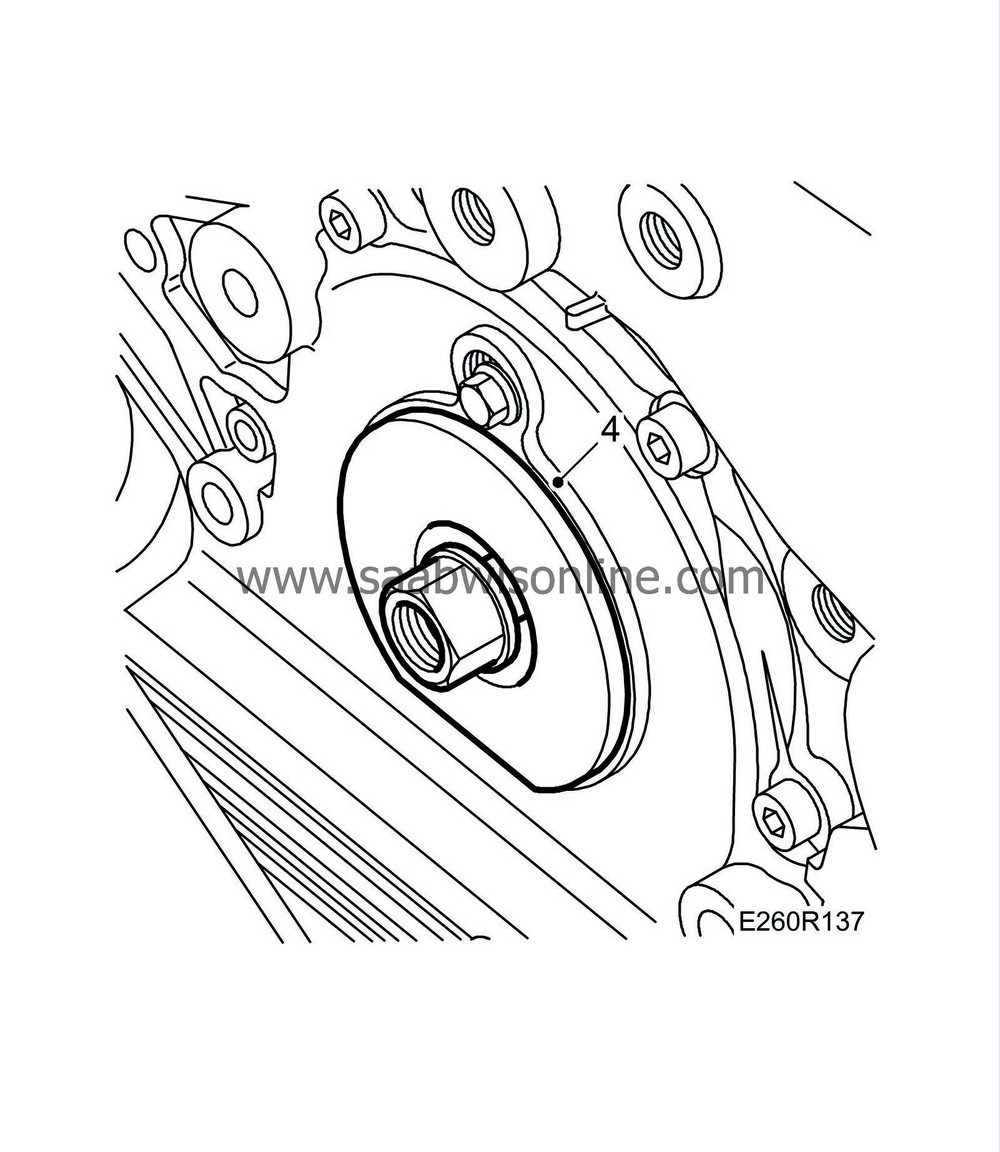
Fit the sealing ring in the fuel pump recess. Use
83 95 758 Fitting tool, fuel pump seal
.
|
|
| 5. |
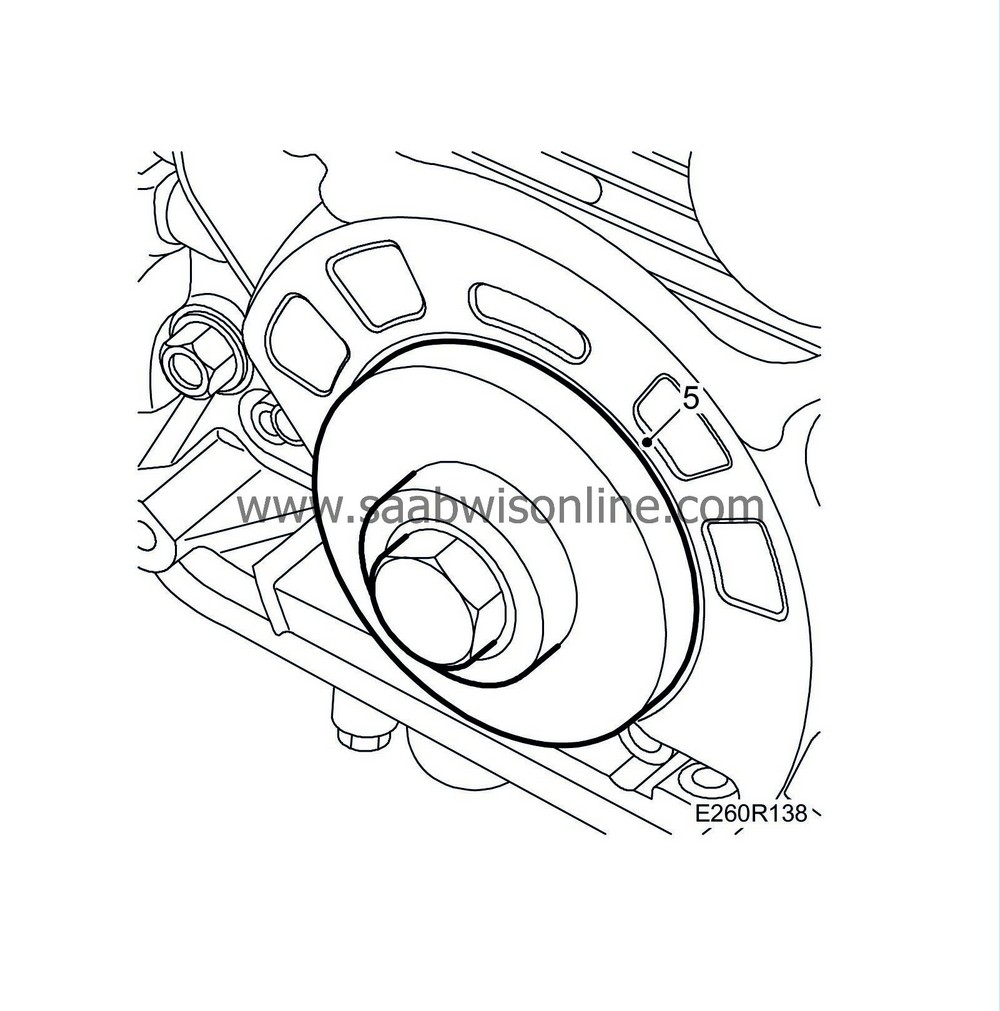
Fit the sealing ring for the crankshaft. Use
83 95 717 Fitting tool, crankshaft seal, front
.
|
|
| 6. |
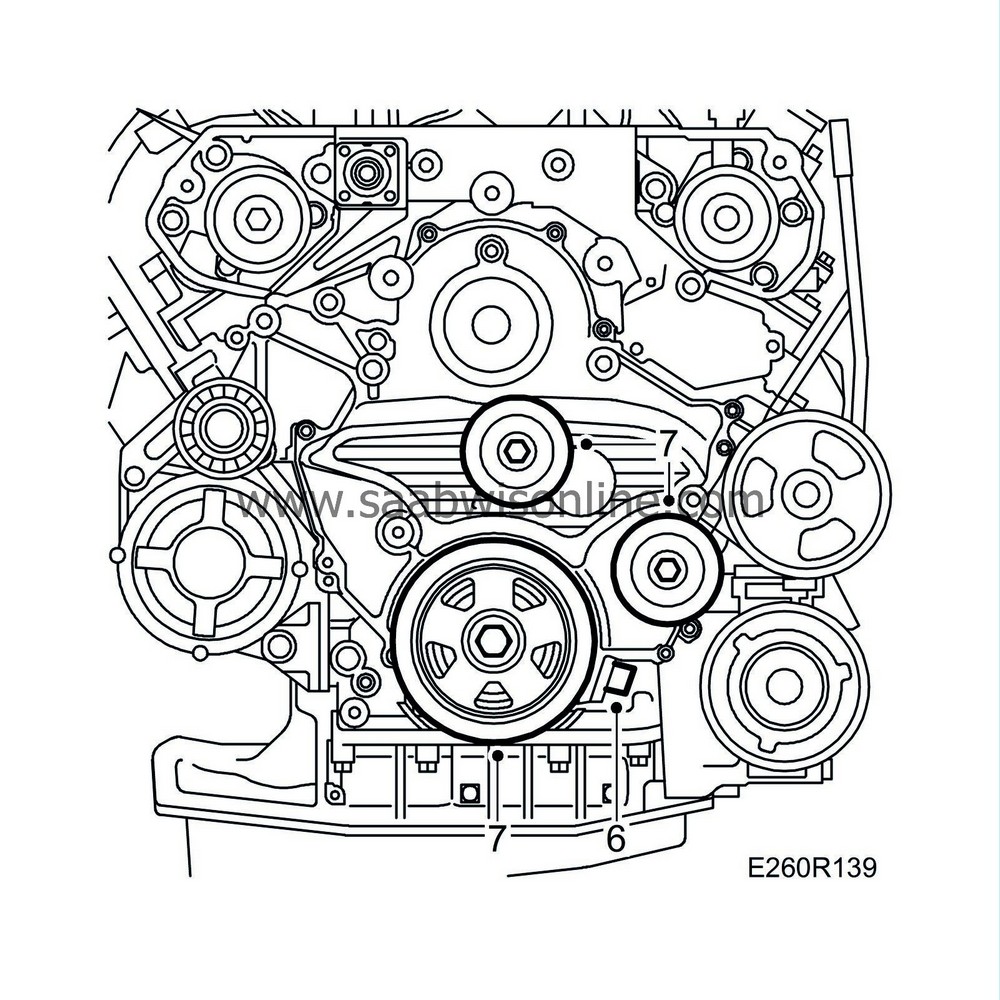
Plug in the timing sensor connector.
|
|
| 7. |
Fit the crankshaft pulley and idler pulley.
|
|
| 8. |
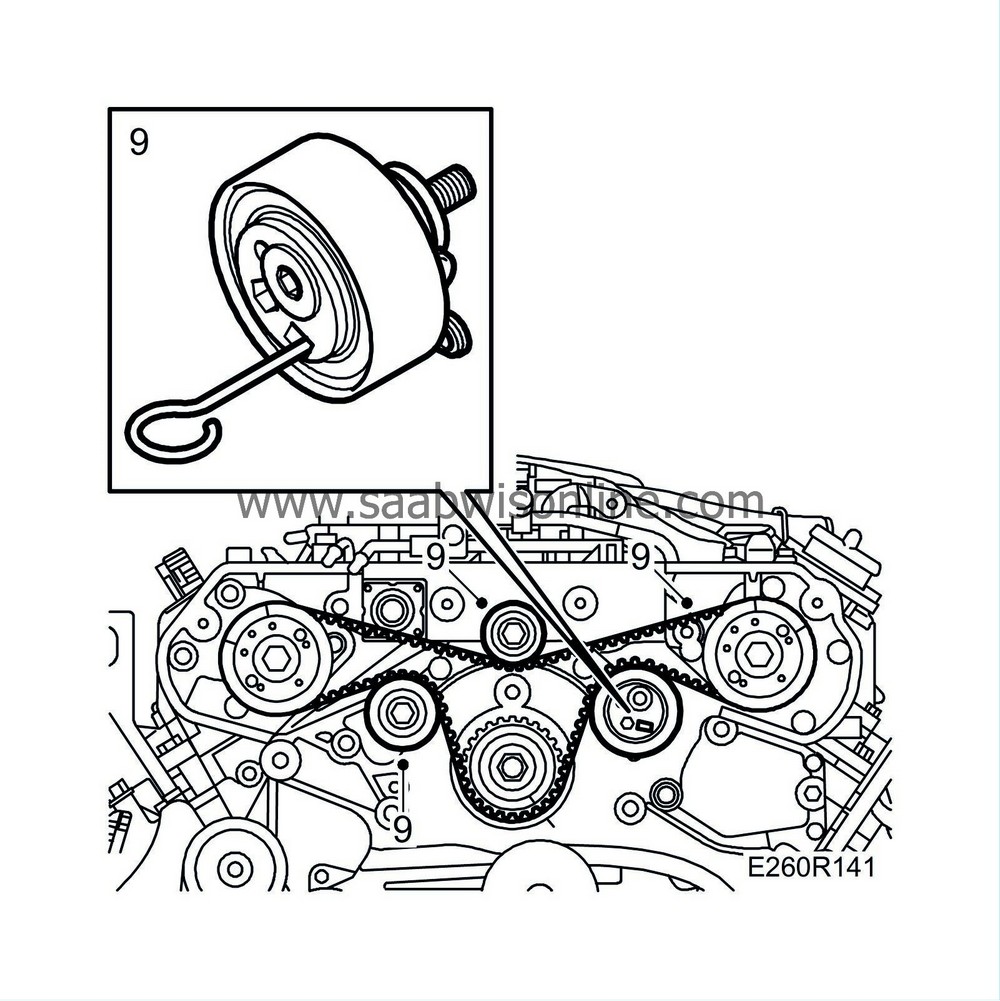
If the belt tensioner has been released, compress it using a vice and fit the locking pin. Fit the belt tensioner. Fit the belt so that the markings are aligned with those on the pulleys.
|
|
| 9. |
Fit the idler pulleys and remove the locking pin.
|
|
| 10. |
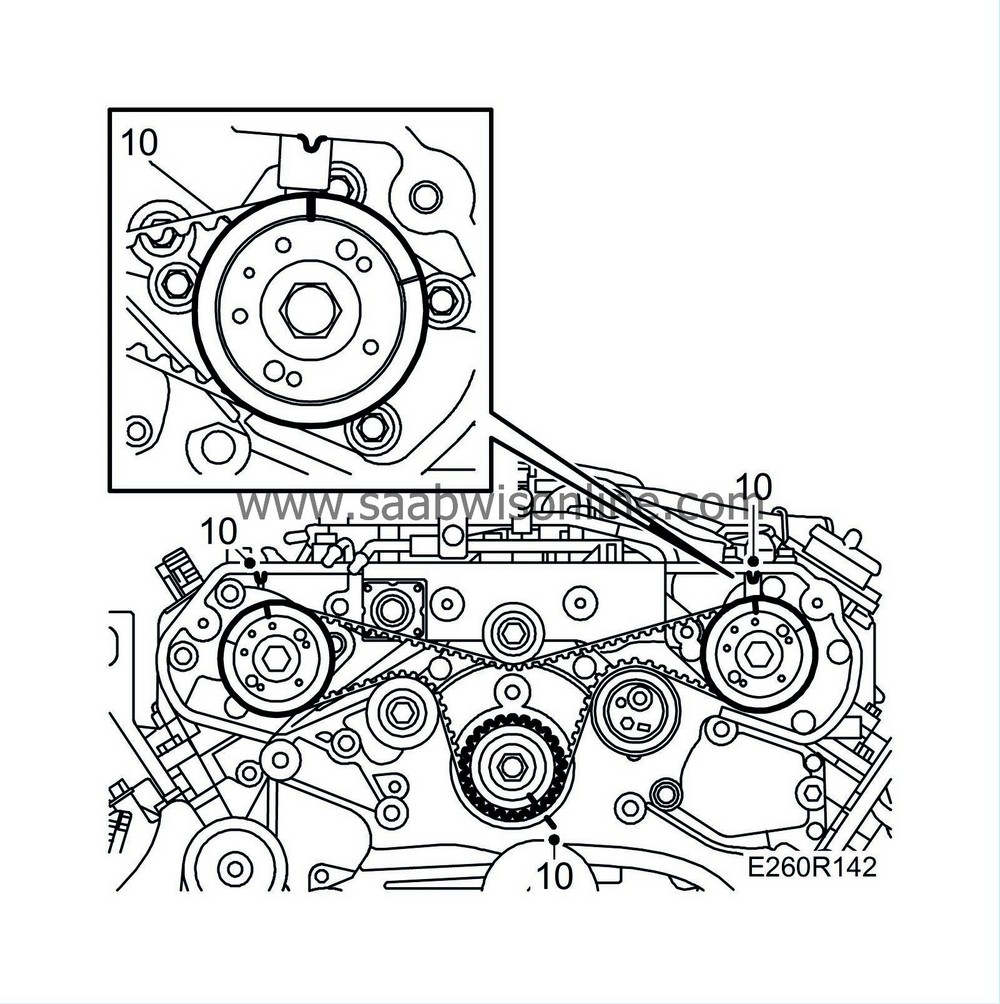
Turn over the engine twice and check that the markings on the pulleys are aligned with those on the covers.
|
|
| 11. |
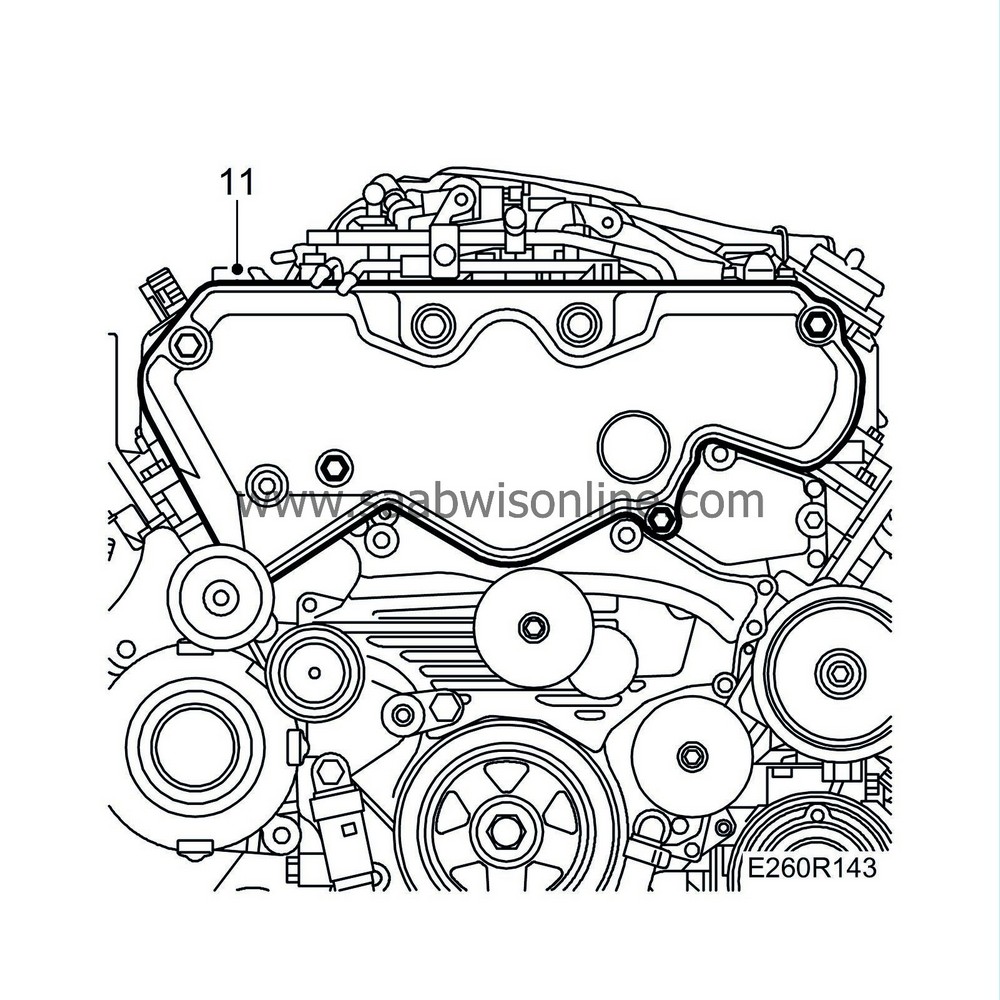
Fit the cam belt cover.
|
|
| 12. |
Fit the right-hand engine mounting with bracket and engine pad. Raise the engine slightly to insert the engine bracket bolts.
Tightening torque 47 Nm (35 lbf ft) 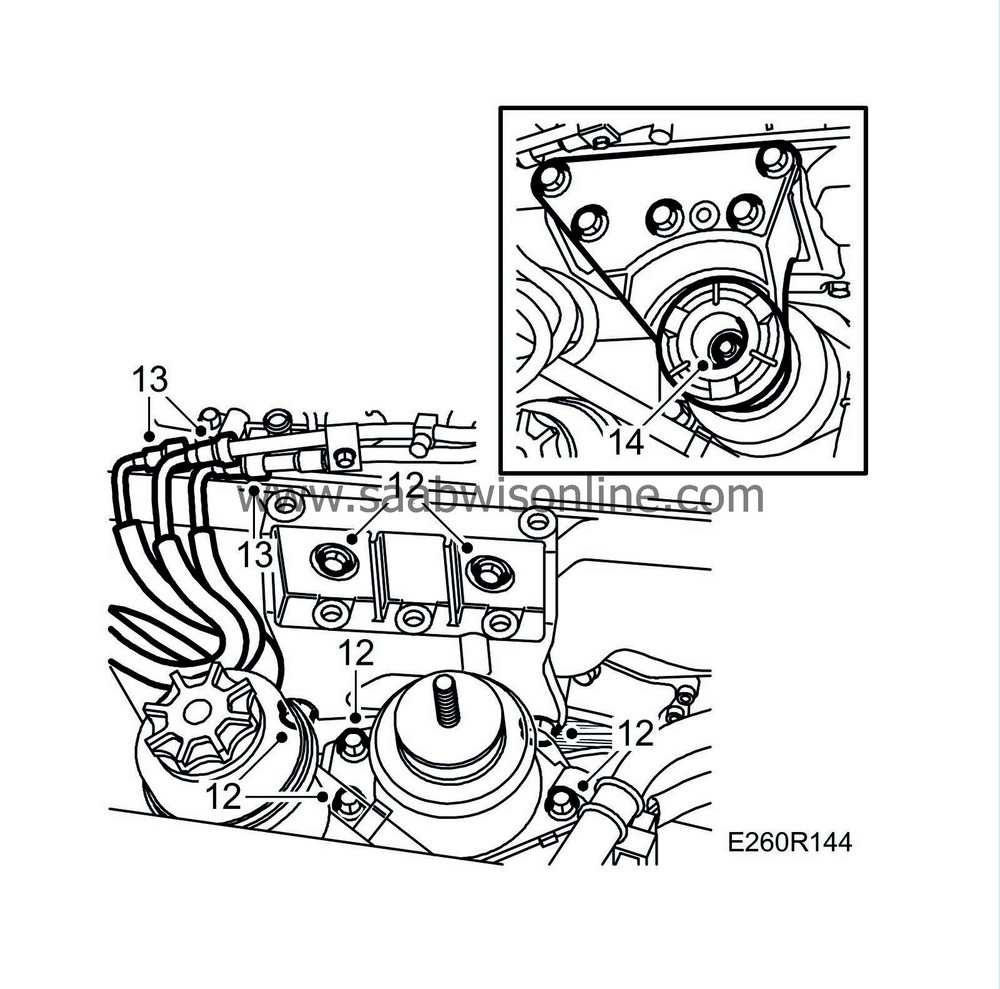
|
|
| 13. |
Fit the quick-release couplings on the fuel lines.
|
|
| 14. |
Lower the engine and remove the jack. Fit the nut to the right-hand engine mounting.
Tightening torque 47 Nm (35 lbf ft) |
|
| 15. |
Fit the nut to the rear engine pad.
Tightening torque 47 Nm (35 lbf ft) 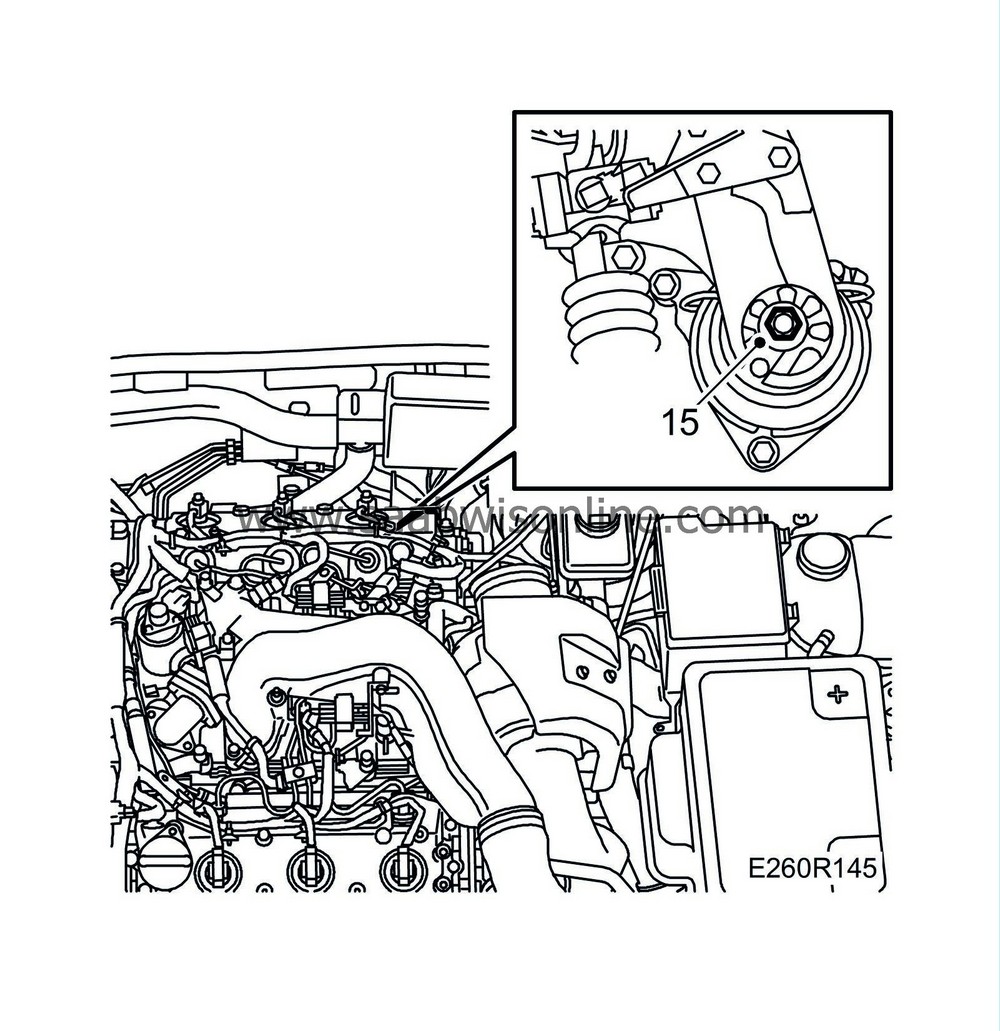
|
|
| 16. |
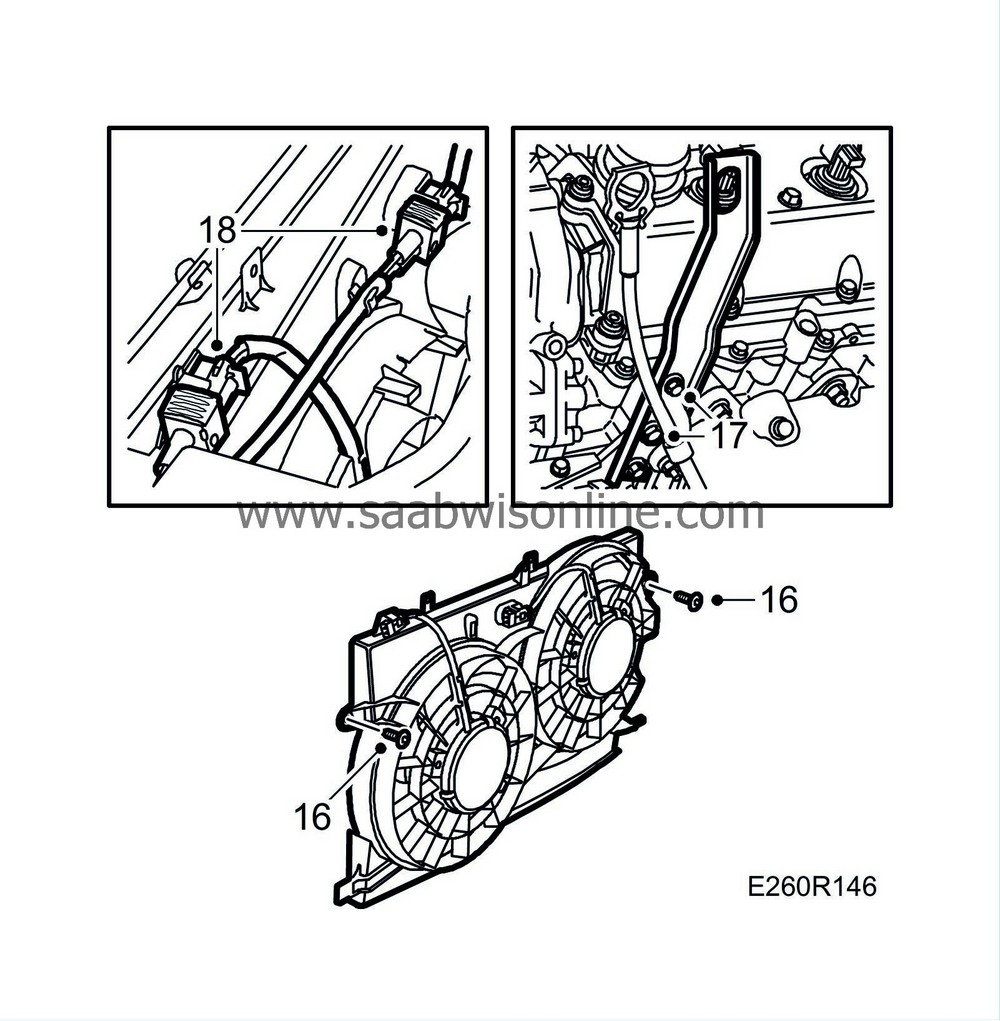
Move aside the lifting eye and fit the fan cowling.
|
|
| 17. |
Fit the upper bolt securing the lifting eye and secure the dipstick pipe to the lifting eye.
|
|
| 18. |
Plug in the fan connectors.
|
|
| 19. |
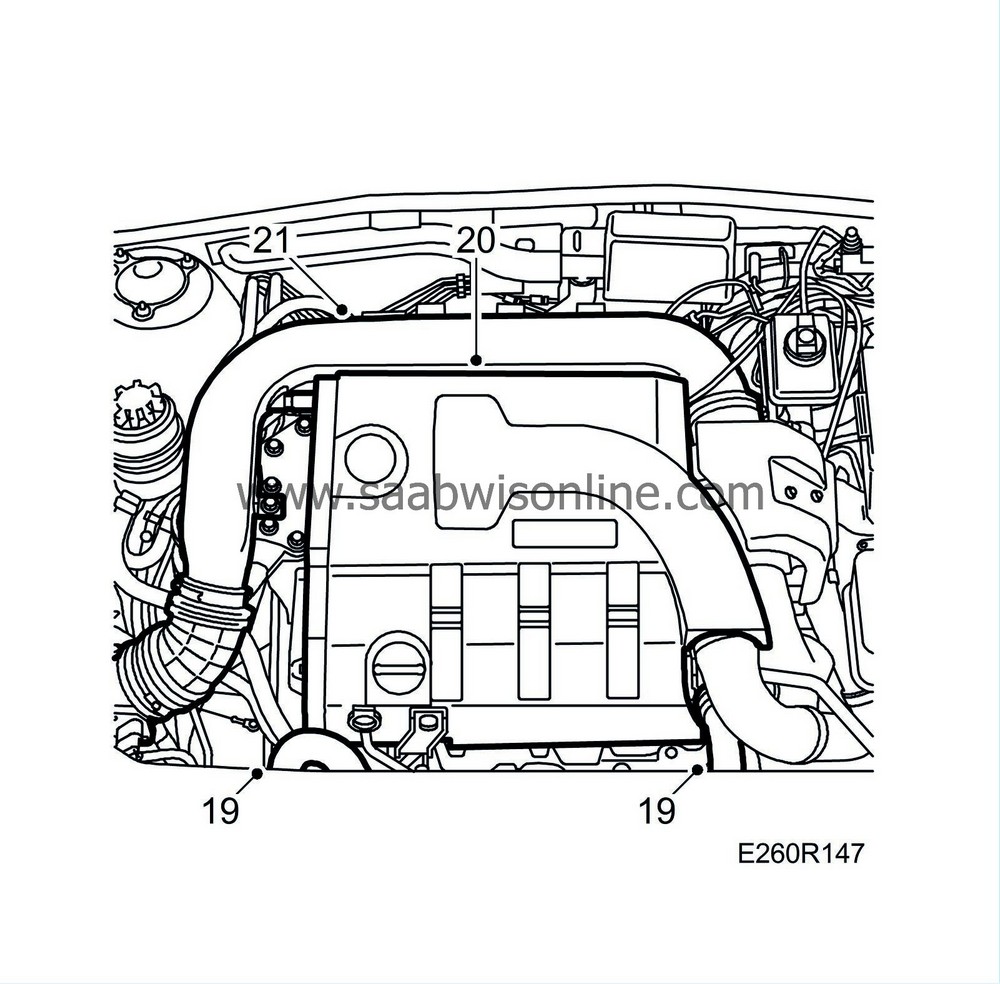
Fit the upper radiator hose.
|
|
| 20. |
Fit the upper engine cover.
|
|
| 21. |
Fit the intake pipe with mass air flow sensor. Plug in the mass air flow sensor connector.
Tightening torque, mass air flow sensor: 3.5 Nm (2.5 lbf ft) |
|
| 22. |
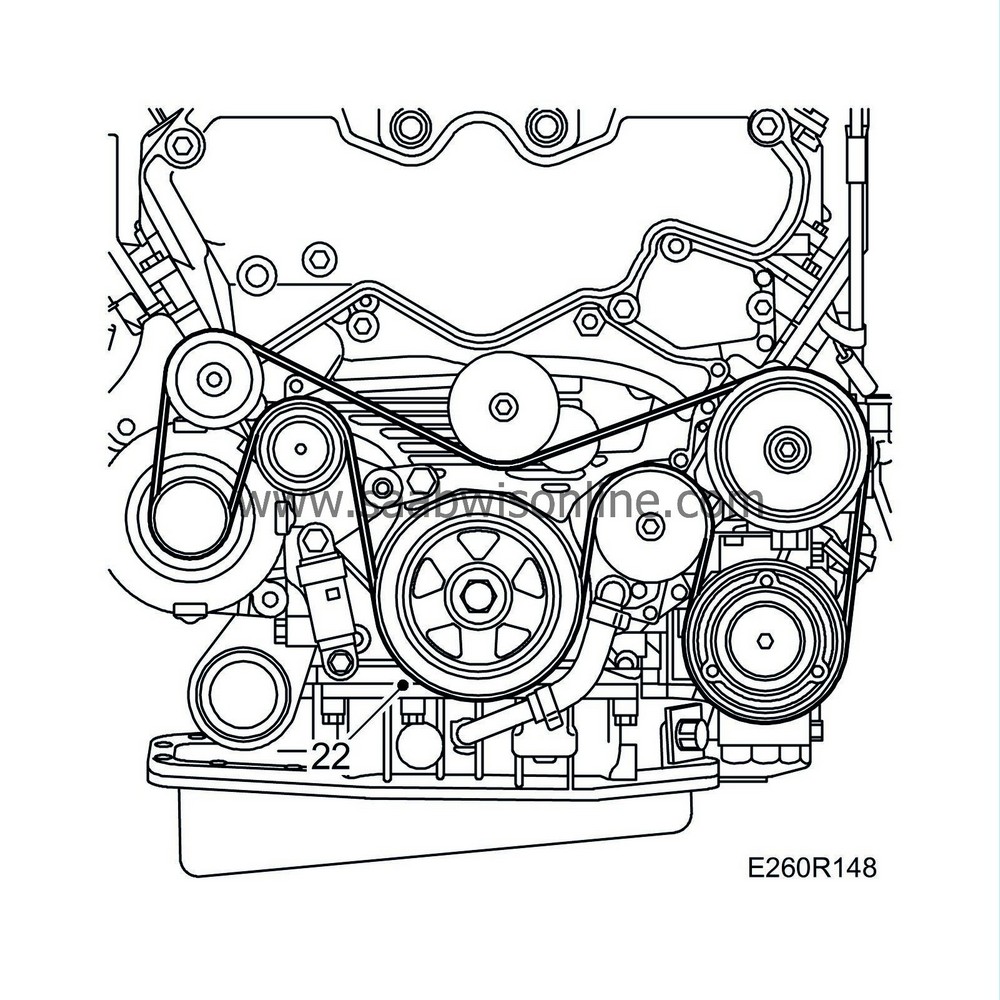
Fit the multigroove V-belt.
|
|
| 23. |
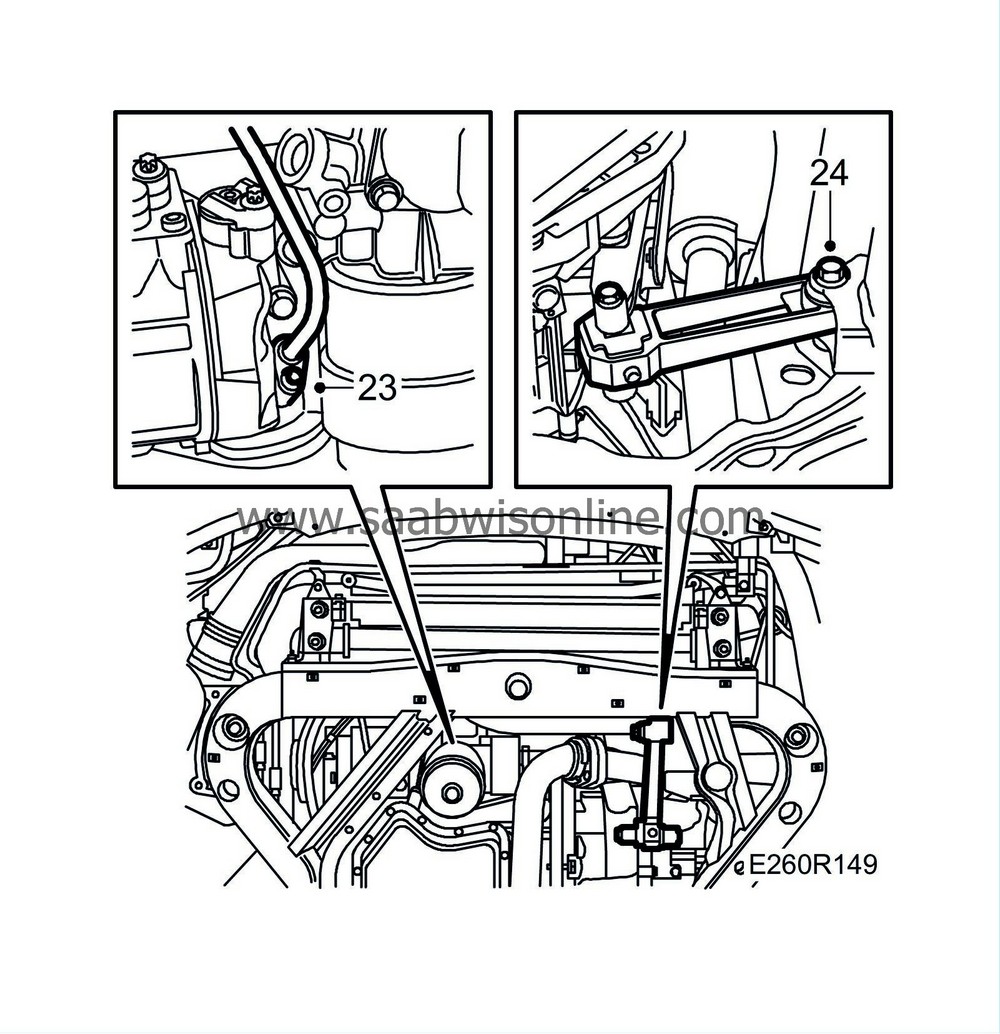
Raise the car and tighten the bolt securing the dipstick pipe.
|
|
| 24. |
Fit the front bolt to the torque arm.
Tightening torque 90 Nm + 90° (66 lbf ft + 90°) |
|
| 25. |
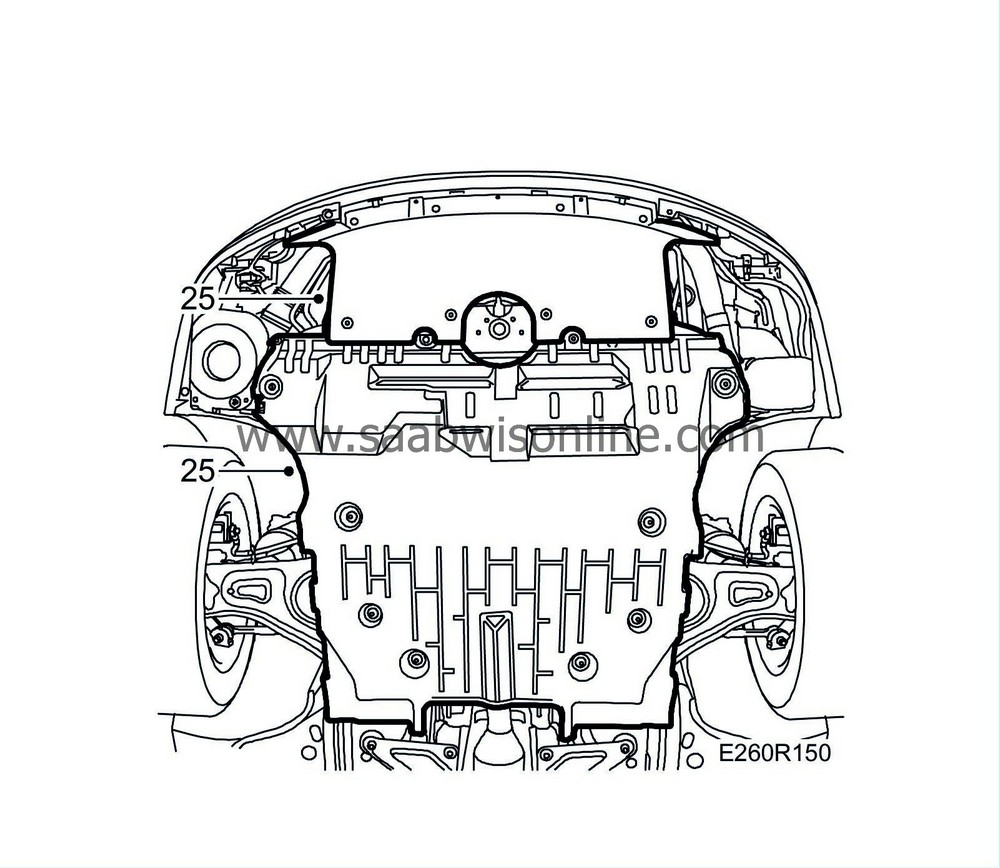
Fit the lower engine cover and lower the car.
|
|
| 26. |
Bleed the fuel system as described under
Bleeding the fuel system.
|
|
| 27. |
Fill with coolant and bleed the cooling system as described under
Bleeding the cooling system
|
|

 Warning

