(234-2686) Poor engine performance during acceleration
Symptom: Poor engine performance during acceleration.
|
TECHNICAL SERVICE BULLETIN
|
|
Bulletin Nbr:
|
234-2686
|
|
Date:
...........
|
Oktober 2007
|
|
Market:
|
enligt separat lista
|
|
|
Poor engine performance during acceleration
|
Saab 9-5 M02-05 with engine alternative D308.
One of the two solenoid valves in the high-pressure pump is blocked. Use Tech2 to test the solenoid valve. Tech2 shows the difference between measured pressure and required pressure in the fuel rail.
In the case of customer complaint, the following procedure must be carried out.
Symptom description
Poor engine performance during acceleration.
Removing/fitting the diesel pump:
See EPC
Procedure, diesel pump:
98 086 740 Solenoid valve (kit)
|
1.
|
Connect the exhaust extractor.
|
|
2.
|
Connect Tech2 to the data link connector.
|
|
4.
|
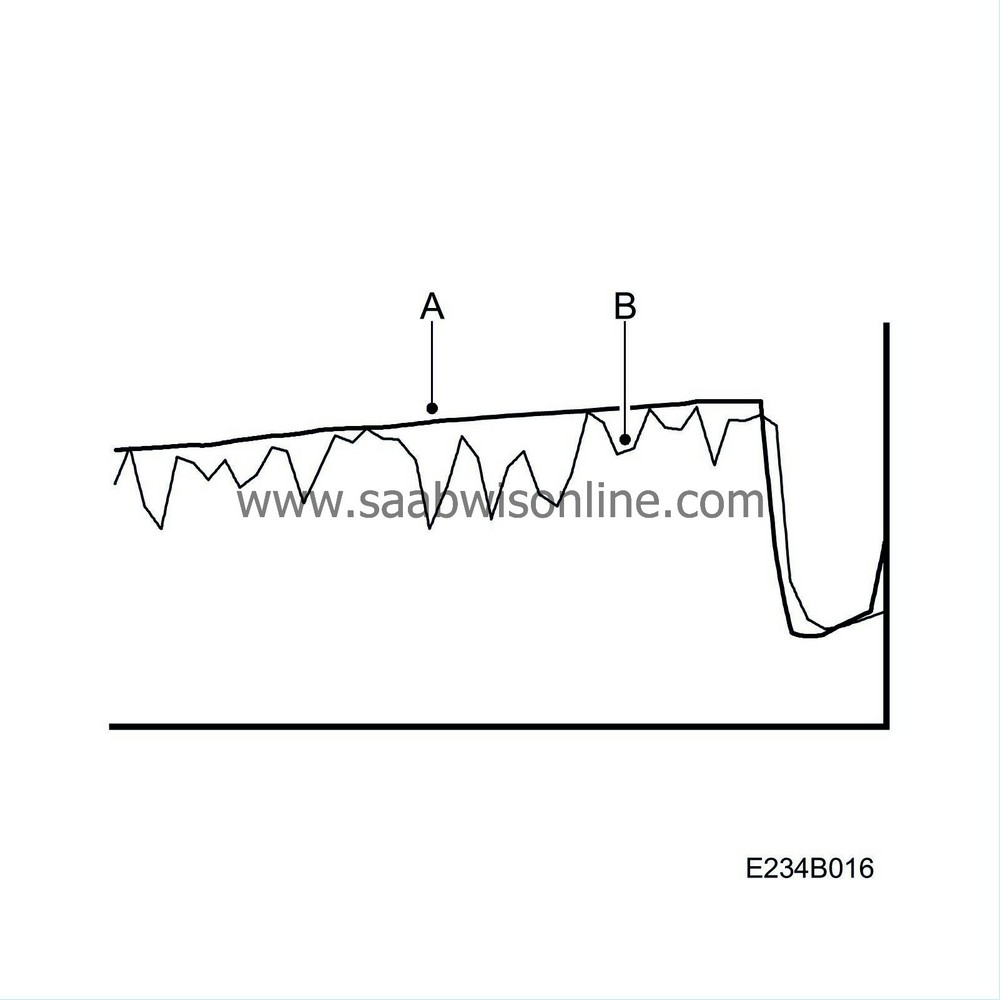
Select the menu - Engine - ECD (V6TiD) - Read values/Activate - Line Graph - select Target Fuel Pressure and Fuel Pressure - press OK.
|
|
5.
|
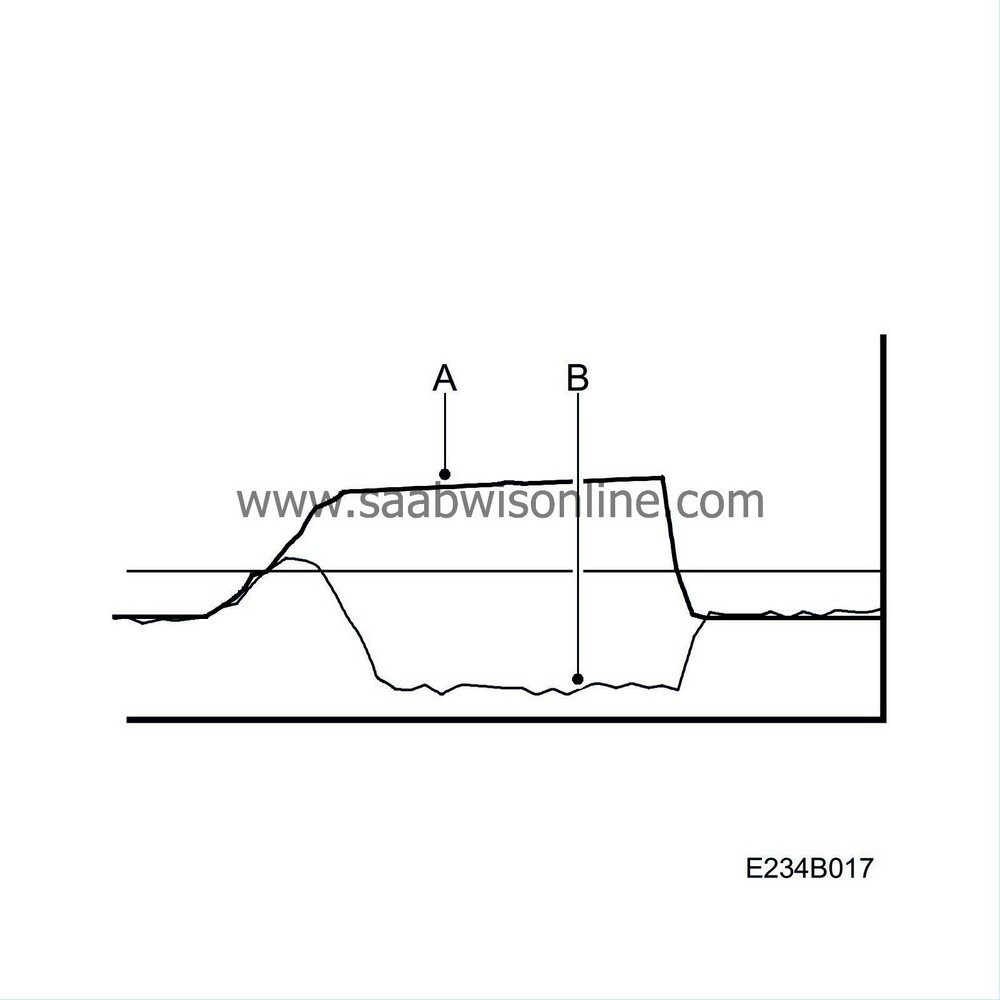
Run the engine at varied speed and compare the target fuel pressure and the actual fuel pressure.
|
|
6.
|
If the target fuel pressure (A) and actual fuel pressure (B) correspond with each other then the solenoid valves are functioning correctly.
|
|
7.
|
If the actual fuel pressure (B) is lower than the target fuel pressure (A), replace the solenoid valves, fuel pressure (652a, 652b) in accordance with the following method.
|
Replacing the solenoid valves, fuel pressure (652a, 653b)
|
1.
|
Remove the high-pressure pump in accordance with WIS 9-5 - Engine - Fuel system, diesel - Adjustment/Replacement - Fuel pump (in car), replacement.
|
|
2.
|
Seal the high-pressure pump's connections:

|
|
|
•
|
Fit the protective cap (A) onto the high-pressure connection.
|
|
|
•
|
Fit the cardboard tube (B), seals (C) and domed nut (D) on the supply connection and the return hose.
|
Note
|
|
The high-pressure pump connections must be sealed directly after the fuel lines have been detached, with the pump remaining on the engine.
|
|
|
3.
|
Clean the high-pressure pump.
|
Note
|
|
Brush away dirt and rust using a wire brush.
|
|
Spray away dirt and rust using "parts cleaner".
|
|
|
4.
|
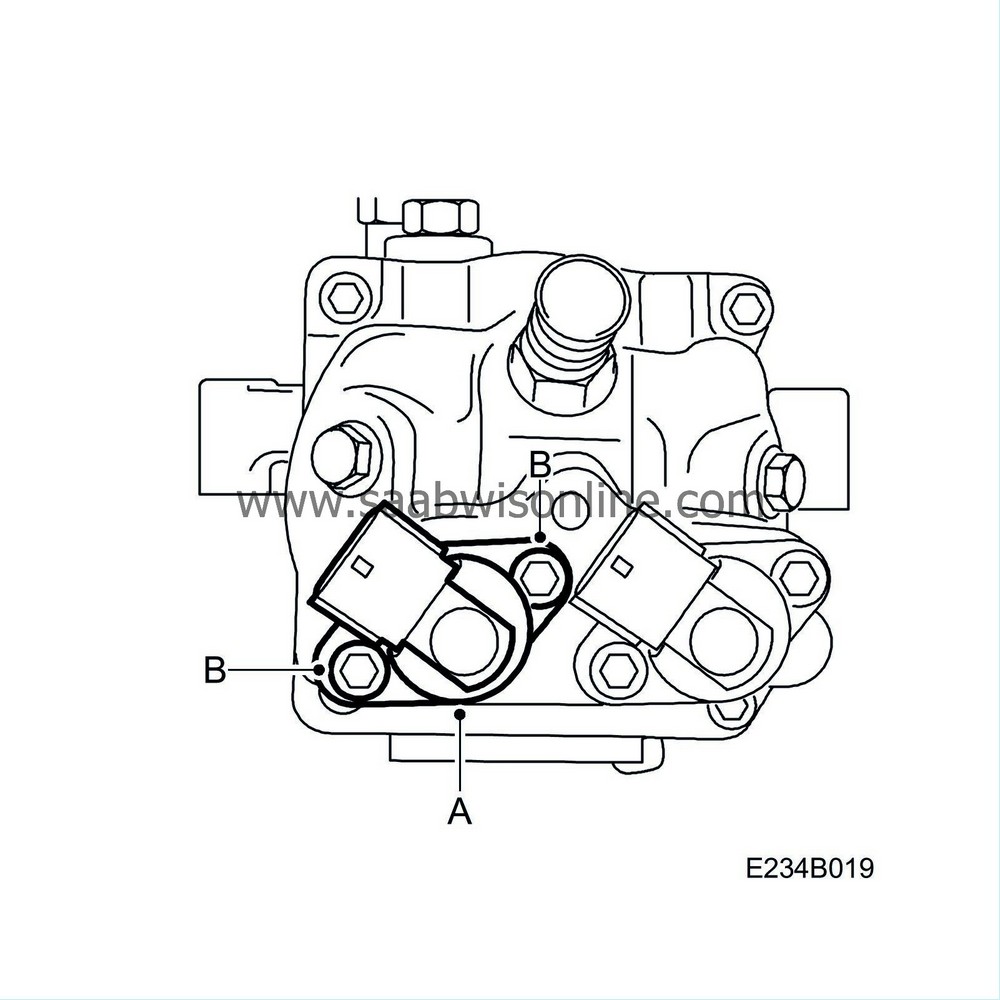
Remove the solenoid valve (red) (A), fuel pressure:
|
|
|
•
|
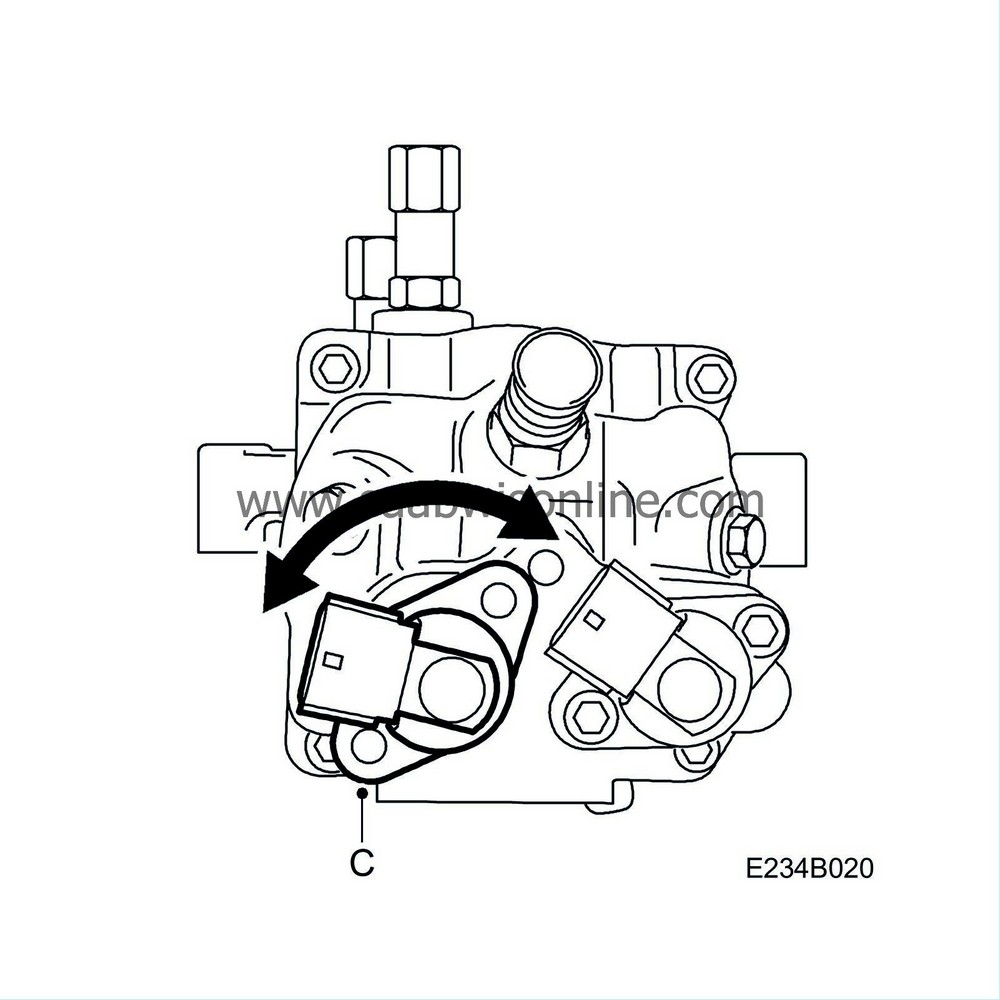
Turn the solenoid valve (red) (C) forward and back and remove the solenoid valve from the pump.
|
Note
|
|
Make sure that dirt does not enter the solenoid valve's hole in the pump housing.
|
|
|
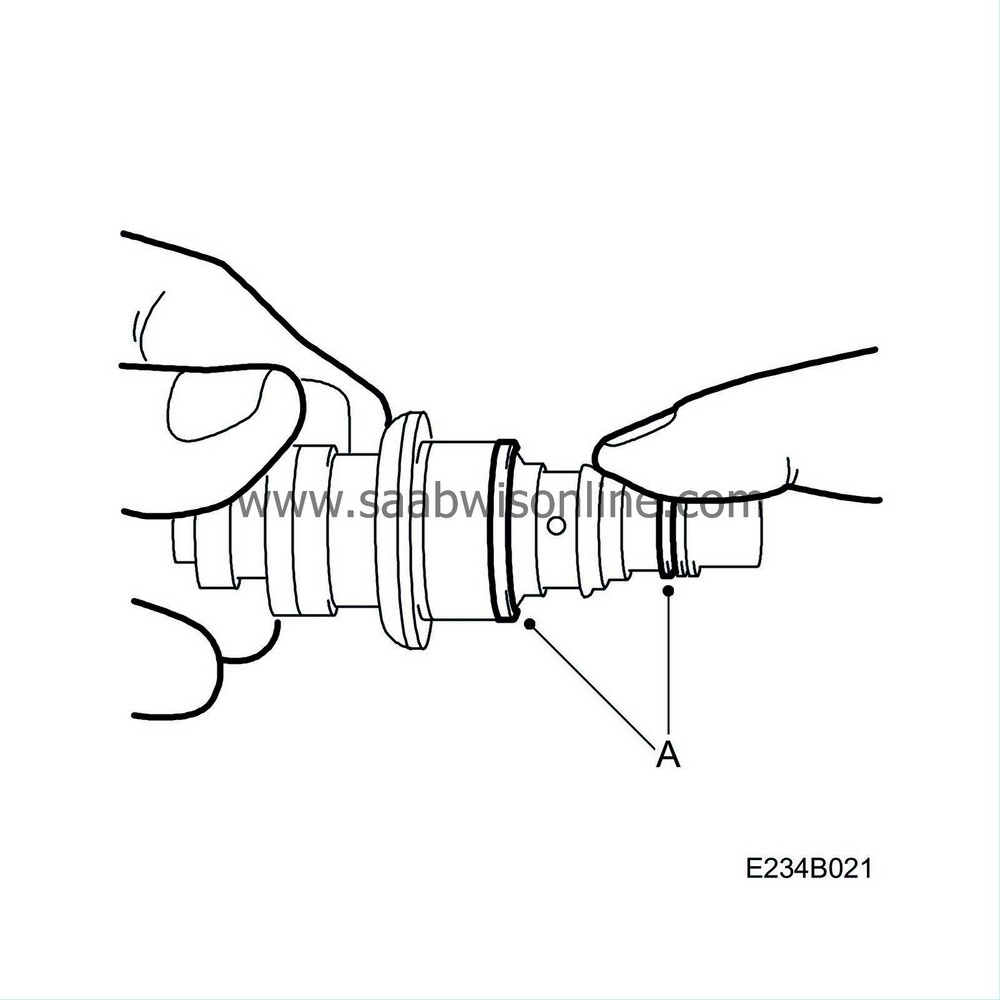
5.
|
Prepare the new solenoid valve.
|
|
|
•
|
Lubricate both of the O-rings (A) with clean engine oil.
|
|
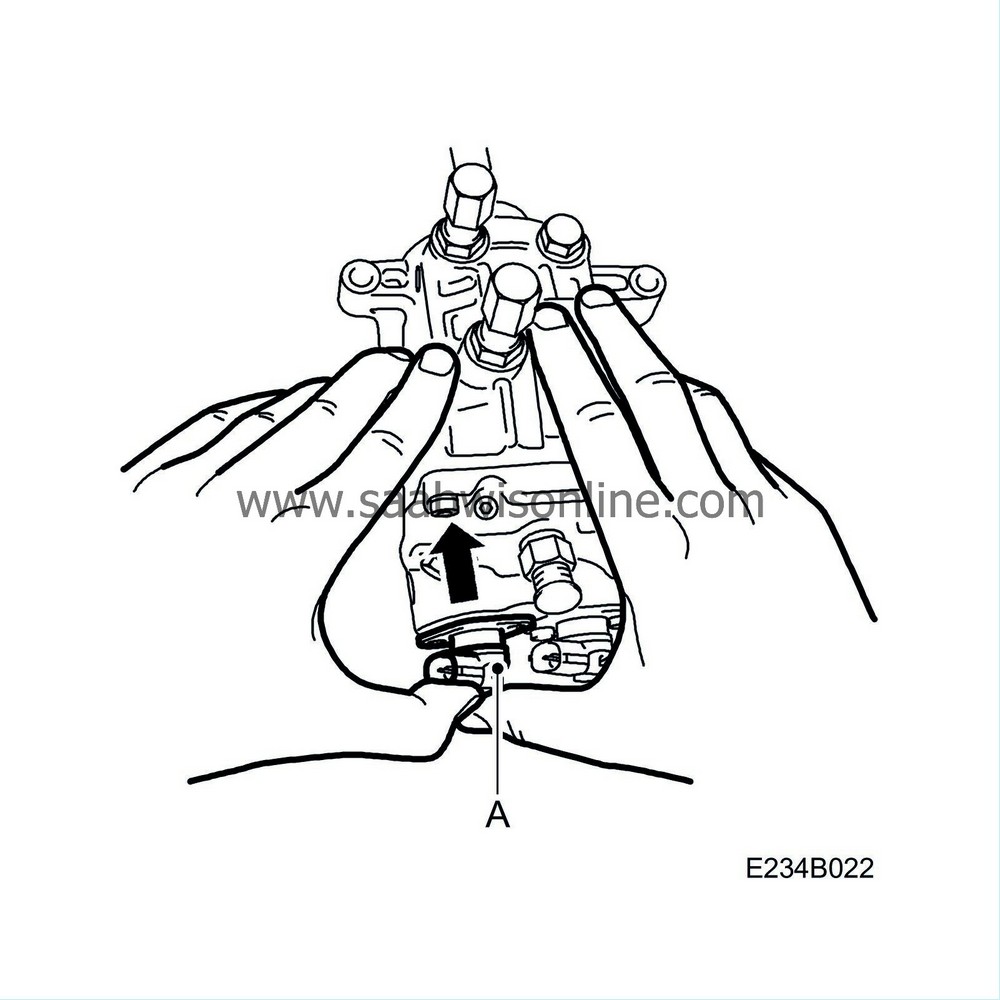
6.
|
Fit the solenoid valve, fuel pressure:
|
|
|
•
|
Press the solenoid valve (red) (A) into the pump housing by hand, in the direction of the arrow.
|
|
|
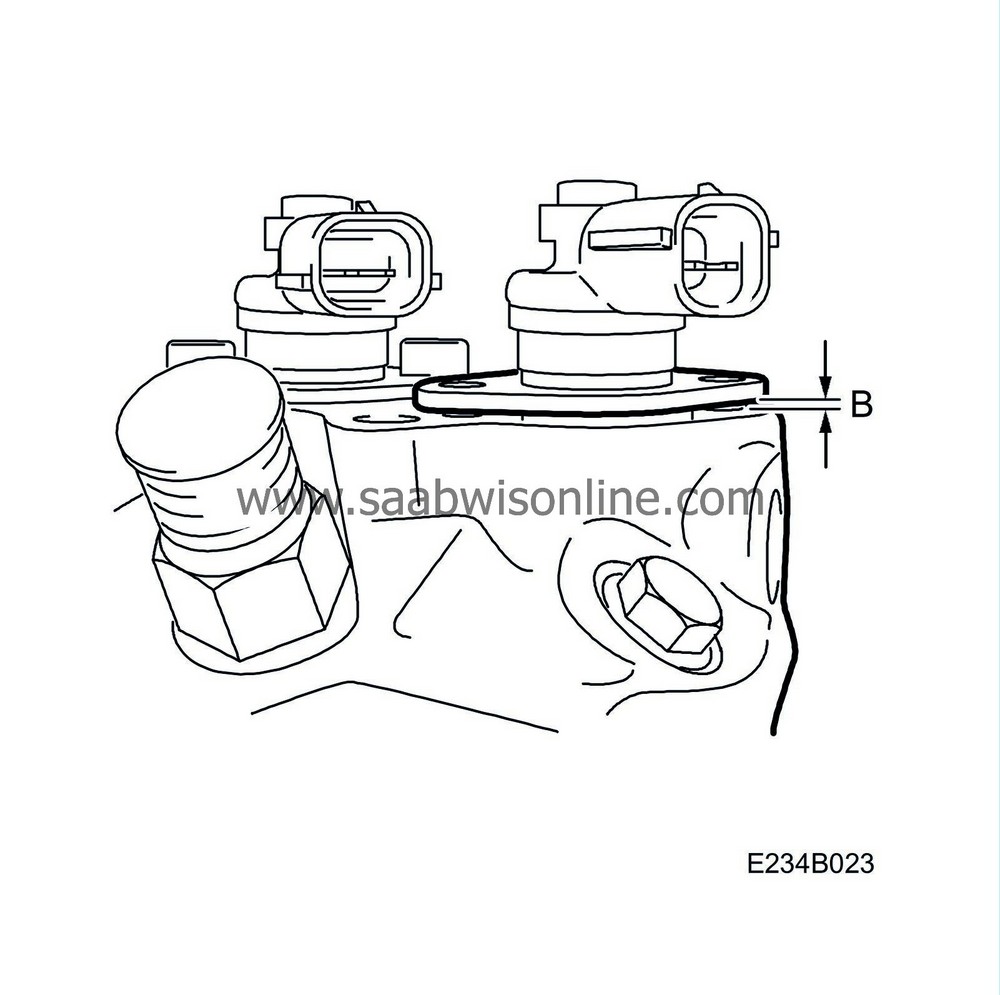
•
|
Clearance (B) of several mm should remain between the solenoid valve and the pump housing.
|
|
|
•
|
Insert the screws by hand.
|
|
|
•
|
Tighten the screws with a tool until the solenoid valve is in contact with the pump housing.
|
Note
|
|
Tighten the screws alternatingly.
|
|
|
|
•
|
Tighten the first screw to 13 Nm (9.6 lbf ft)
|
|
|
•
|
Tighten the second screw to 13 Nm (9.6 lbf ft)
|
|
|
•
|
Retighten the first screw to 13 Nm (9.6 lbf ft)
|
|
7.
|
Replace the second solenoid valve (green) in the same way. Step 4 up to and including step 6.
|
|
8.
|
Fit the high-pressure pump in accordance with WIS 9-5 - Engine - Fuel system, diesel - Adjustment/Replacement - Fuel pump (in car), replacement.
|
|
9.
|
Start the engine and check that the fuel connections are not leaking.
|
|
Warranty/Time Information
|
In the case of customer complaint and if the car is
within the warranty period
, use the following information to fill out the claim:
Failed Object: 24120
Fault/Reason code: 77
Location code: 09
Repair/Action code: 01/08
Time:
Checking: 0.1 hr
Replacing the valves (incl. checking): 5.4 hr


