To fit, gearbox, 4-cyl. diesel
|
|
To fit, gearbox, 4-cyl. diesel
|
 Warning
|
|
Cables, hoses, leads etc. are secured with hard plastic cable ties. After being tightened, the ends are cut off, leaving sharp edges at the fixing points. Be aware of the risk of injury due to these sharp ends of cable ties.
|
|
|
|
|
|
|
2.
|
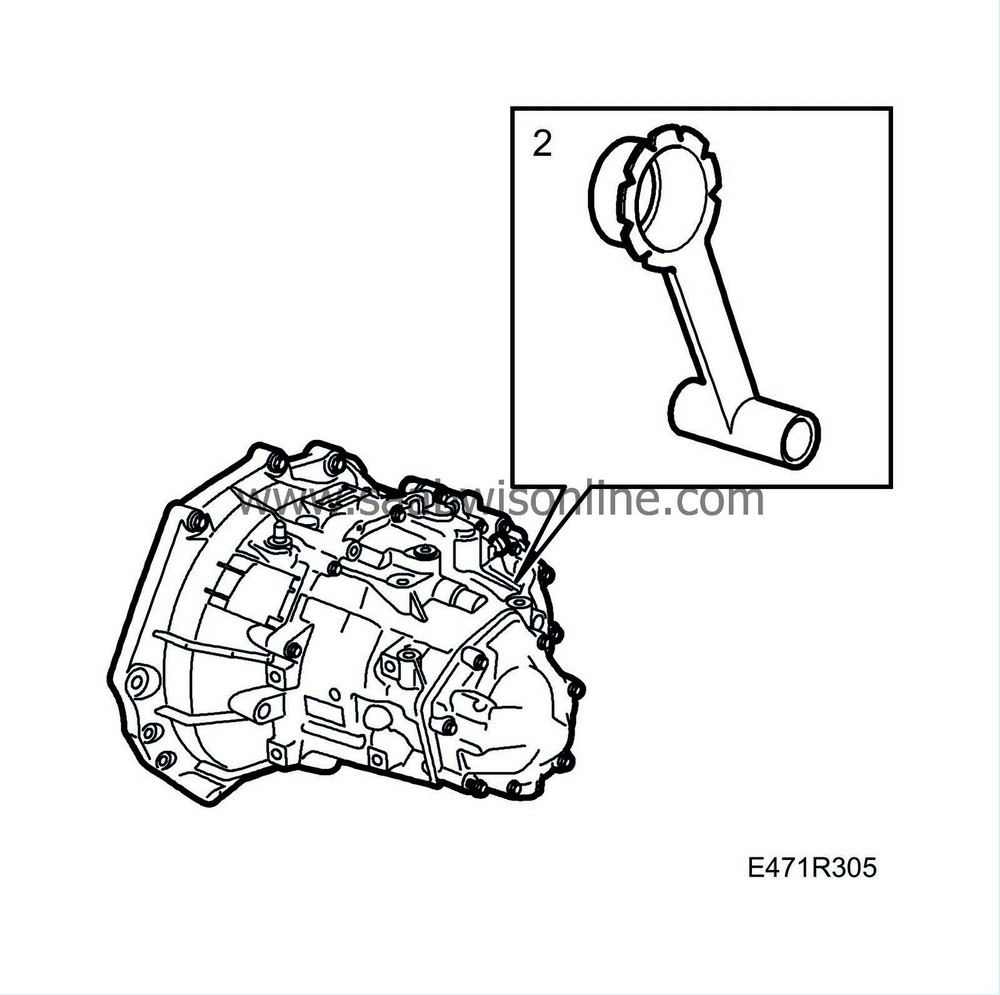
Insert
83 95 162 Protective sleeve, drive shafts
into the right-hand shaft seal in the gearbox to protect the seal when the gearbox is fitted.
|
Important
|
|
Always replace the shaft seals in the gearbox. Lubricate with gearbox oil.
|
|
|
|
|
3.
|
Fit the gearbox with lifting tool onto the jack.
|
Important
|
|
Slide in the gearbox until approx. 20 mm are remaining and remove the tool 83 95 162.
|
|
|
|
|
4.
|
Push in the rest of the gearbox. Turn the primary shaft, if needed, so that the gearbox can be fitted.
|
|
5.
|
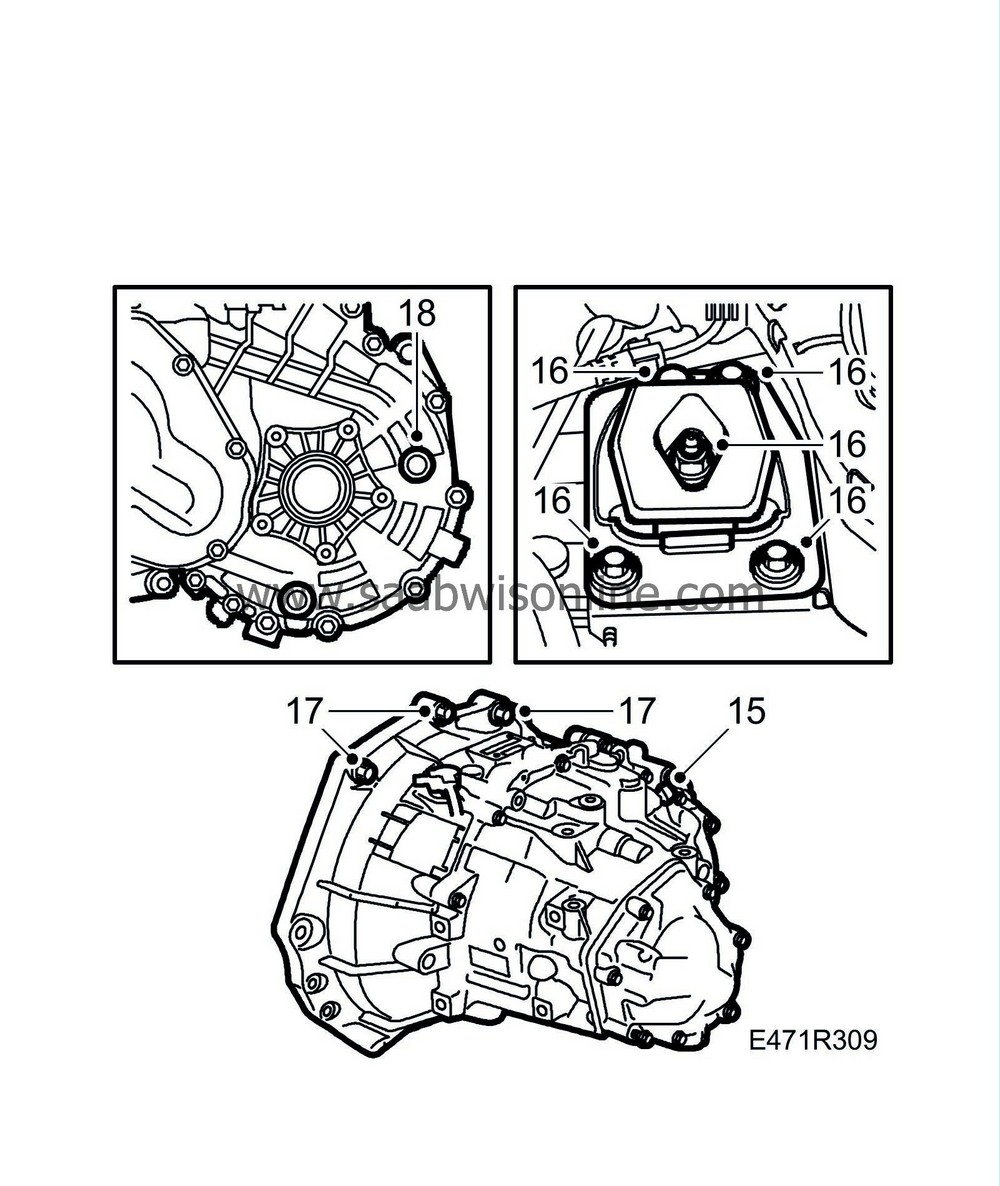
Tighten all the bolts except the upper bolts between the engine and gearbox.
Tightening torque, misc. bolts 70 Nm (52 lbf ft)
Tightening torque, lower bolts 40 Nm (30 lbf ft)
|
|
6.
|
Remove the lifting tool from the gearbox and move aside the jack.
|
|
7.
|
Refit the gearbox bolts.
Tightening torque 24 Nm (18 lbf ft)
|
|
8.
|
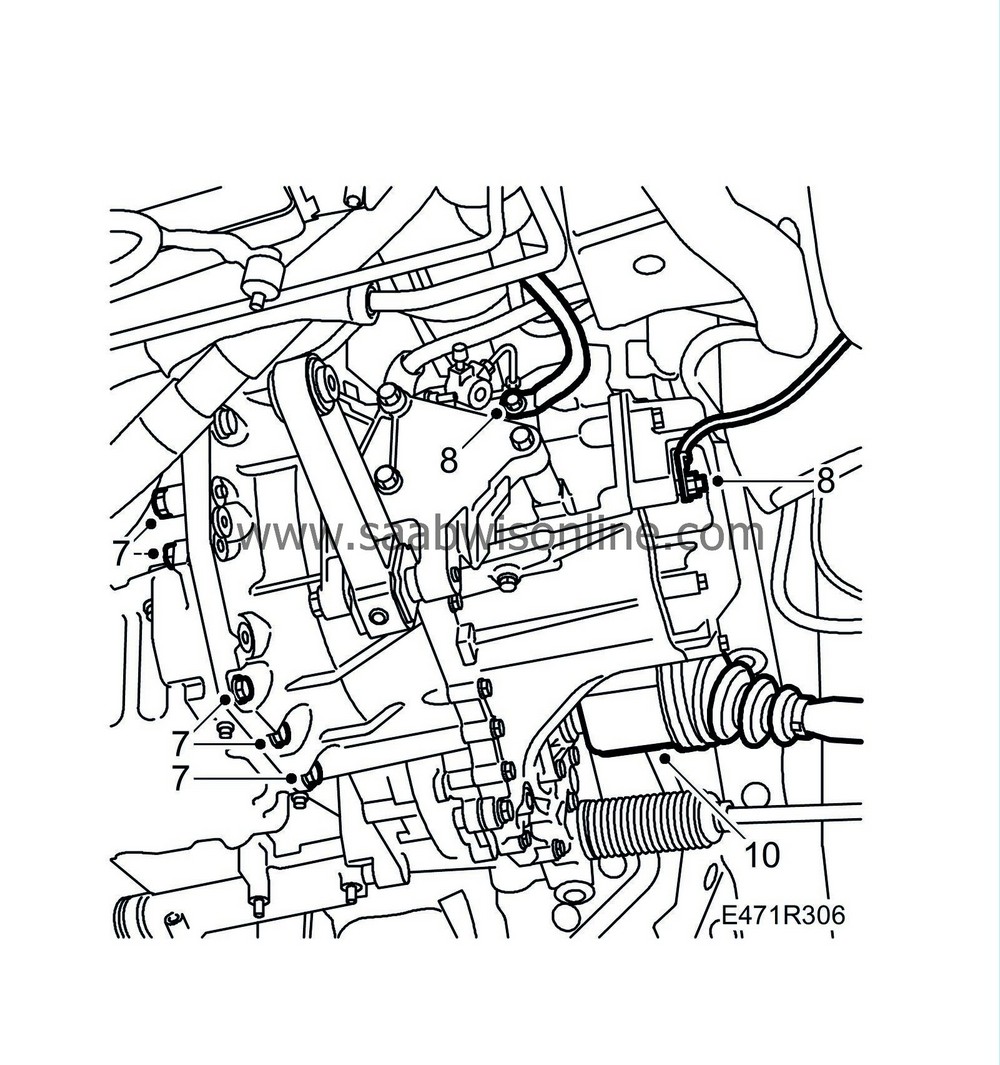
Attach the two grounding cables to the gearbox.
|
|
9.
|
Insert
83 95 162 Protective sleeve, drive shafts
into the left-hand shaft seal. Make sure that the driver is clean and fit it into the tool.
|
Important
|
|
Fit the driver in the gearbox until approx.20 mm are remaining and pull out the tool before the sealing surface of the shaft reaches the shaft seal.
|
|
|
|
|
10.
|
Push in the rest of the shaft until the circlip snaps into place.
|
|
11.
|
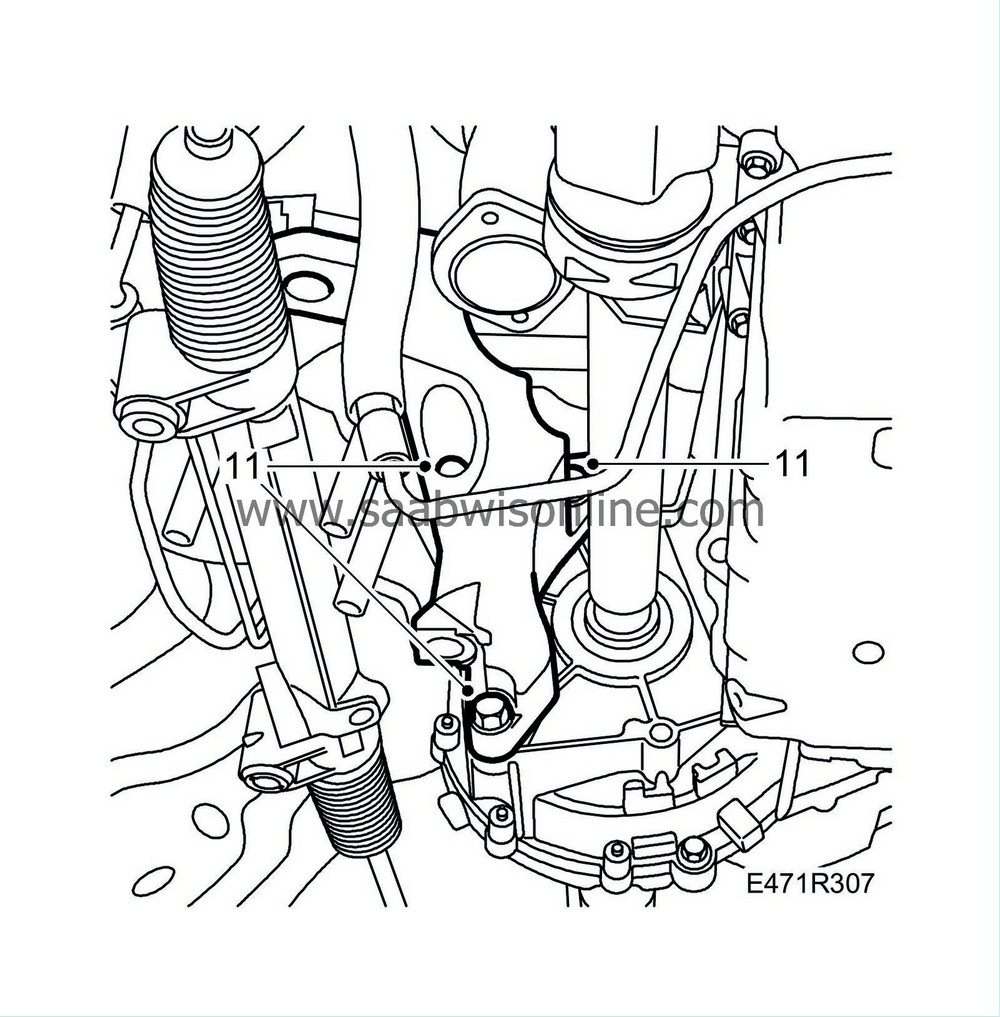
Fit the rear engine mounting. Position the engine pad.
Tightening torque 60 Nm + 60° (44 lbf ft +60°)
|
|
12.
|
Lower the car and fit the left-hand engine mounting.
Tightening torque 40 Nm + 30° (30 lbf ft + 30°)

|
|
13.
|
Move the clutch delivery pipe into position and connect this to the gearbox. Fit the circlip. Remove the pinch-off pliers.
|
|
14.
|
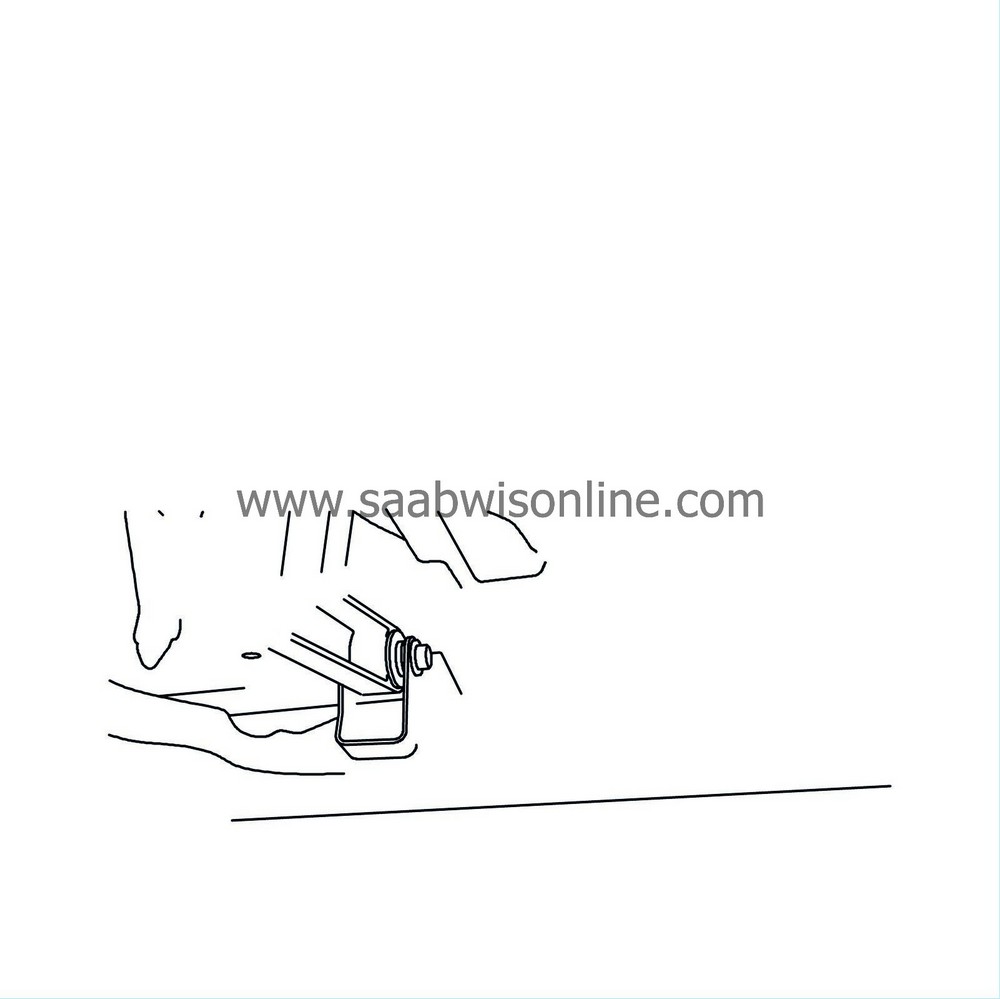
Connect a hose to the bleed nipple, slacken the nipple and allow a small amount of brake fluid to run out. Tighten the nipple and test the clutch. If it does not work bleed the clutch as described under
Bleeding the brake system
.
|
|
15.
|
Plug in the reversing light switch.
|
|
16.
|
Lift the engine using the lifting beam and fit the engine pad nut.
Tightening torque 84 Nm (62 lbf ft)
|
|
17.
|
Fit the upper bolts between the engine and gearbox.
Tightening torque 70 Nm (52 lbf ft)
|
|
19.
|
Raise the car and roll the trolley and subframe under the car. Lubricate the locating pins for the radiator with vaseline. Carefully raise the subframe, engaging the locating pins.
|
Important
|
|
Be observant of the rubber gaiters for the inner drivers. These can knock against the centre mountings on the subframe before the subframe comes against the body.
|
|
Guide in the ball joints.
|
|
|
|
|
20.
|
Fit the suspension arm to the steering swivel member, raise slightly further and fit the steering gear.
Tightening torque 90 Nm (66 lbf ft)
|
|
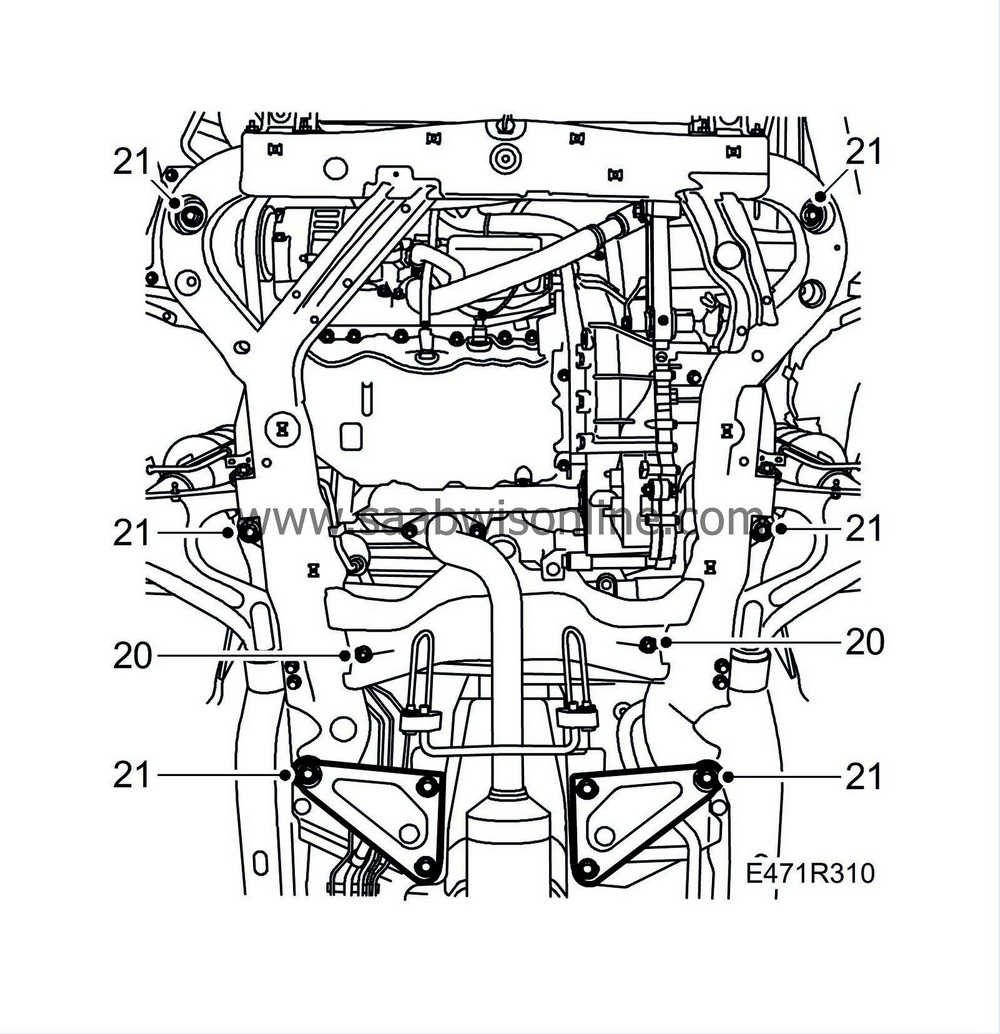
21.
|
Fit the bolts securing the subframe and support plates. Move the lifting trolley aside. Tighten the bolts securing the subframe.
Tightening torque 100 Nm + 45° (74 lbf ft + 45°)
Tightening torque, support plates 60 Nm (44 lbf ft)
|
|
22.
|
Remove the strap from the radiator and fit the steering servo coolant pipe.

|
|
23.
|
Fit the air cleaner to the subframe.
|
|
24.
|
Fit the A/C lines to the plastic clips on the subframe.
|
|
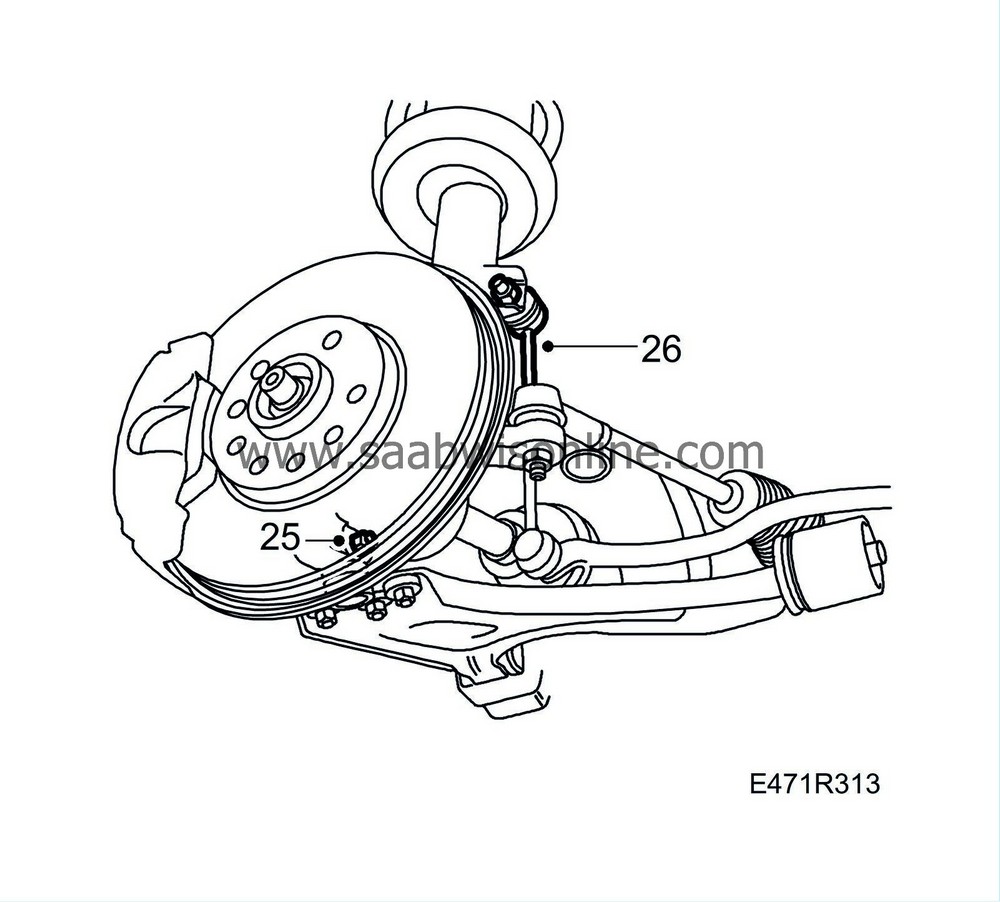
25.
|
Fit the bolts that secure the outer ball joints to the steering swivel member on both sides. Tighten the nuts.
Tightening torque 50 Nm (37 lbf ft)
|
Warning
|
|
Check that the spindle on the ball joint protrudes above the steering swivel member attachment.
|
|
|
|
|
|
|
|
26.
|
Fit the anti-roll bars. Take the strain with a thin open ended 17 mm spanner.
Tightening torque 92 Nm (68 lbf ft)
|
|
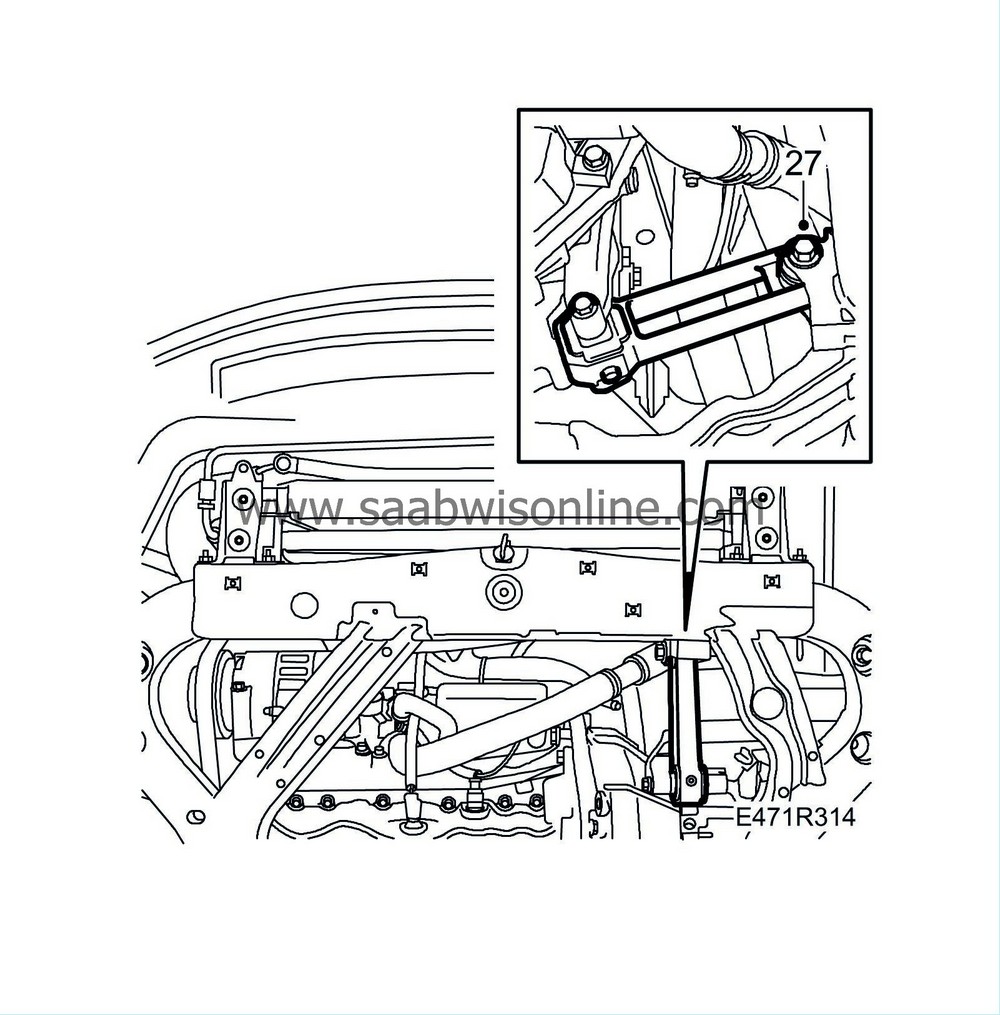
27.
|
Fit the bolt securing the front torque rod to the subframe.
Tightening torque 90 Nm + 90° (66 lbf ft + 90°)
|
|
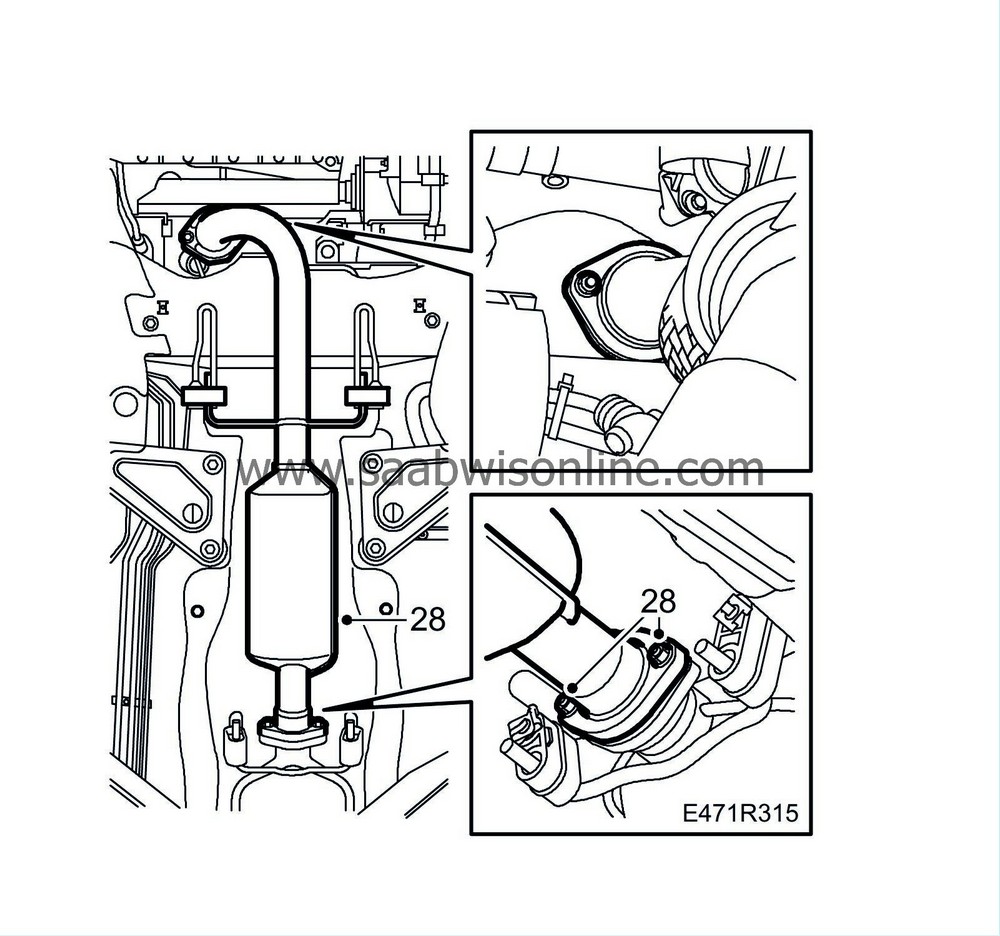
28.
|
Fit the front exhaust pipe and catalytic converter. Do not tighten the front nuts yet.
Tightening torque 25 Nm (18 lbf ft)
|
|
29.
|
Lower the car and remove the lifting beam.
|
|
30.
|
Check that the upper locating pins for the radiator are correctly positioned. Shake the power train to avoid tension in the engine pads.
|
|
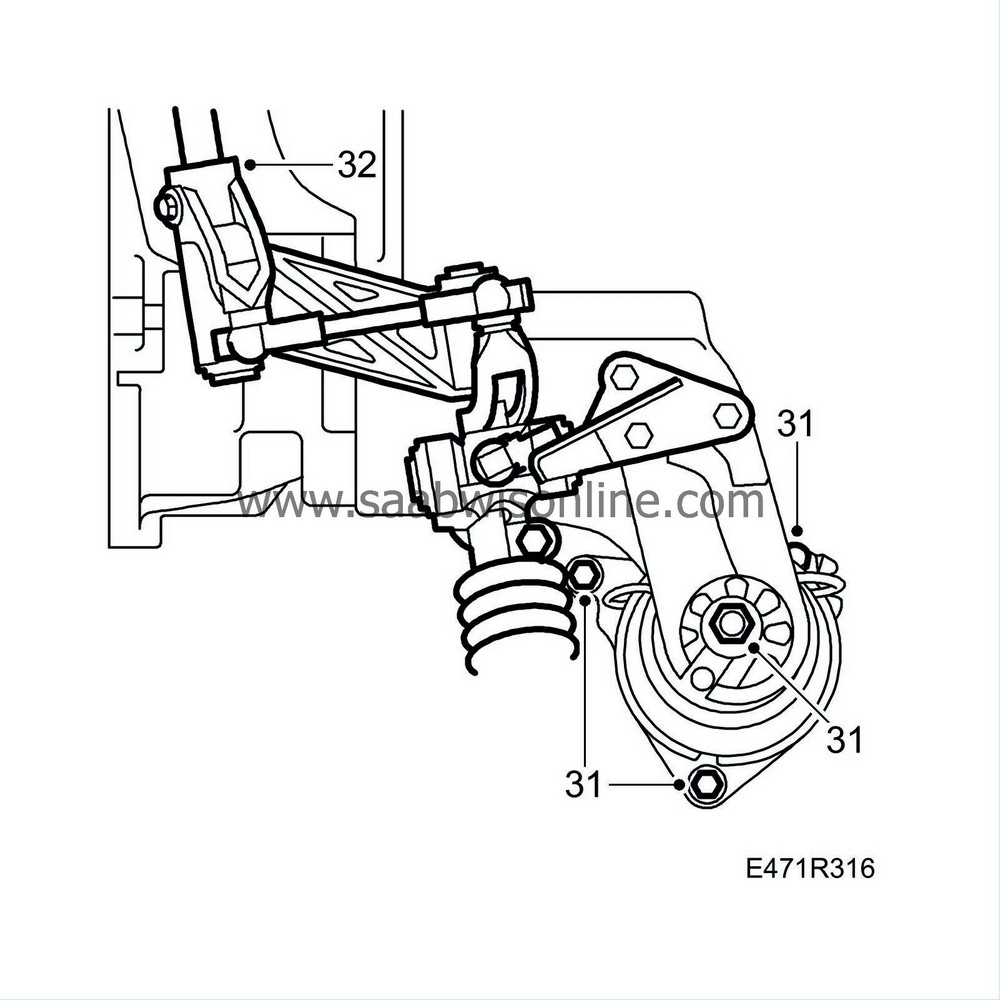
31.
|
Tighten the bolts for the rear engine pad from the engine bay side, starting with the rear bolt. Then tighten the nut.
Tightening torque, bolts 26 Nm (19 lbf ft)
Tightening torque, nut 47 Nm (35 lbf ft)
|
|
32.
|
Fit the selector linkage to the gearbox and tighten.
Tightening torque 24 Nm (18 lbf ft)
|
|
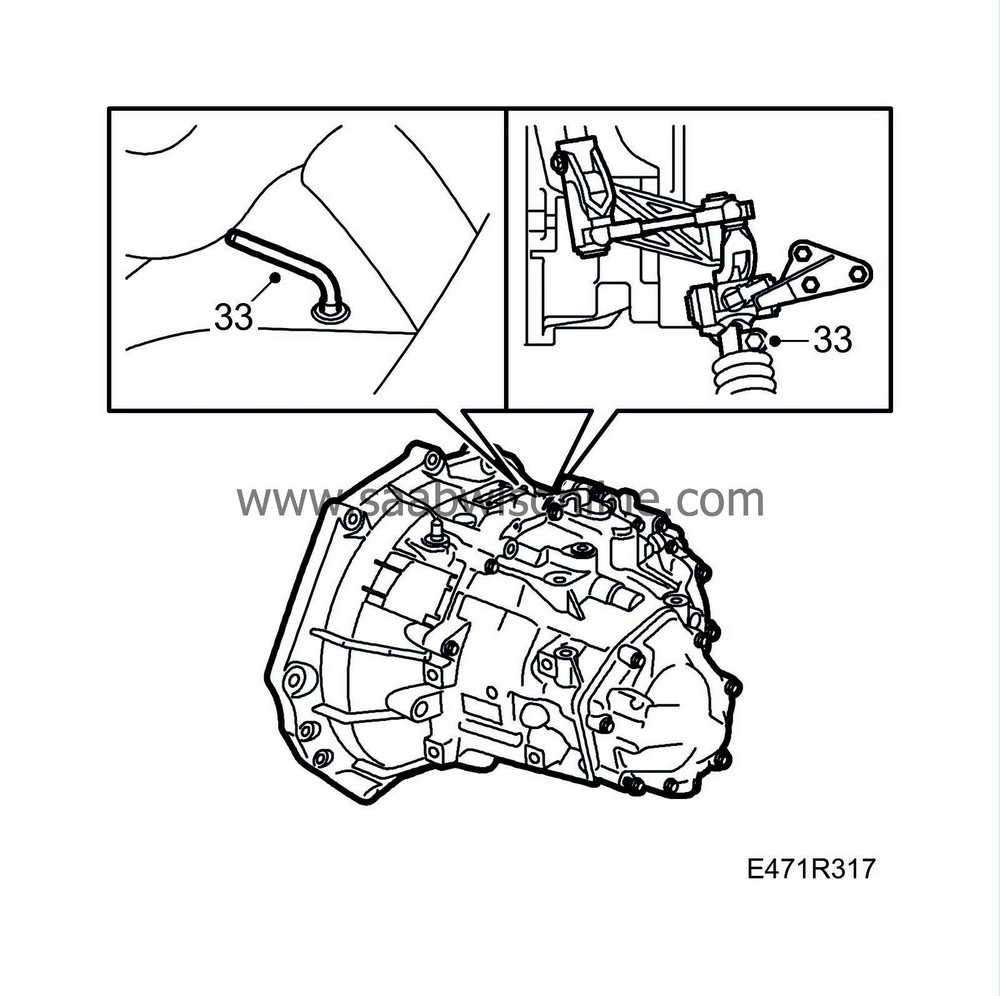
33.
|
Remove
87 92 335 Locking pin
from the gear lever housing and connect the gear linkage to the selector rod.
|
|
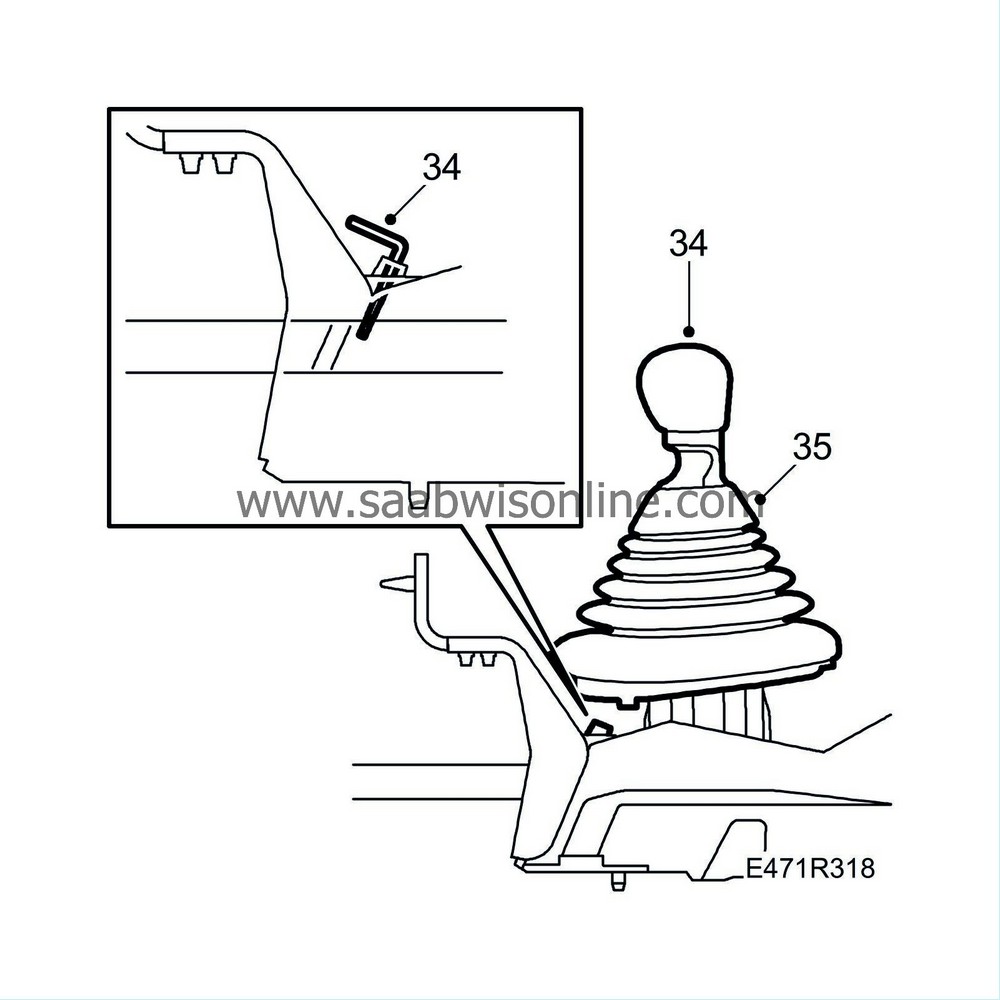
34.
|
Select 4th gear and fit the
87 92 632 Locking pin
. Tighten the clamp on the gear change linkage.
Tightening torque 22 Nm (16 lbf ft)
|
|
35.
|
Remove the locking pins, check the gear positions and that the ignition key can be inserted and removed. Insert the plastic plug into the gearbox. Fit the gaiter.
|
|
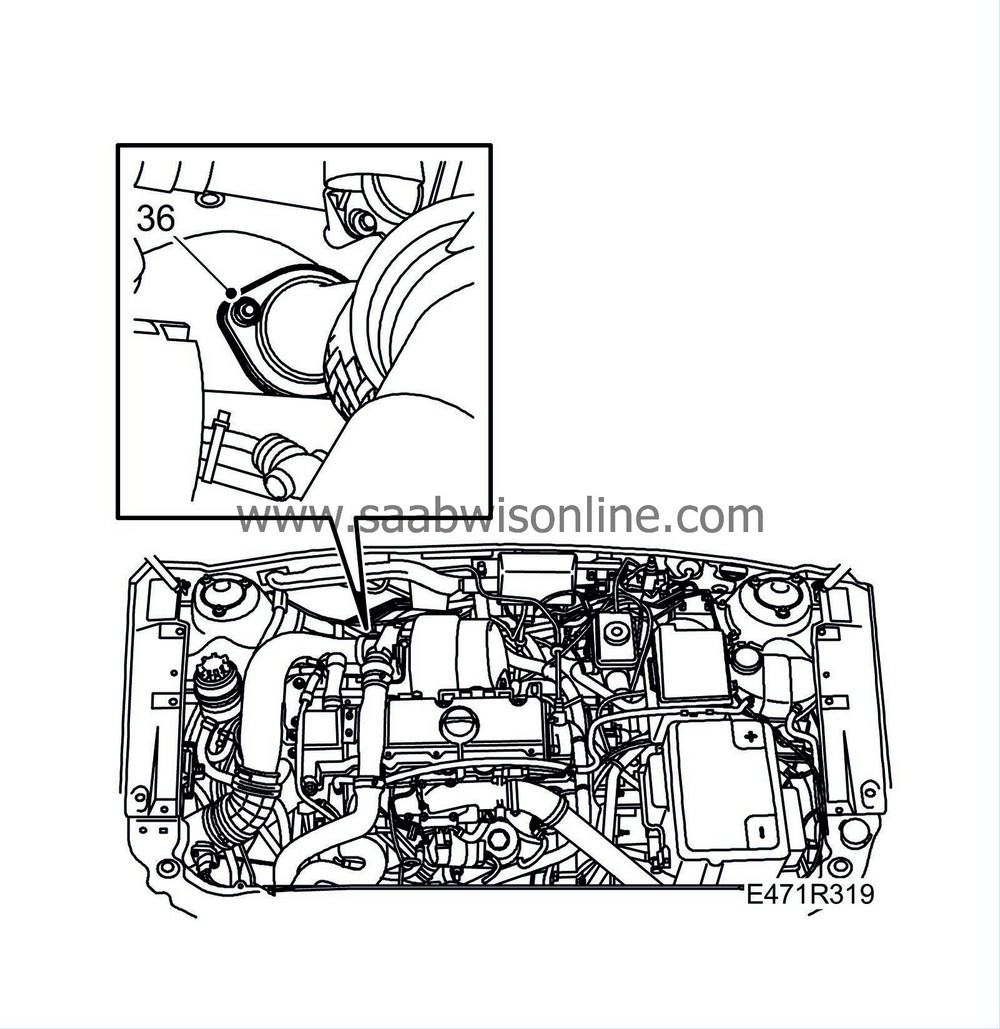
36.
|
Tighten the nuts on the front exhaust pipe.
Tightening torque 25 Nm (18 lbf ft)
|
|
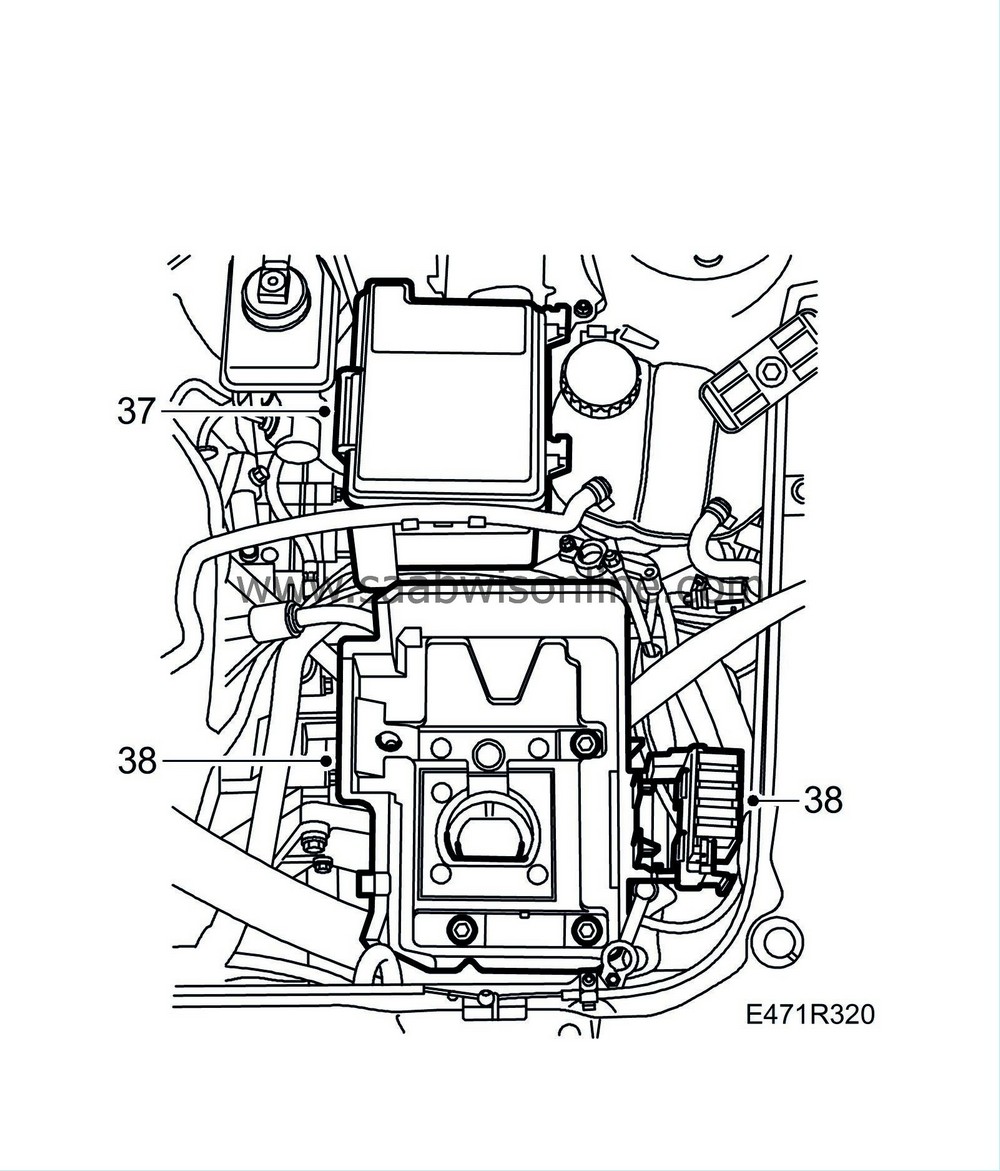
37.
|
Fit the main fuse board, refit the clip, and fit the battery tray.
|
|
38.
|
Fit the Maxi fuse holder and battery. Connect the battery cables. Fit the plastic cover over the battery.
|
|
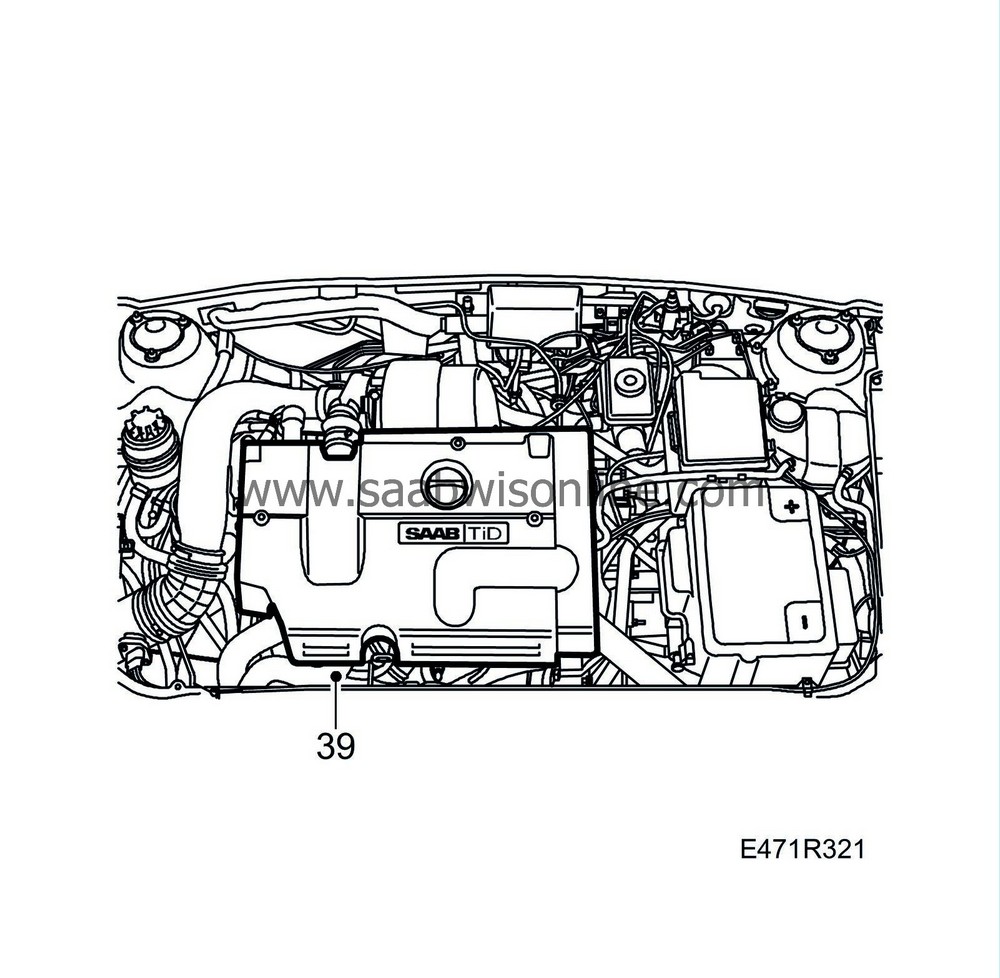
39.
|
Fit the upper engine cover.
|
|
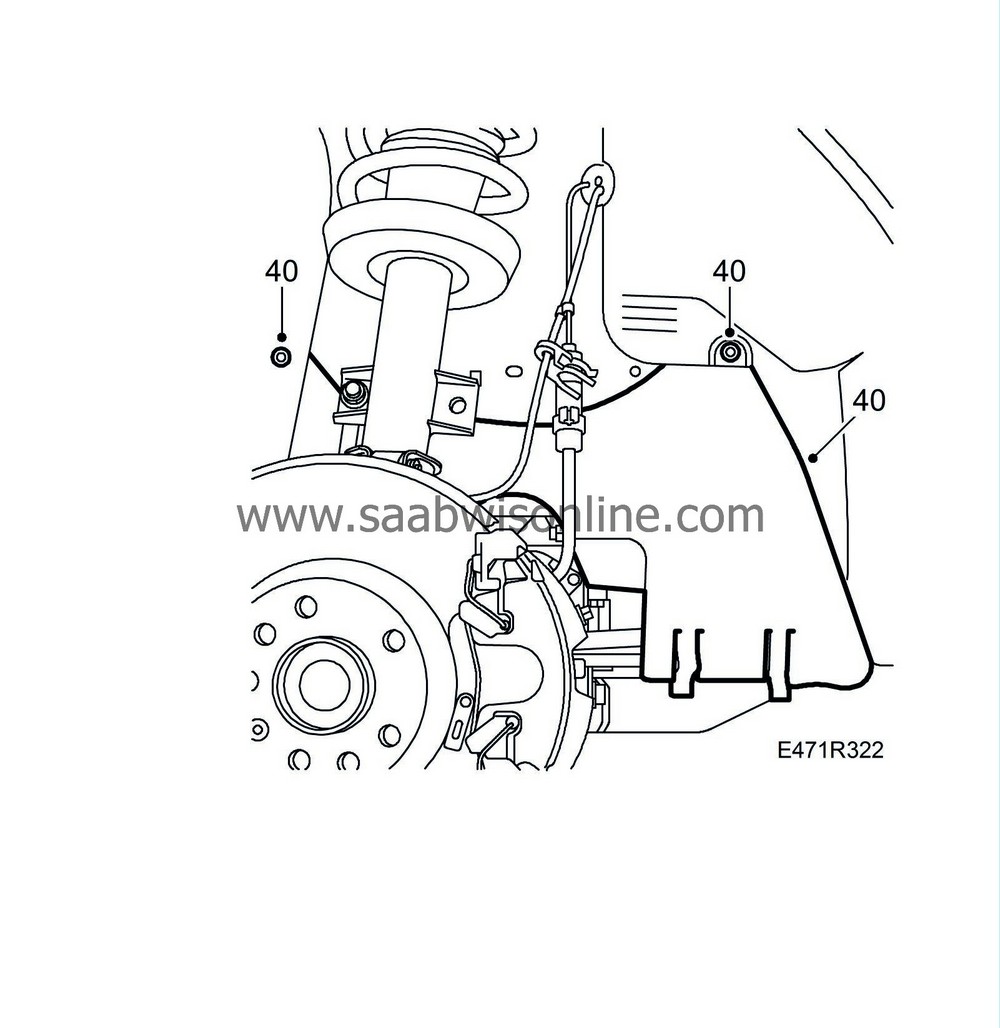
40.
|
Raise the car. Fit the two side covers in the wheel housing.
|
|
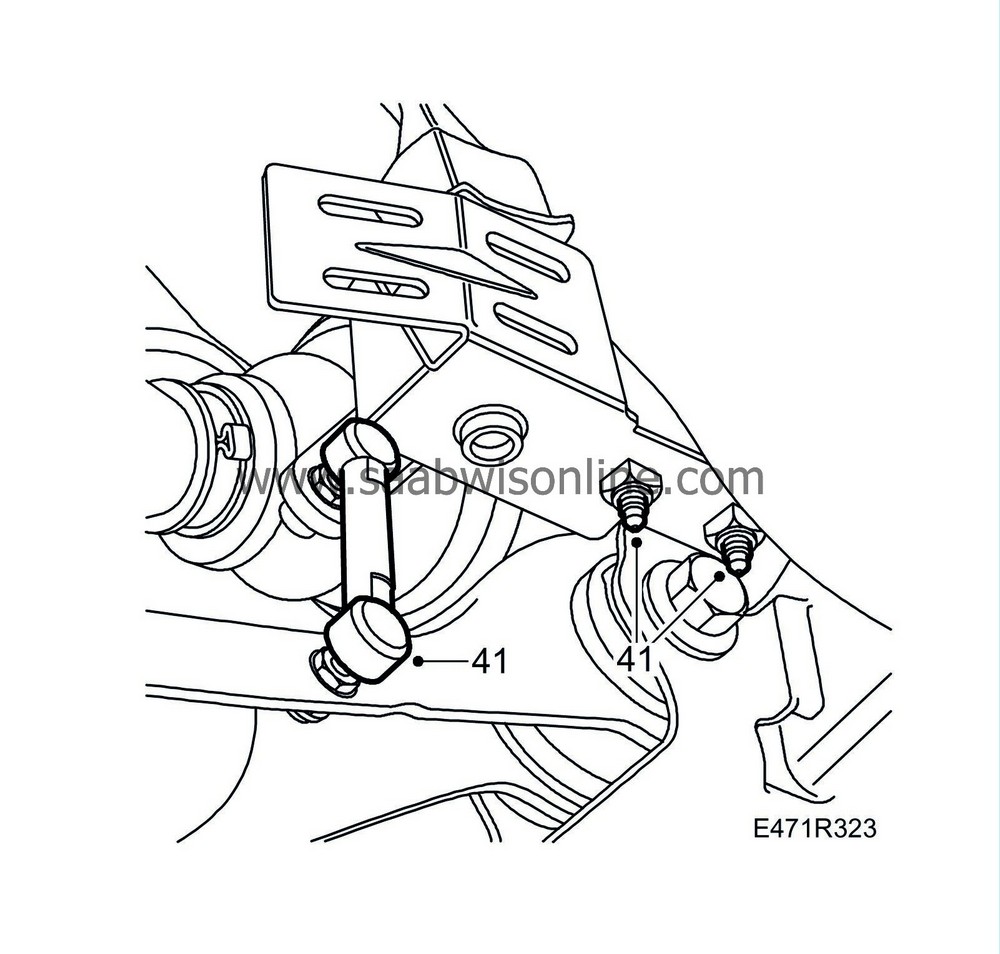
41.
|
Fit the headlamp levelling sensors (option).
|
|
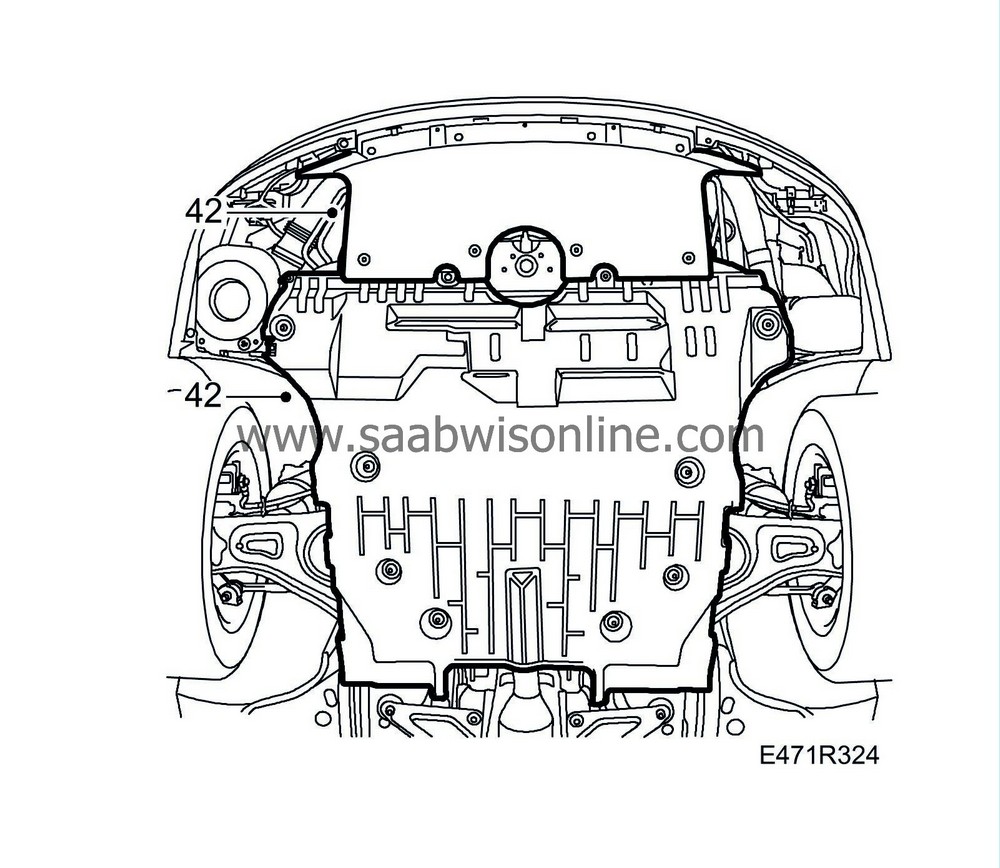
42.
|
Fit the two lower engine covers.
|
|
43.
|
Fit the front wheels. Refer to
Wheels
Tightening torque 110 Nm (81 lbf ft)
|
|
44.
|
Set the clock and enter the radio code, if required. Test drive the car. Check the position of the steering wheel when driving straight ahead on a level road. Adjust if needed.
|


