PRE-RELEASE
Compressor (V6 diesel)
| Compressor (V6 diesel) |
| To remove |
| 1. |
Place the car on a lift.
|
|
| 2. |
Drain the refrigerant from the system. See
Draining and filling of refrigerant
.
|
|
| 3. |
Remove the intake manifold from the mass air flow sensor and the turbocharger.
|
|
| 4. |
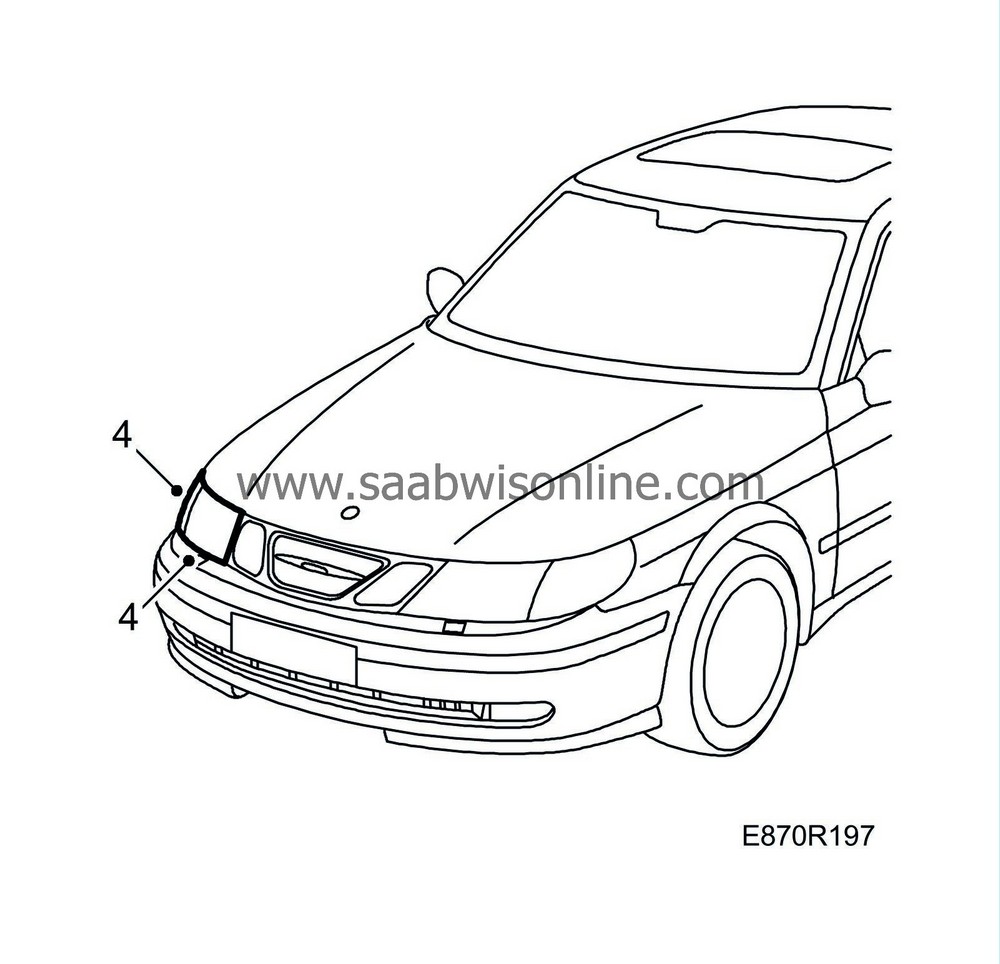
Remove the RH headlamp and direction indicator. See
Headlamps
.
|
|
| 5. |
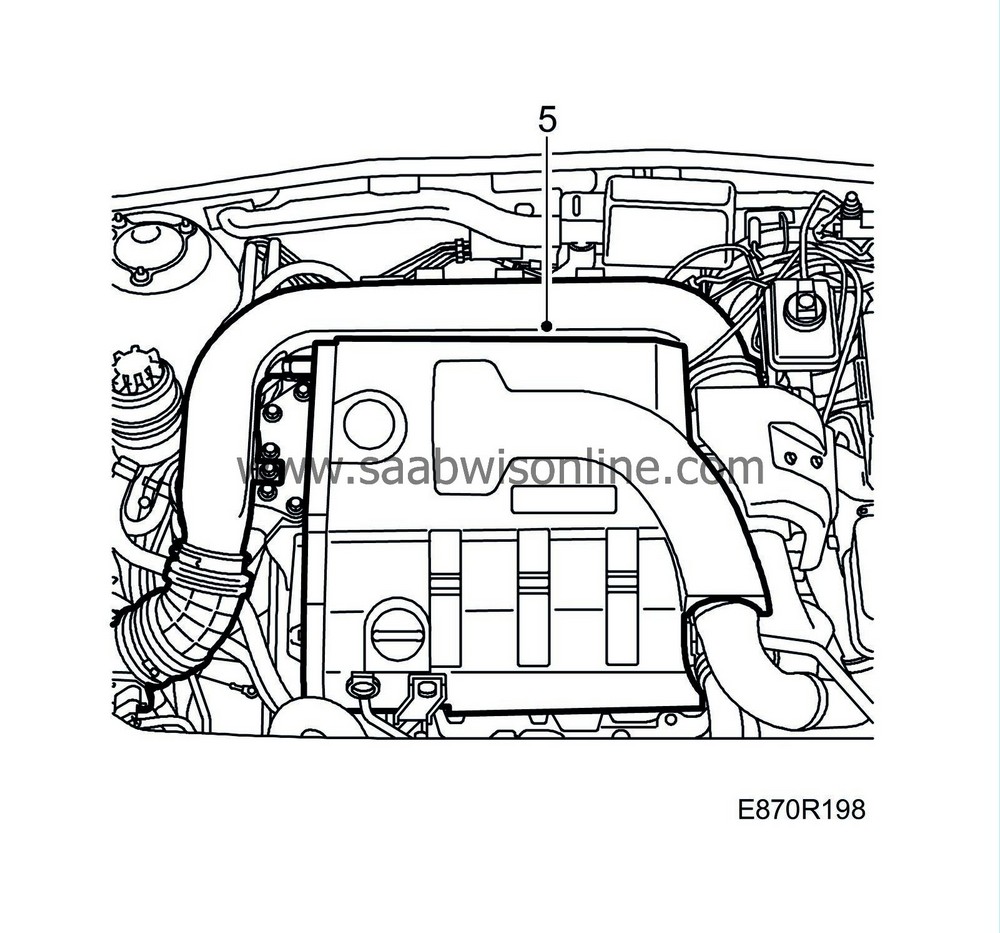
Remove the engine cover.
|
|
| 6. |
Unplug the connector to the A/C compressor at the RH headlamp.
|
|
| 7. |
Remove the PAD connections for the high and low-pressure pipes of the A/C compressor.
Plug the openings. 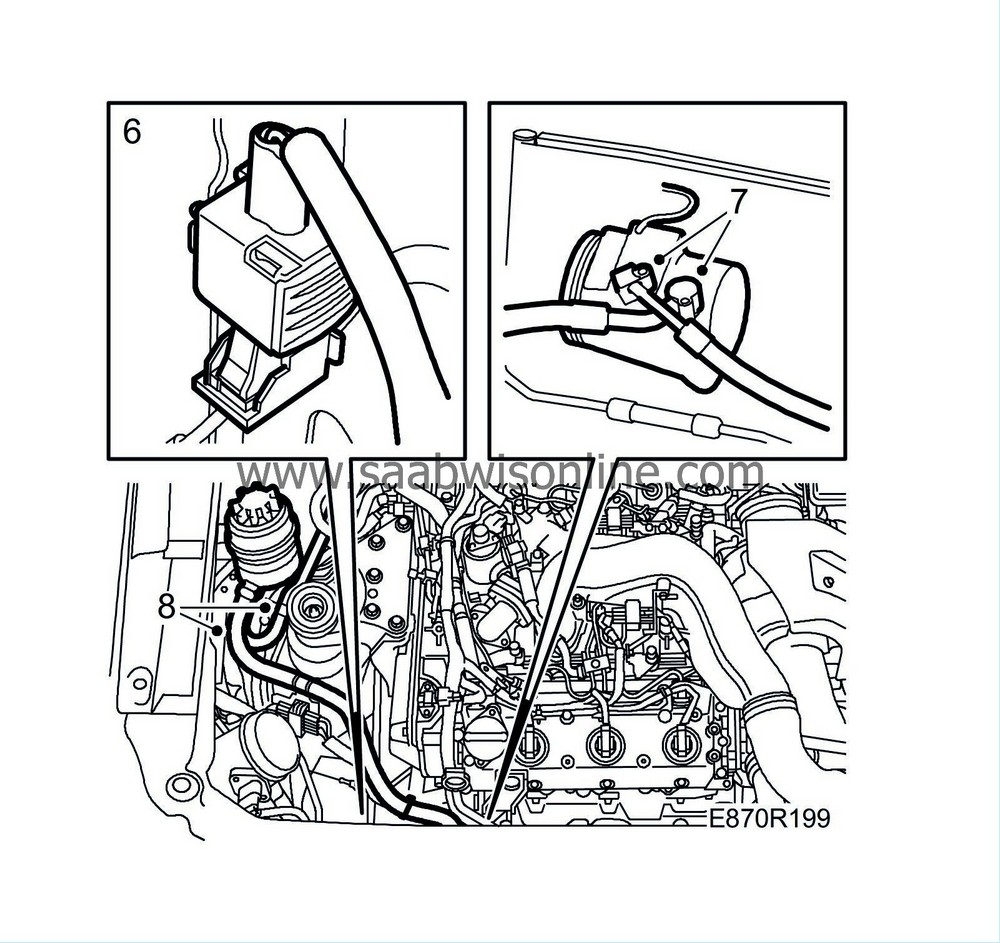
|
|
| 8. |
Place two pairs of pinch-off pliers
30 07 739 Hose pinch-off pliers
on the inlet and outlet hoses from the power steering fluid reservoir.
|
|
| 9. |
Raise the car.
|
|
| 10. |
Remove the engine's lower cover.
|
|
| 11. |
Remove the front covering below the radiator unit.

|
|
| 12. |
Remove the side cover in the front right wheel housing.
|
|
| 13. |
Relieve the tension off the multigroove V-belt. Mark its direction of rotation.
|
|
| 14. |
Remove the connector to the power steering cooling coil at the RH side of the subframe.
Plug the pipes. 
|
|
| 15. |
Unplug the connector to the crankshaft position sensor.

|
|
| 16. |
Remove the three retaining screws for the A/C compressor.

|
|
| 17. |
Remove the A/C compressor by lifting it upward and turning it forward.
|
|
| 18. |
Guide the A/C compressor through the hole in the subframe.
|
|
| To fit |
| 1. |
Adjust the oil level in the compressor. See
Filling and adjustment of compressor oil
.
|
|
| 2. |
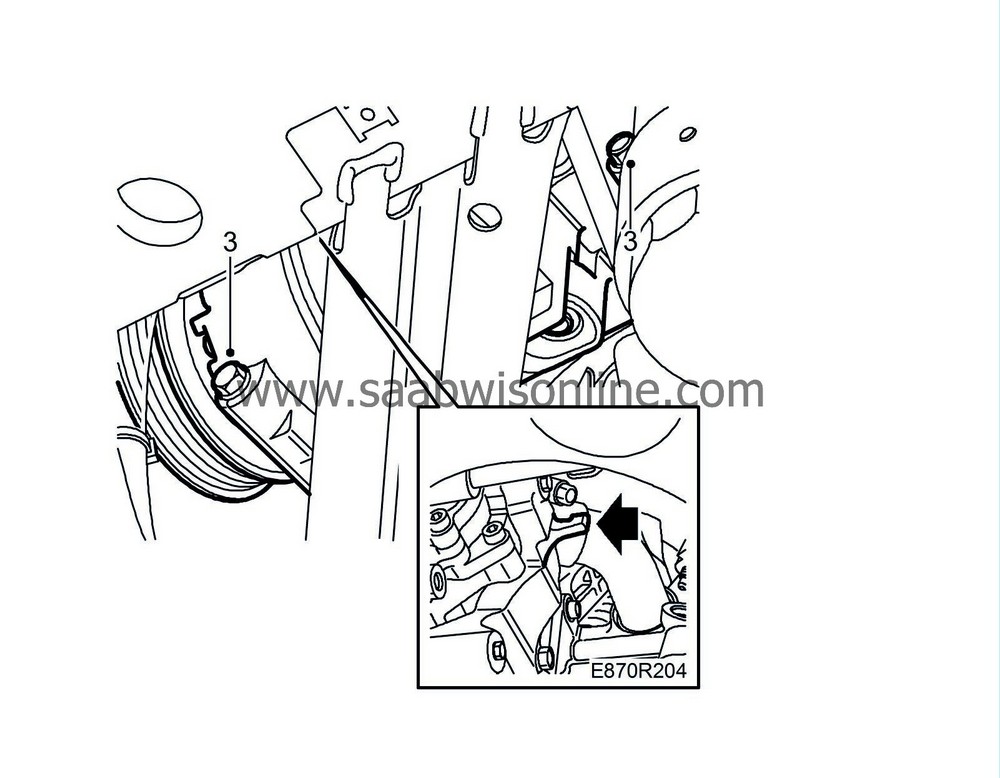
First fit the lower screw in the A/C compressor. Then guide the A/C compressor through the hole in the subframe.
|
|
| 3. |
Put in place the compressor and tighten the two retaining bolts (M8).
Tightening torque 24 Nm (18 lbf ft) |
|
| 4. |
Tighten the third retaining bolt (M10) in the A/C compressor.
Tightening torque 40 Nm (30 lbf ft) |
|
| 5. |
Insert the PAD connections into the A/C compressor.

|
|
| 6. |
Attach the connector to the power steering cooling coil.
Tightening torque 30 Nm (22 lbf ft) |
|
| 7. |
Attach the connector to the crankshaft position sensor.
|
|
| 8. |
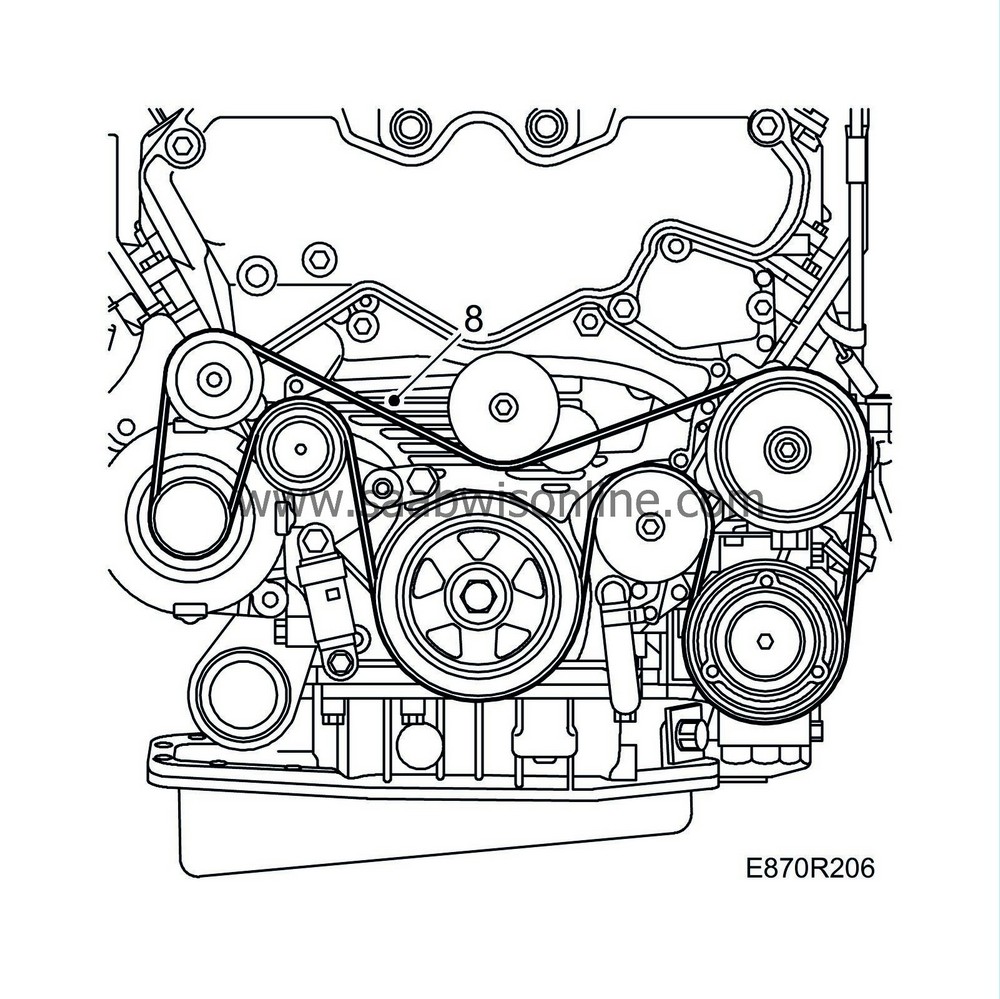
Fit and tension the multigroove V-belt. Check that the direction of rotation is correct.
|
|
| 9. |
Fit the side cover.

|
|
| 10. |
Fit the front cover below the radiator core.
|
|
| 11. |
Fit the lower engine cover.
|
|
| 12. |
Lower the car to the floor.
|
|
| 13. |
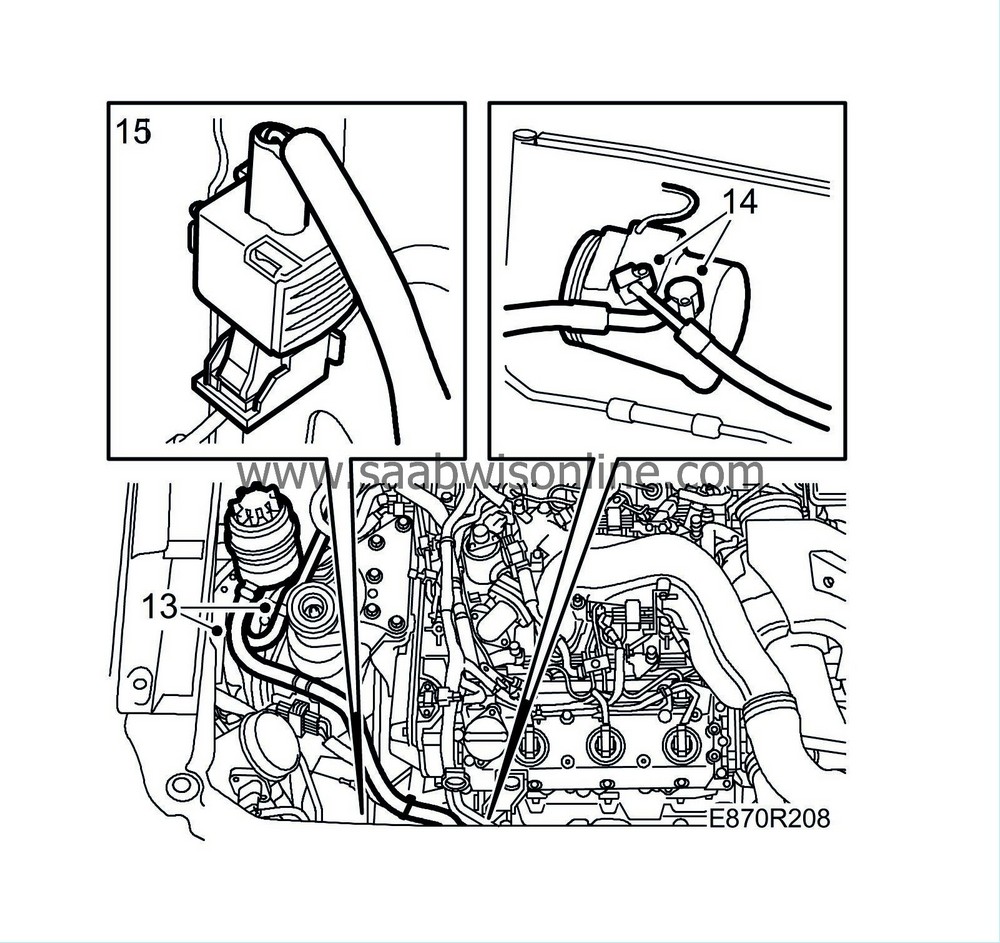
Remove the pinch-off pliers from the hoses to the power steering fluid reservoir.
|
|
| 14. |
Fit the PAD connections for the high and low-pressure pipes of the A/C compressor.
Tightening torque 20 Nm (15 lbf ft) |
|
| 15. |
Plug in the connector to the A/C compressor.
|
|
| 16. |
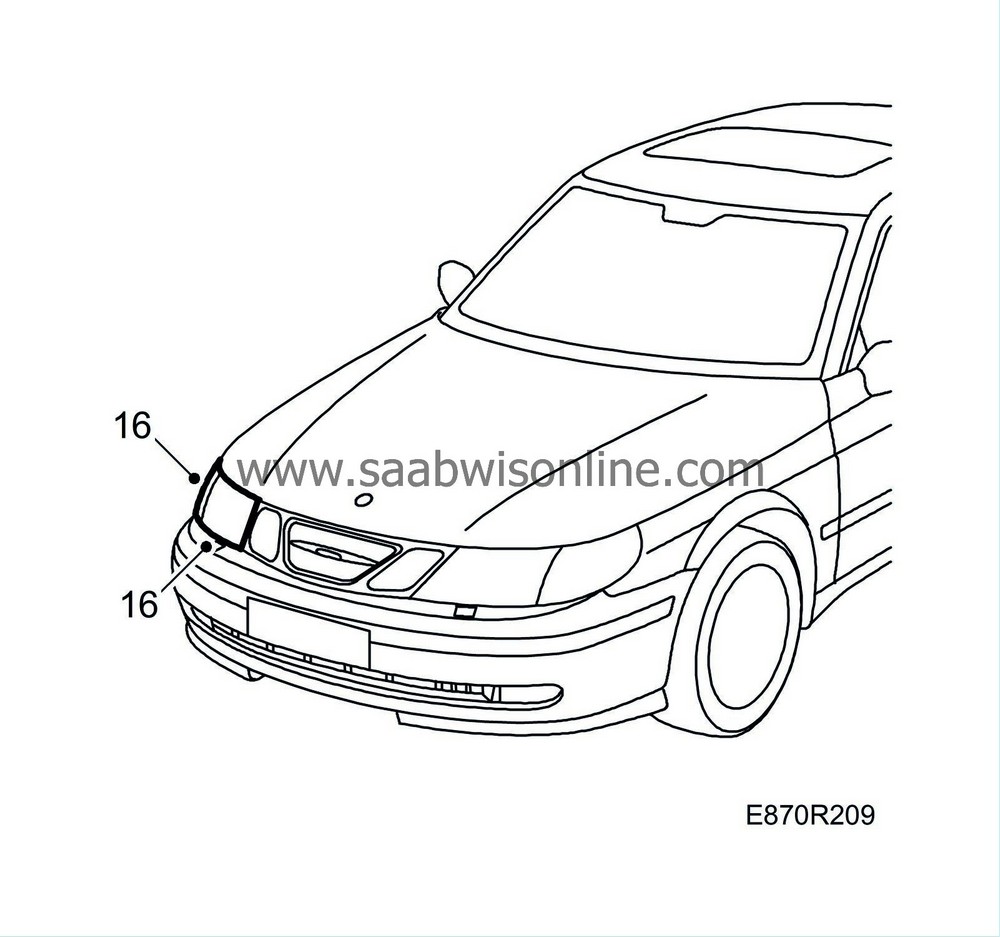
Fit the RH headlamp and direction indicator. See
Headlamps
.
|
|
| 17. |
Fill oil in the power steering fluid reservoir.
|
|
| 18. |
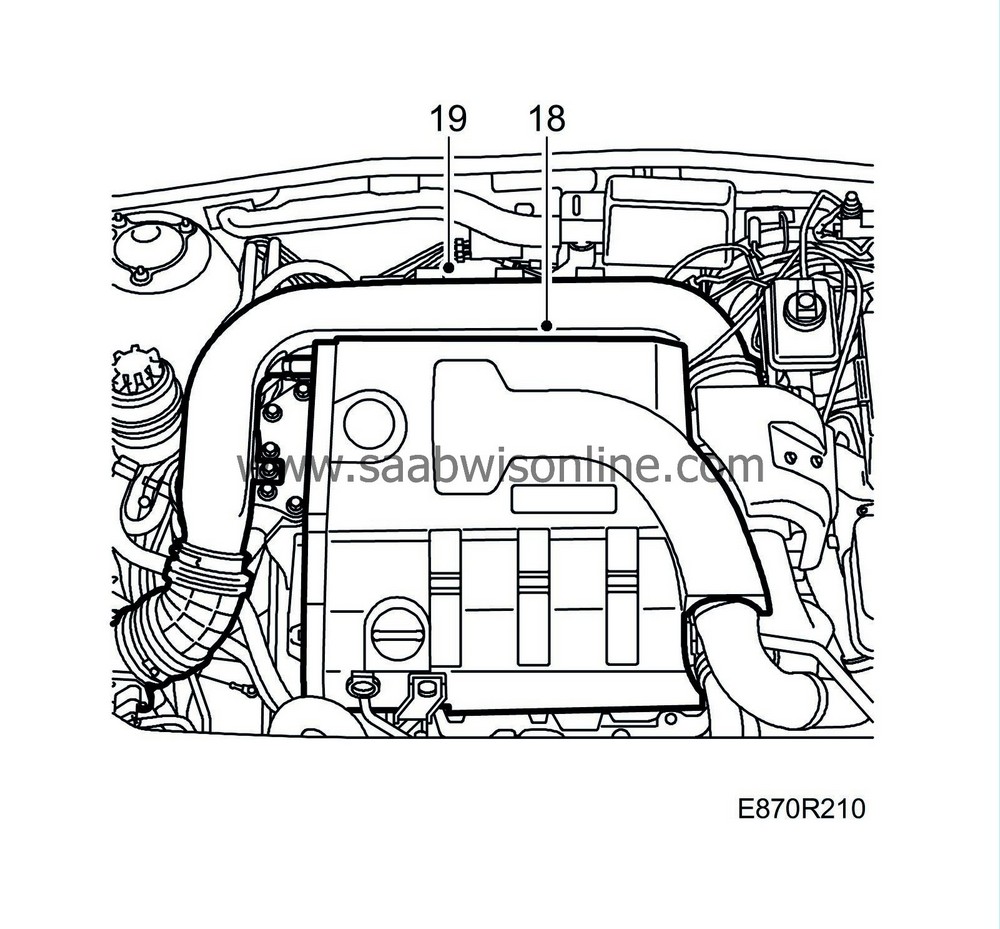
Fit the engine cover.
|
|
| 19. |
Fit the intake manifold to the mass air flow sensor and the turbocharger.
|
|
| 20. |
Evacuate the A/C system and refill with refrigerant. See
Draining and filling of refrigerant
.
|
|
| 21. |
Running in the compressor to distribute the compressor oil in the system:
|
|
| - |
- Activate the A/C and let it run for at least 2 minutes at an engine speed of <1500 rpm.
|
| 22. |
Start the engine, turn the steering wheel back and forth a few times and check for leaks.
|
|
| 23. |
Turn off the engine. Adjust the power steering fluid level.
|
|
| 24. |
Test the A/C system, see
Performance test, A/C system
.
|
|


