PRE-RELEASE
Fitting the power unit
| Fitting the power unit |
| To fit |
| 1. |
Move the trolley lift with the power unit under the raised car. Slightly raise the lifting table carefully so that the cable for the starter motor/generator can be fitted into the cable duct.
|
|
| 2. |
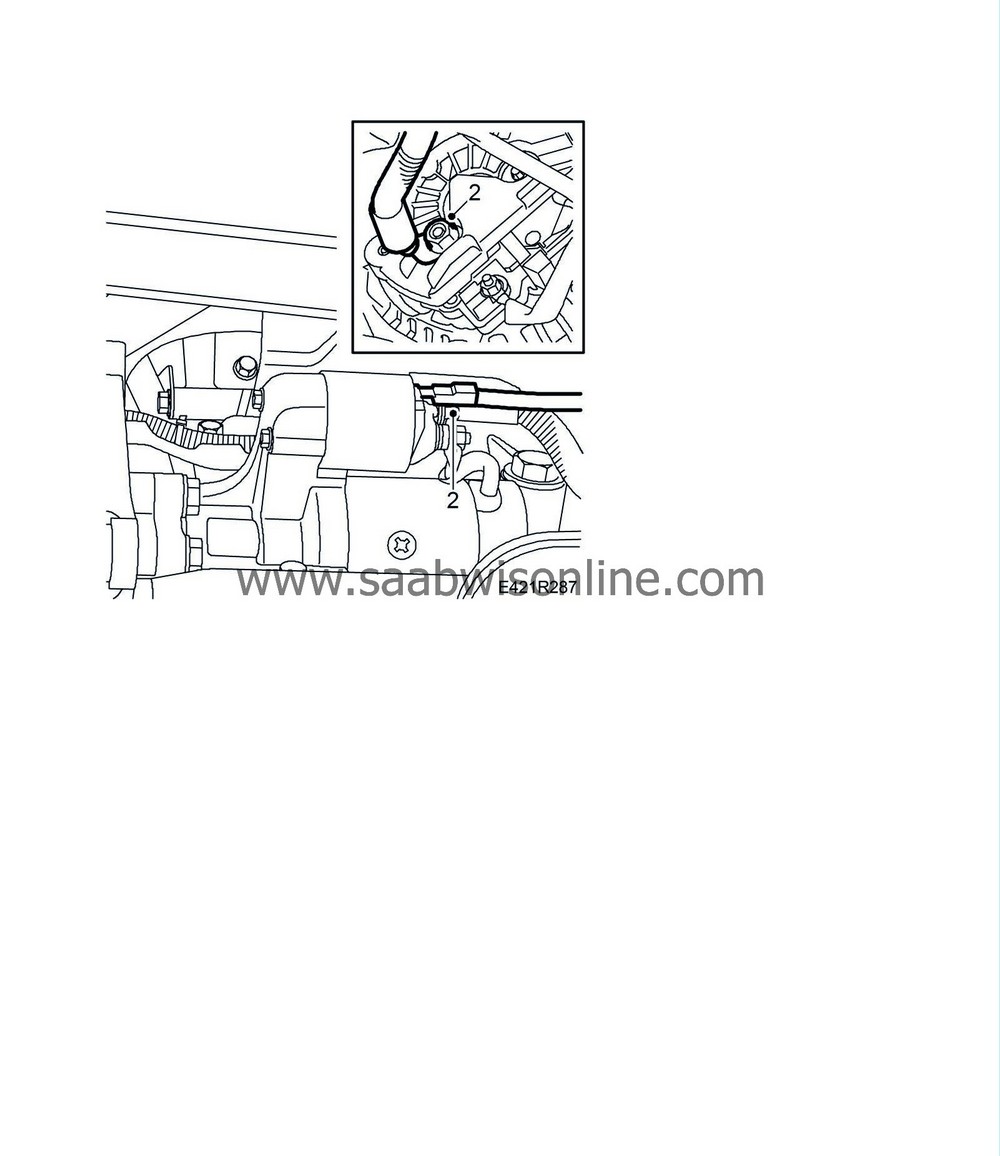
Fit the cables for the starter motor and the generator as well as the cable clips.
|
|
| 3. |
Remove the cable tie from the A/C compressor. Raise the power unit further and fit the drive shafts in the hub. Make sure the lower spindle joints go into their holes.
|
|
| 4. |
Raise the trolley lift further and make sure that the A/C compressor runs freely when fitting the engine in the engine bay. Make sure that the radiator core enters its mountings.
|
|
| 5. |
Fit the screws to the AC compressor.
Tightening torque: 50 Nm (37 lbf ft) 
|
|
| 6. |
Remove the subframe retaining screws and the two nuts at the air cleaner.
Tightening torque, subframe 100 Nm + 45° (74 lbf ft + 45°) 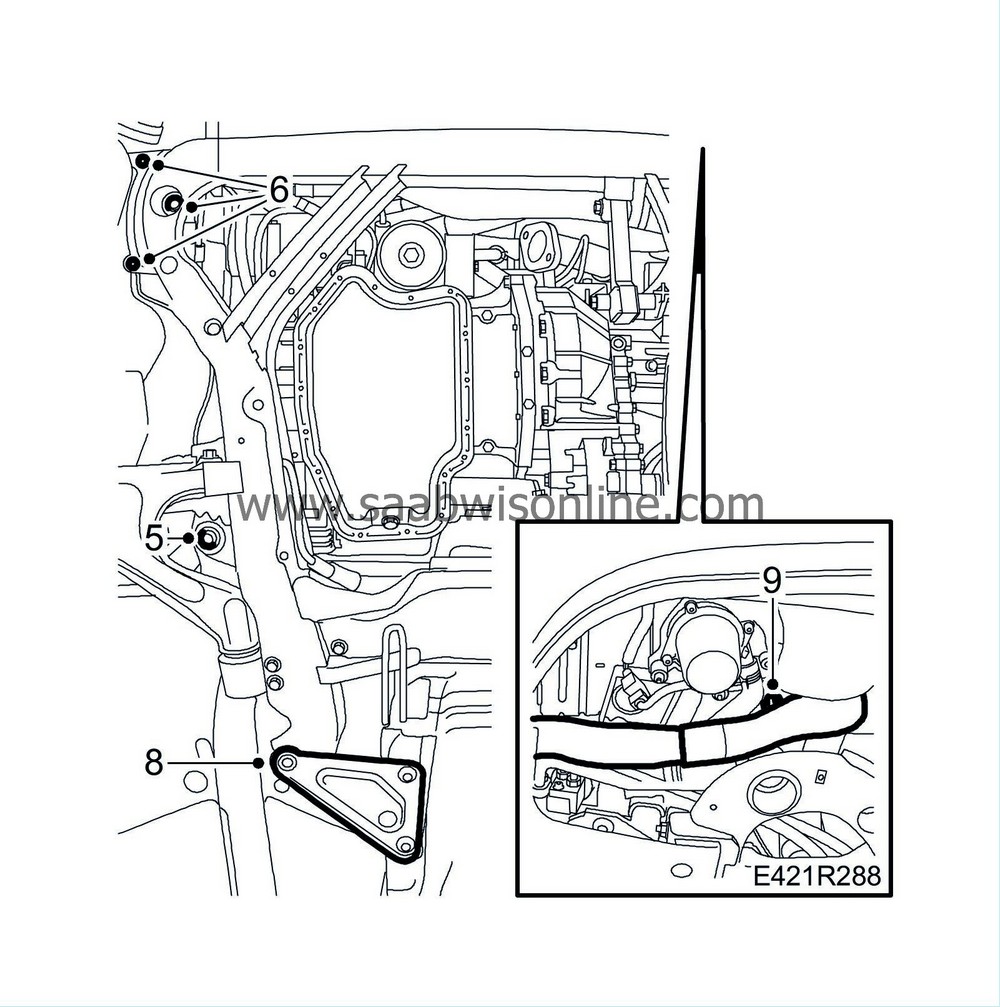
|
|
| 7. |
Remove the lifting truck.
|
|
| 8. |
Fit the triangular stiffeners.
Tightening torque: 63 Nm (46 lbf ft) |
|
| 9. |
Connect the battery case's cooler pipe.
|
|
| 10. |
Fit the cables to the starter motor and the generator and tension the cable clip.

|
|
| 11. |
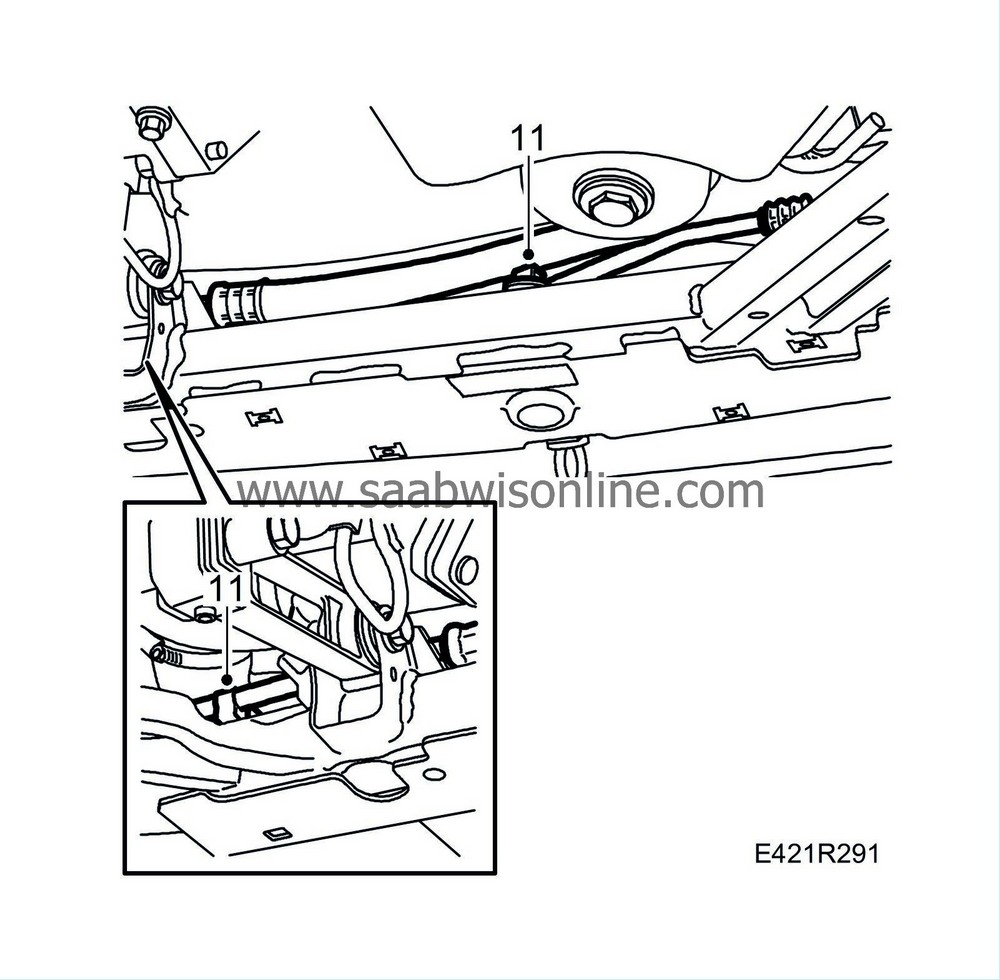
Fit the A/C points in the attachment points on the subframe.
|
|
| 12. |
Fit the charge air pipe to the subframe.

|
|
| 14. |
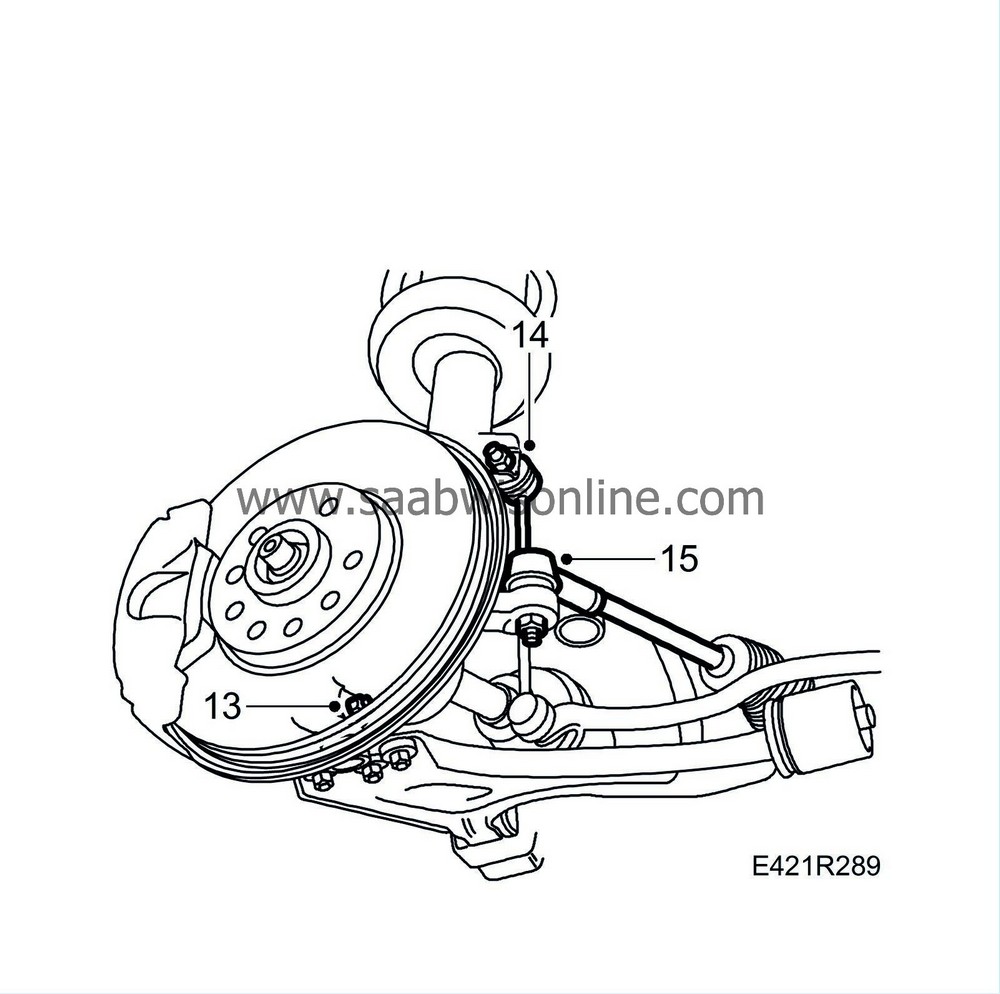
Lower the car and fit the upper nuts to the anti-roll bars.
Tightening torque: 90 Nm (66 lbf ft) |
|
| 15. |
Fit the track rod ends to the steering swivel member. Hold with a wrench so that they do not rotate and become damage, or hold the hexagonal pin with a socket.
Tightening torque: 84 Nm (62 lbf ft) Tightening torque, nut with steel lock: 95 Nm (66 lbf ft) |
|
| 16. |
Relieve the weight of the gearbox carefully using a jack.
|
|
| 17. |
Fit the cable clamp for the cable to the starter motor/generator on the gearbox.

|
|
| 18. |
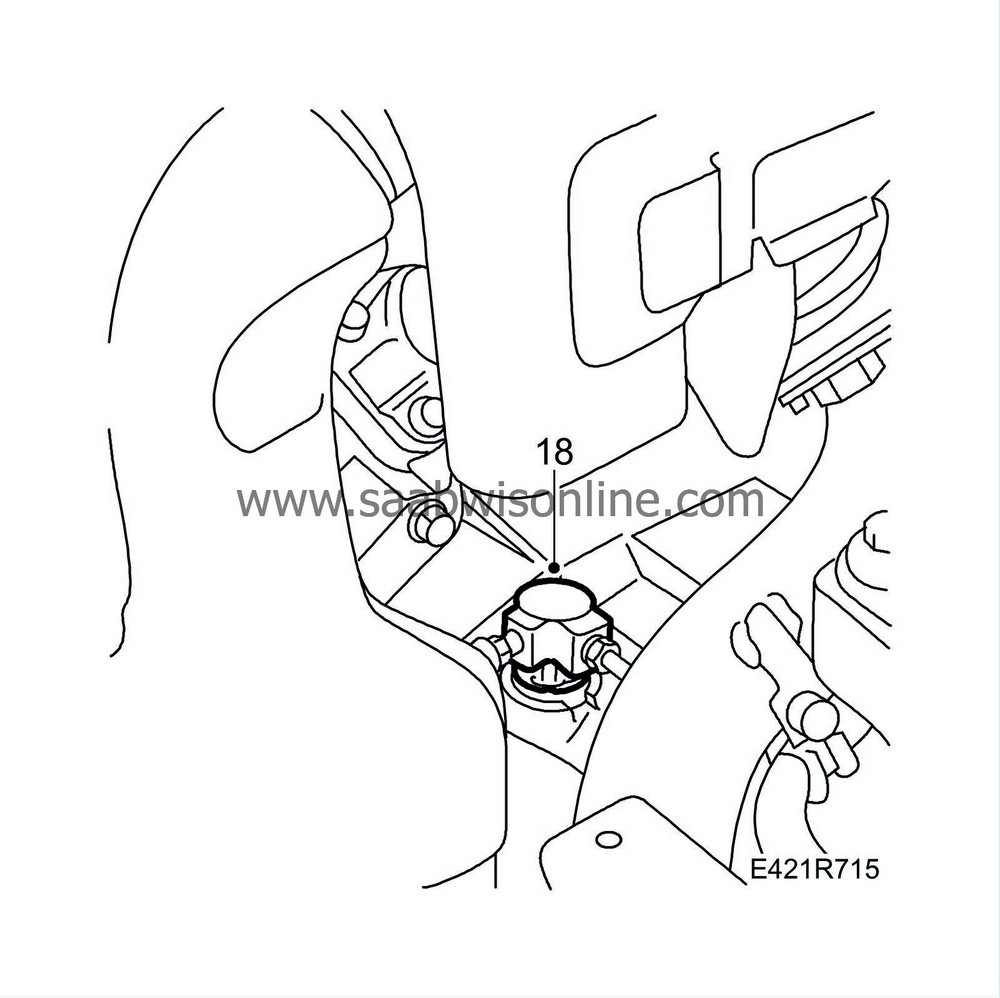
Connect the clutch pressure hose onto the gearbox. Remove the pinch-off pliers.
|
|
| 19. |
Connect a plastic hose to the air nipple on the slave cylinder pipe and open it until brake fluid comes out. Tighten the nipple and try the clutch. If it does not work, carry out
Bleeding clutch hydraulic system in car
. Check the integrity.
|
|
| 20. |
Raise the jack and fit the left-hand engine pad to the body and gearbox, fit all bolts and the nut. Tighten the nut.
Tightening torque: 77 Nm (57 lbf ft) 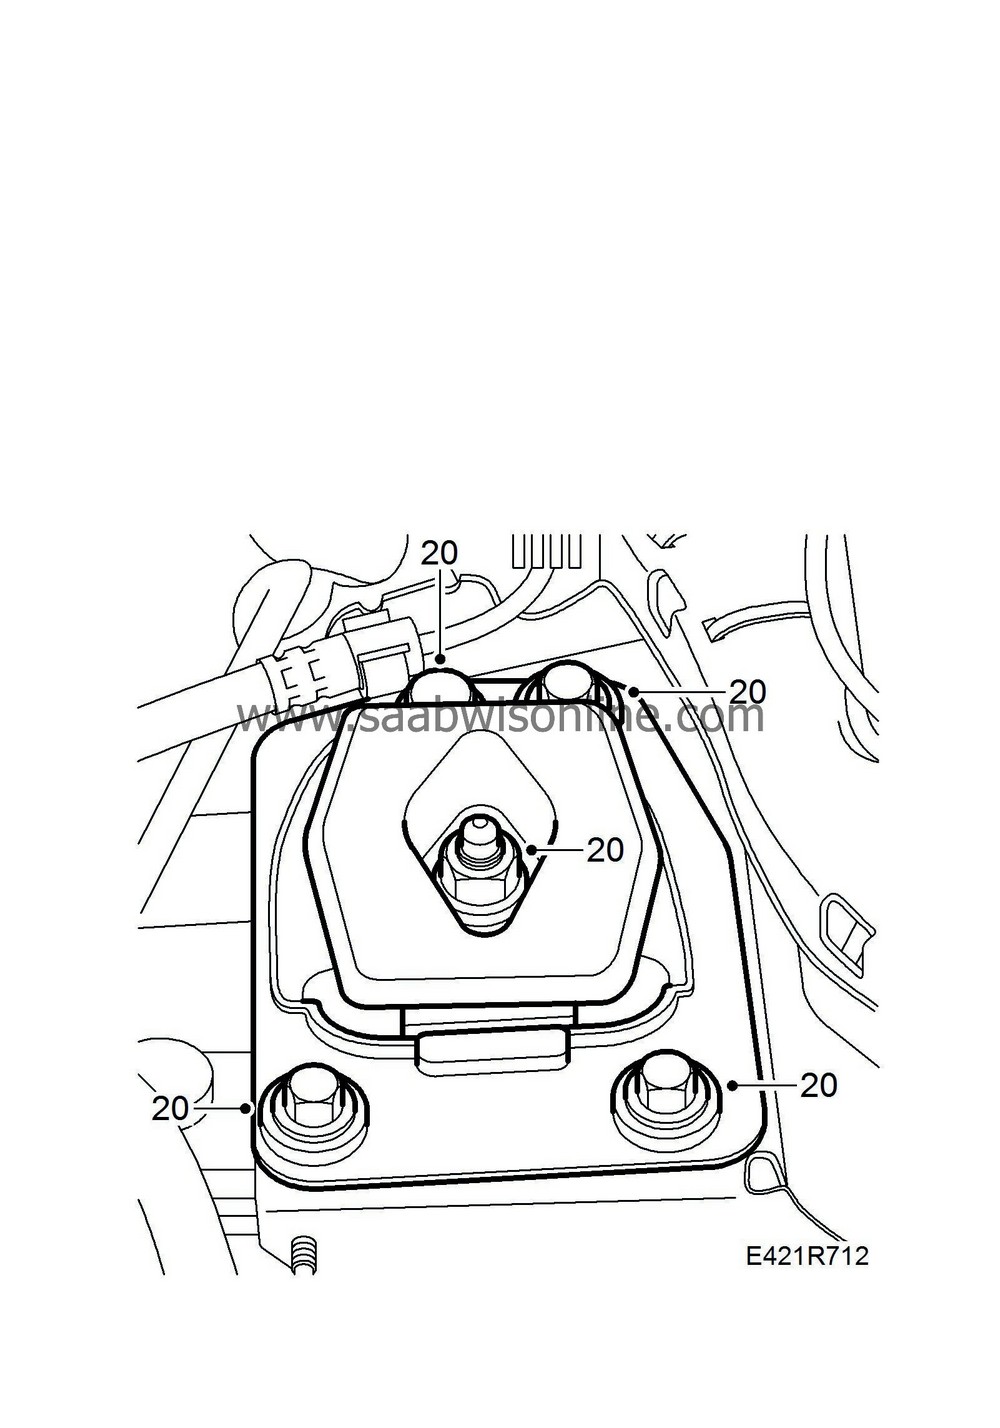
|
|
| 21. |
Lower the jack.
|
|
| 22. |
Relieve the weight of the engine and raise it slightly with a jack.
|
|
| 23. |
Fit the RH engine mounting.
Tightening torque bolts 40 Nm + 60° (30 lbf ft + 60°) Tightening torque nut 105 Nm (77 lbf ft) 
|
|
| 24. |
Tighten the bolts for the left-hand engine pad.
Tightening torque 40 Nm (30 lbf ft) |
|
| 25. |
Fit the power steering pump.
Tightening torque: 25 Nm (18 lbf ft) 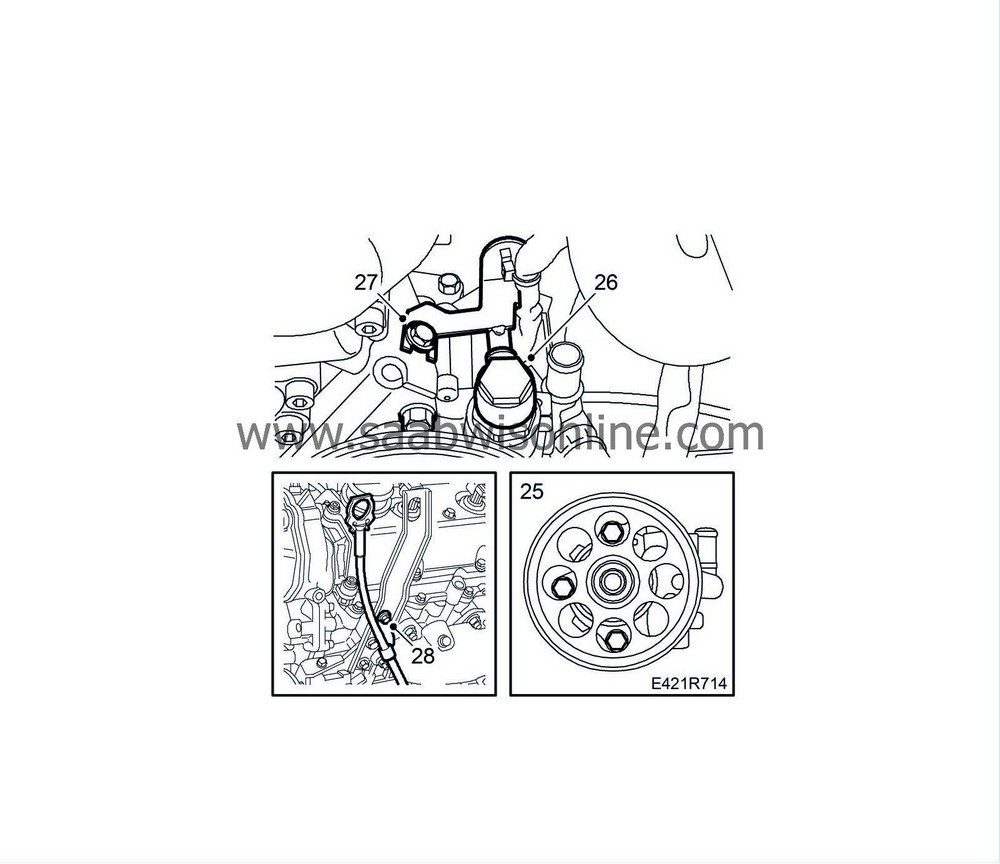
|
|
| 26. |
Fit the banjo screw, use new seals.
Tightening torque: 30 Nm (22 lbf ft). |
|
| 27. |
Fit the bolt to the pipe bracket.
|
|
| 28. |
Fit the dipstick tube.
|
|
| 29. |
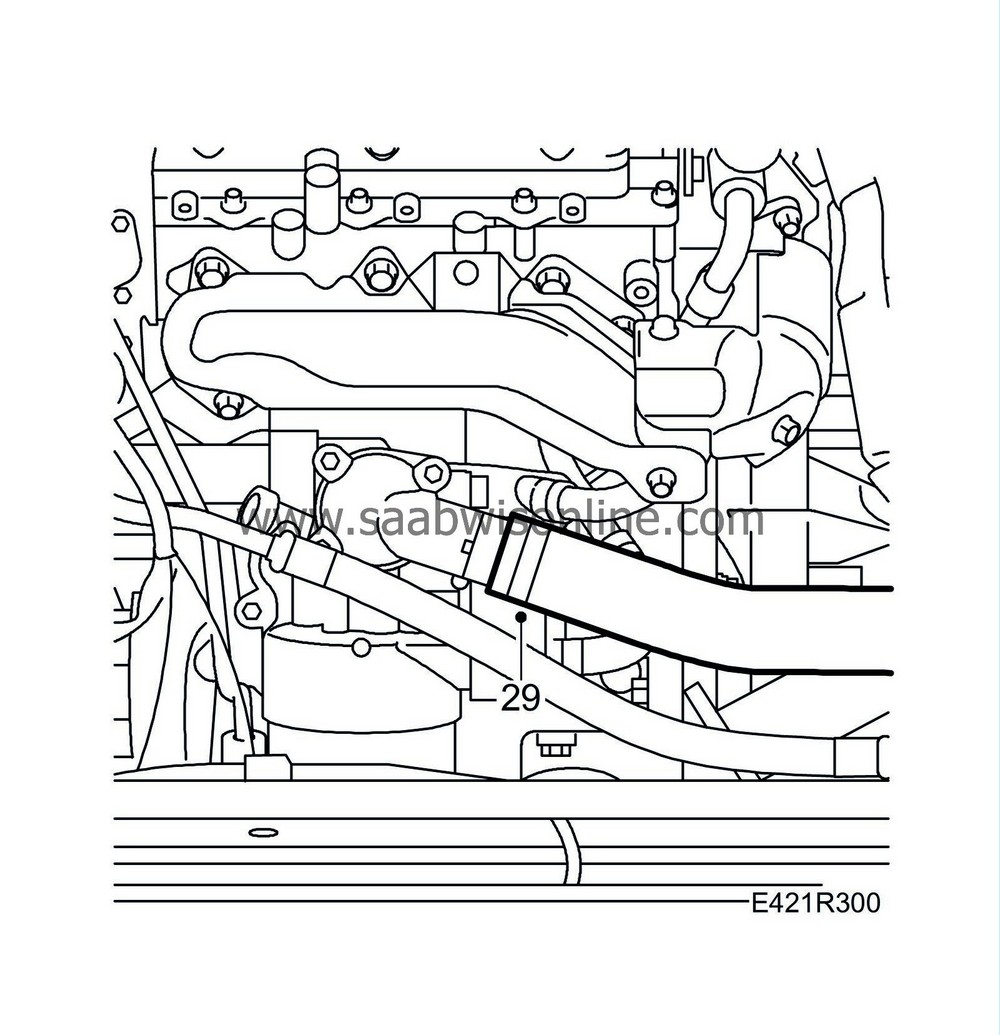
Fit the lower radiator hose to the thermostat housing.
|
|
| 30. |
Remove the cable tie for the radiator unit.
|
|
| 31. |
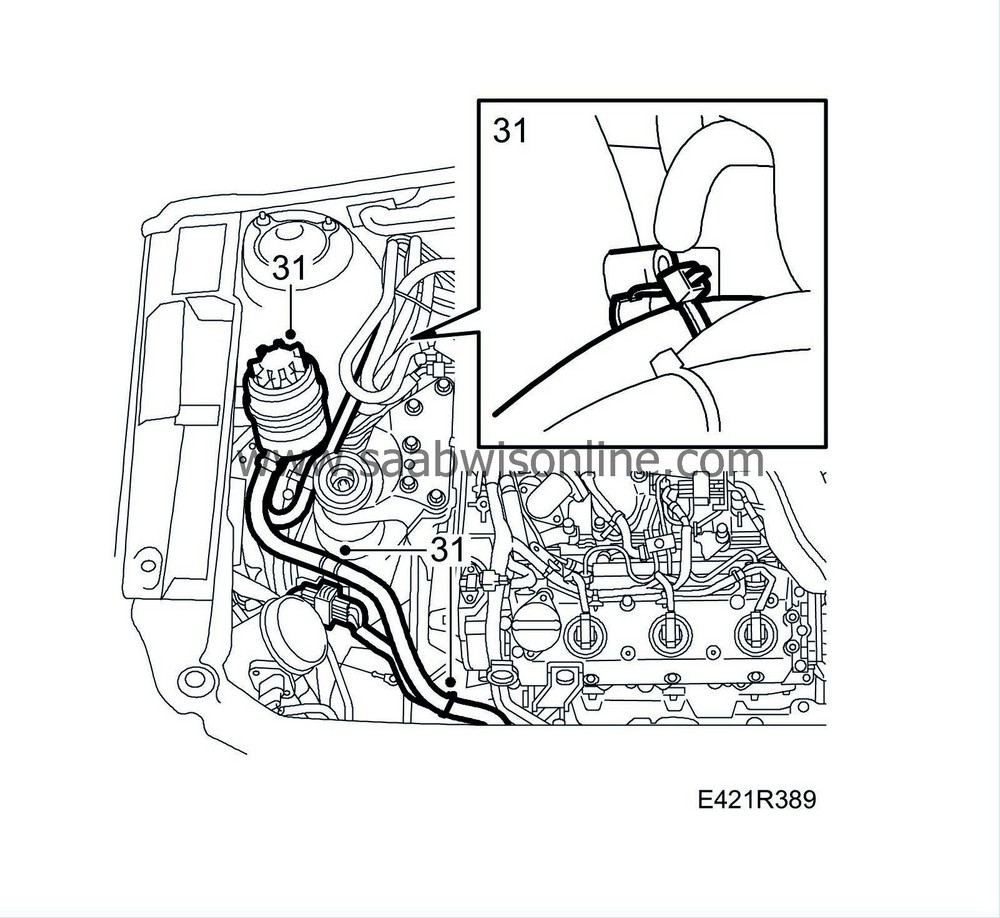
Remove the pinch-off pliers and fit the power steering reservoir.
|
|
| 32. |
Fit the nuts to the holders for the starter motor cable.

|
|
| 33. |
Connect the hoses to the heater unit.
|
|
| 34. |
Fit the radiator hose to the turbocharger.

|
|
| 35. |
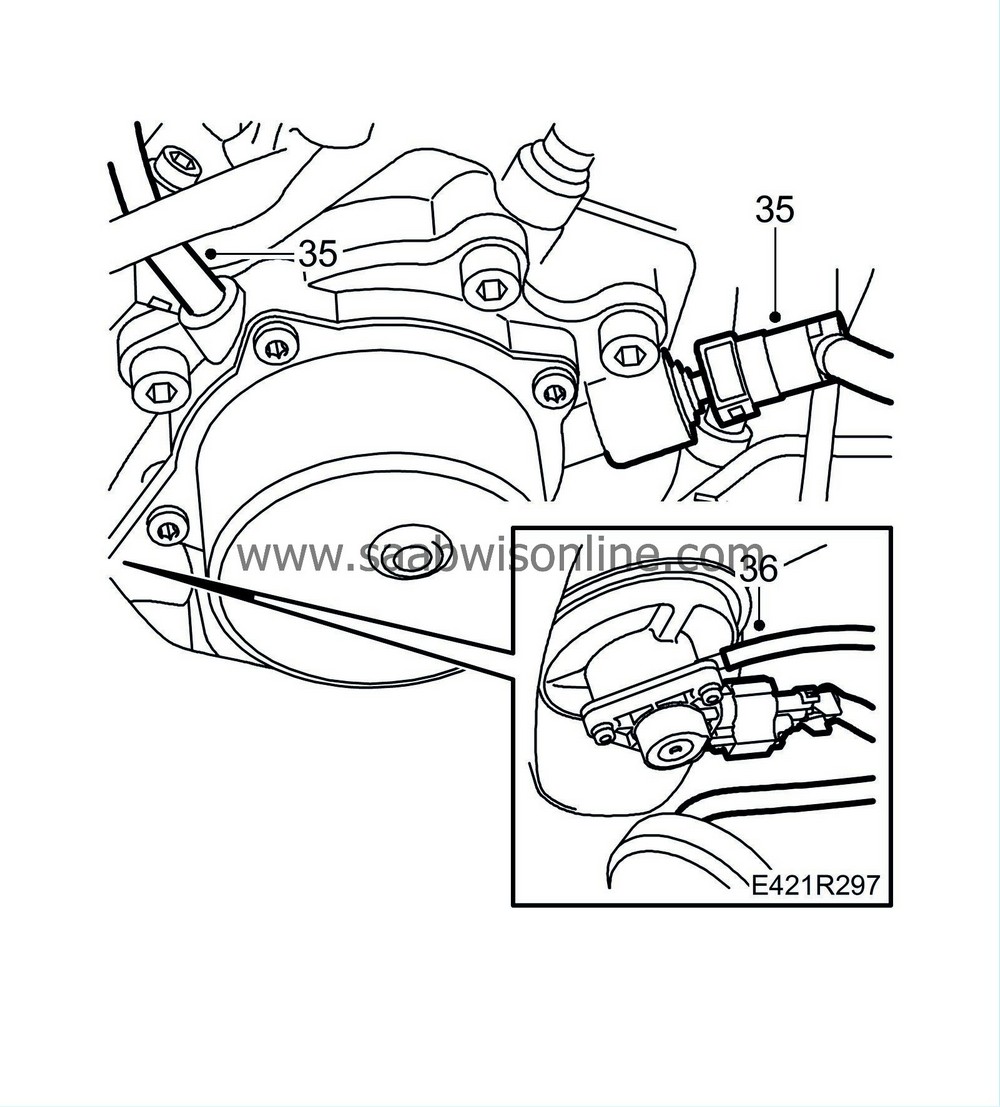
Connect the vacuum hoses to the vacuum pump.
|
|
| 36. |
Connect the hose to the turbo's vacuum box.
|
|
| 37. |
Fit the engine harness bracket to the bulkhead.
|
|
| 38. |
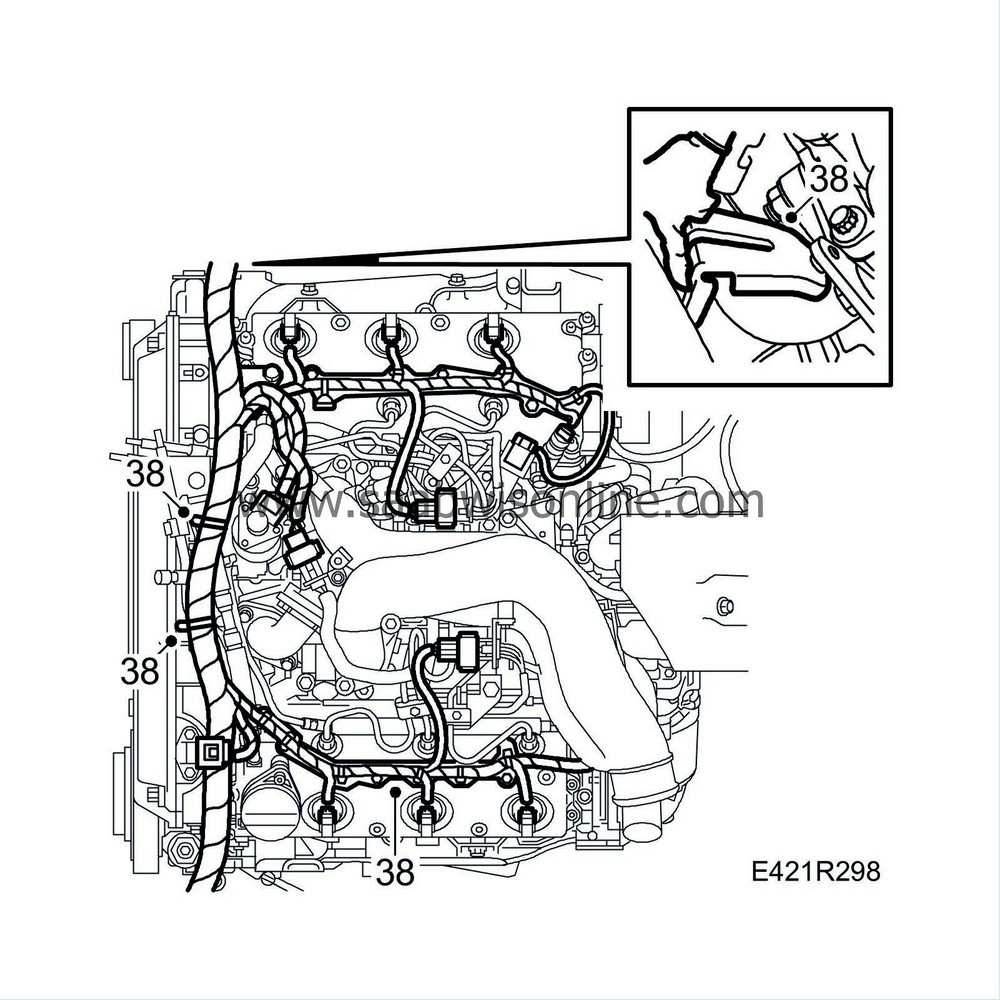
Fit the cable ducts and attach the engine harness connector.
|
|
| 39. |
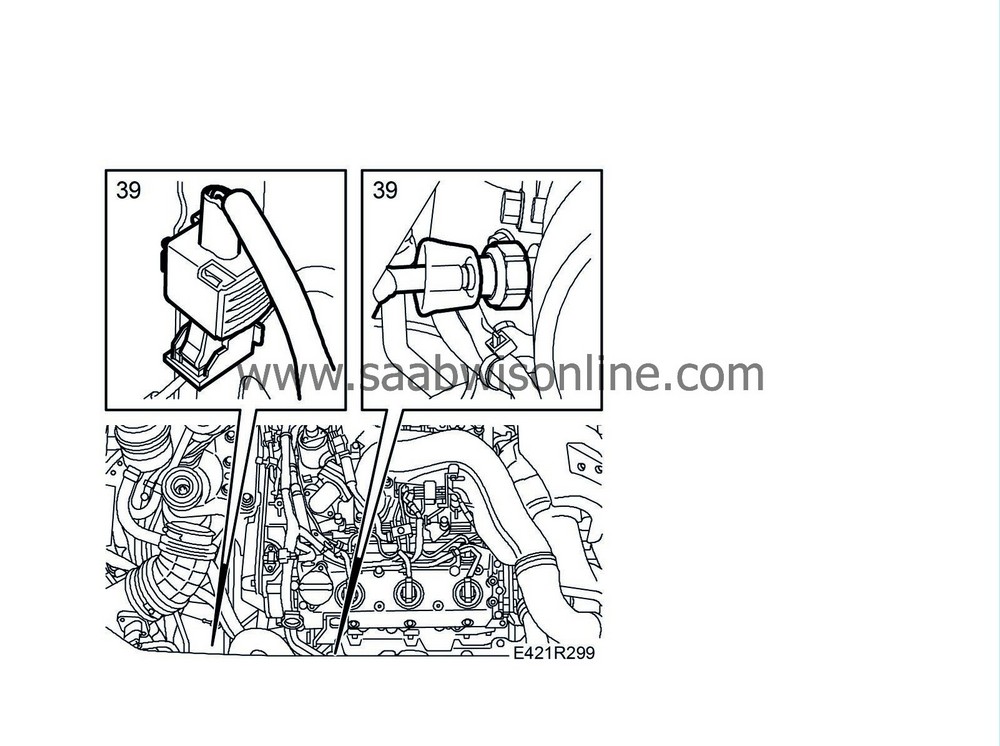
Attach the connectors of the A/C compressor and the oil pressure sensor.
|
|
| 40. |
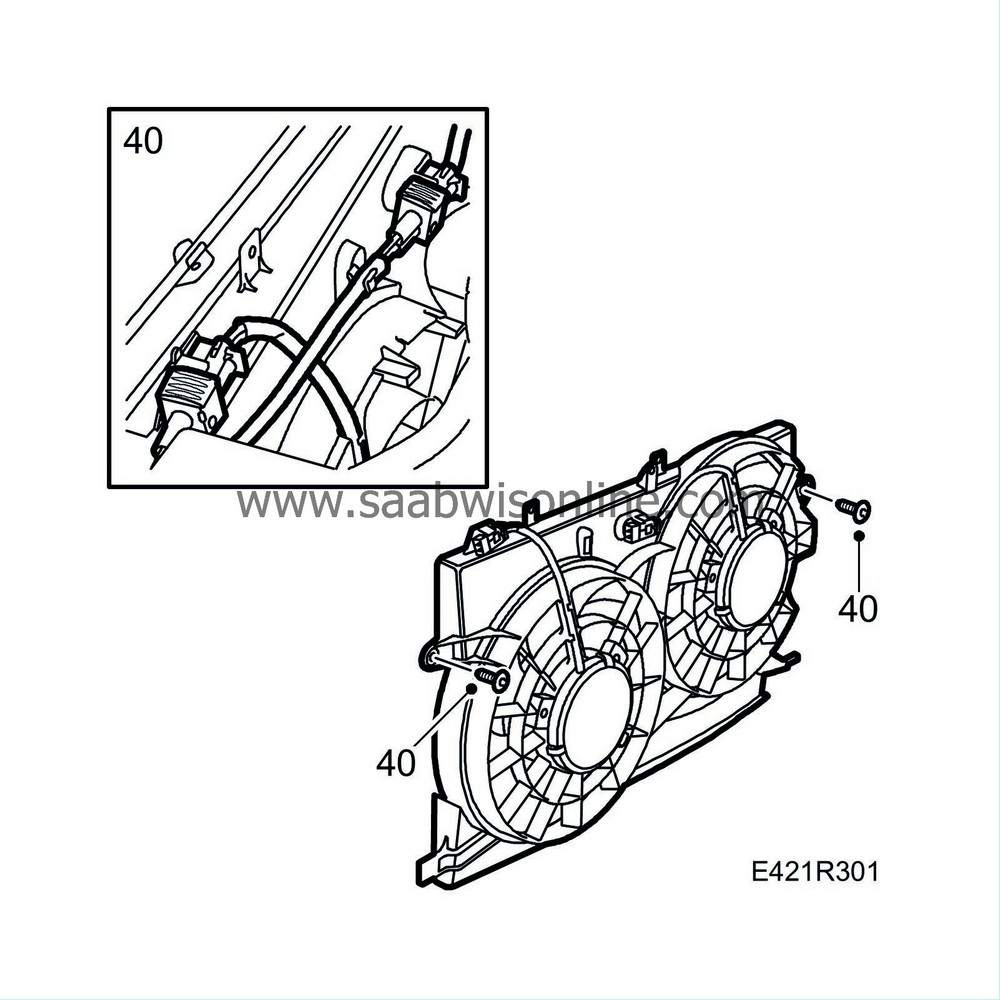
Carefully fit the fan cowling and attach the fan's connector.
|
|
| 41. |
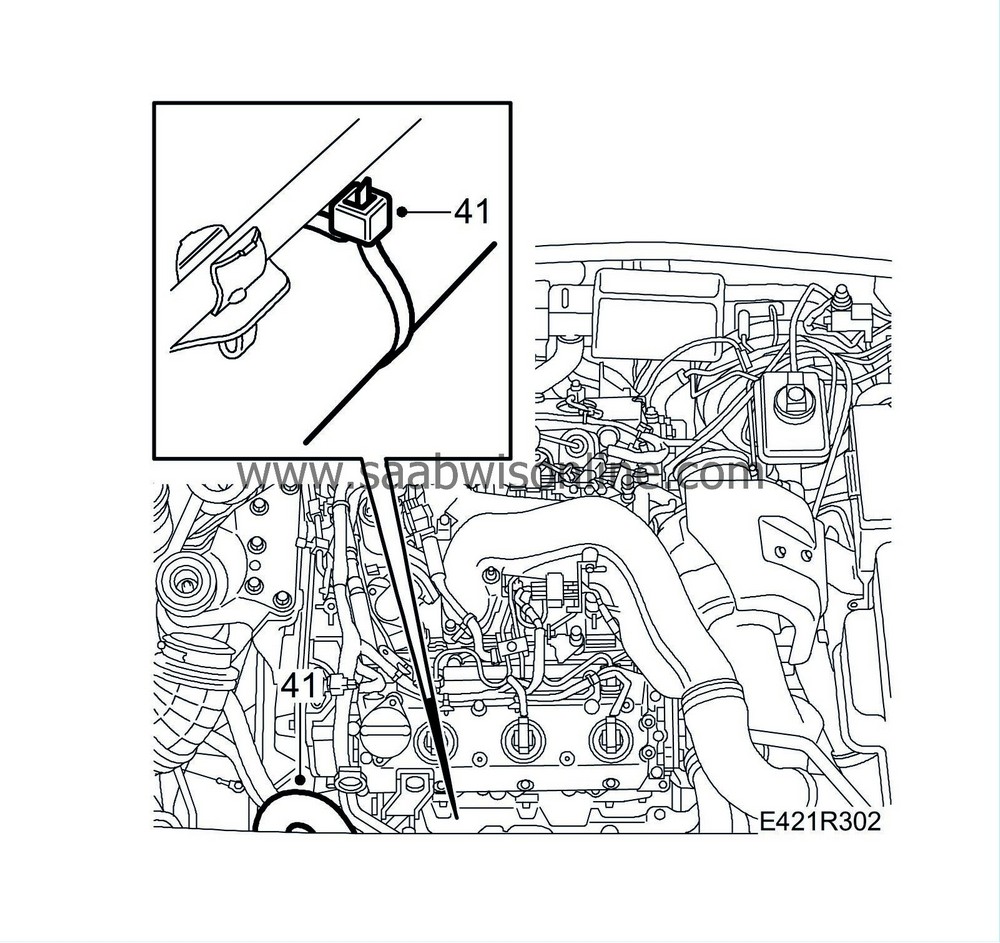
Fit the upper radiator hose with cable tie and attach the air vent hose to the engine.
|
|
| 42. |
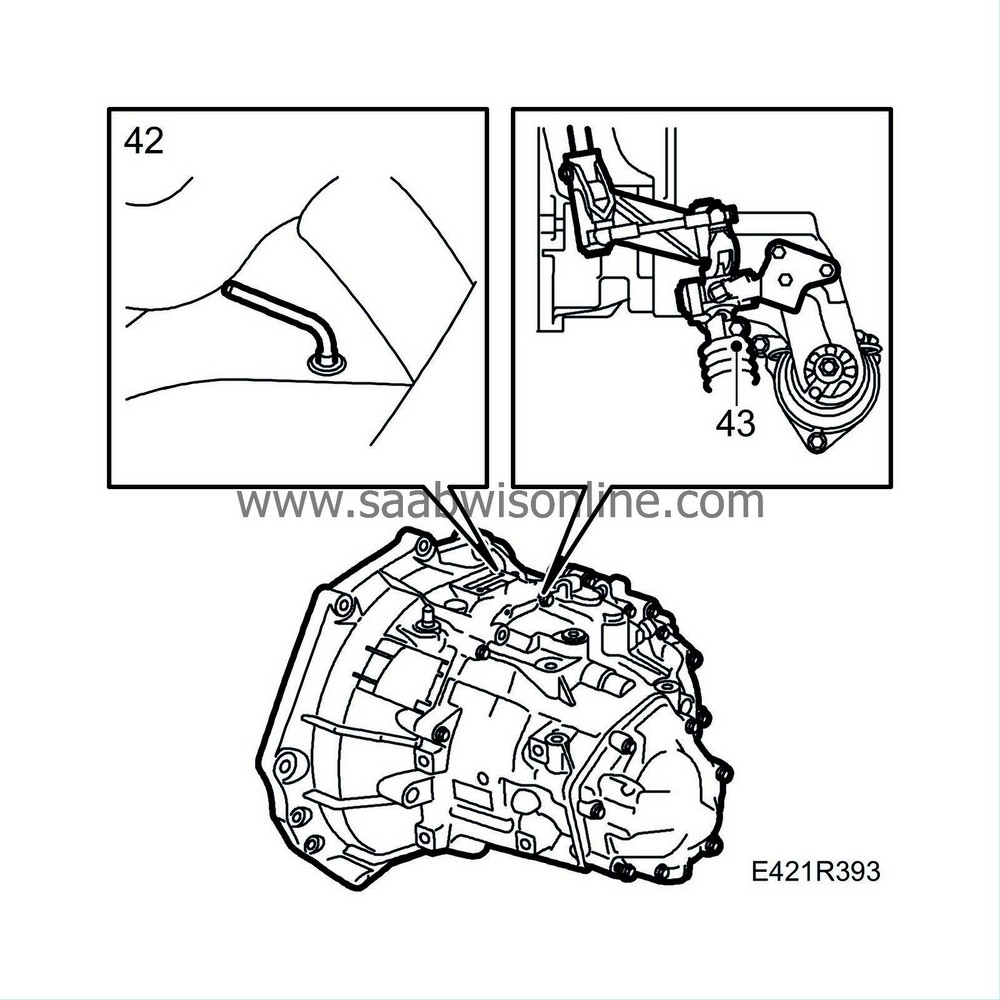
Remove
87 92 335 Lock pin
from the gear lever housing.
|
|
| 43. |
Engage 4th gear and fit
87 92 632 Lock pin
. Tighten the clip on the gear linkage.
Tightening torque: 22 Nm (16 lbf ft) |
|
| 44. |
Remove the locking pins, check the gear positions and that the ignition key can be removed. Insert the plastic plug into the gearbox.
|
|
| 45. |
Fit the gear lever gaiter.
|
|
| 46. |
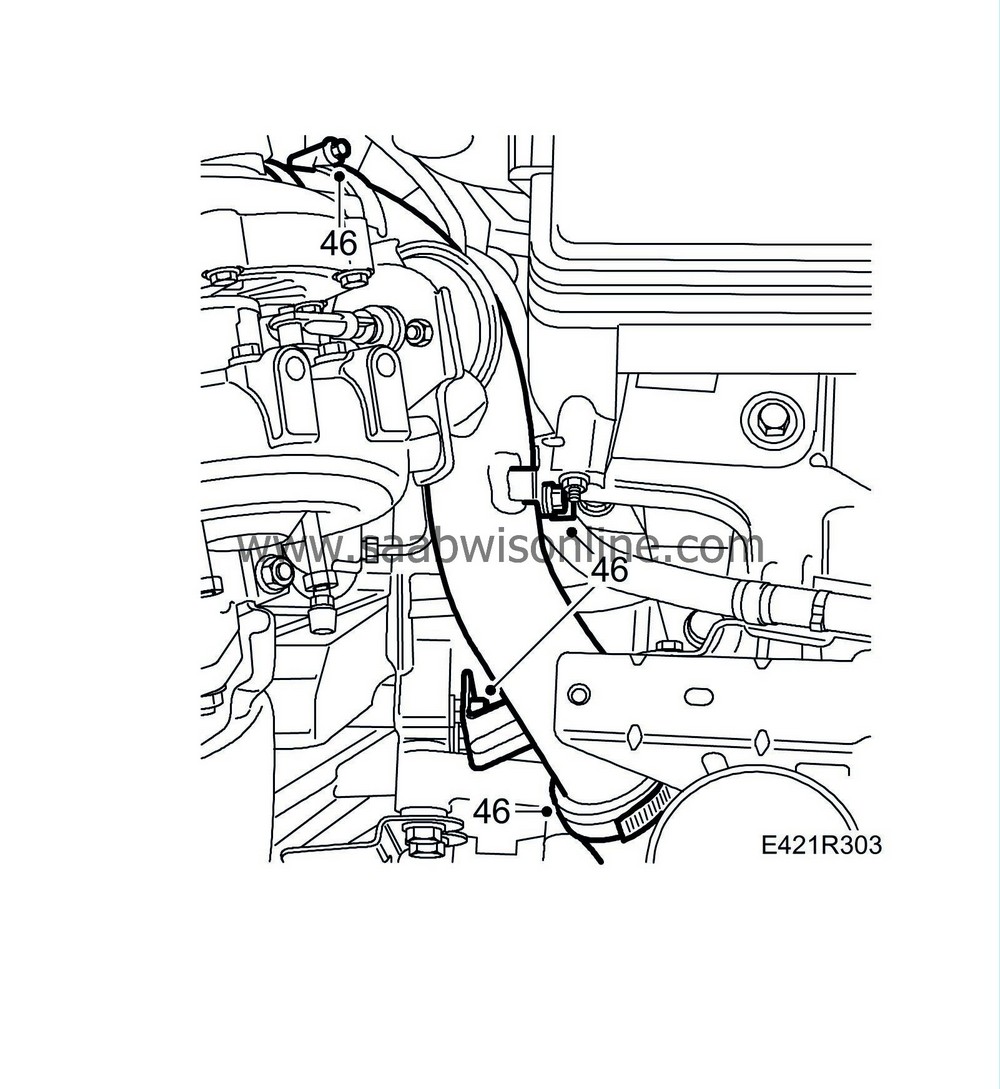
Fit the cable clamp for the starter motor's cable network as well as the charge air pipe to the turbocharger over the gearbox.
|
||||||||||
| 47. |
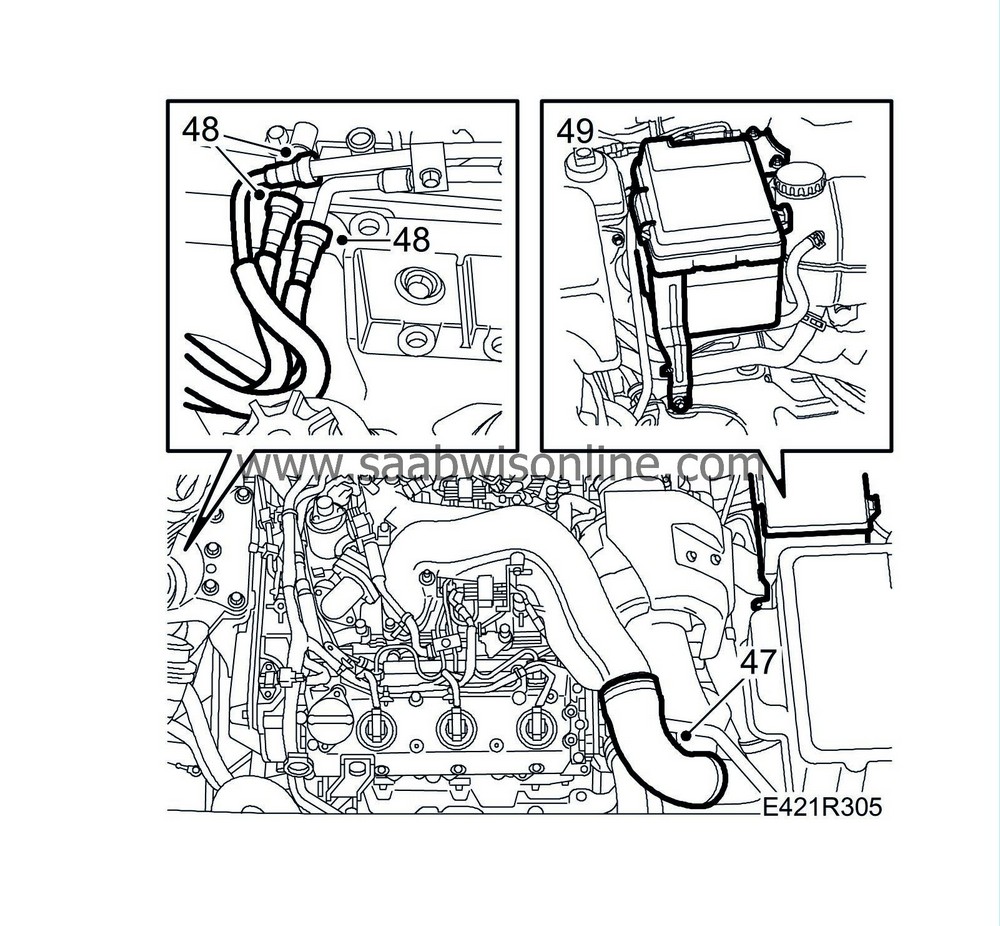
Attach the charge air hose to the upper charge air pipe.
|
|
| 48. |
Fit the fuel pipes.
|
|
| 49. |
Fit the main fuse box.
|
|
| 50. |
Rock the engine so that it loosens.
|
|
| 51. |
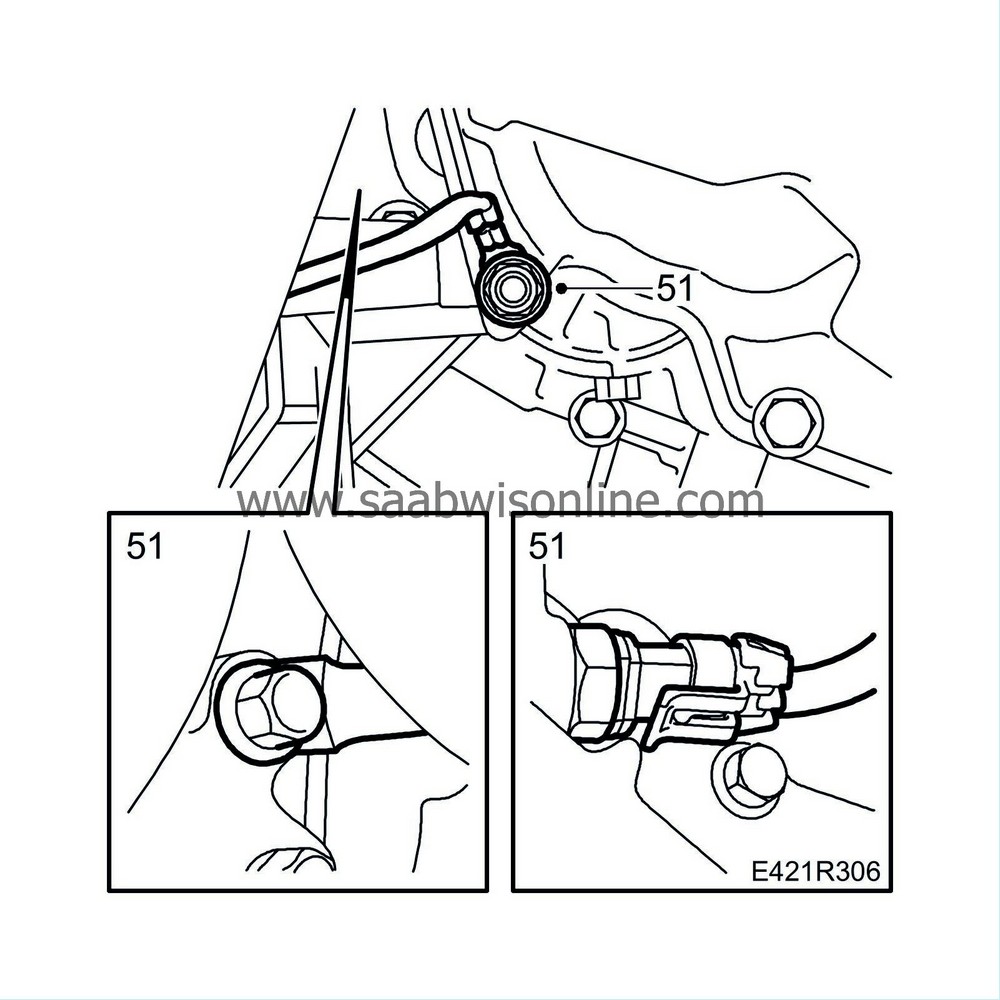
Raise the car and connect both grounding cables on the gearbox and the connector for the reversing light switch.
|
|
| 52. |
Attach the connectors for the crankshaft position sensor and the oil level sensor.

|
|
| 53. |
Tighten the bolt of the front torque arm.
Tightening torque: 90 Nm + 90° (66 lbf ft + 90°) 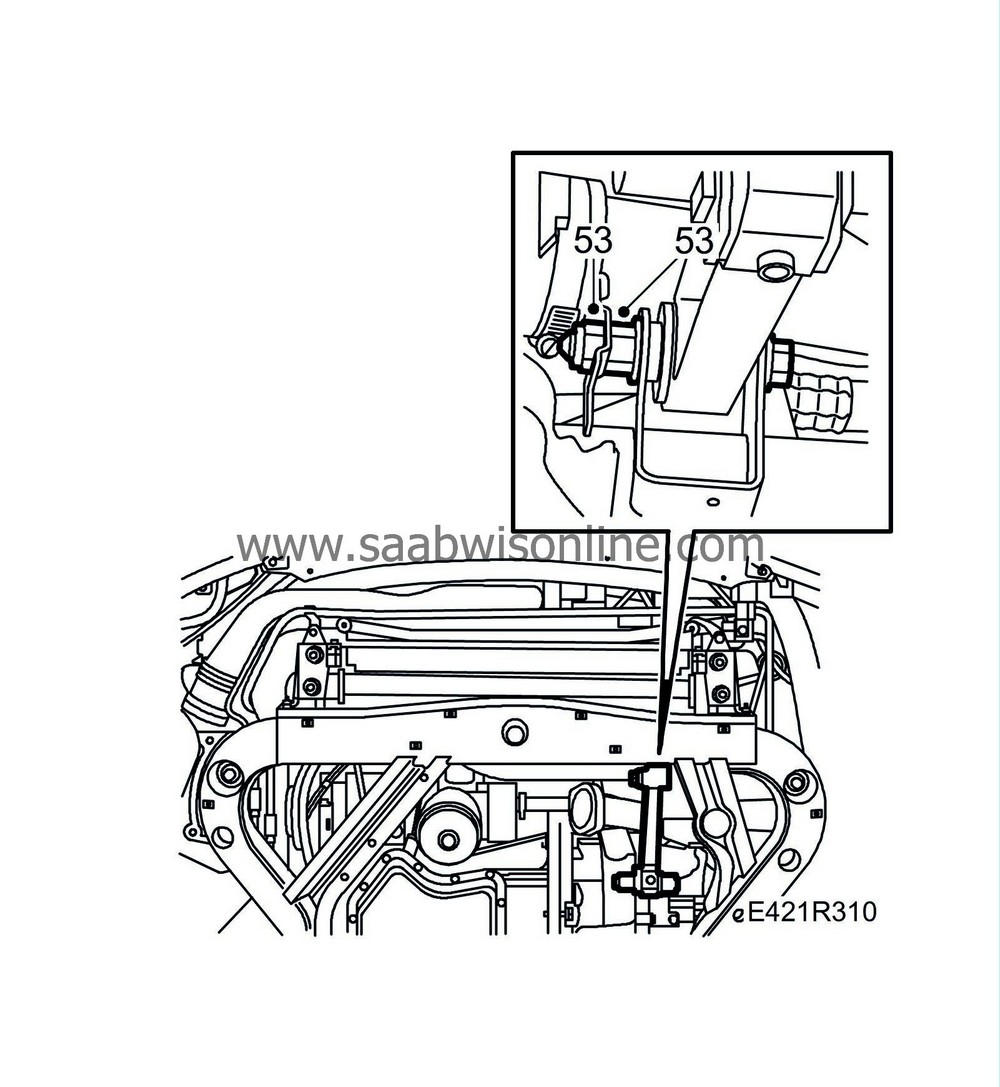
|
|
| 54. |
Fit the front exhaust pipe. Coat the bolts with Molycote 1000.
Tightening torque, front bolted union 24 Nm (18 lbf ft) Tightening torque, rear bolted union 22 Nm (16 lbf ft) 
|
|
| 55. |
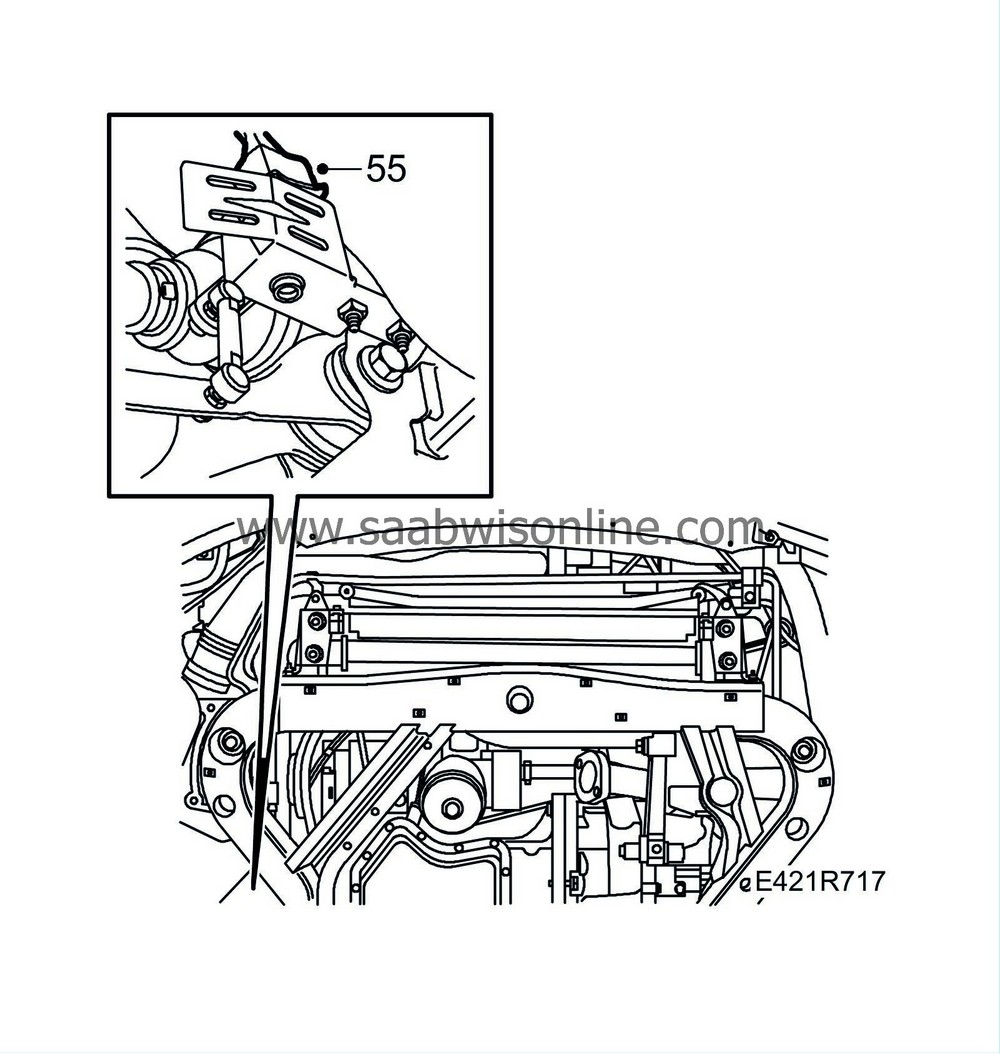
Attach the connector to the level sensor for the headlamps (applies only to xenon headlamps).
|
|
| 56. |
Slowly and carefully relieve the tension on the belt tensioner and fit the multigroove V-belt.
|
|
| 57. |
Fit the side covers in the RH and LH wheel housing.

|
|
| 58. |
Close the cooling system drain.
|
|
| 59. |
Lower the car and fit the front wheels, and tighten the hub nuts. See
Wheels
.
Tightening torque, hub centre nuts: 230 Nm (170 lbf ft) Tightening torque, wheels 110 Nm (81 lbf ft) |
|
| 60. |
Fit the steering shaft to the steering gear and tighten the bolt which holds the steering shaft to the steering gear. Make sure that the bolt to the steering gear fits into the milled out groove in the pinion shaft.
Tightening torque, 30 (25 lbf ft) 
|
|
| 61. |
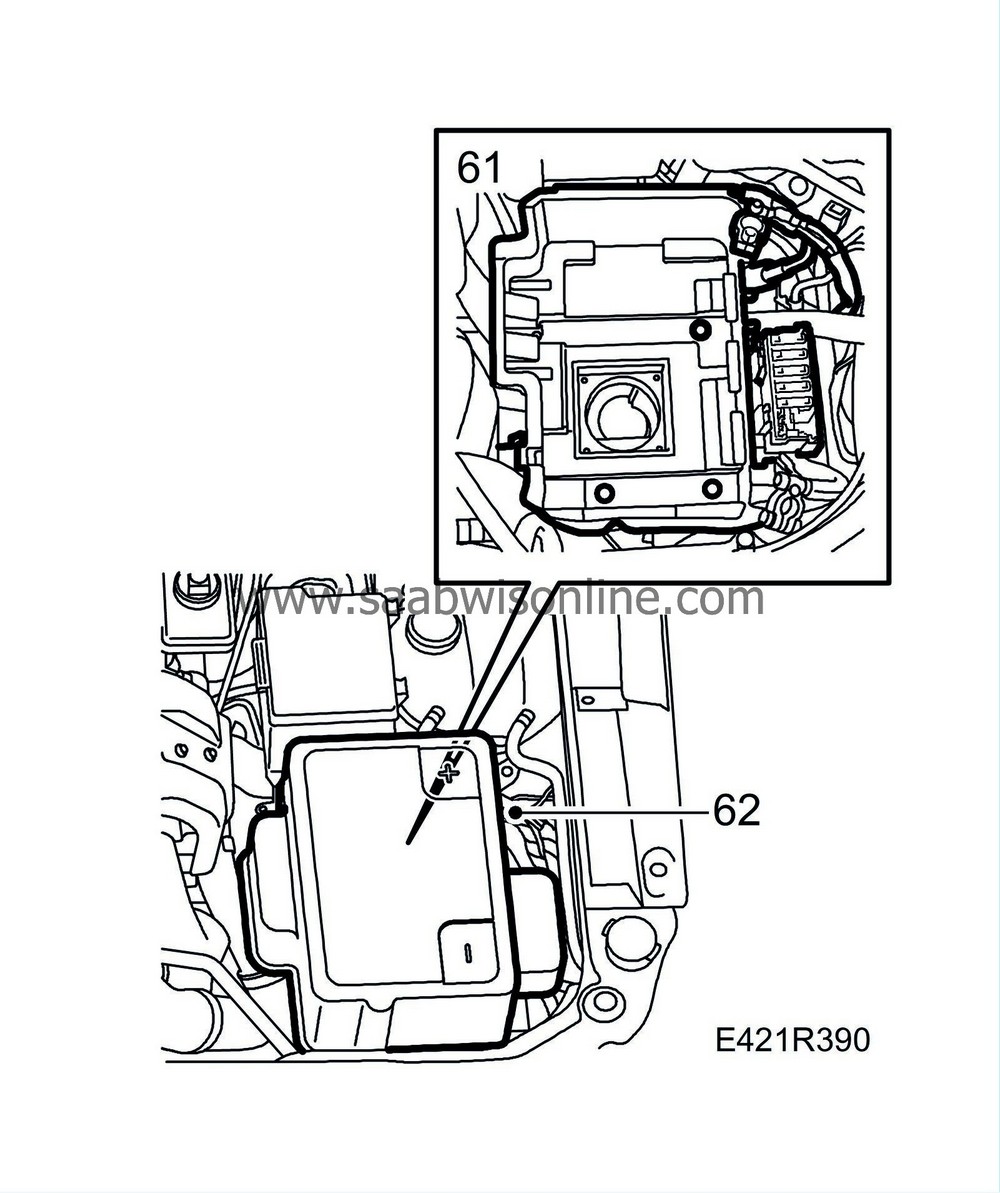
Fit the battery tray and the maxi fuse holder.
|
|
| 62. |
Fit the battery and connect the battery cables.
|
|
| 63. |
Bleed the fuel system following
Bleeding the fuel system.
|
|
| 64. |
Raise the car and check that there are no leaks. Fit the lower engine covers.

|
|
| 65. |
Lower the car to the floor.
|
|
| 66. |
Fit the battery cover and the upper engine cover.

|
|
| 67. |
Fit the upper intake manifold between the mass air flow sensor and the turbo.
Tightening torque, mass air flow sensor: 3.5 Nm (2.5 lbf ft) |
|
| 68. |
Top up and bleed the cooling system following
Bleeding the cooling system
.
|
|
| 69. |
Bleed the power steering system. See
Bleeding the power steering system
.
|
|
| 70. |
Test drive the car and check all functions. Check that the steering wheel stands straight when driving on a straight road. Adjust as necessary. Also check the oil level in the engine and gearbox.
|
|
| 71. |
Set the car clock.
|
|

