PRE-RELEASE
Coolant pump, 4-cyl
| Coolant pump, 4-cyl |
| To remove |
| 1. |
Open the expansion tank cap to release any excess pressure.
|
|
| 2. |
Raise the car.
|
|
| 3. |
Remove the RH front wheel.
|
|
| 4. |
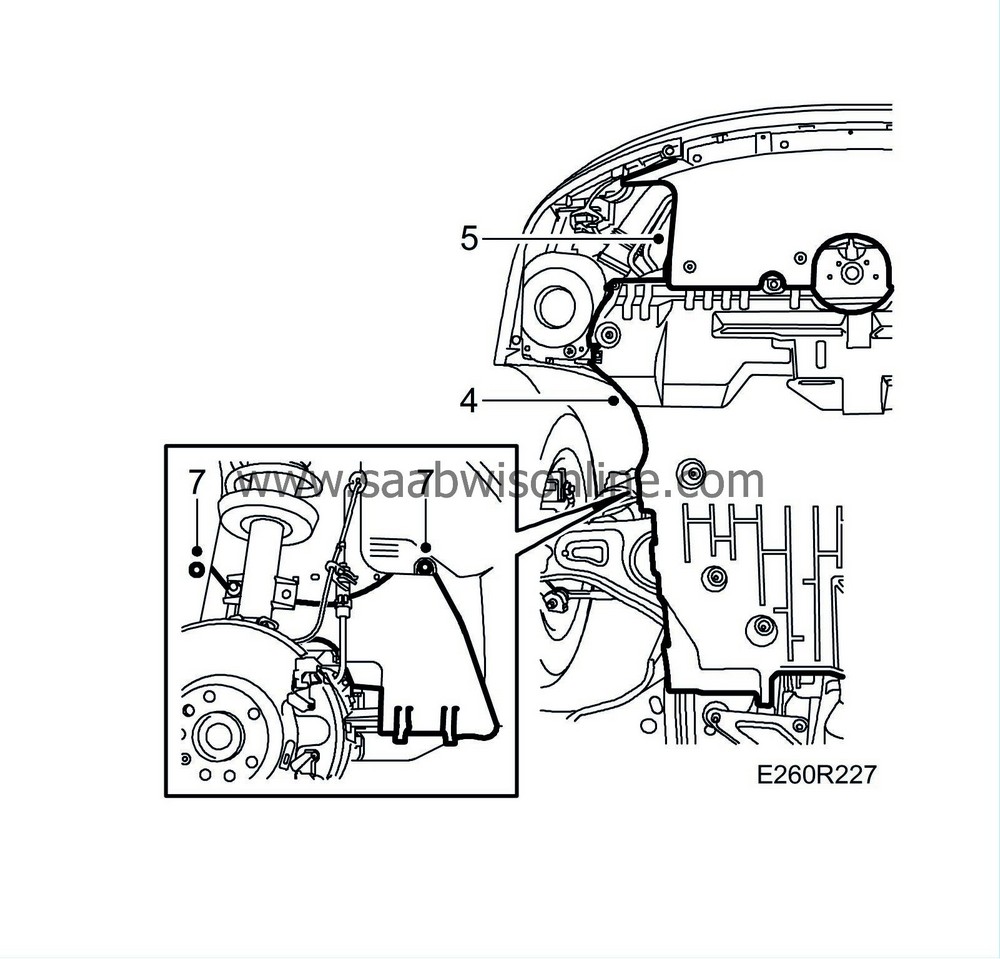
Remove the lower engine cover.
|
|
| 5. |
Remove the front spoiler shield.
|
|
| 6. |
Put a suitable receptacle in place and drain the coolant.
|
|
| 7. |
Remove the belt circuit cover.
|
|
| 8. |
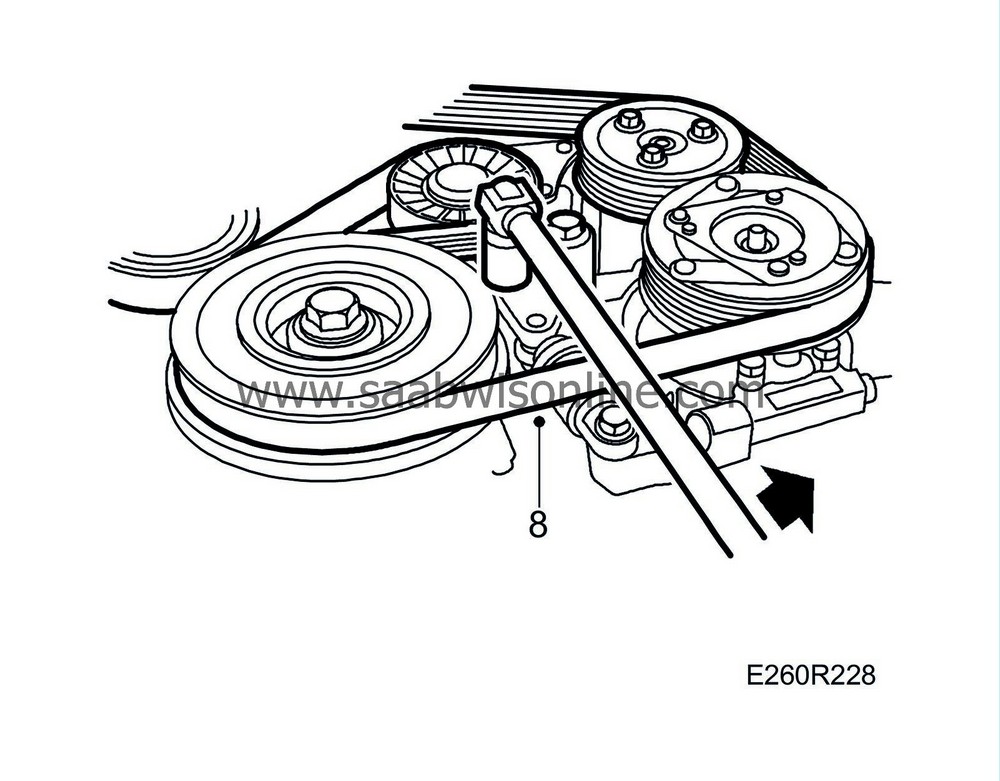
Mark the direction of rotation, relieve the pressure and remove the Poly-V-belt.
|
|
| 9. |
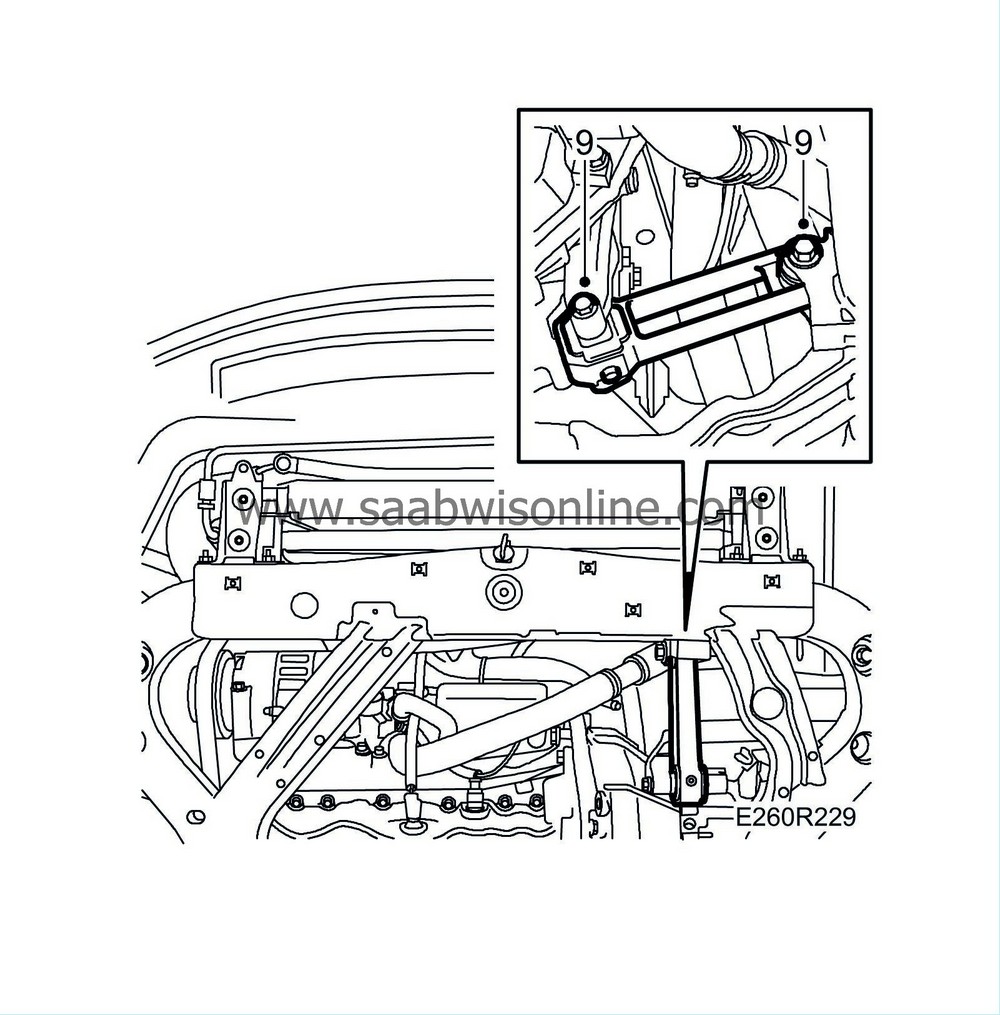
Remove the front bolt of the torque arm and loosen the rear one.
|
|
| 10. |
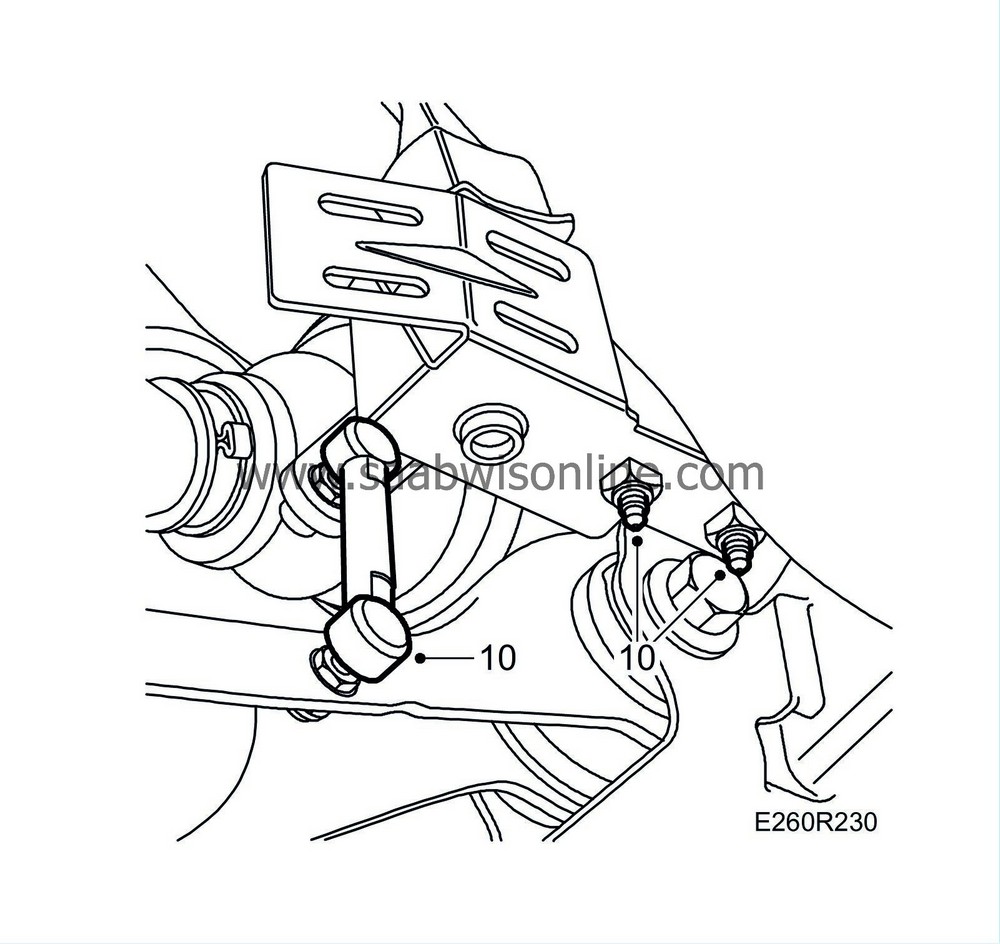
Remove the mountings of the headlamp position sensor (option) and move the sensor aside.
|
|
| 12. |
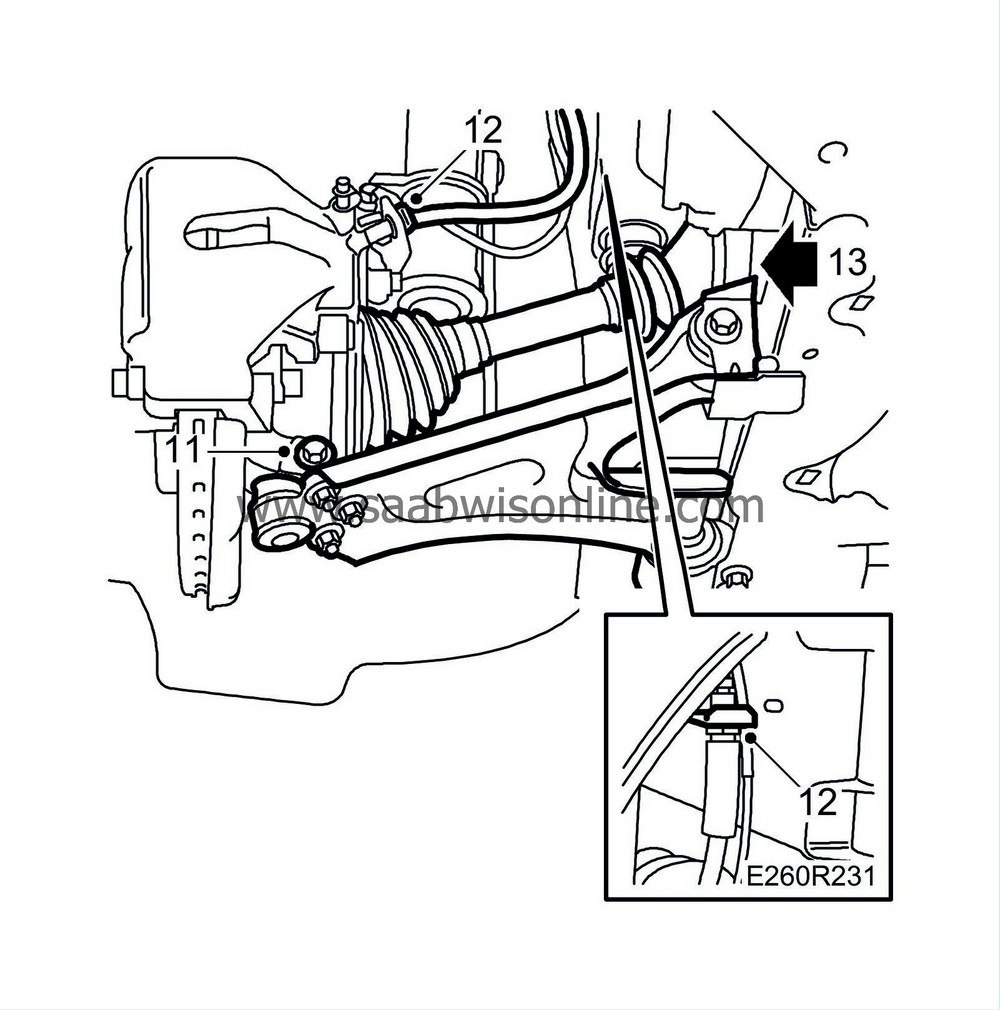
Loosen the brake hose clip and the ABS cable mounting.
|
|
| 13. |
Tap the drive shaft out of the intermediate shaft using a hammer and brass drift. Pull out the shaft and put it to the side.
|
|||||||||
| 14. |
Close the drain cock.
|
|
| 15. |
Move the receptacle to catch any coolant that spills when the water pump is removed.
|
|
| 16. |
Lower the car.
|
|
| 17. |
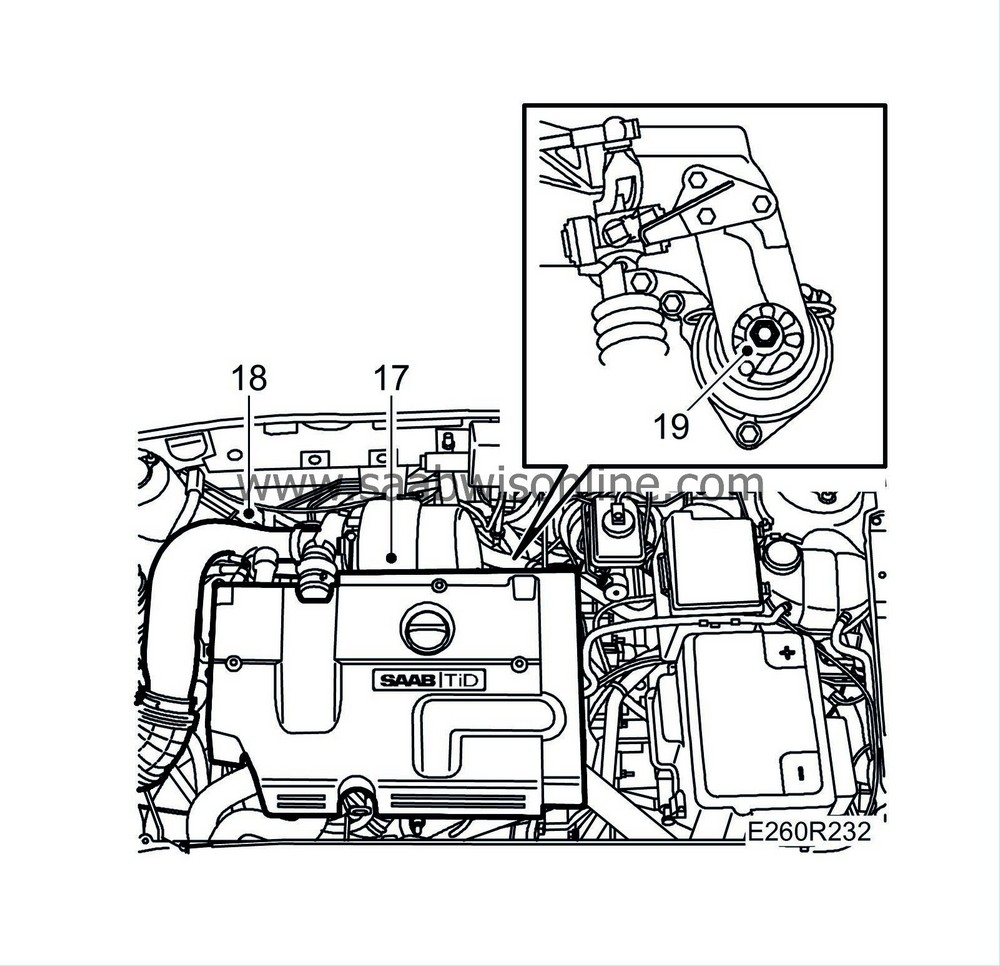
Remove the upper engine cover.
|
|
| 18. |
Remove the intake manifold from the mass air flow sensor to the turbocharger and camshaft cover.
|
|
| 19. |
Remove the nut on the rear engine pad.
|
|
| 20. |
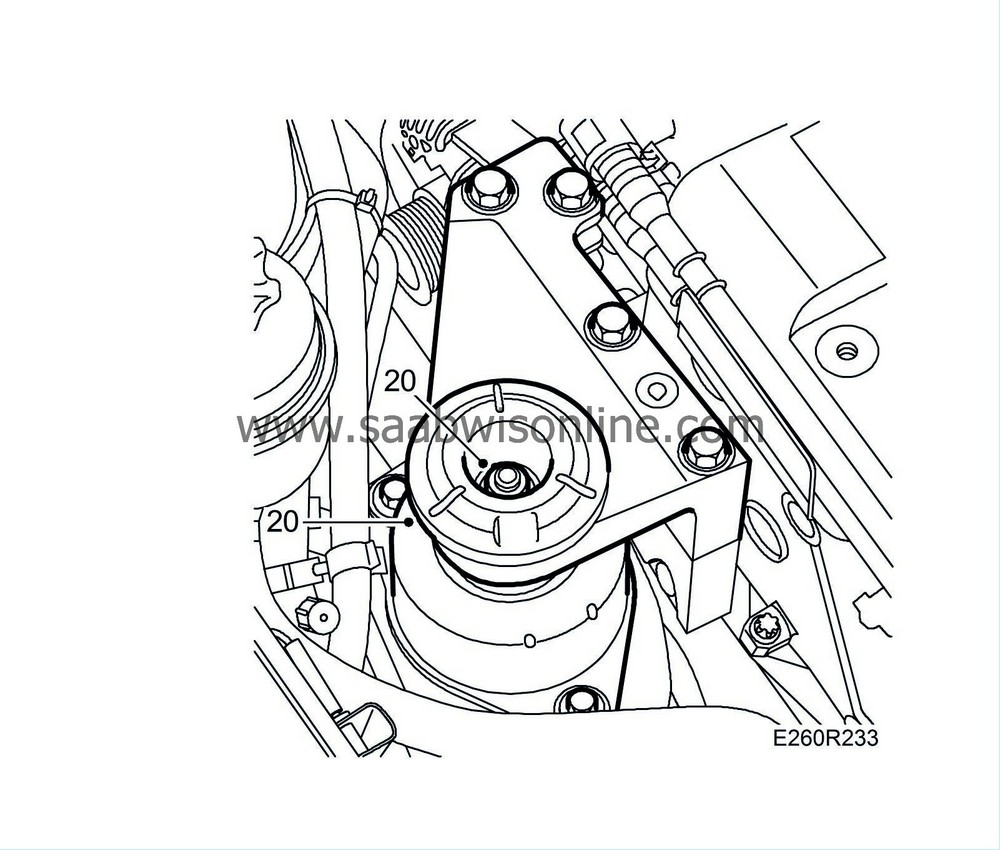
Remove the nut and vibration damper of the RH engine pad.
|
|
| 21. |
Carefully relieve pressure from the engine using a jack.
|
|
| 22. |
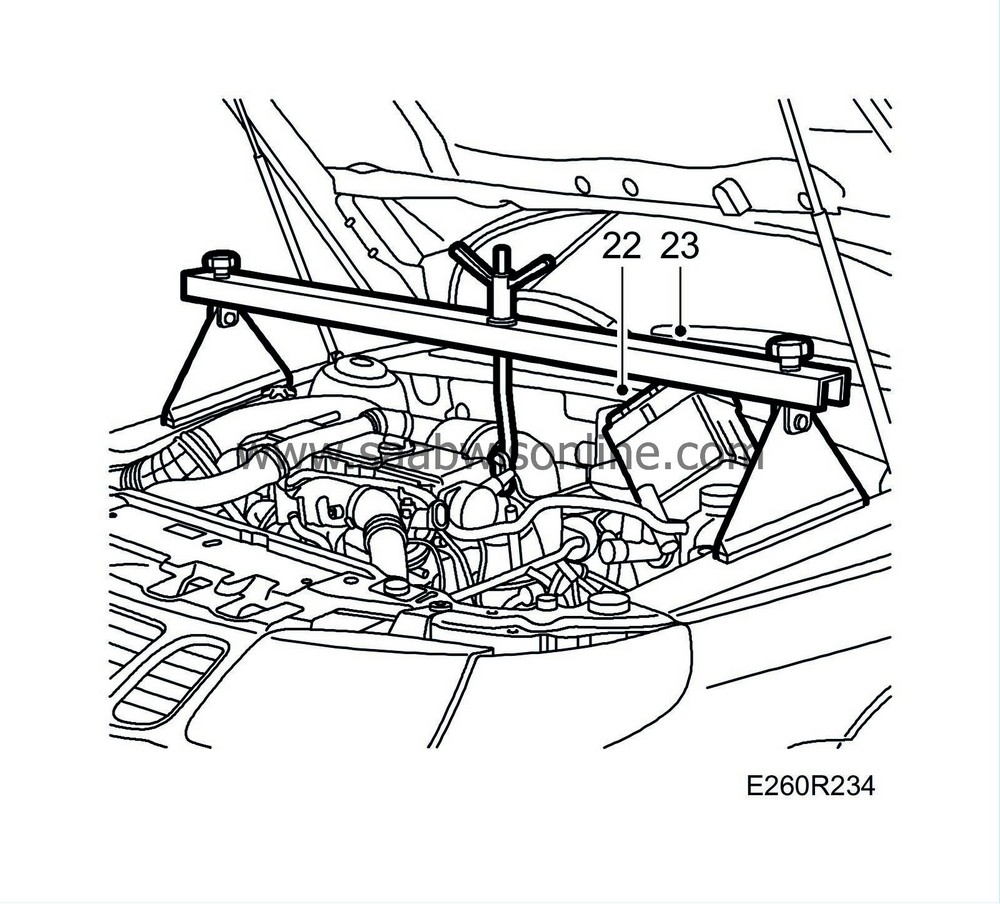
Loosen and move aside the electrical distribution box.
|
|
| 23. |
Put
83 94 850 Lifting beam
in place and relieve pressure on the engine in the LH front lifting eye.
|
|
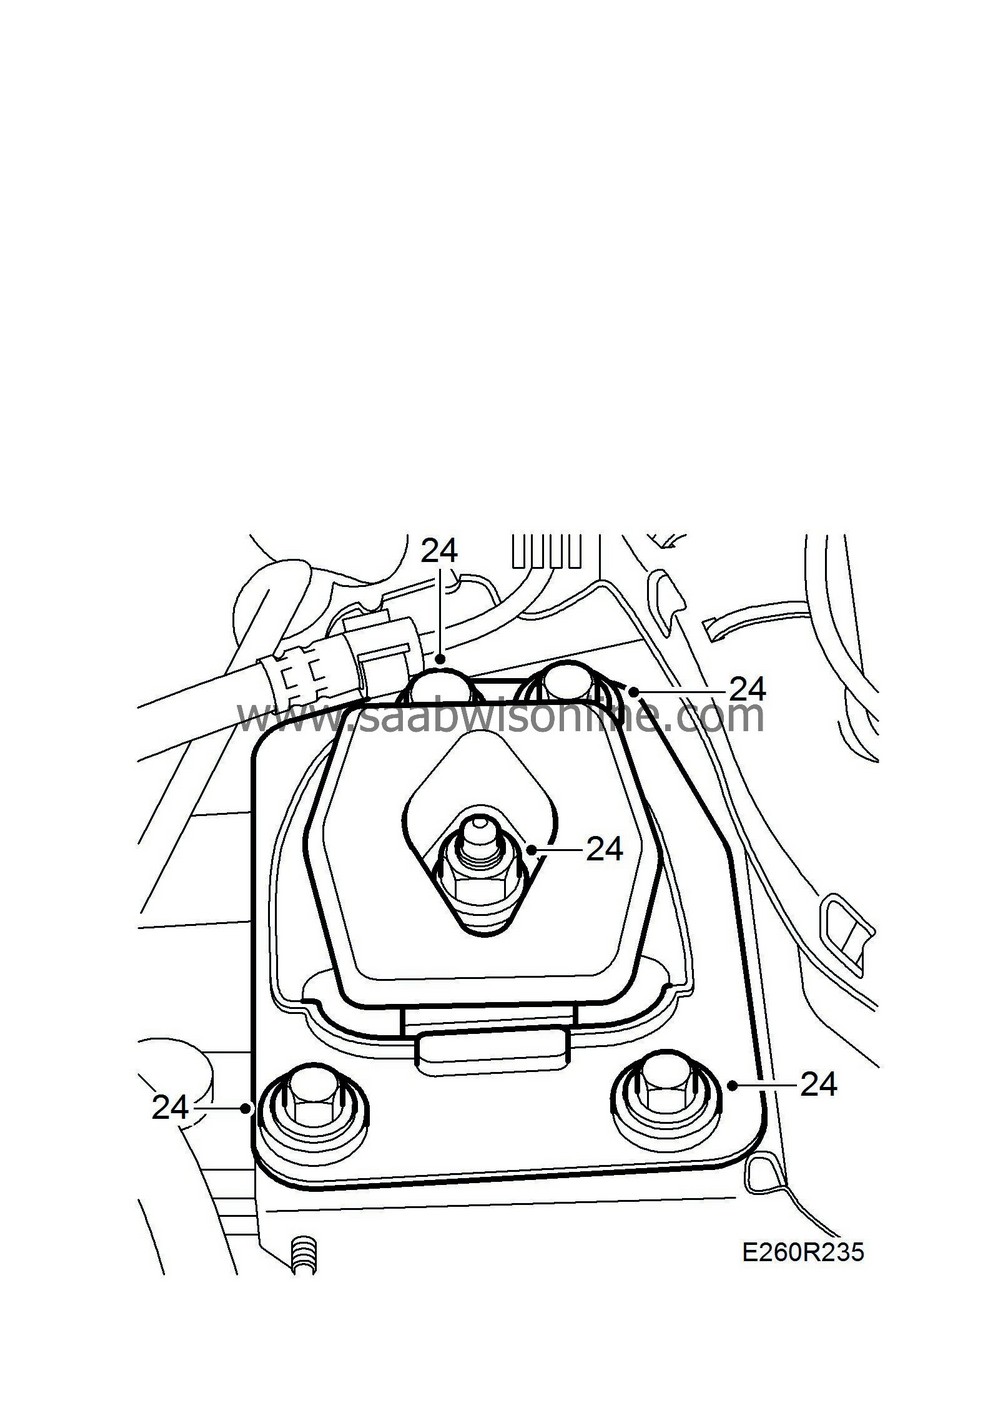
| 24. |
Relieve the pressure on the engine slightly and remove the LH engine pad.
|
|
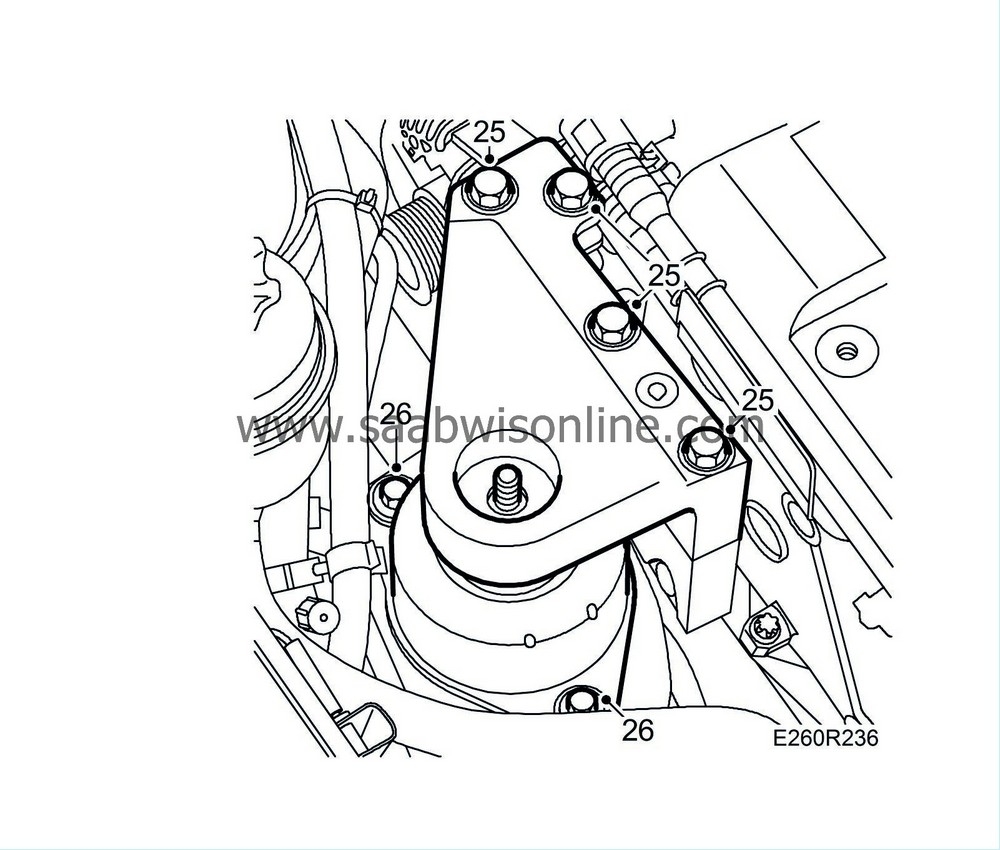
| 25. |
Remove the RH, upper engine bracket.
|
|
| 26. |
Remove the RH engine pad.
|
|
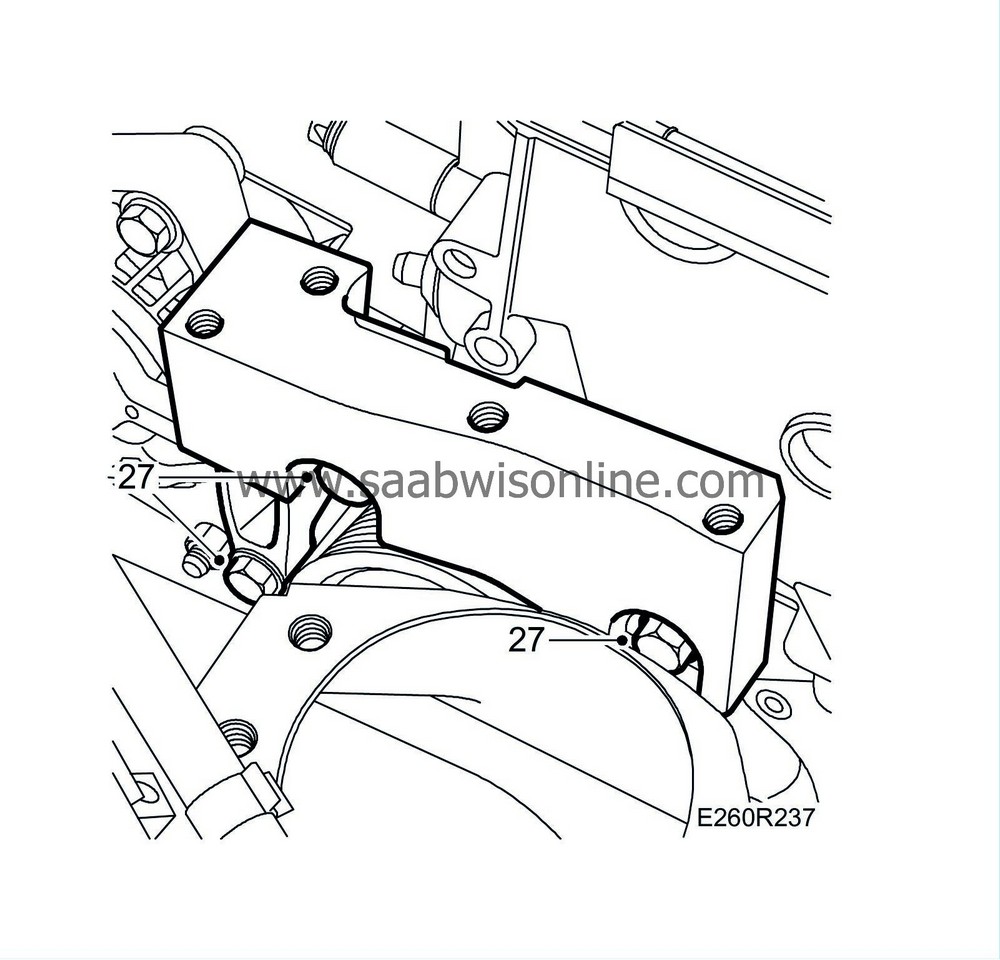
| 27. |
Raise the engine using the jack and remove the lower bracket.
|
|
| 28. |
Lower the engine/gearbox using the lifting beam.
|
|
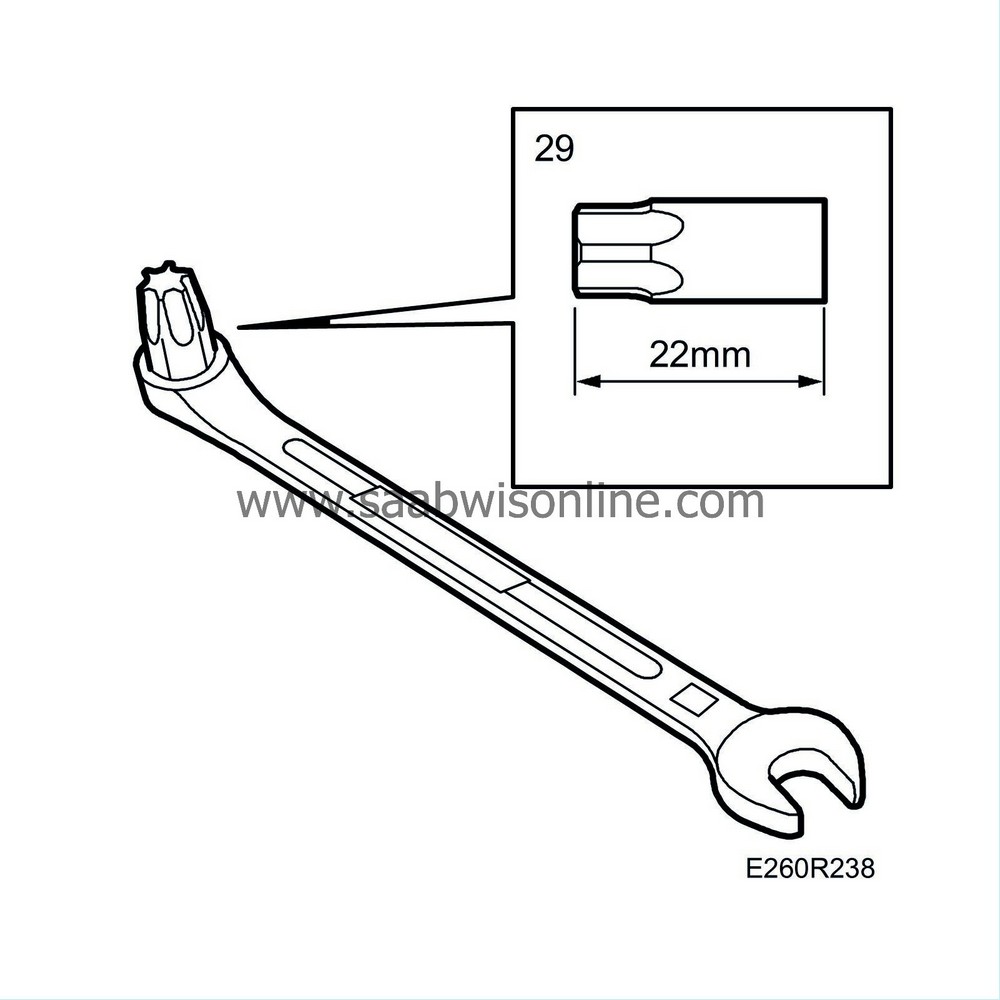
| 29. |
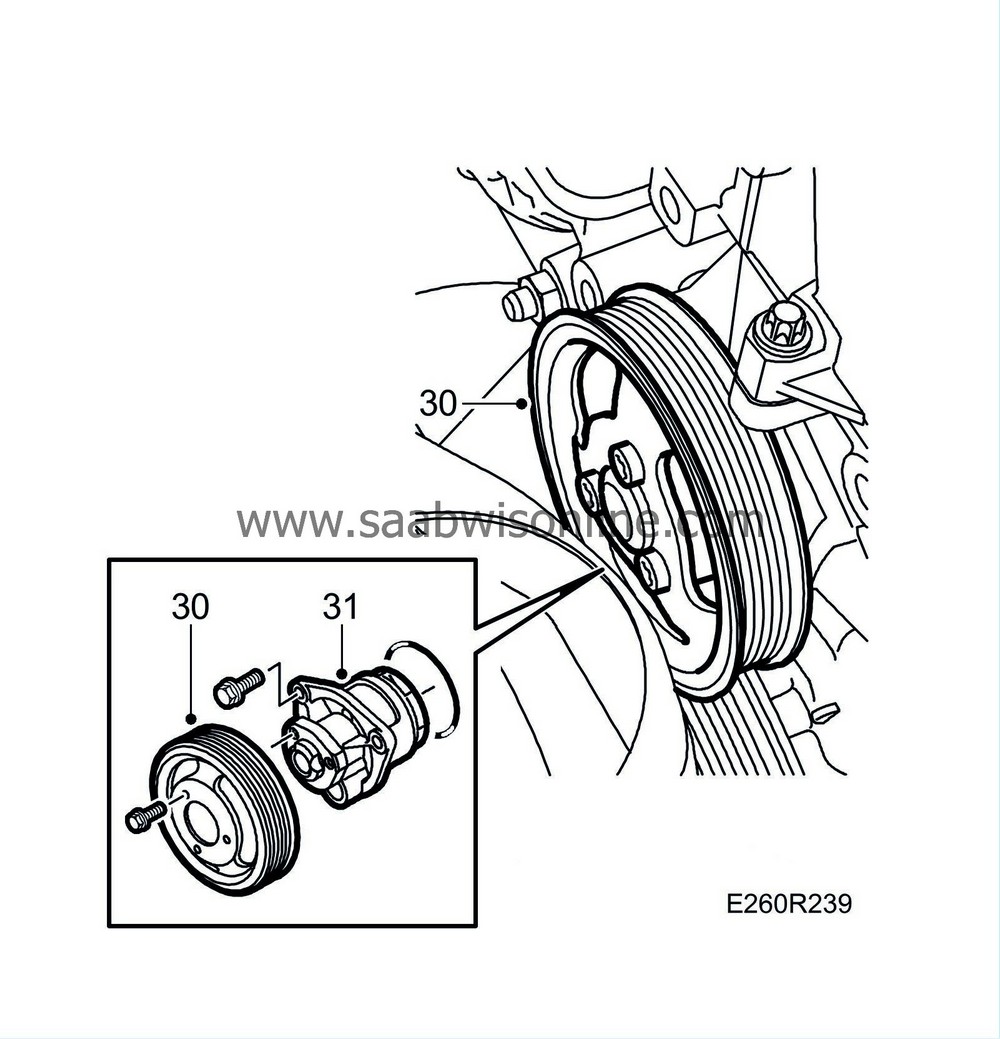
Cut a T-45 torx bit to a total length of approx. 22 mm and use with an 8 mm fixed spanner to loosen the belt pulley screws.
|
|
| 31. |
Remove the water pump.
|
|
| To fit |
| 1. |
Clean the sealing surfaces and fit the coolant pump with a new O-ring. The recess in the pump should be up.
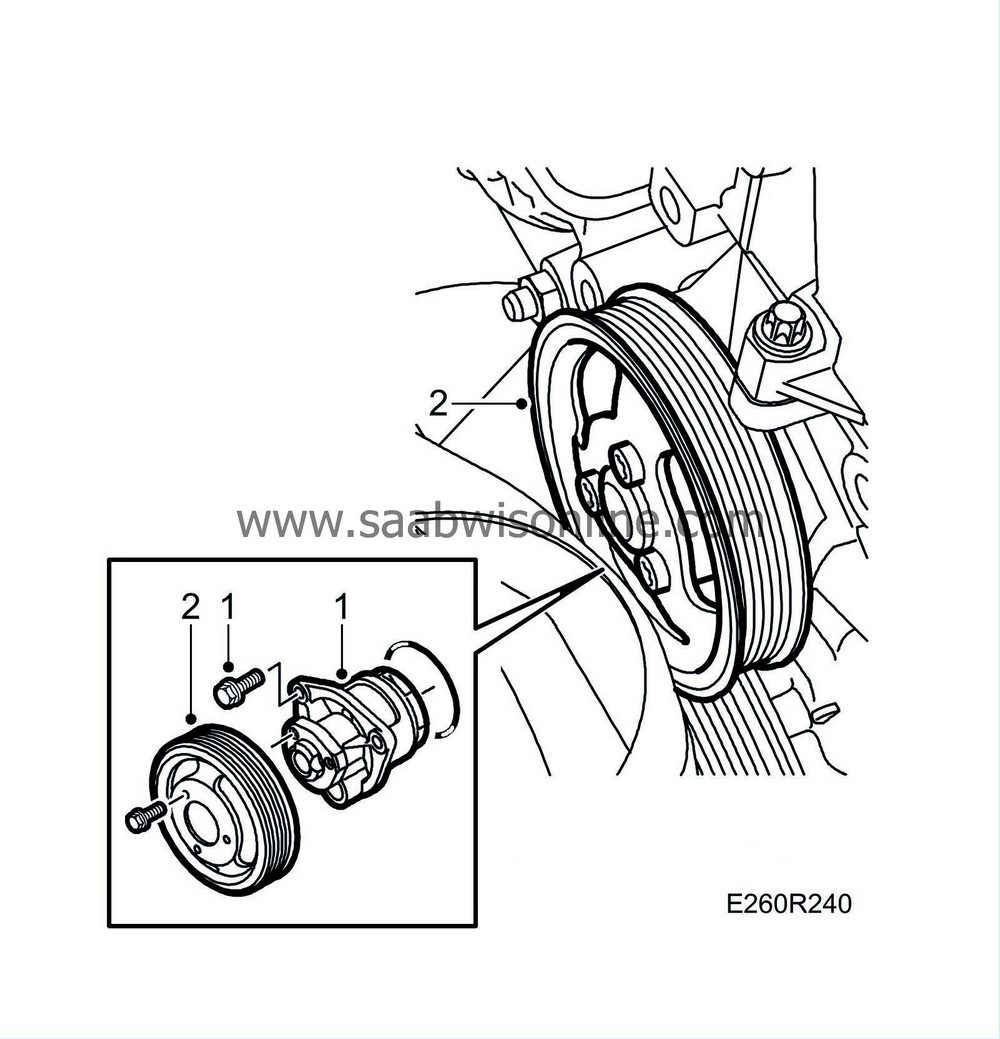
Tightening torque: 20 Nm (15 lbf ft) |
|
| 2. |
Fit the belt pulley, lock it with a screwdriver or the like and tighten the screws.
Tightening torque: 20 Nm (15 lbf ft) |
|
| 3. |
Fit the RH, lower engine bracket.
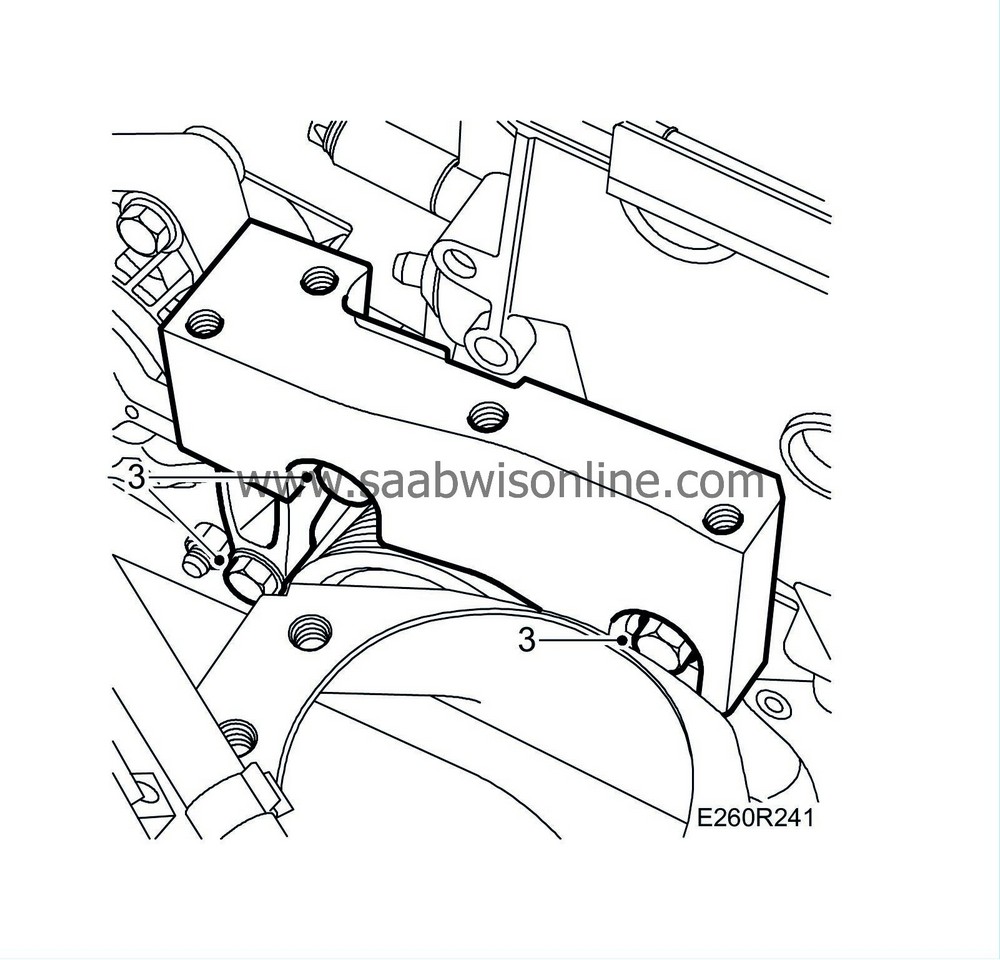
Tightening torque: 40 Nm (30 lbf ft) +90° |
|
| 4. |
Fit the RH engine pad.
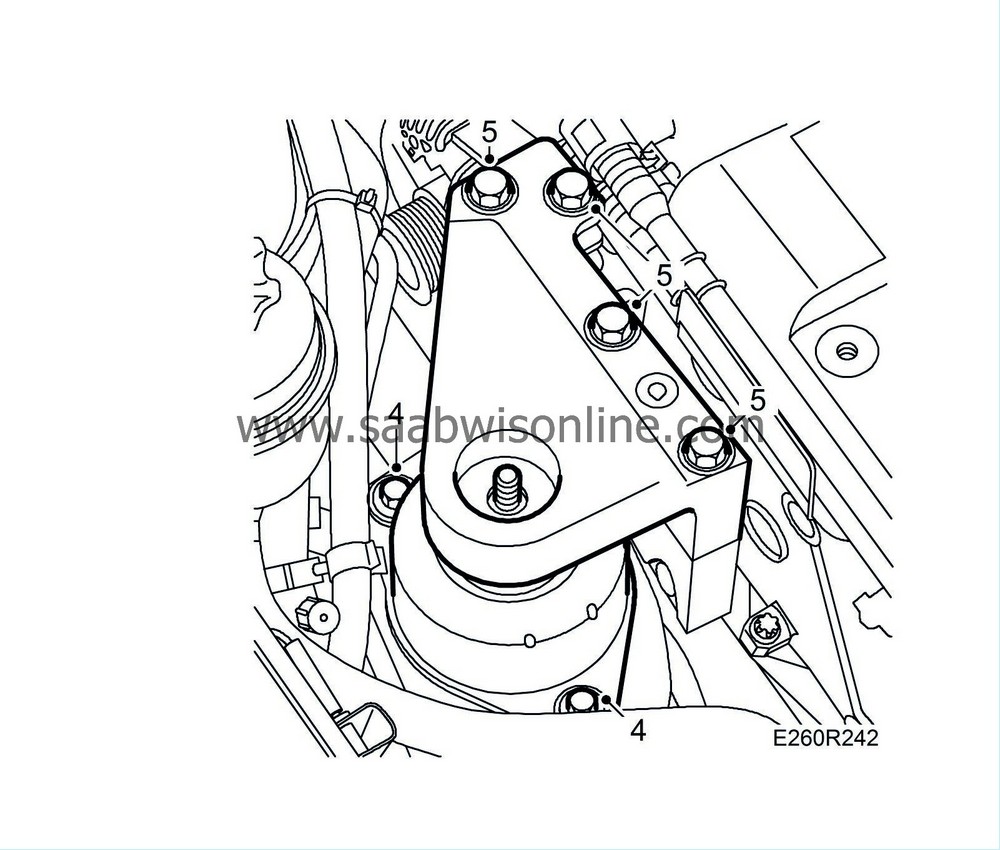
Tightening torque 47 Nm (35 lbf ft) |
|
| 5. |
Fit the RH, upper bracket.
Tightening torque: 40 Nm (30 lbf ft) +60° |
|
| 6. |
Lower the engine with the jack and pull it to the right until the upper engine bracket rests against the RH engine pad. If necessary, adjust the position of the engine with the lifting beam.
|
|
| 7. |
Fit the LH engine pad on the stud bolt of the gearbox mounting and use the lifting beam or jack to adjust the position of the engine so that the threaded holes in the body are centred with the holes in the engine pad.
|
|
| 8. |
Tighten the screws and fit the nut.
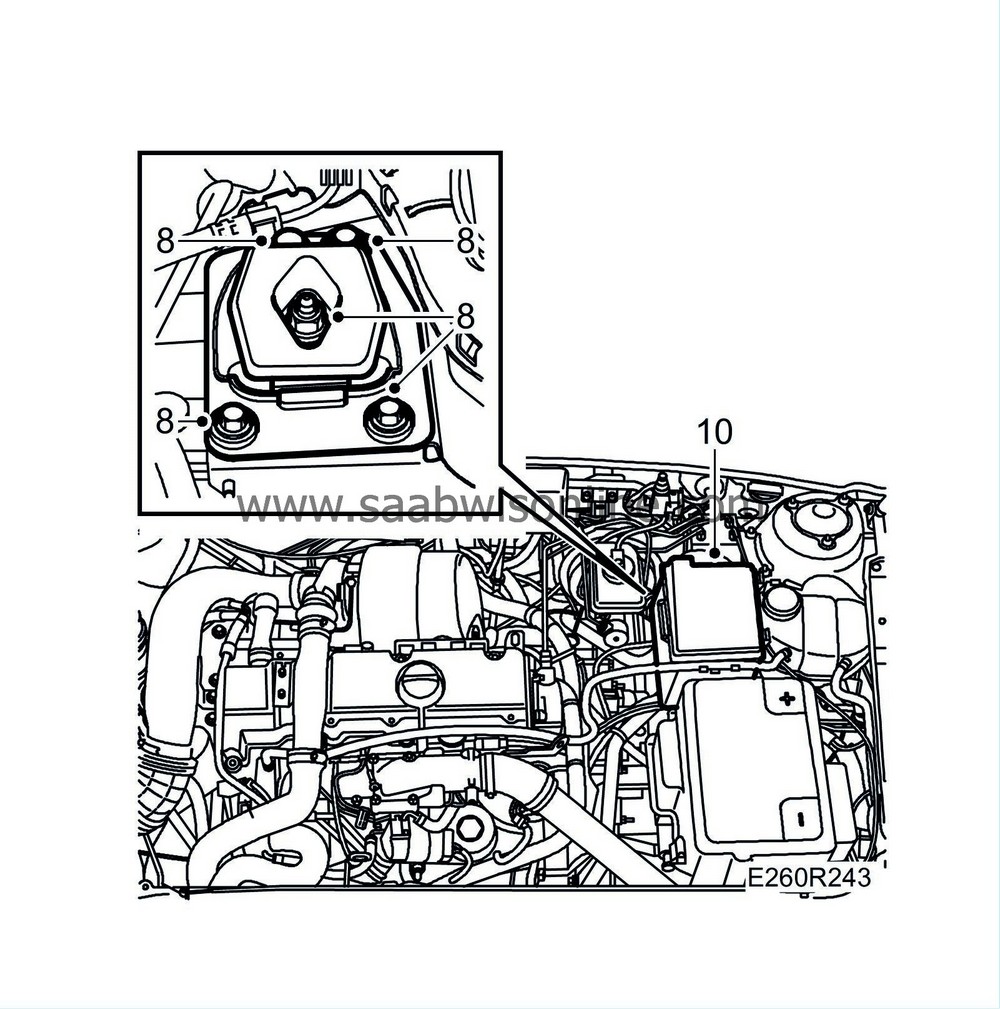
Tightening torque 47 Nm (35 lbf ft) |
|
| 9. |
Remove the lifting beam and jack.
|
|
| 10. |
Fit the electrical distribution box.
|
|
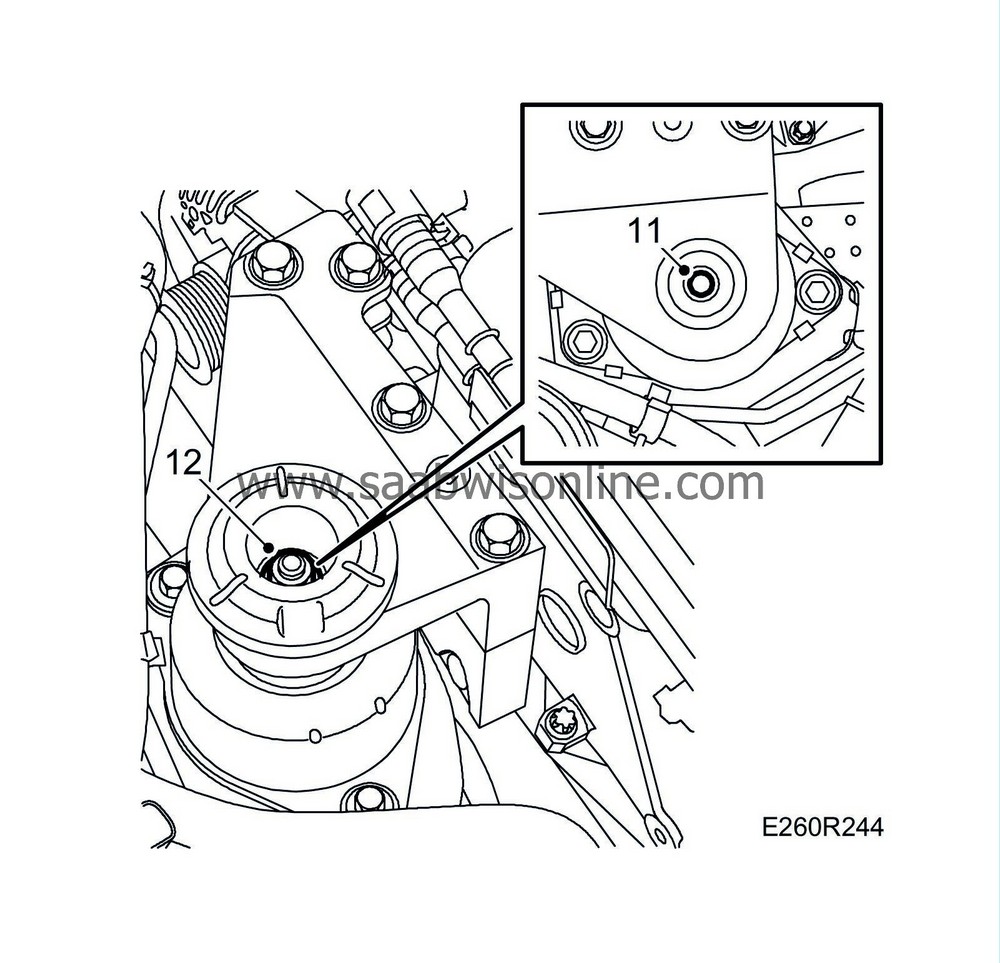
| 11. |
Adjust the upper bracket so that the engine pad stud bolt is as close as possible to the centre of the upper bracket's hole.
|
|
| 12. |
Fit the vibration damper and nut to the RH engine pad.
Tightening torque: 105 Nm (77 lbf ft) |
|
| 13. |
Fit and tighten the nut of the rear engine pad.
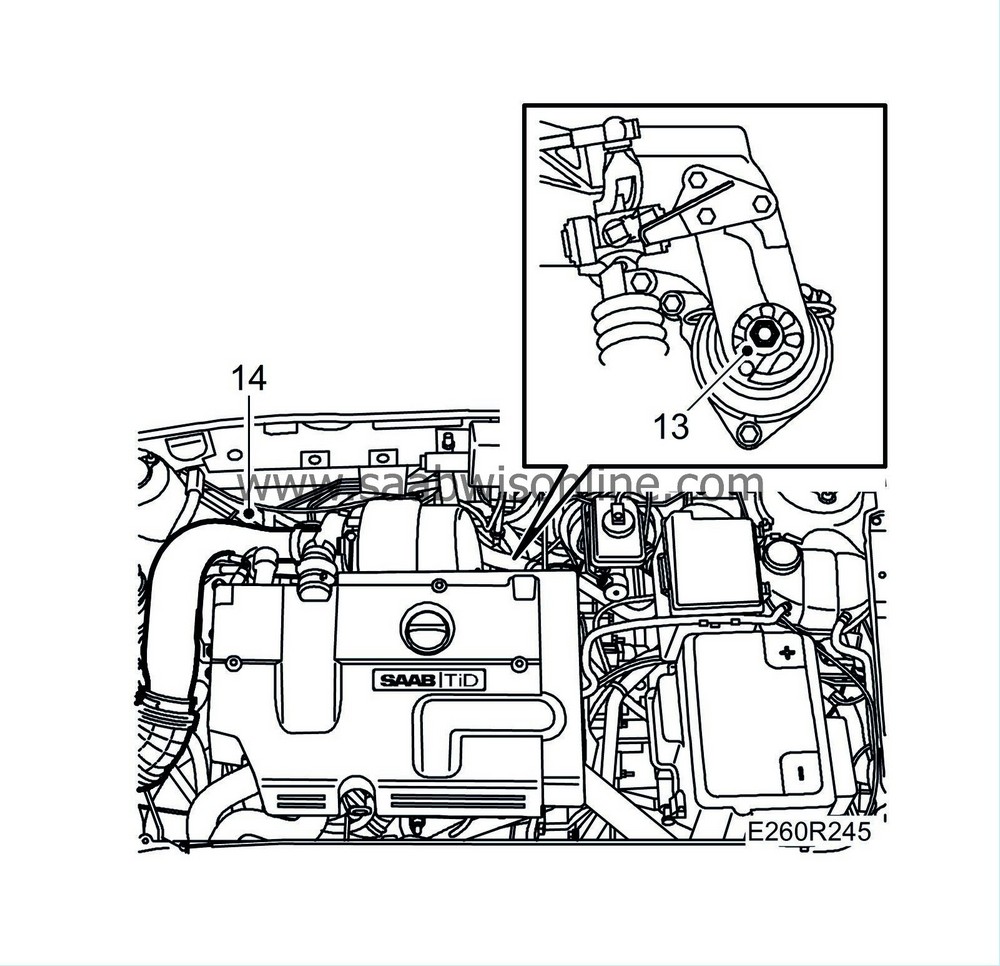
Tightening torque 47 Nm (35 lbf ft) |
|
| 14. |
Fit the intake manifold to the mass air flow sensor, turbocharger and camshaft cover.
Tightening torque, mass air flow sensor: 3.5 Nm (2.5 lbf ft) |
|
| 15. |
Raise the car.
|
|
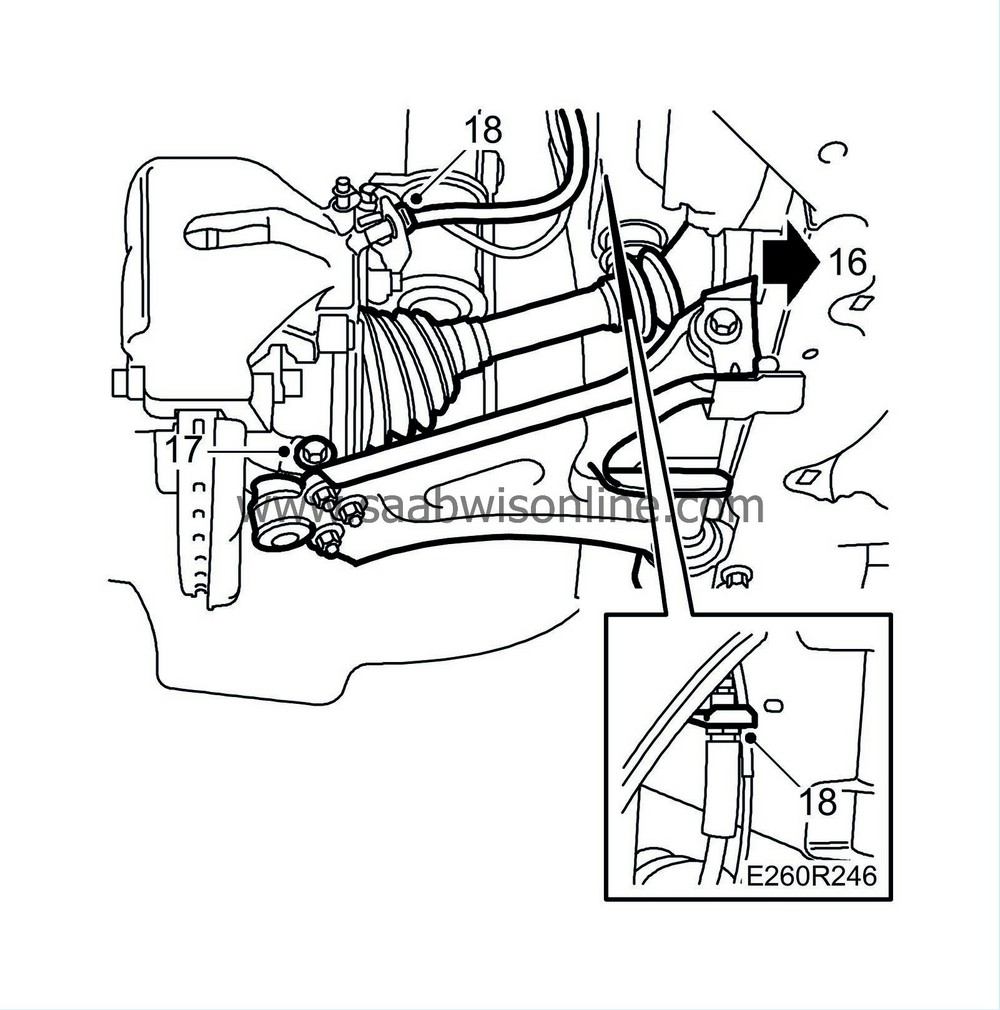
| 16. |
Lubricate the drive shaft splines with
90 513 210 Universal paste
and fit the drive shaft into the intermediate shaft. Make sure that the dust cap sits on the drive shaft. Check that the circlip snaps in place on the intermediate shaft.
|
|
| 17. |
Fit the ball joint to the steering swivel member. Tighten.
Tightening torque: 49 Nm (36 lbf ft)
|
|||||||||
| 18. |
Fit the brake hose in the mounting on the steering swivel member and fit the lock clip. Secure the ABS cable fixings.
|
|
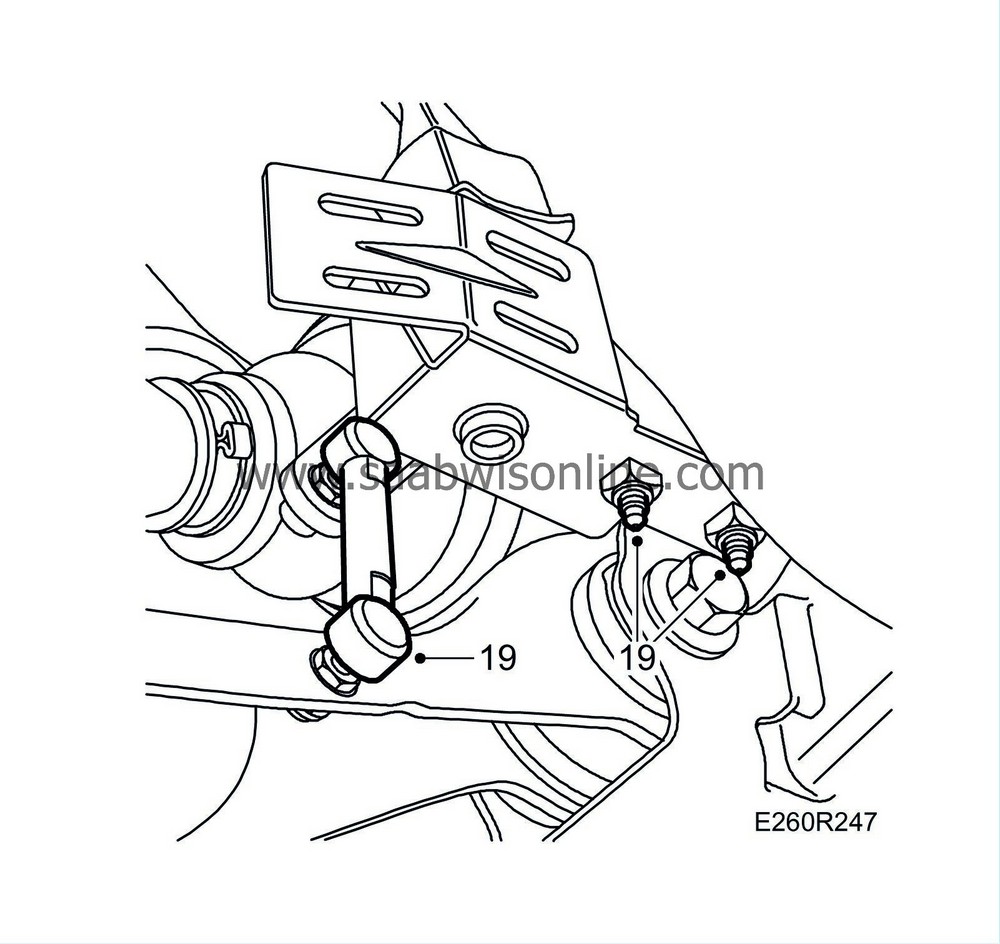
| 19. |
Fit the headlamp position sensor (option).
|
|
| 20. |
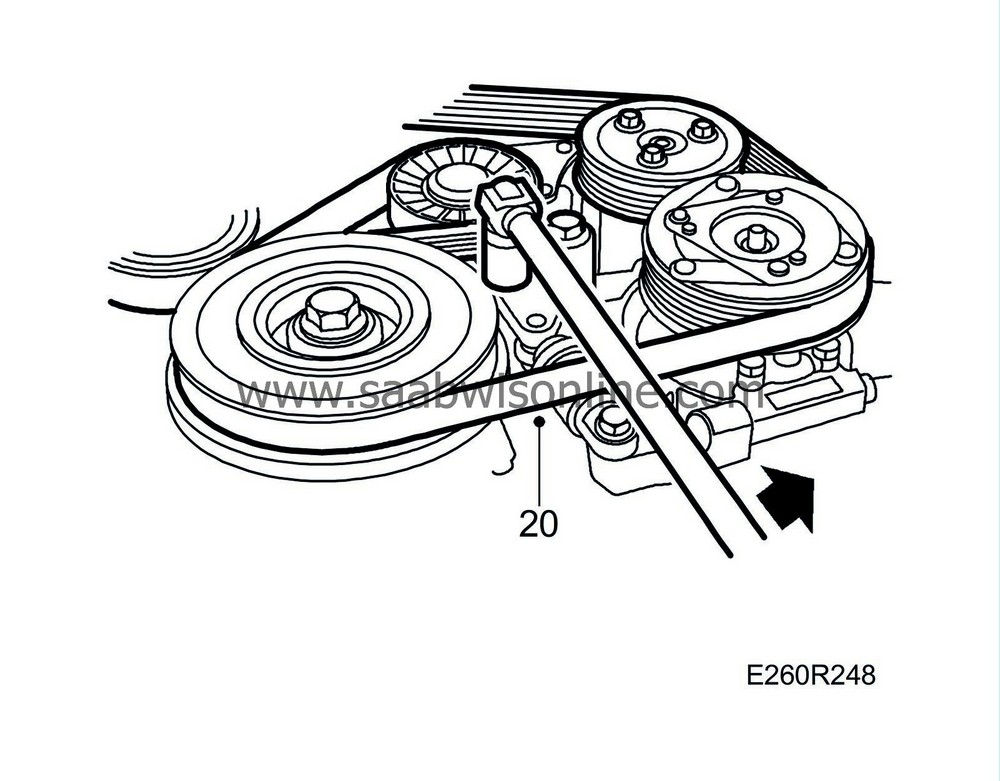
Fit the Poly-V-belt; check that it sits correctly against the belt pulleys.
|
|
| 21. |
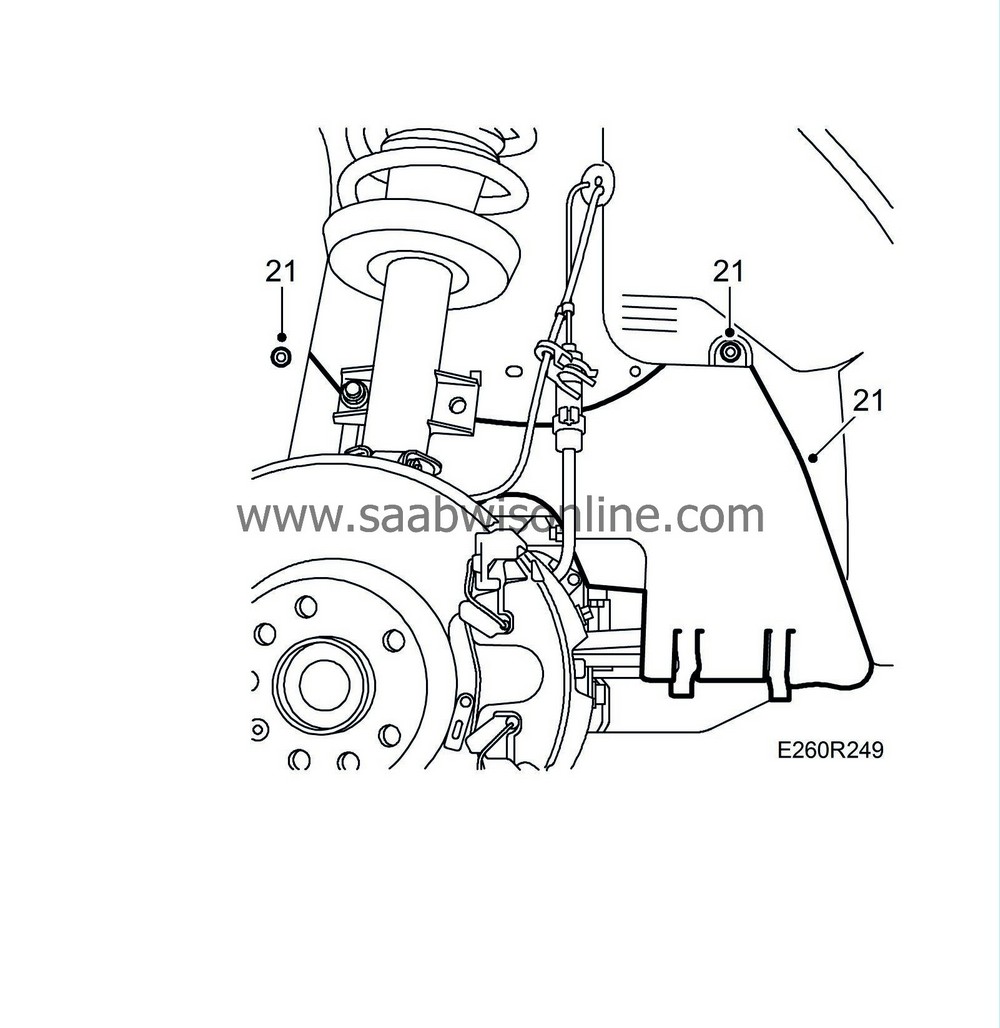
Fit the belt circuit cover.
|
|
| 22. |
Fit the front bolt of the torque arm and tighten the rear one.
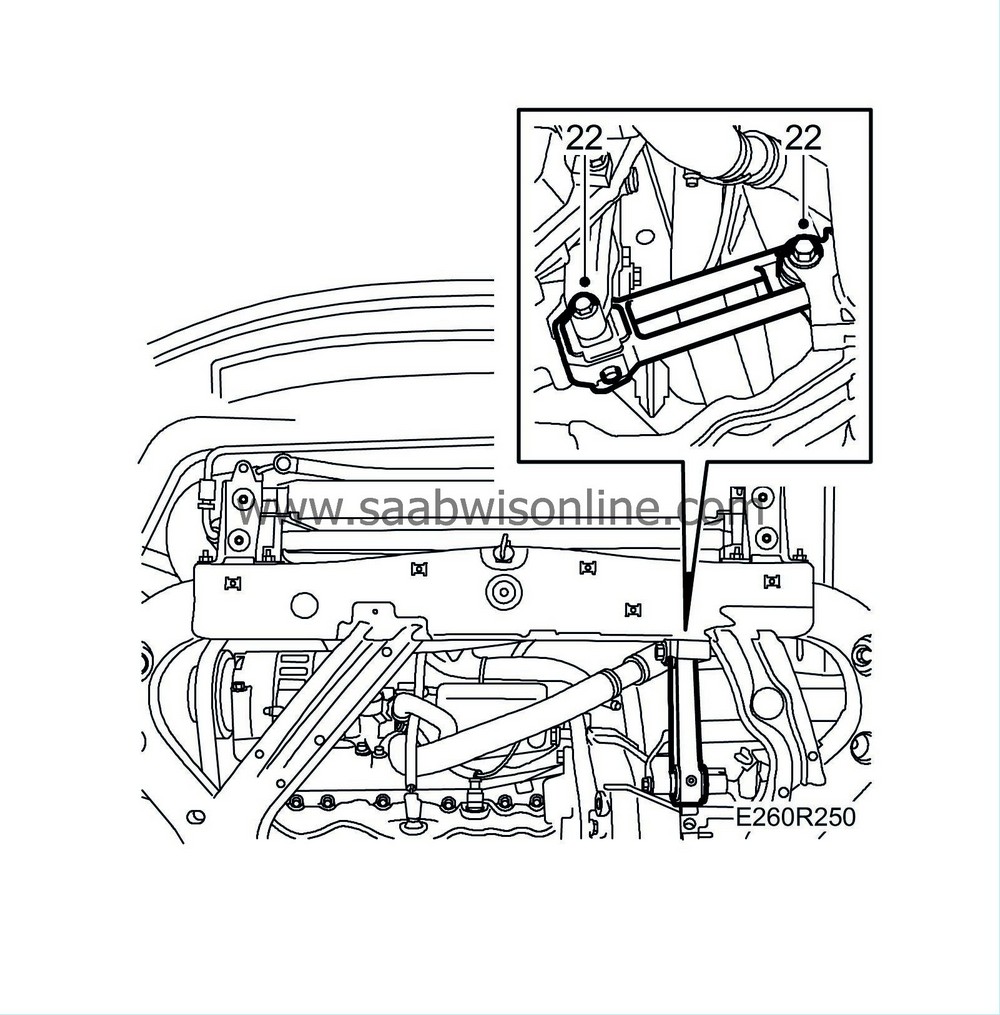
Front bolt: Tightening torque 90 Nm (66 lbf ft) +90° Rear bolt: Tightening torque 50 Nm (37 lbf ft) +120° |
|
| 23. |
Check that the radiator drain plug has been tightened.
|
|
| 24. |
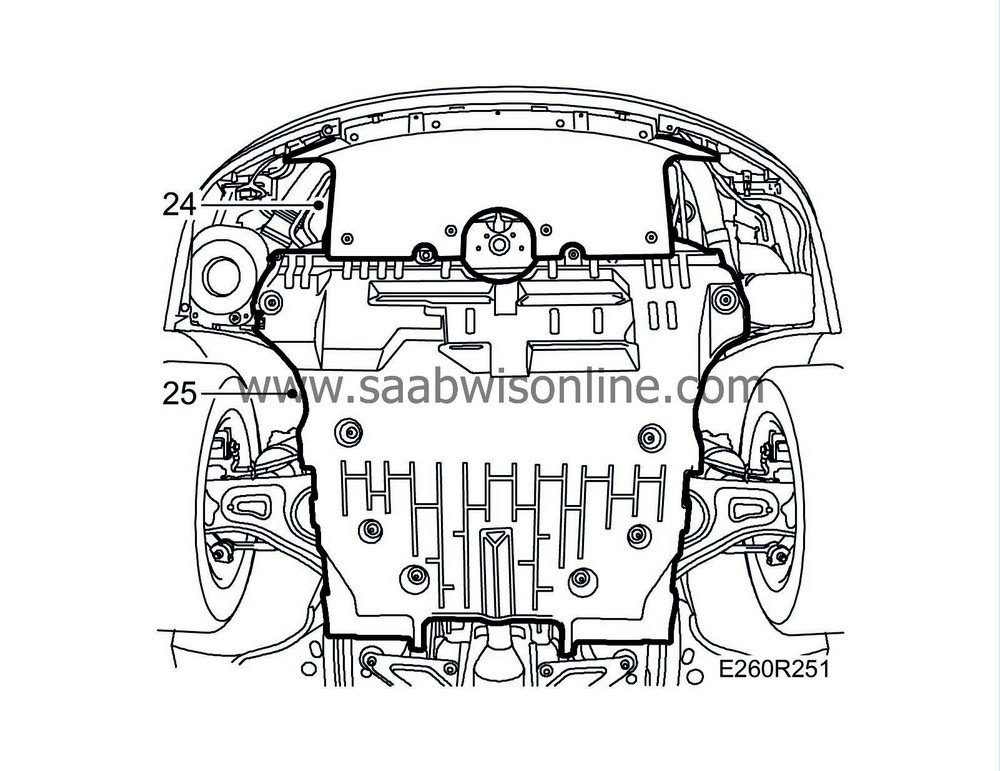
Fit the front spoiler shield.
|
|
| 25. |
Fit the lower engine cover.
|
|
| 26. |
Fit the RH front wheel. See
Wheels
.
|
|
| 27. |
Lower the car to the floor.
|
|
| 28. |
Check that the Poly-V-belt lies correctly over the belt pulleys.
|
|
| 29. |
Refit the engine cover.
|
|
| 30. |
Fill with coolant. See
Coolant
.
|
|
| 31. |
Check the system for leaks and add coolant to around 20 mm above the mark on the expansion tank.
|
|

 Warning
