Diesel auxiliary heater LHD, V6
|
|
Diesel auxiliary heater LHD, V6
|
|
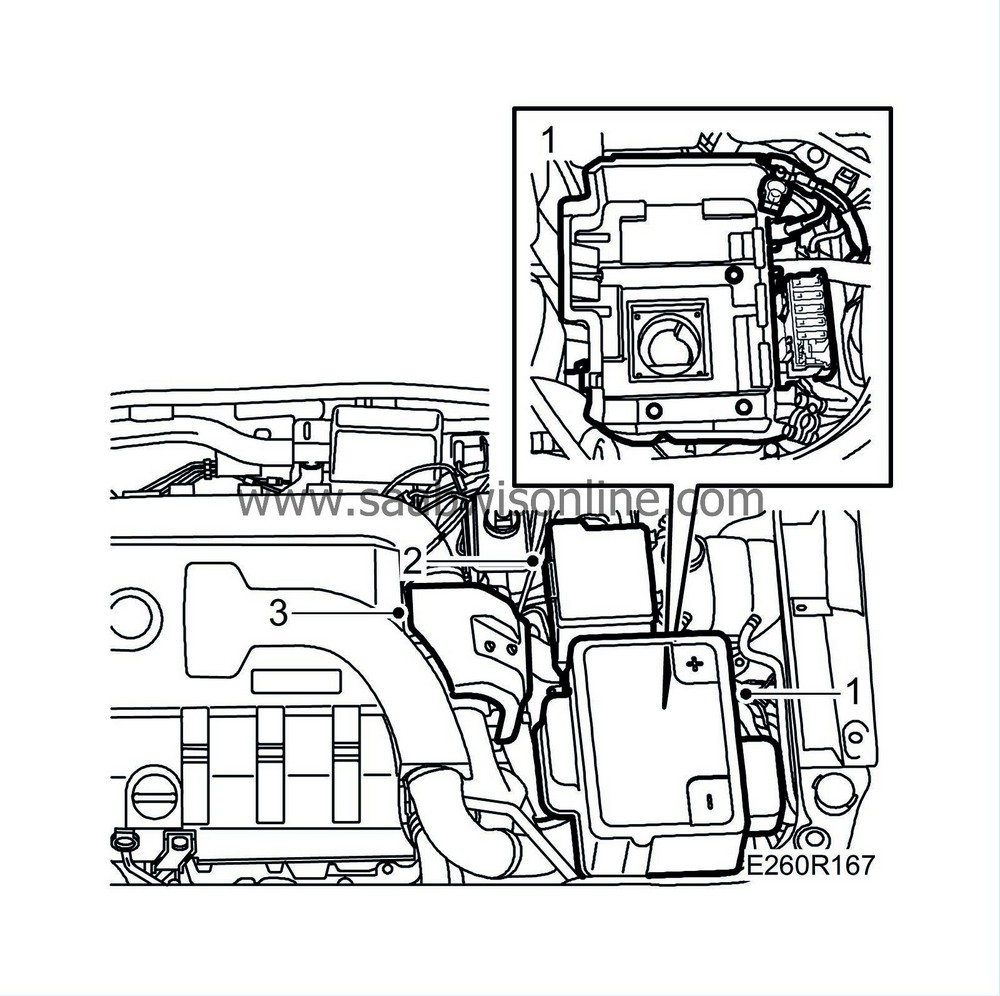
1.
|
Remove the battery cover, battery and battery tray. Detach the fuse holder from the battery tray.
|
|
2.
|
Detach the fuse holder and bend it up.
|
|
3.
|
Prevent brake fluid from running out of the brake fluid reservoir by using
30 07 739 Hose pinch-off pliers
to block off the brake fluid hose to the slave cylinder.
|
|
4.
|
Remove the lock clip from the slave cylinder and loosen the connection to the delivery pipe. Refit the lock clip. E421R234
|
|
5.
|
Remove the heat cover for the turbocharger.
|
|
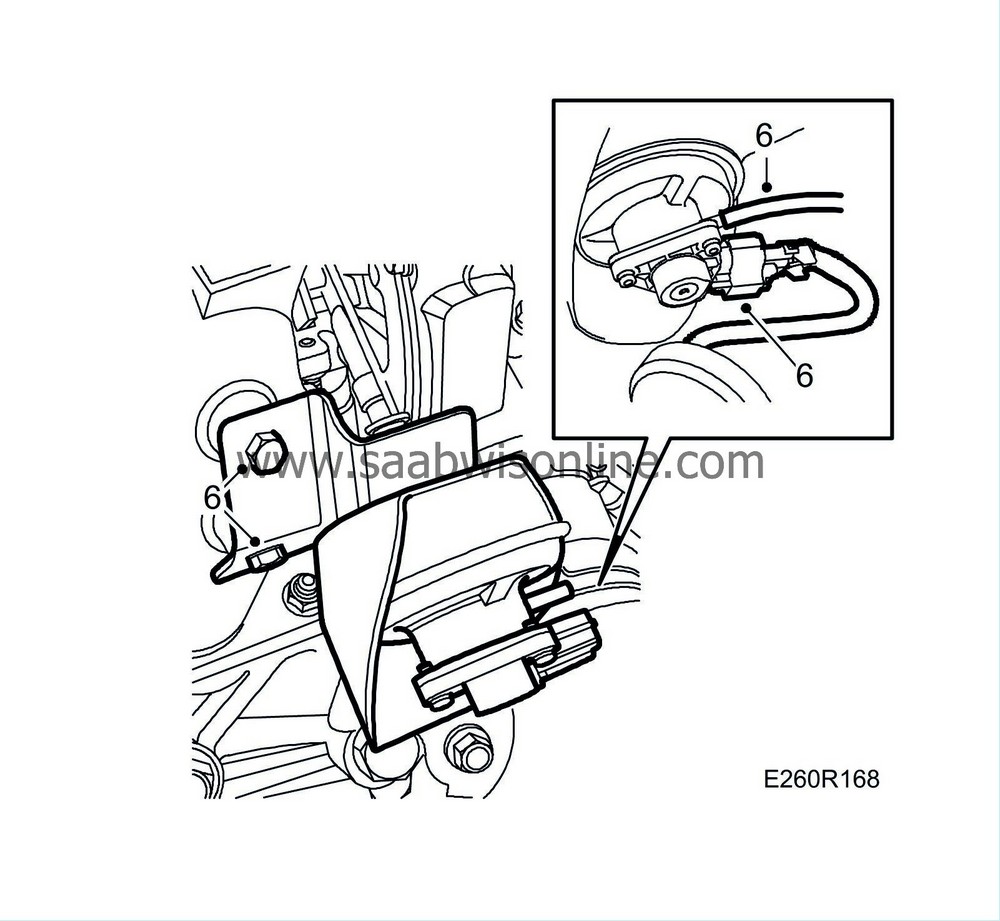
6.
|
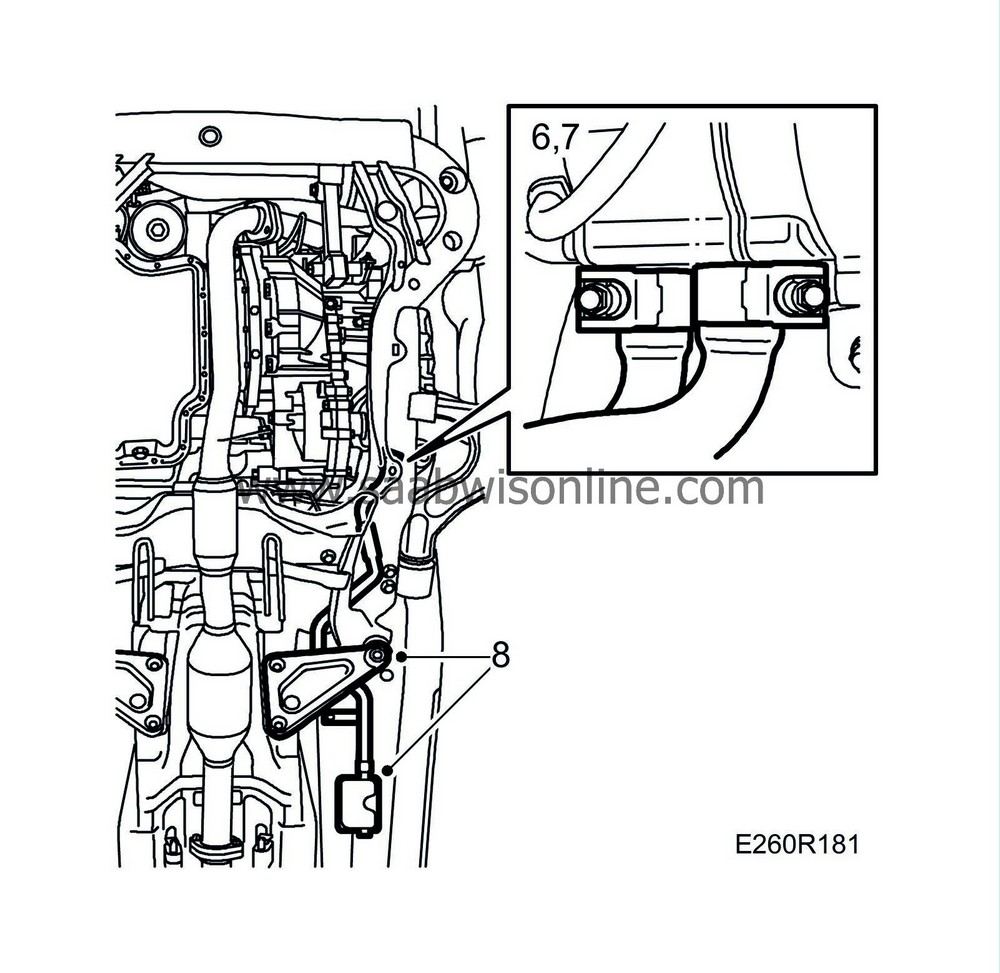
Unplug the connector and hose from the diaphragm box, undo the two screws and bend up the box.
|
|
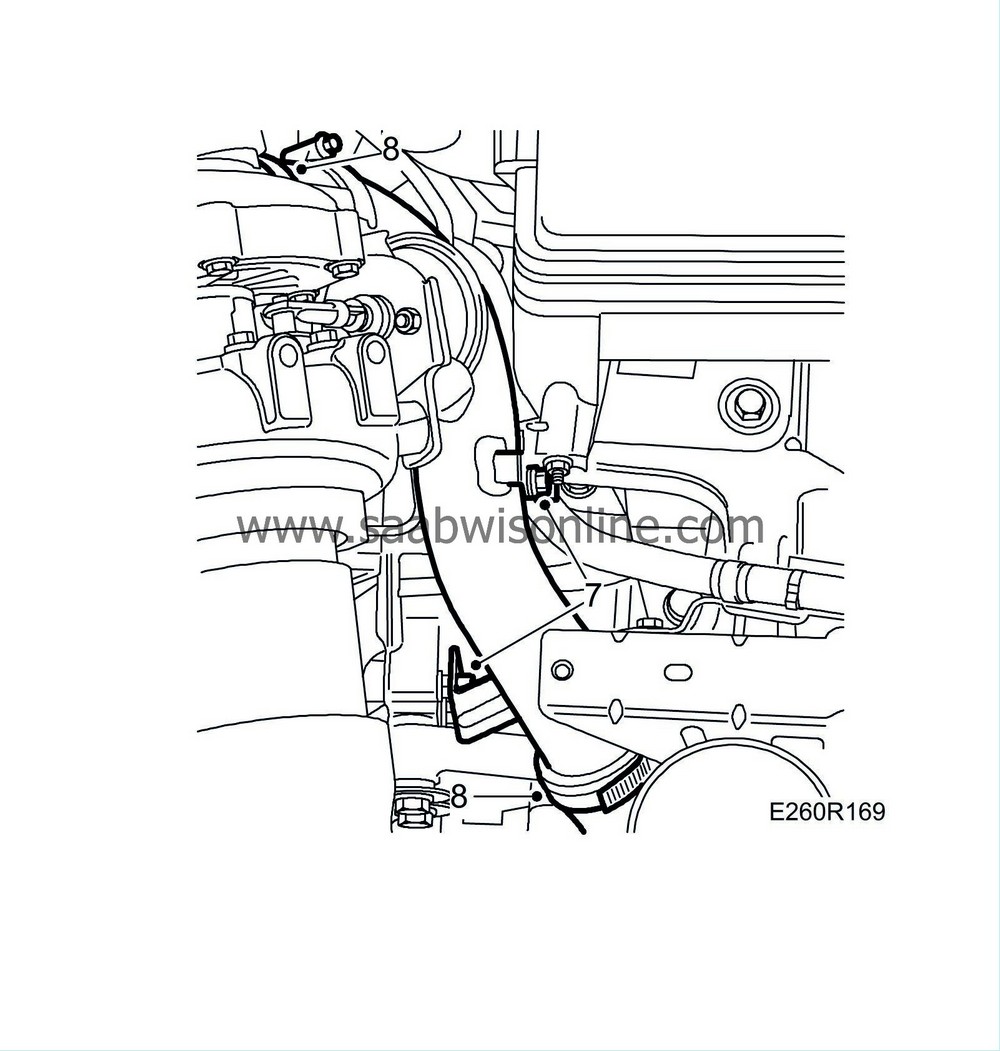
7.
|
Remove the cable bracket from the charge air pipe.
|
|
8.
|
Remove the charge air pipe (metal) and the rubber hose from the turbocharger.
|
|
10.
|
Remove the front left wheel.
|
|
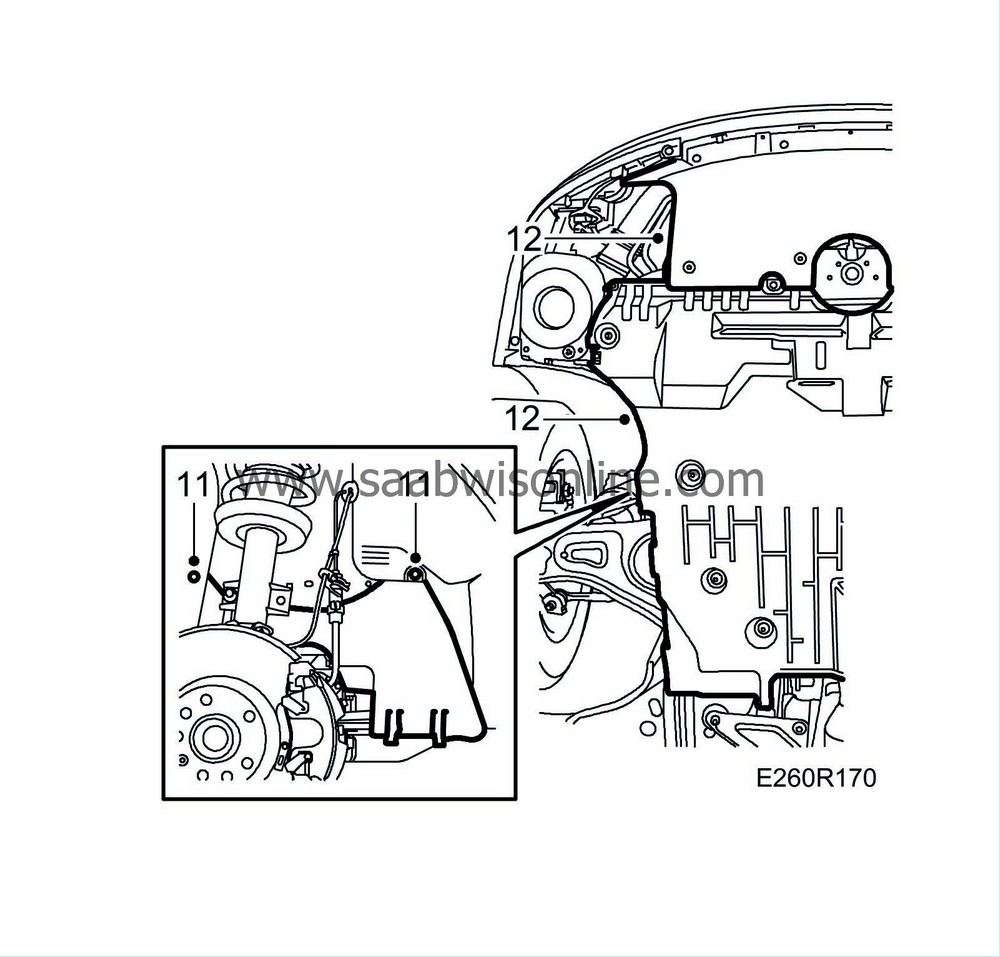
11.
|
Remove the wing liner.
|
|
12.
|
Remove the front and lower engine covers.
|
|
13.
|
Drain the cooling system.
|
|
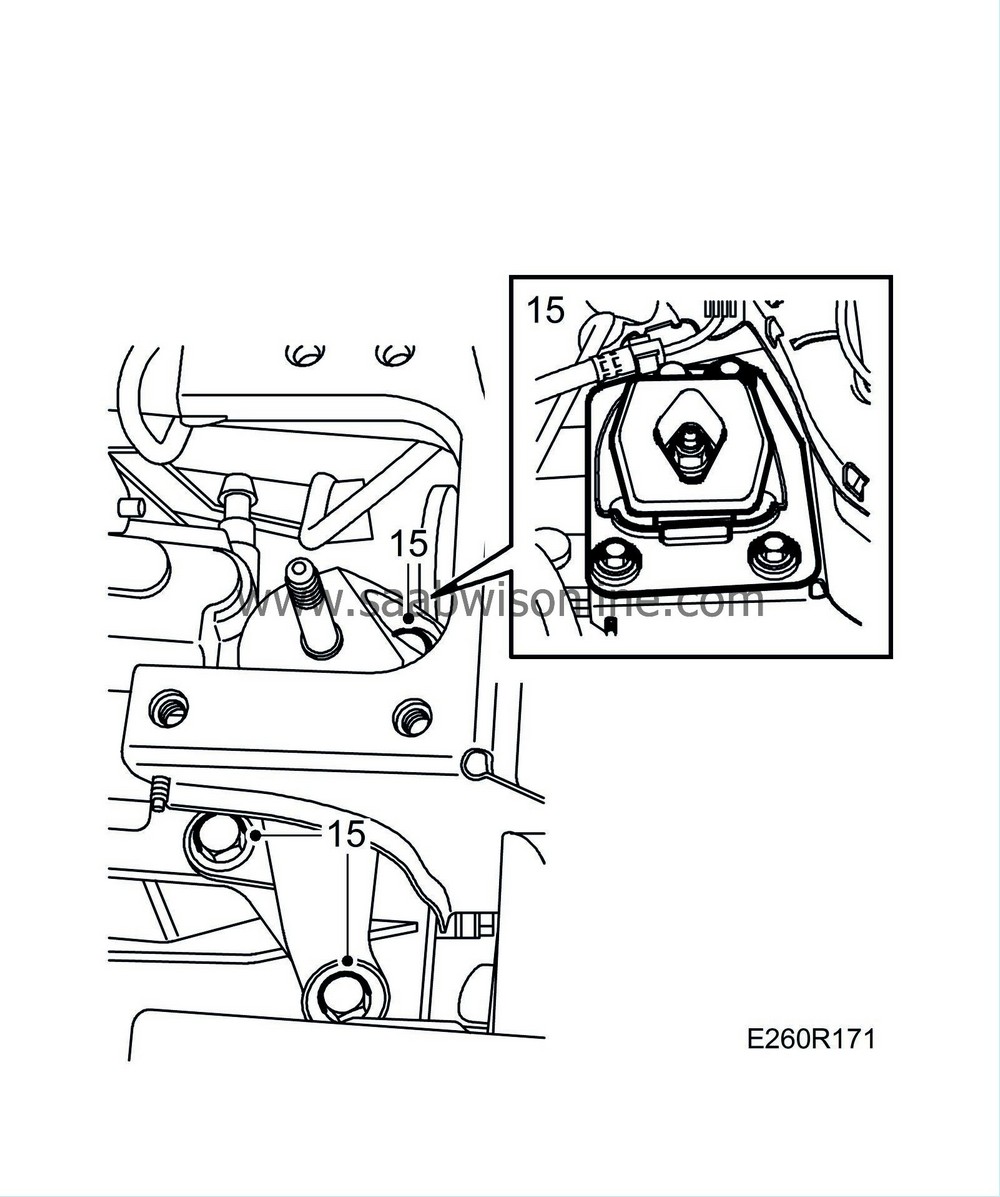
15.
|
Place a jack under the gearbox, remove the gearbox mounting and lower the gearbox against the subframe.
|
|
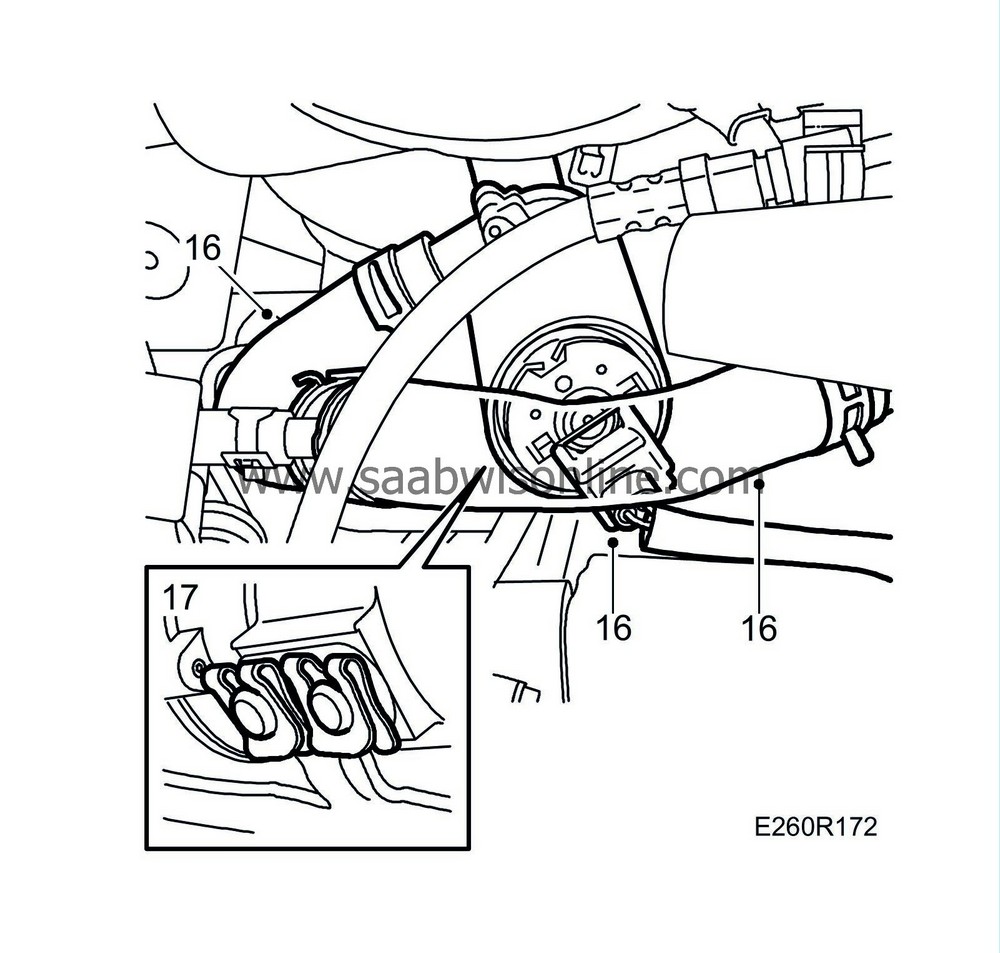
16.
|
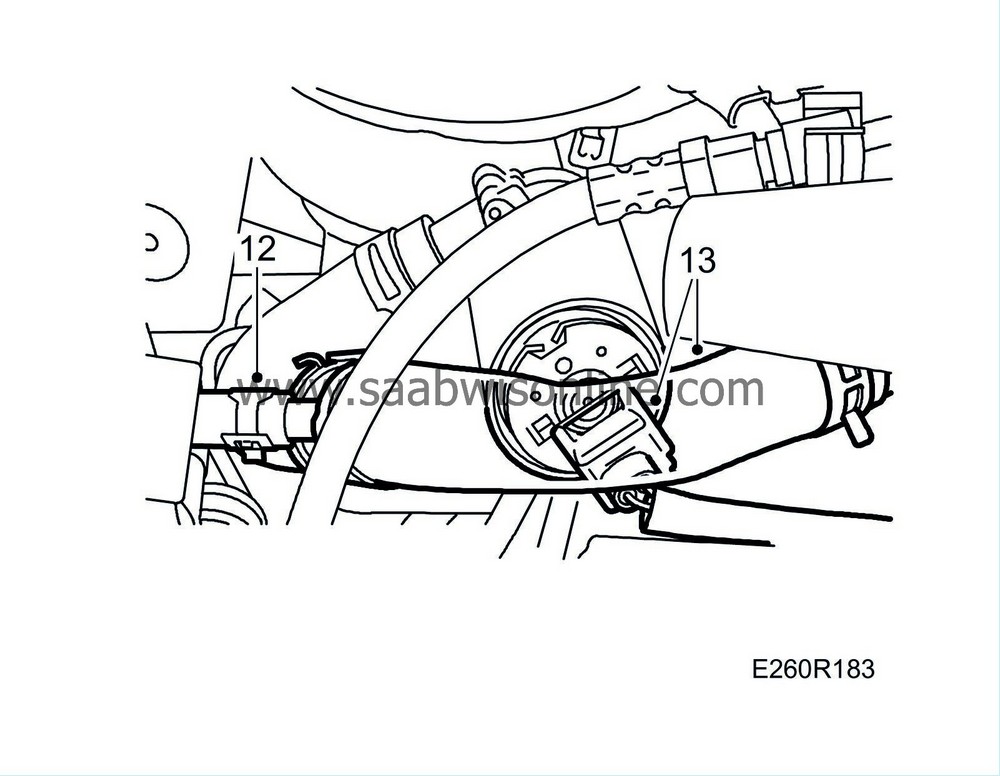
Disconnect the hose running from the auxiliary heater to the circulation pump, undo the heater side and unplug the circulation pump connector.
|
|
17.
|
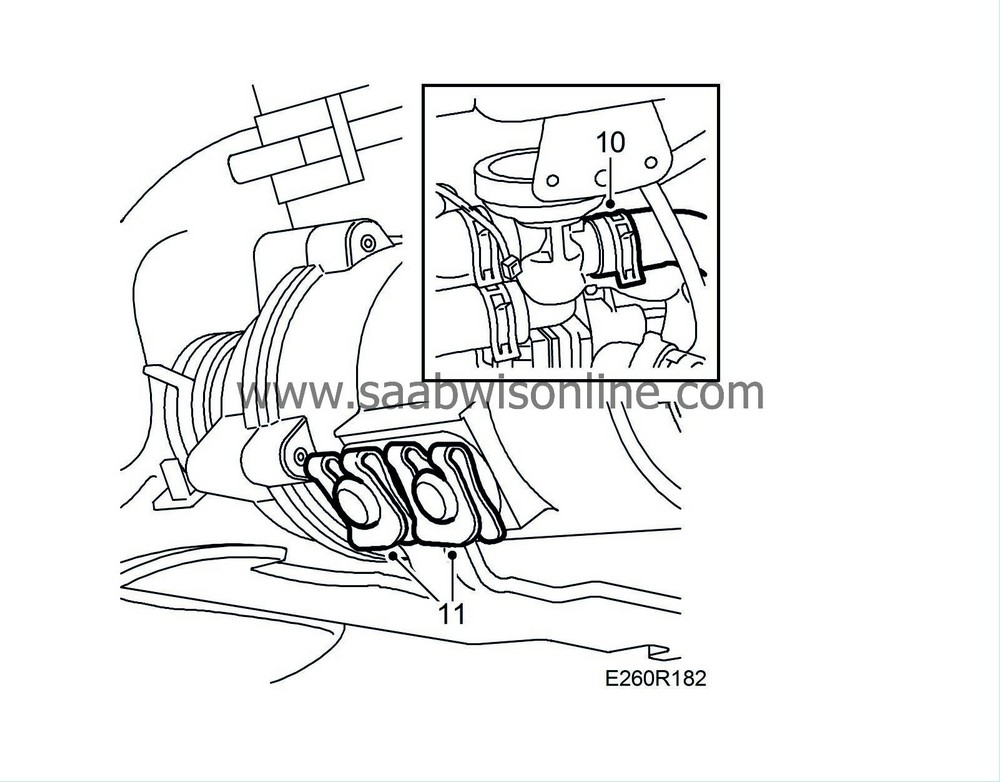
Remove the clips securing the circulation pump.
|
|
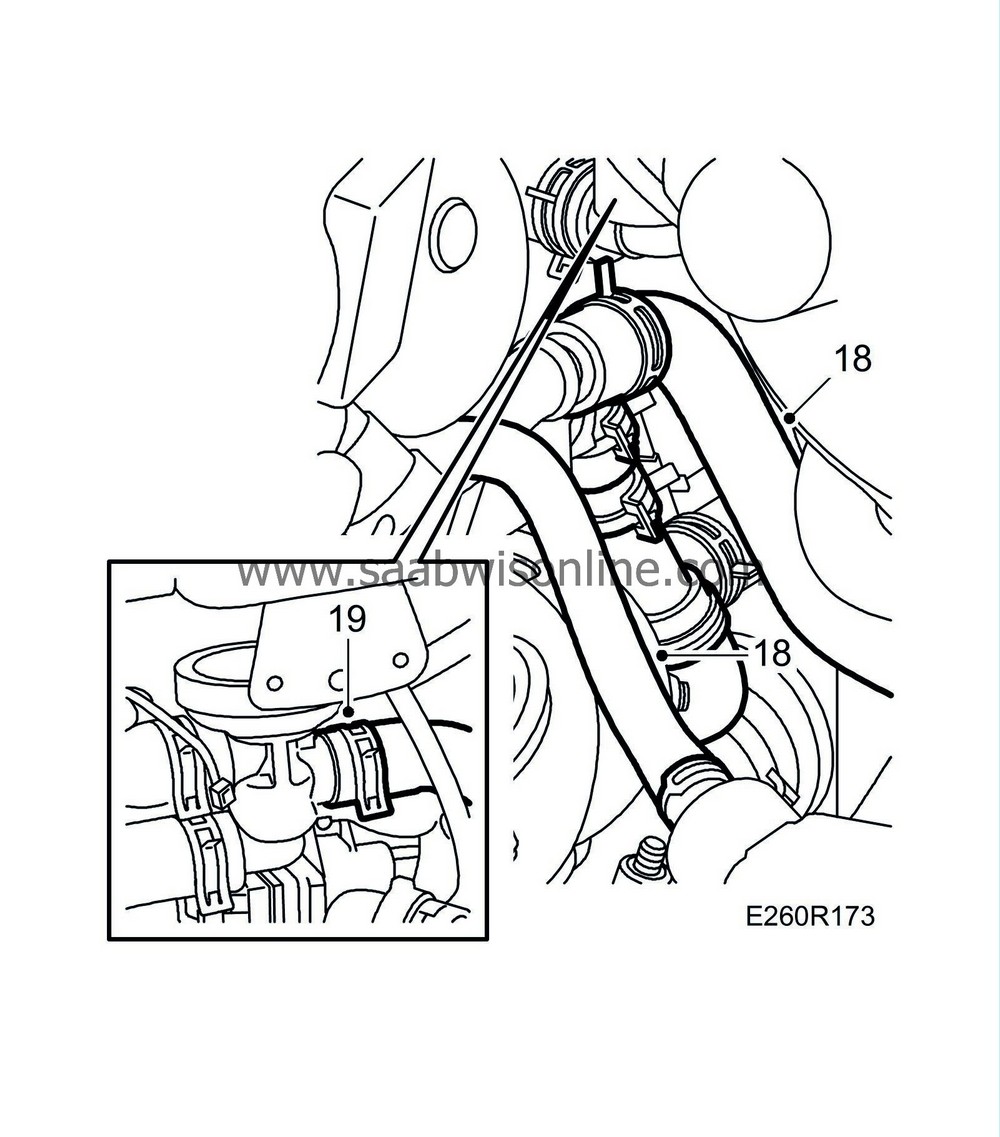
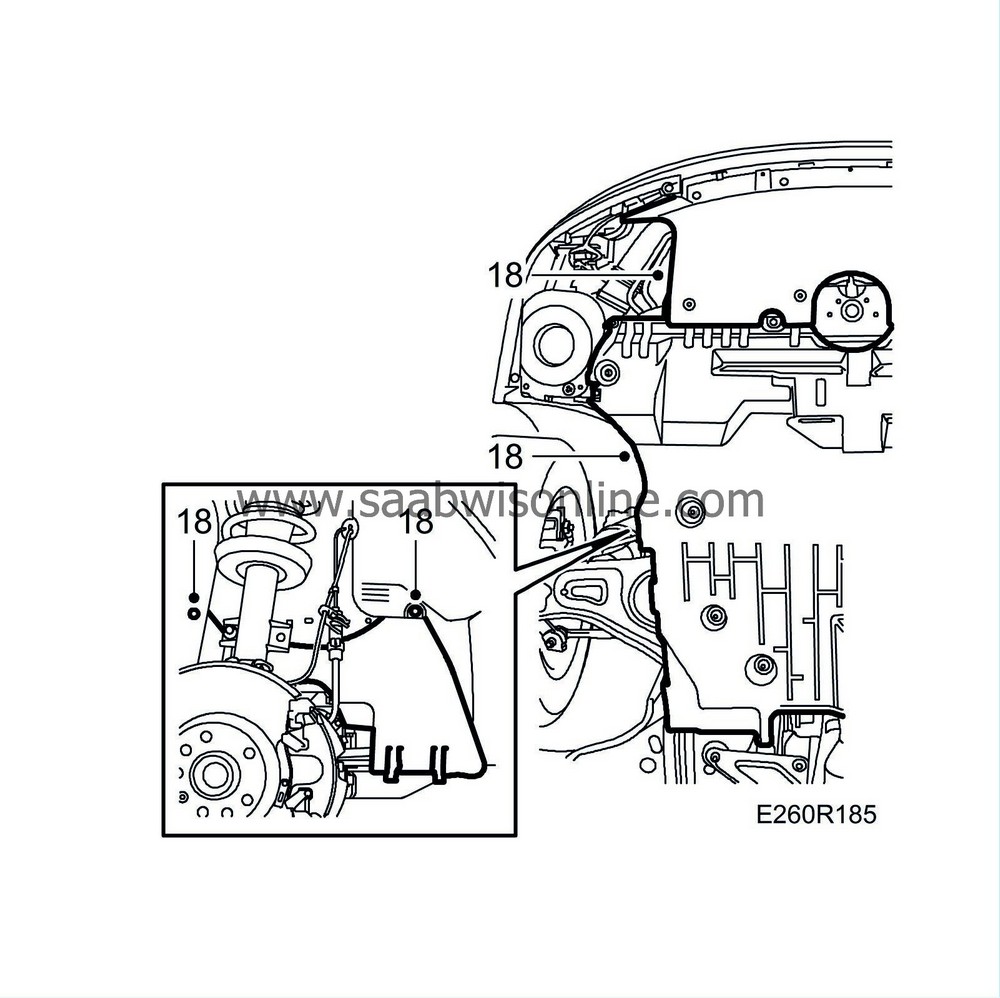
18.
|
Remove the thin water hose to the turbocharger and the thick hose to the rear cylinder bank and lift out the circulation pump with hoses.
|
|
19.
|
Remove the water hose between the auxiliary heater and the shut-off valve.
|
|
21.
|
Loosen the clamp on the auxiliary heater exhaust pipe and the clamp on the intake pipe. Remove the intake pipe.

|
|
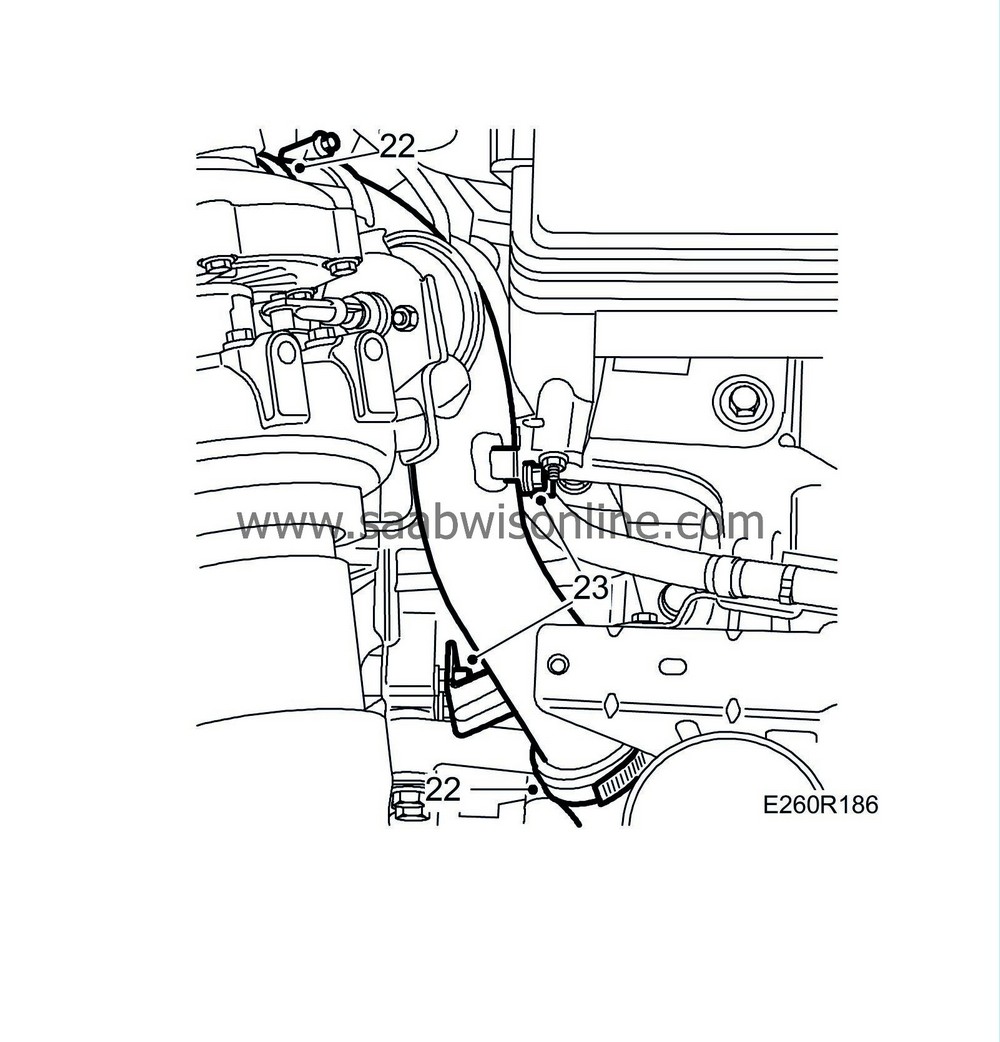
22.
|
Remove the triangular bracket and the auxiliary heater exhaust pipe.
|
|
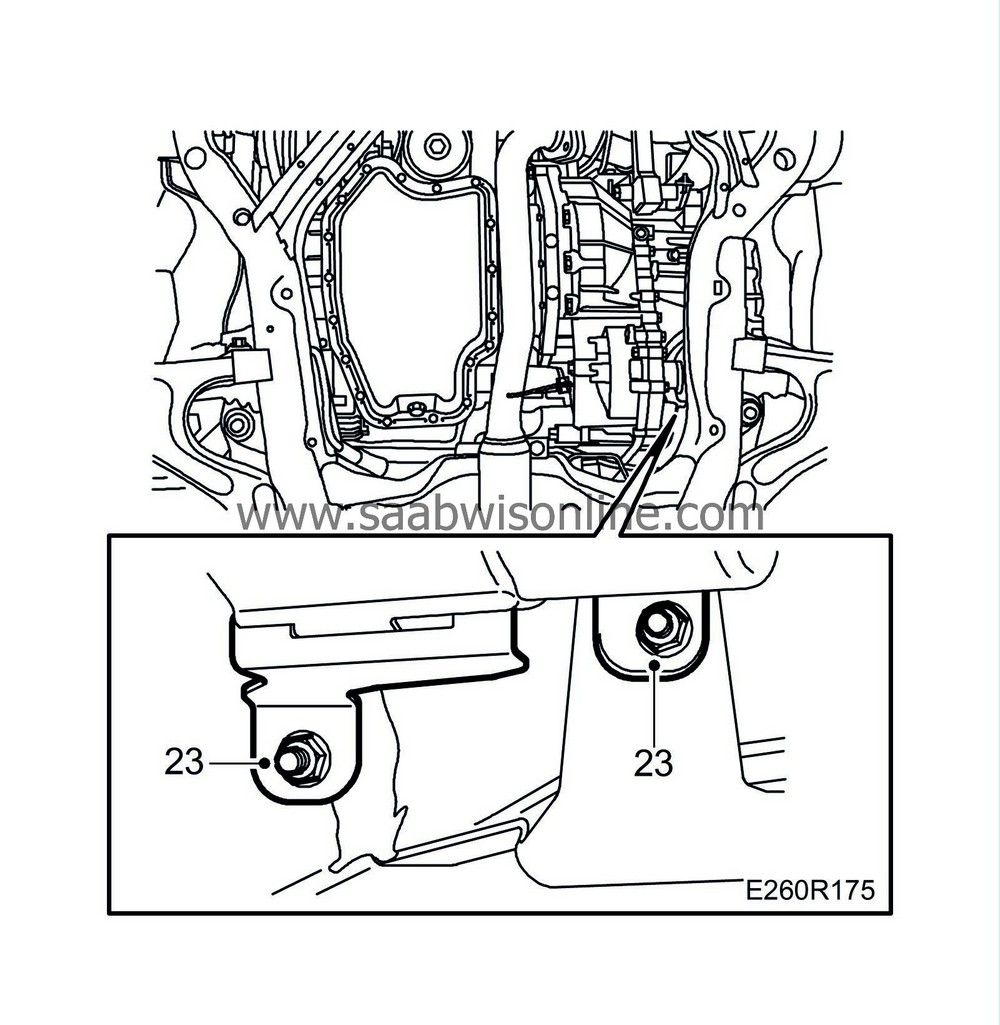
23.
|
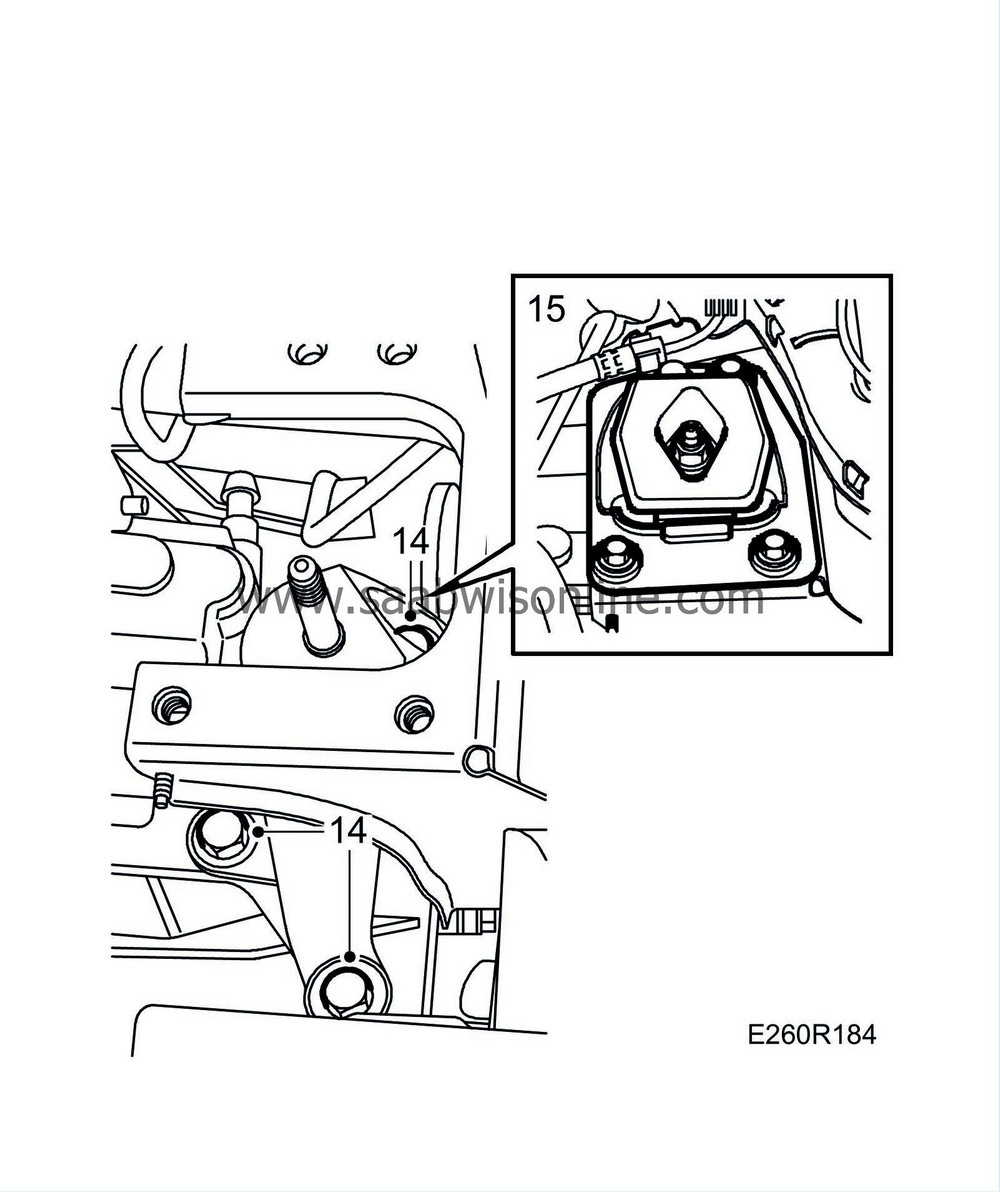
Loosen the two lower nuts on the auxiliary heater bracket.
|
|
24.
|
Lower the car to the floor.
|
|
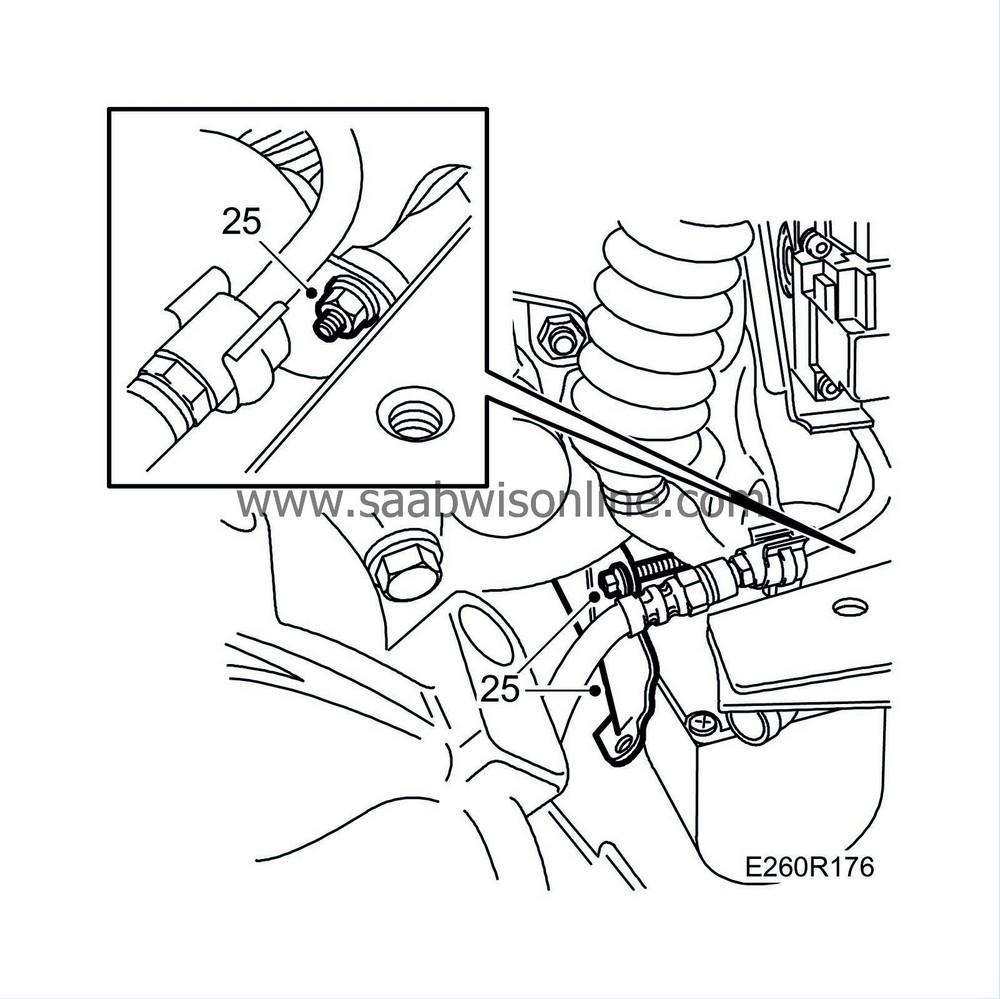
25.
|
Loosen the bolt on the auxiliary heater bracket and remove it. Loosen the upper nut on the auxiliary heater bracket.
|
|
26.
|
Unplug the reversing light electrical connector and the auxiliary heater connector.
|
|
27.
|
Move away the auxiliary heater together with its bracket from the structural member, separate the bracket and the auxiliary heater and remove the bracket.
|
|
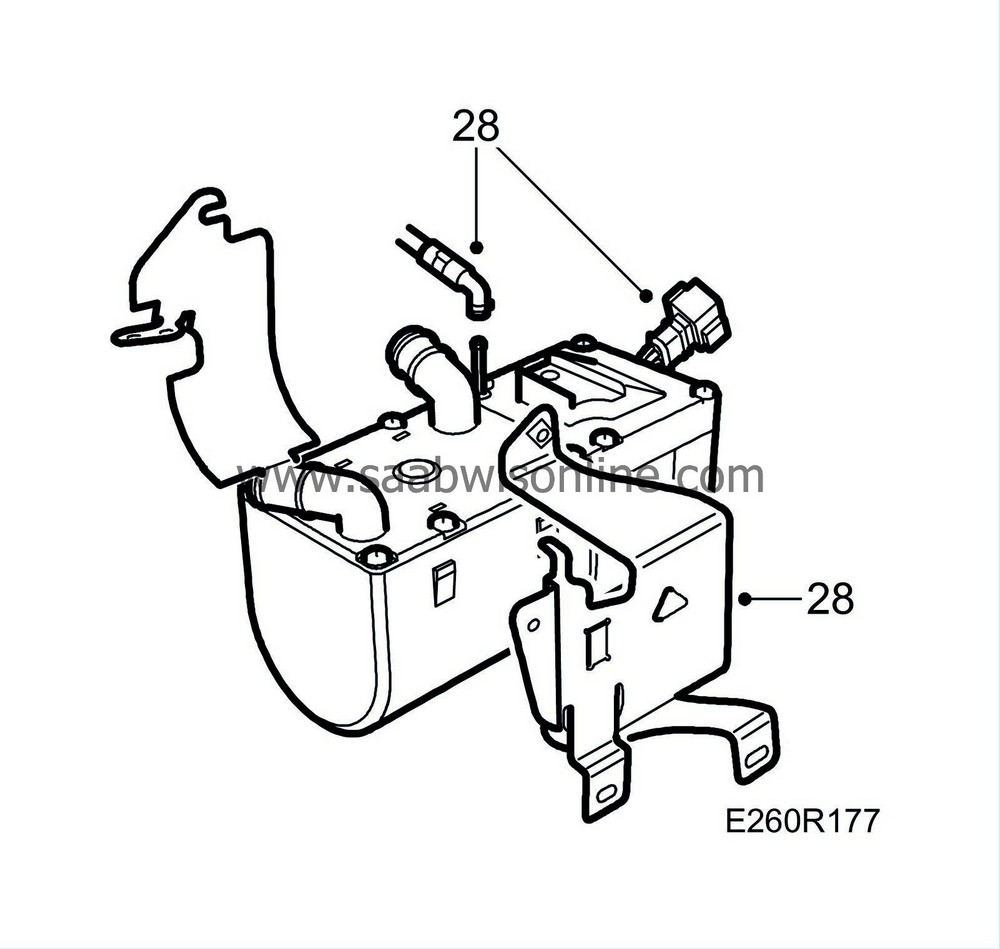
28.
|
Move the auxiliary down and release the fuel hose and the connector.
|
|
29.
|
Turn the auxiliary heater through ninety degrees and pull it forward/upward, put it on edge and remove it between the two brackets for the gearbox on the structural member.

|
|
1.
|
Move the auxiliary heater on edge between the two gearbox brackets on the structural member. Move it down and to the rear and turn the heater ninety degrees clockwise.
|
|
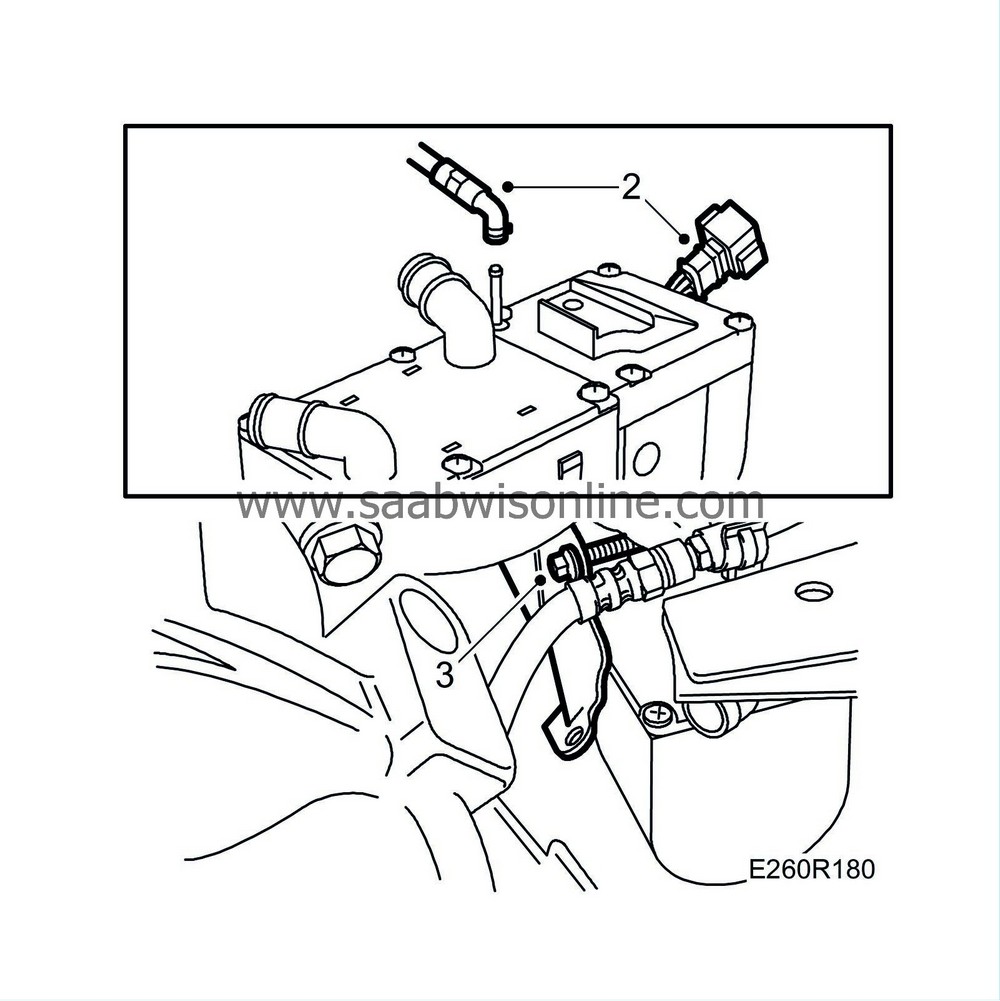
2.
|
Move the auxiliary heater up and fit the fuel hose and the auxiliary heater connector.
|
|
3.
|
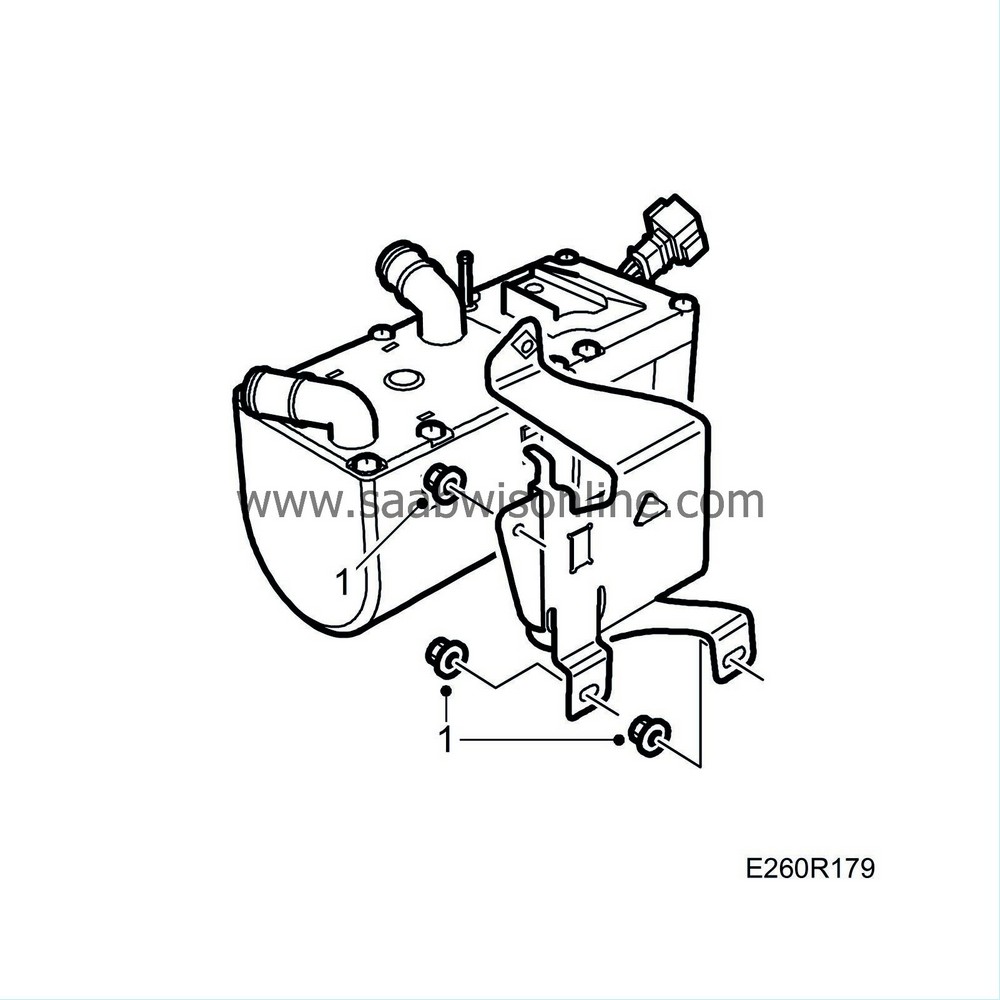
Move the auxiliary heater with its bracket towards the structural member, fit the bracket to the structural member and screw on the three nuts. Fit the mounting bracket outside the auxiliary heater.
|
|
4.
|
Plug in the reversing light connector.
|
|
6.
|
Fit the intake pipe and exhaust pipe. Turn the intake pipe so it does not touch the exhaust pipe.
|
|
7.
|
Tighten the clip on the intake pipe and the exhaust pipe.
|
|
8.
|
Screw on the exhaust pipe nuts. Fit the triangular bracket.
|
|
10.
|
Fit the water hose between the auxiliary heater and the shut-off valve.
|
|
11.
|
Fit the circulation pump with the clips.
|
|
12.
|
Fit the thin water hose to the turbocharger and the thick hose to the rear cylinder bank.
|
|
13.
|
Fit the water hose running from the circulation pump to the auxiliary heater. Plug in the circulation pump connector.
|
|
14.
|
Place a jack under the gearbox. Fit the torque arm.
Tightening torque 90 Nm +90°
|
|
15.
|
Jack up the gearbox towards the subframe and move it back. Fit the gearbox bracket.
|
|
18.
|
Fit the side cover and dust cover. Fit the lower and front engine covers.
|
|
20.
|
Fit the front left wheel, see
Wheels
.
|
|
21.
|
Lower the car to the floor.
|
|
22.
|
Fit the charge air pipe (metal) and the rubber hose from the turbocharger.
|
|
23.
|
Fit the cable bracket on the charge air pipe.
|
|
24.
|
Fit the diaphragm box.
Tightening torque 8 Nm (6 lbf ft)
. Plug in the connector and fit the hose on the diaphragm box.

|
|
25.
|
Fit the heat cover for the turbocharger.
|
|
26.
|
Connect the clutch pressure hose to the gearbox. Remove the pinch-off pliers.
|
|
27.
|
Connect a plastic hose to the air nipple on the slave cylinder pipe and open it until brake fluid comes out. Tighten the nipple and try the clutch. If it does not work, carry out
Bleeding clutch hydraulic system in car
. Check the integrity. XXXE421R715
|
|
28.
|
Fit the fuse holder.

|
|
29.
|
Fit the battery tray, battery and battery cover.
|


