PRE-RELEASE
Intermediate shaft, 4-cyl.
| Intermediate shaft, 4-cyl. |
| To remove |
| 1. |
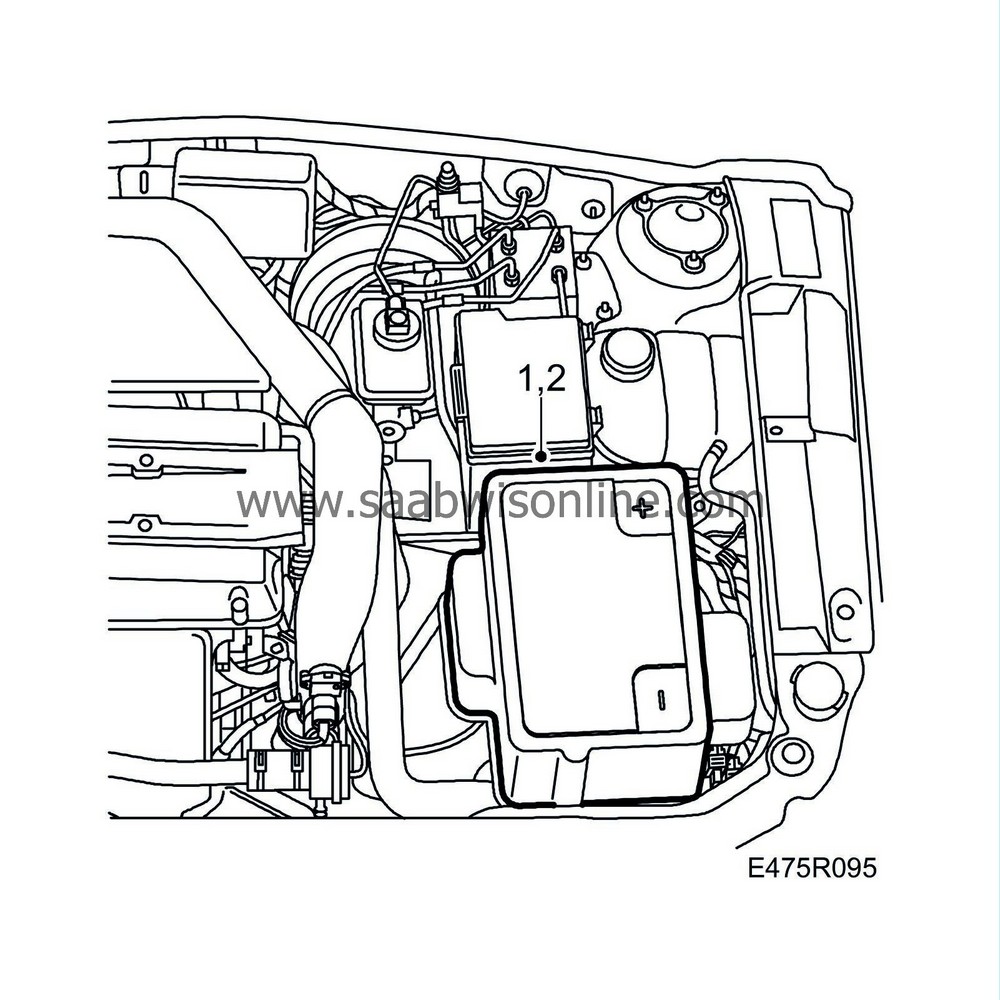
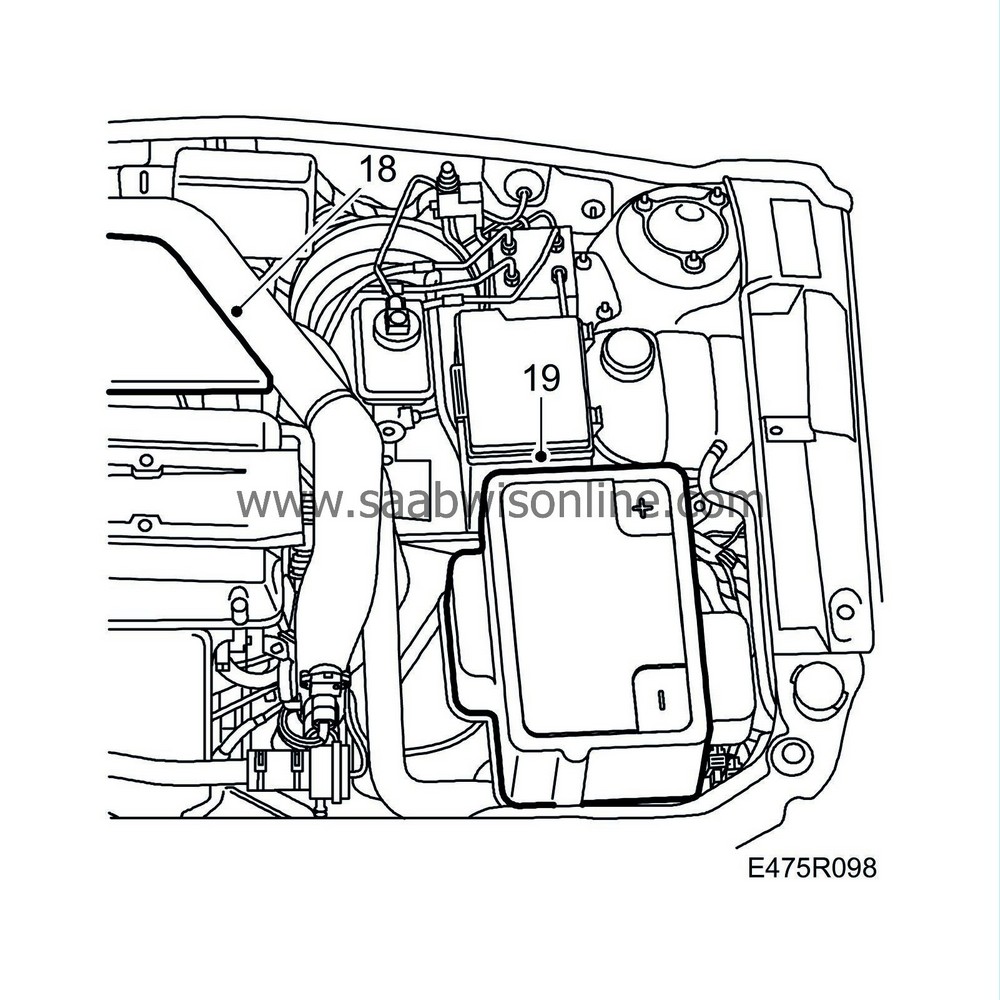
Cover the wings and lift off the battery cover.
|
|
| 2. |
Remove the negative lead from the battery.
|
|
| 3. |
Raise the car.
|
|
| 4. |
Remove the RH wheel.
|
|
| 5. |
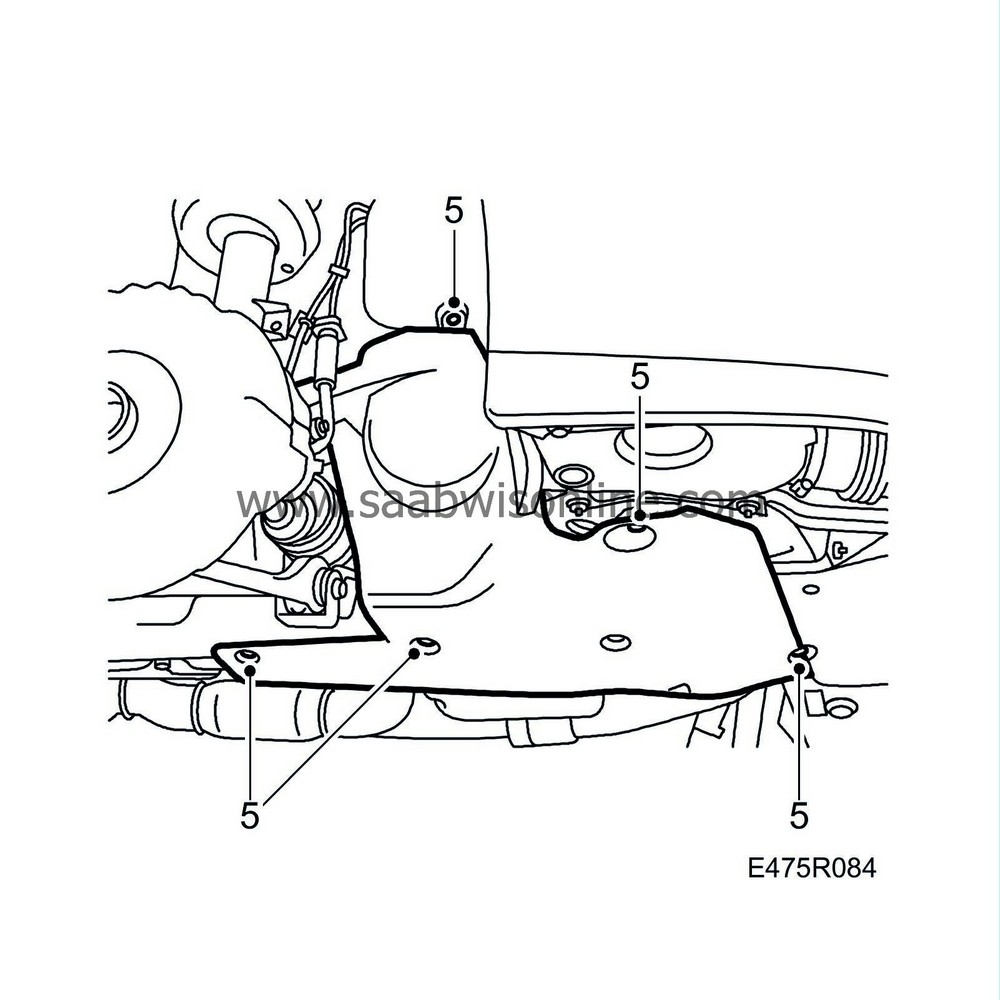
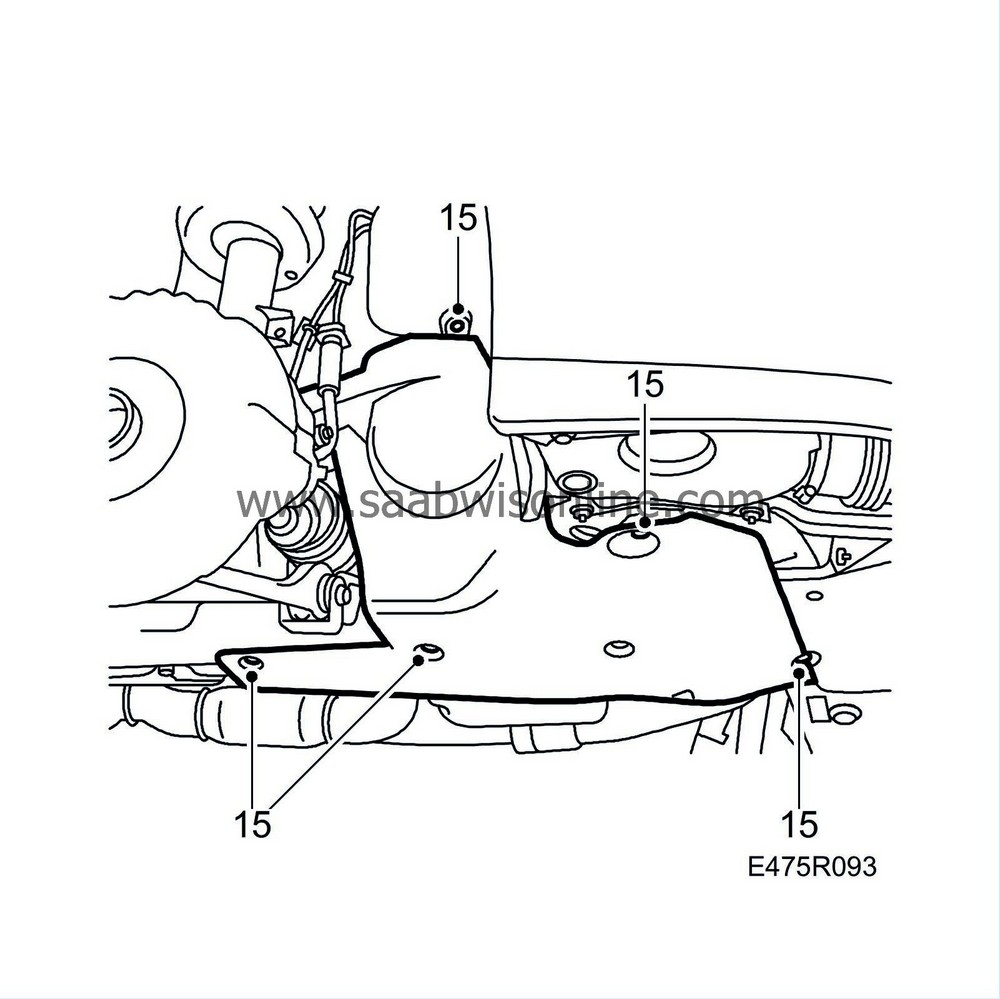
Remove the cover on the belt circuit.
|
|
| 6. |
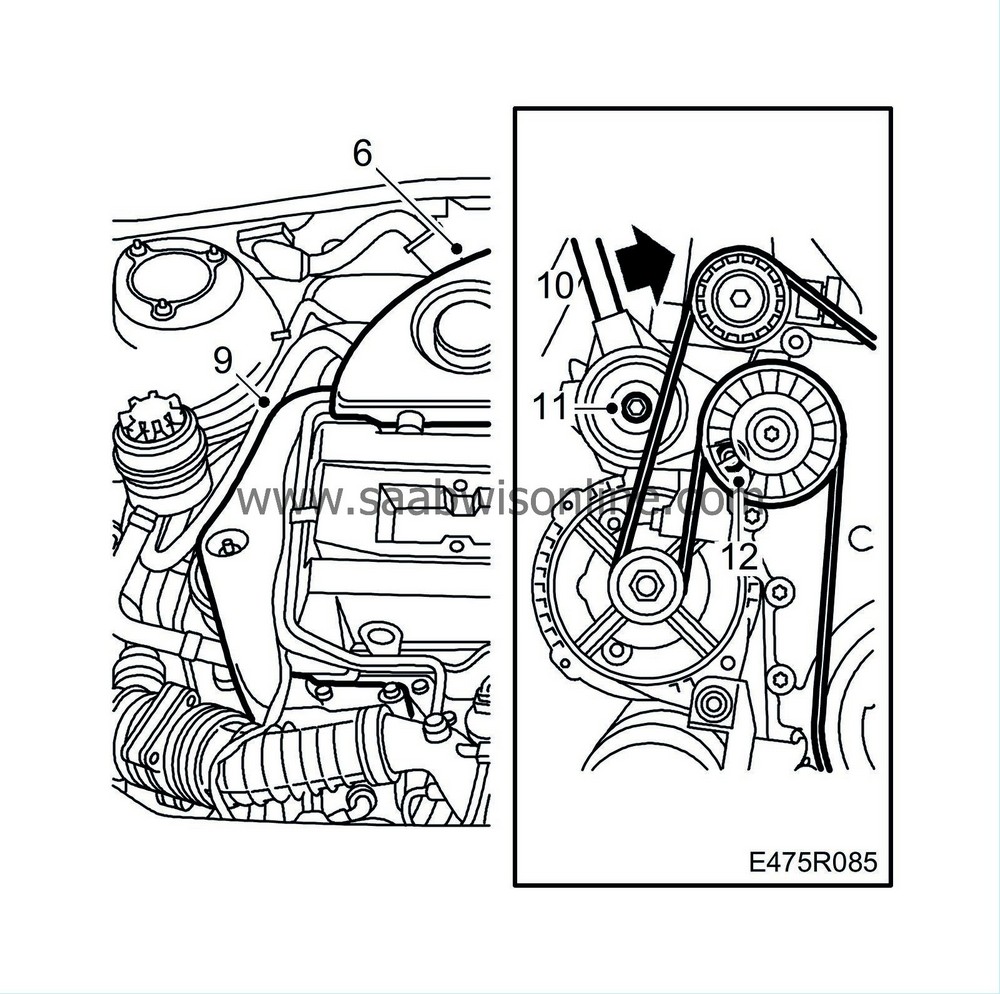
Remove the upper engine cover.
|
|
| 7. |
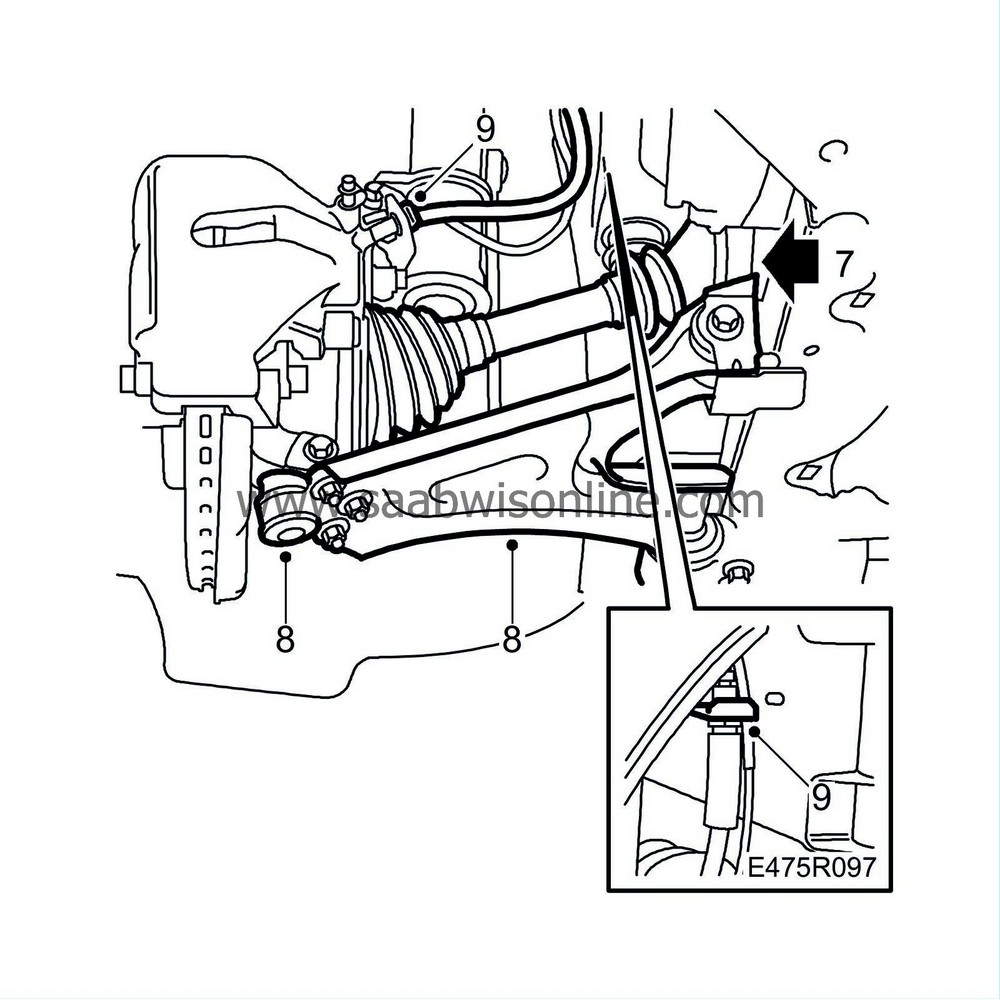
Remove the clamp for the steering servo pipe.
|
|
| 8. |
Place a
wedge
between the oil sump and the subframe.
|
|
| 9. |
Remove the upper engine bracket.
|
|
| 10. |
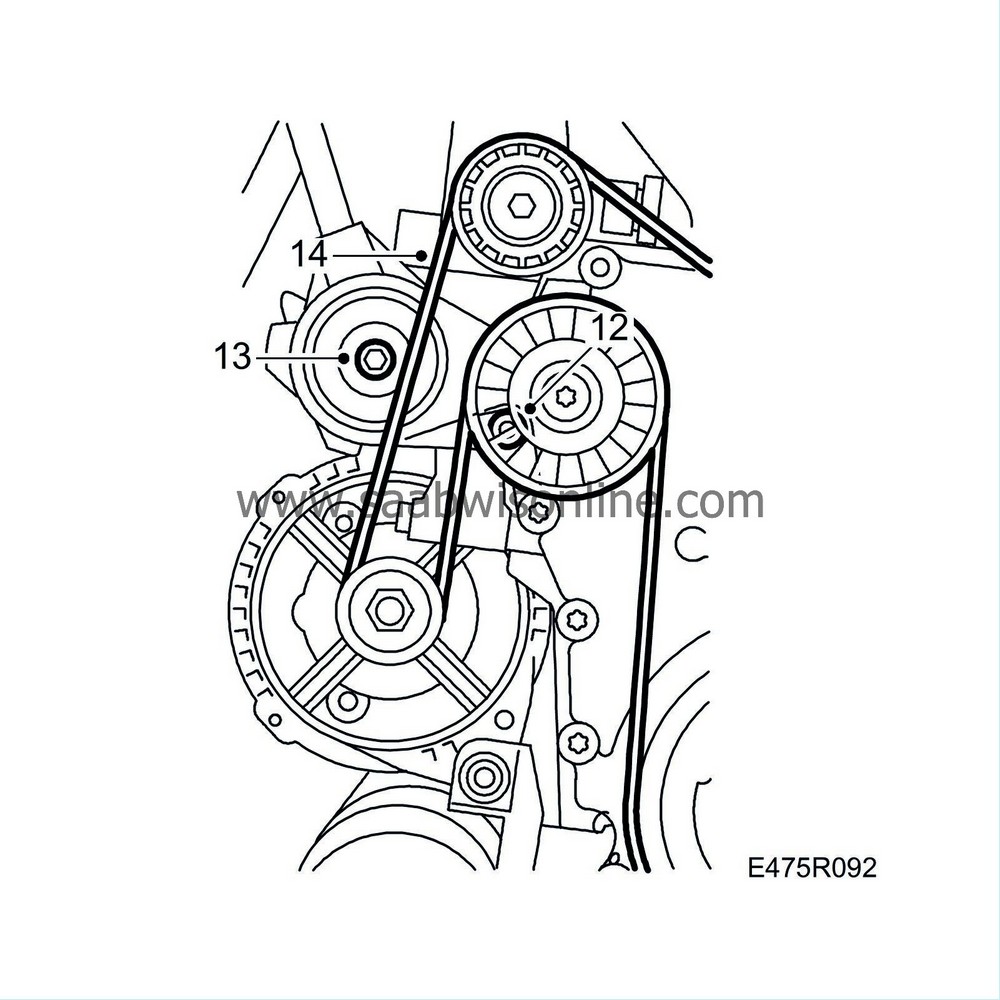
Relieve the tension on the belt tensioner with
83 95 254 Drawbar handle, hydraulic belt tensioner
and lift off the multigroove belt.
|
|
| 11. |
Remove the belt tensioner using an 8 mm allen key.
|
|
| 12. |
Remove the upper generator bolt with an 8 mm allen key
|
|
| 13. |
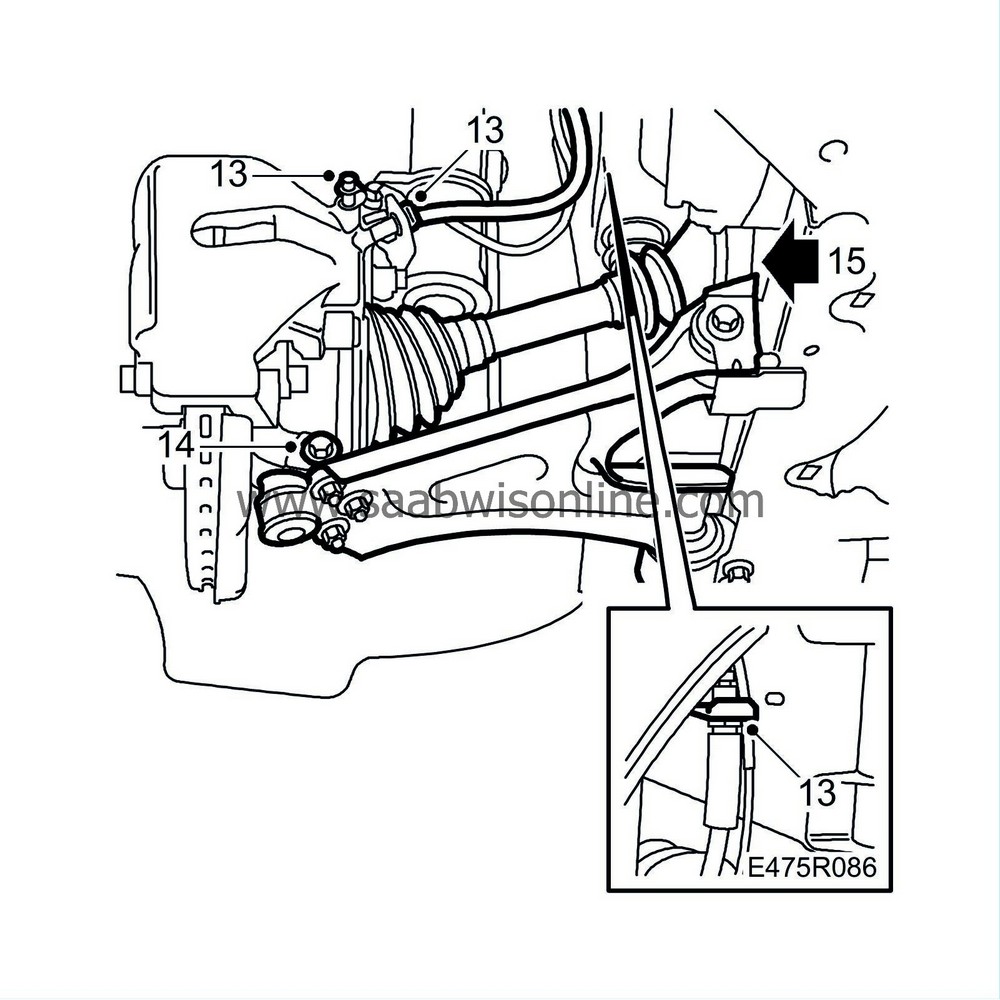
Undo the clips for the brake hose and bend the hose to one side. Detach the ABS cable.
|
|
| 14. |
Remove the outer suspension arm through bolt from the steering swivel member.
|
|
| 15. |
Tap the drive shaft off the intermediate shaft with a brass drift and hammer.
|
|
| 16. |
Prise loose and lower the suspension arm and secure it in this position with a block of wood between the suspension arm and the anti-roll bar.
|
|
| 17. |
Turn the wheel to the left for better access to the drive shaft. Tap the drive shaft further out if necessary. Grip the MacPherson strut and pull. The drive shaft will follow. Then lower it down in front of the suspension arm.
|
|
| 18. |
Remove the generator cables and the lower generator bracket bolt.
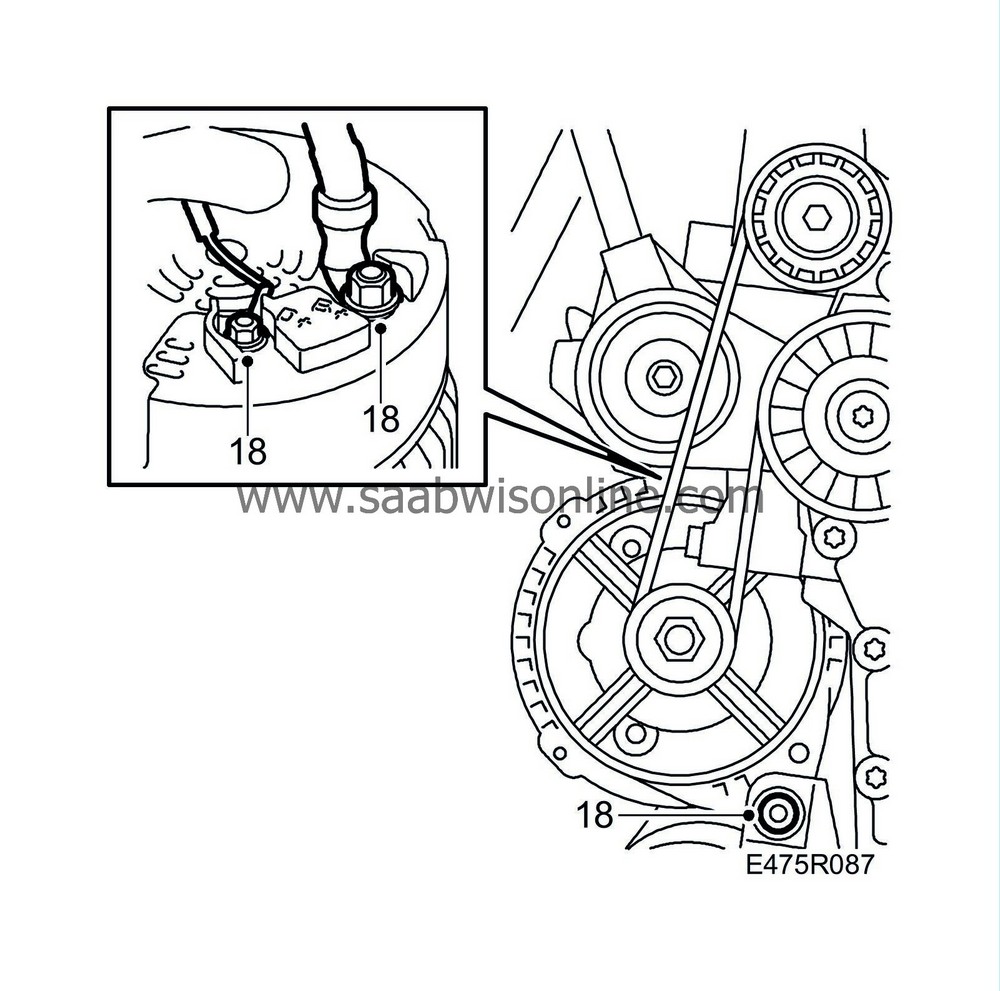
|
|
| 19. |
Move the generator out of the way.
|
|
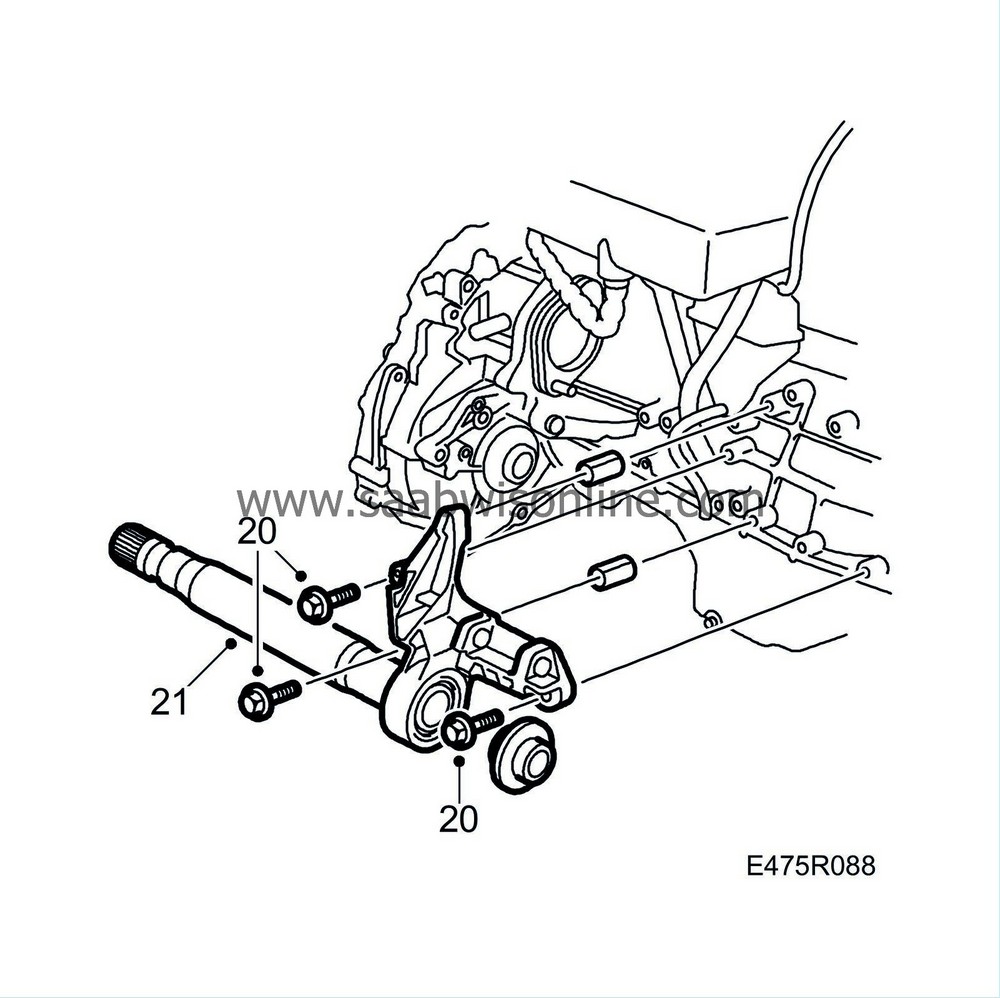
| 20. |
Unscrew the support bearing bracket screws.
|
||||||||||
| 21. |
Fold out the support bearing bracket from the guide pins in the engine block and extract the intermediate shaft from the gearbox.
|
|
| To fit |
| 1. |
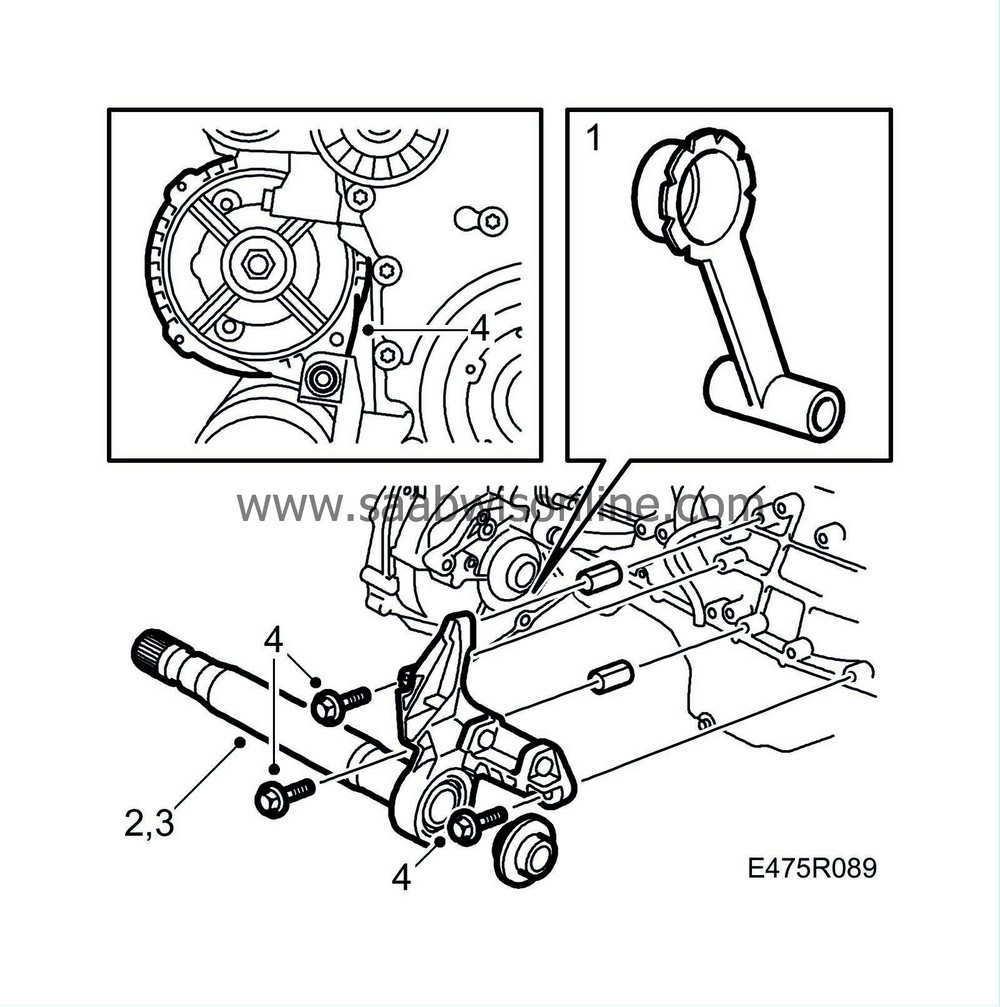
Fit
83 95 162 Protective collar, drive shafts
into the sealing ring.
|
||||||||||
| 2. |
Make sure that the intermediate shaft is clean and then align the intermediate shaft in the tool.
|
||||||||||
| 3. |
Push in the rest of the shaft.
|
|
| 4. |
Guide the support bearing bracket onto the upper locating pin and then tighten the bearing bracket.
Tightening torque up to M06: 47 Nm (34 lbf ft) Tightening torque from M07: 38 Nm (28 lbf ft) |
|
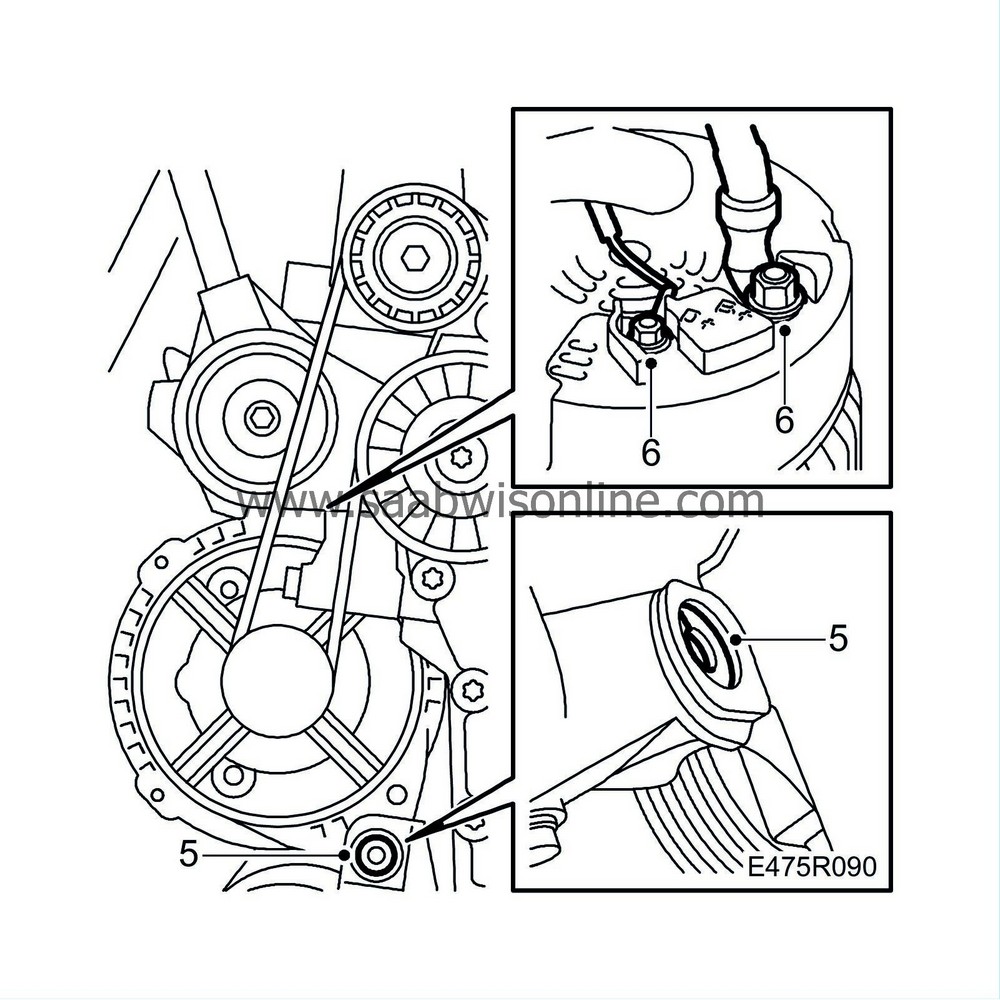
| 5. |
Make sure that the adjuster sleeves in the generator bracket is tapped out approx. 1 mm to facilitate fitting. Then fit the two generator retaining bolts and tighten the lower one.
|
|
| 6. |
Connect the generator cables.
|
|
| 7. |
Tilt out the MacPherson strut and attach the drive shaft to the intermediate shaft until the circlip snaps in place. Lubricate the splines with universal paste 87 81 684, see
Summary of lubricants and sealants.
|
|
| 8. |
Remove the wedge, raise the suspension arm and connect the steering swivel member. Fit and tighten the bolt.
Tightening torque 50 Nm (37 lbf ft)
|
|||||||||
| 9. |
Secure the brake hose to the mounting on the steering swivel member and fit the clips. Fit the ABS cable. (2 mountings)
|
|
| 10. |
Fit the upper engine mounting.
|
|
| 11. |
Fit the clamp for the steering servo pipe.
|
|
| 12. |
Tighten the upper bolt on the generator.
|
|
| 13. |
Fit the belt tensioner.
|
|
| 14. |
Fit the pulley.
|
|
| 15. |
Fit the cover for the belt circuit.
|
|
| 16. |
Fit the wheel. See
Wheels
Tightening torque 110 Nm (80 lbf ft)
|
||||||||||
| 17. |
Lower the car to the floor.
|
|
| 18. |
Fit the upper engine cover.
|
|
| 19. |
Connect the negative lead to the battery and fit the battery cover.
|
|
| 20. |
Fill up with automatic transmission fluid to the correct level. See
Topping up with transmission fluid
.
|
|
| 21. |
Set the clock and radio code if applicable.
|
|


 Warning

