Fitting the gearbox, V6 diesel
|
|
Fitting the gearbox, V6 diesel
|
|
3.
|
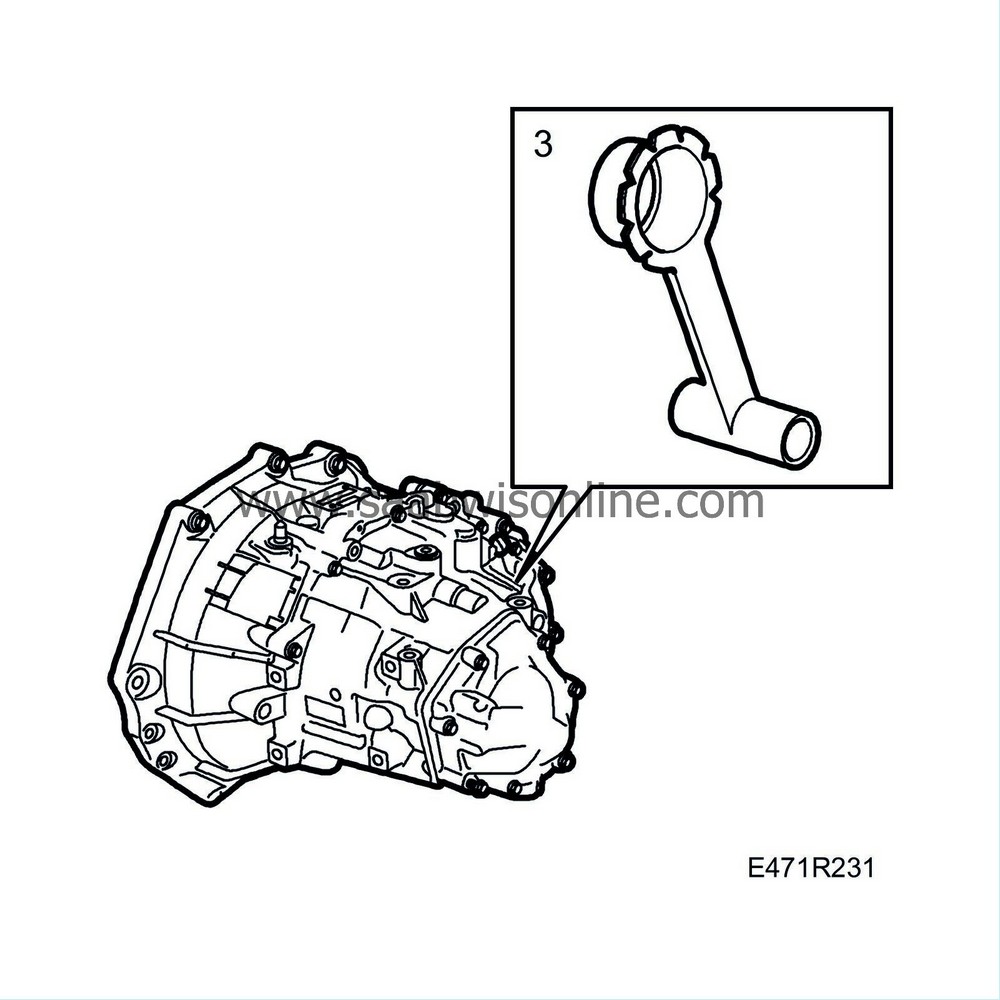
Fit
83 95 162 Protective collar, drive shafts
in the right-hand shaft seal in the gearbox to protect the seal when the gearbox is refitted.
|
Important
|
|
Always replace the drive shaft seals. Lubricate with gearbox oil, see

|
|
|
|
|
5.
|
Ensure that the locating sleeves in the engine are correctly positioned. Lubricate with thin corrosion protection oil.
|
|
7.
|
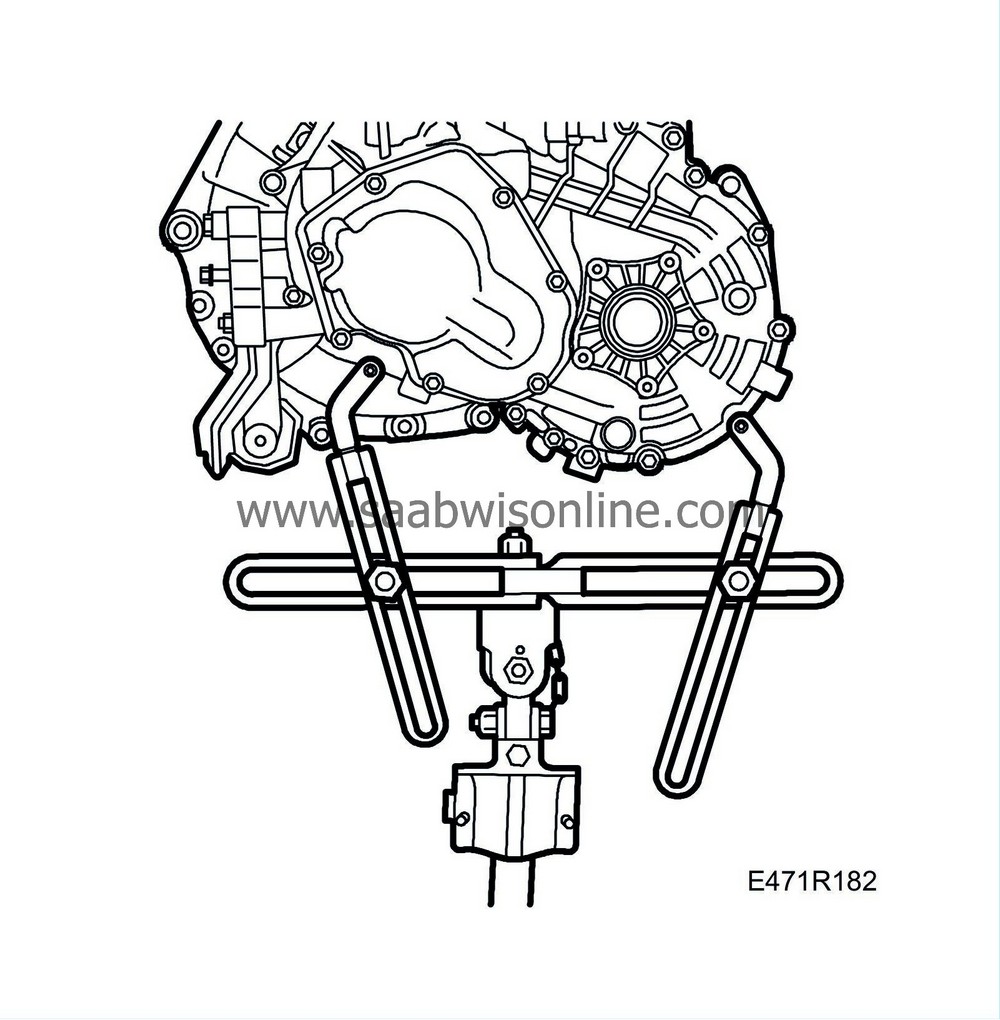
Fit the gearbox using the lifting tool on a column jack.
|
Important
|
|
Insert the gearbox until around 20 mm remains, and remove tool 83 95 162.
|
|
|
|
|
8.
|
Insert the remainder of the gearbox. Turn the crankshaft if necessary to seat the gearbox correctly.
|
|
9.
|
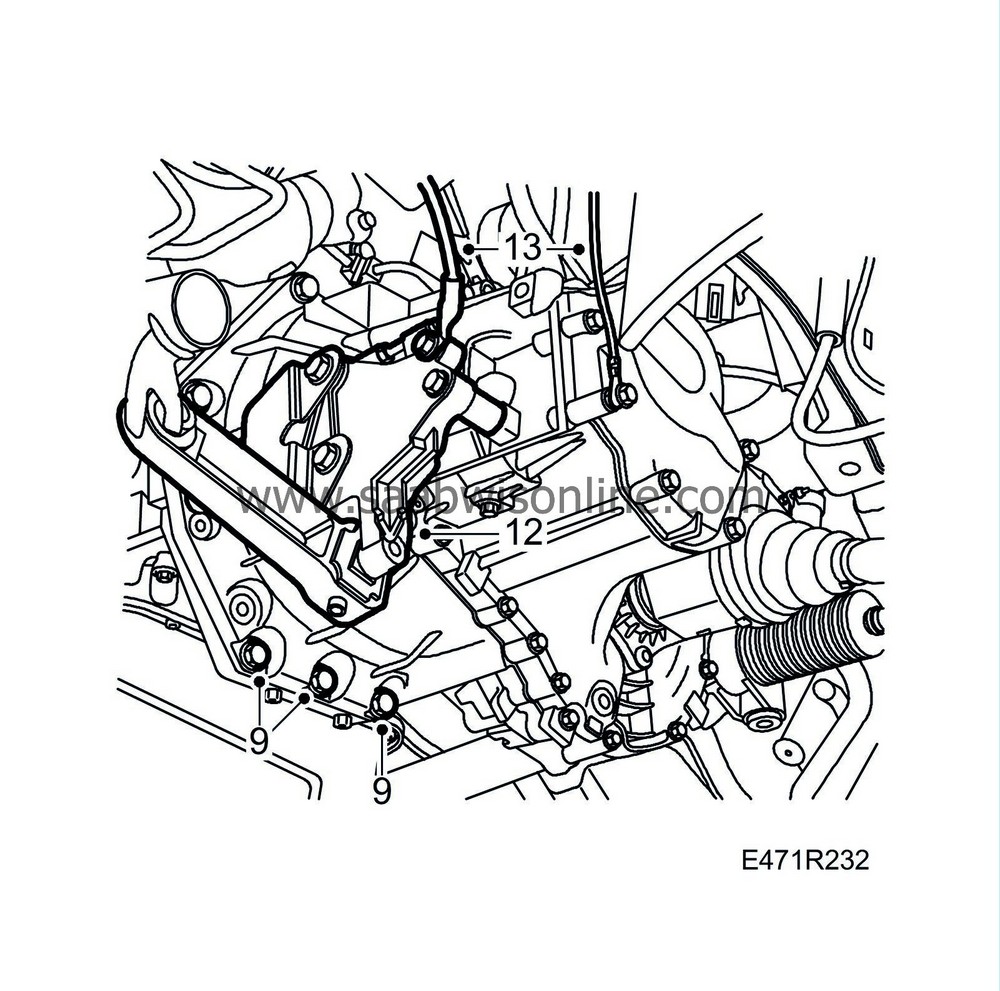
Fit and tighten the lowest bolts between engine and gearbox.
Tightening torque: 40 Nm (30 lbf ft)
|
|
10.
|
Remove the lifting tool from the gearbox and lower the jack.
Refit the gearbox bolts.
Tightening torque: 24 Nm (18 lbf ft)
|
|
11.
|
Fit the other gearbox bolts which are accessed from below.
Tightening torque: 70 Nm (52 lbf ft)
|
|
12.
|
Fit the torque rod fixing on the gearbox.
Tightening torque: 41 Nm (30 lbf ft)
|
|
13.
|
Fit the ground leads to the mounting and gearbox.
|
|
14.
|
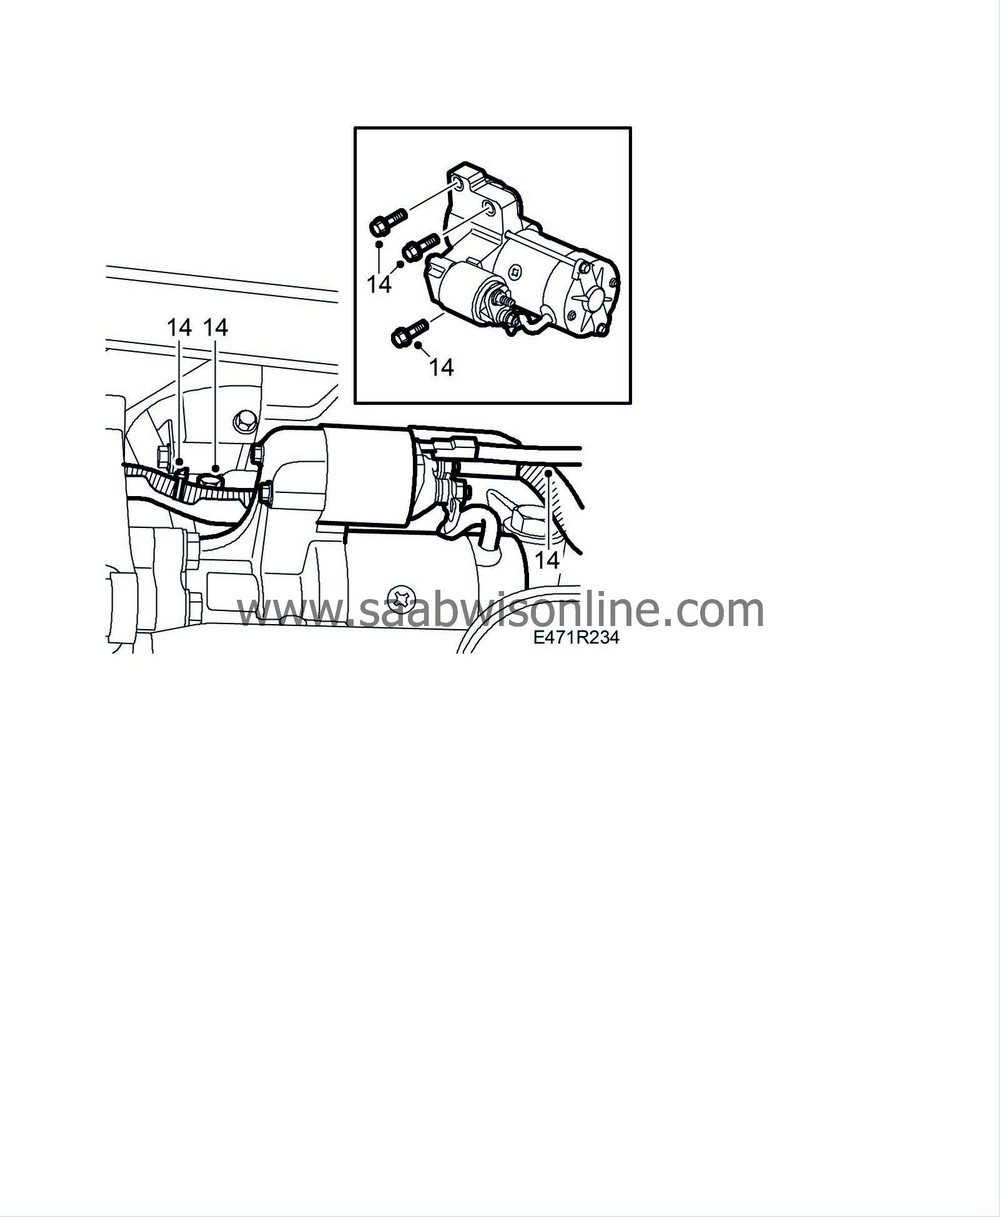
Fit the starter motor with electrical connections and cable duct.
|
|
15.
|
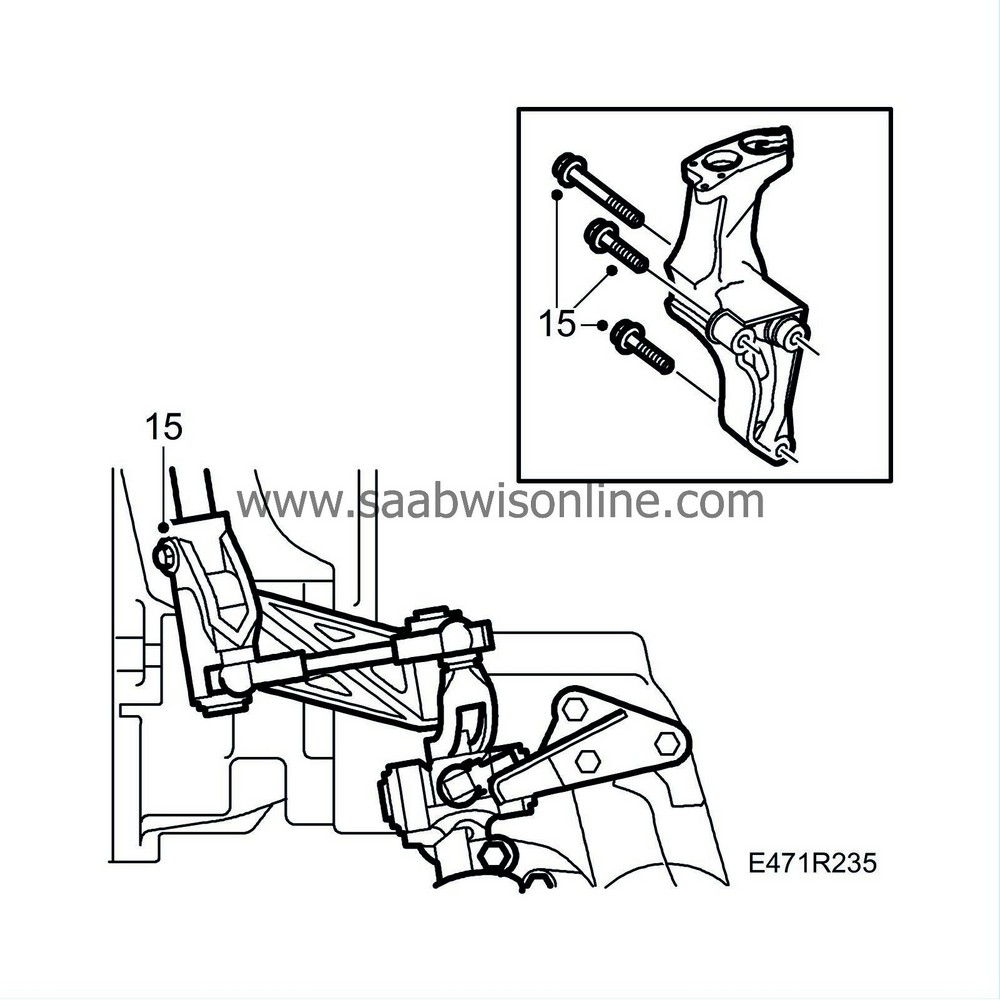
Fit the rear engine mounting with gear linkage. Fit the shim and connect the linkage to the gearbox. Tighten the bolts. Use
74 96 268 Thread locking adhesive
on the bolts to the gear linkage.
Tightening torque engine mounting, 60 Nm (44 lbf ft)
gear linkage, 20 Nm (15 lbf ft)
|
|
17.
|
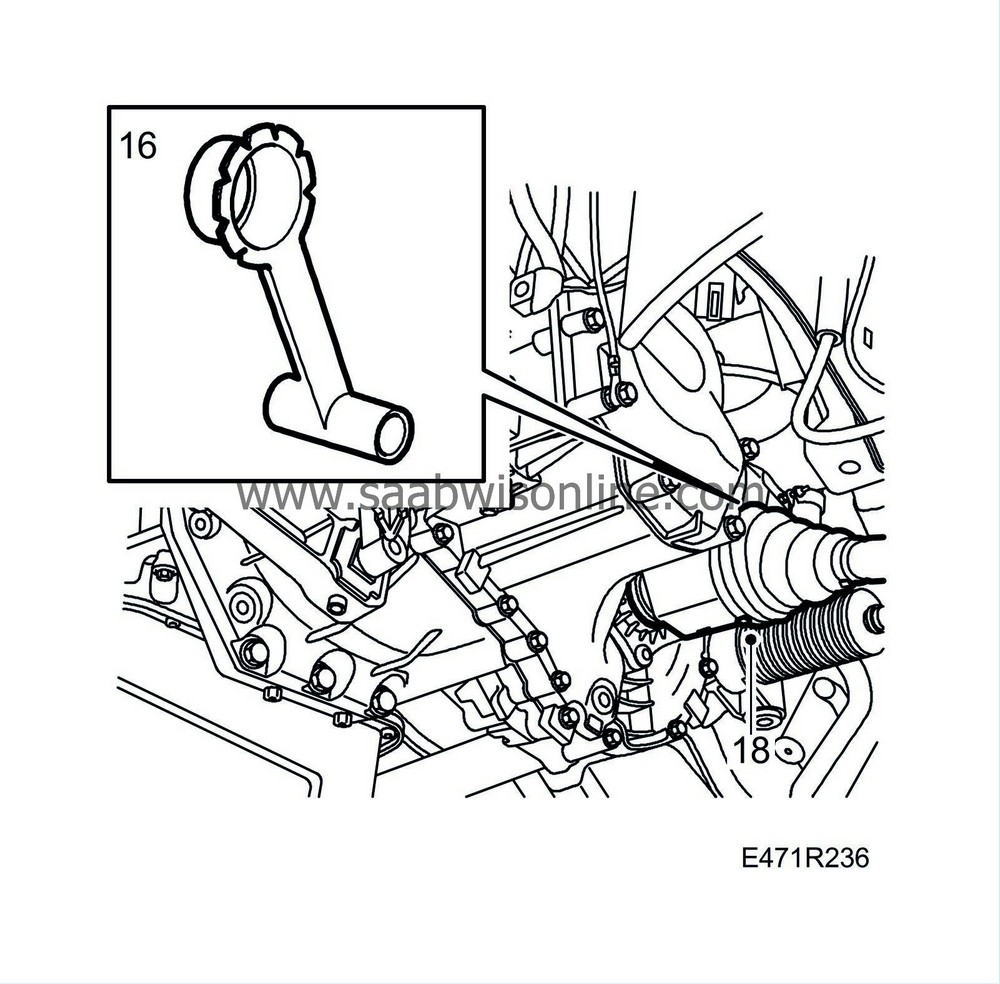
Ensure that the driver is clean and then insert the driver in the tool.
|
Important
|
|
Fit the driver in the gearbox until around 20 mm remains, and twist off the tool before the shaft sealing surface reaches the shaft seal.
|
|
|
|
|
18.
|
Insert the remainder of the shaft until the circlips engage.
|
|
19.
|
Lower the car to the floor.
|
|
20.
|
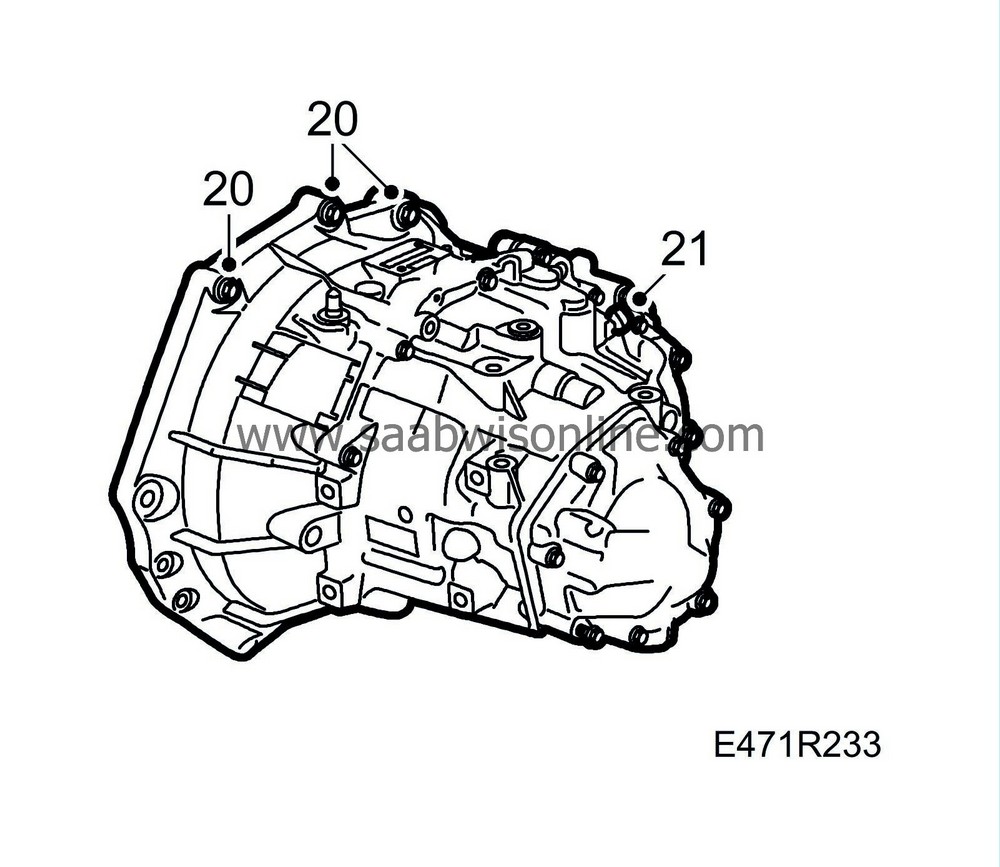
Fit the gearbox upper bolts.
Tightening torque: 70 Nm (52 lbf ft)
|
|
21.
|
Connect the reversing light switch connector.
|
|
22.
|
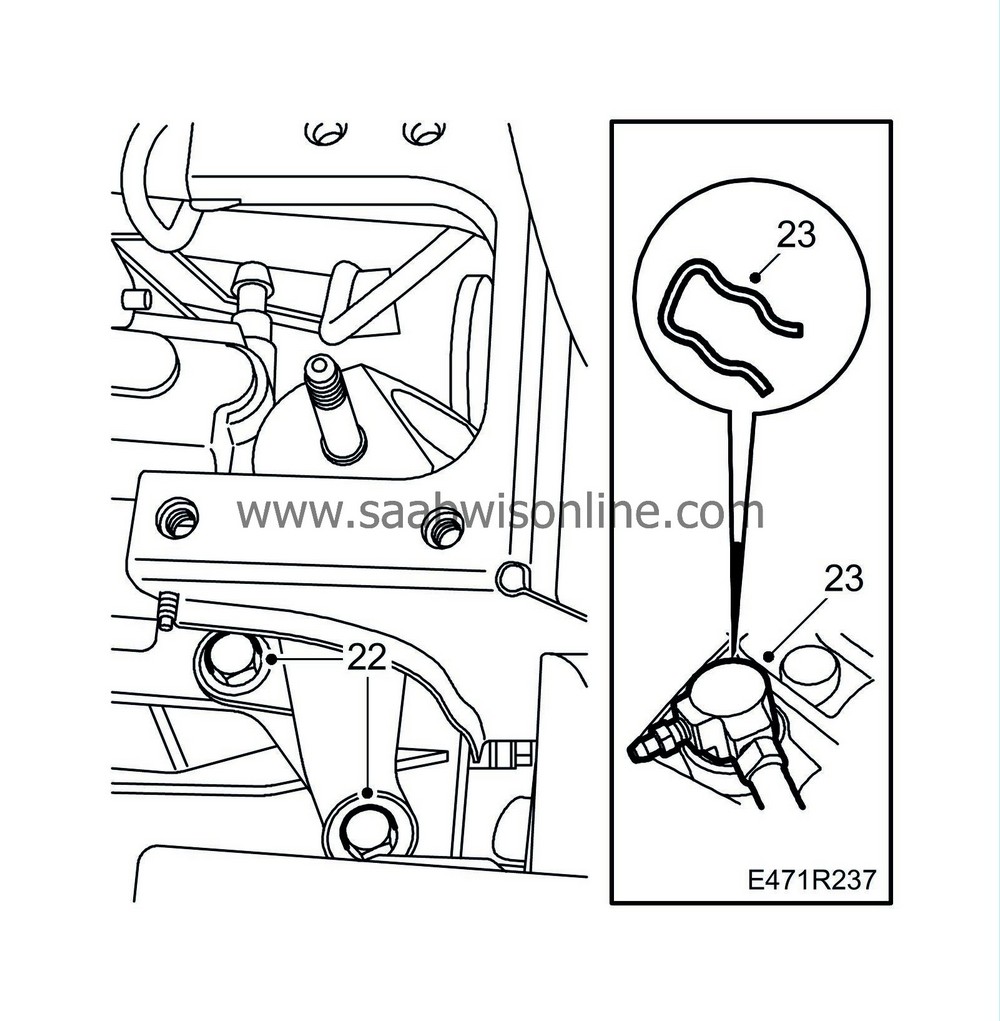
Fit the gearbox mounting.
Tightening torque: 40 Nm (30 lbf ft)
|
|
23.
|
Connect the clutch pressure pipe to the gearbox.
|
|
24.
|
Remove the clamping pincer. Connect a plastic hose to the air nipple and open until brake fluid emerges. Tighten the nipple and test the clutch. If it does not work, perform procedure
Bleed clutch hydraulic system in car
. Check for leaks.
|
|
25.
|
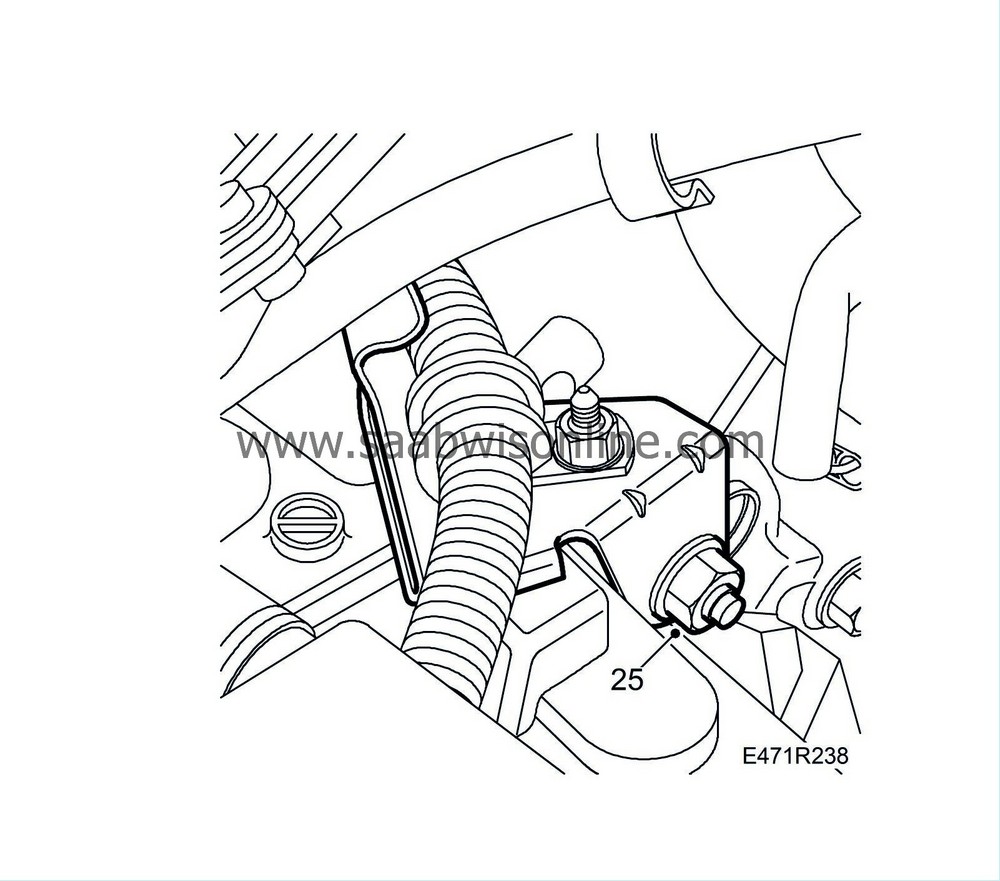
Fit the nuts to the cable duct.
|
|
26.
|
Raise the power train with a lifting beam.
|
|
27.
|
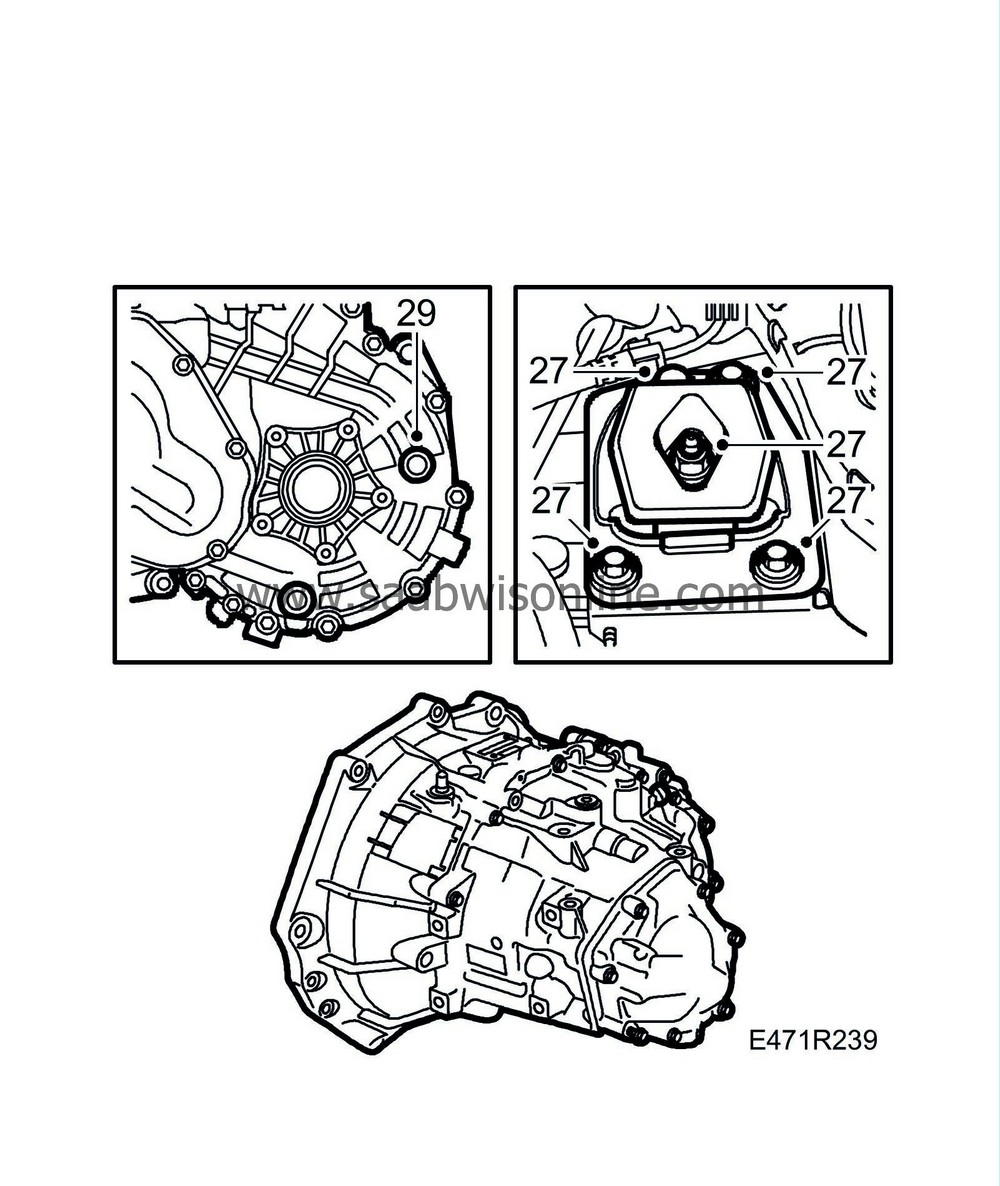
Fit the left-hand engine cushion to the body and gearbox, insert all bolts and nuts. Tighten nuts.
Tightening torque: 77 Nm (57 lbf ft)
|
|
28.
|
Lower the power train to relieve the load on the lifting yoke.
|
|
29.
|
Add oil to the gearbox to the correct level. Tighten level plug, drain plug and filling plug.
Tightening torque: 50 Nm (37 lbf ft)
|
|
30.
|
Check that the radiator core guide pins are correctly fastened to the radiator bar.
|
|
31.
|
Raise the car and fit the rear engine mount with the nut loosened.
|
|
32.
|
Move the trolley lift with subframe below the car.
|
|
33.
|
Carefully raise the subframe. Ensure that the rubber boots for the inner drivers do not contact the centre mountings on the subframe before the subframe contacts the body. Guide the coolant lines into the steering swivel member. Note the position of the antiroll bar linkages.
|
|
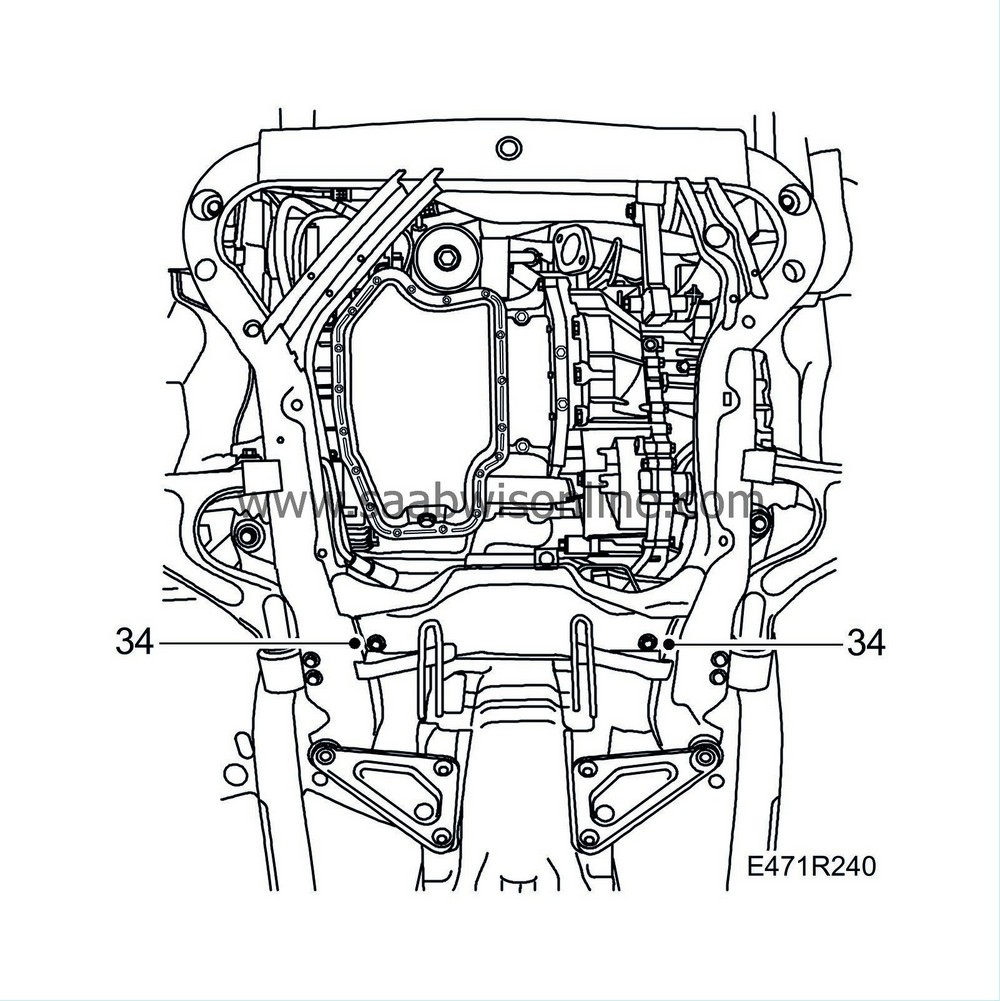
34.
|
Fit the screws to the steering gear before the subframe is fully raised.
Tightening torque: 90 Nm (66 lbf ft)
|
|
35.
|
Fit the power steering pipe in the clip.
|
|
36.
|
Guide the radiator core guide pins into the subframe. Lubricate with vaseline for easier installation.
|
|
37.
|
Guide the A/C pipe into its holder on the subframe.
|
|
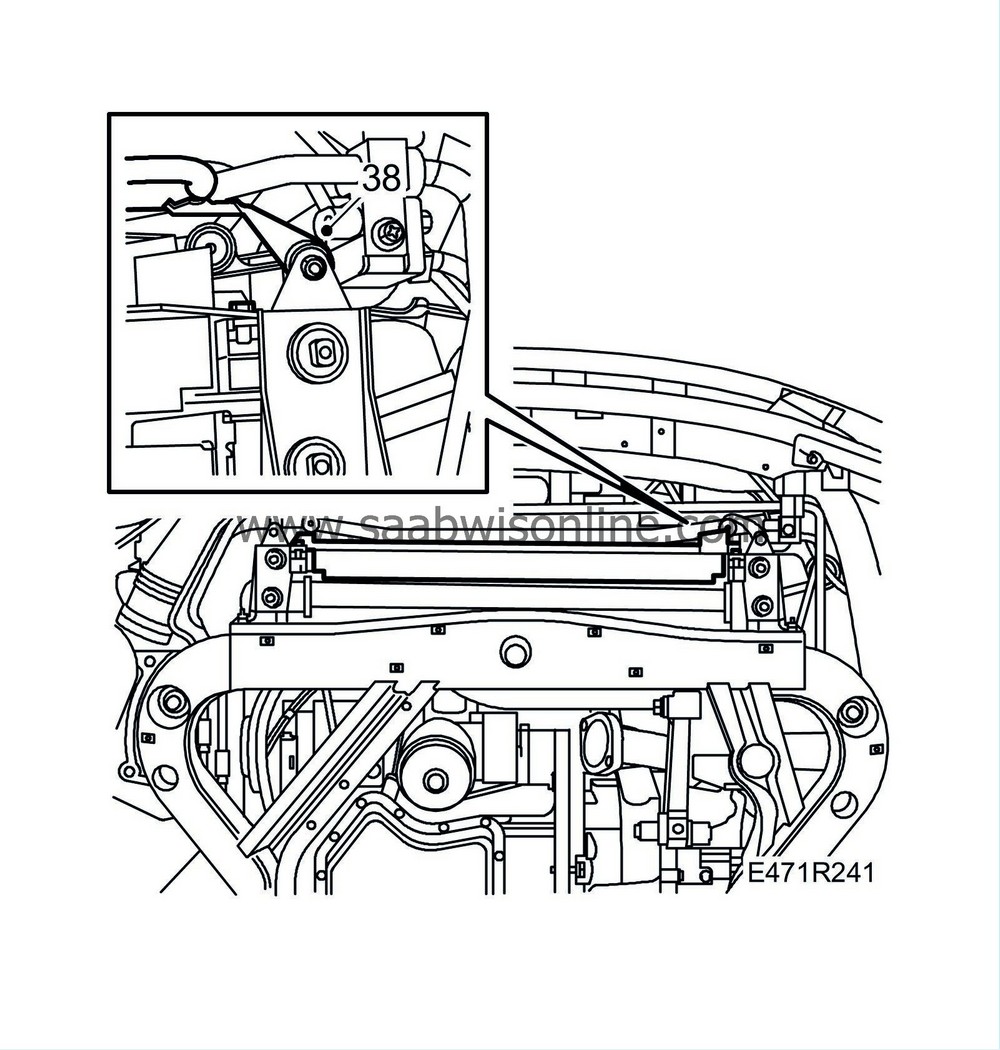
38.
|
Fit the cooling pipe to the power steering.
|
|
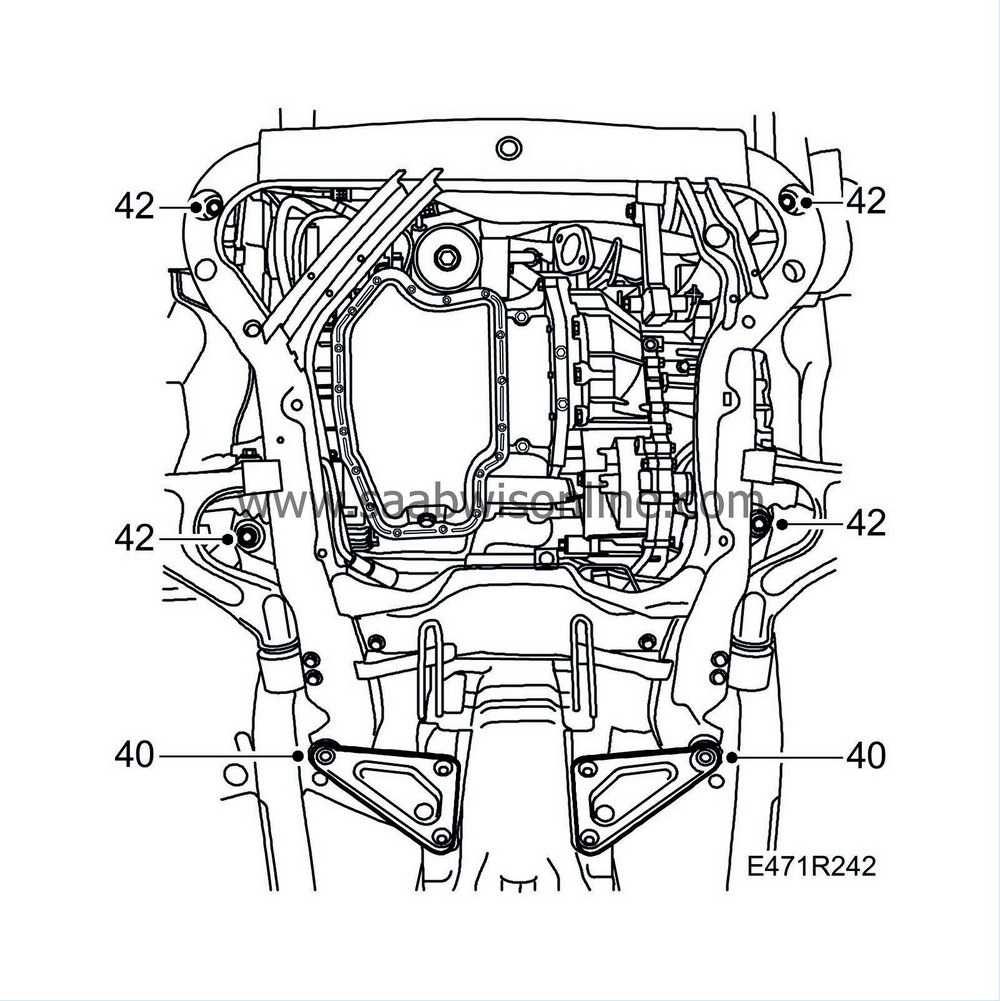
39.
|
Adjust the subframe so that the screw hole lines up with the body. On the trolley lift are 2 guide pins, front left and rear right, which guide the subframe into position.
|
|
40.
|
Fit the bolts holding the subframe and rear supporting plates. Tighten sufficiently for the subframe not to move out of position when the trolley lift and fixture are removed.
|
Note
|
|
The centre bolts on the subframe should not be confused with the others (different size and design).
|
|
|
41.
|
Remove the trolley lift.
|
|
42.
|
Tighten the bolts to the subframe.
Tightening torque 100 Nm + 45° (74 lbf ft + 45°)
|
|
43.
|
Tighten the supporting plate bolts.
Tightening torque: 63 Nm (46 lbf ft)
|
|
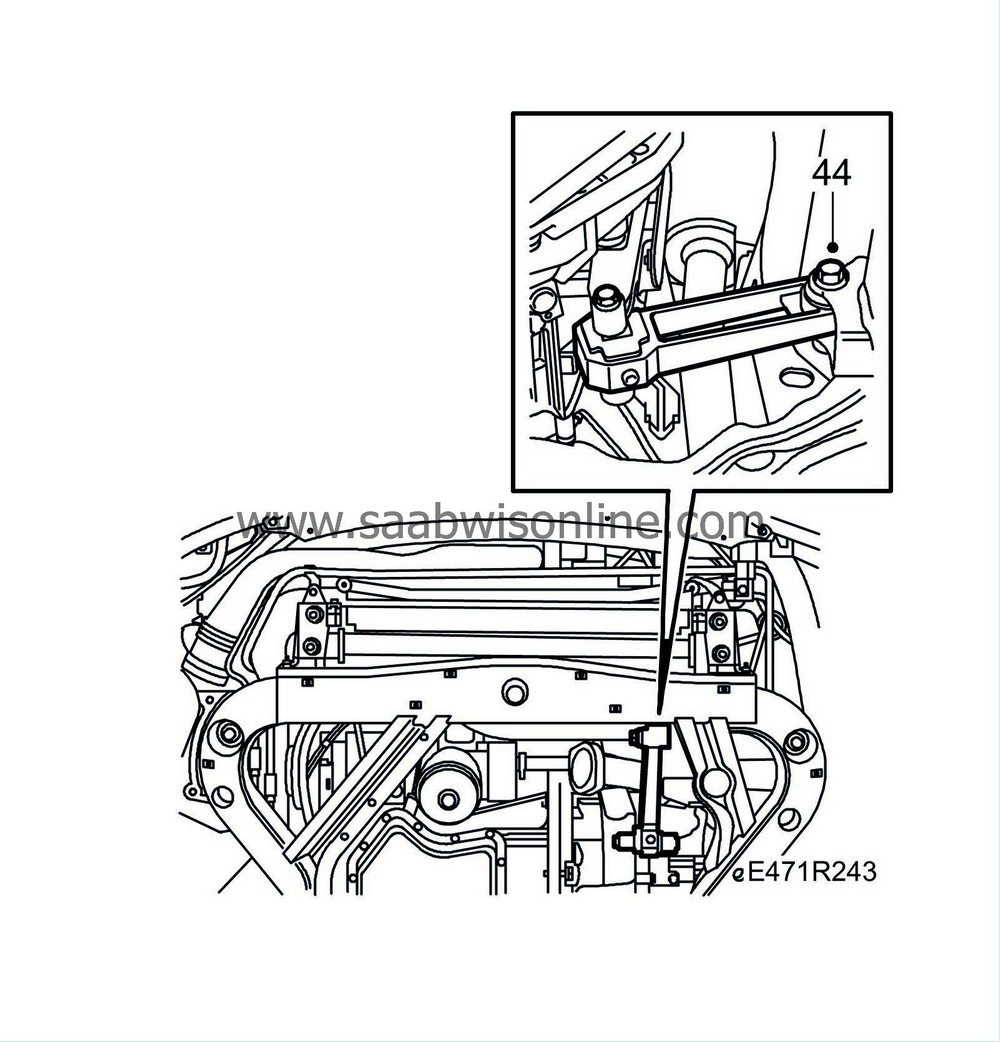
44.
|
Fit and tighten the bolts which hold the torque rod to the subframe.
Tightening torque 90 Nm + 90° (66 lbf ft + 90°)
|
|
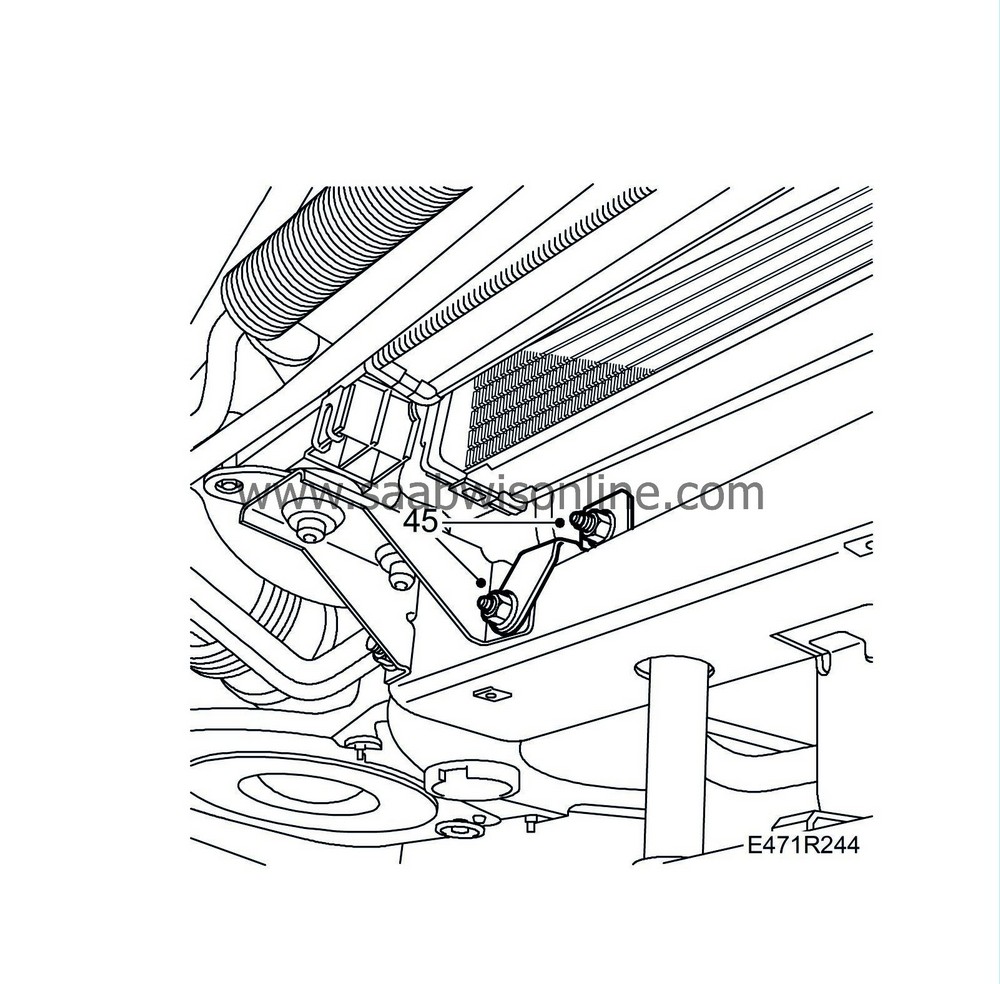
45.
|
Remove the cable tie supporting the radiator core and mount the fixing for the charge air cooler pipe.
|
|
46.
|
Fit the air deflector to the radiator.
|
|
47.
|
Connect the hoses to the battery cooler.
|
|
48.
|
Fit the air filter housing.
|
|
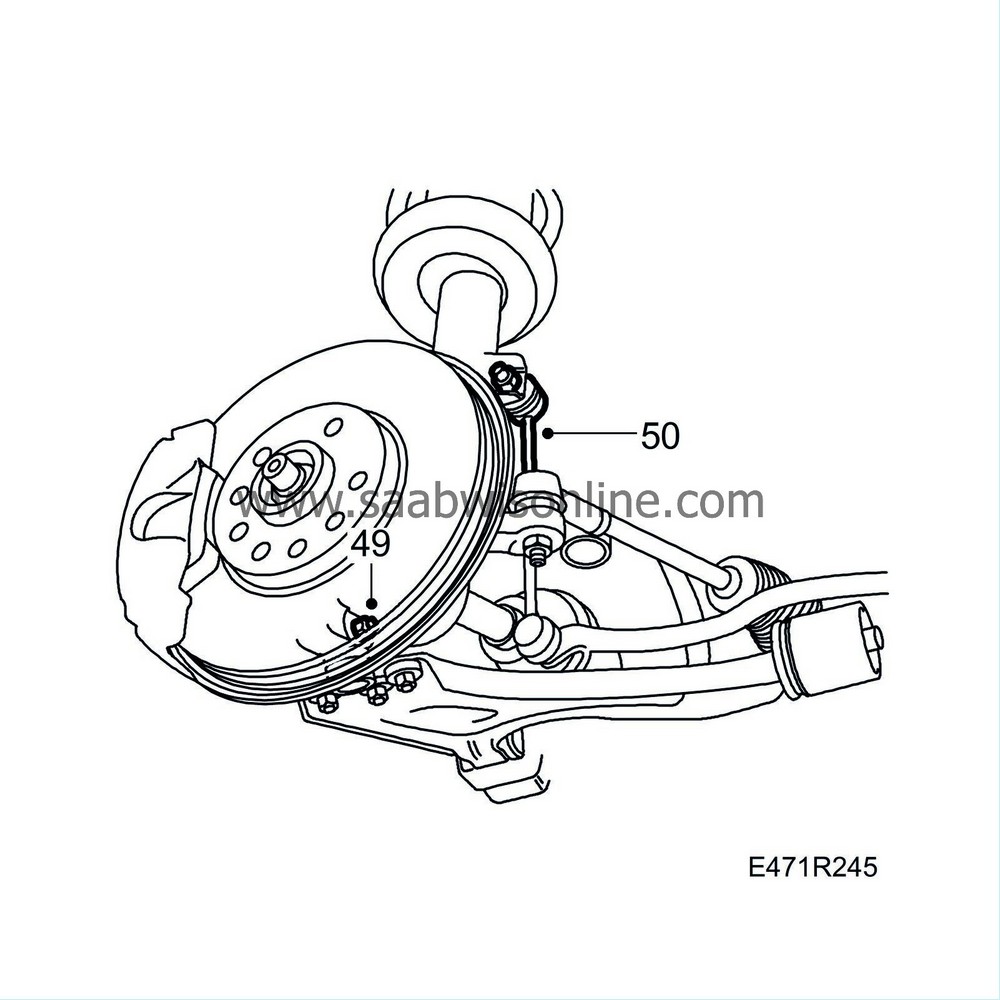
49.
|
Tighten the outer ball joints on the steering swivel member.
Tightening torque: 50 Nm (37 lbf ft)
 Warning
|
|
Check that the pins on the ball joint protrude above the steering swivel member fixing.
|
|
|
|
|
|
|
|
50.
|
Fit the anti-roll bar. Hold in place with a thin, open-ended 17 mm wrench.
Tightening torque: 85 Nm (64 lbf ft)
|
Note
|
|
To avoid pressing the boot in, use a thin wrench as counterholder.
|
|
|
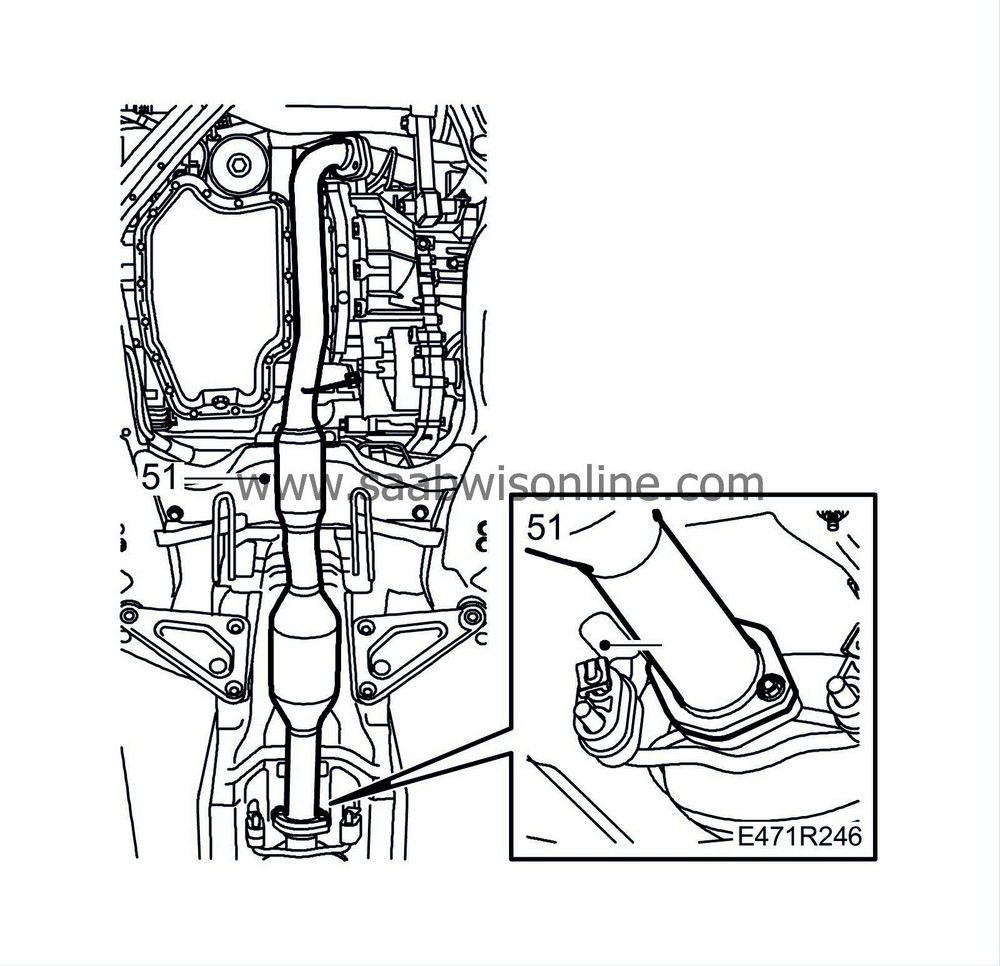
51.
|
Fit the centre exhaust pipe.
|
|
52.
|
Lower the car and remove the lifting beam with holder.
|
|
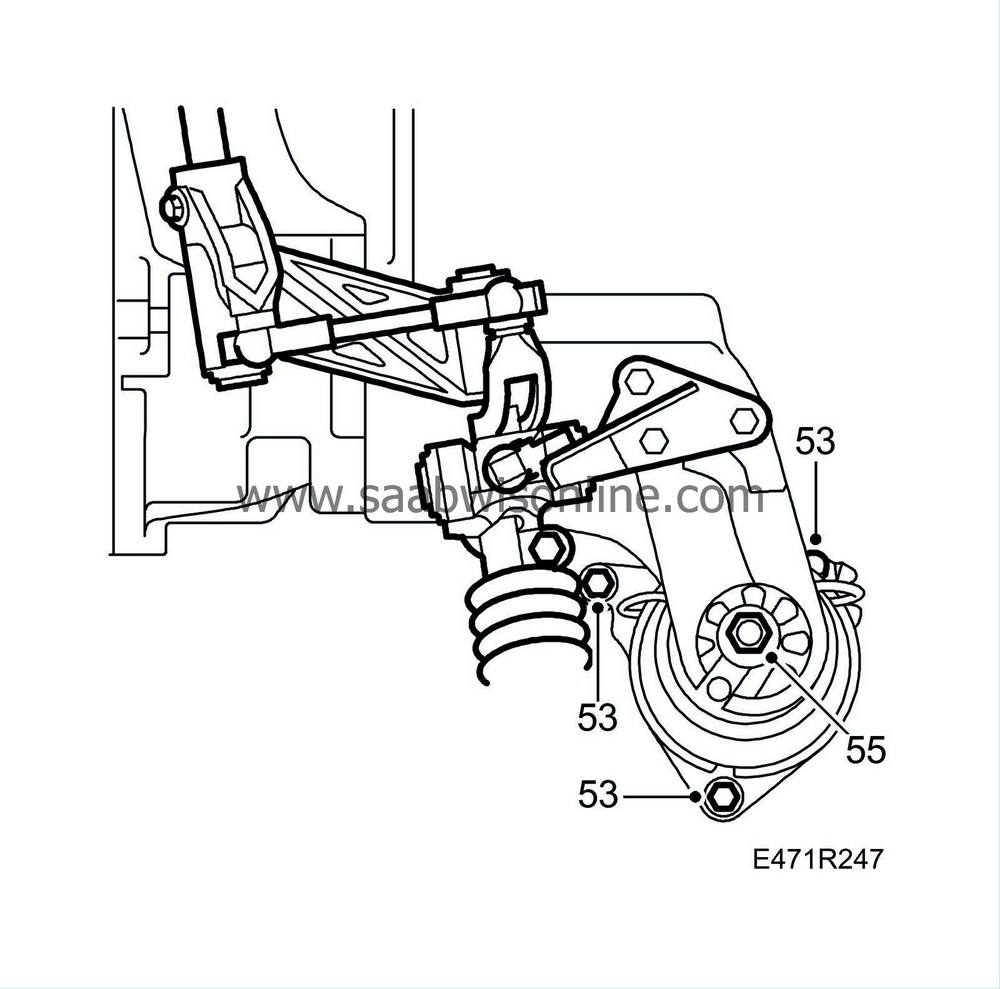
53.
|
Tighten the bolts to the rear engine cushion from the engine bay side, starting with the rear bolt.
Tightening torque: 24 Nm (18 lbf ft)
|
|
54.
|
Relieve the load on the left-hand engine cushion by lifting the gearbox using a jack. Then lower the jack and tighten the bolts.
Tightening torque: 40 Nm (30 lbf ft)
|
|
55.
|
Tighten the bolts to the rear engine cushion. First shake the power train to prevent stresses in the engine cushions.
Tightening torque: 45 Nm (33 lbf ft)
|
|
56.
|
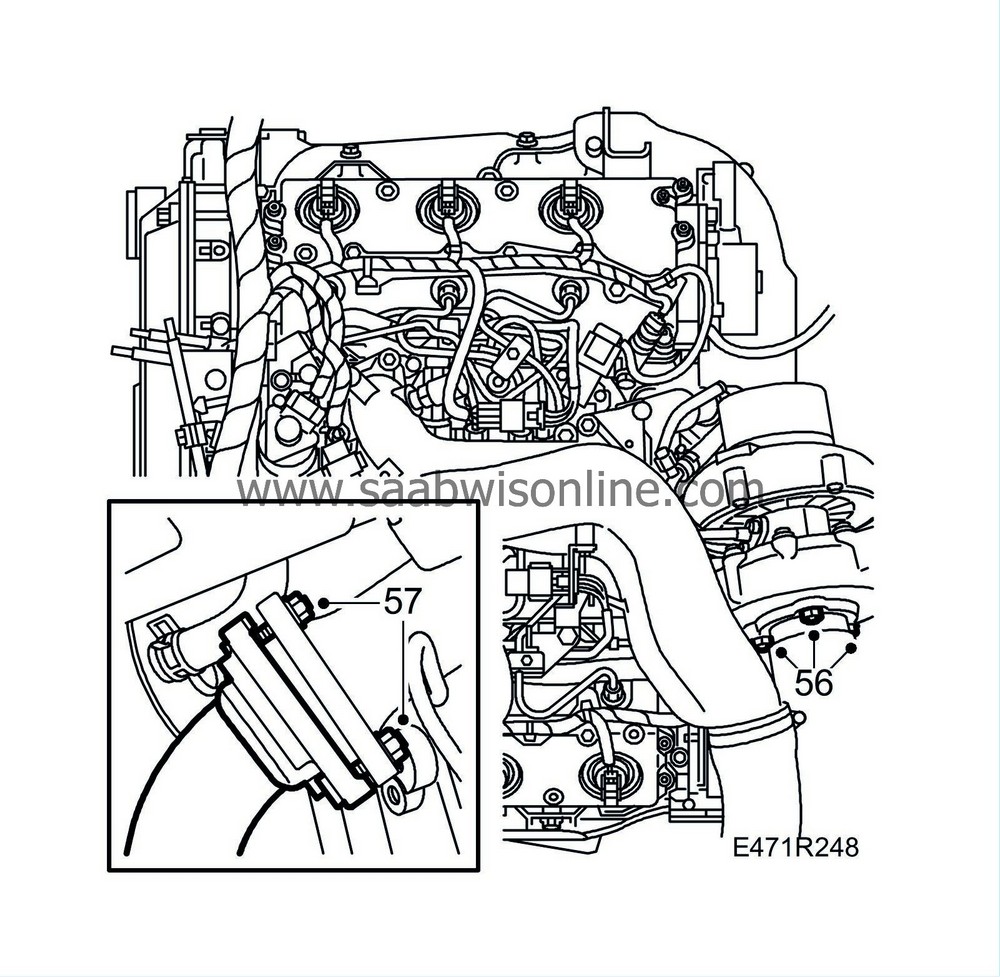
Fit the front catalytic converter and loosely tighten the nuts.
|
|
57.
|
Raise the car and fit the lower bolts to the exhaust pipe and catalytic converter.
|
|
58.
|
Tighten the bolt to the front torque rod at the gearbox, centre the rubber cushion in the stay and tighten.
Tightening torque: 47 Nm (34 lbf ft)
|
|
59.
|
Lower the car to the floor.
|
|
60.
|
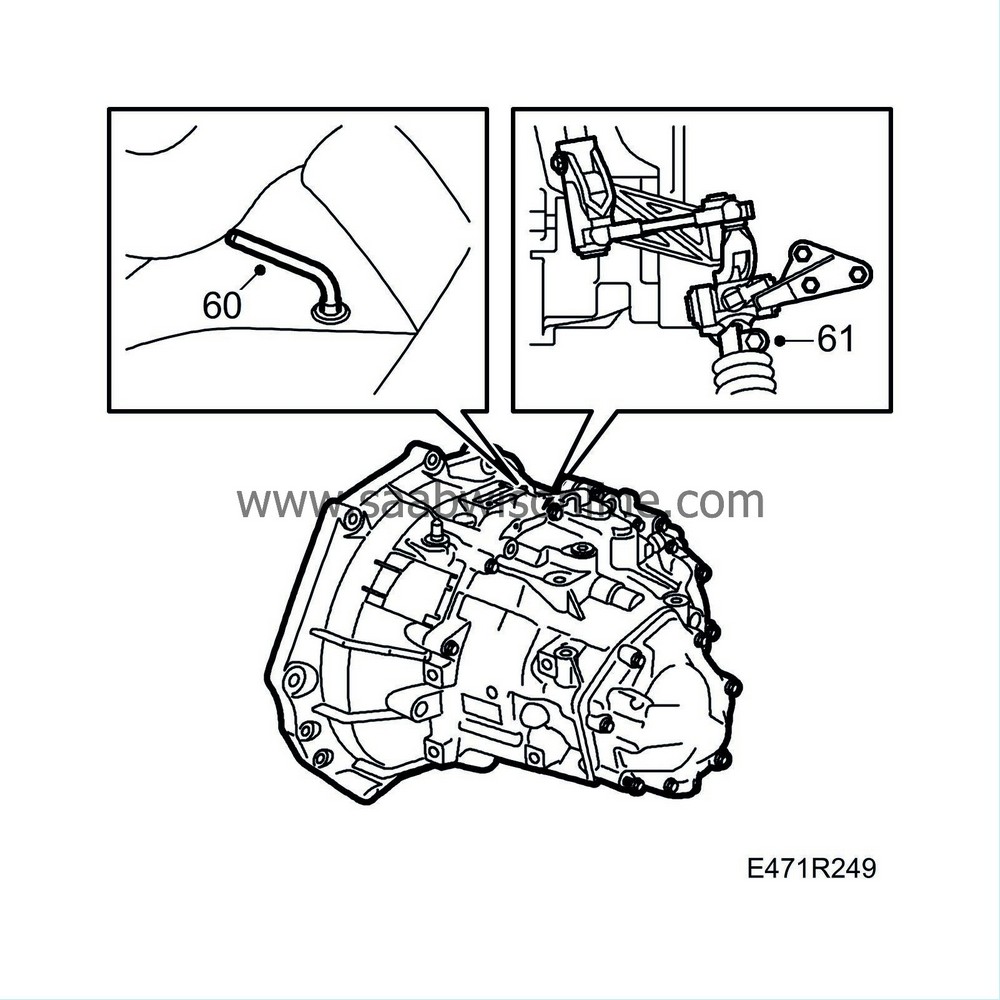
Remove lock pin 87 92 335 from the selector rod housing.
|
|
61.
|
Select 4th gear and insert lock pin 87 92 632. Tighten the clamp on the gear linkage.
Tightening torque: 22 Nm (16 lbf ft)
|
|
62.
|
Remove the lock pins, check the gear positions and that the ignition key can be removed. Insert the plastic plug in the gearbox.
|
|
63.
|
Fit the selector lever gaiter.
|
|
64.
|
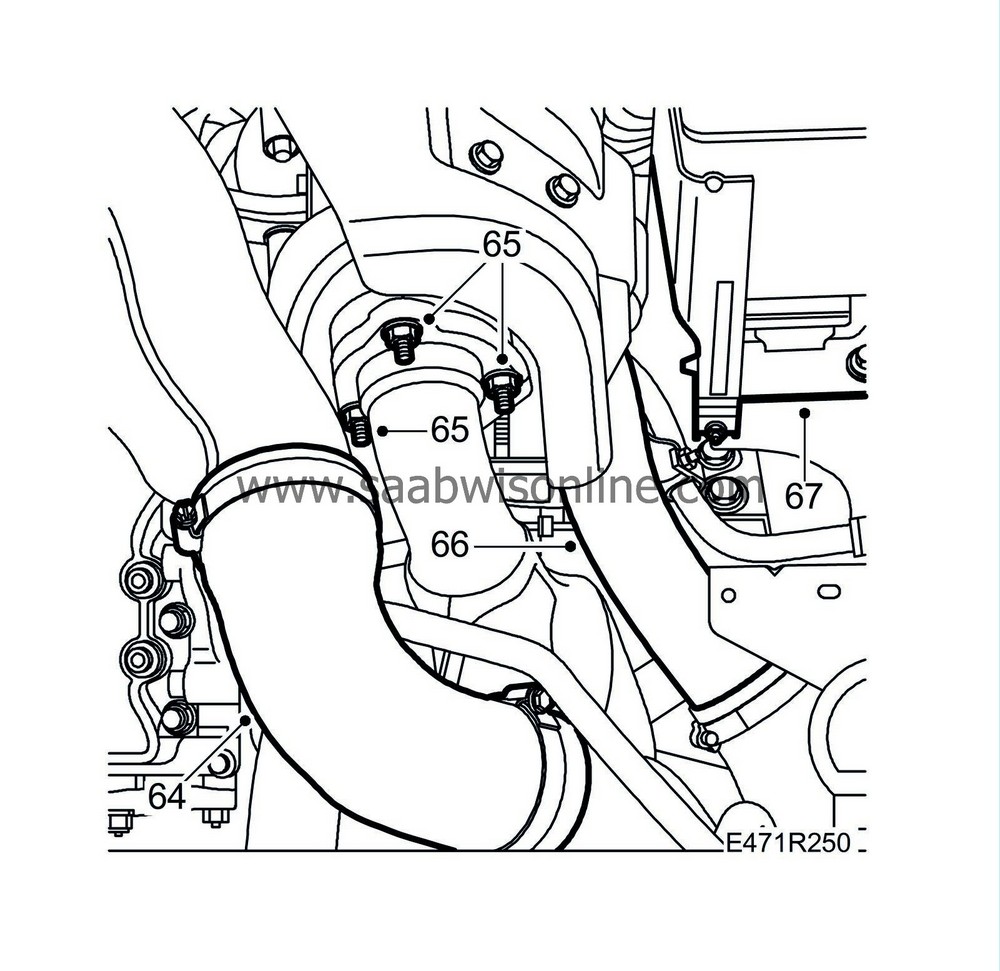
Fit the hose to the intake manifold.
|
|
65.
|
Tighten the nuts on the front exhaust pipe to turbo.
Tightening torque: 25 Nm (18 lbf ft)
|
|
66.
|
Fit the pipe between the turbo and the charge air cooler, and the clamp for the positive cable on the pipe.
|
|
67.
|
Fit the electrical unit.
|
|
68.
|
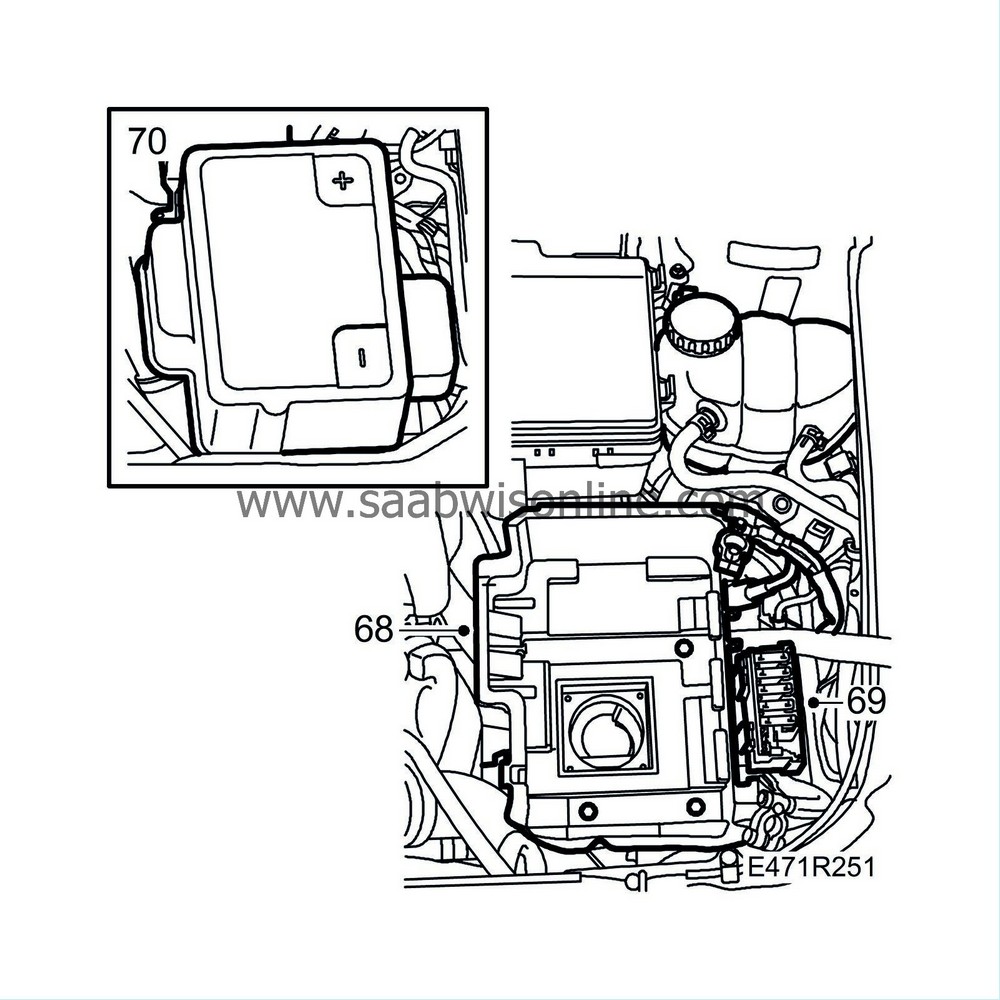
Fit the battery tray.
|
|
69.
|
Fit the fuse holder for the maxi fuses.
|
|
70.
|
Fit and connect the battery, and attach the plastic cover.
|
|
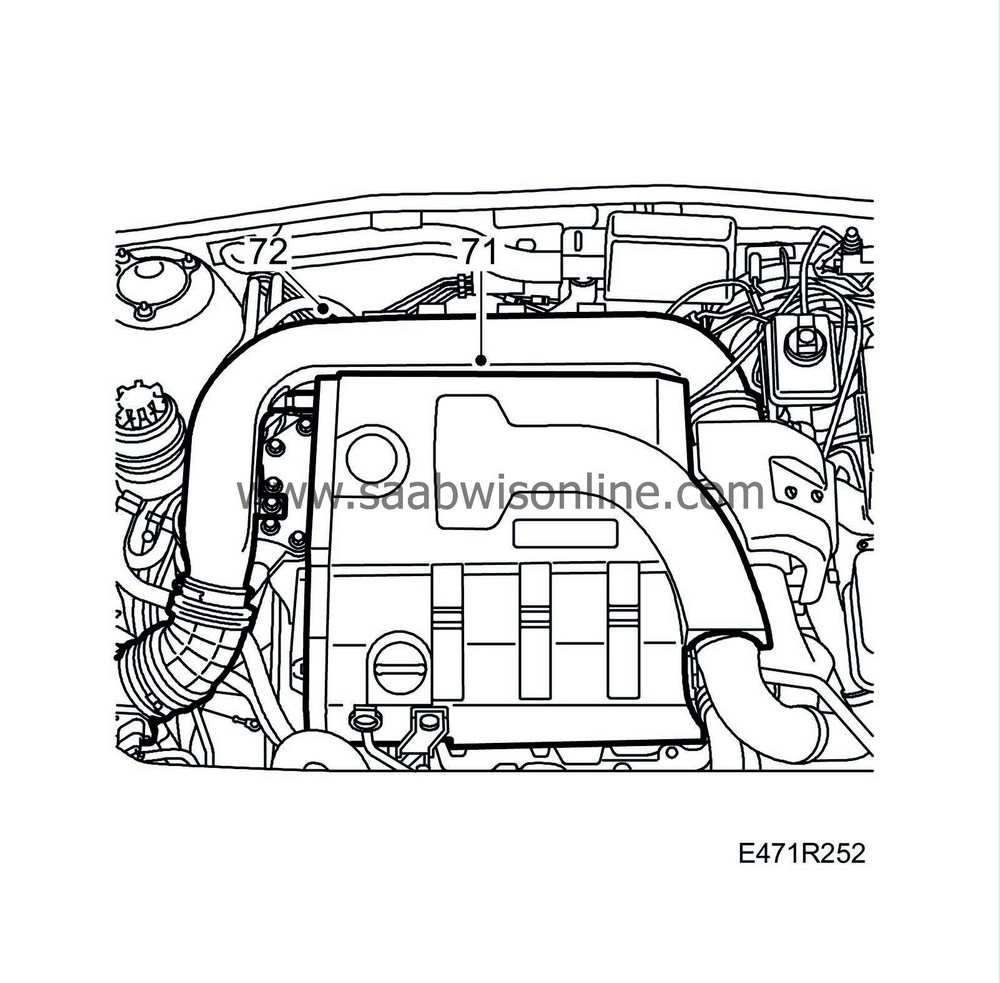
71.
|
Fit the upper engine cover.
|
|
72.
|
Fit the intake manifold and turbo heat shield.
|
|
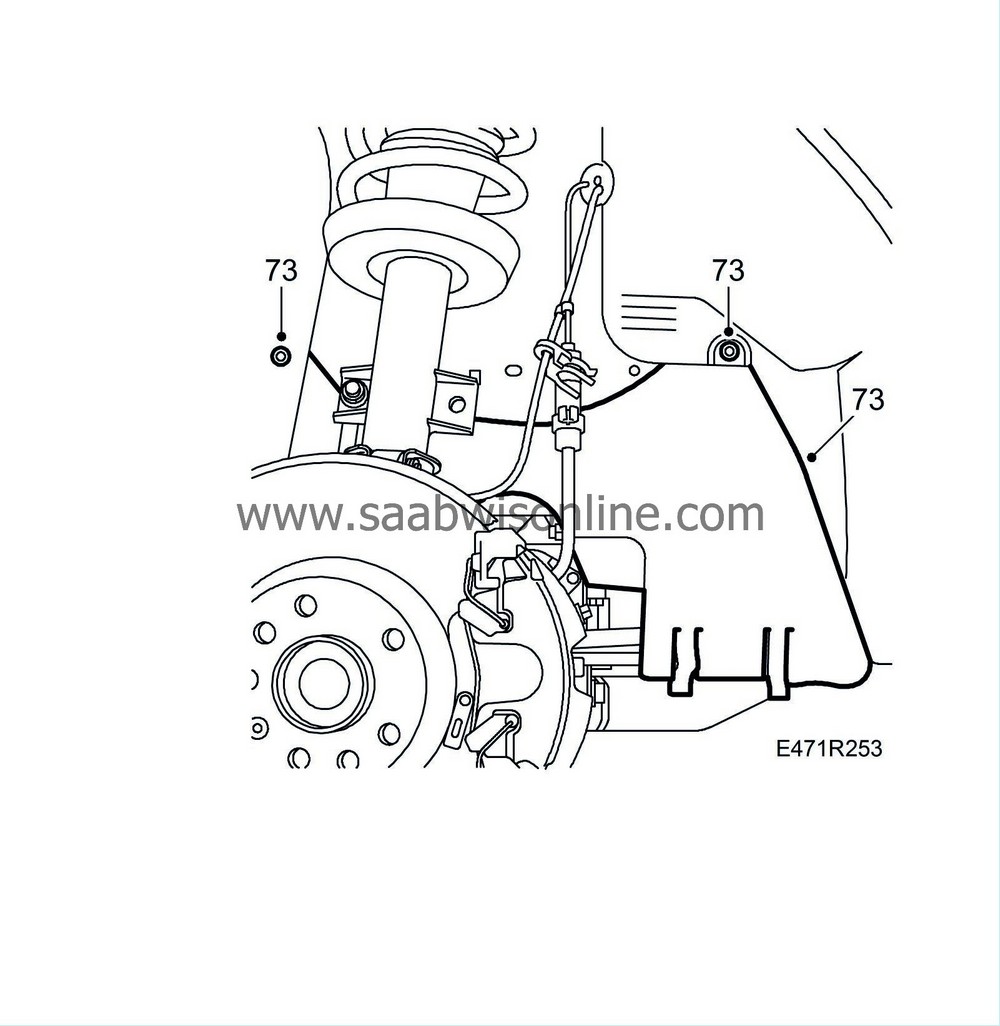
73.
|
Raise the car and fit the side covers in the wheelarches.
|
|
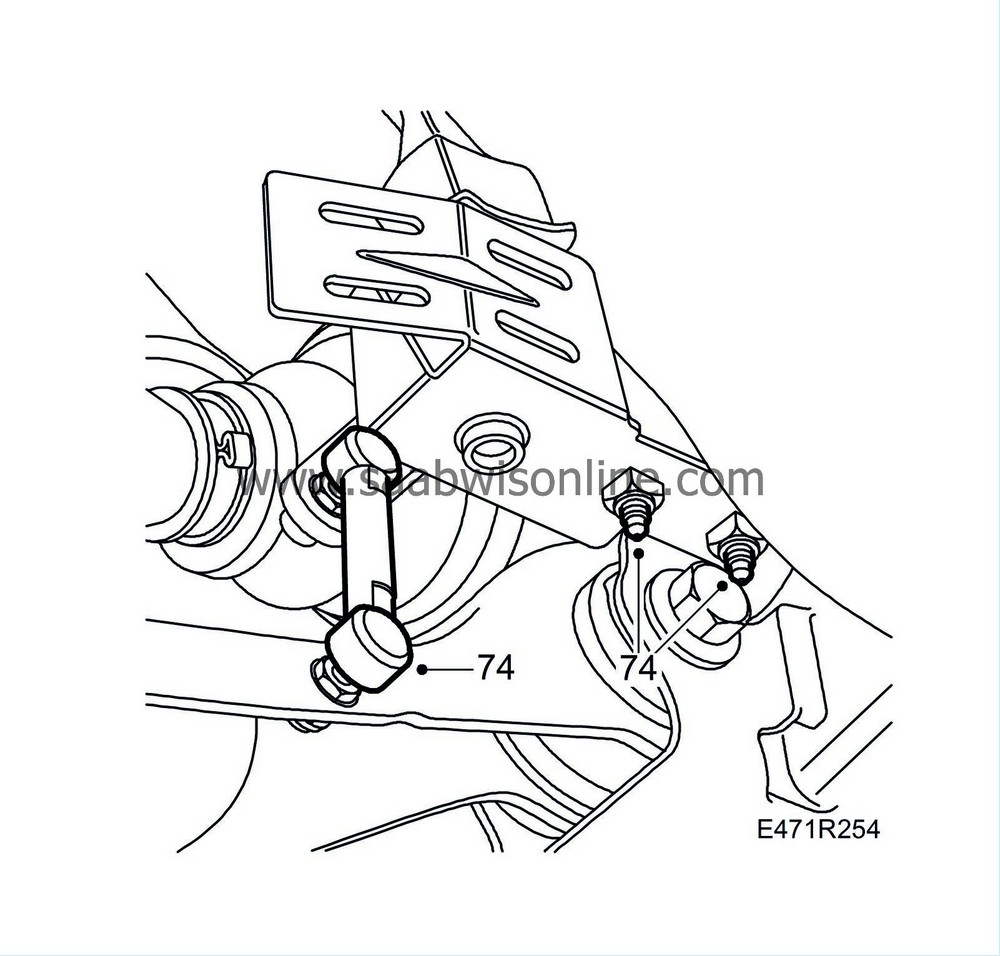
74.
|
Fit the level sensor for the xenon headlamps (option).
|
|
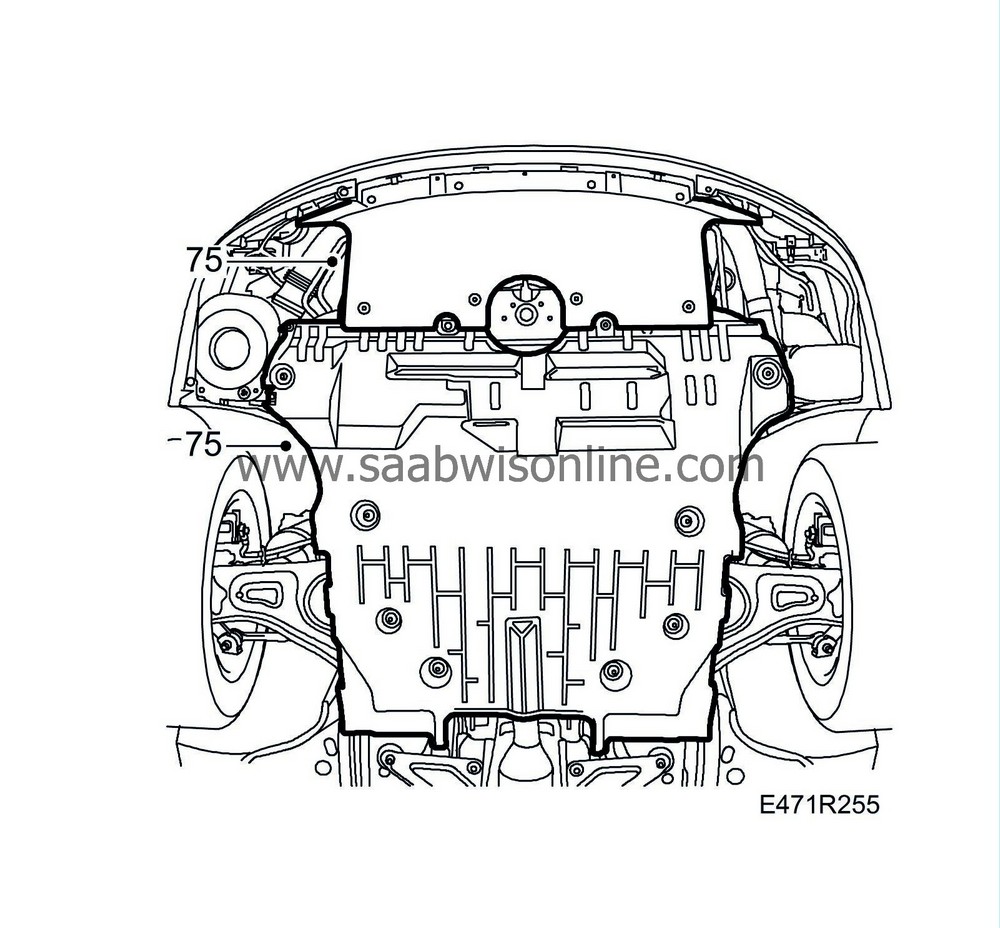
75.
|
Fit the rear and front lower engine covers.
|
|
76.
|
Fit the front wheels which must be freely suspended. See
Wheels
.
Tightening torque: 110 Nm (80 lbf ft)
|
|
77.
|
Test drive the car. Check the steering wheel position during driving on straight roads. Adjust if necessary.
|
|
78.
|
Set the clock and any radio code.
|





 Warning

