PRE-RELEASE
To dismantle, engine block
| To dismantle, engine block |
| To remove |
| 1. |
Remove the power unit from the car. See
To remove, power unit
|
|
| 2. |
Remove other equipment from the engine. See
Engine on subframe, To remove - To fit
|
|
| 3. |
Remove the flywheel.

|
|
| 4. |
Remove the upper intake manifold.

|
|
| 5. |
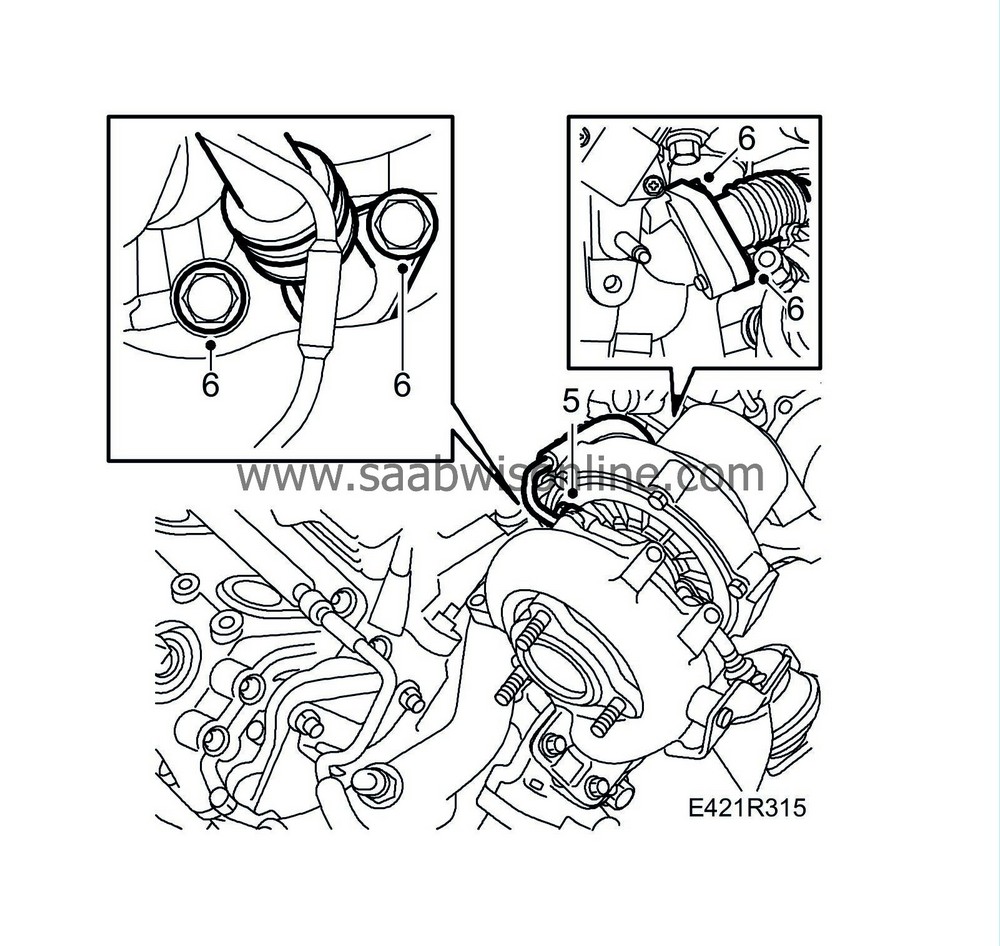
Remove the turbo bracket and the turbo's water pipe.
|
|
| 6. |
Remove the bolts of the turbo's oil pipe from the cylinder block plus the EGR pipe.
|
|
| 7. |
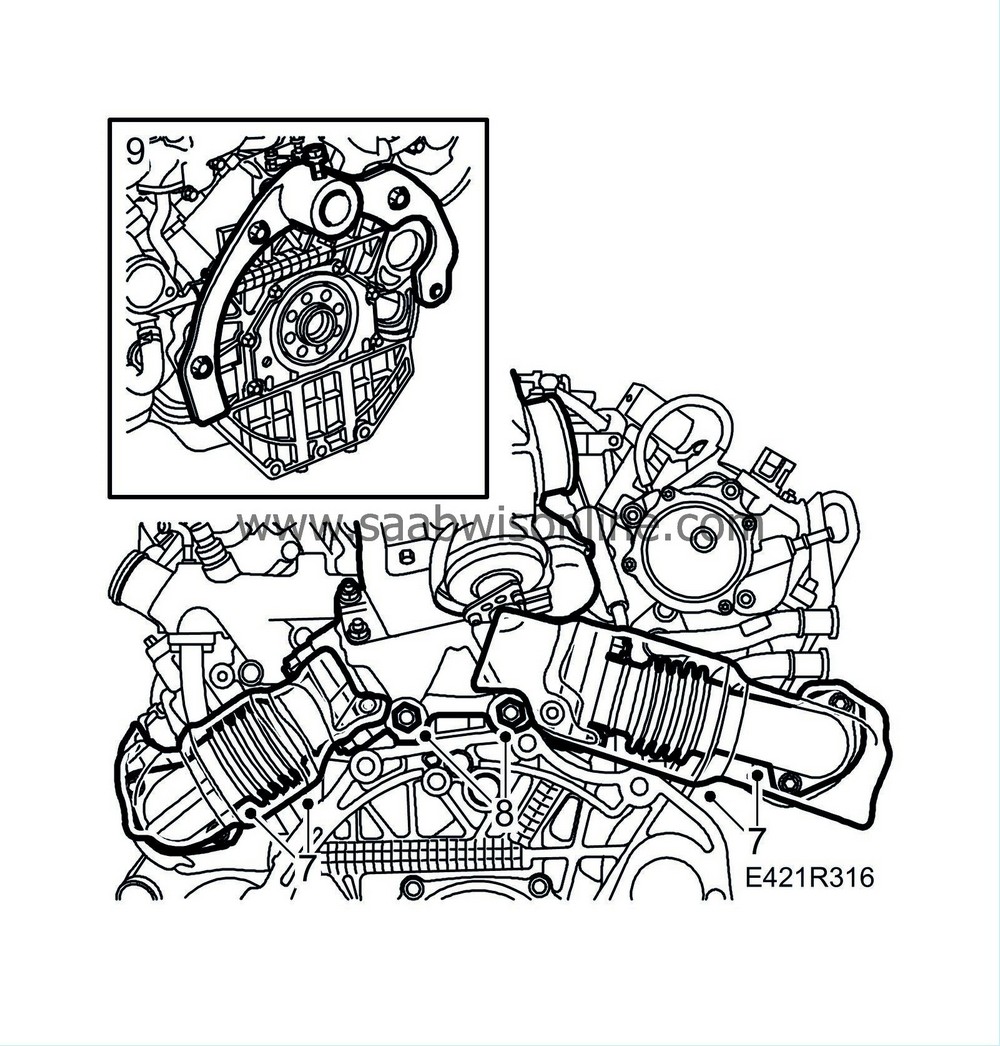
Remove the heat shields and exhaust pipe bolts from the exhaust manifolds and the two large retaining screws from under the turbo.
|
|
| 8. |
Remove the turbocharger with pipe as a unit.
|
|
| 9. |
Fit
83 94 751 Holder, engine
onto the engine and mount it in
Floor stand 78 74 878
.
|
|
| 10. |
Drain the oil from the oil sump via the drain plug and from the oil filter container via the plug in the filter container.

|
|
| 11. |
Remove the oil filter.
|
|
| 12. |
Remove the dipstick.
|
|
| 13. |
Remove the heat shield from the exhaust manifolds.
|
|
| 14. |
Remove the rear and front exhaust manifolds.

|
|
| 15. |
Remove the starter motor.
|
|
| 16. |
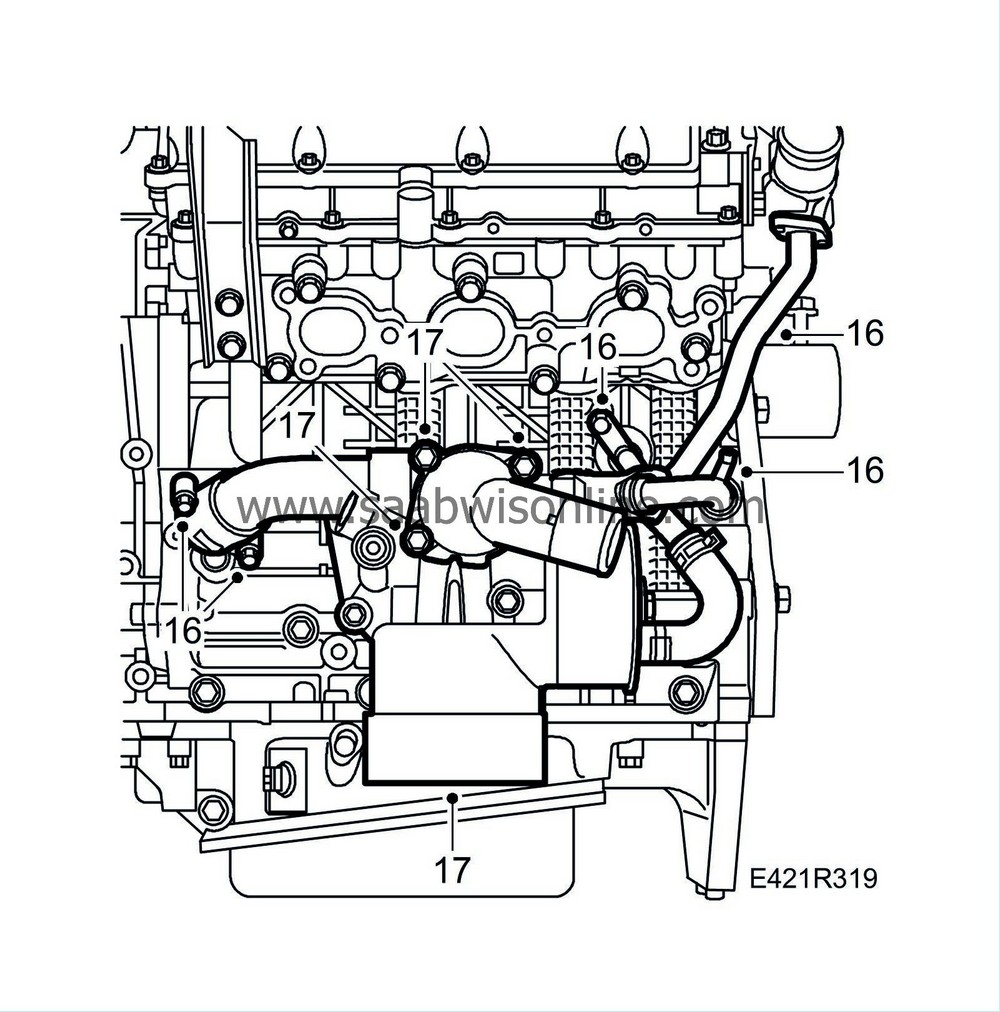
Remove the water and oil pipes of the thermostat and oil filter housing from the connections on the cylinder block.
|
|
| 17. |
Remove the thermostat and oil filter housings.
|
|
| 18. |
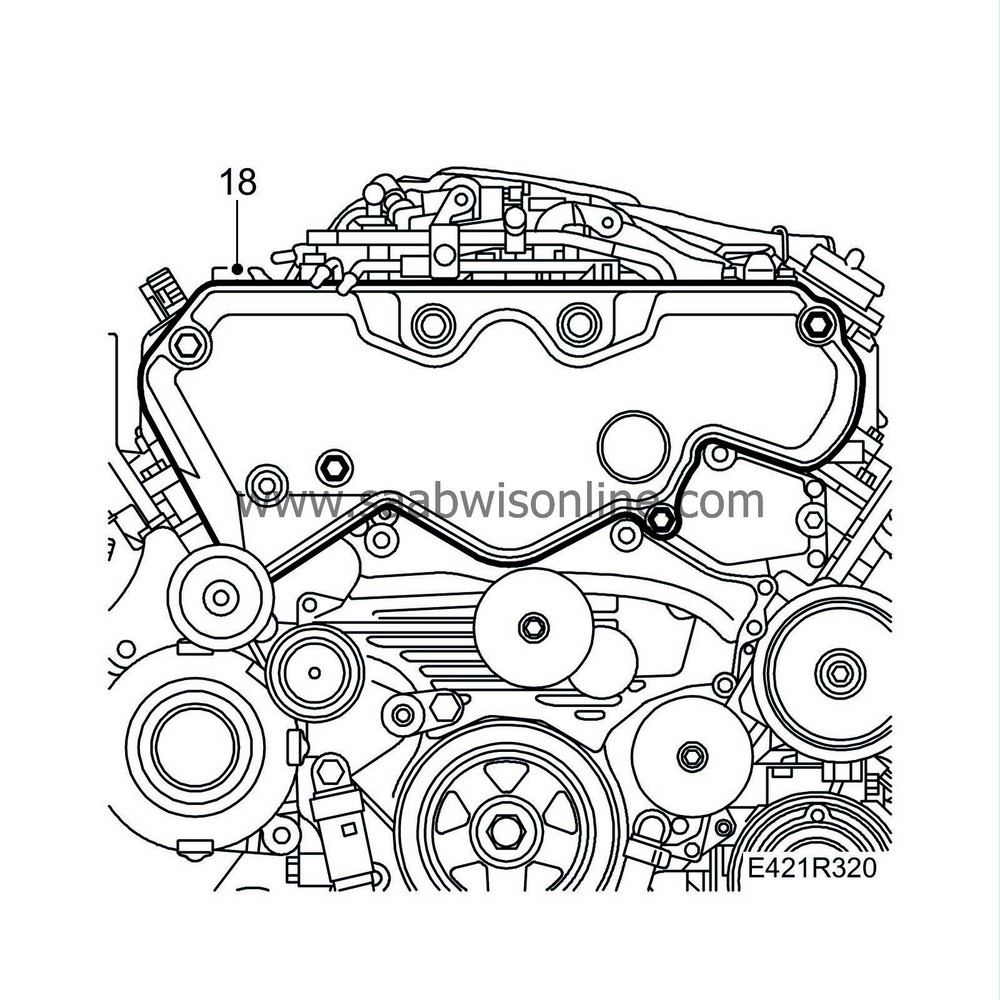
Remove the timing belt cover.
|
|
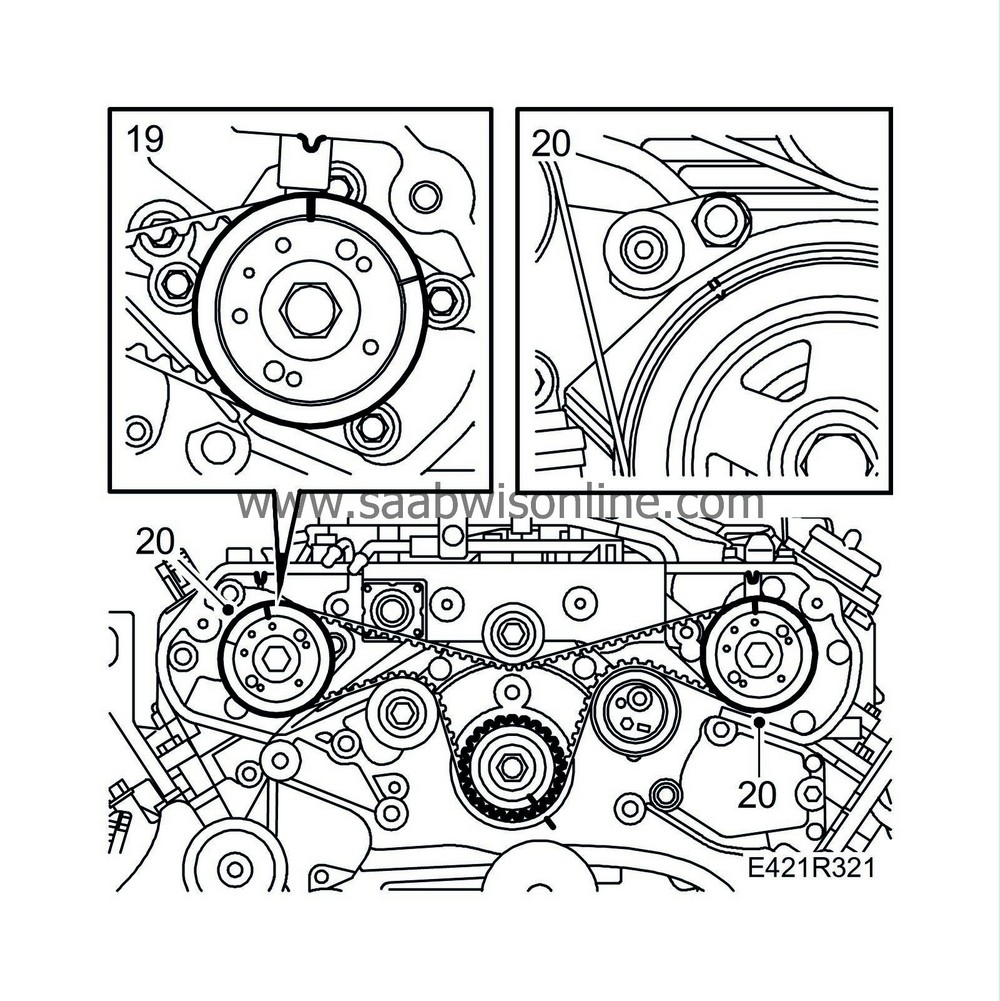
| 19. |
Reset the engine by turning the crankshaft belt pulley so that the setting marks on the belt pulley and cam gear end up against the markings on the engine.
|
|
| 20. |
Remove the bolt of the crankshaft pulley. Check that the belt pulley has not become twisted. Remove the belt pulley.
|
|
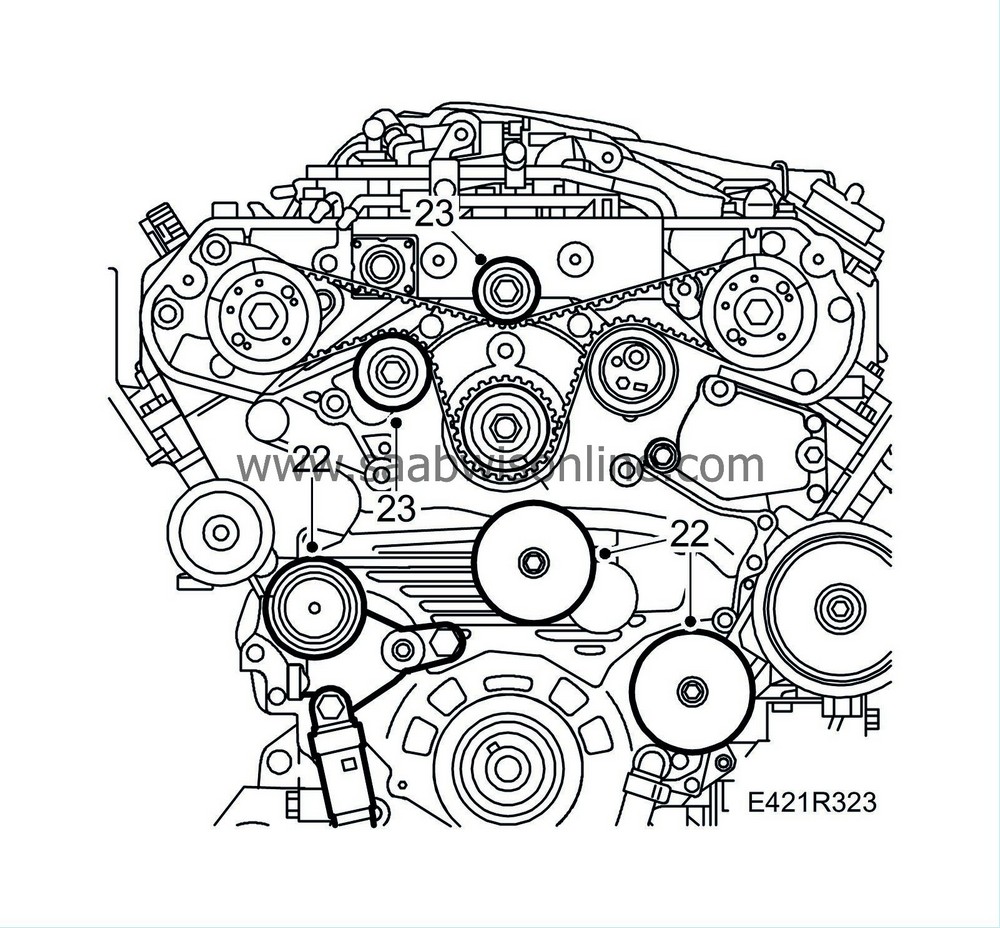
| 22. |
Remove the idler pulley, belt tensioner and belt pulley for the auxiliary equipment belt circuit.
|
|
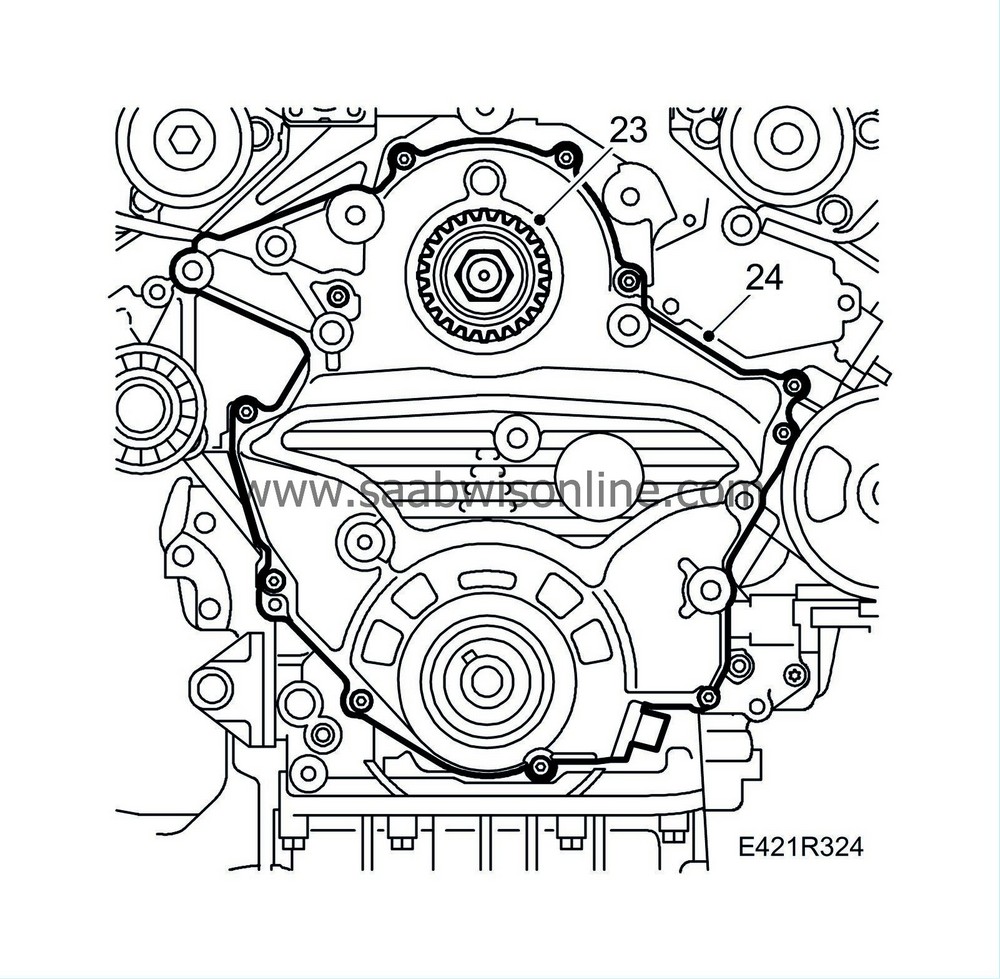
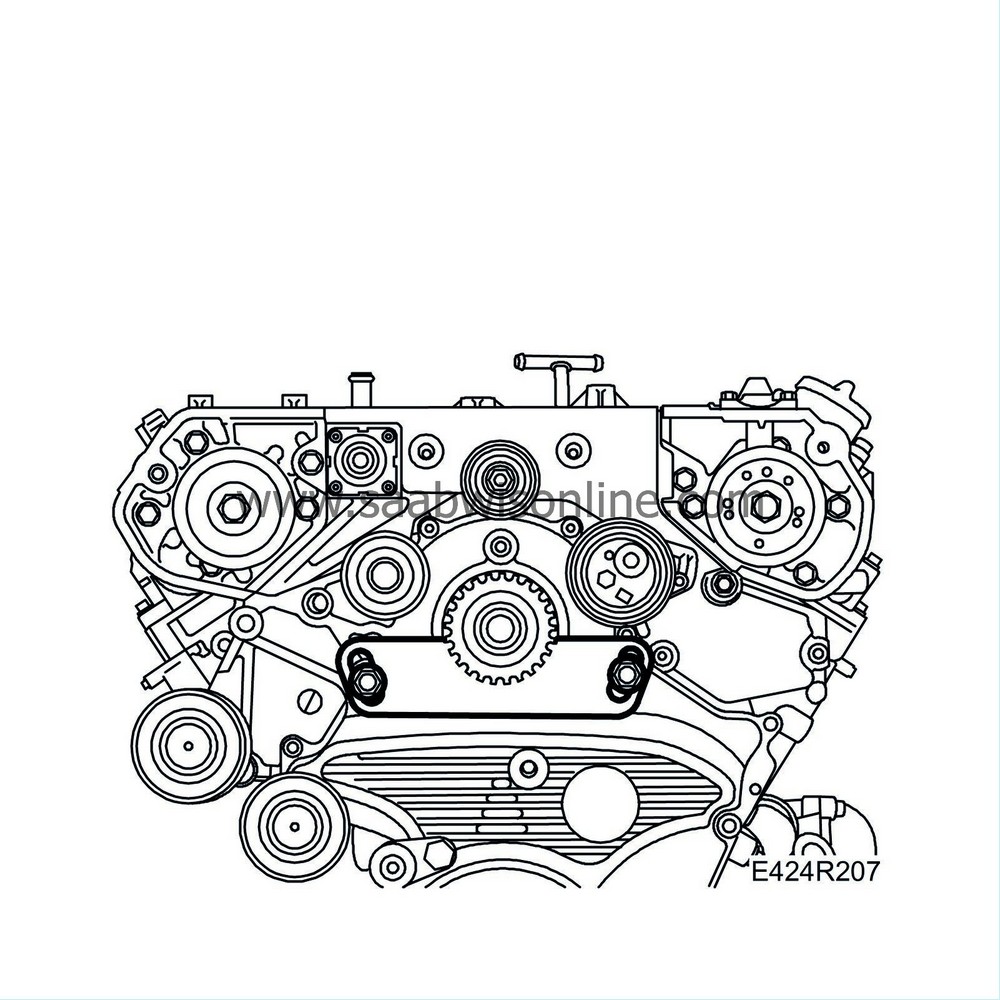
| 23. |
Remove the idler pulleys for the timing belt. Use
EN-47646 Holding tool, fuel pump
|
|
| 24. |
Remove the outer timing cover.
|
|
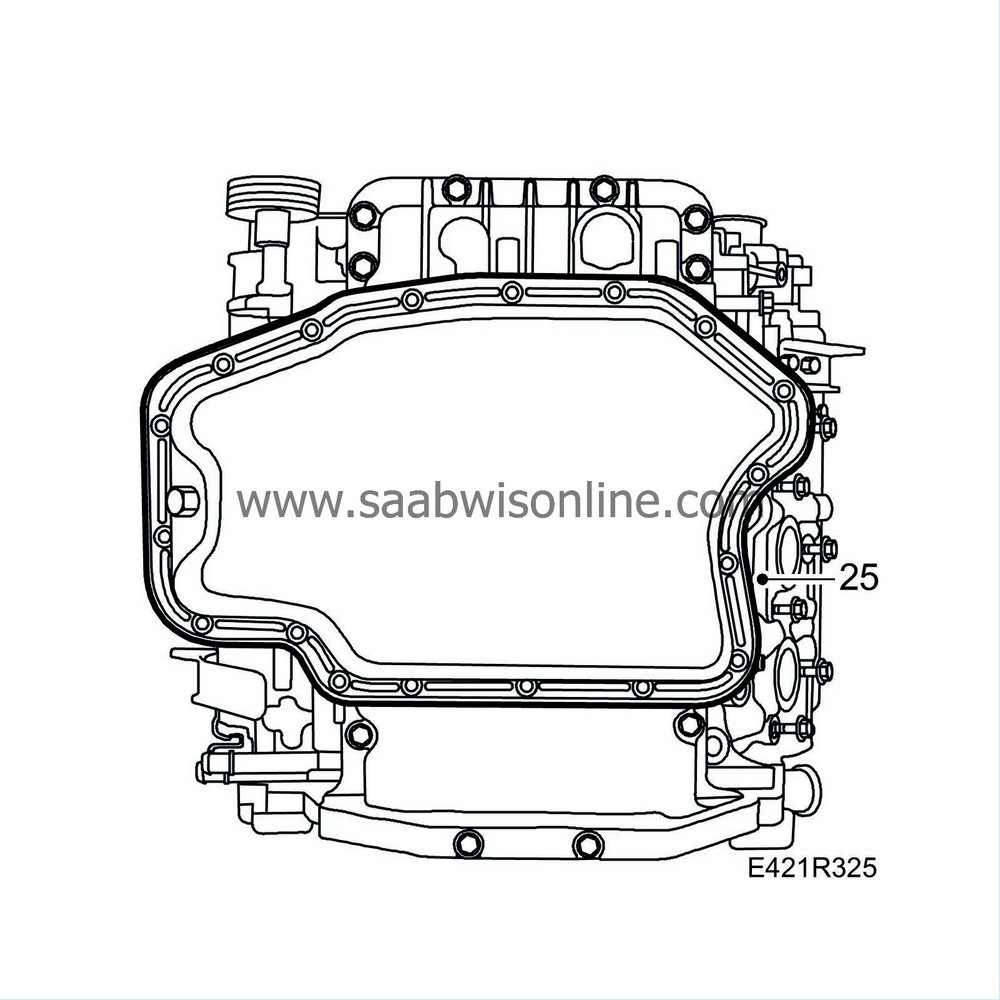
| 25. |
Turn the engine on the stand and remove the sheet metal oil sump.
|
|
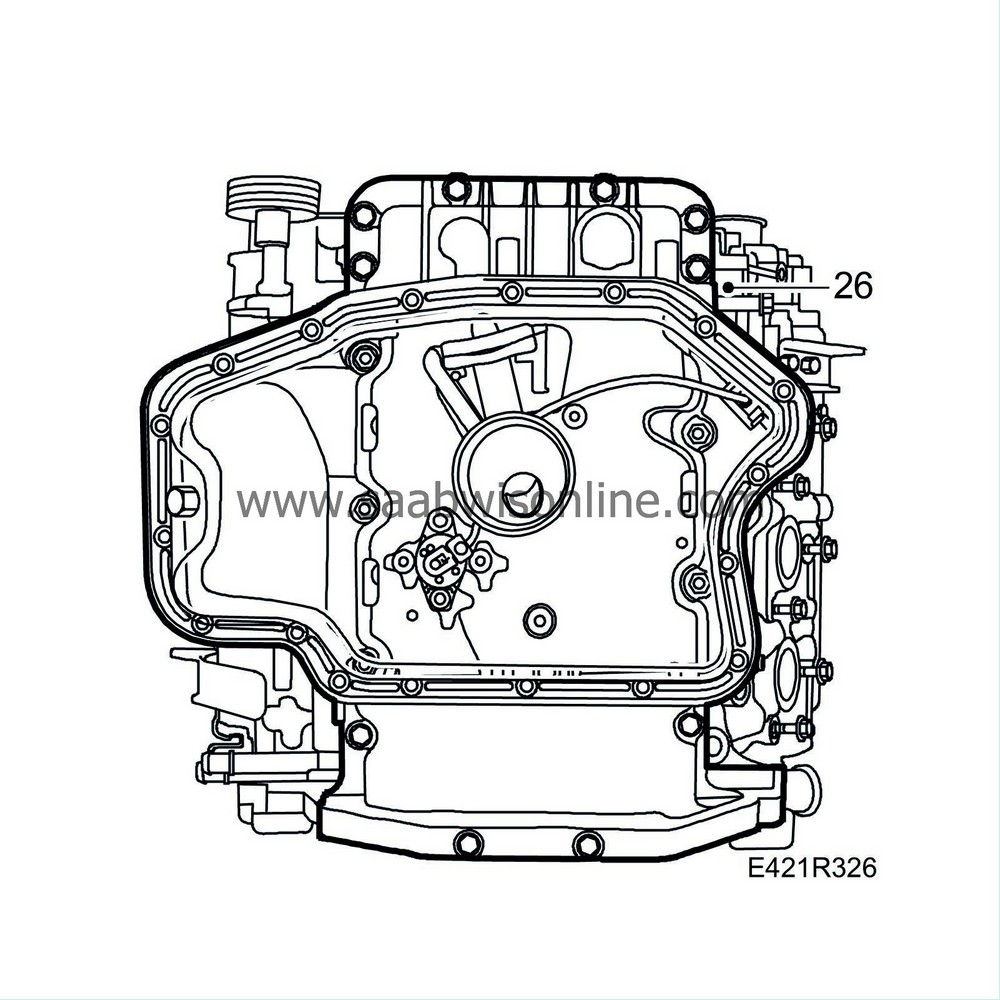
| 26. |
Remove the upper oil sump.
|
|
| 27. |
Turn back the engine on the stand so that the remaining oil runs out.

|
|
| 28. |
Remove the engine harness connector and the engine harness with cable ducts.
|
|
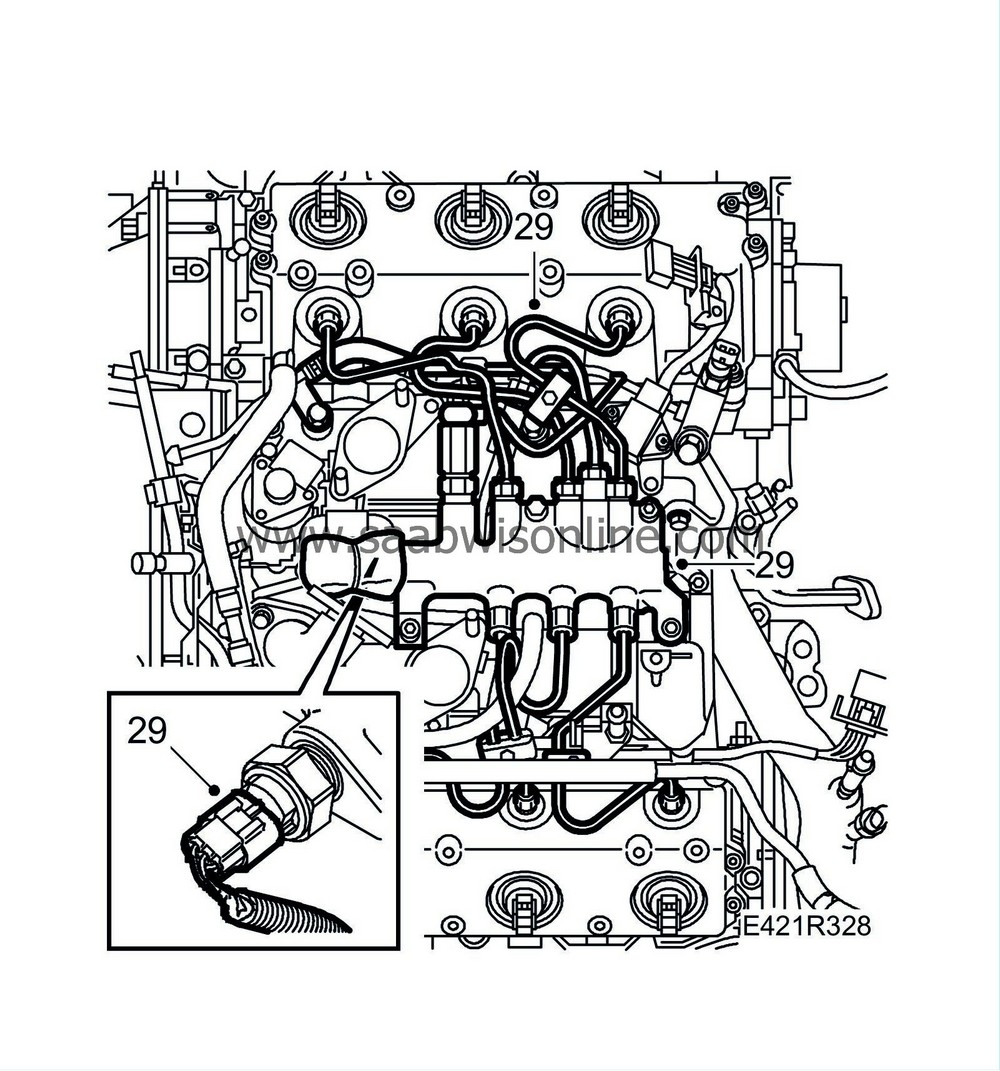
| 29. |
Remove all fuel feed pipes with holders.
|
|
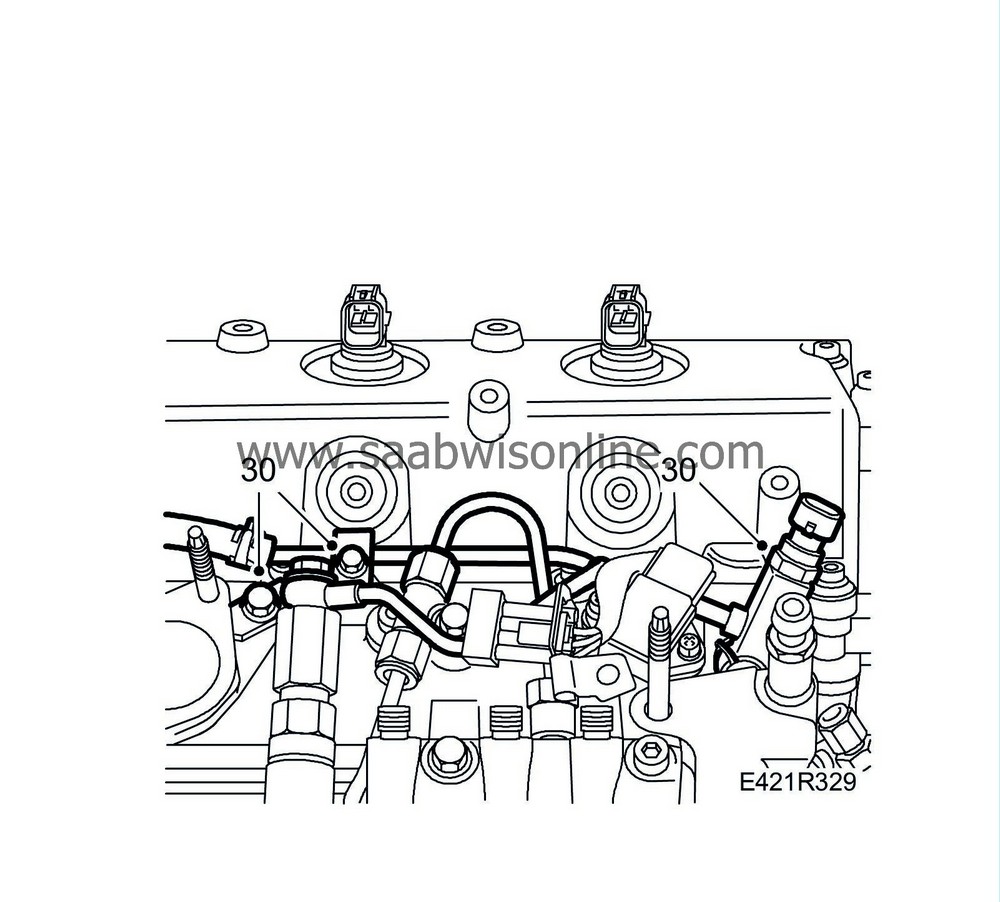
| 30. |
Detach the connector and remove the fuel rail.
|
|
| 31. |
Remove the EGR valve with cooling jacket.

|
|
| 32. |
Remove the coolant pipe and the fuel rail from the cylinder head.

|
|
| 33. |
Remove EGR and coolant pipe as one unit.
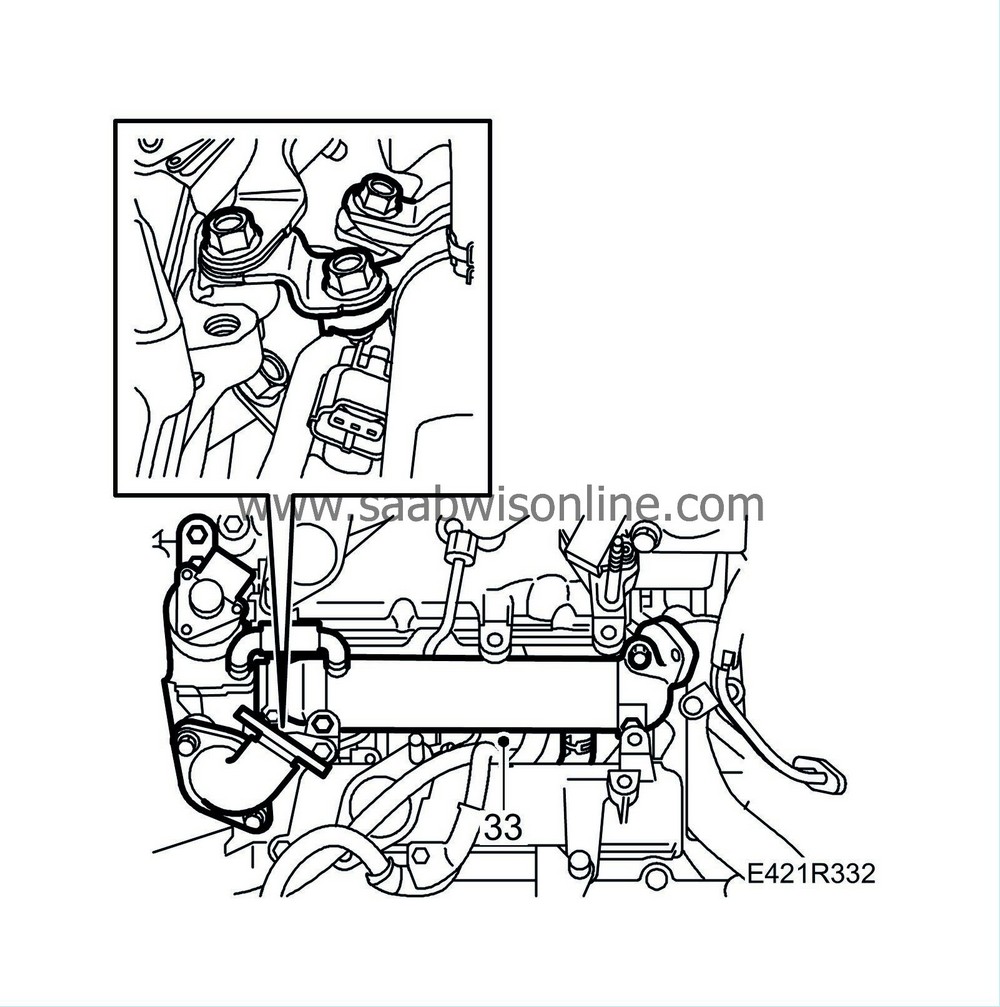
|
|
| 34. |
Remove the camshaft covers.
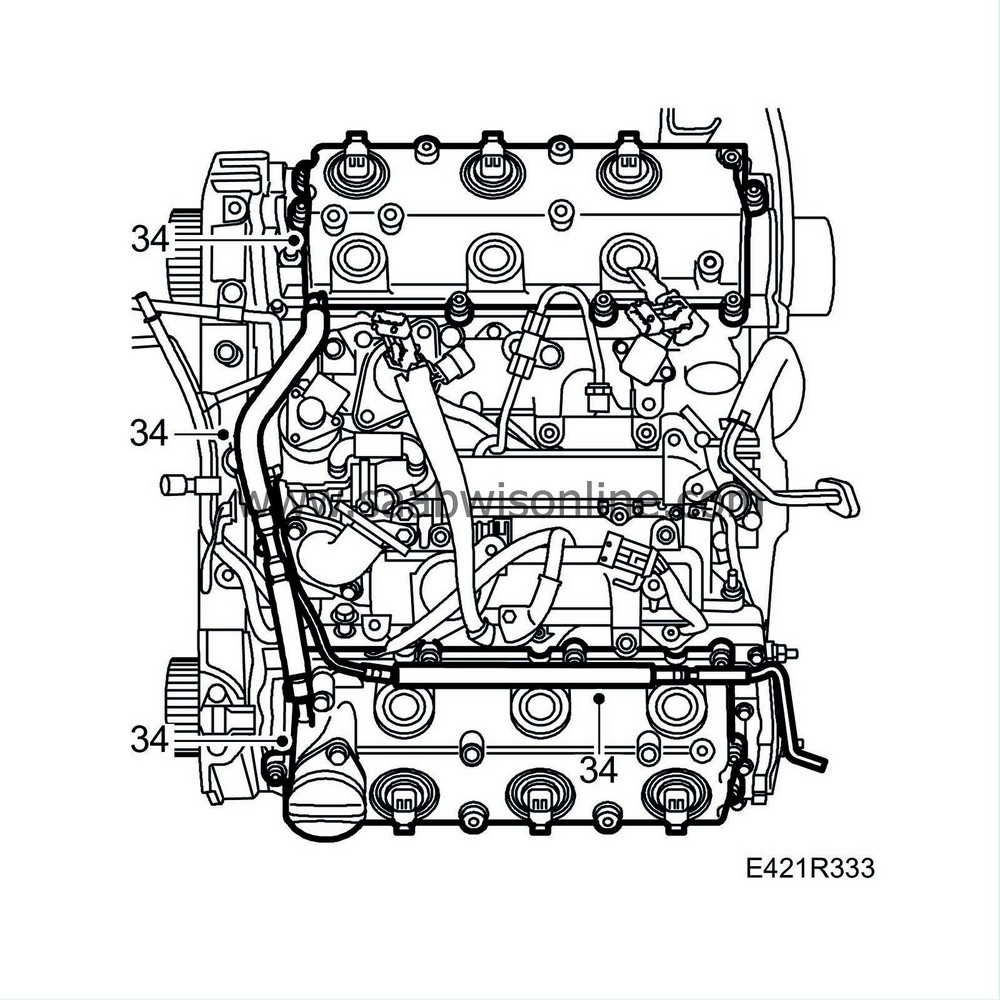
|
|
| 35. |
Remove the power steering pump with bracket as well as the lifting eyes.
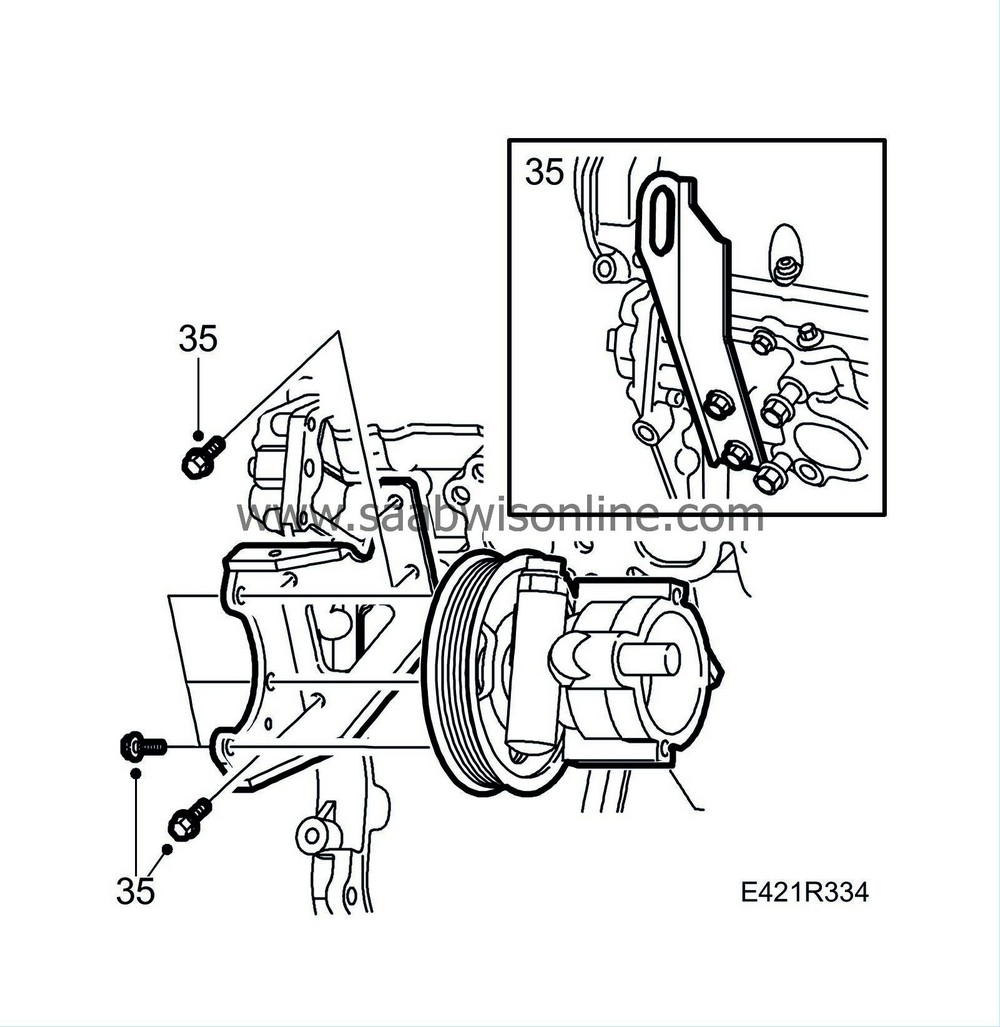
|
|
| 36. |
Remove the injector bracket.
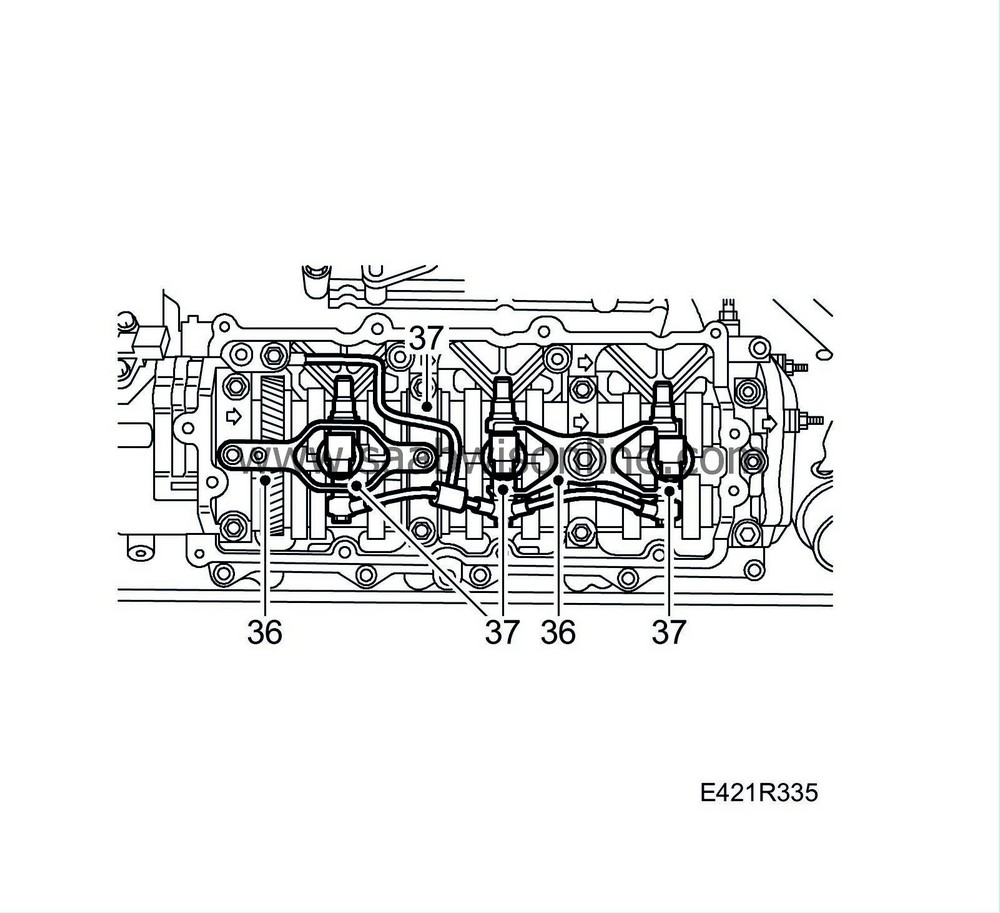
|
|
| 37. |
Remove the injectors with pipes as one unit from each cylinder bank.
|
|
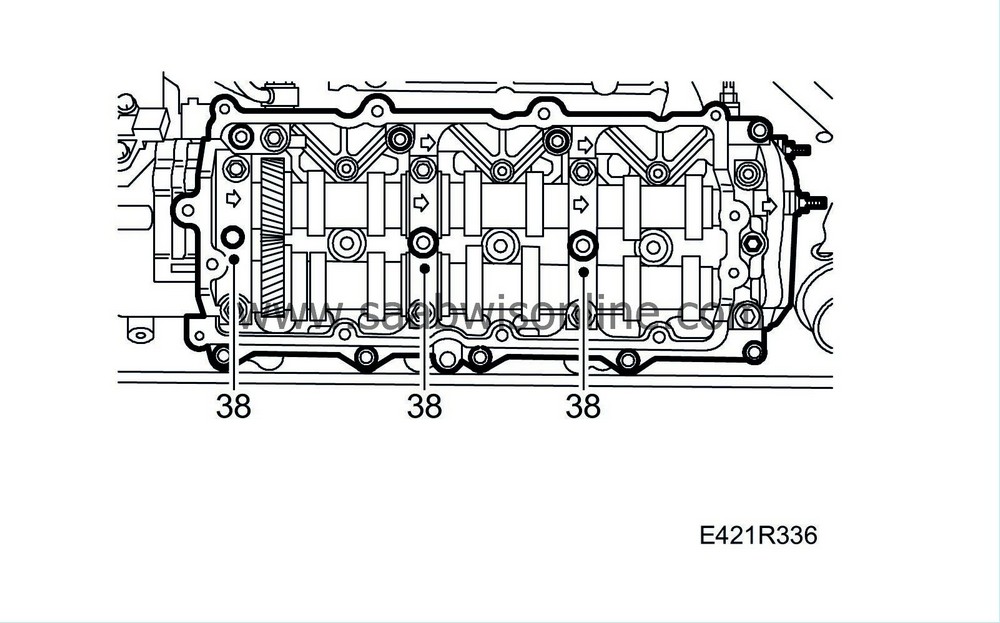
| 38. |
Remove the studs of the injector bracket.
|
|
| 39. |
Remove the camshaft frames.
|
|
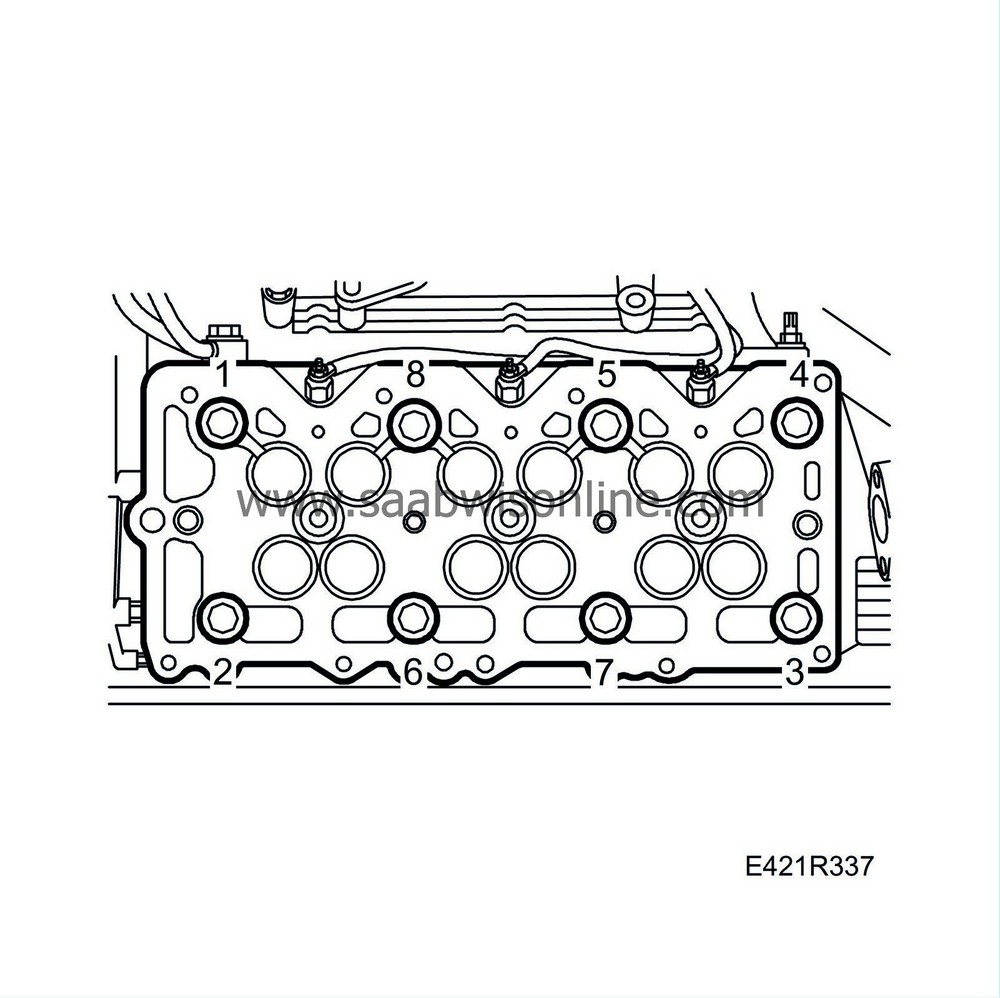
| 40. |
Remove the cylinder heads.
|
|
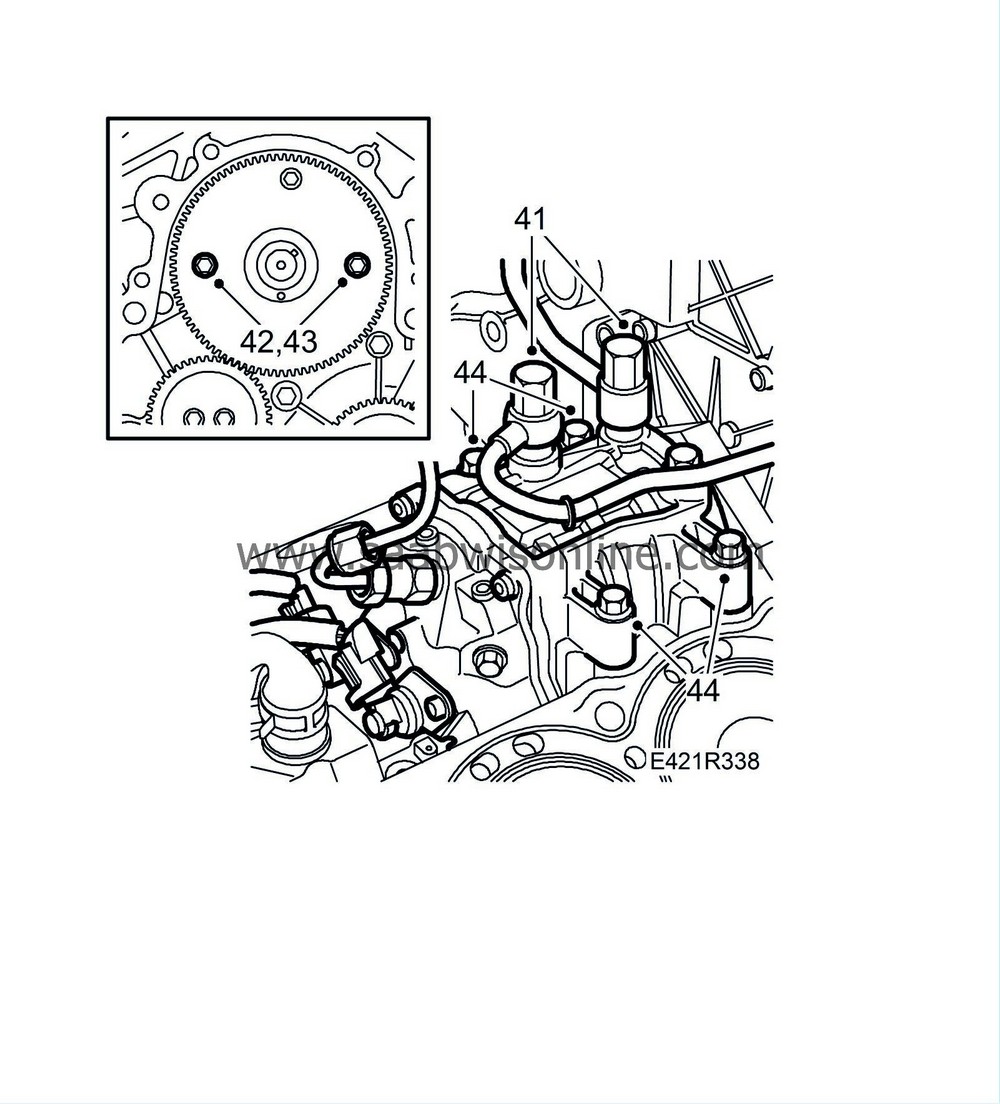
| 41. |
Remove the fuel feed pipes from the fuel pump.
|
|
| 42. |
Fit two M6 bolts in the holes of the fuel pump gear. Tighten the bolts alternately until the outer portion of the gear has loosened.
|
|
| 43. |
Fit two M6 bolts in the holes of the inner portion of the fuel pump gear and remove it.
|
|
| 44. |
Remove the fuel pump.
|
||||||||||
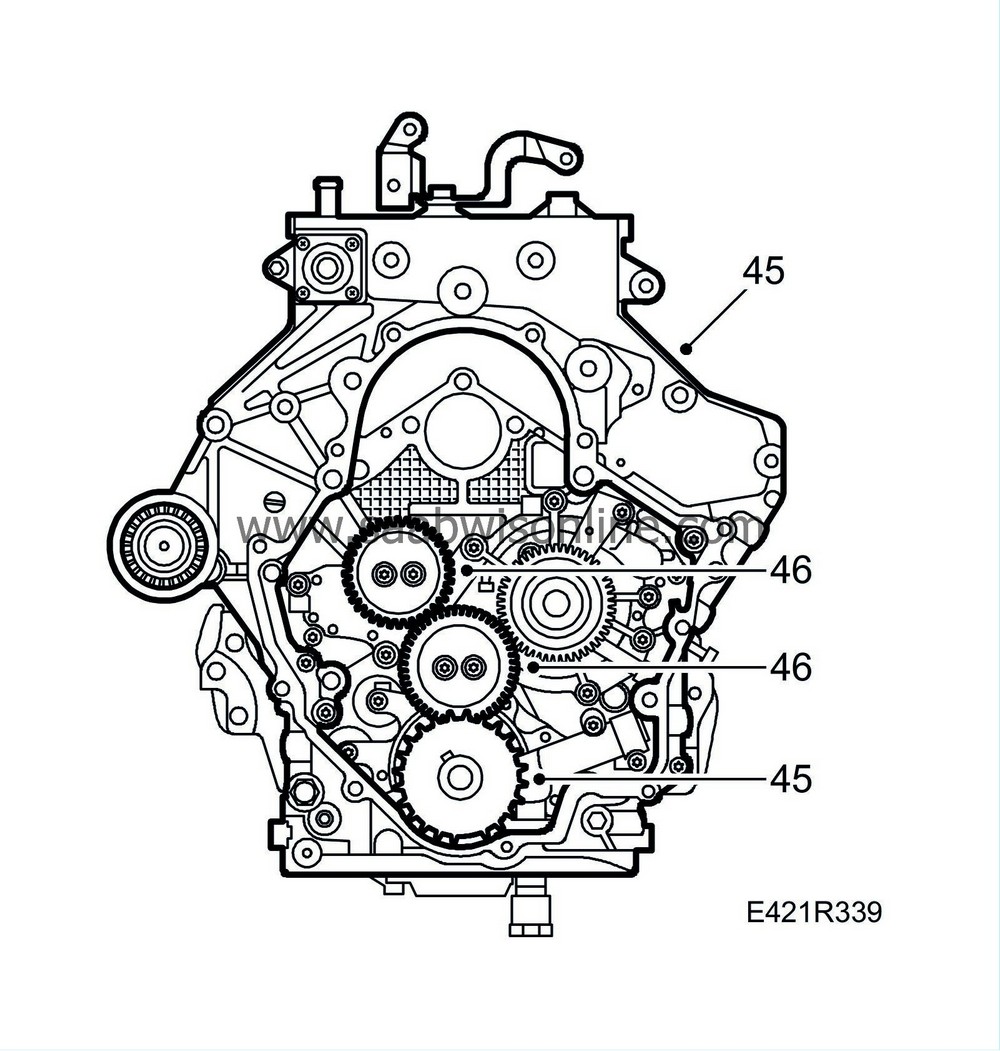
| 45. |
Remove the crankshaft position sensor's sprocket and the inner timing cover.
|
|
| 46. |
Remove the timing belt.
|
|
| 47. |
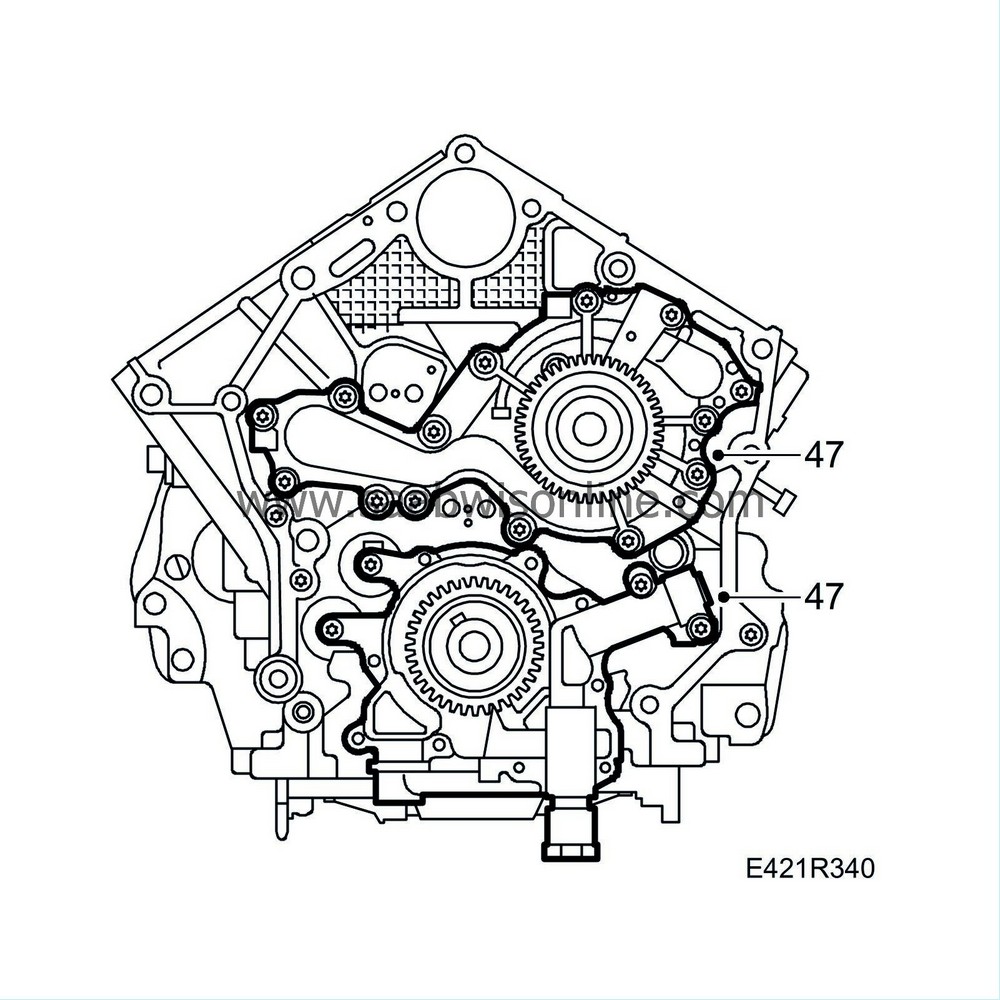
Remove the coolant pump and the oil pump.
|
|
| 48. |
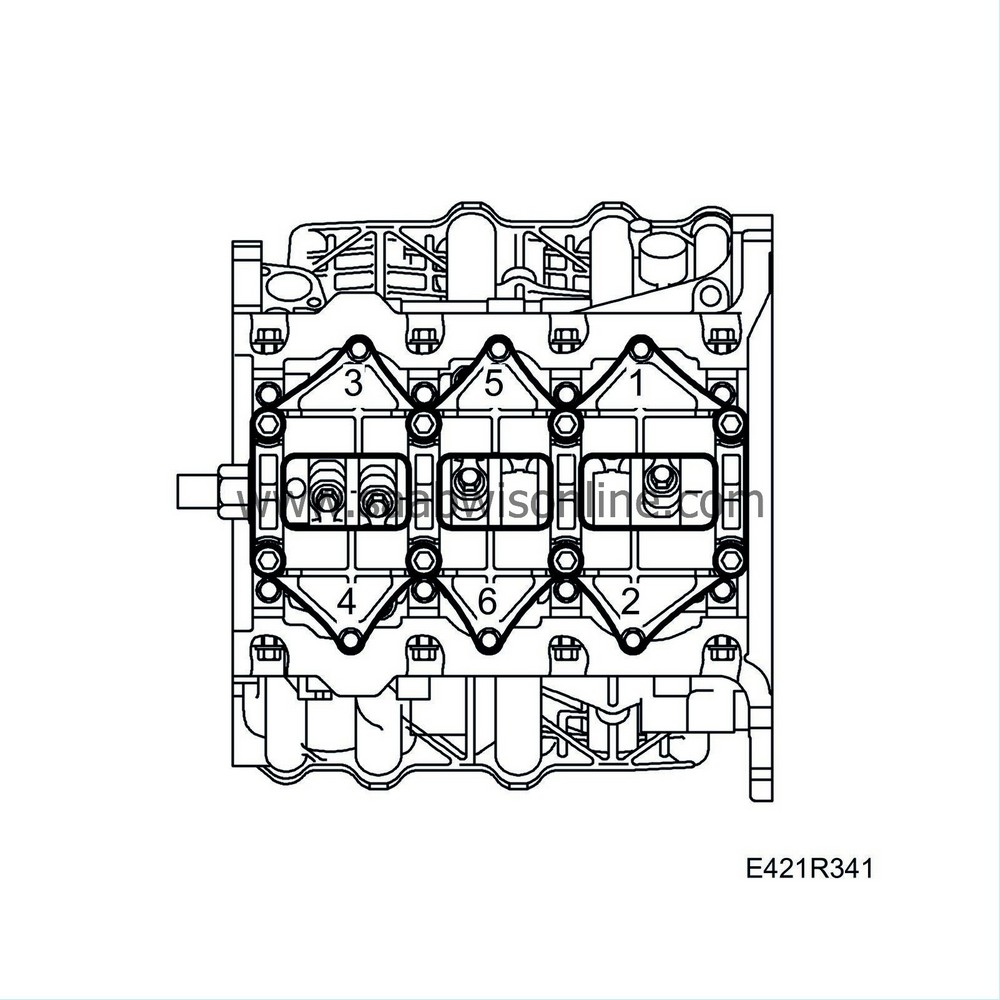
Turn the engine so that the underbody becomes accessible. Remove the main bearing member.
|
|
| 49. |
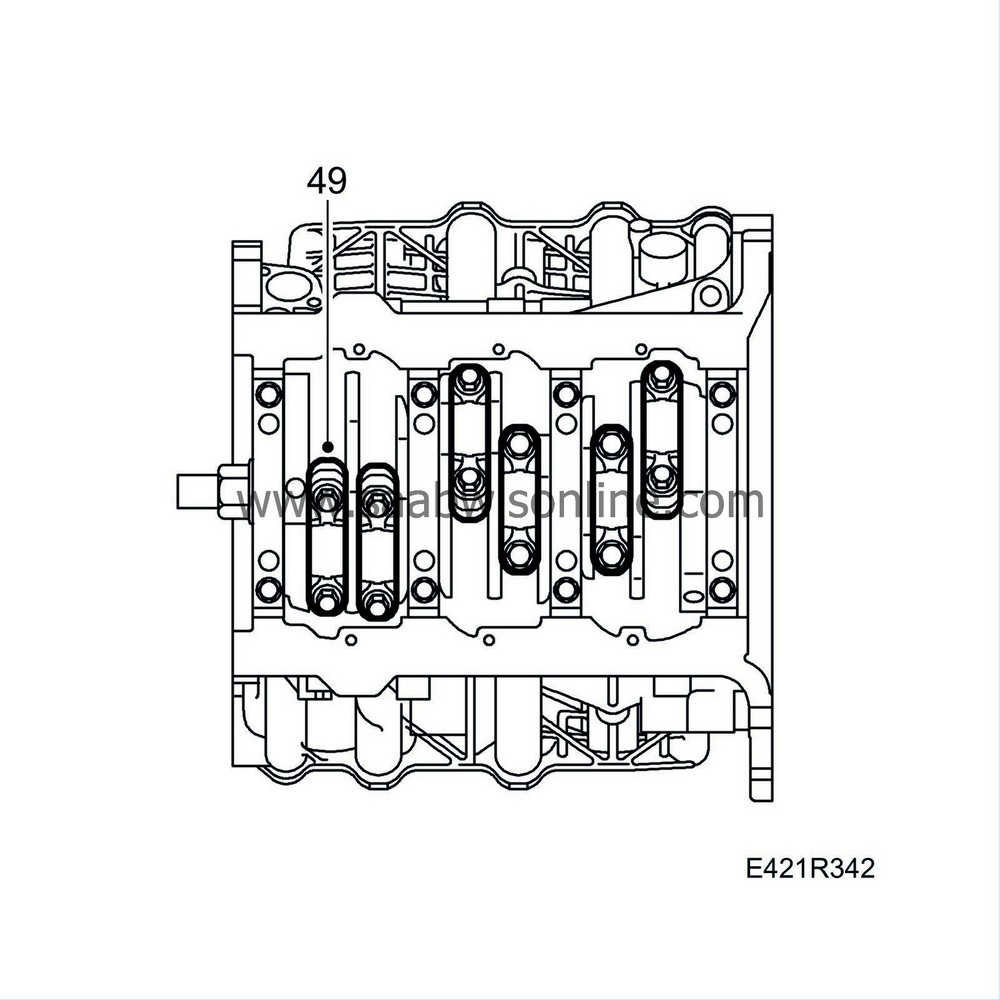
Remove all big-end bearing caps. Remove the pistons with connecting rods.
|
|
| 50. |
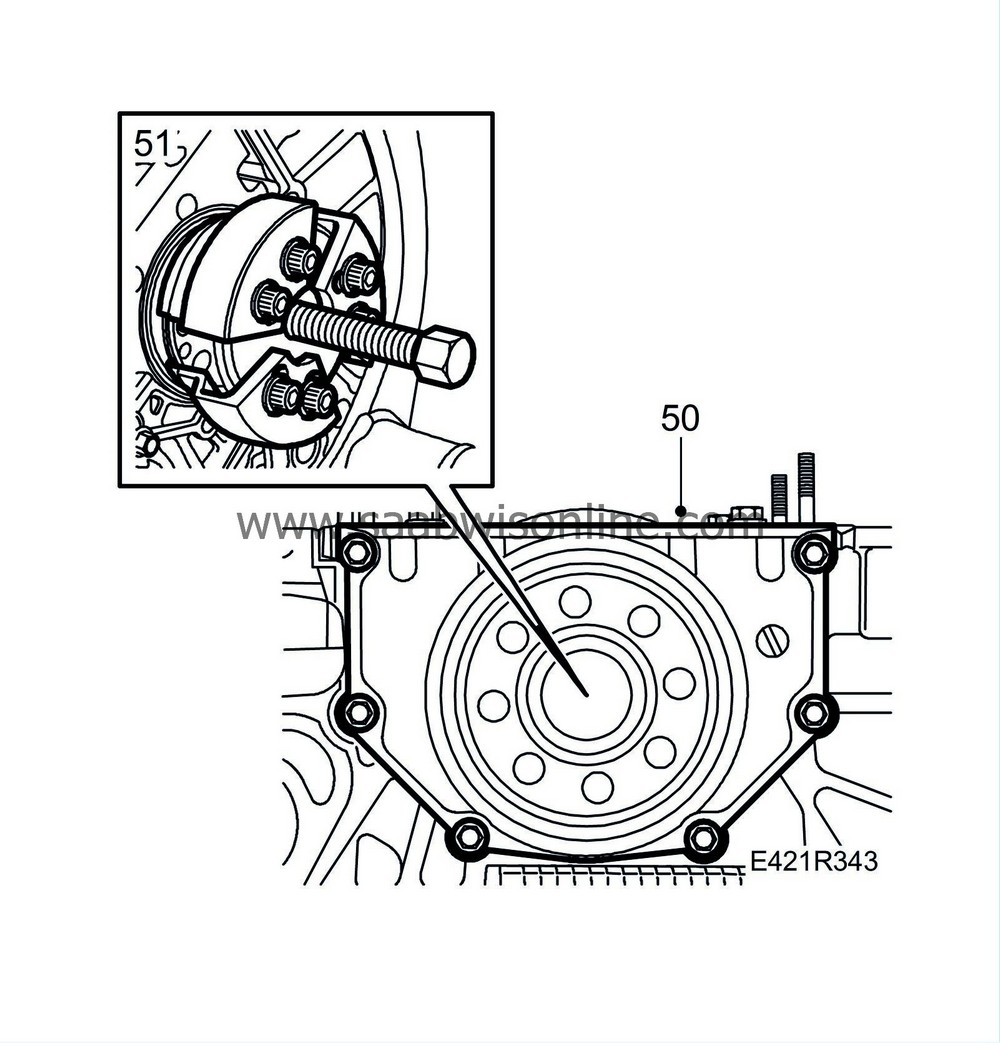
Remove the crankshaft seal housing.
|
|
| 51. |
Remove the rear crankshaft seal using
83 95 733 Removal tool, rear crankshaft seal
.
|
|
| 52. |
Remove the main bearing caps by pulling them upwards using long bolts fastened in the threaded holes.

|
|
| 53. |
Remove the crankshaft.
|
|
| 54. |
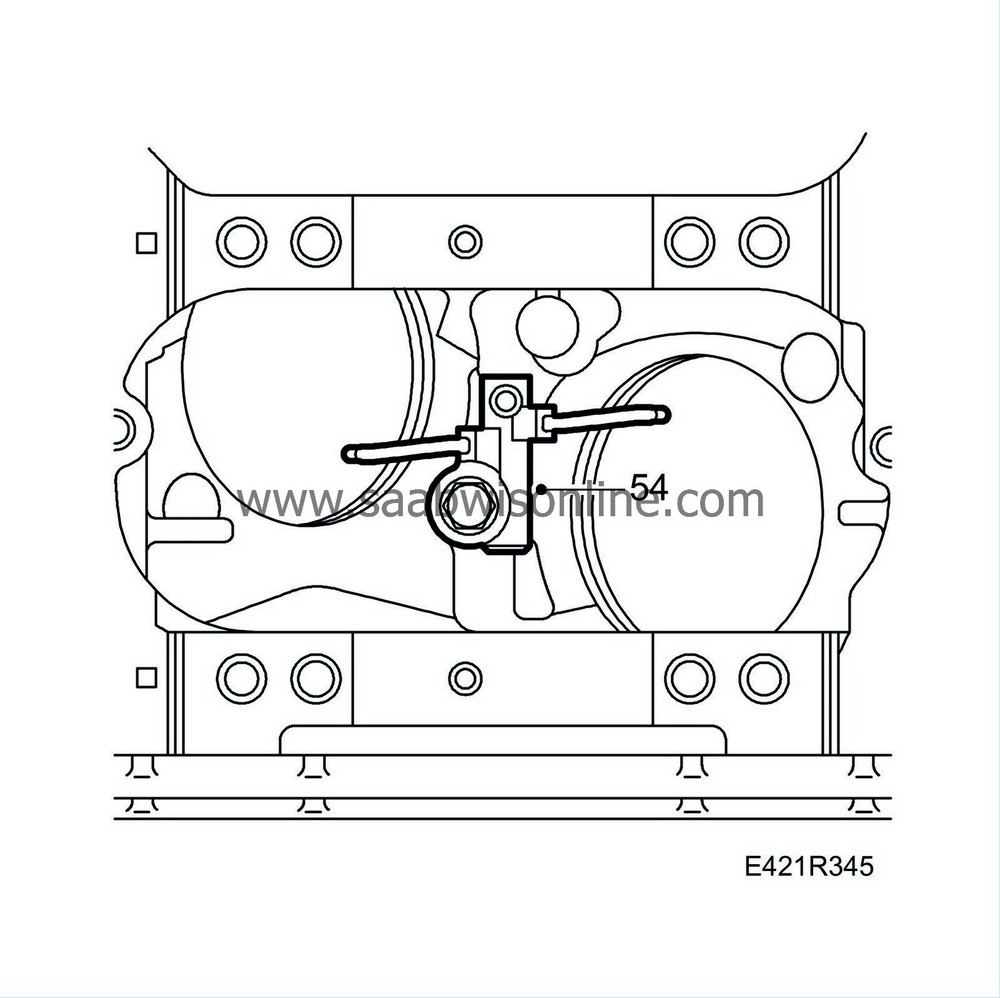
Remove the piston cooling nozzles.
|
|
| 55. |
Clean the parts and remove the remains of old gaskets. Check for wear on bearings, piston rings, etc. before fitting. Replace worn and faulty components.
|
|


