Subframe, 4-cylinder diesel engine
|
|
Subframe, 4-cylinder diesel engine
|
This method is used when the same subframe is to be refitted.
|
Important
|
|
Cables, hoses, leads, etc., are secured with cable ties made of hard plastic. After tightening, the ties are cut off, leaving more or less sharp ends that can cause cuts if not handled carefully.
|
|
|
|
1.
|
Place the car on a lift.
|
|
2.
|
Lay protection over the wings.
|
|
3.
|
Remove the upper engine cover.
|
|
5.
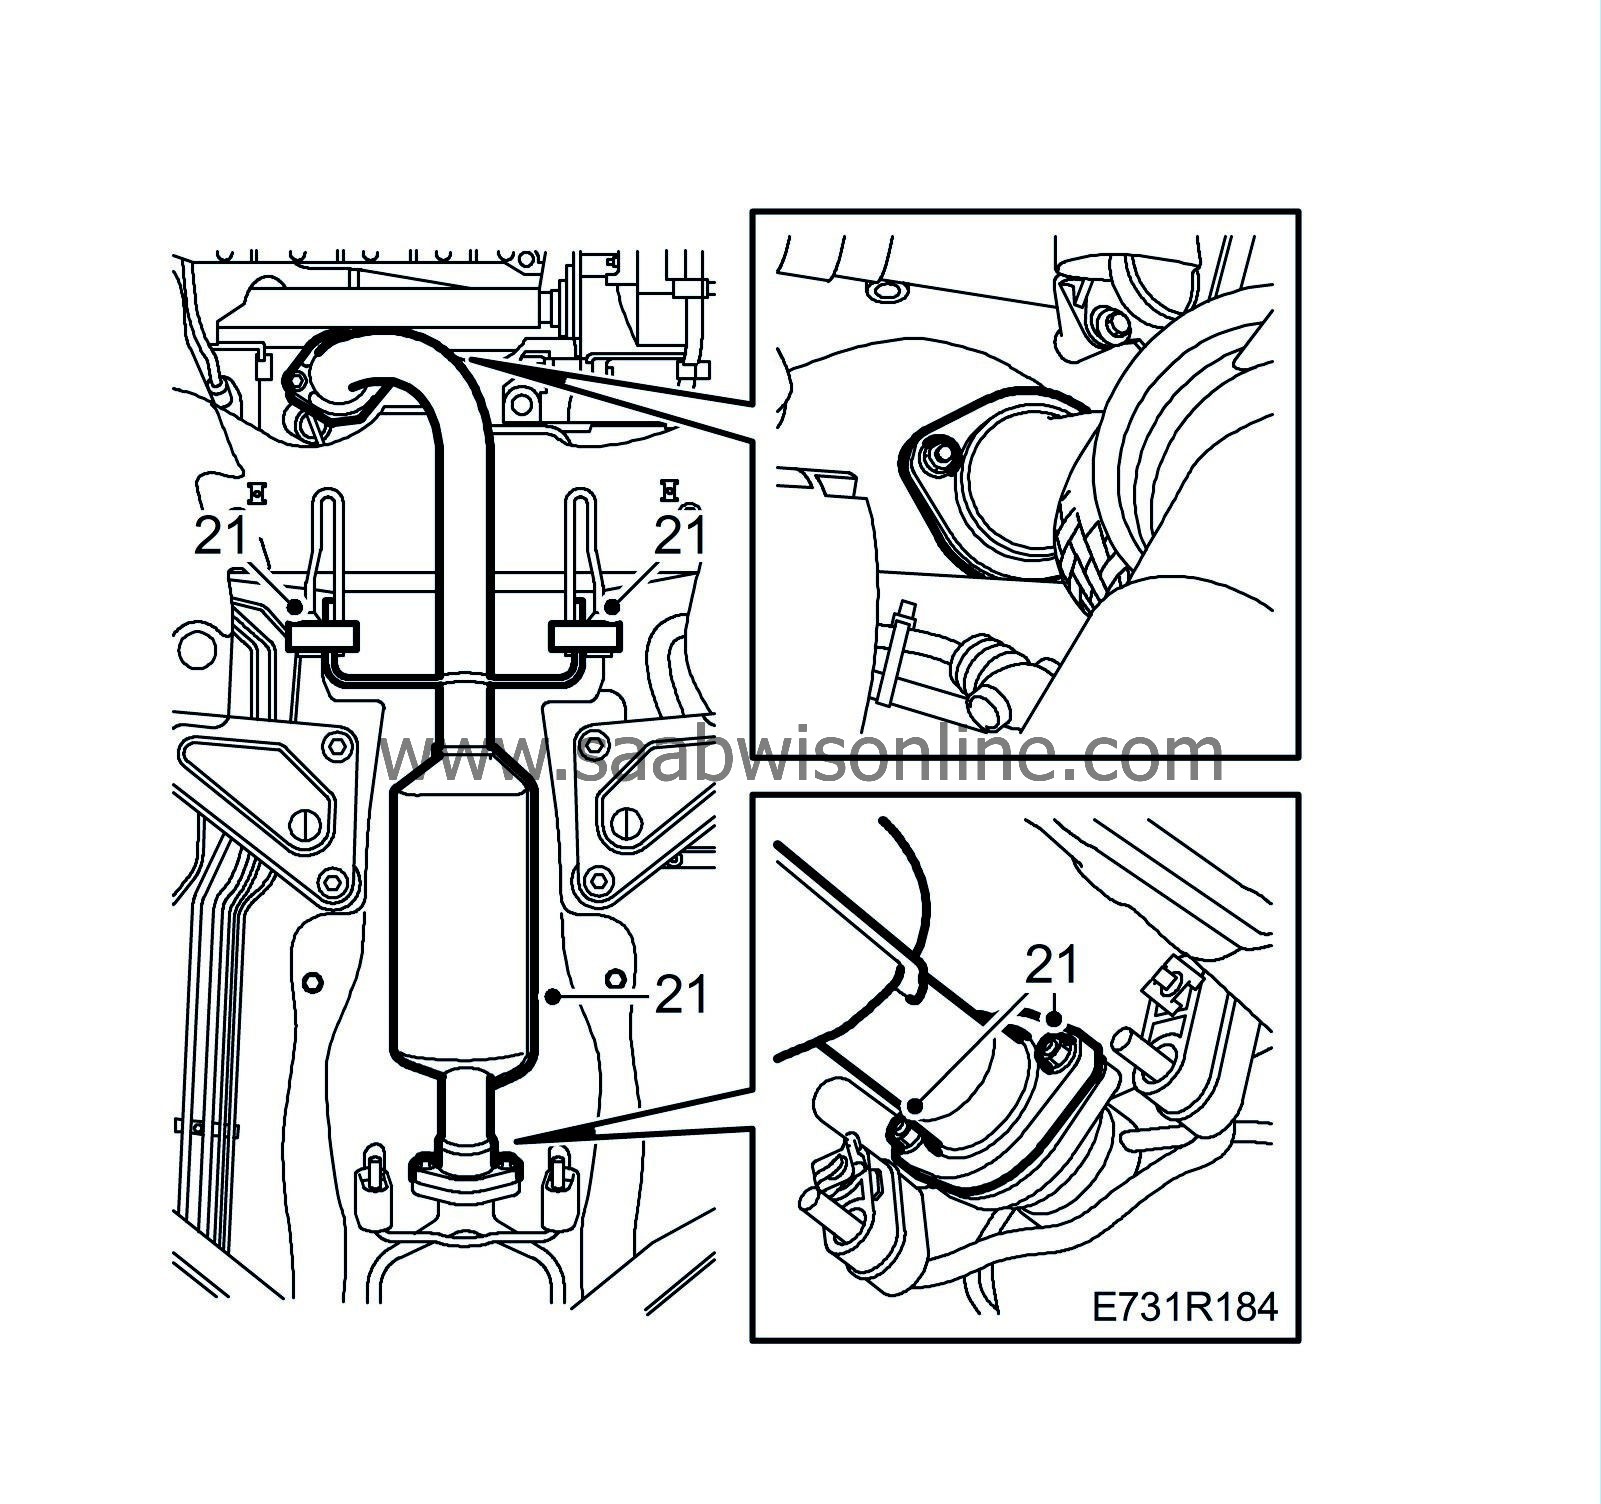
|
Unscrew the nuts from the exhaust pipe flange.
|
|
6.
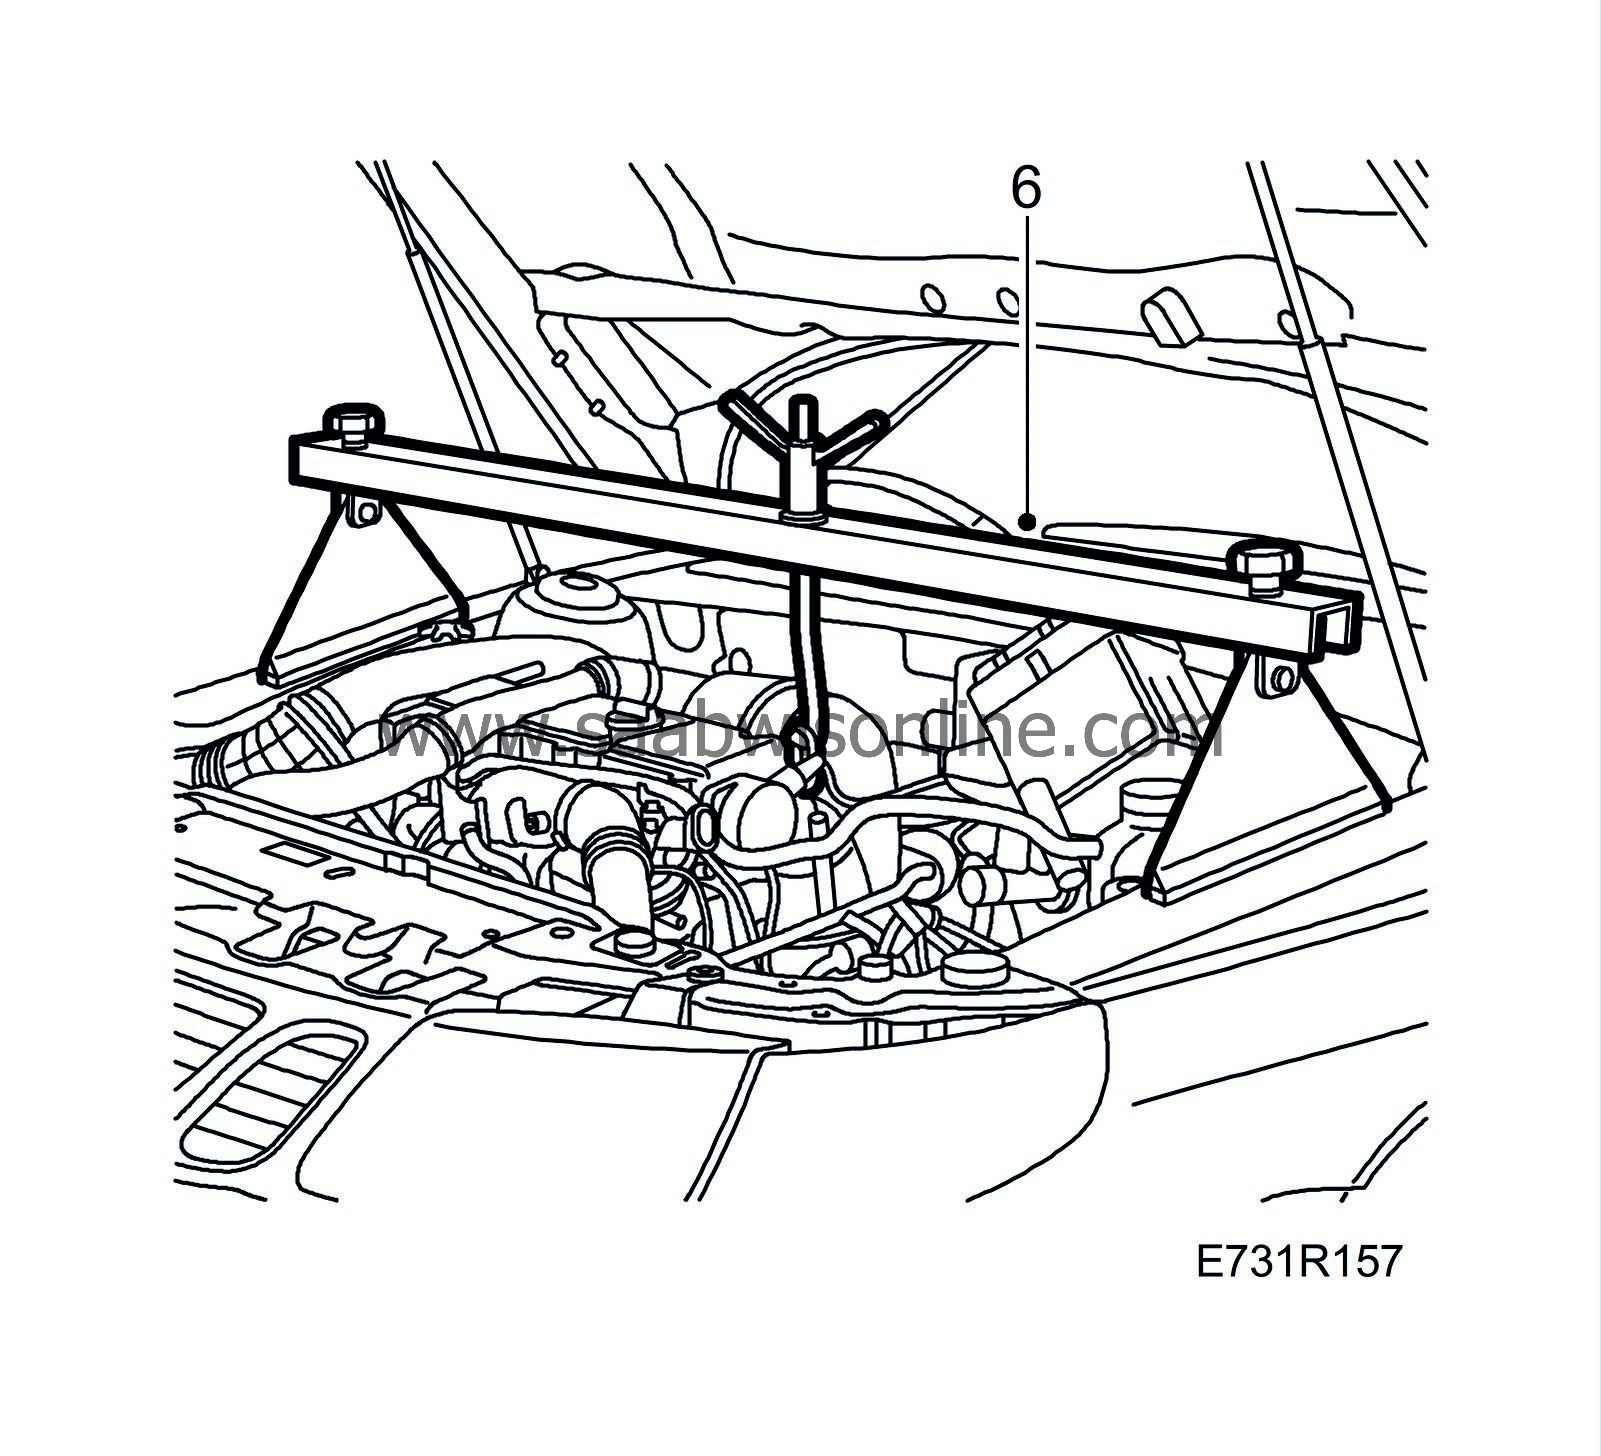
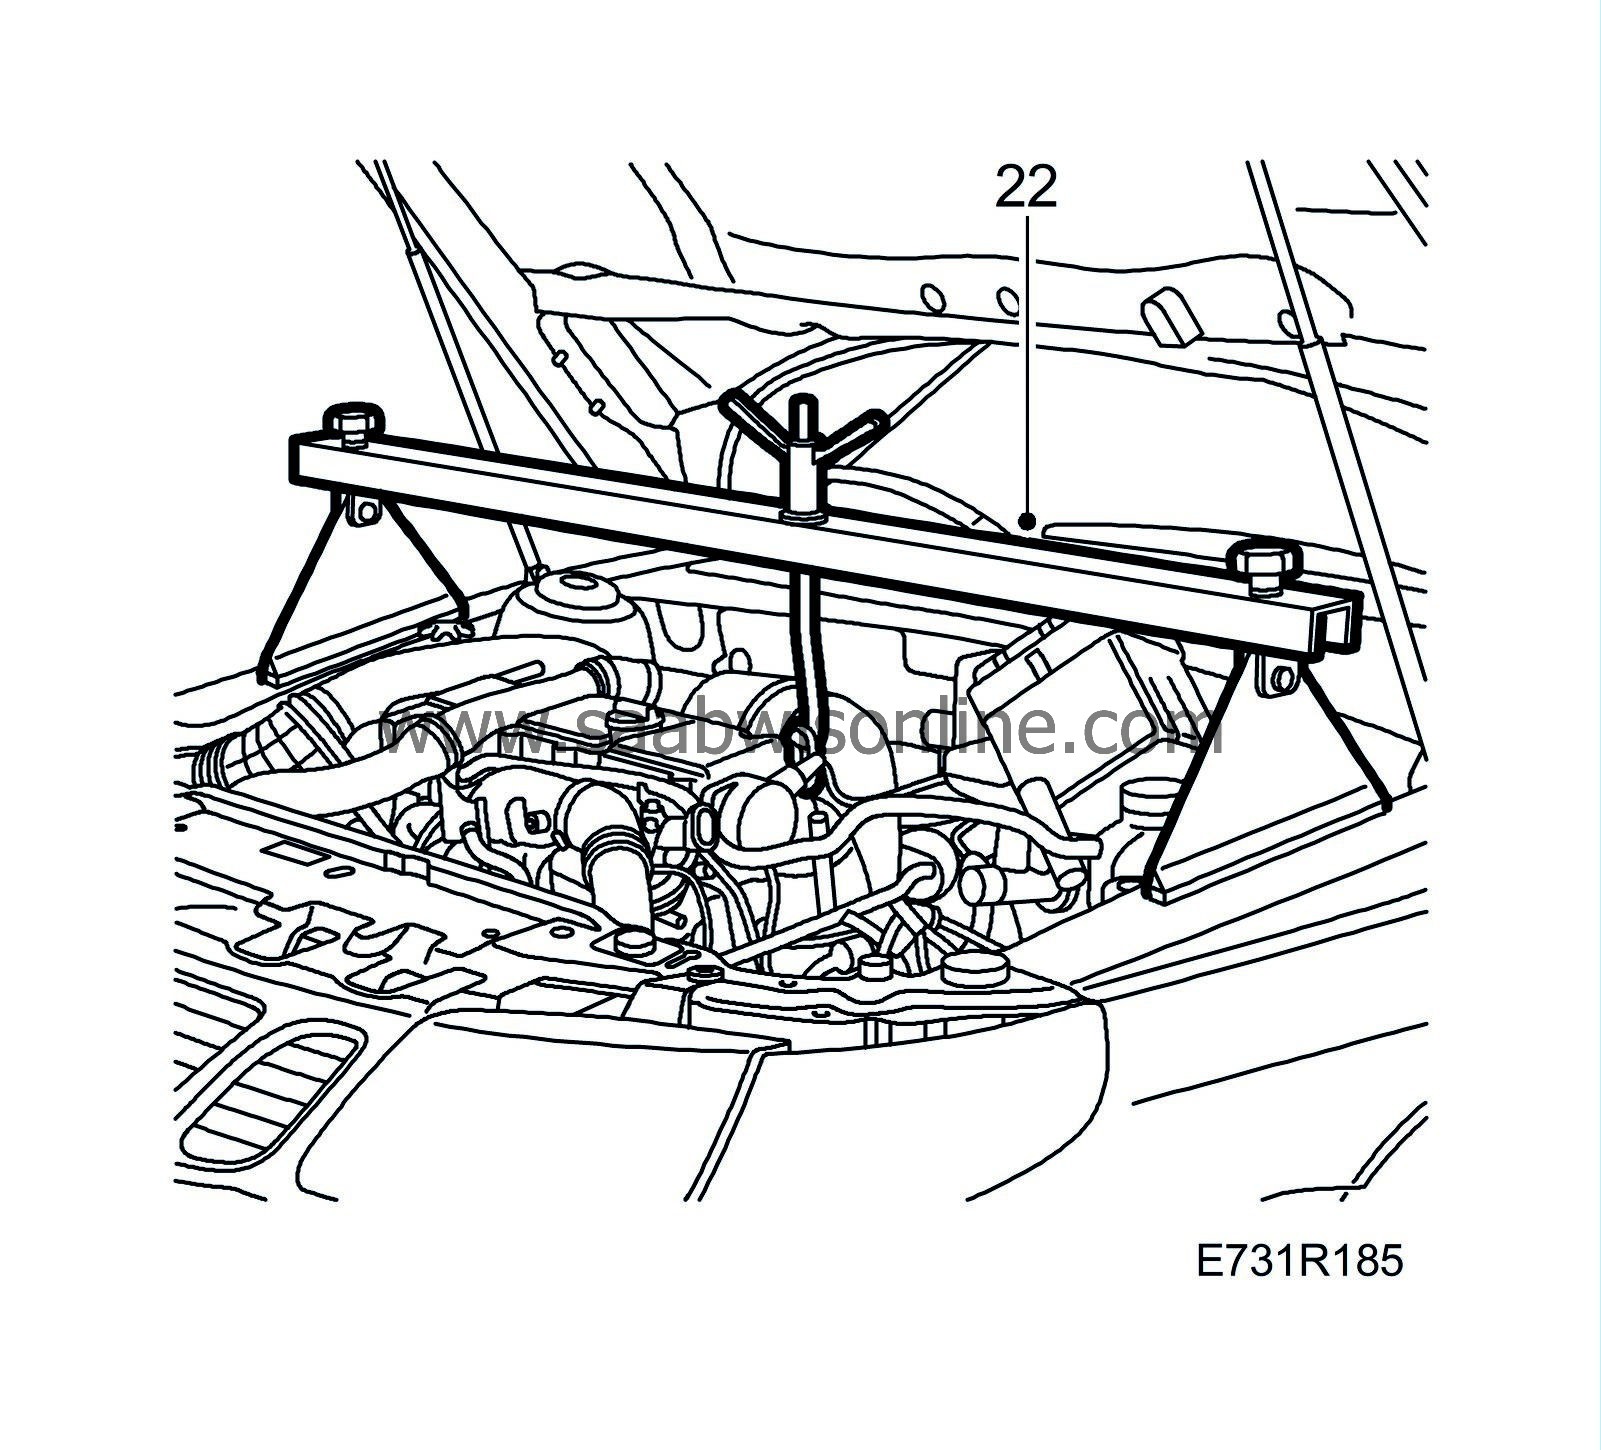
|
Take the weight off the engine and gearbox with
83 94 850 Lifting beam
. Place the beam on the wheel housings so that it rests on the edge of the wings, close to the wing retaining bolts.
|
|
7.
|
Raise the car and remove the front wheels.
|
|
8.
|
Remove both the lower engine covers.
|
|
9.
|
Cars with xenon headlamps:
Detach the level sensor for the xenon headlamps from its mounting and place it to one side.
|
|
10.
|
Remove the side covers in both wheel housings.
|
|
11.
|
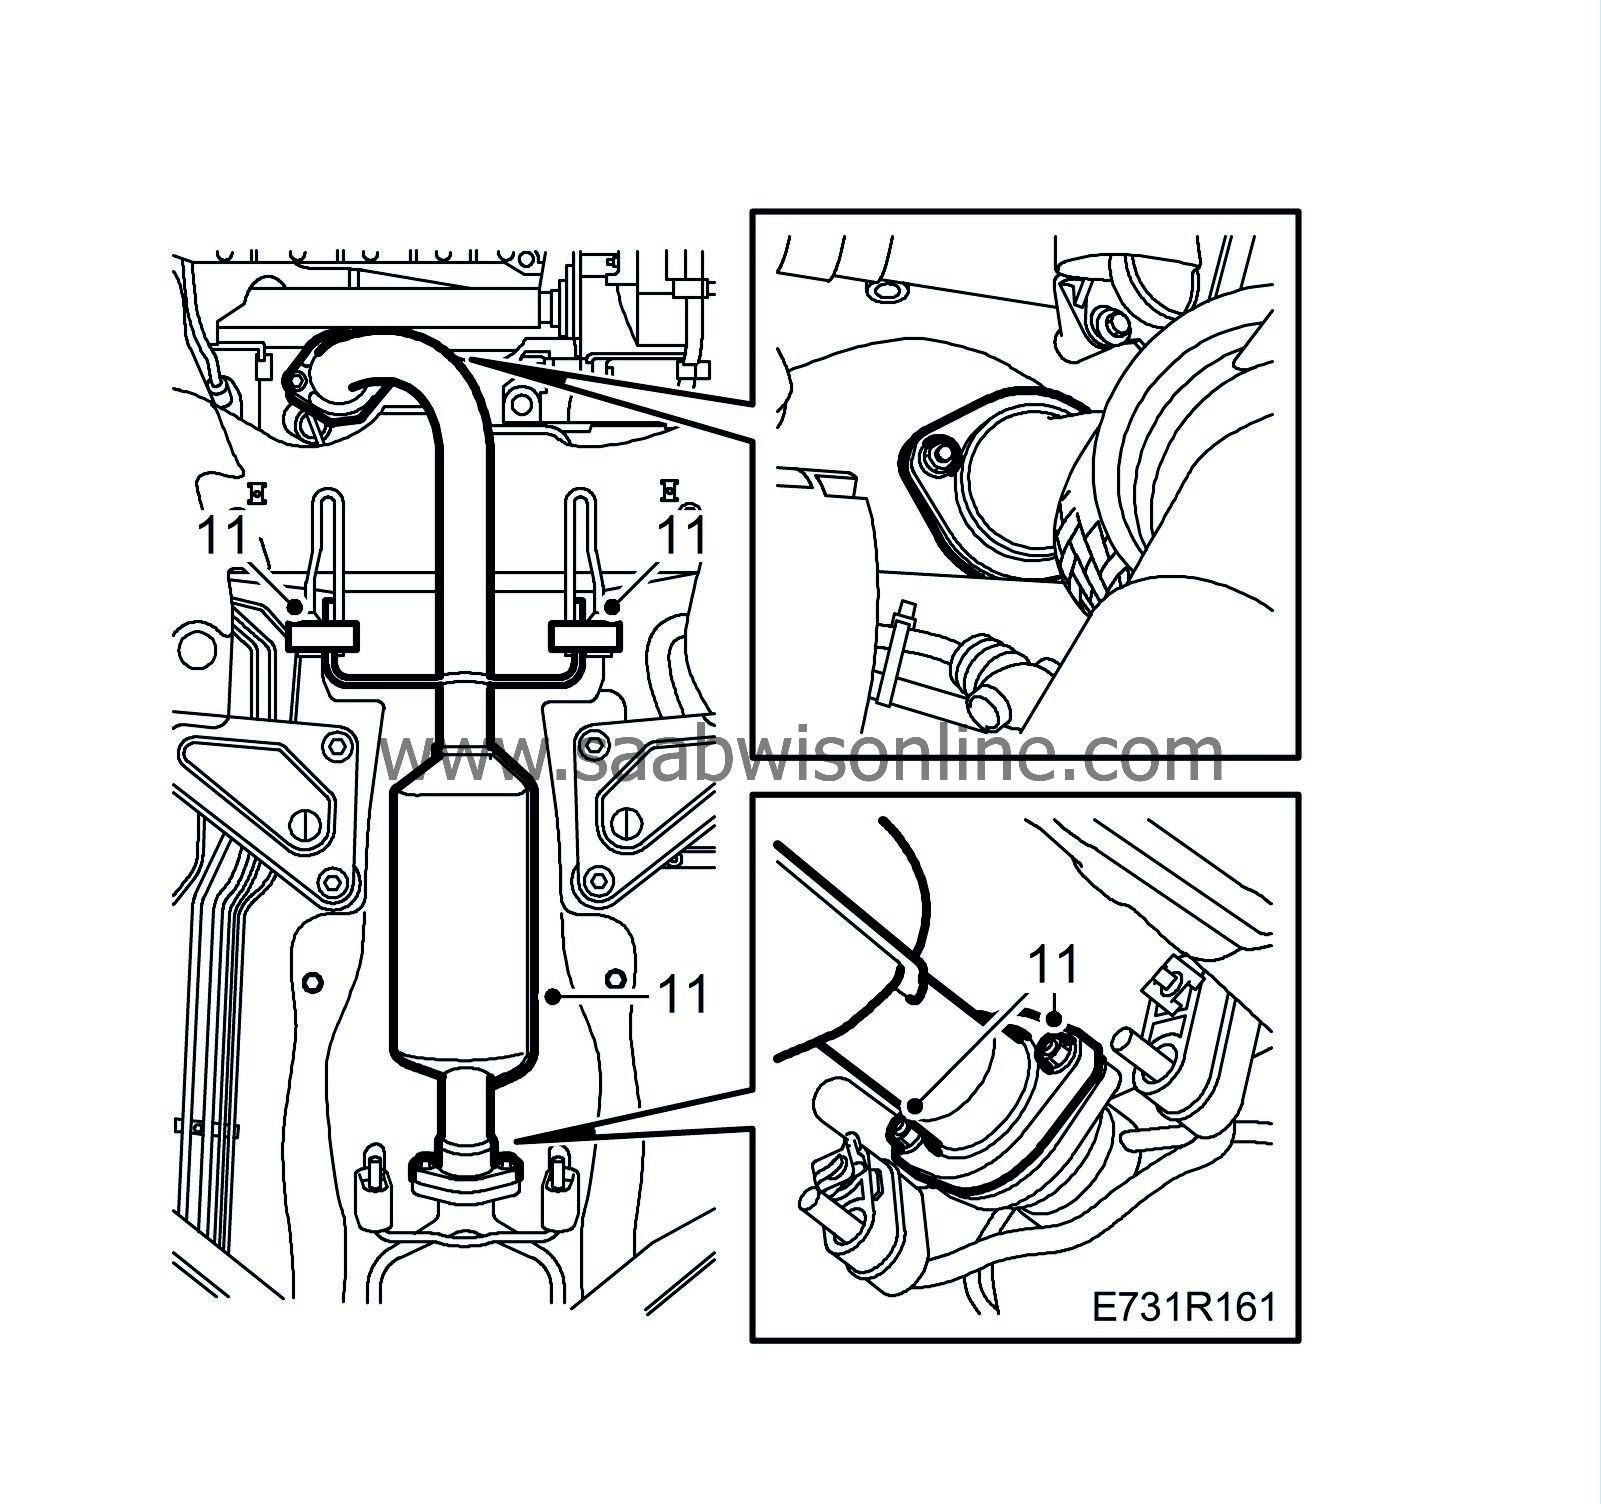
Remove the front piece of the exhaust pipe.
|
|
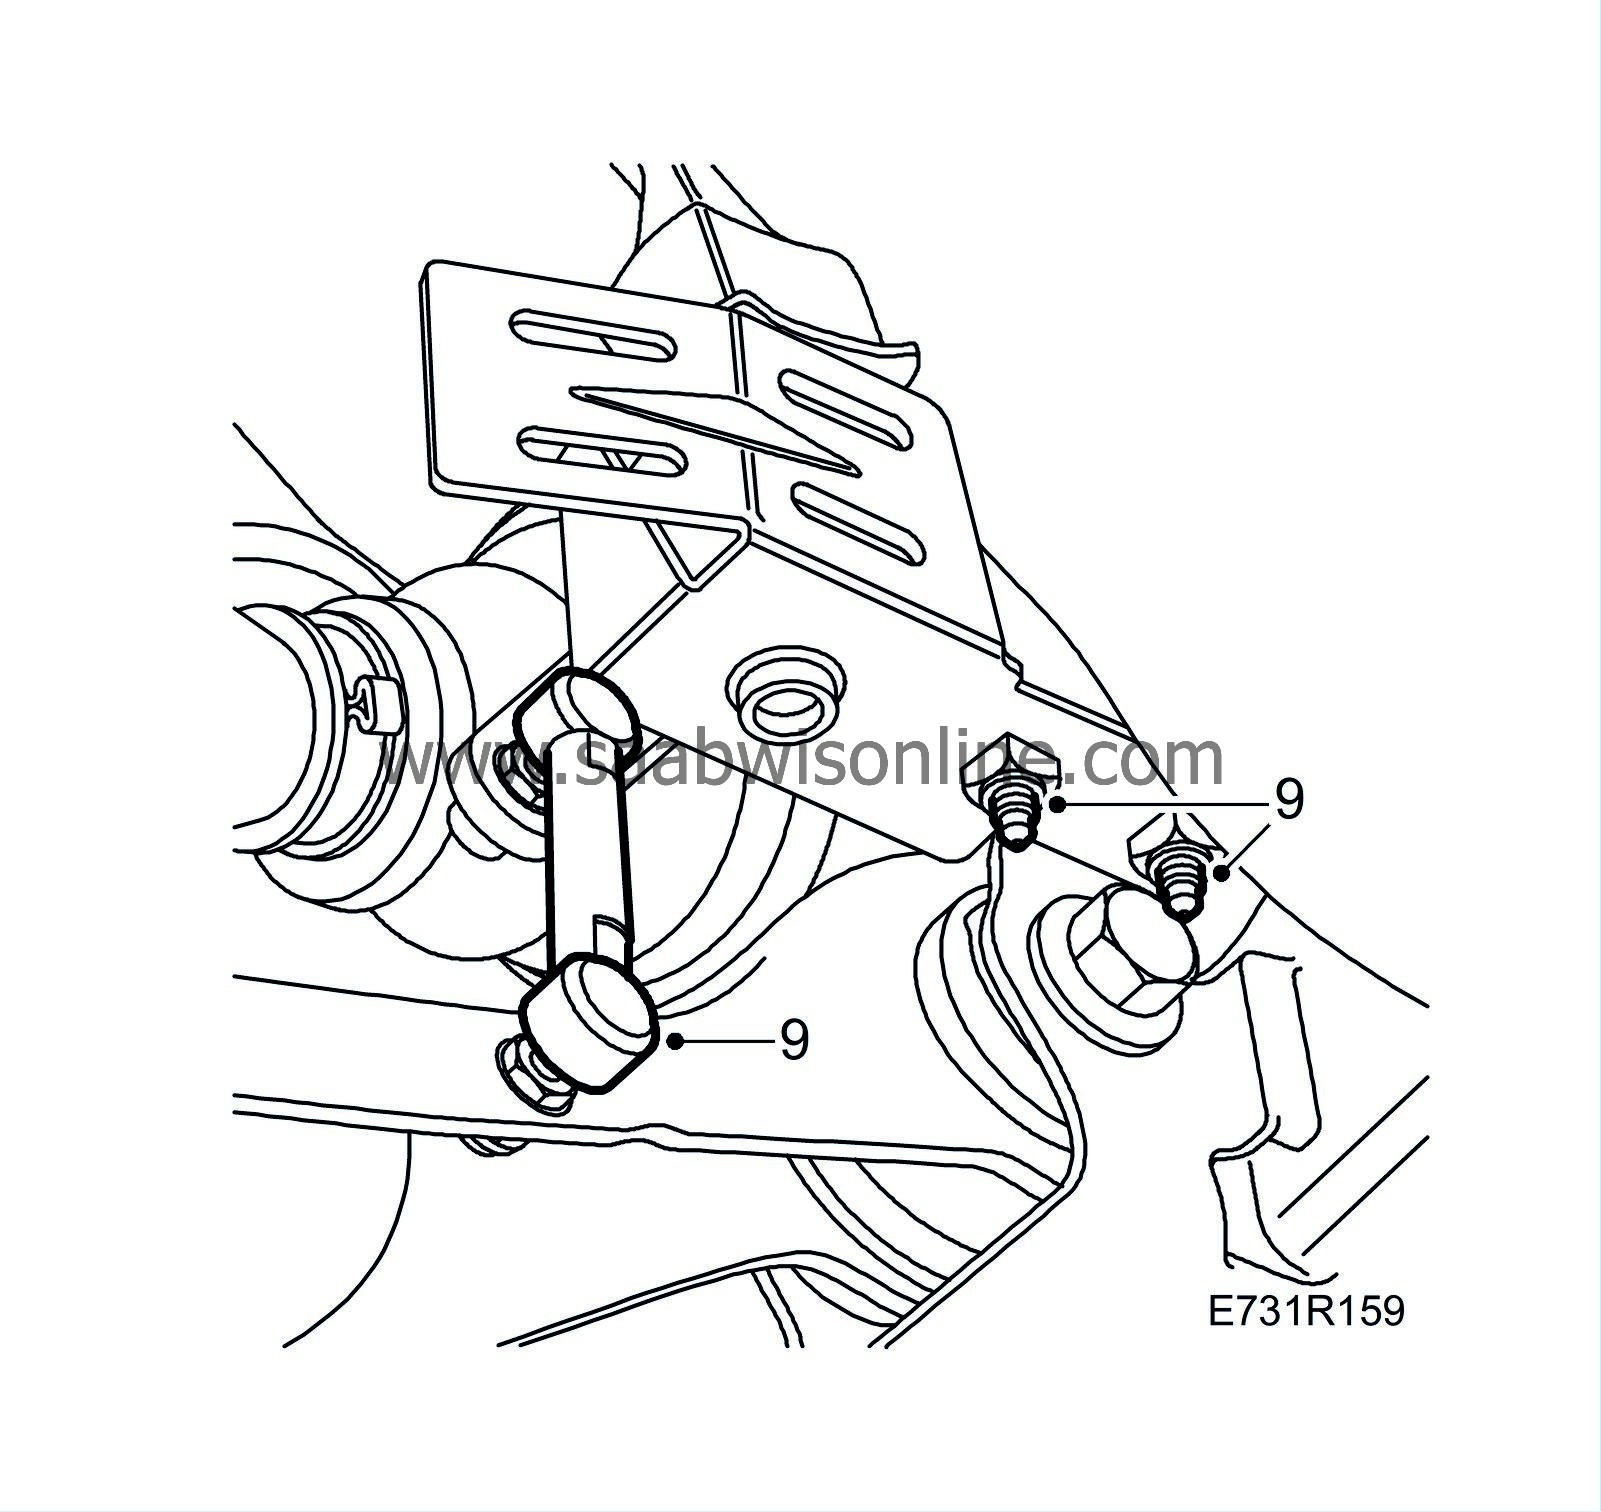
12.
|
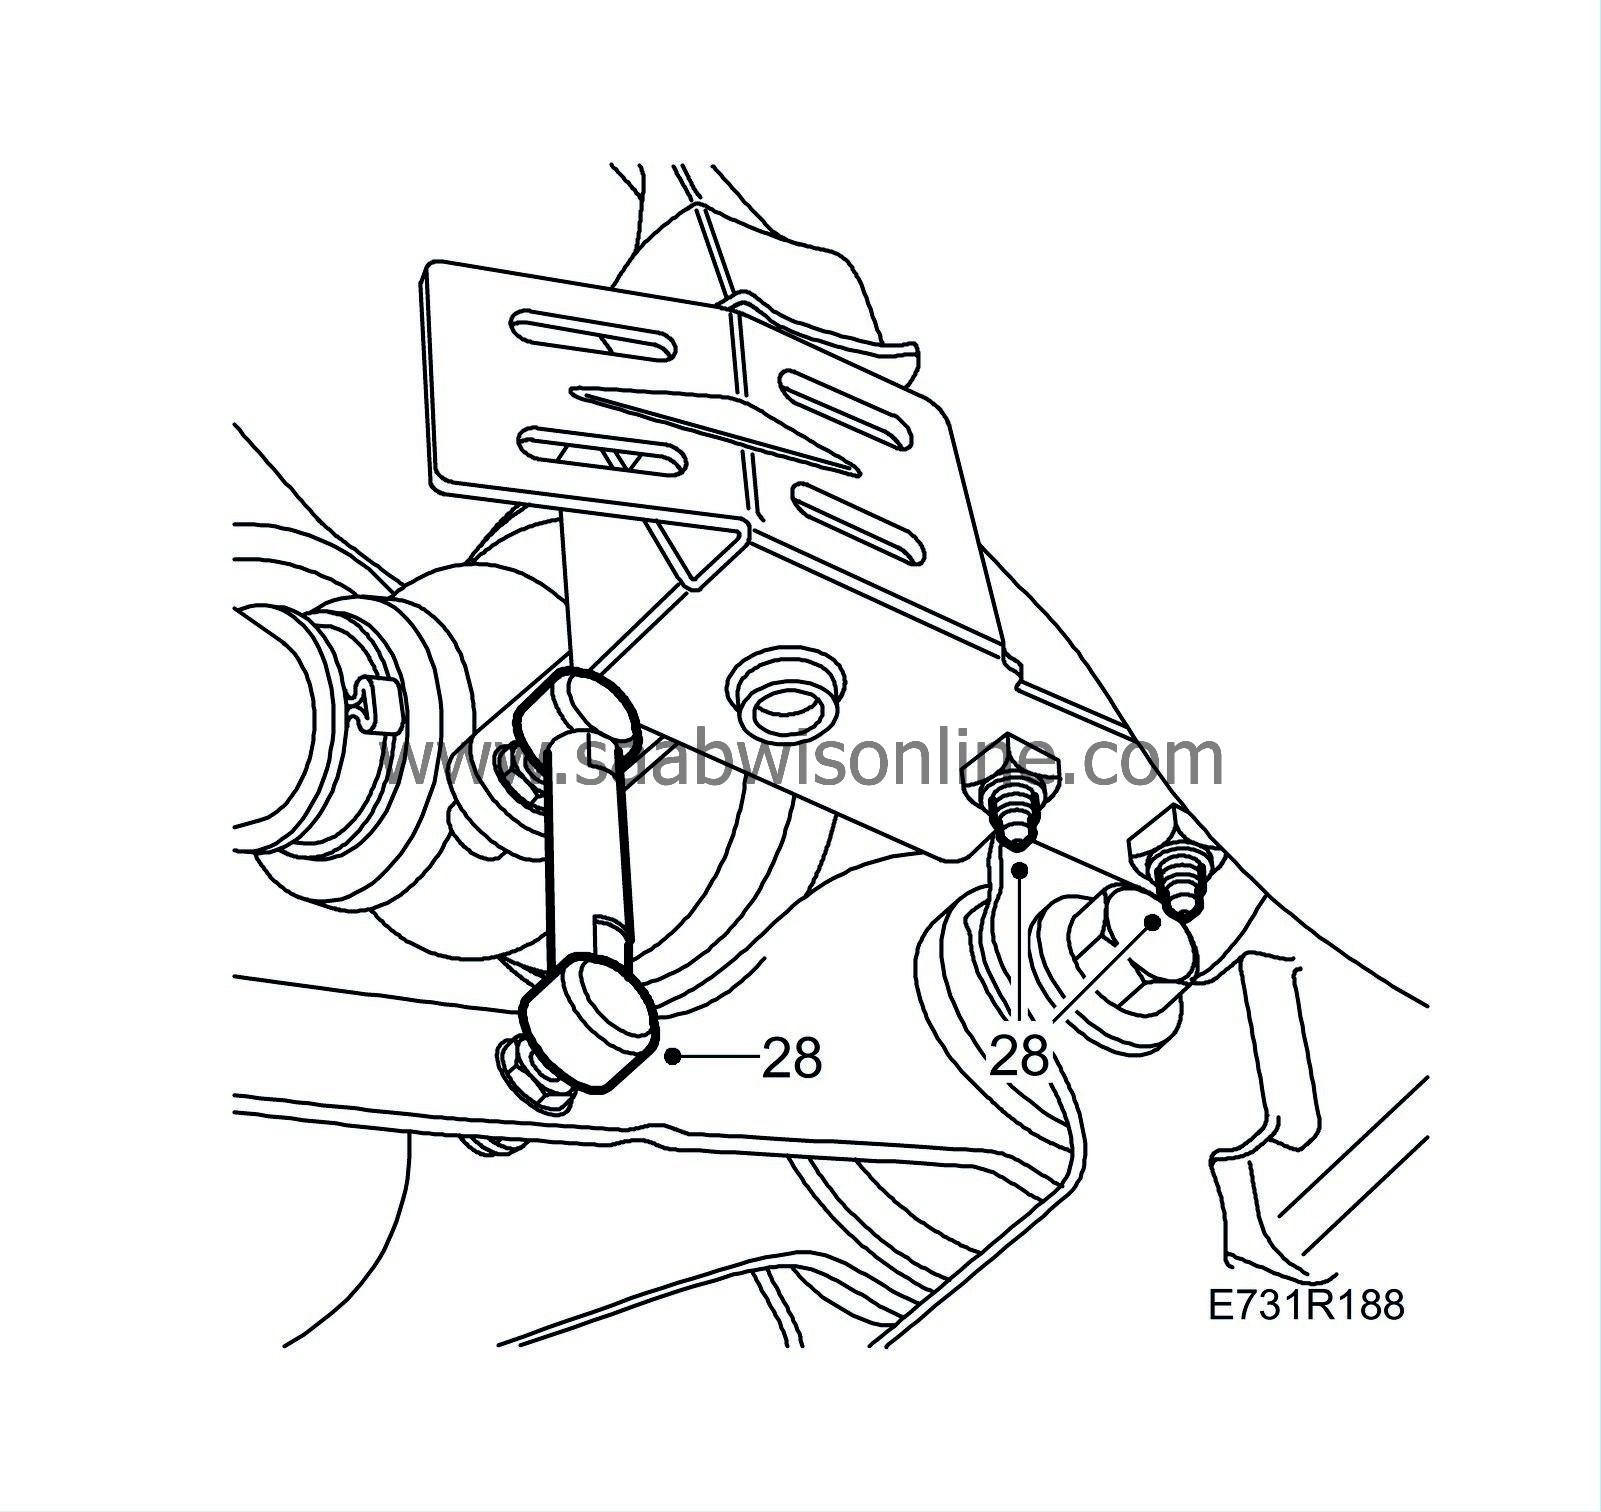
Remove the bolt securing the front torque arm to the subframe.
|
|
13.
|
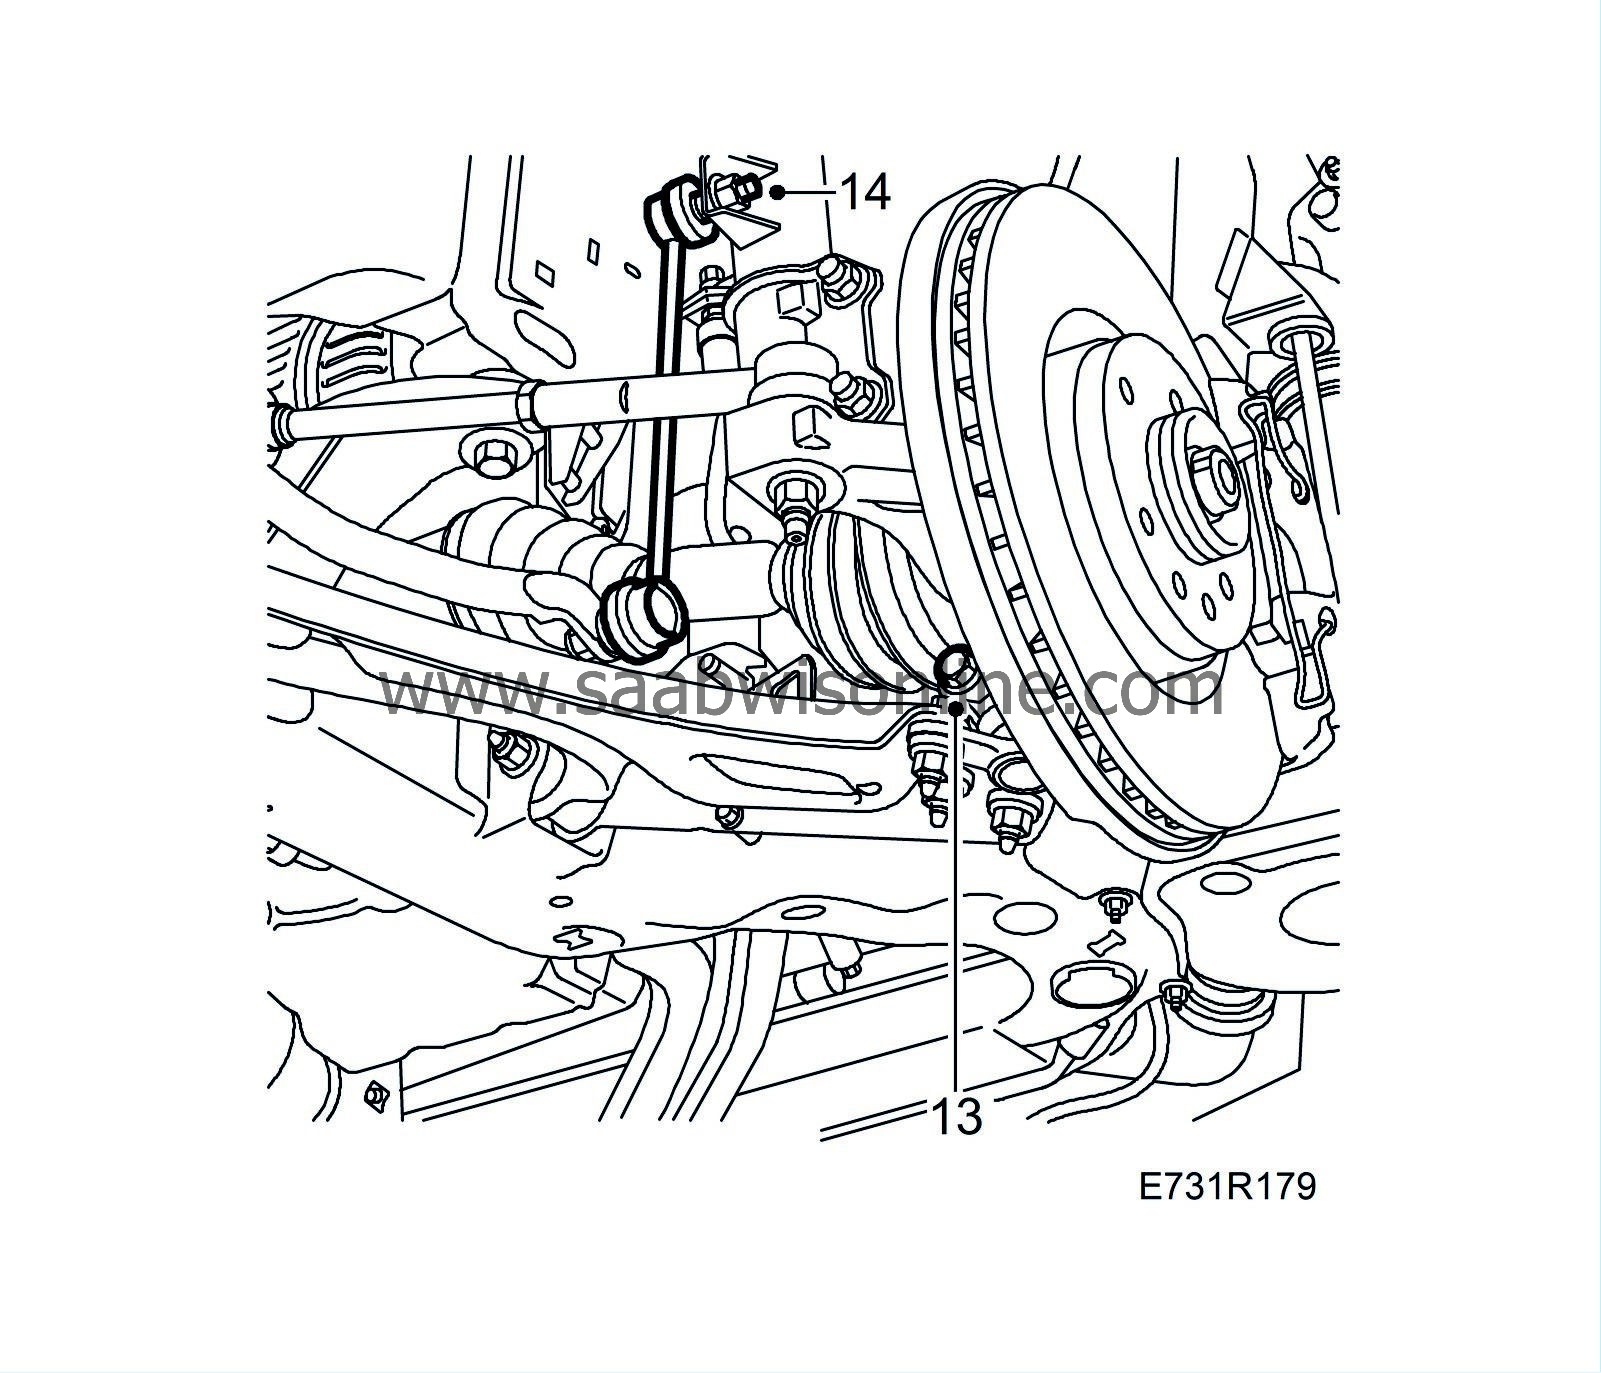
Detach the ball joints from the steering swivel member.
|
|
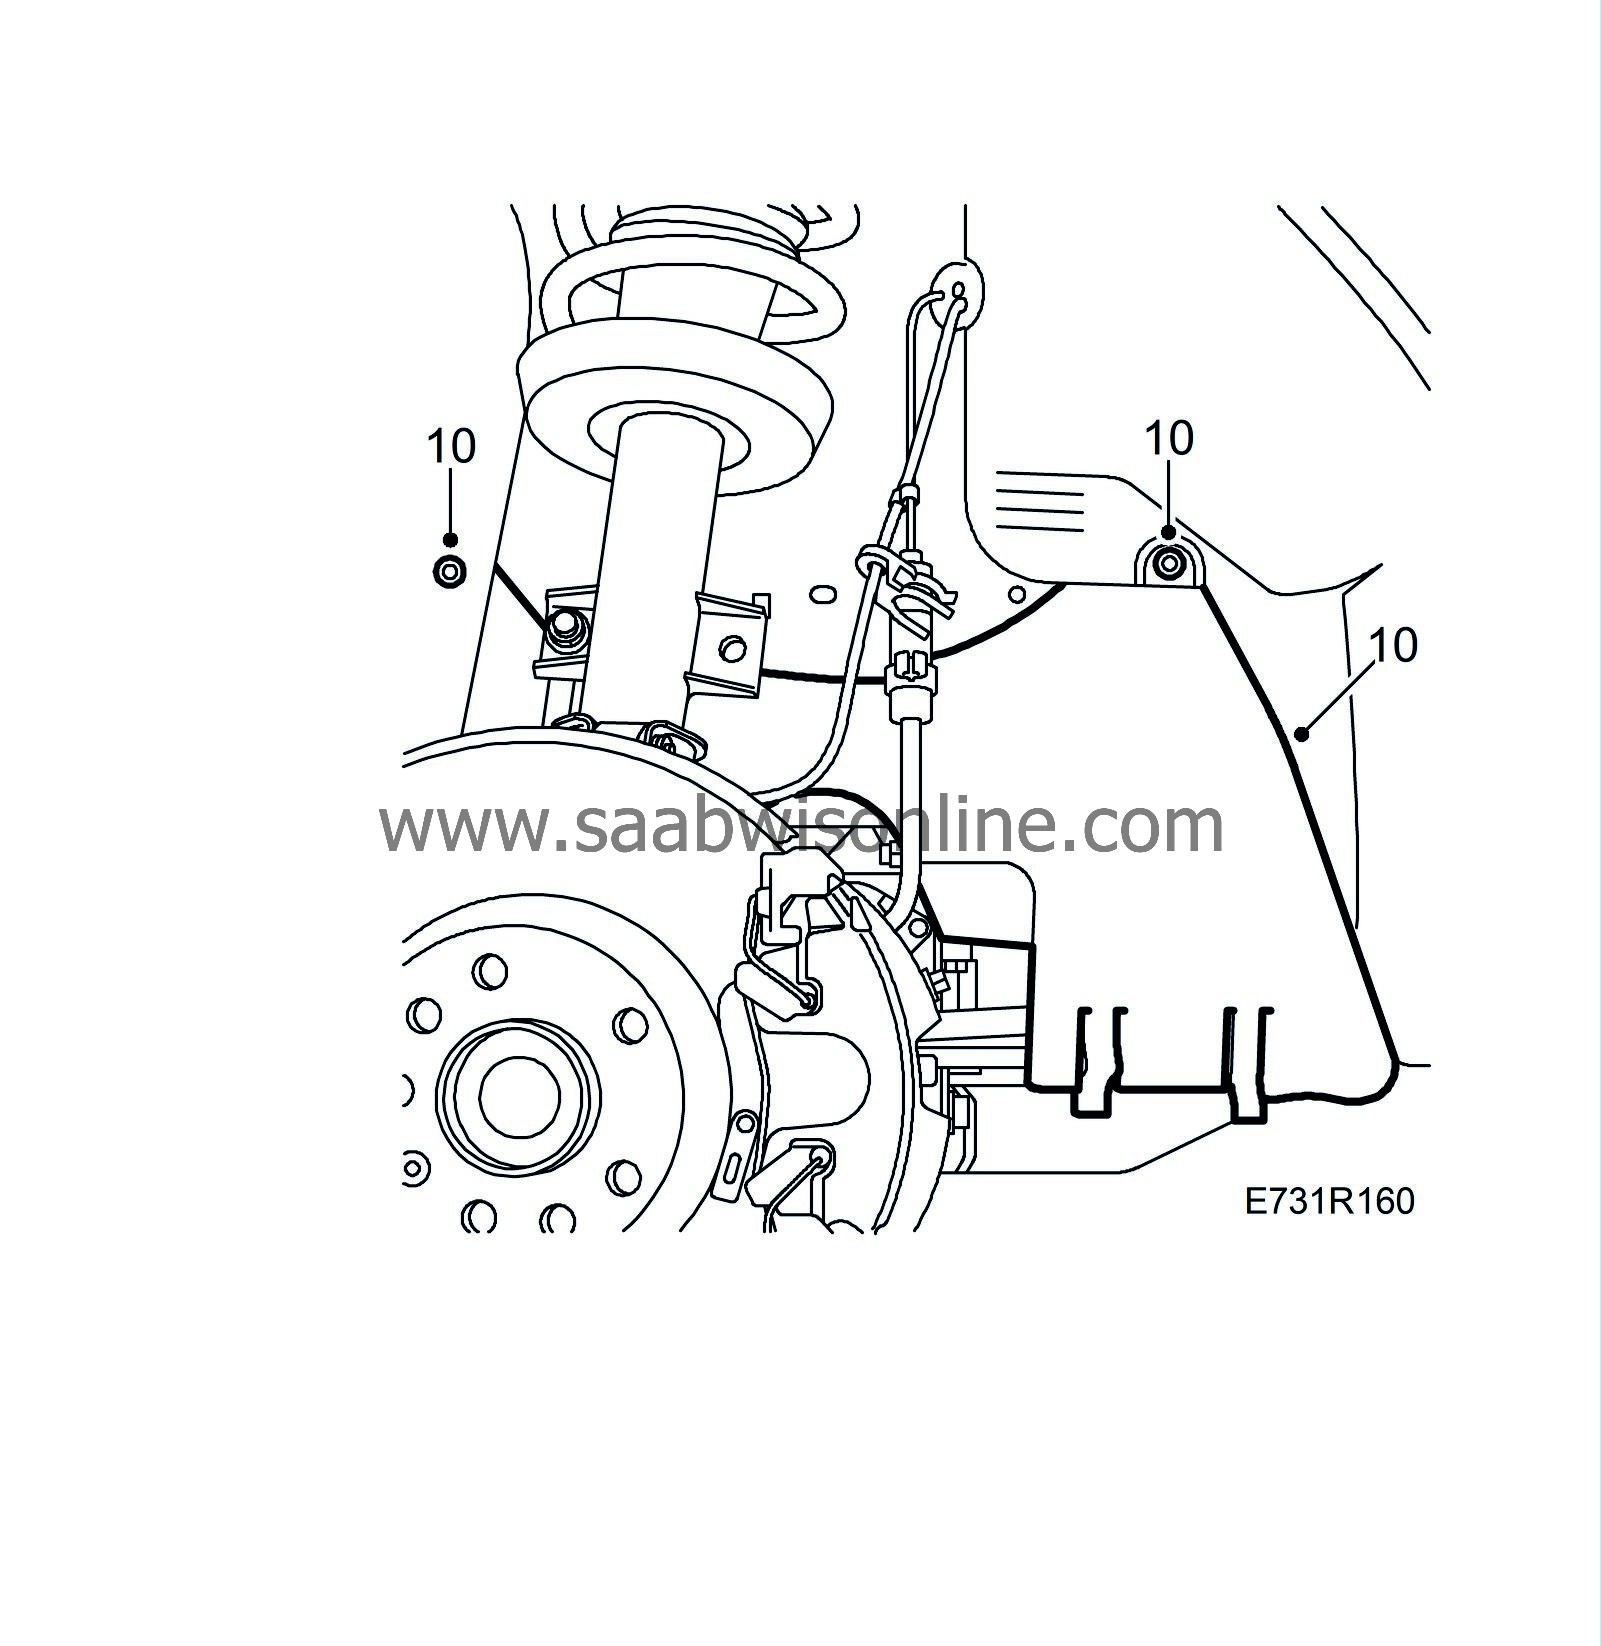
14.
|
Remove the anti-roll bar link from the MacPherson strut. Use a thin 17mm spanner as a counterstay.
|
|
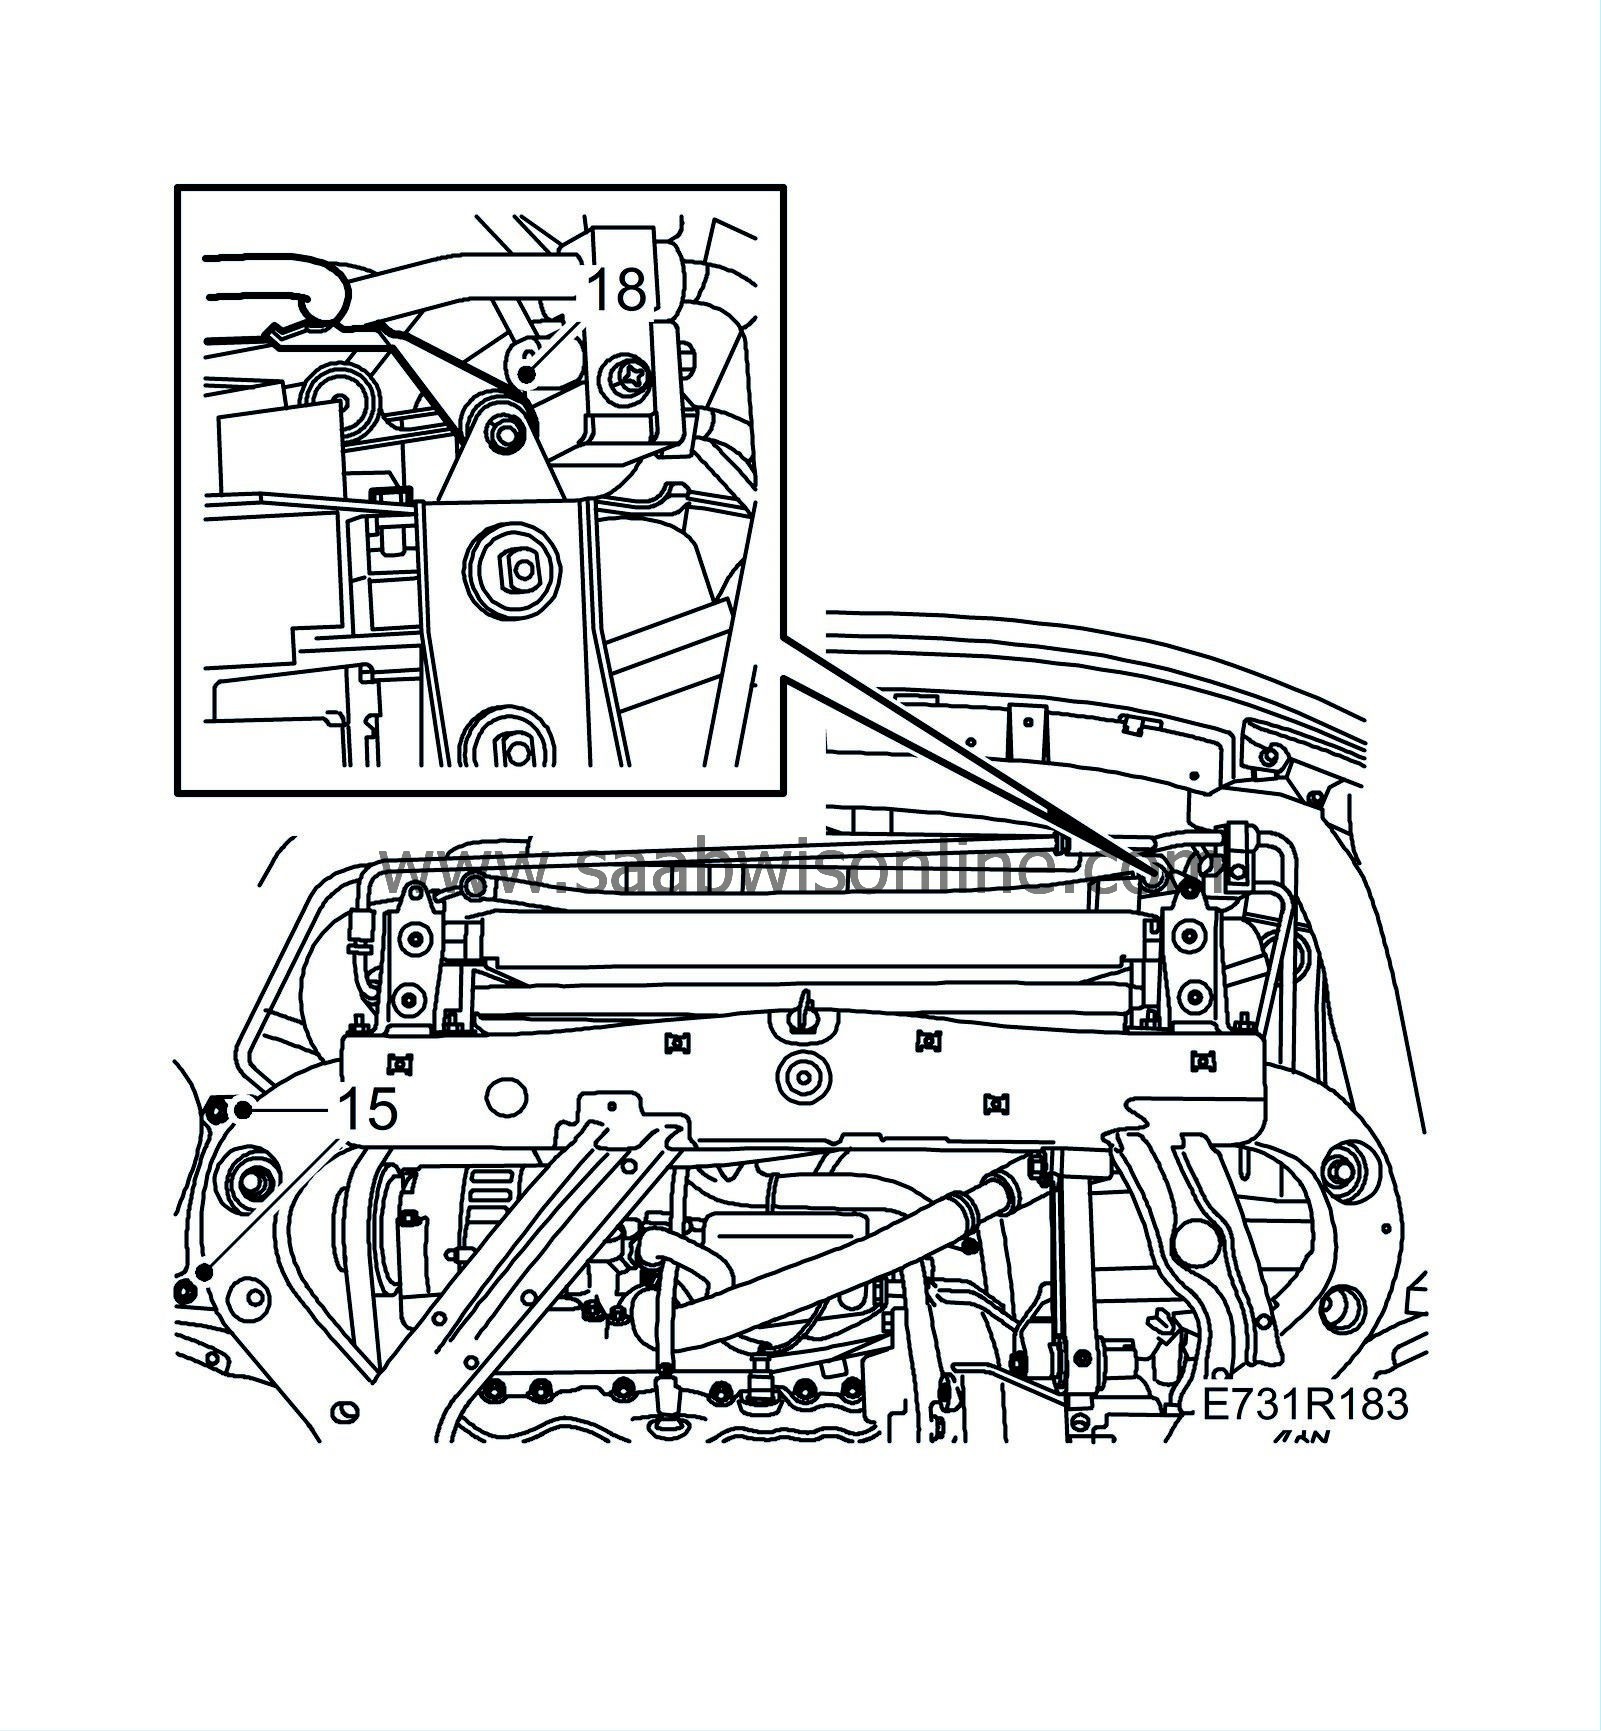
15.
|
Detach the air cleaner casing from the subframe.

|
|
16.
|
Pull strap
83 95 212 Strap
around the radiator assembly and radiator member to hold up the radiator assembly.
|
|
17.
|
Undo the rubber suspension on the power steering cooling pipe.
|
|
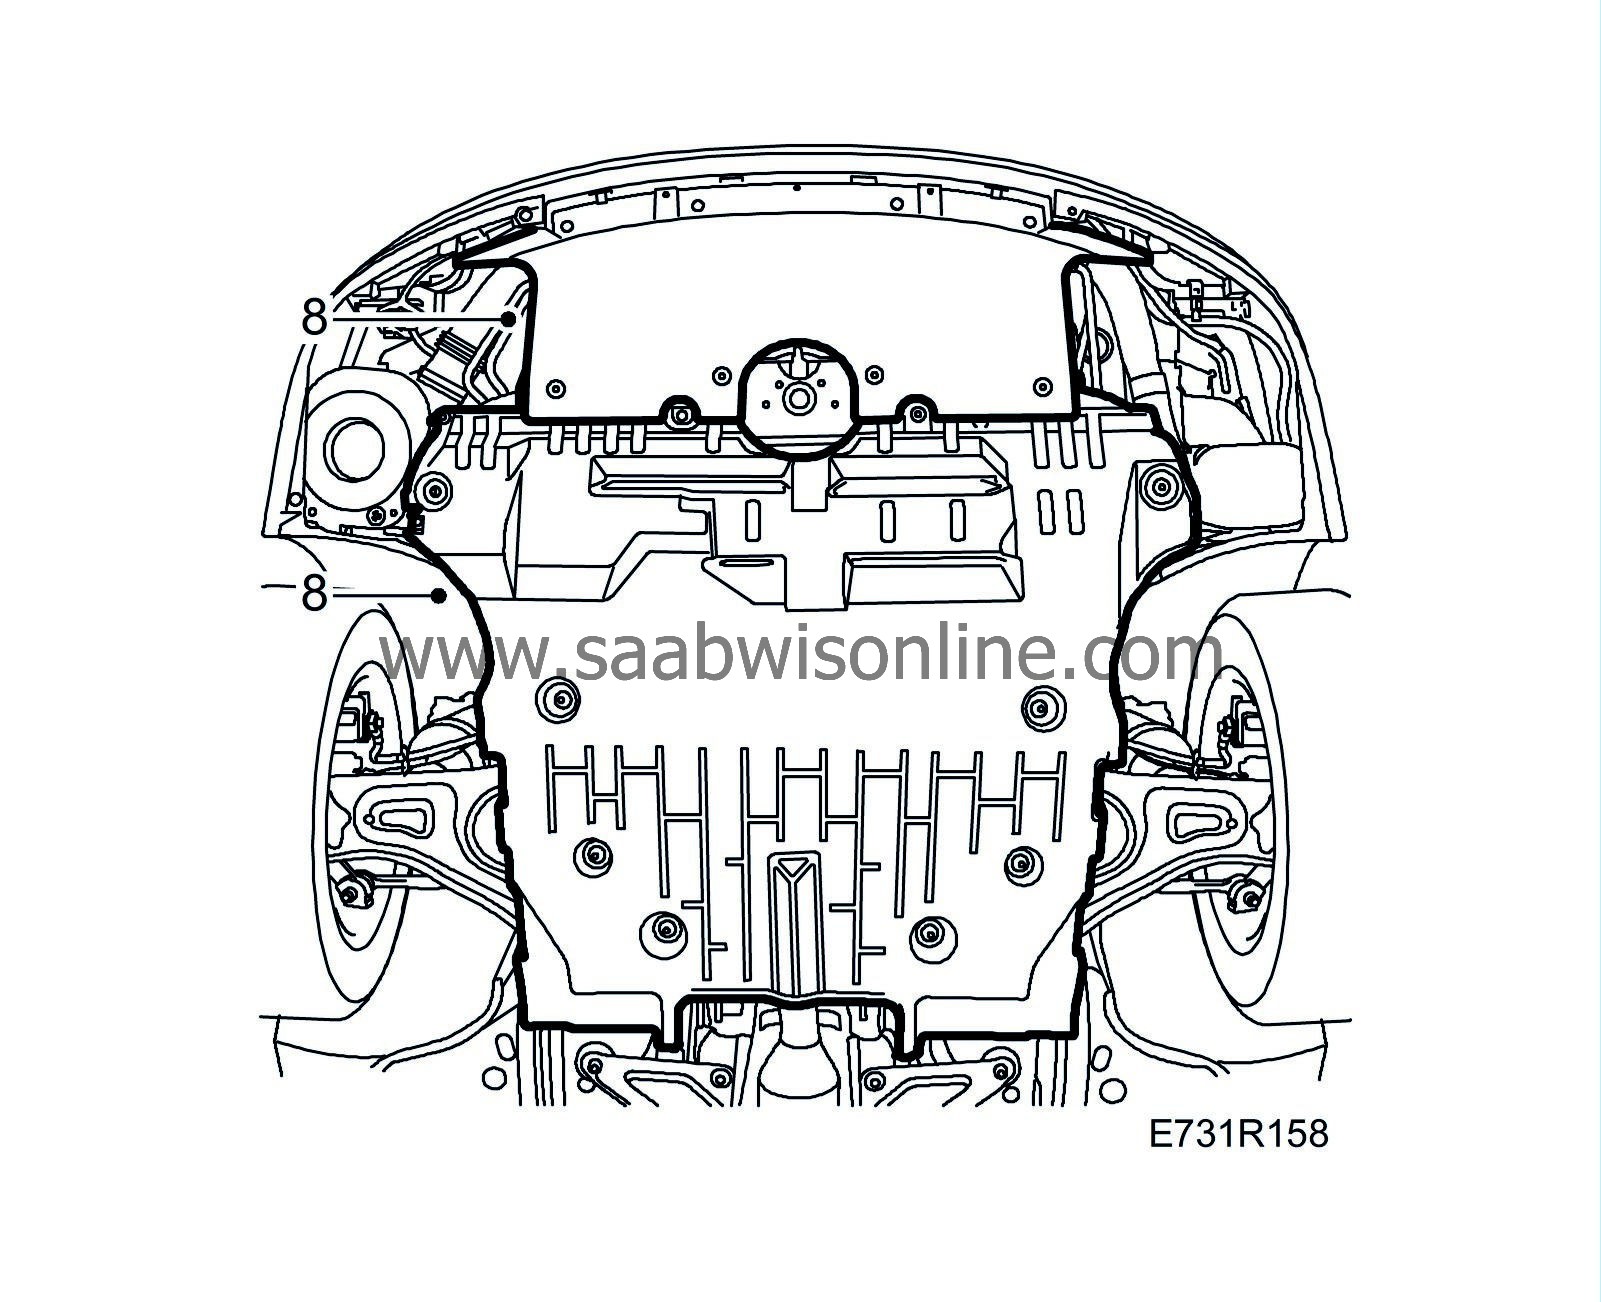
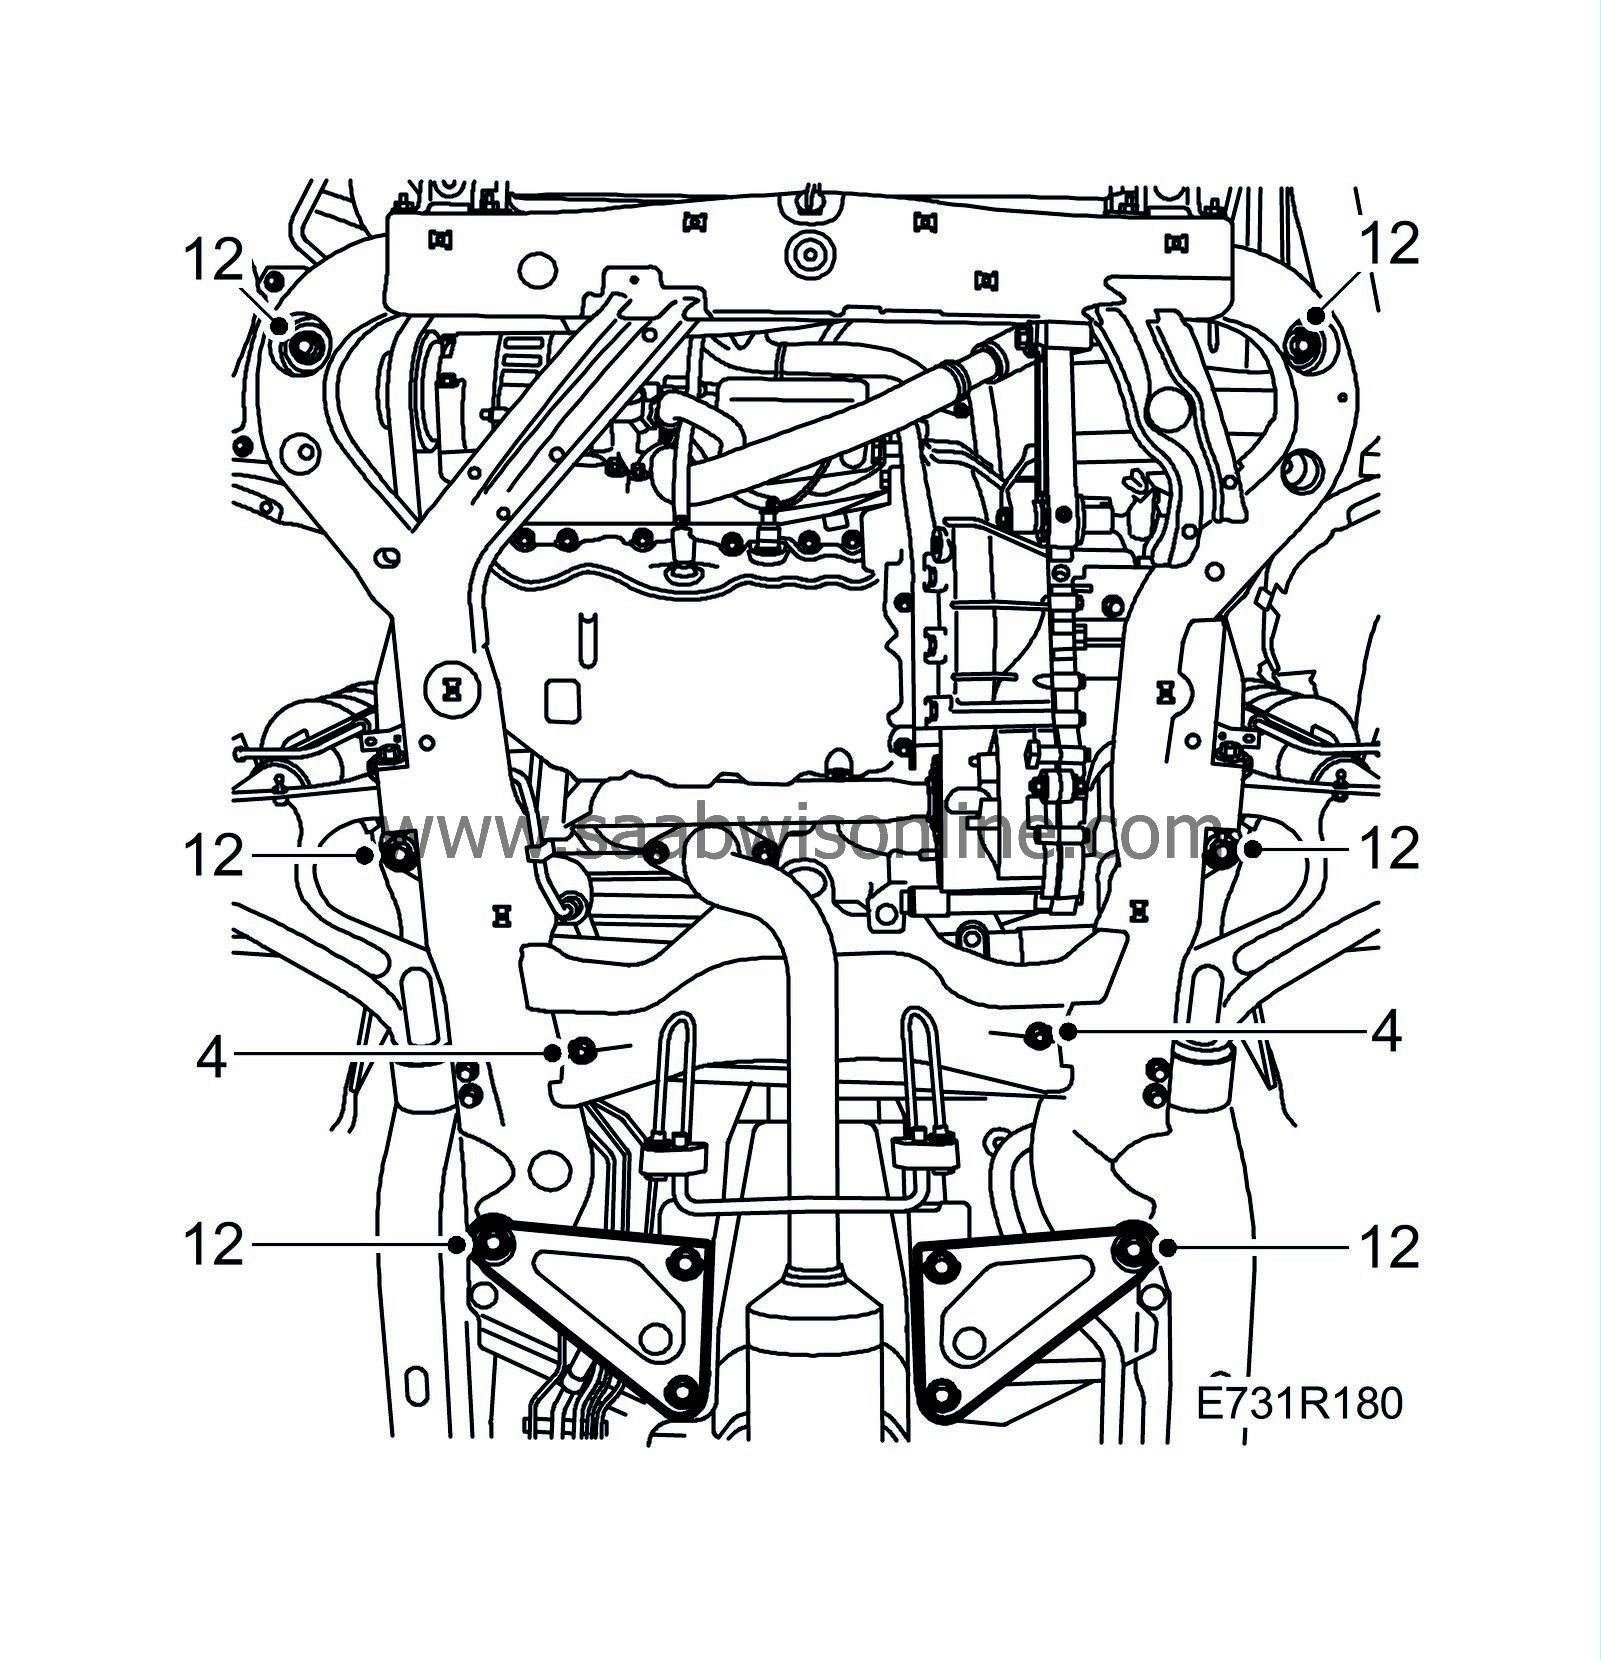
18.
|
Remove the bolts holding the rear support plates and the rear bolts on the subframe.
|
|
19.
|
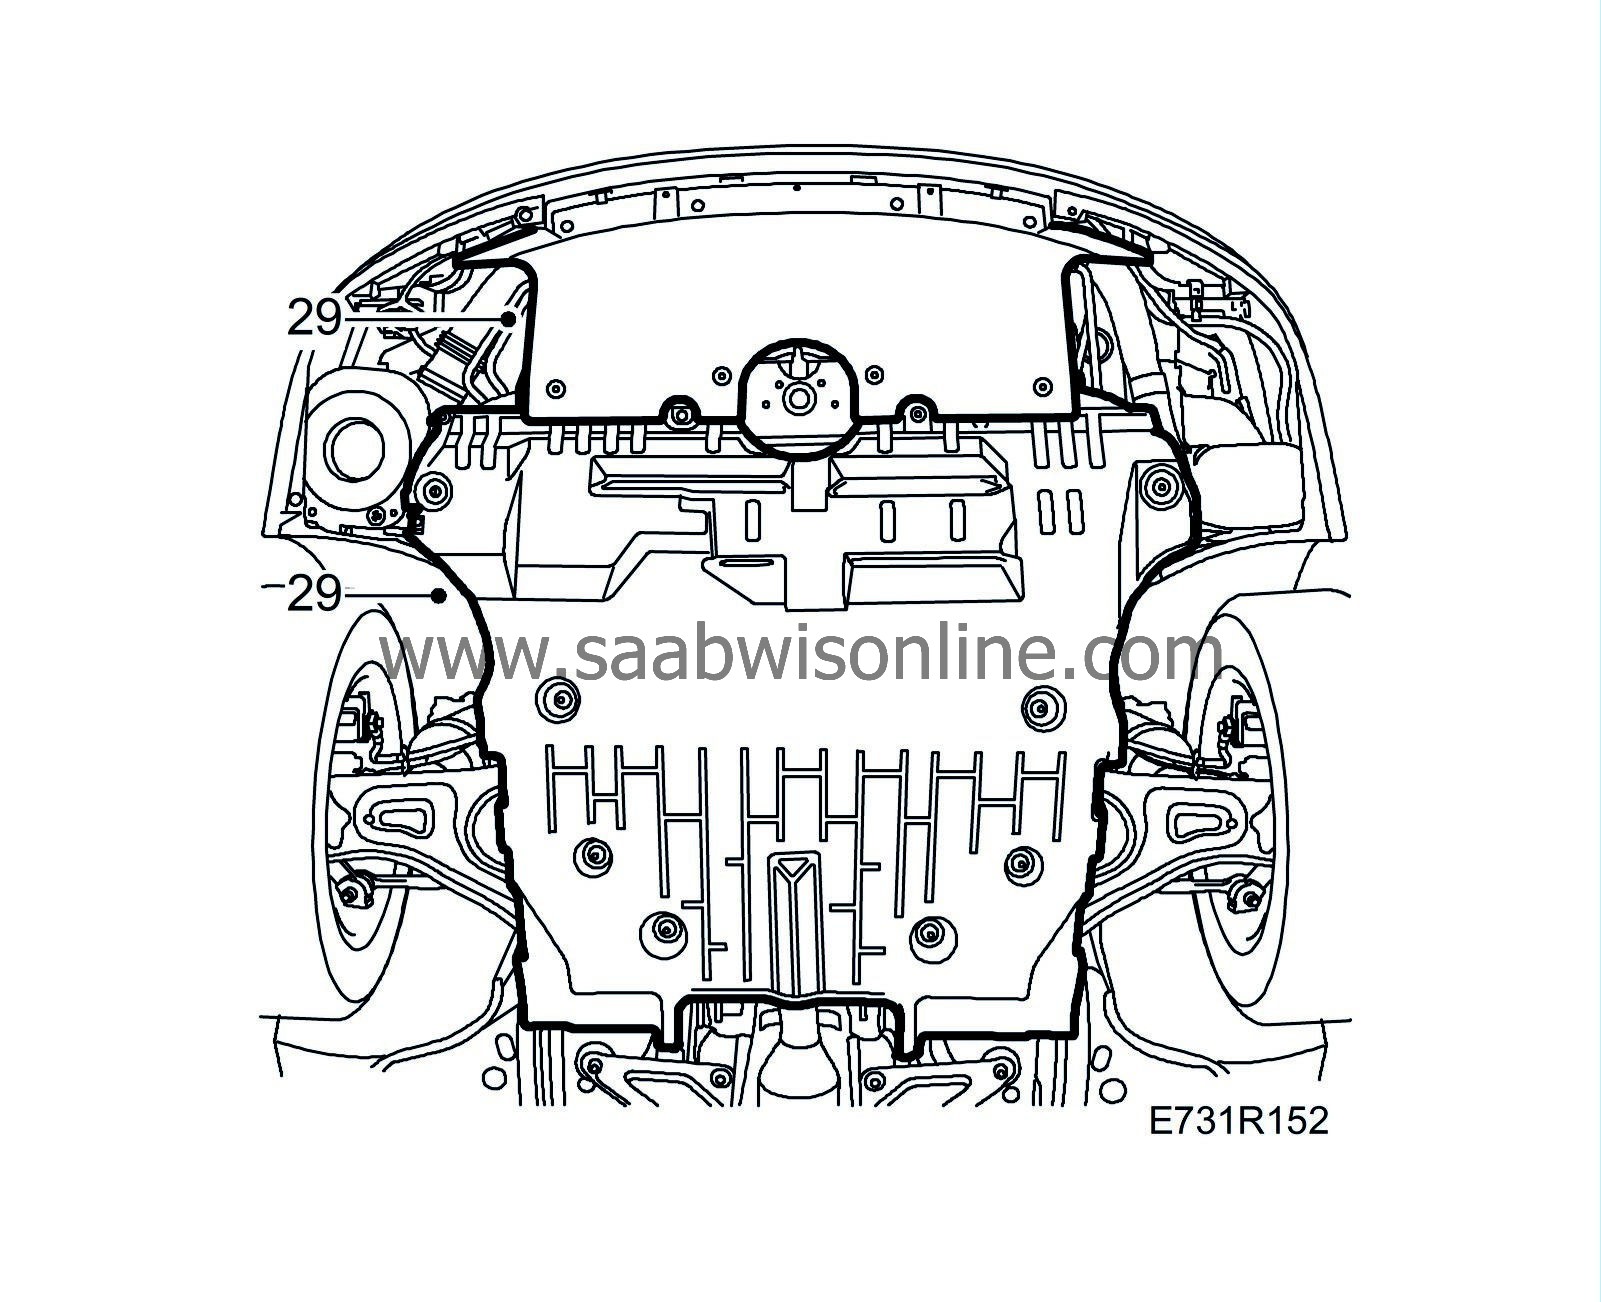
Separate the pipe for the battery cooling.
|
|
21.
|
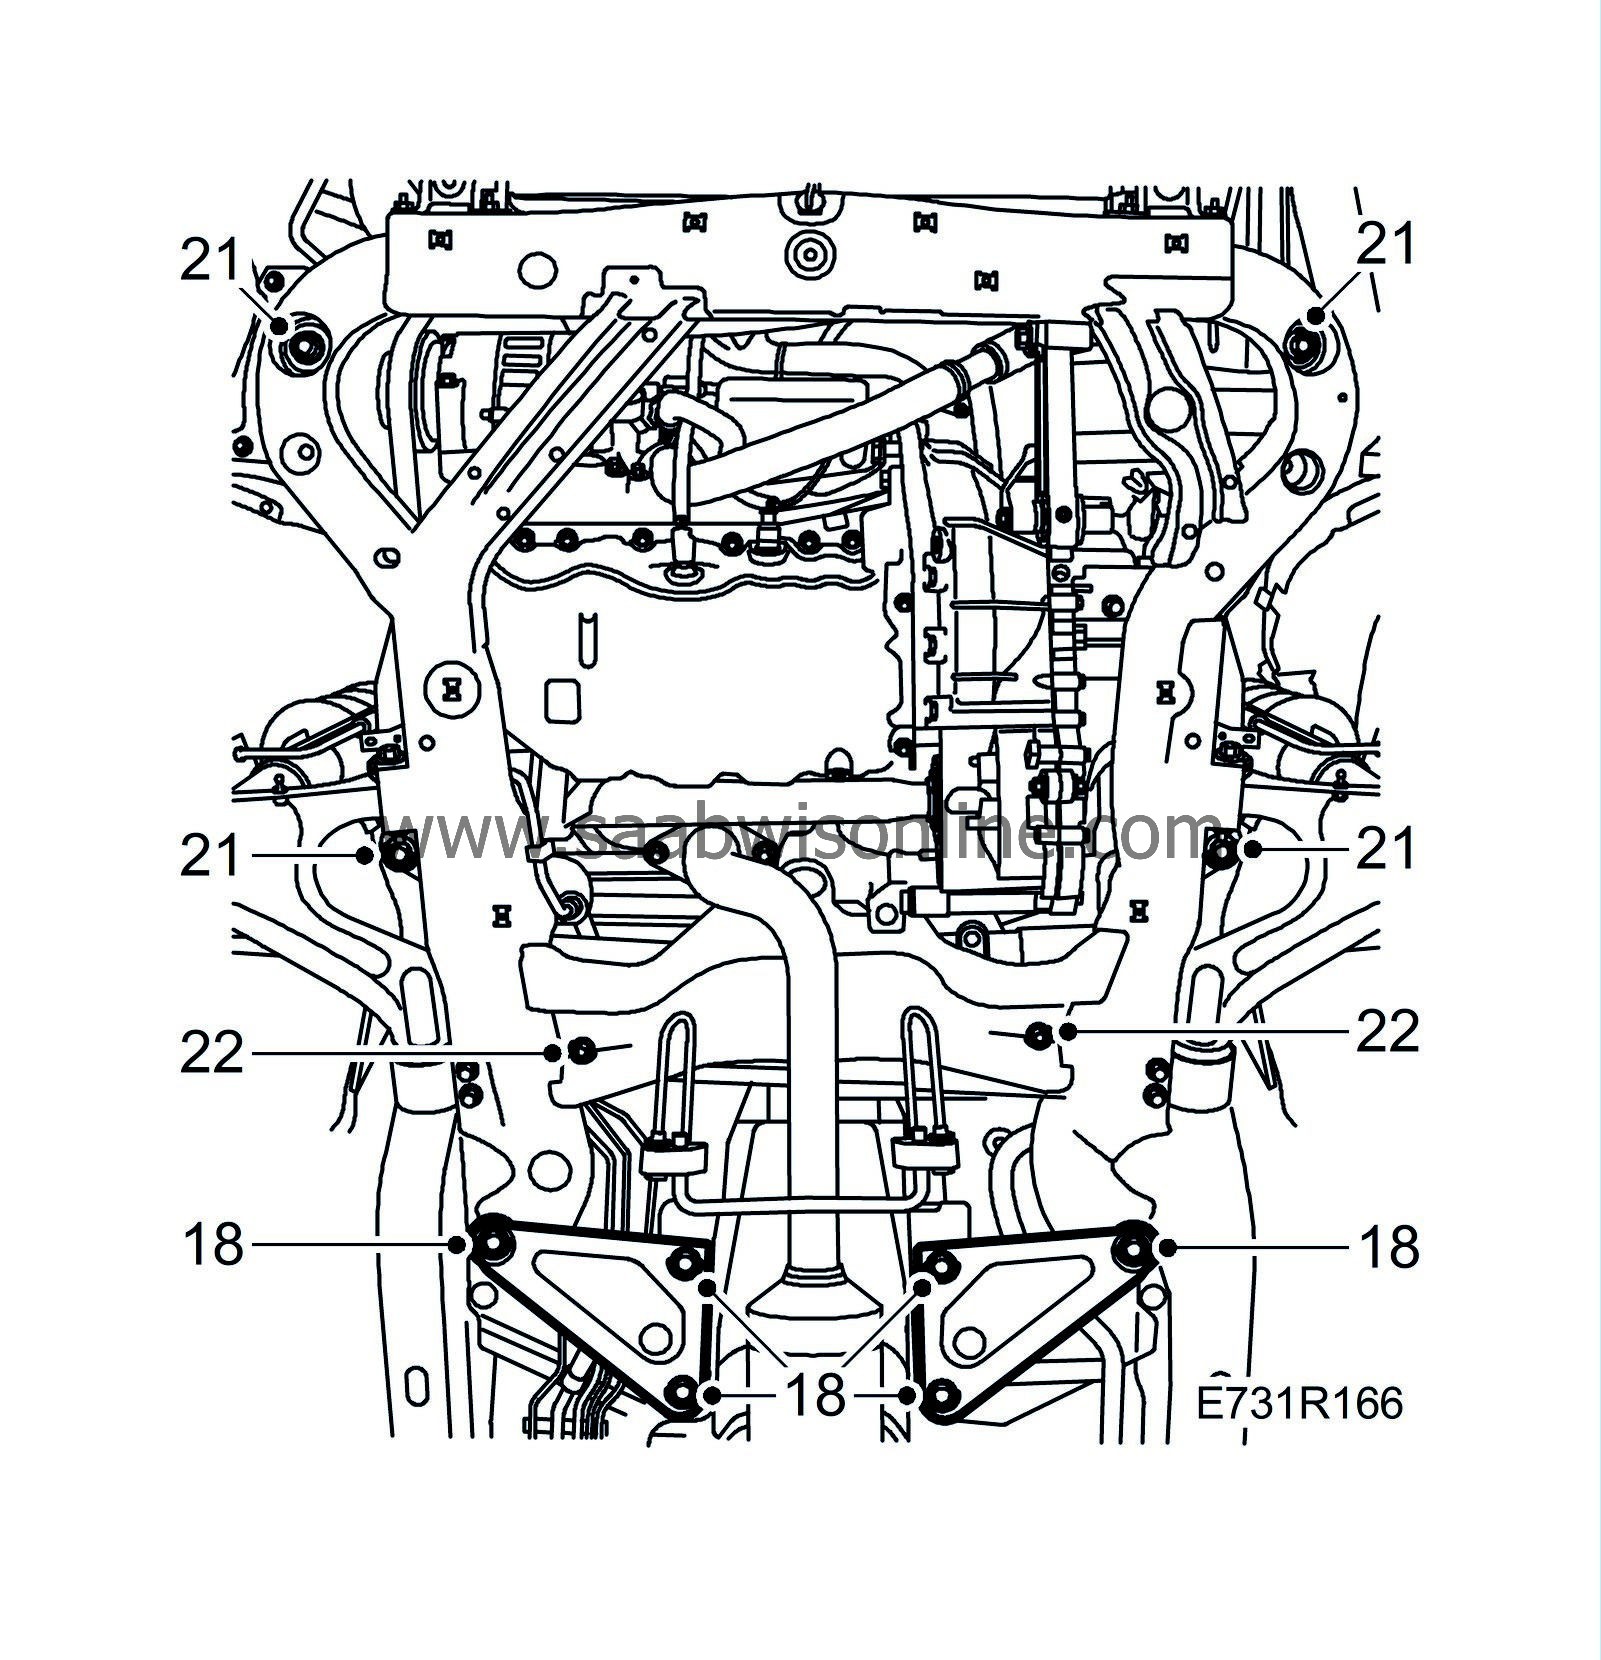
Remove the remaining bolts securing the subframe.
|
Note
|
|
Do not get the middle subframe bolts mixed up with the others when refitting (another size and design).
|
|
|
22.
|
Lower the subframe far enough to access the steering gear bolts. Remove the bolts.
|
|
23.
|
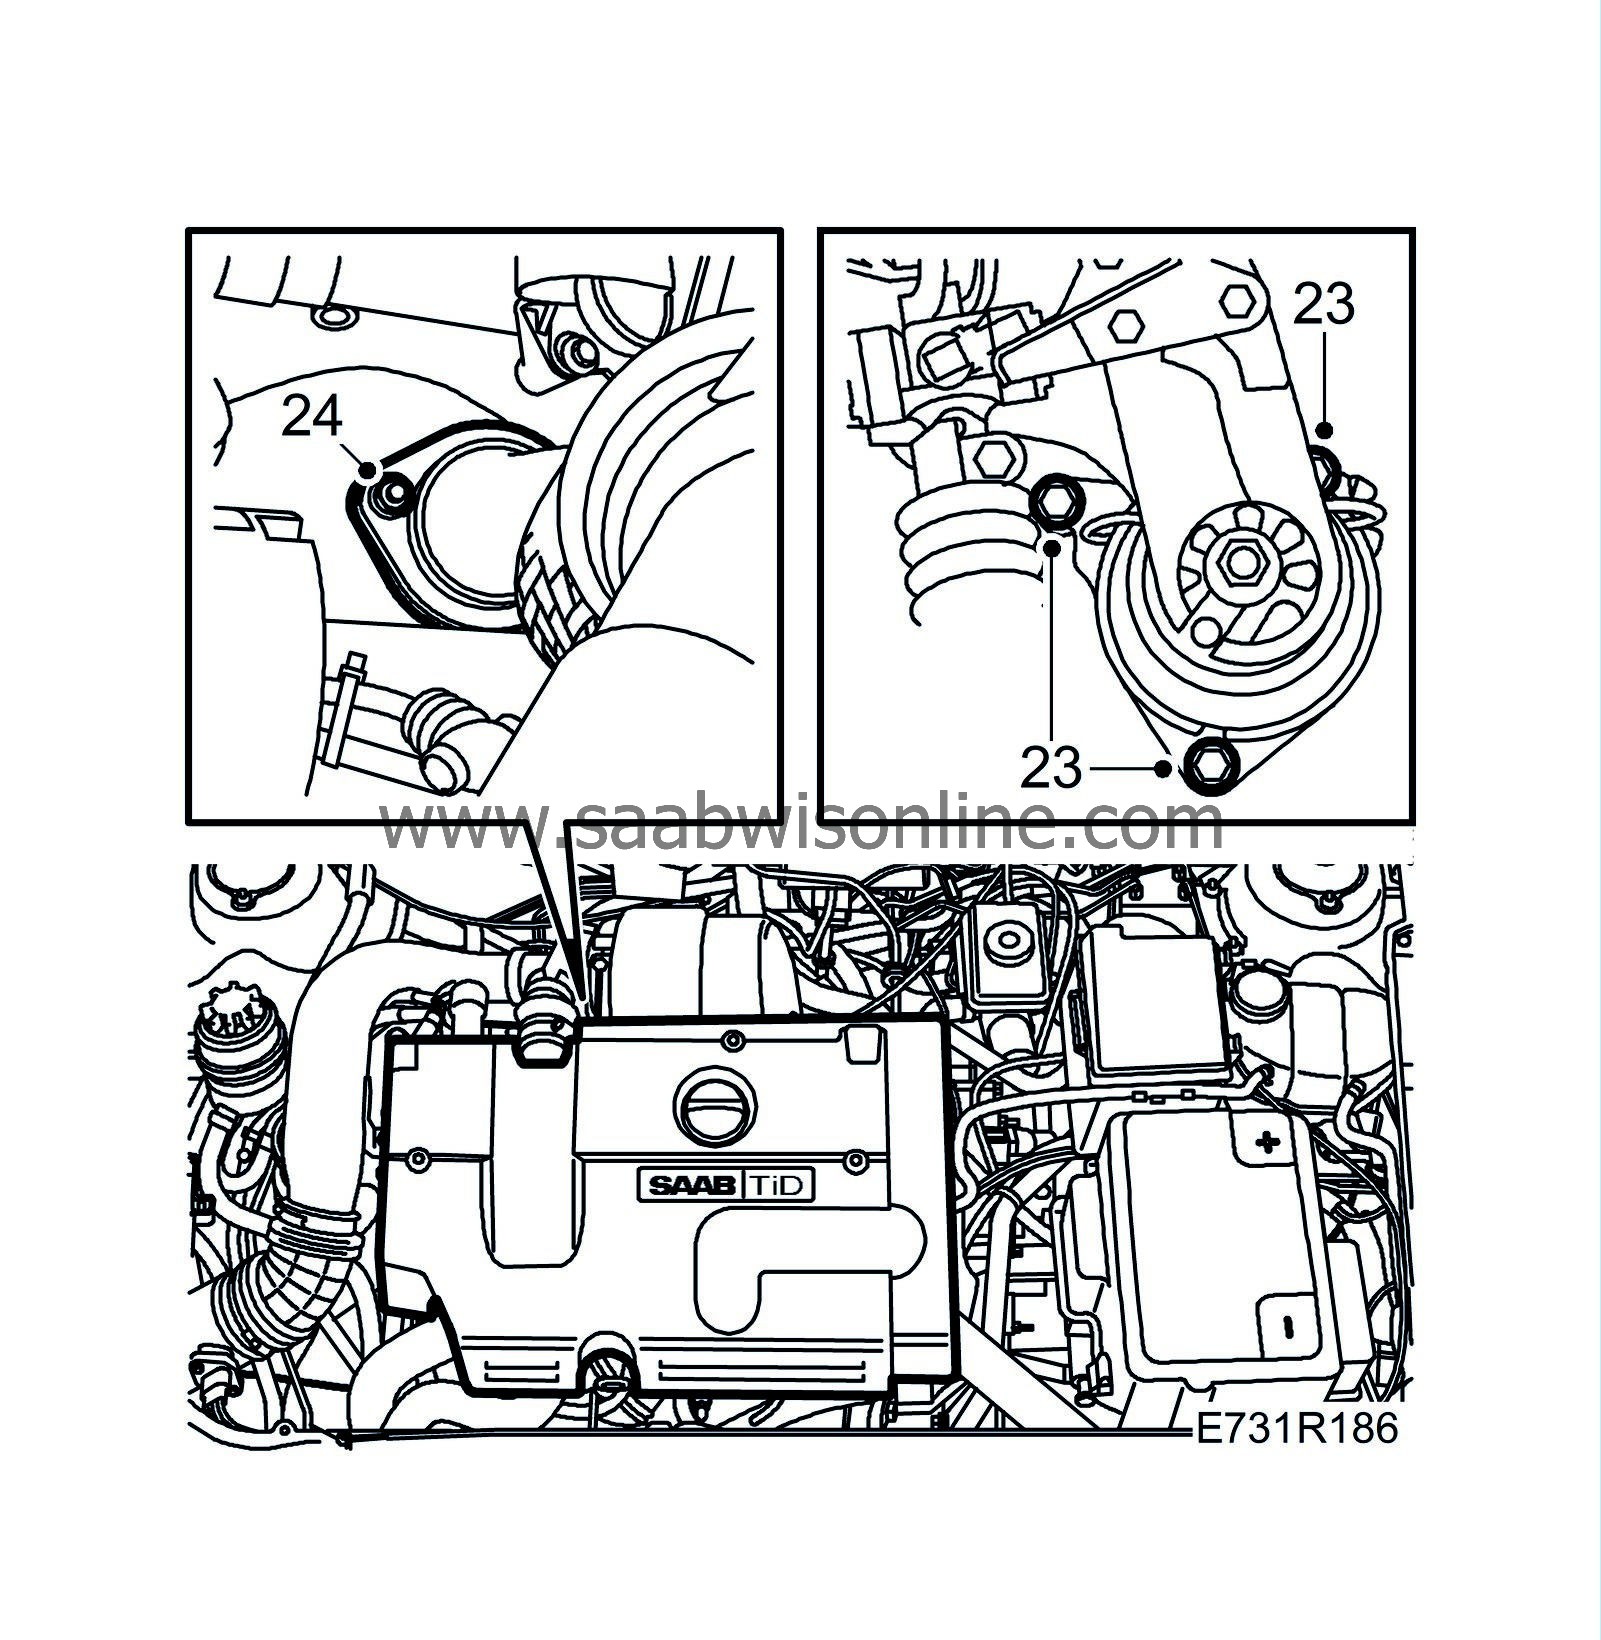
Open the clamps securing the power steering pipe at the same time and secure the power steering cooling pipe with a cable tie. Detach the A/C pipes from their clips.
|
|
25.
|
Move the lifting trolley out of the way.
|
|
1.
|
Make sure the radiator assembly guide pins are positioned correctly in the radiator crossmember.
|
|
2.
|
Run the lifting trolley with subframe under the car.
|
|
3.
|
Lift up the subframe carefully. Make sure the rubber gaiters for the inner universal joint drivers do not knock the centre mountings on the subframe before the subframe is resting against the body.
|
|
4.
|
Fit the bolts for the steering gear before lifting up the subframe completely.
Tightening torque: 90 Nm (66 lbf ft).
|
|
5.
|
Fit the power steering delivery pipe into the clips.
|
|
6.
|
Guide the radiator guide pins into the subframe. Lubricate with Vaseline to facilitate fitting.
|
|
7.
|
Guide the A/C pipes into their holders on the subframe.
|
|
8.
|
Fit the power steering coolant pipe.
|
|
9.
|
Adjust the position of the subframe so that the bolt holes are in line with the body. There are 2 guide pins on the lifting trolley, front left and rear right, that guide the subframe into the correct position.
|
|
10.
|
Fit the bolts to secure the subframe and the rear support plates. Tighten the bolts just enough so that the subframe does not move out of its position when the lifting trolley and fixture are removed.
|
Note
|
|
Do not get the middle subframe bolts mixed up with the others. The middle bolts have a thinner washer and 20mm head.
|
|
|
11.
|
Move the lifting trolley out of the way.
|
|
12.
|
Tighten the subframe bolts.
Tightening torque: 100 Nm +45° (74 lbf ft +45°).
|
|
13.
|
Tighten the support plate bolts.
Tightening torque: 63 Nm (46 lbf ft).
|
|
14.
|
Fit and tighten the bolt securing the torque arm to the subframe.
Tightening torque: 90 Nm +90° (66 lbf ft +90°).

|
|
15.
|
Fit the ball joints to the steering swivel members.
Tightening torque (on nut) 49 Nm (36 lbf ft).

|
|
16.
|
Fit the anti-roll bar support to the MacPherson strut.
Tightening torque: 90 Nm (65 lbf ft).
|
|
17.
|
Remove the strap holding up the radiator assembly.
|
|
18.
|
Fit the rubber suspension for the power steering pipe.
|
|
19.
|
Attach the hoses for the battery cooler.
|
|
20.
|
Fit the air cleaner casing.
|
|
21.
|
Fit the front piece of the exhaust pipe. Tighten the nuts on the front flange later.
|
|
22.
|
Lower the car and remove the lifting beam.
|
|
23.
|
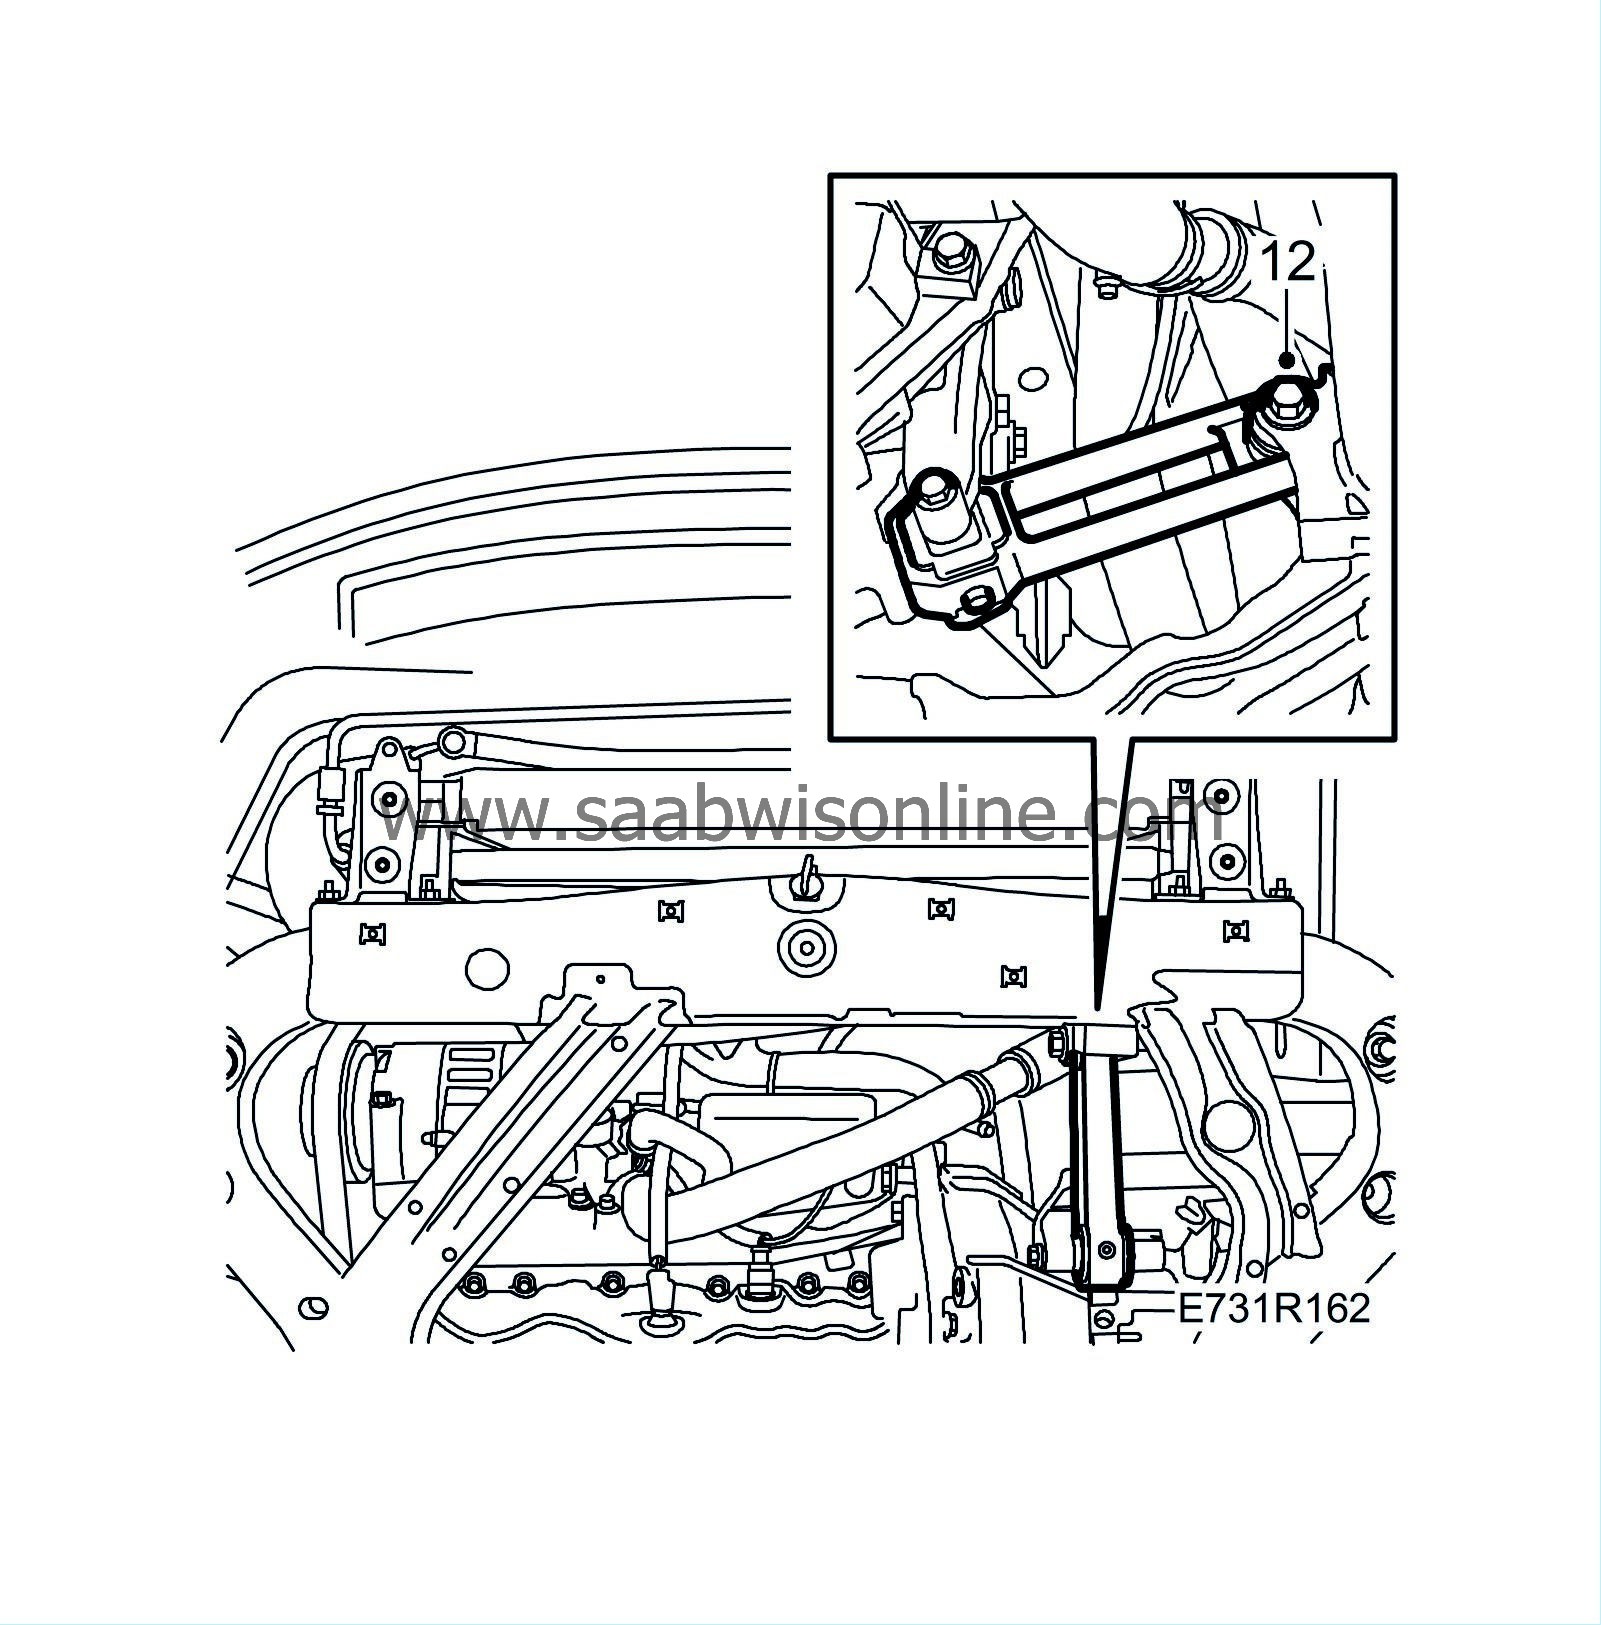
Tighten the bolts on the rear engine mounting from the engine bay side starting with the rear bolt.
Tightening torque: 24 Nm (18 lbf ft).
|
|
24.
|
Tighten the nuts on the front exhaust pipe flange.
Tightening torque: 25 Nm (18 lbf ft).
|
|
26.
|
Undo the bolt for the front torque arm on the gearbox, centre the rubber pad in the rod and tighten.
Tightening torque: 70 Nm +90° (52 lbf ft +90°).
|
|
27.
|
Fit the side covers in the wheel housings.

|
|
28.
|
Cars with xenon headlamps:
Fit the level sensor for the xenon headlamps.
|
|
29.
|
Fit the rear and front lower engine covers.
|
|
30.
|
Fit the front wheels. The wheels must be suspended freely when tightening, see .
Tightening torques
aluminium rim 110 Nm (81 lbf ft)
pressed steel rim 50 Nm +2x90°, max. 110 Nm (37 lbf ft +2x90°, max. 81 lbf ft)
|
|
31.
|
Lower the car to the floor.
|
|
32.
|
Fit the upper engine cover.
|
|
33.
|
Perform a road test. Check the position of the steering wheel while driving on a level road. Adjust as necessary.
|


