Checking valve clearances
| Checking valve clearances |
Check and adjust the valve clearance relative to the working range of the tappet.
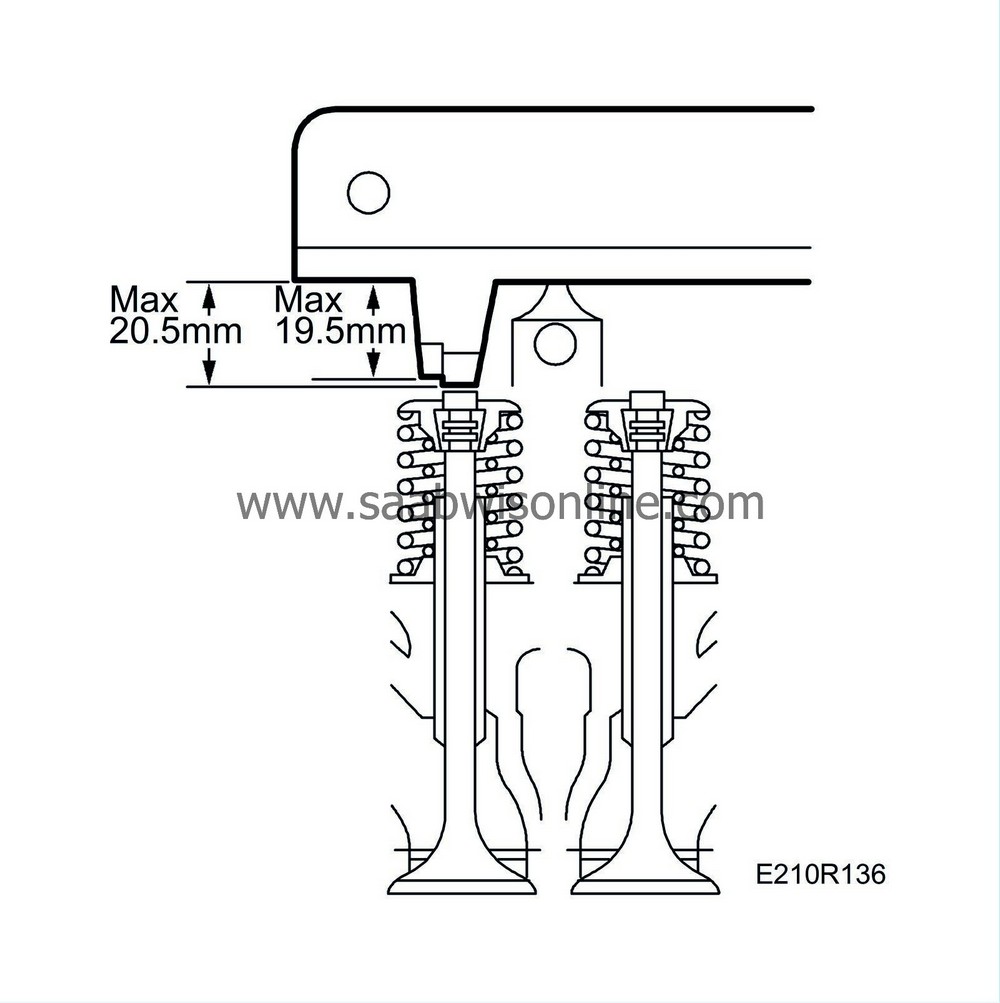
The tolerances for valve clearance are 19.5±0.05 mm minimum and 20.5±0.05 mm maximum.
The valve clearance settings are 20.0 mm minimum and 20.4 mm maximum, with a nominal clearance of 20.2 mm.
Valve clearance is equivalent to the distance between the end of the valve stem and the camshaft bearing seat.
Before valve clearances can be checked, the camshafts and valve tappets must first be removed.
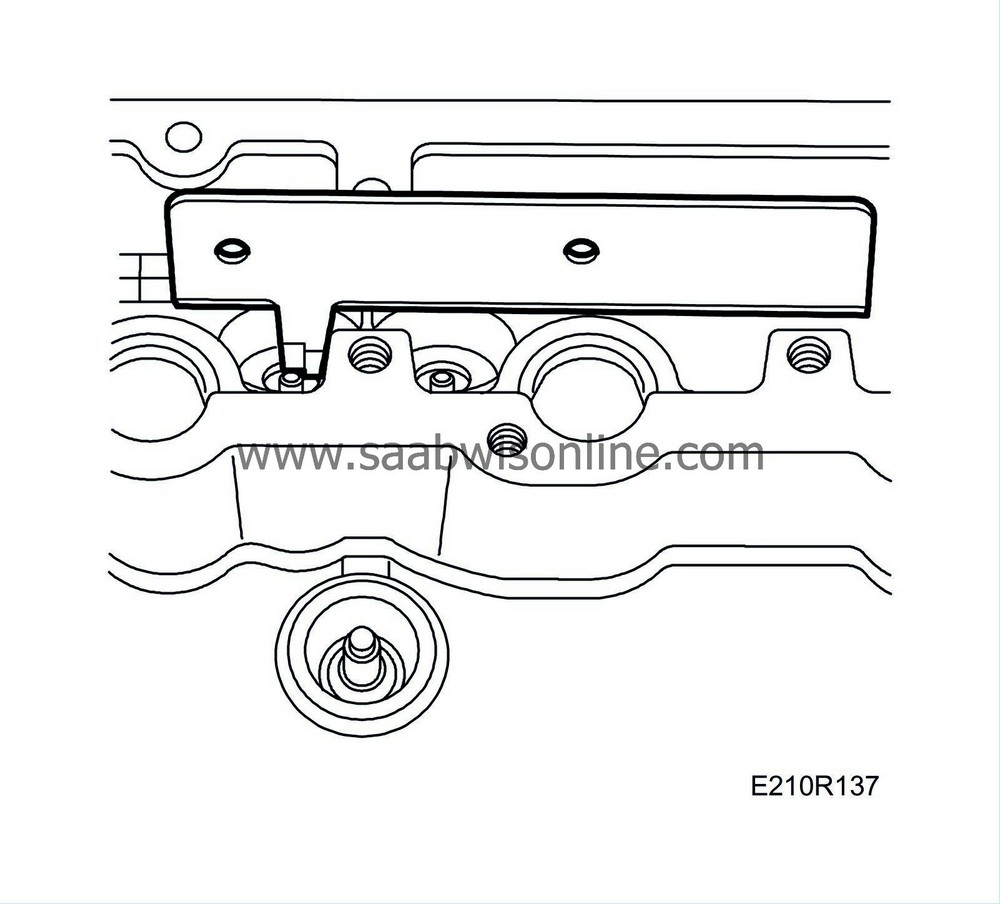
The valve clearance is checked with Valve clearance gauge 83 93 753 as follows:
| • |
Place valve clearance gauge across two of the camshaft bearing seats with the depth gauge against the end of the valve stem.

|
|
| • |
Check that the maximum gauge depth of 20.5 mm actually reaches down to the end of the valve stem (noticed by the valve clearance gauge not bottoming against the bearing seat closest to the depth gauge).
|
|
| • |
Then check that the min depth 19.5 mm does not reach the end of the valve stem spindle. Correct valve position should be between the depth measurement min and max values. If the valve position deviates from the given measurements, adjustments are done on the valve spindle or valve seat. The valve spindle is shortened if measurement is below the min value and the valve seat is machined if the max value is exceeded. When adjusting the valve position, set this at nominal value 20.2 mm.
|
|


