Replacement of timing chain (in car)
| Replacement of timing chain (in car) |
Checking
| 1. |
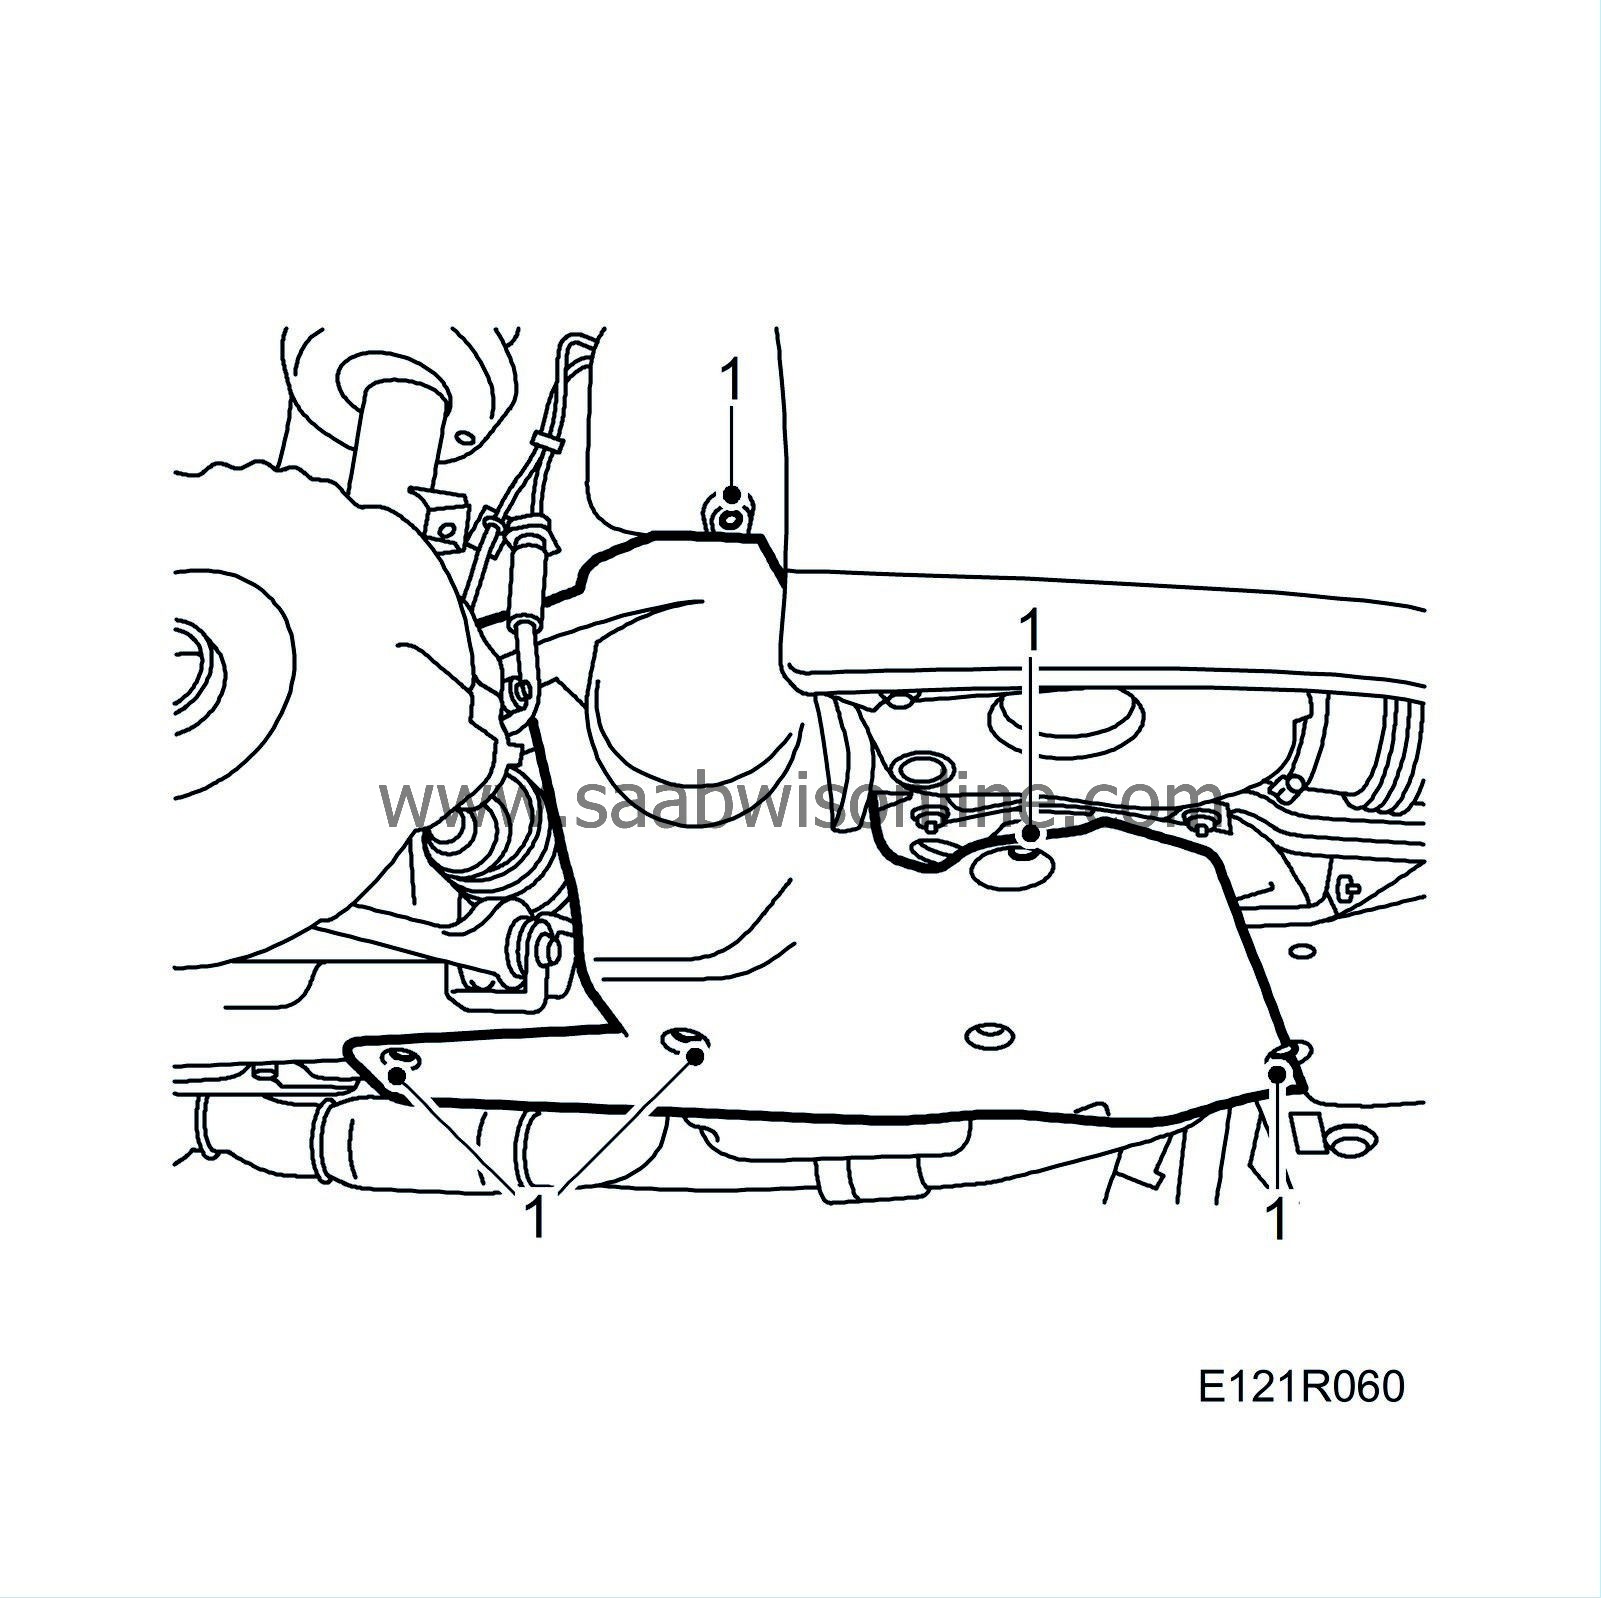
Raise the care and remove the belt circuit cover.
|
|
| 2. |
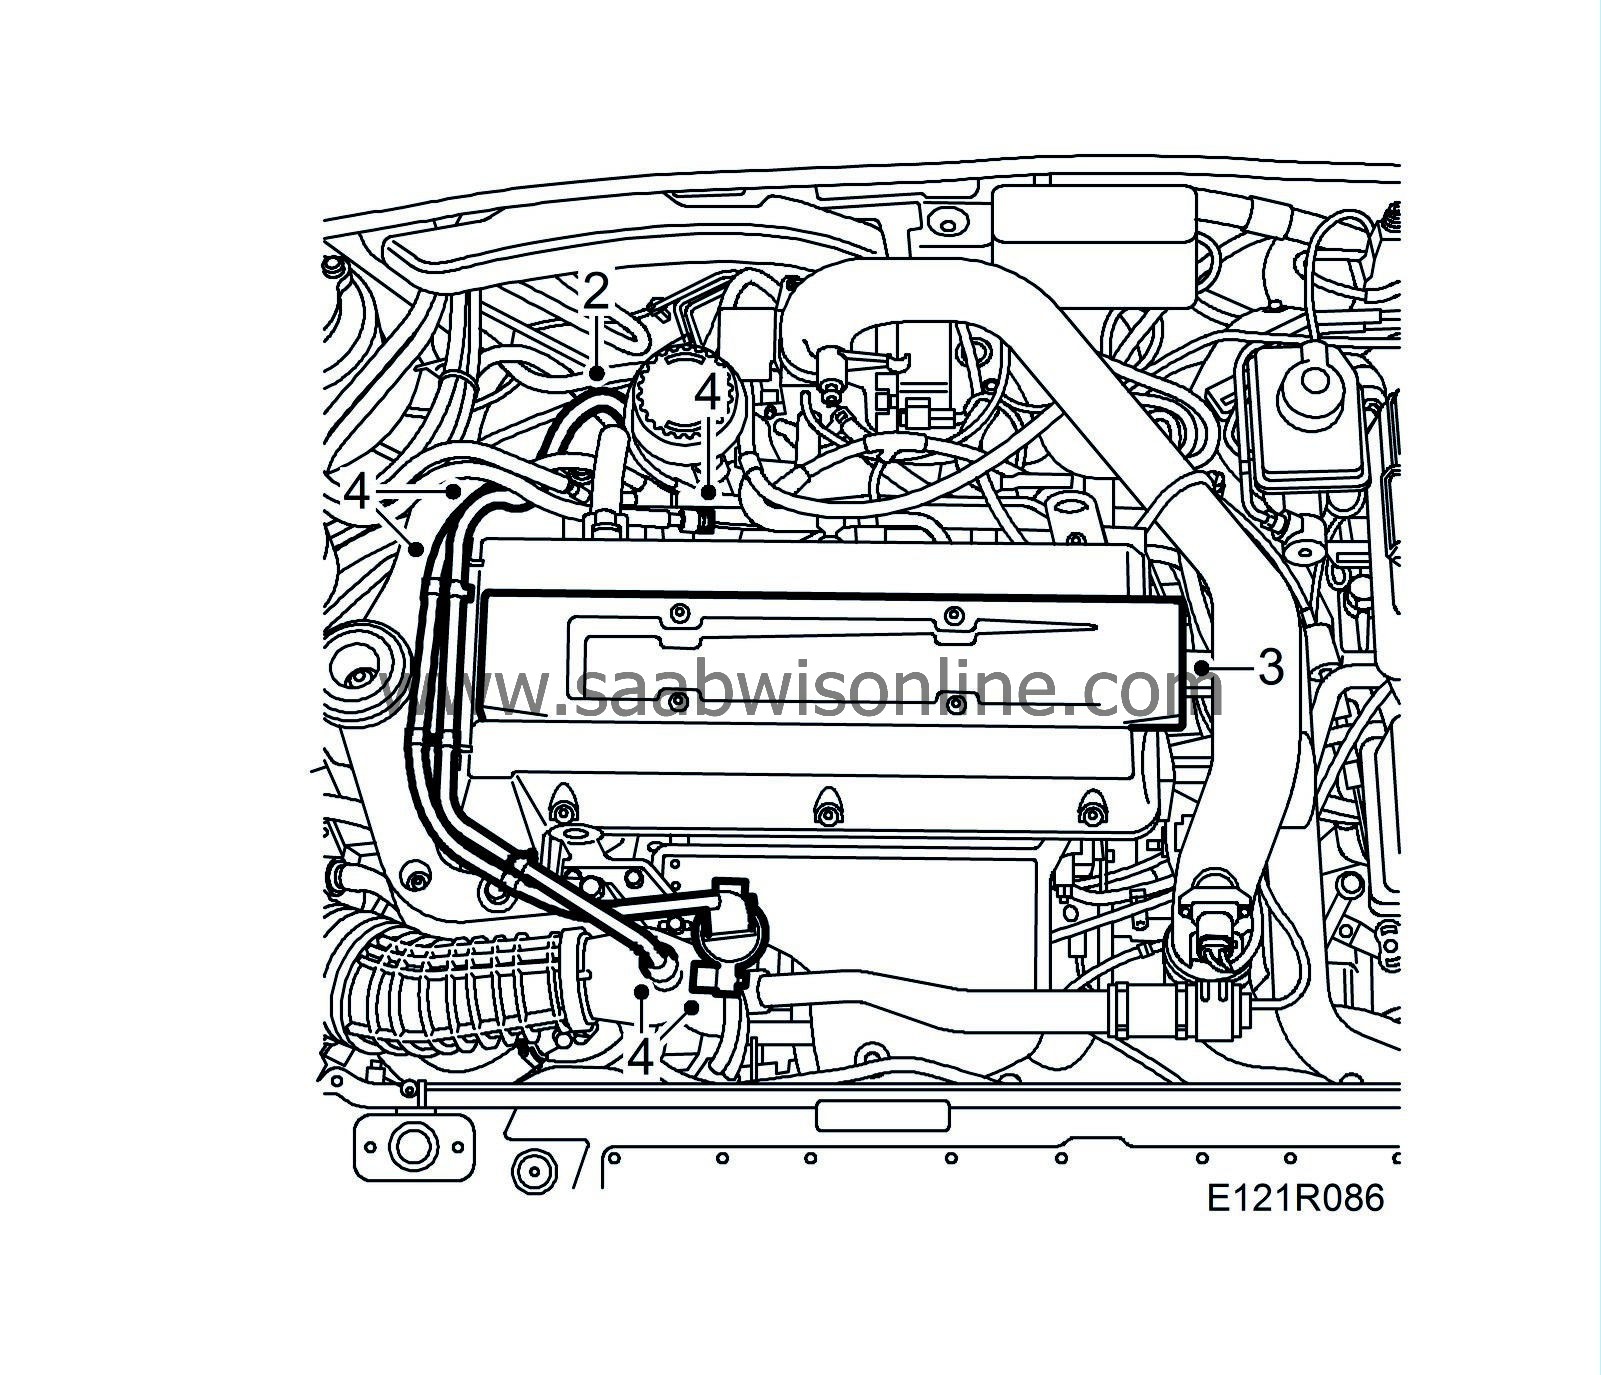
Lower the car and remove the upper engine cover.
|
|
| 3. |
Remove the ignition discharge module and spark plugs.
|
|
| 4. |
Remove the crankcase ventilation pipe and hose. Cut the cable tie on the check valve. Unplug the solenoid valve connector and remove the camshaft cover.
|
|
| 5. |
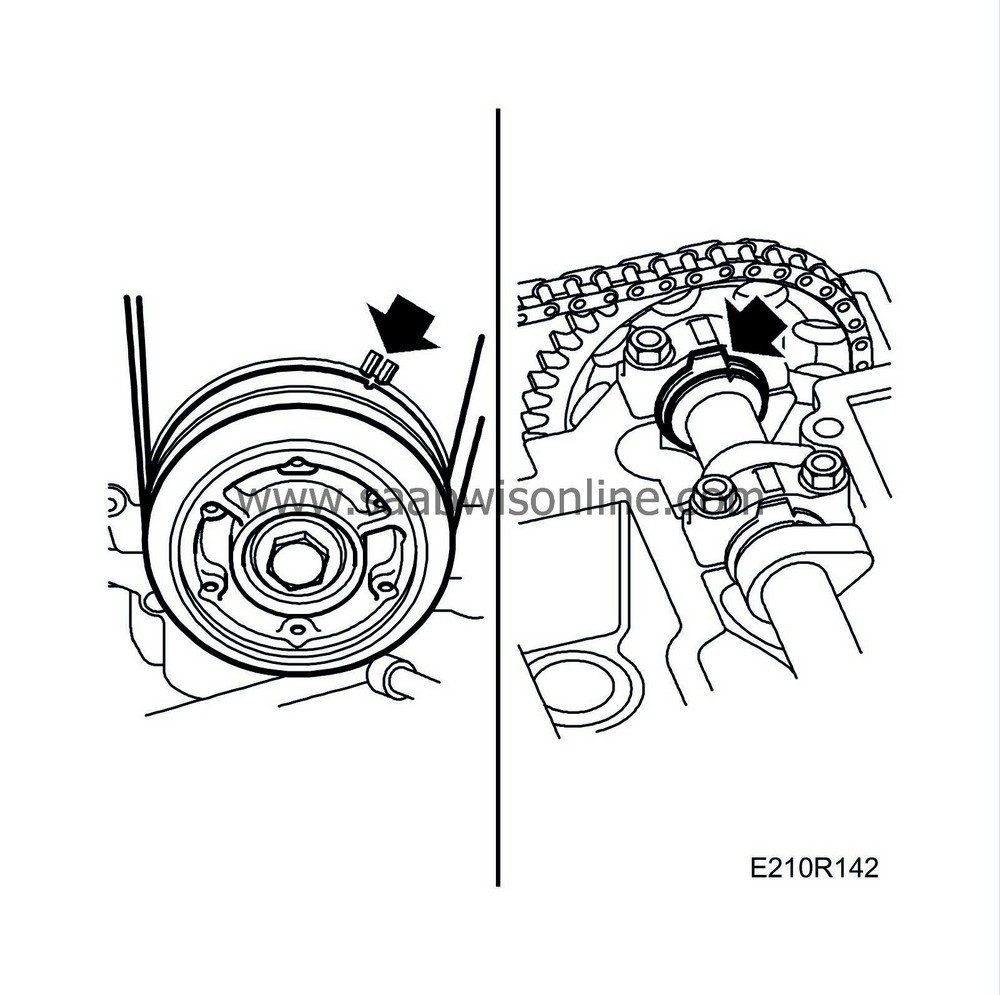
Align the crankshaft and camshafts with their respective setting marks by turning the crankshaft clockwise.
|
|
| 6. |
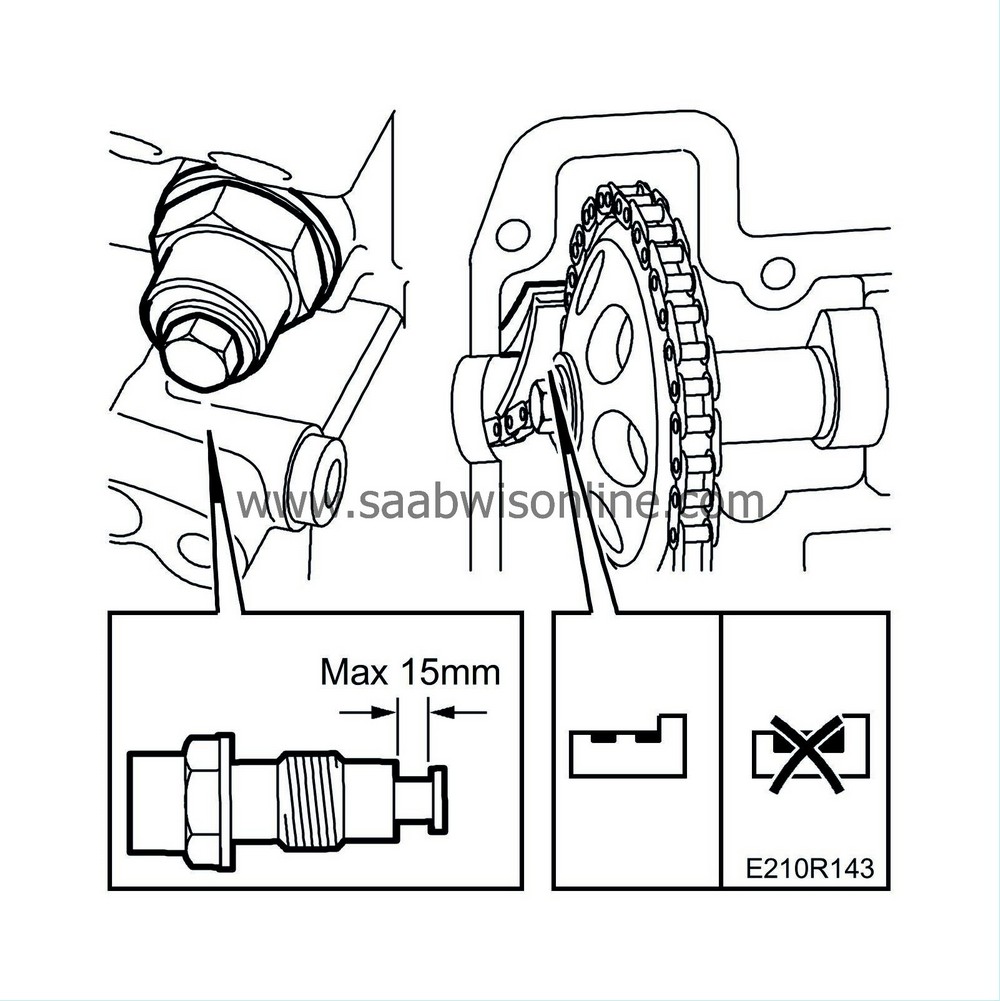
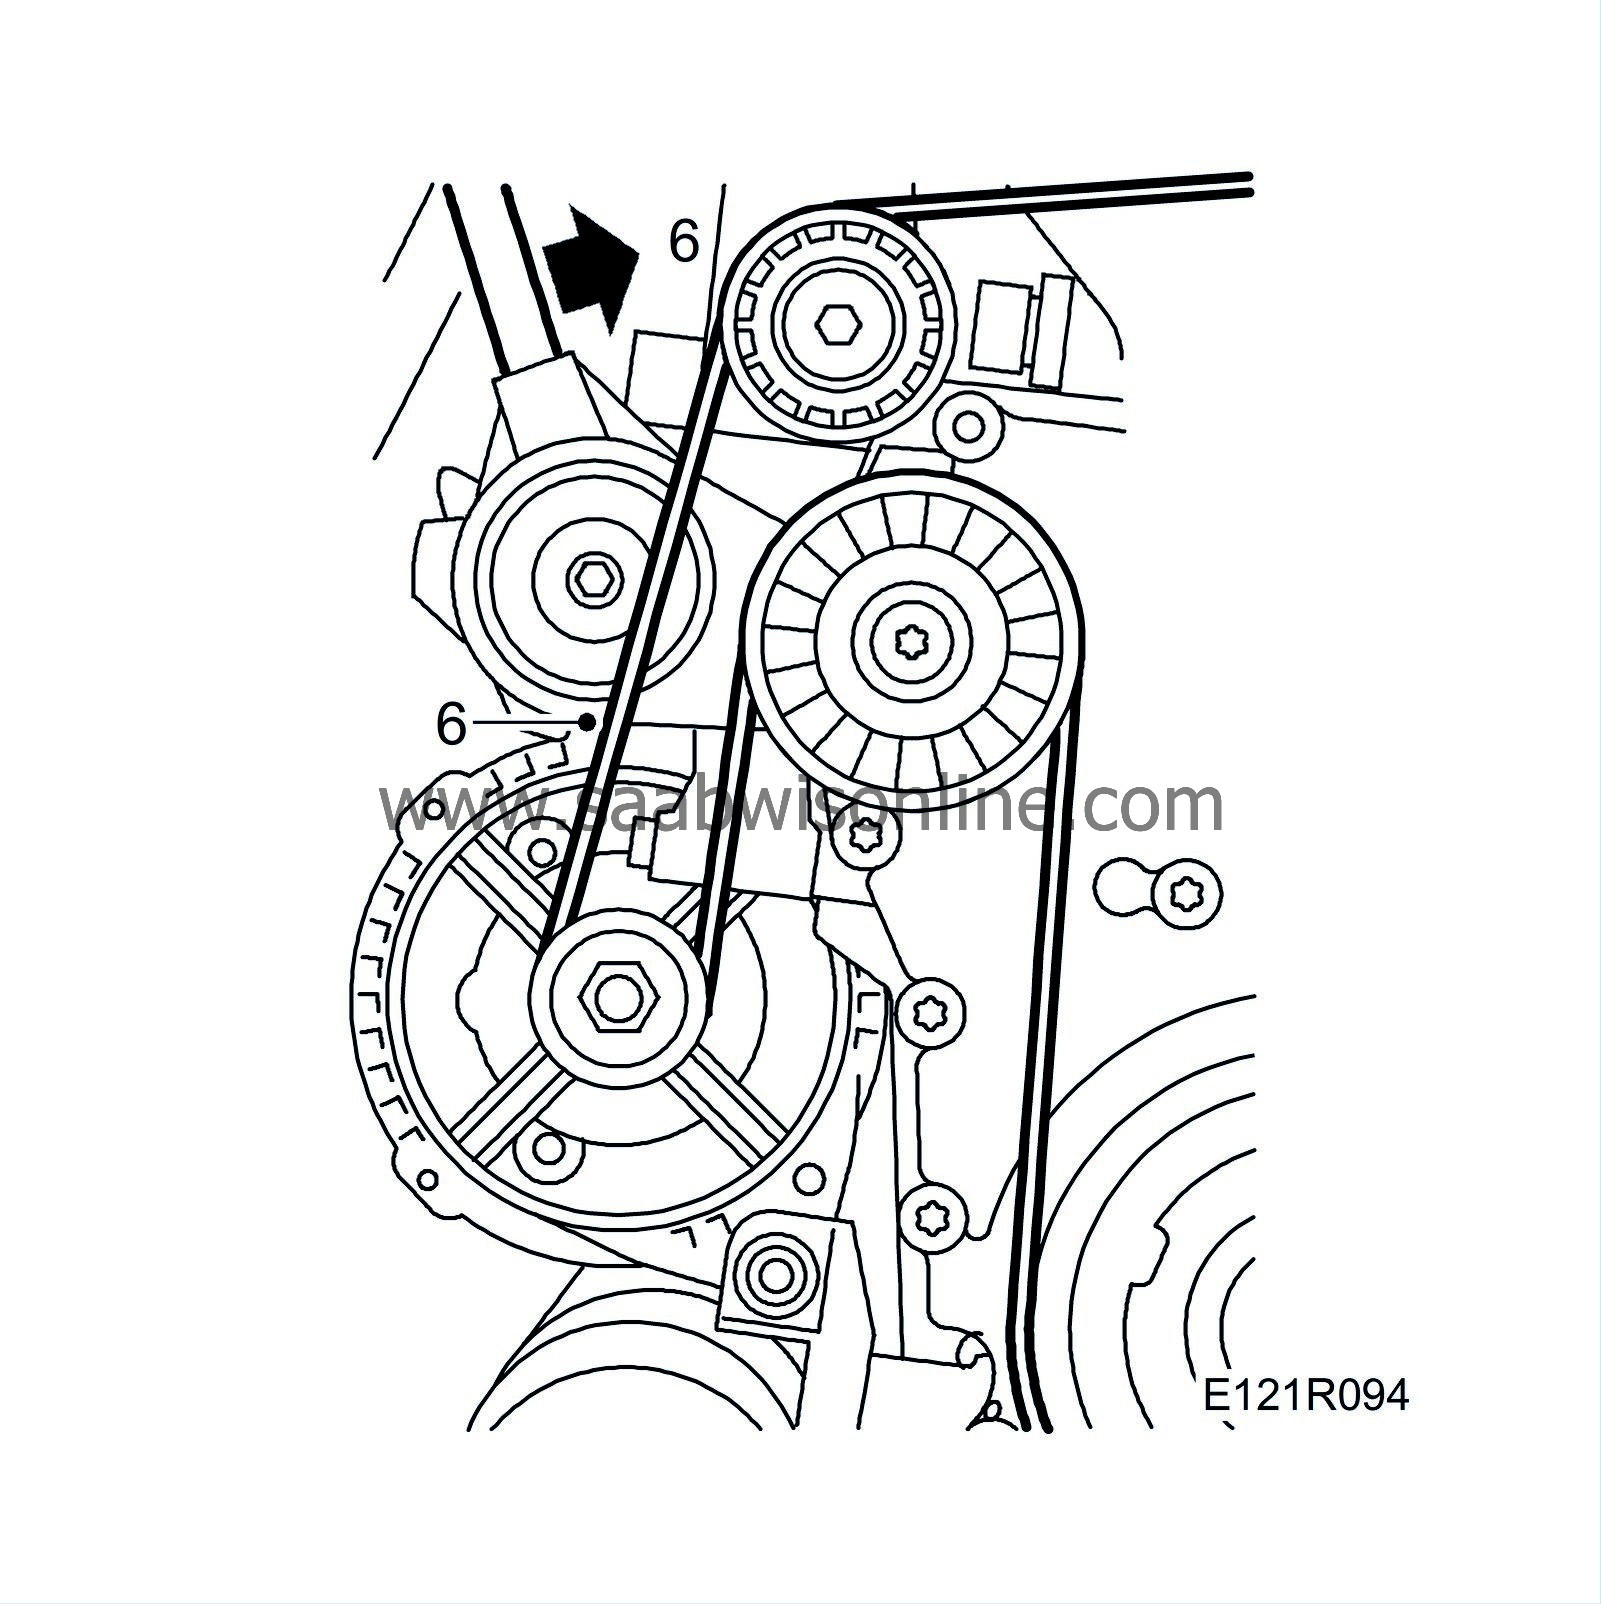
Relieve the tension from the multigroove belt and undo the idler sprocket so that the chain tensioner sleeve is freed.
|
|
| 8. |
Check the wear on chain sprockets and chain guide.
Chain guide wear must not be so great that the chain acts on the surface between the outer tracks. If the surface between the outer tracks shows signs of wear, they must also be replaced and the chain changed in the usual manner. |
|
Changing the chain
| 1. |
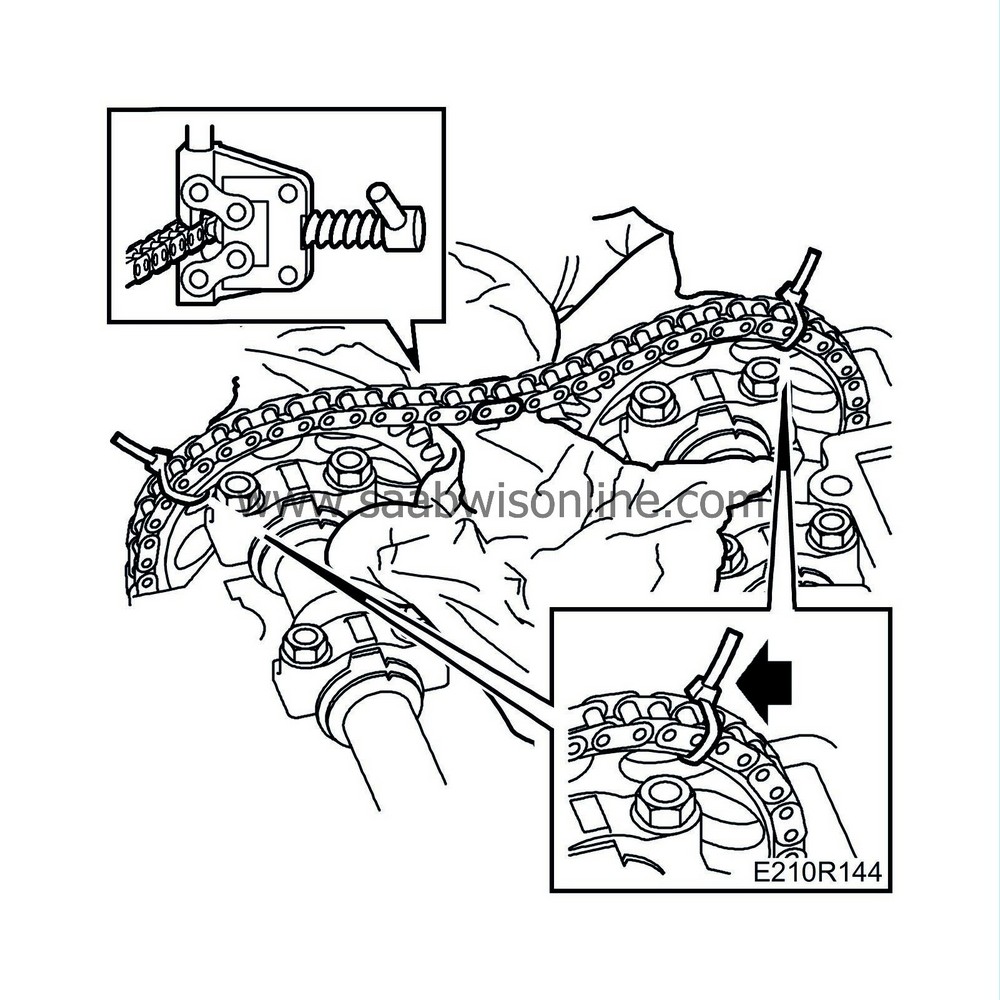
Cover the area round the chain with a cloth and also secure the chain with cable ties on both sides.
|
|
| 2. |
Split the chain by pressing out a link using
83 94 637 Removal tool
and then removing the link with a pair of pliers. Attach a cable tie to the end of the old chain.
|
|
| 3. |
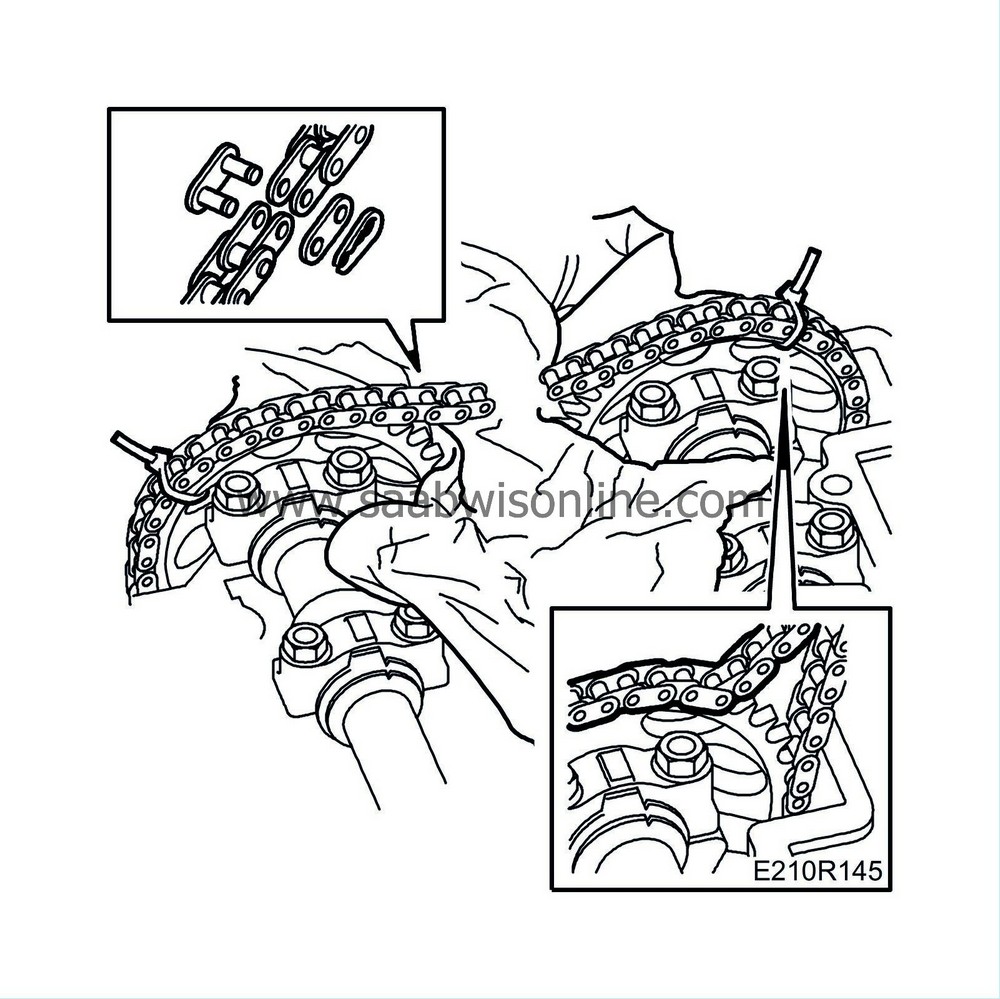
Couple together the new chain with the old one using
83 94 660 Chain locking link
. Take care not to let the chain fall down!
|
|
| 4. |
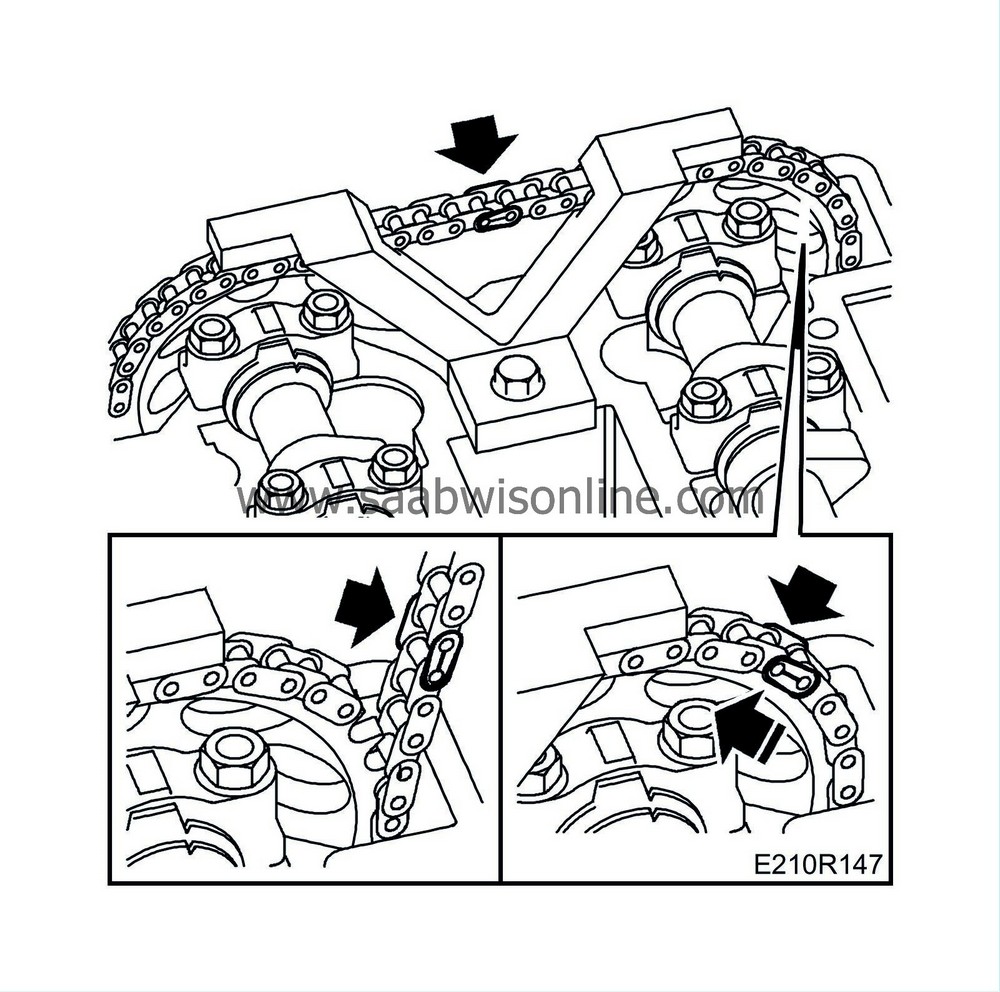
Make sure that the new chain lies over the camshaft sprockets on the intake side.
|
|
| 5. |
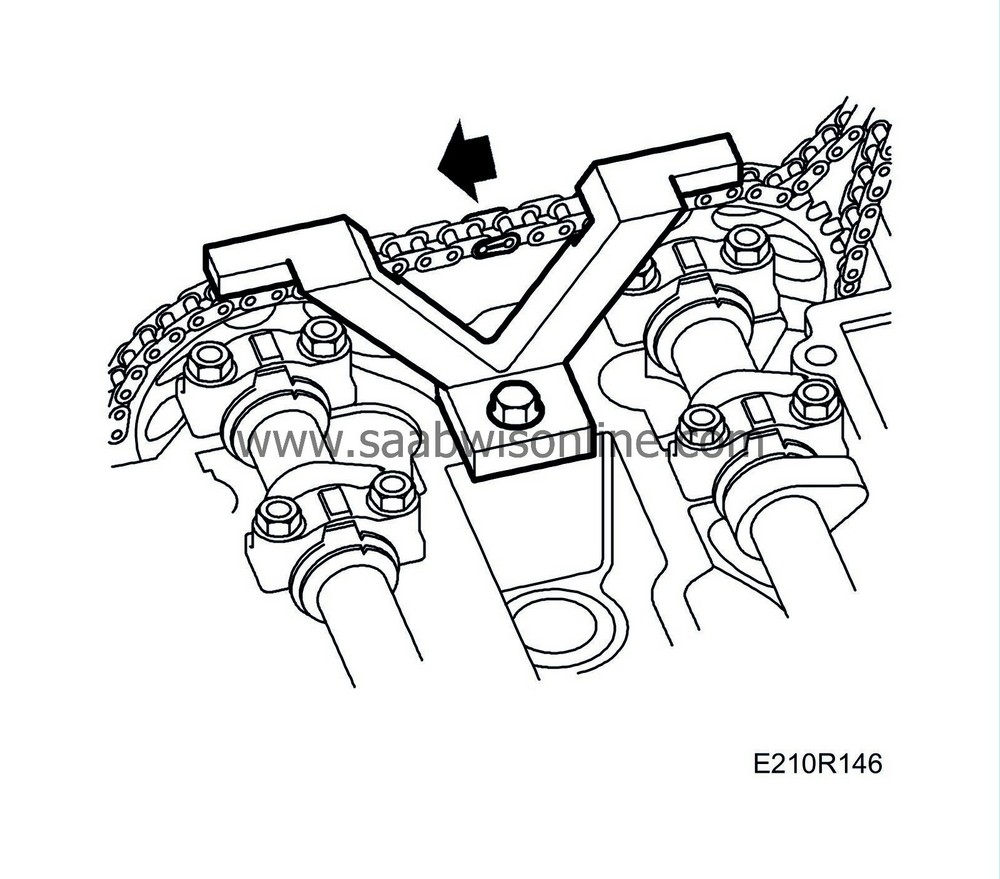
Fit the chain support in
83 94 652 Fixture
and remove the cloth and the cable tie on the camshaft sprocket.
|
|
| 6. |
With the old chain in your hand and the new one resting over your hand, carefully feed in the new chain while a helper turns the crankshaft.
|
||||||||||
| 8. |
Connect the ends of the new chain together with a chain link and remove the cable tie and cloth. Pull the chain round until the link is midway between the shanks of the chain support.
|
|
| 10. |
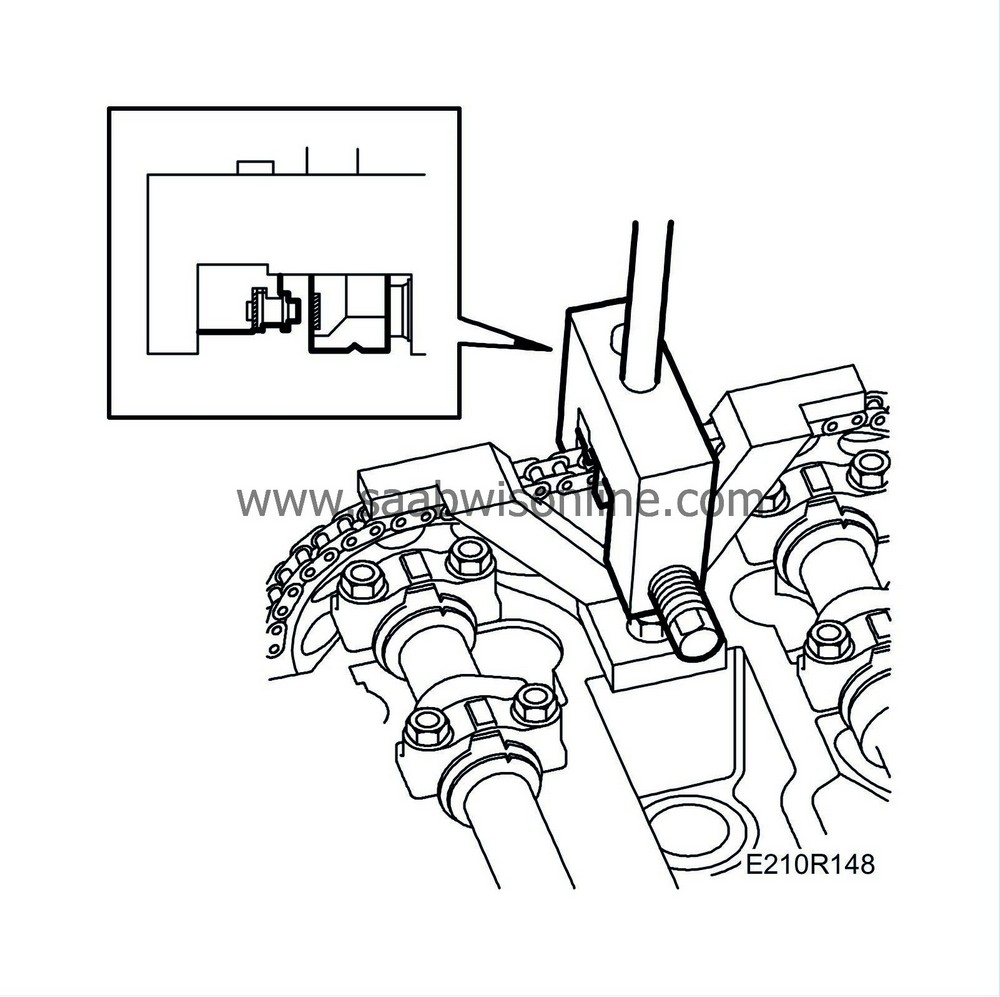
Reverse the insert in the tool and position the tool with the V notch directly over one of the shanks of the link.
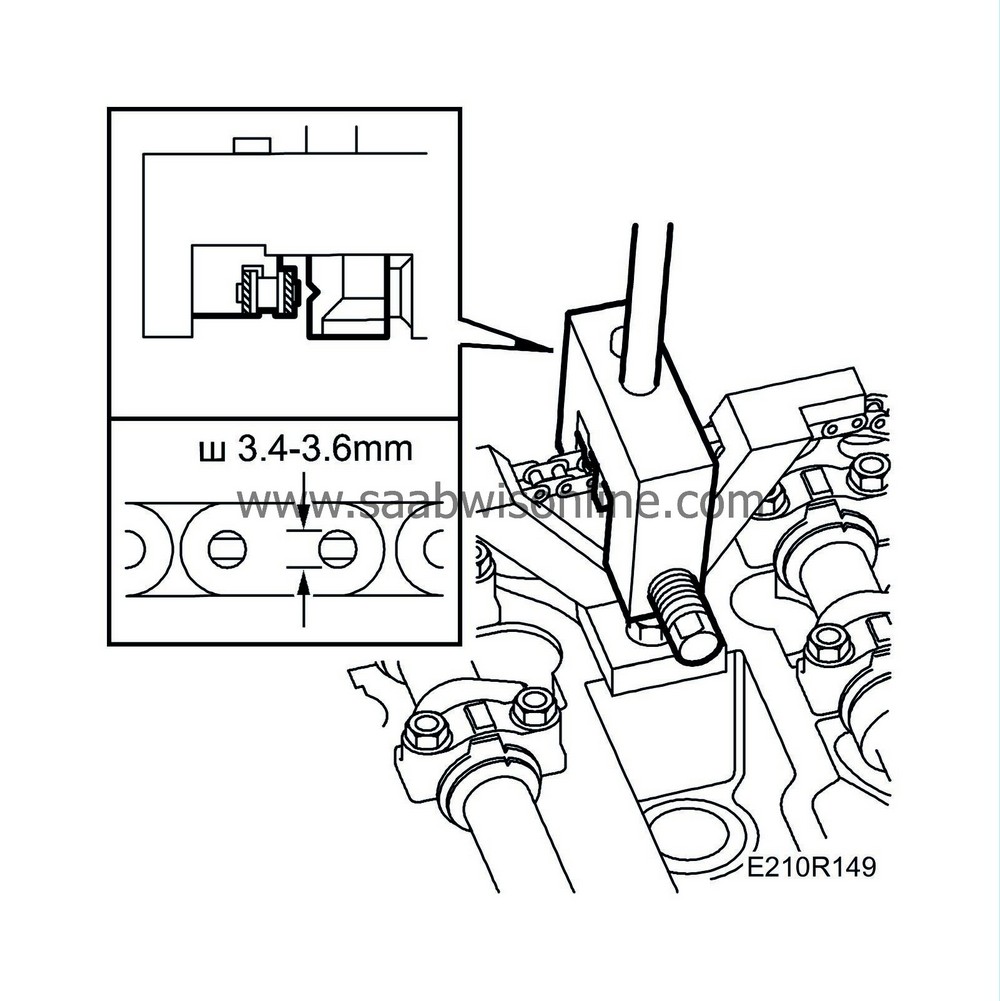
Rivet the shanks with a force of 15 Nm (11 lbf ft). Repeat for the other shank. |
|
| 11. |
Check the riveting by checking the compressed shank diameter with a vernier caliper.
The correct diameter is Ø 3.4-3.6 mm. |
|
| 12. |
Remove the cloth and shank support.
|
|
| 14. |
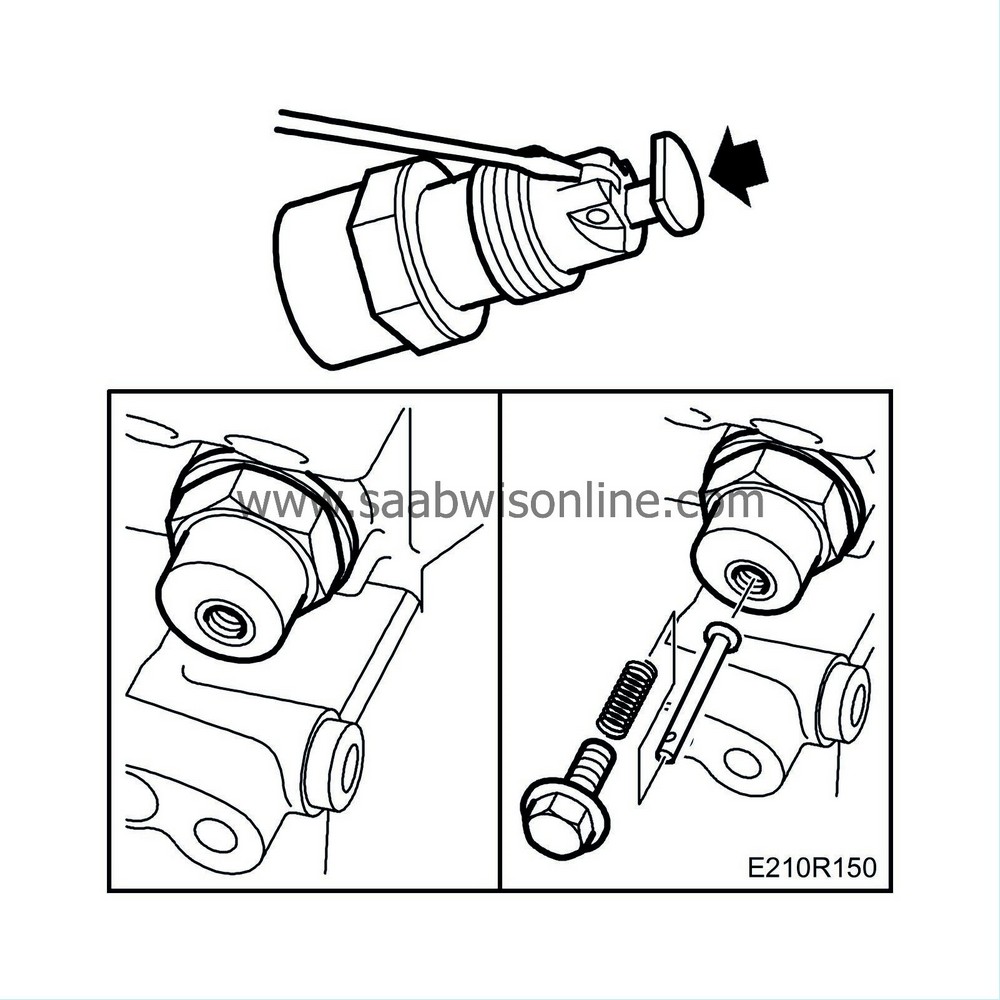
Tighten the chain tensioner bolt and make sure the multigroove belt is correctly positioned on all pulleys.
Tightening torque 63 Nm (47 lbf ft) 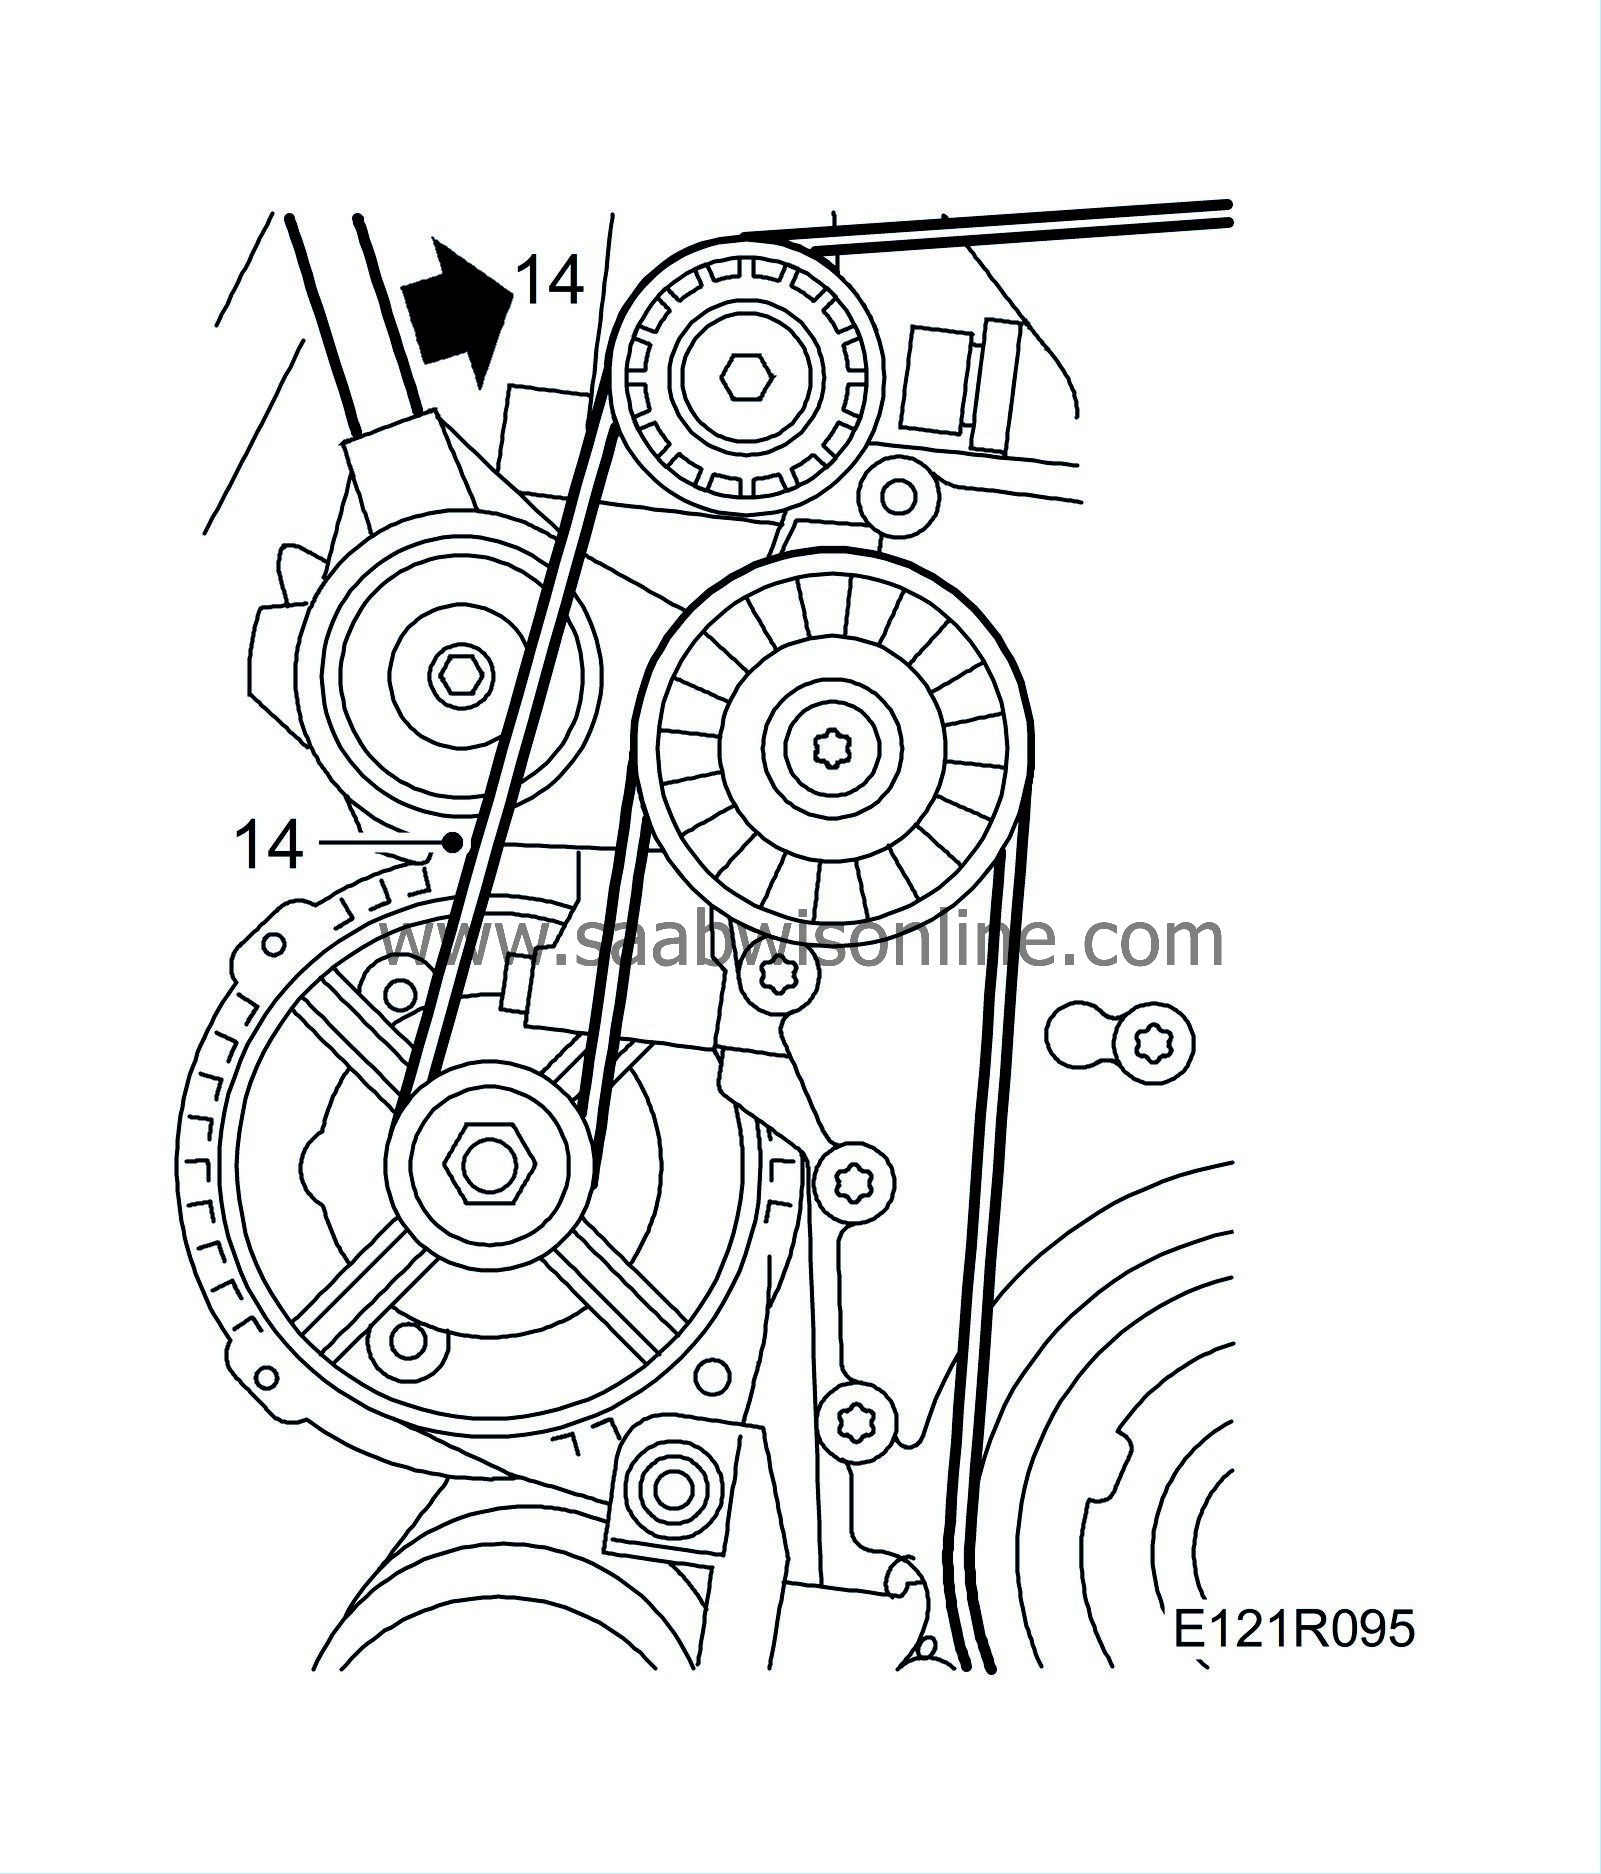
|
|
| 15. |
Turn the engine over two turns and check the 0 marks of the camshafts and crankshaft.
|
|
| 16. |
Wash the cylinder head gasket surface with benzene and oil the four recesses with engine oil.
|
|
| 17. |
Fit the camshaft cover as shown in the illustration.
Tightening torque 15 Nm (11 lbf ft) 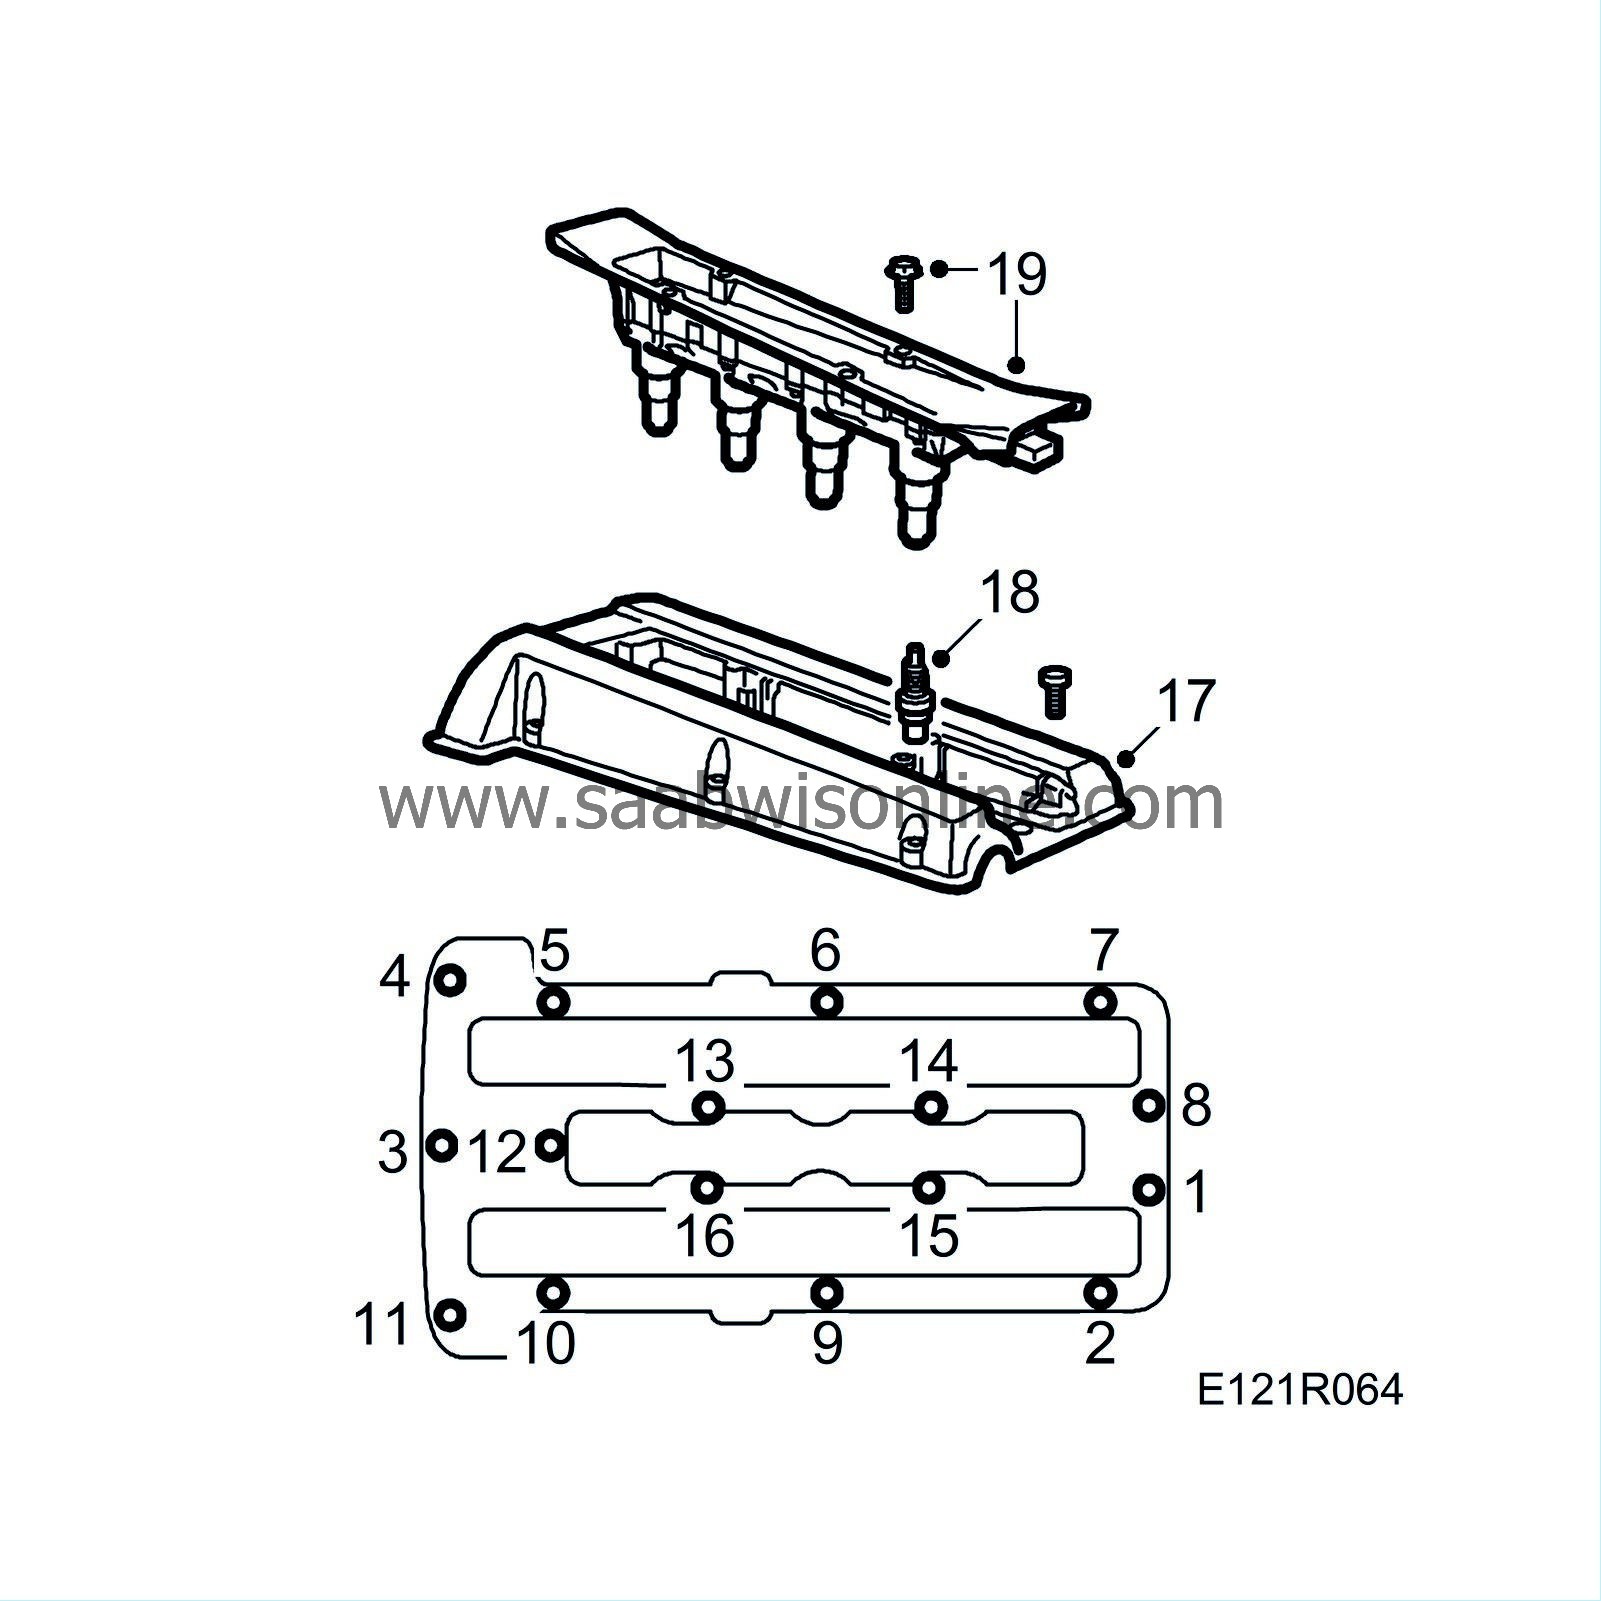
|
|
| 18. |
Fit the spark plugs.
Tightening torque: 28 Nm (21 lbf ft) |
|
| 19. |
Fit the ignition discharge module and connector.
Tightening torque: 11 Nm (8 lbf ft) |
|
| 20. |
Fit the crankcase ventilation hose and pipe. Secure the check valve with a cable tie.
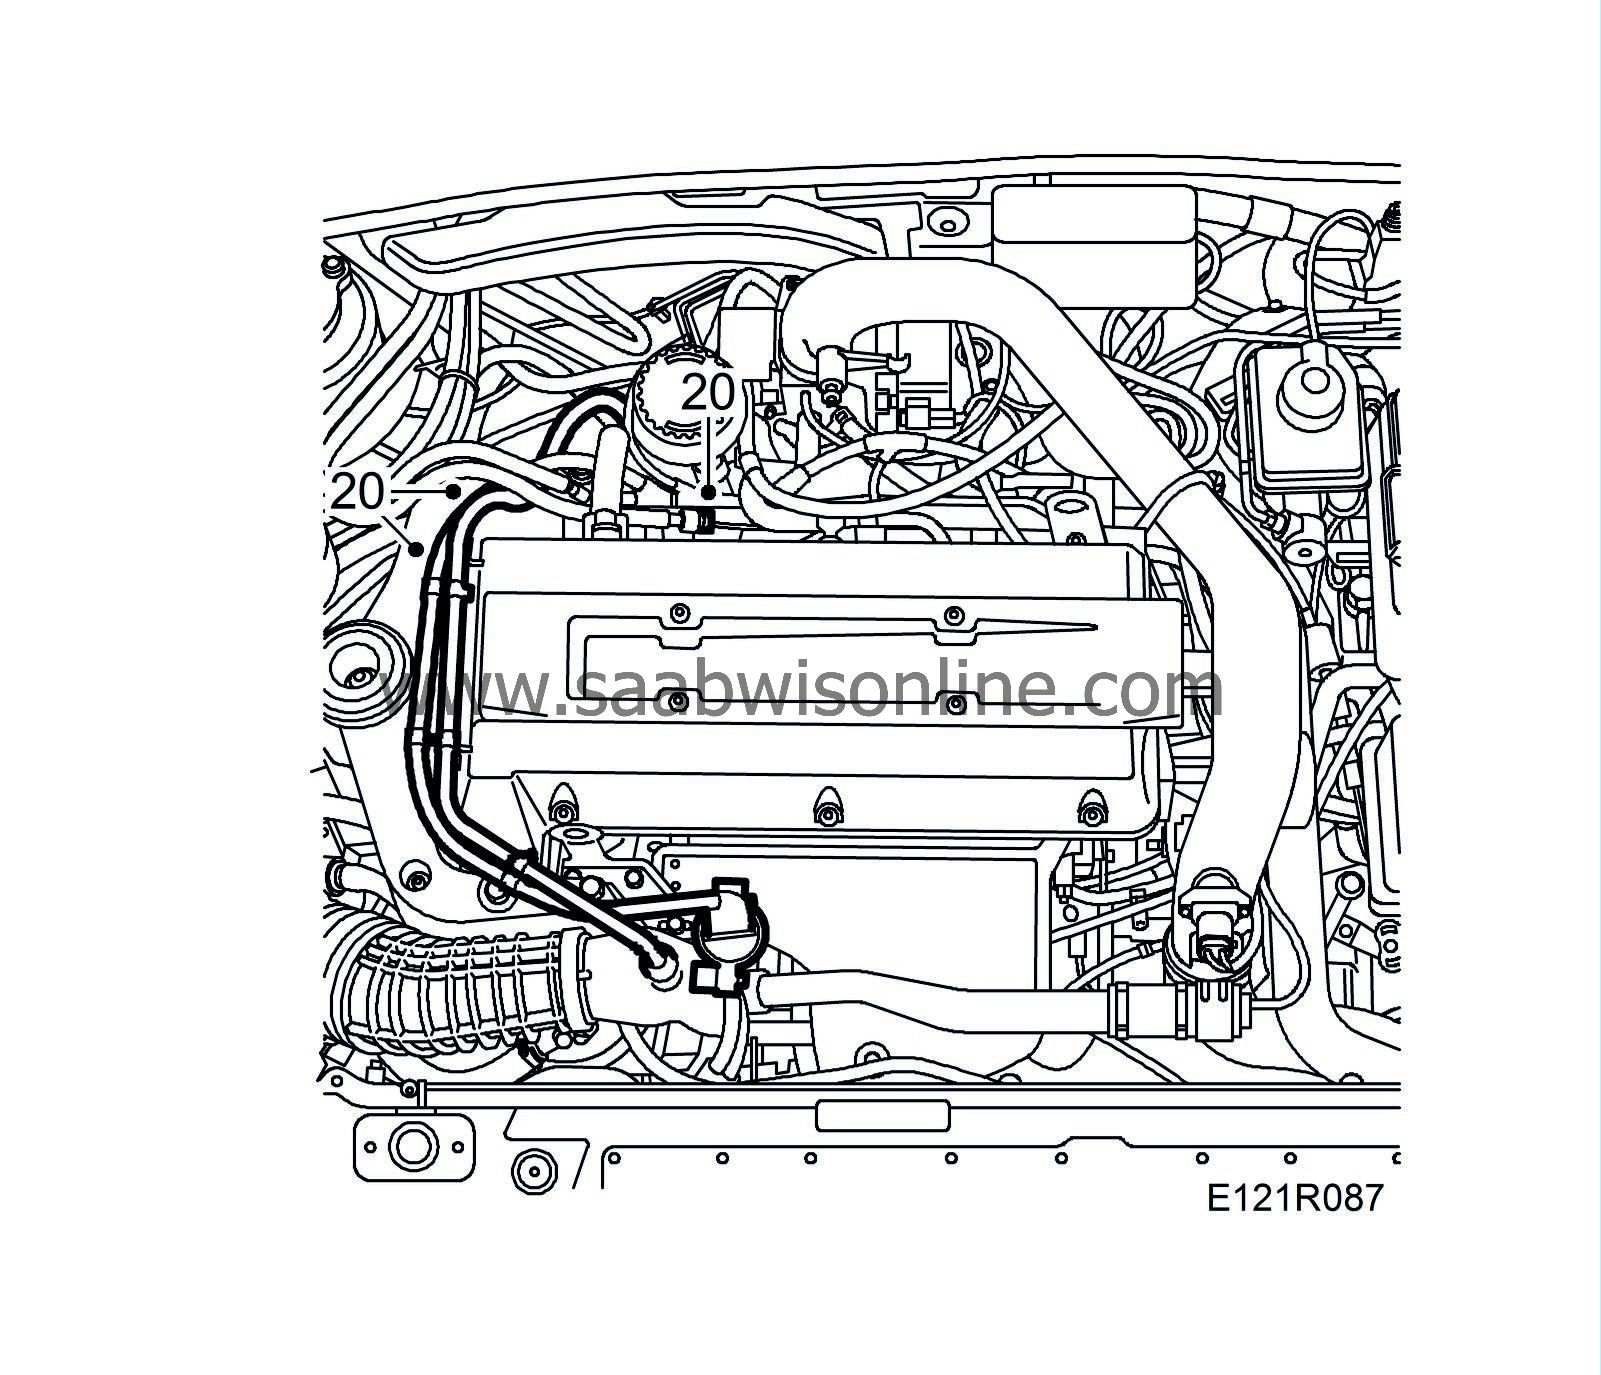
|
|
| 21. |
Raise the care and fit the belt circuit cover.
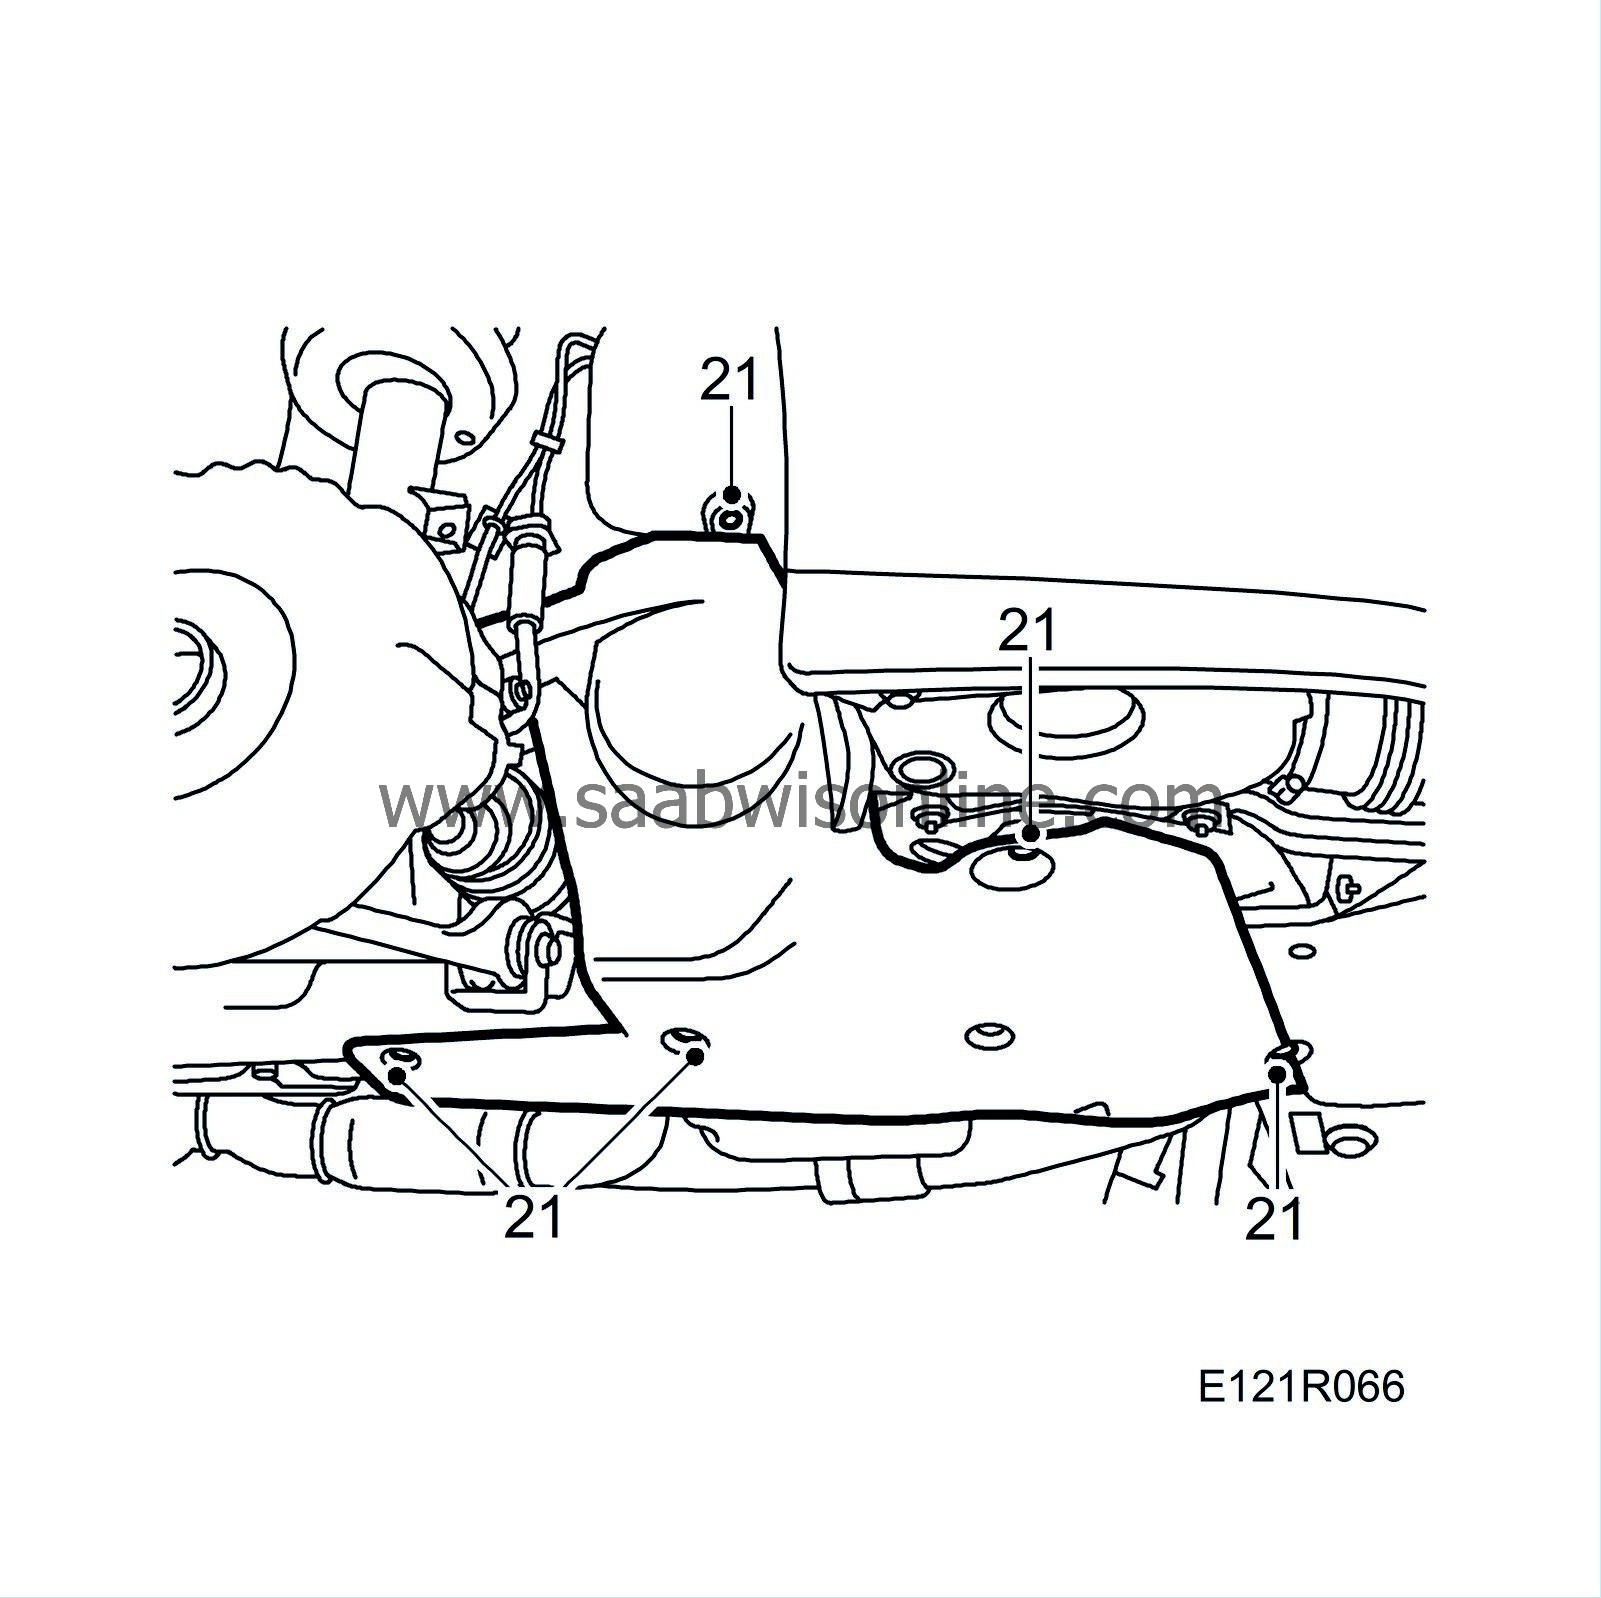
|
|
| 22. |
Lower the car and fit the upper engine cover.
|
|

