(234-2626 utg. 4) Securing the fuel connection to the fuel pump
Symptom: The fuel line detaches
|
MODIFICATION INSTRUCTION
|
|
Bulletin Nbr:
|
234-2626 utg. 4
|
|
Date:
...........
|
Juni 2007
|
|
Market:
|
US, CA, JP
|
|
|
Securing the fuel connection to the fuel pump
|
|
Product Safety Campaign 150 18
|
Replaces MI 234-2514
Cars in stock must be rectified before delivery.
A personal communication must be sent to the owners of cars already delivered requesting them to get in touch with the nearest Saab garage as soon as possible to have the fault rectified.
Saab 9-3 CV, M00 - M03
Saab 9-3 3/5D M01 - M02
Saab 9-5 M01 - M05 (US/CA)
Saab 9-5 M01 - M07 up to VIN 73512960 (JP)
The clips holding the fuel line to the fuel pump may be damaged on delivery. This can result in the fuel line detaching.
Symptom description
The fuel line detaches
12 806 113 Fixing kit, retaining clip and screw
Not US/CA:
Before taking any action, check the box of the modification identity plate. See the table under "Marking the modification identity plate". If the box is not filled in, continue as follows.
Procedure 9-3:
|
1.
|
Make sure that the tank is as empty as possible.
Cars without ORVR/OBD2:
Drain the tank in accordance with WIS - 9-3(9440) - Engine - Fuel system - Adjustment/Replacement - Draining the fuel tank.
Cars with ORVR/OBD2:
The fuel tank must not be drained by means of siphoning via the filler pipe. The check valve will be destroyed!
|
|
2.
|
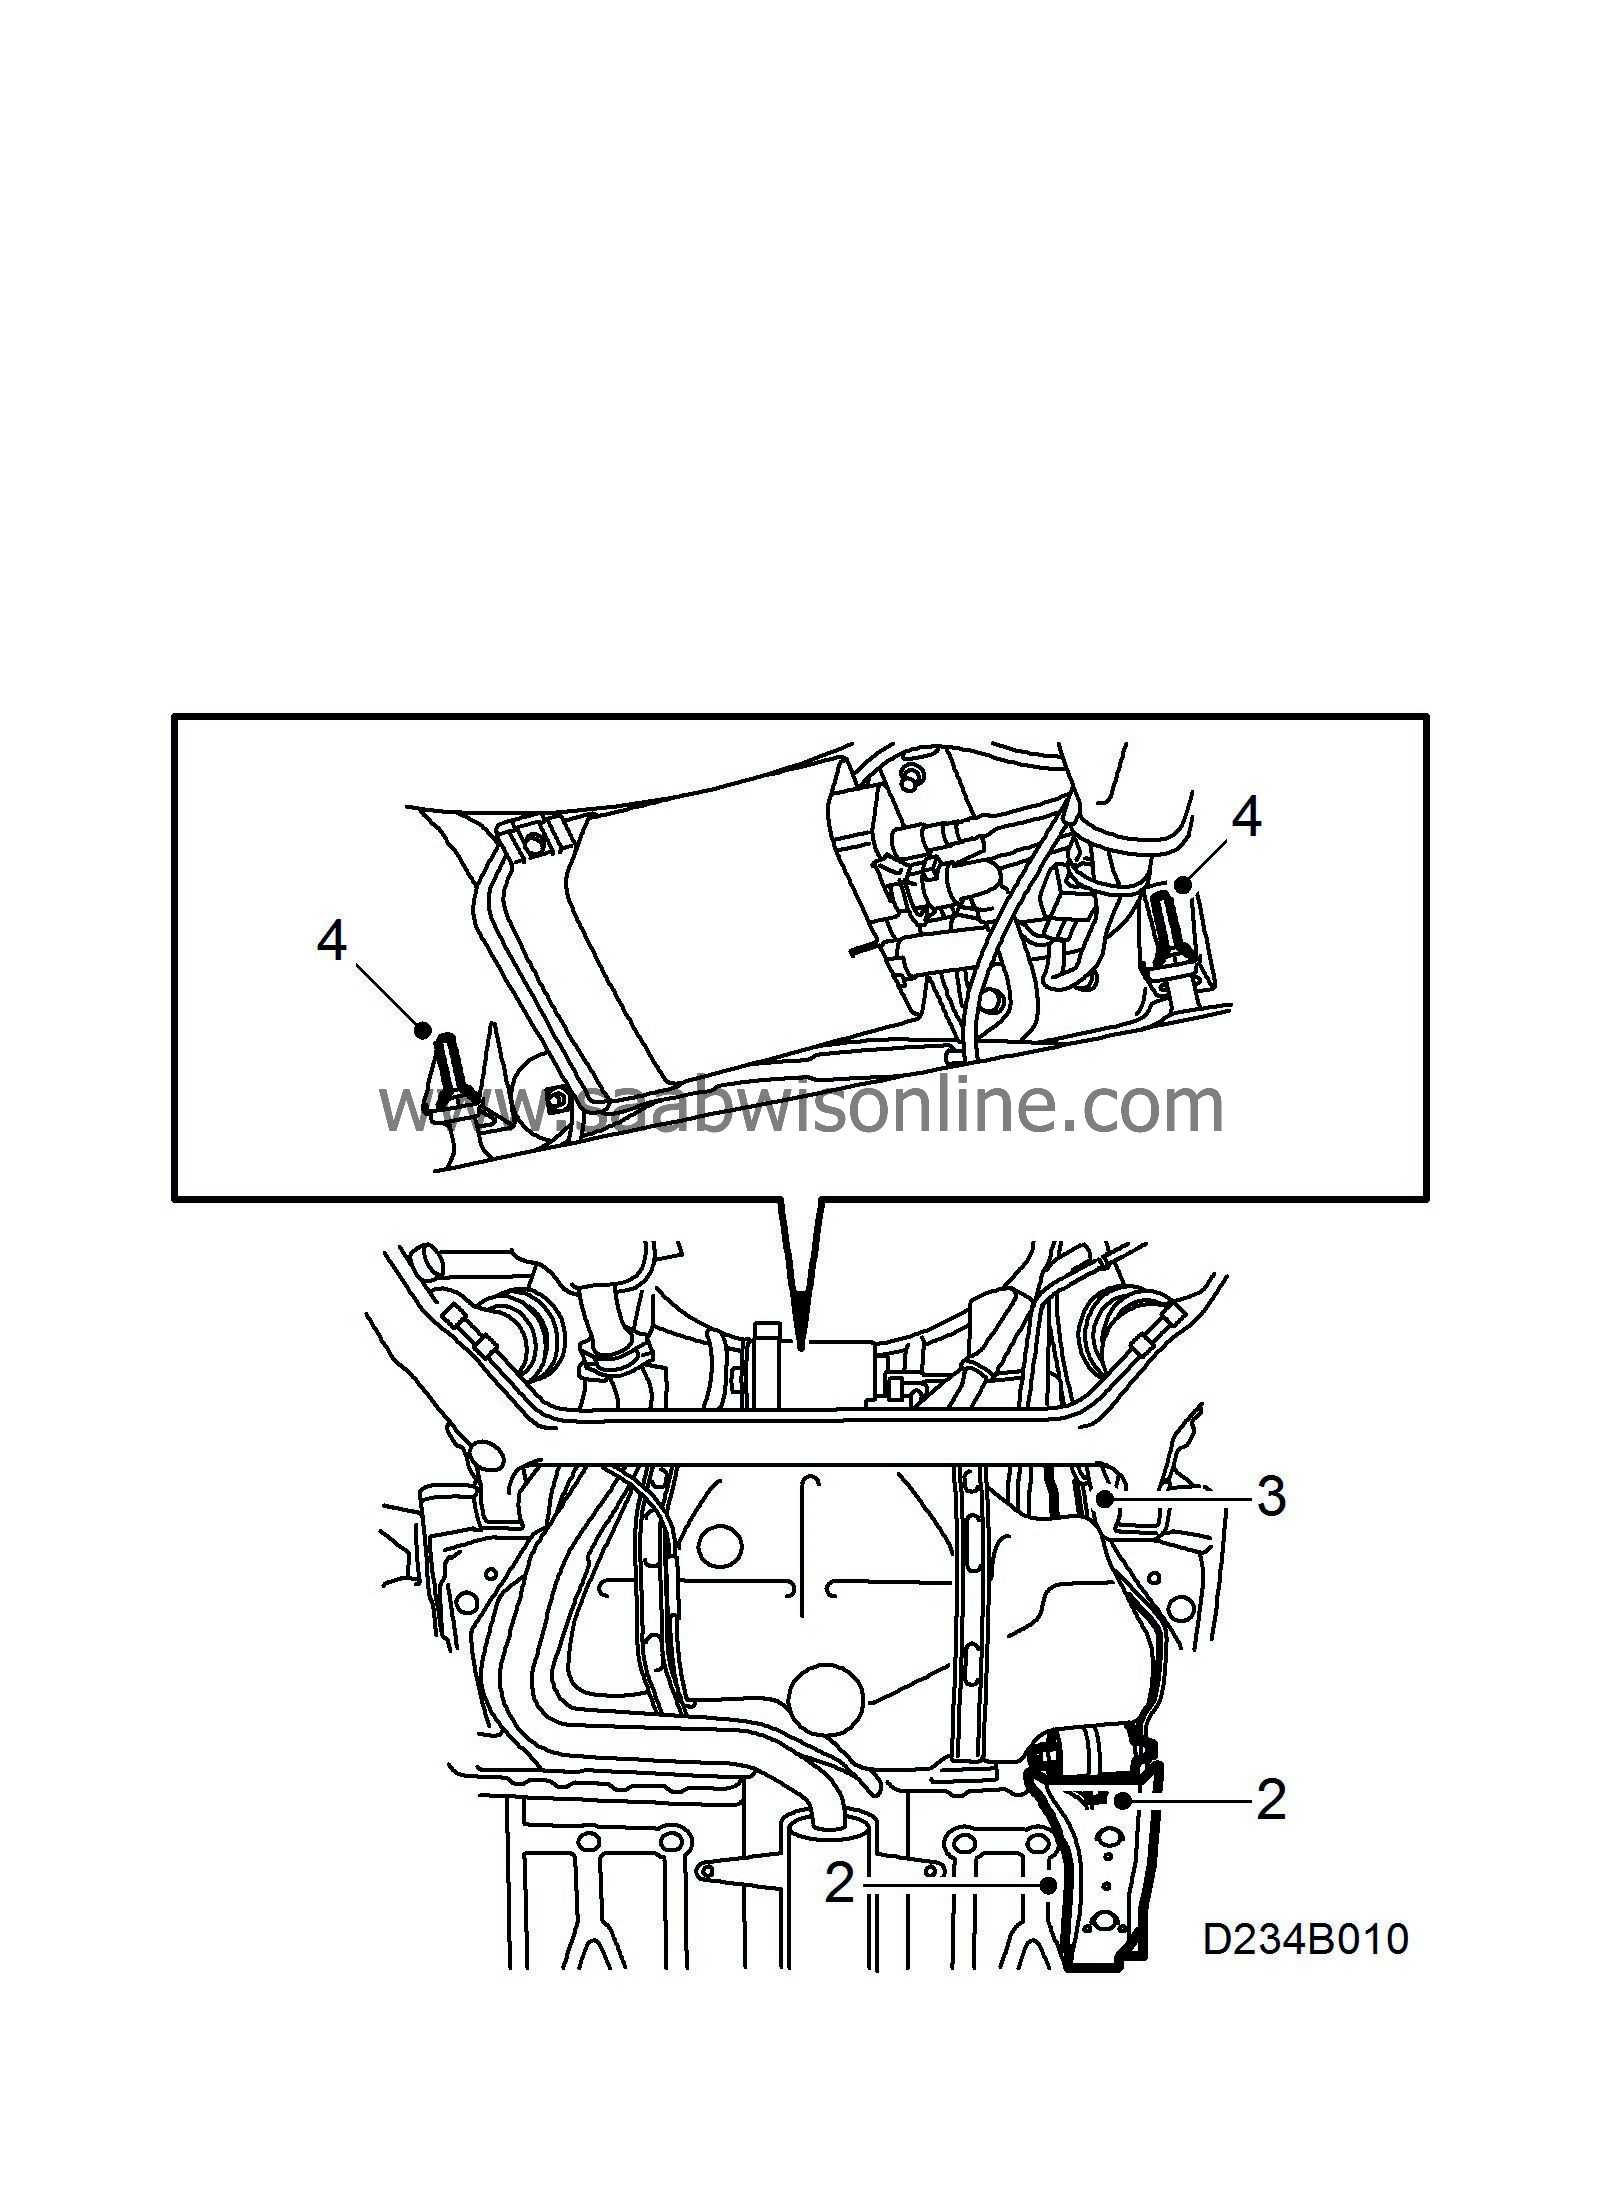
Raise the car, make sure that the right-hand rear lifting arm is located as far out to the right as possible so as not to prevent removal. Remove the cover and detach the clamp holding the fuel filter.
|
|
3.
|
Remove the tank filler hose(s) from the tank and seal the tank with cloth tape or the like.
|
|
4.
|
Install a column lift under the tank and remove the tank straps.
|
|
5.
|
Lower the right-hand rear of the tank as far as possible.
|
|
6.
|
Detach the ventilation line from the tank clips.

|
|
7.
|
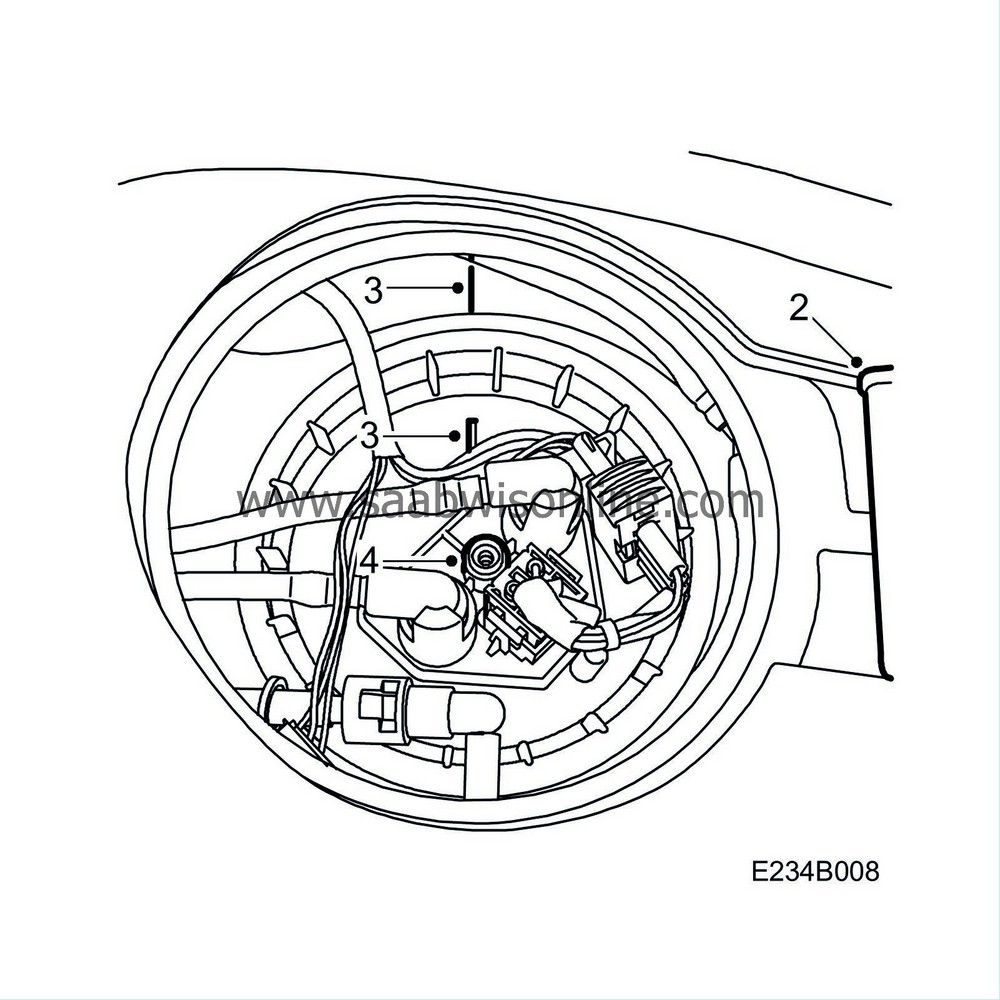
Remove the cover over the fuel pump.
|
|
8.
|
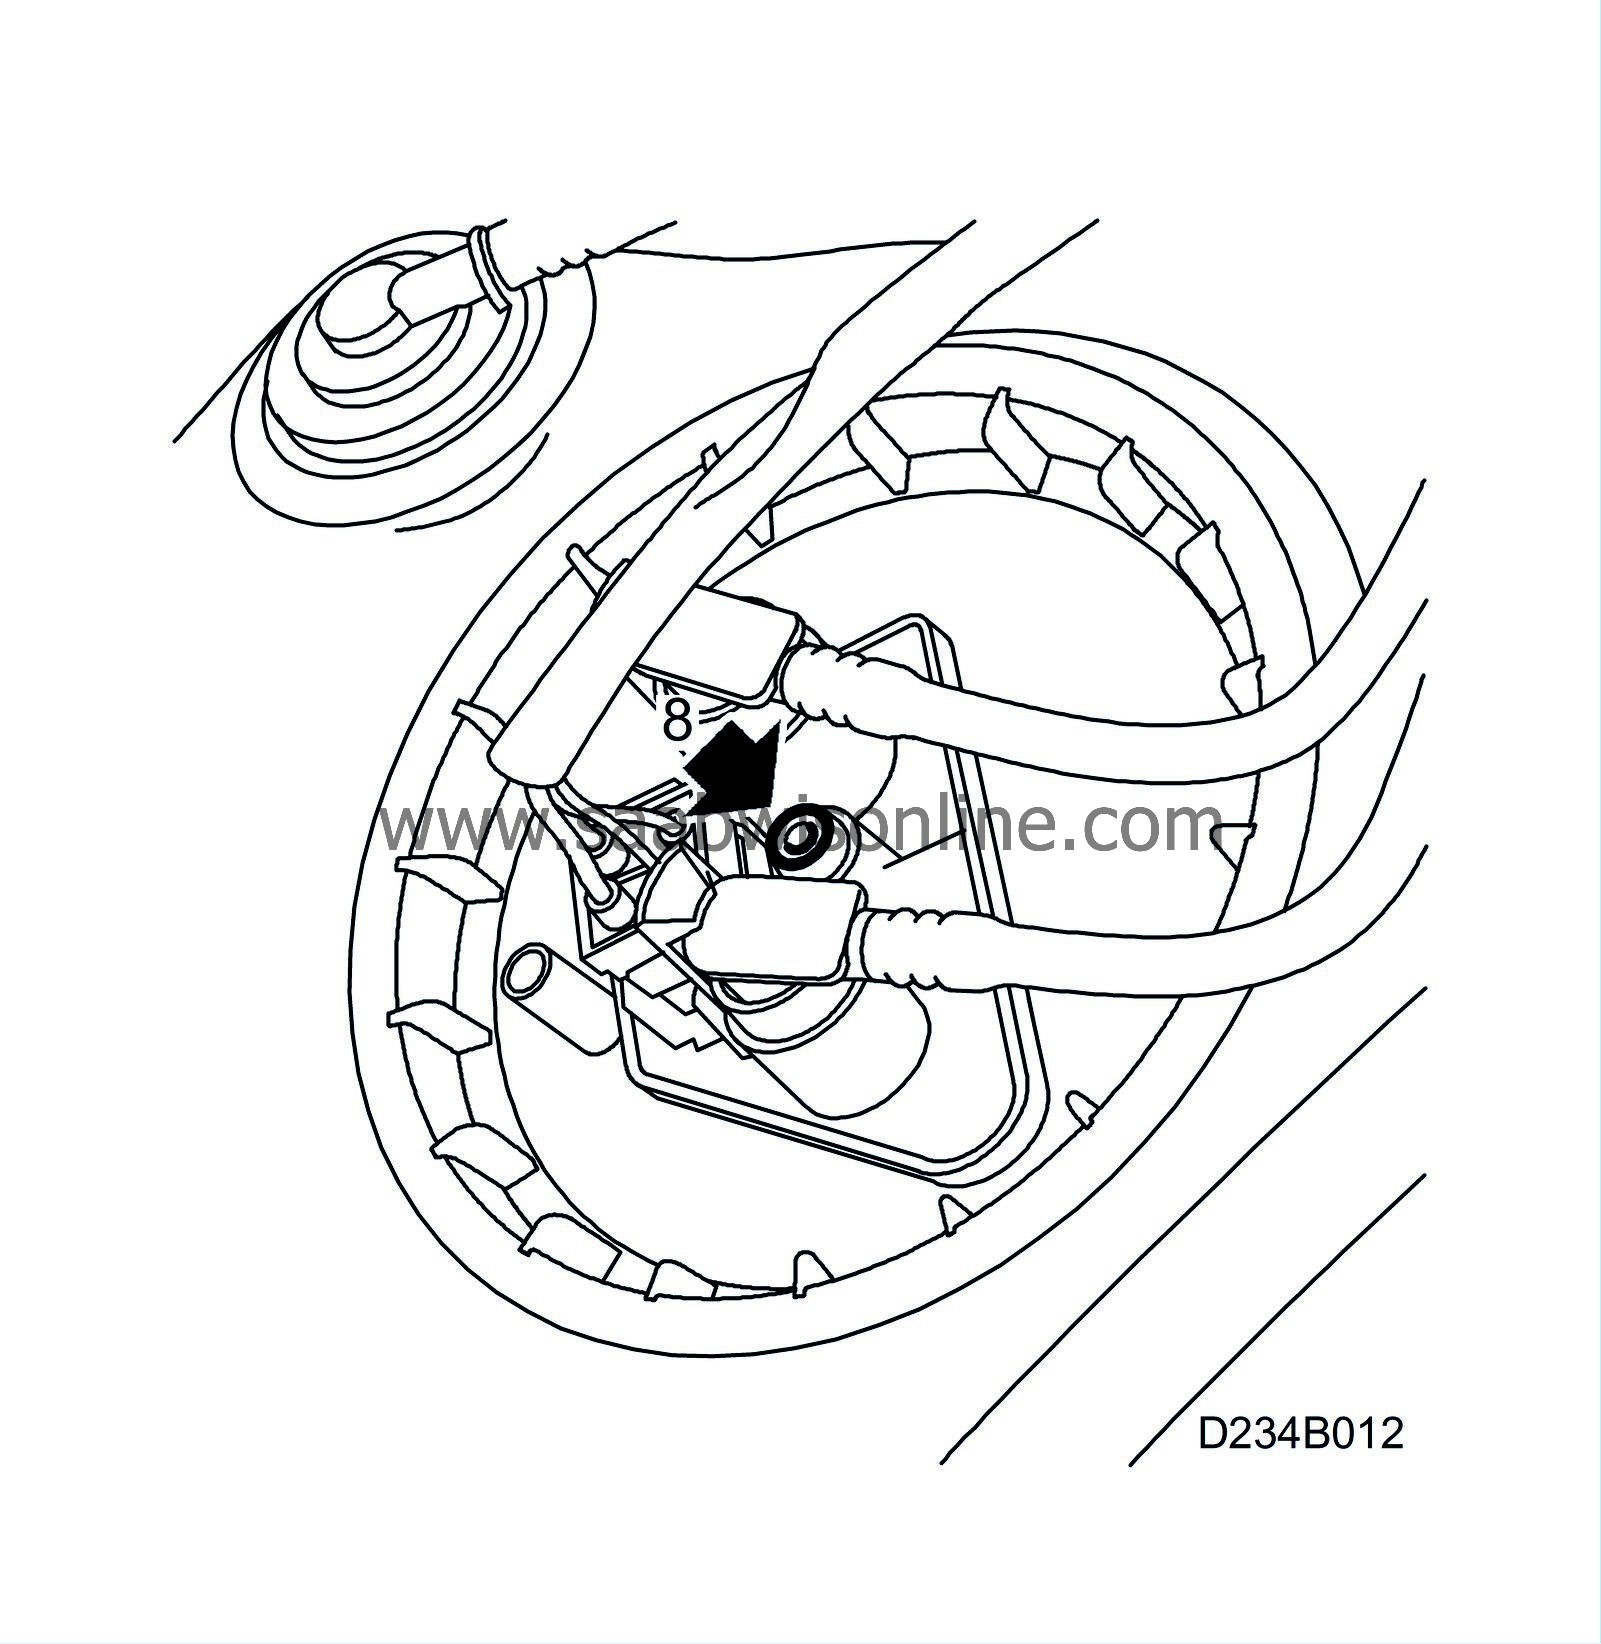
Remove the sealing paint in the groove on the Torx screw and remove the screw.
|
|
9.
|
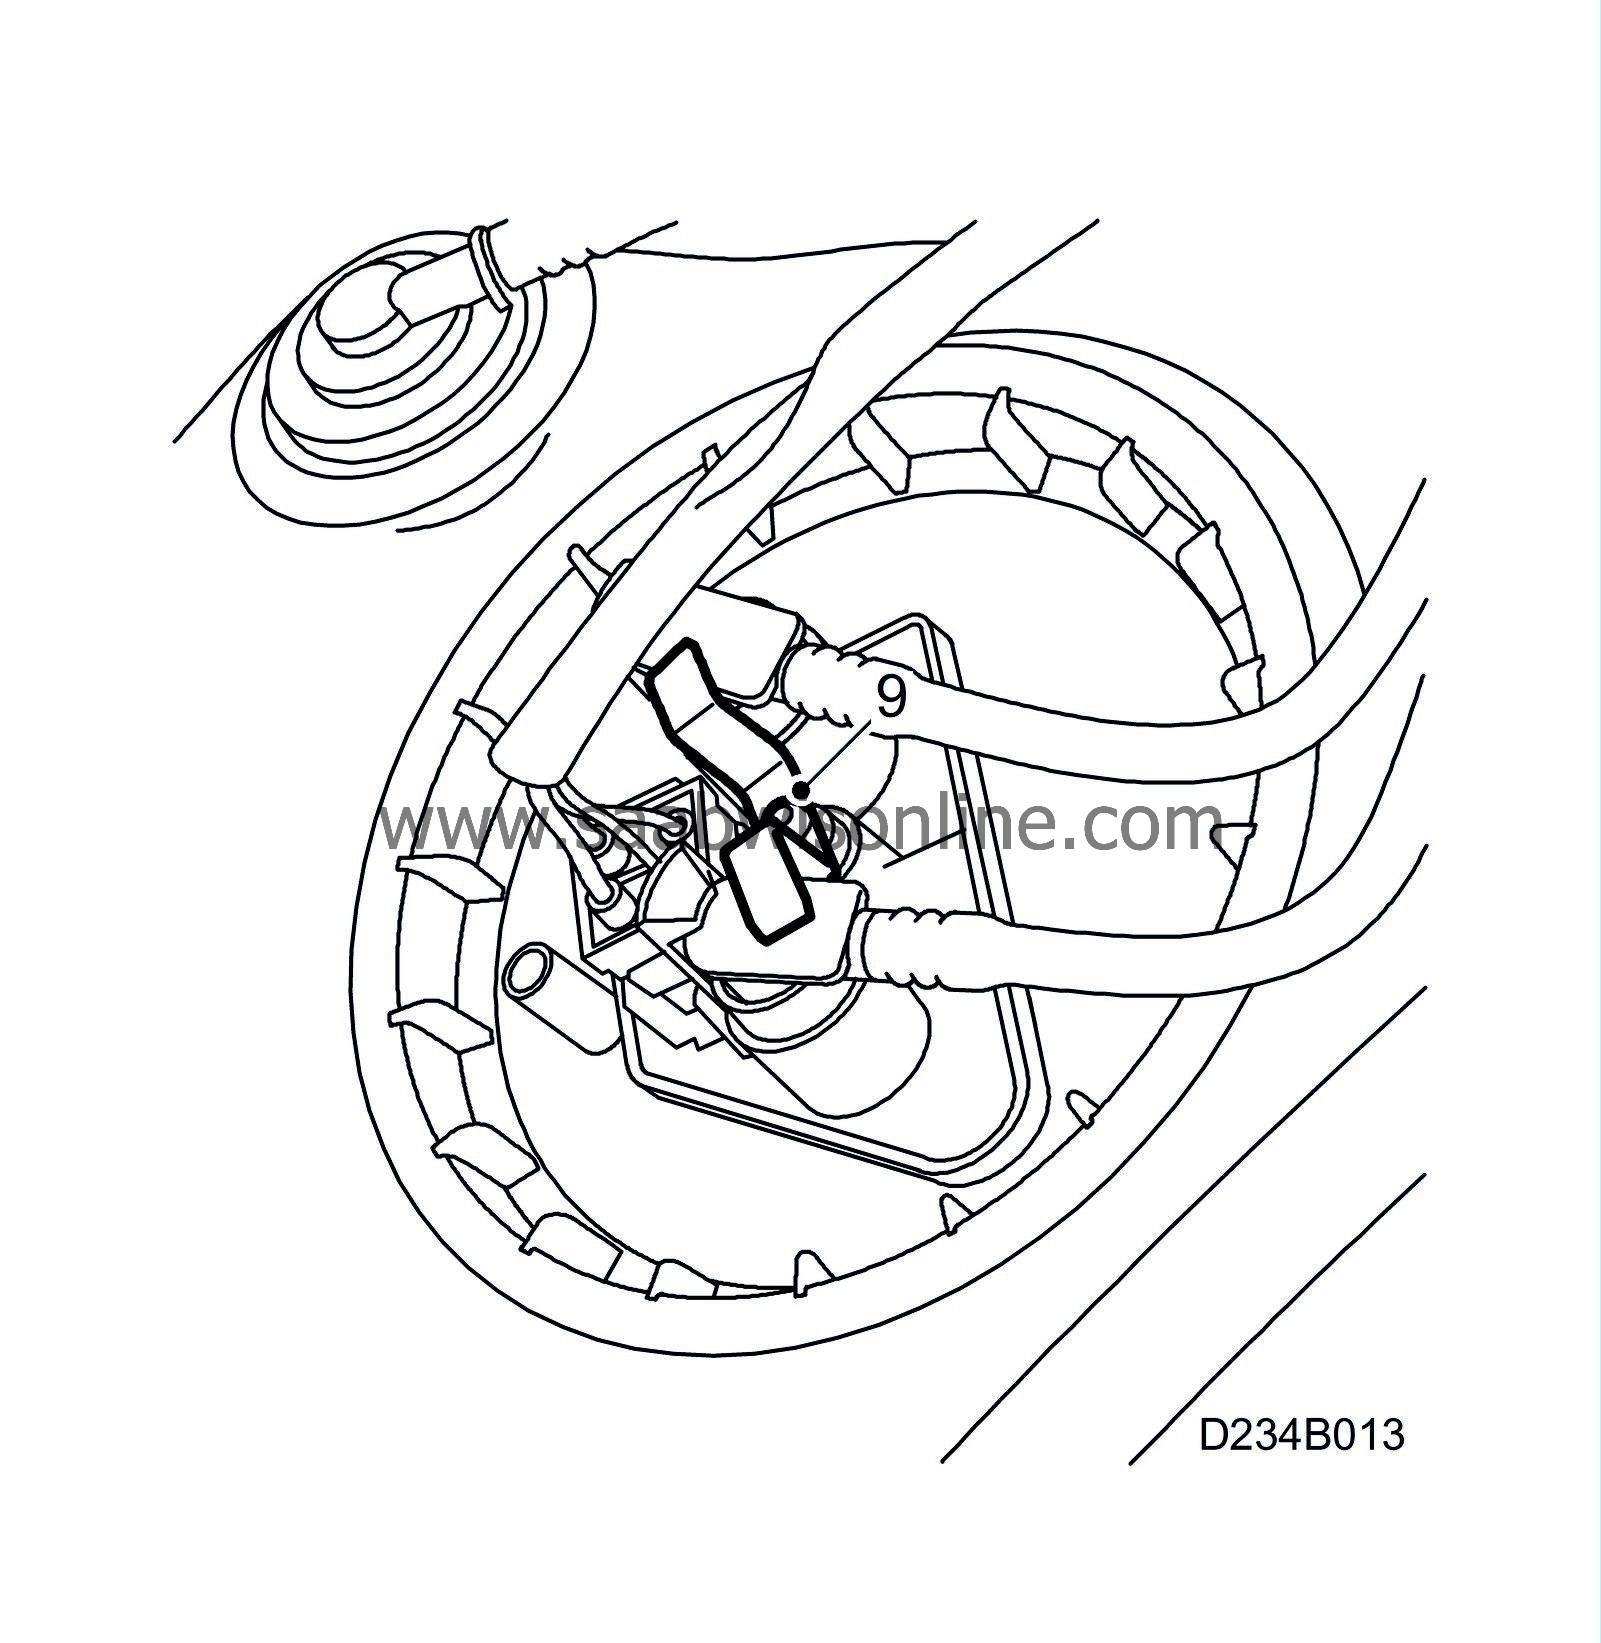
Fit the retaining clip with the new screw. Insert the screw manually to avoid damaging the thread.
Tightening torque 2 Nm (1.5 lbf ft)
|
|
10.
|
Fit the cover over the fuel pump.
|
|
11.
|
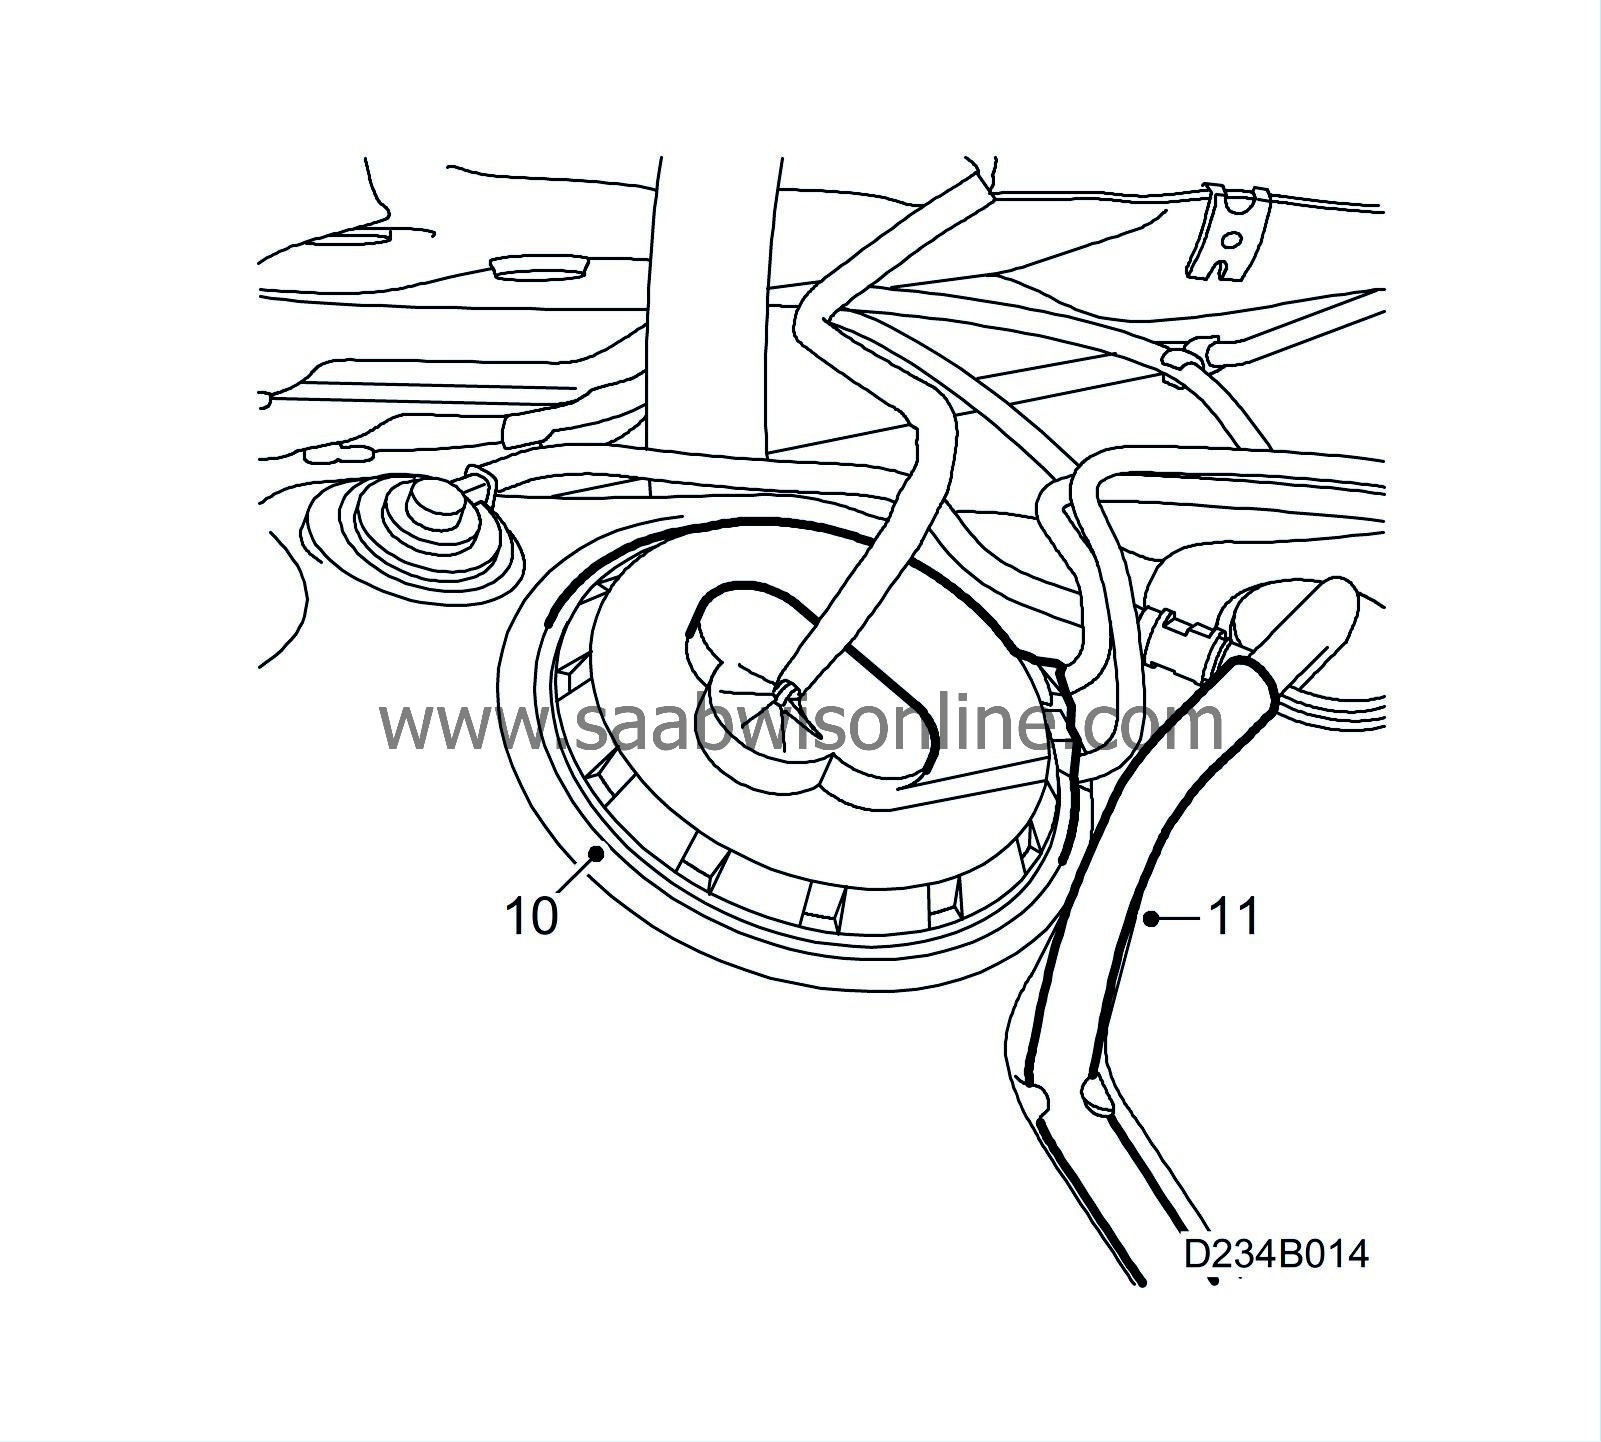
Fit the ventilation line in the tank clips.
|
|
12.
|
Raise the tank using the column lift and fit the tank straps. Make sure that the wiring harness connectors are not trapped.

|
|
13.
|
Remove the plug/cloth tape and fit the hose(s).
Tightening torque 2 Nm (1.5 lbf ft)
|
|
14.
|
Fit the fuel filter and the cover.
|
|
16.
|
Refill any drained fuel.
|
Procedure 9-5:
|
1.
|
Open the left rear door and raise the seat cushion of the left rear seat.
|
|
2.
|
Move aside the carpet's fuel pump flap and remove the cover.
|
|
3.
|
Confirm the index markings on the pump and tank aligned. If not, slacken the screw ring slightly using 83 94 462 Wrench, fuel pump and turn the pump to the correct position. Tighten the screw ring.
Tightening torque 75 Nm (55 lbf ft)
|
|
4.
|
Remove the sealing paint in the groove on the Torx screw and remove the screw.
|
|
5.
|
Fit the retaining clip in a vice and bend one of the retaining clip wings as illustrated.

|
|
6.
|
Check the angle against the template.

|
|
7.
|
Check that the wings are parallel.
|
|
8.
|
Fit the retaining clip with the new screw. Insert the screw manually to avoid damaging the thread. Check that the retaining clip does not press against the yellow catches.
Tightening torque 2 Nm (1.5 lbf ft)

|
|
9.
|
Fit the cover and reposition the carpet flap.
|
|
10.
|
Reposition the left seat cushion and close the left rear door.
|
|
Marking the modification identity plate (not US/CA)
|
After completing the work, mark the relevant box of the modification identity plate (see the table below). Mark the box with a "7" if the procedure was carried out by the importer or an "8" if done by a dealer.
Model year
|
9-3 CV
|
00
|
A4
|
01
|
C1
|
02
|
C1
|
03
|
C1
|
Model year
|
9-3
|
01
|
C1
|
02
|
C1
|
Model year
|
9-5
|
01
|
C2
|
02
|
F2
|
03
|
C2
|
04
|
C2
|
05
|
C2
|
06
|
C2
|
07
|
C2
|
|
Warranty/Time Information
|
See separate information.


