PRE-RELEASE
Belt tensioners
| Belt tensioners |
| Seat belts |
The cars are equipped with seat belts for the front and rear seats in conformity with legal requirements.
For more information, see Seat-belt system, System overview .

|
||||||||||
| Inertia reel with belt tensioner activated |
When a car has been involved in a collision and a belt tensioner has been activated, the entire inertia reel with pretensioner, buckle lock and end fitting must be replaced.
If any of the rear belts were in use at the time of the accident, they must be replaced together with the buckle lock.
If no belt tensioner has been activated, inspect all belts and other equipment thoroughly.
The seat-belt tensioners must be scrapped once they have been triggered, see Scrapping cars with airbags and seat-belt tensioners .
| To remove |

|
|||||||
| 1. |
Ignition switch in the OFF position.
|
|
| 2. |
Slide the seat forwards as far as it will go.
|
|
| 3. |
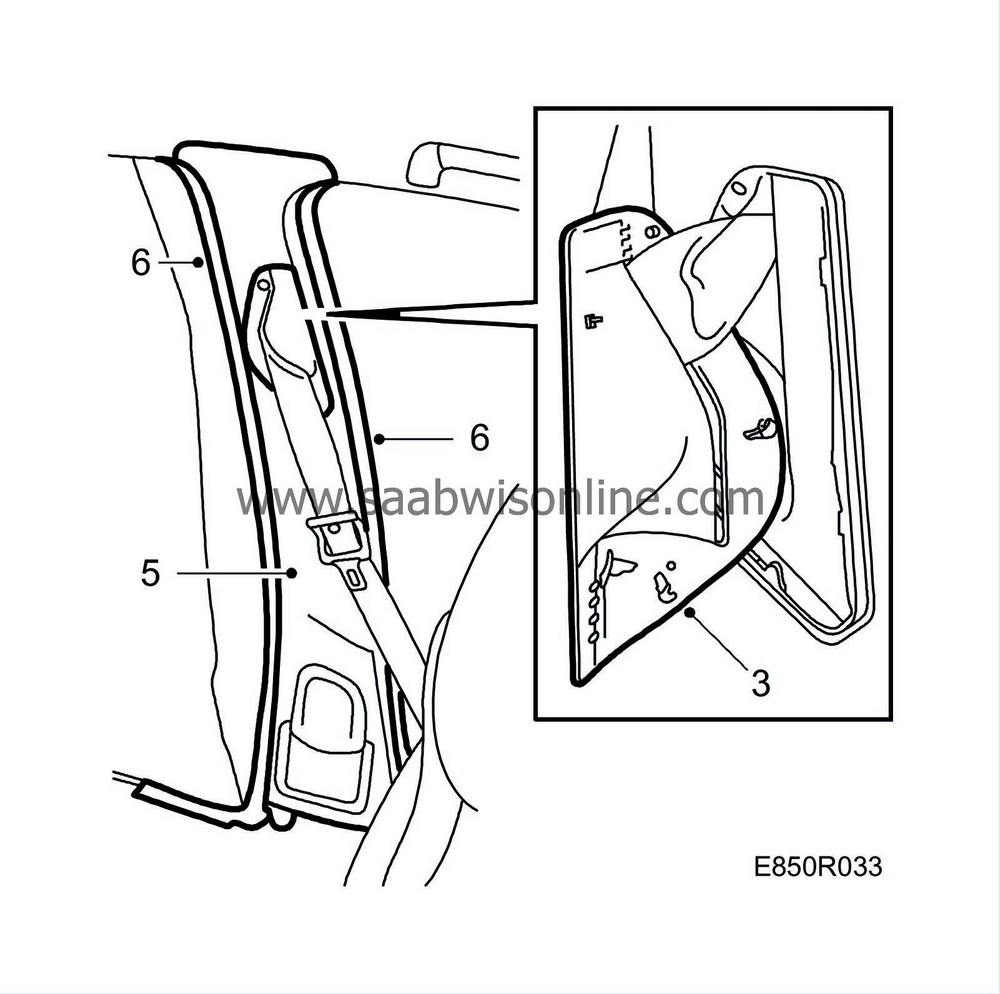
Pull away the B-pillar trim (fastened with clips) and lift it out of the air duct.
|
|
| 4. |
Detach the seat-belt bracket in the front seat by pressing in the catch using an angled screwdriver.
|
|
| 5. |
Remove the belt guide and pass the belt through the B-pillar trim.
|
|
| 6. |
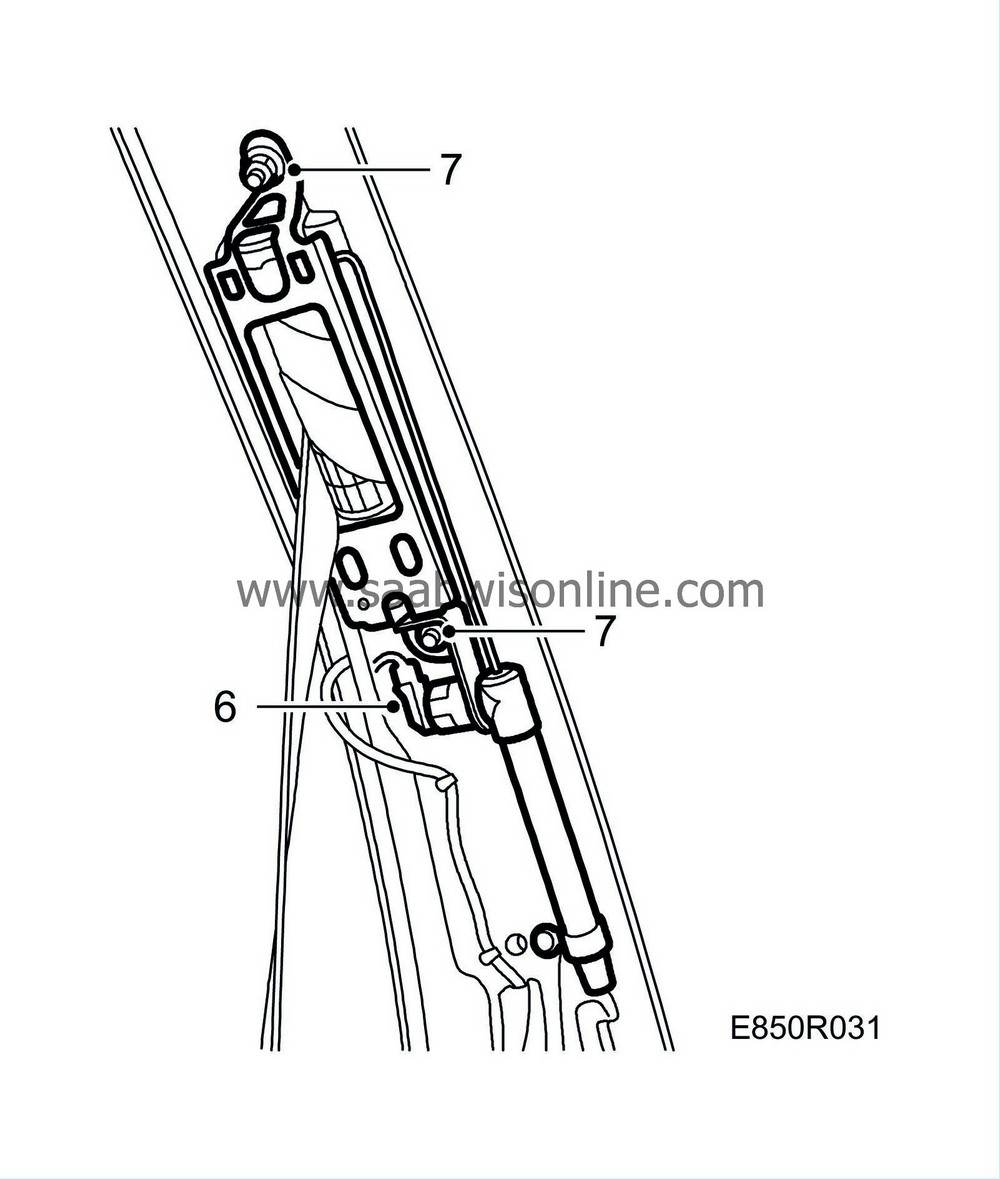
Unplug the connector from the seat-belt tensioner.

|
|
| 7. |
Remove the seat-belt reel and tensioner, 3 screws.
|
|
| To fit |

| 1. |
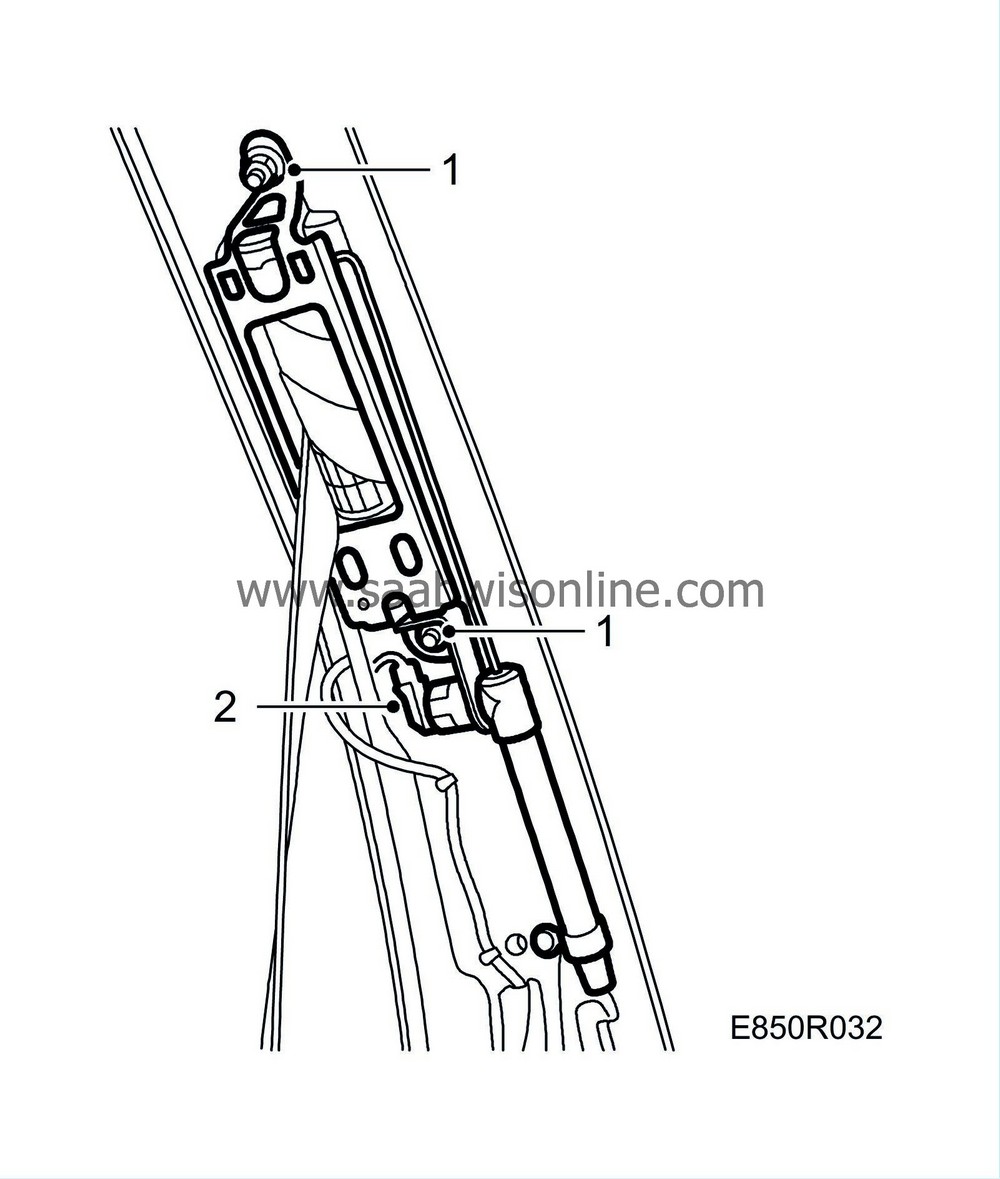
Fit the seat-belt reel and tensioner, 3 screws.
Tightening torque: 45 Nm (33 lbf ft) |
|
| 2. |
Plug in the seat-belt tensioner connector.
|
|
| 3. |
Pass the belt through the B-pillar trim and refit the belt guide.

|
|
| 4. |
Fasten the belt to the seat.
|
|
| 5. |
Fit the B-pillar trim.
Make sure that carpets and scuff plates come inside the B-pillar trim. |
|
| 6. |
Fit the door sealing mouldings round the B-pillar.
|
|
| 7. |
Then check the following with the diagnostic tool:
Connect the diagnostic tool to the diagnostic socket under the dashboard. Clear any diagnostic trouble codes that are present. Turn the ignition off and on again. Wait at least 10 seconds with the ignition on. Check whether a diagnostic trouble code is shown: If a diagnostic trouble code is shown: Carry out fault diagnosis in accordance with the directions given for each DTC. If no diagnostic trouble code is shown: The installation is successful. Disconnect the diagnostic tool. |
|

 Warning

