Oil sump (in car) B235R manual
|
|
Oil sump (in car) B235R manual
|
To remove
|
1.
|
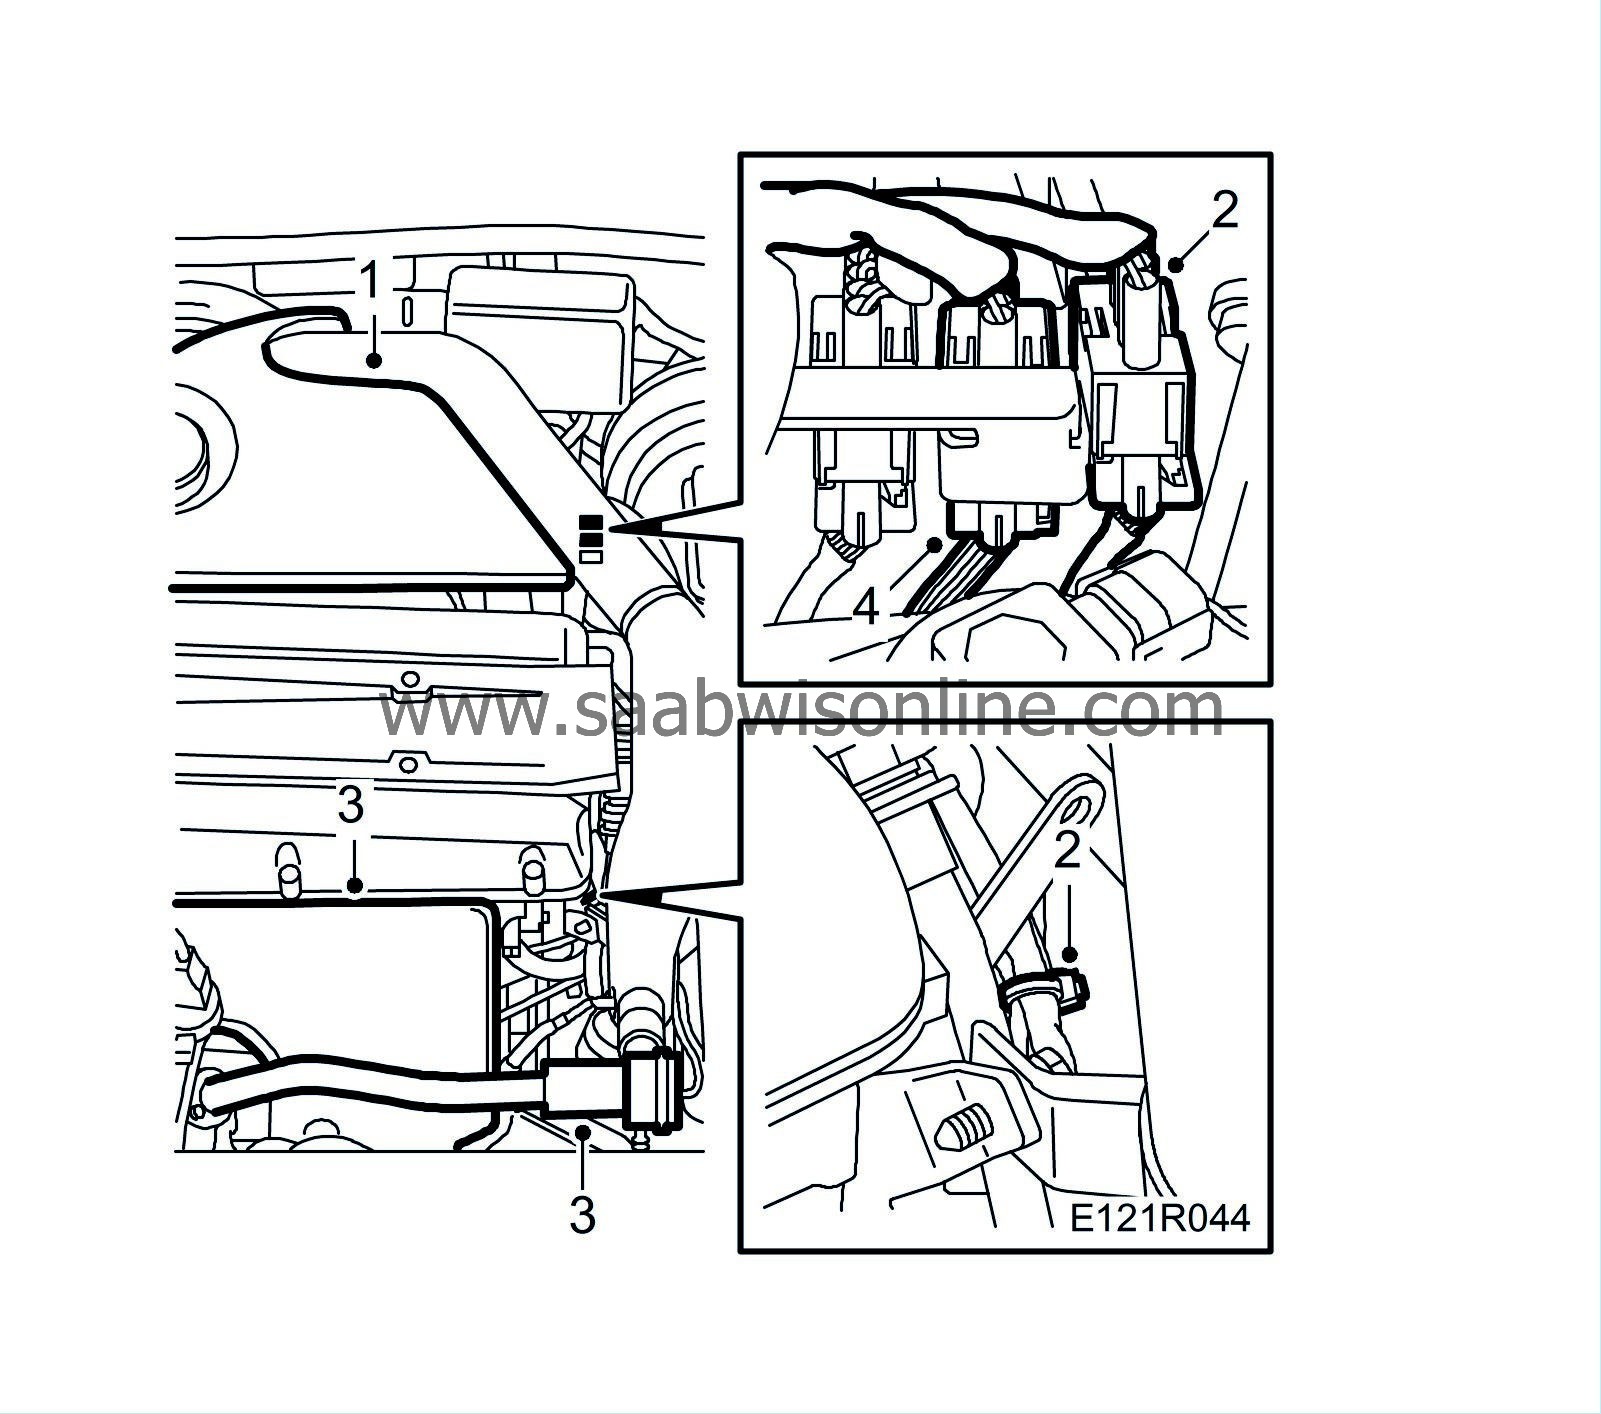
Remove the upper engine cover.
|
|
2.
|
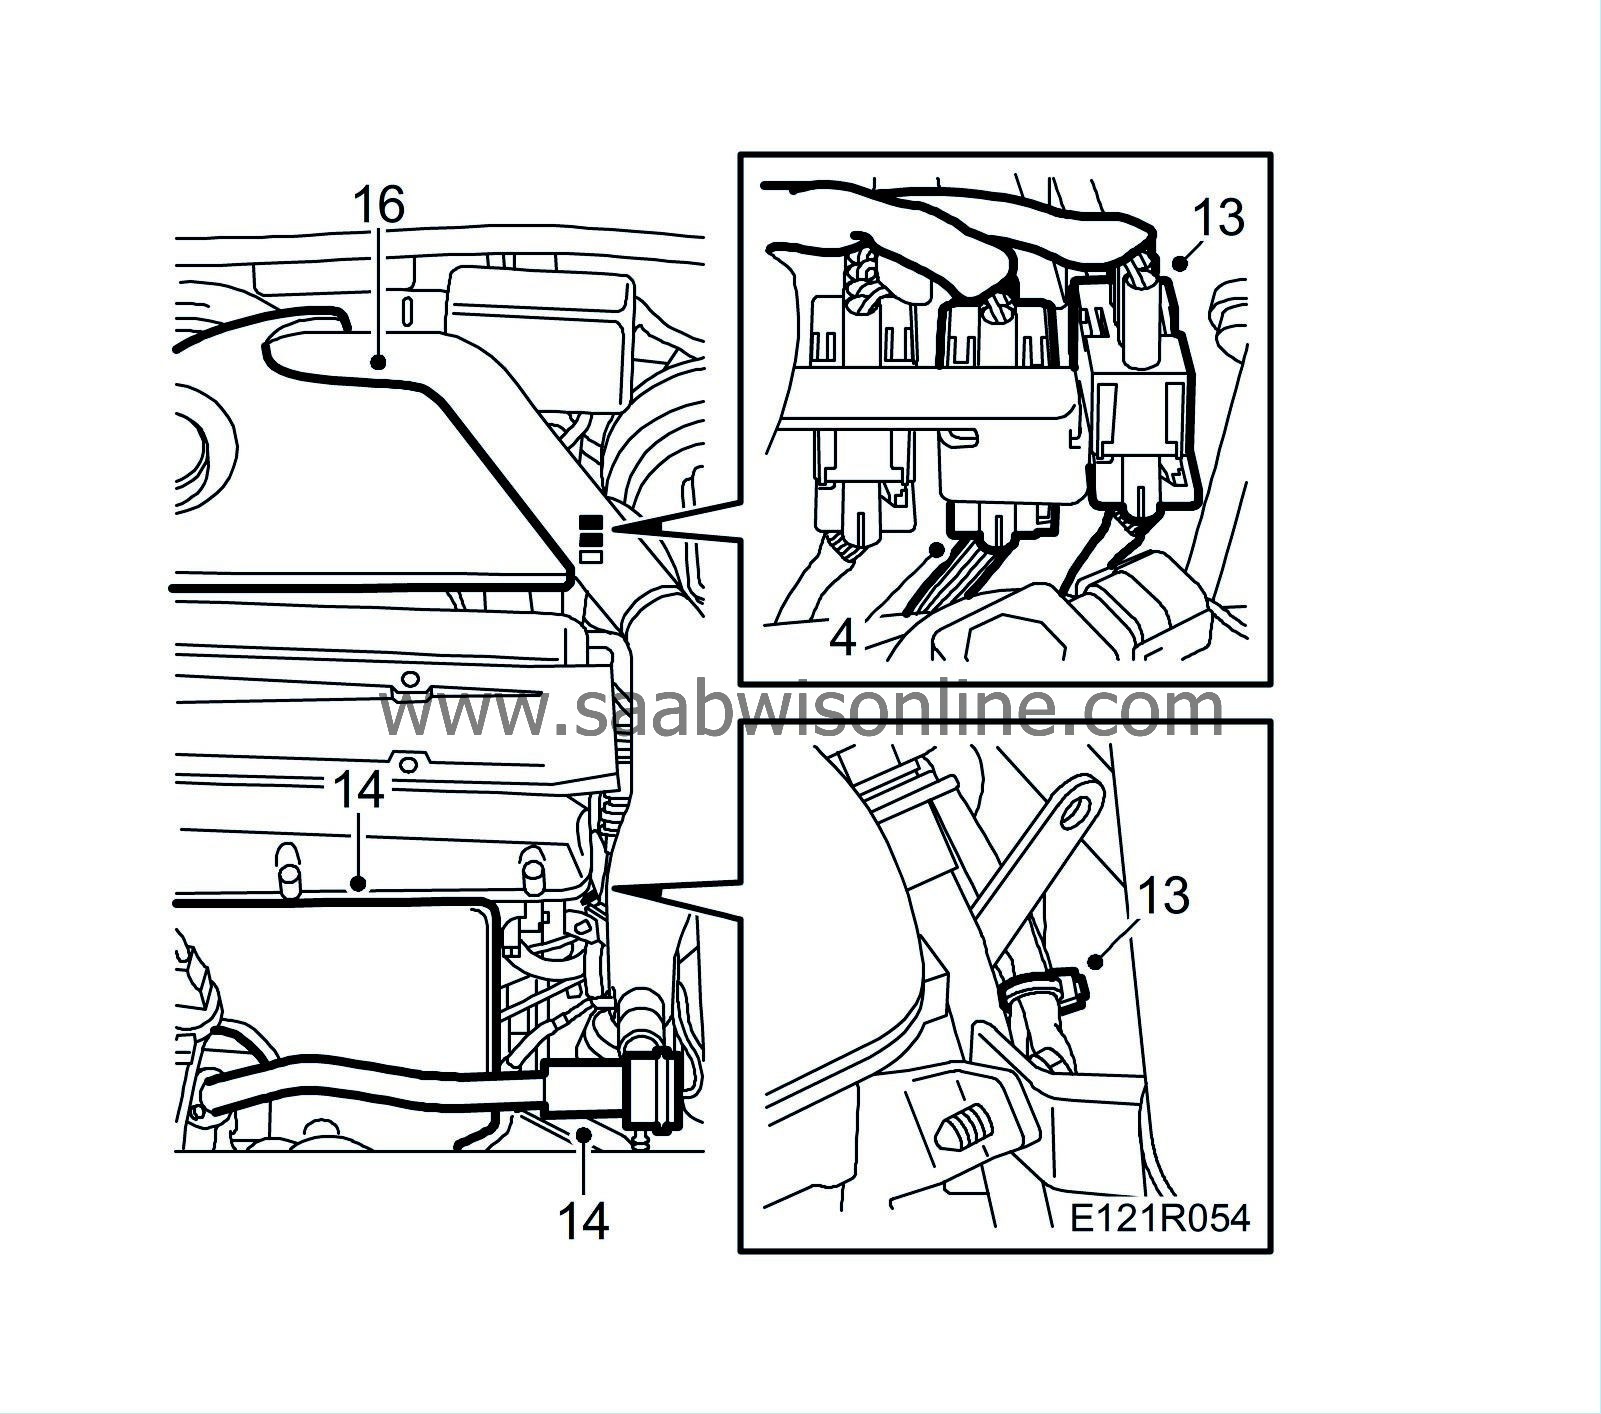
Remove the dipstick and place a cloth in the tube. Remove the heated oxygen sensor cables.
|
|
3.
|
Remove the turbo bypass pipe and the heat shield on the exhaust manifold.
|
|
4.
|
Loosen the upper two nuts on the exhaust pipe.
|
|
5.
|
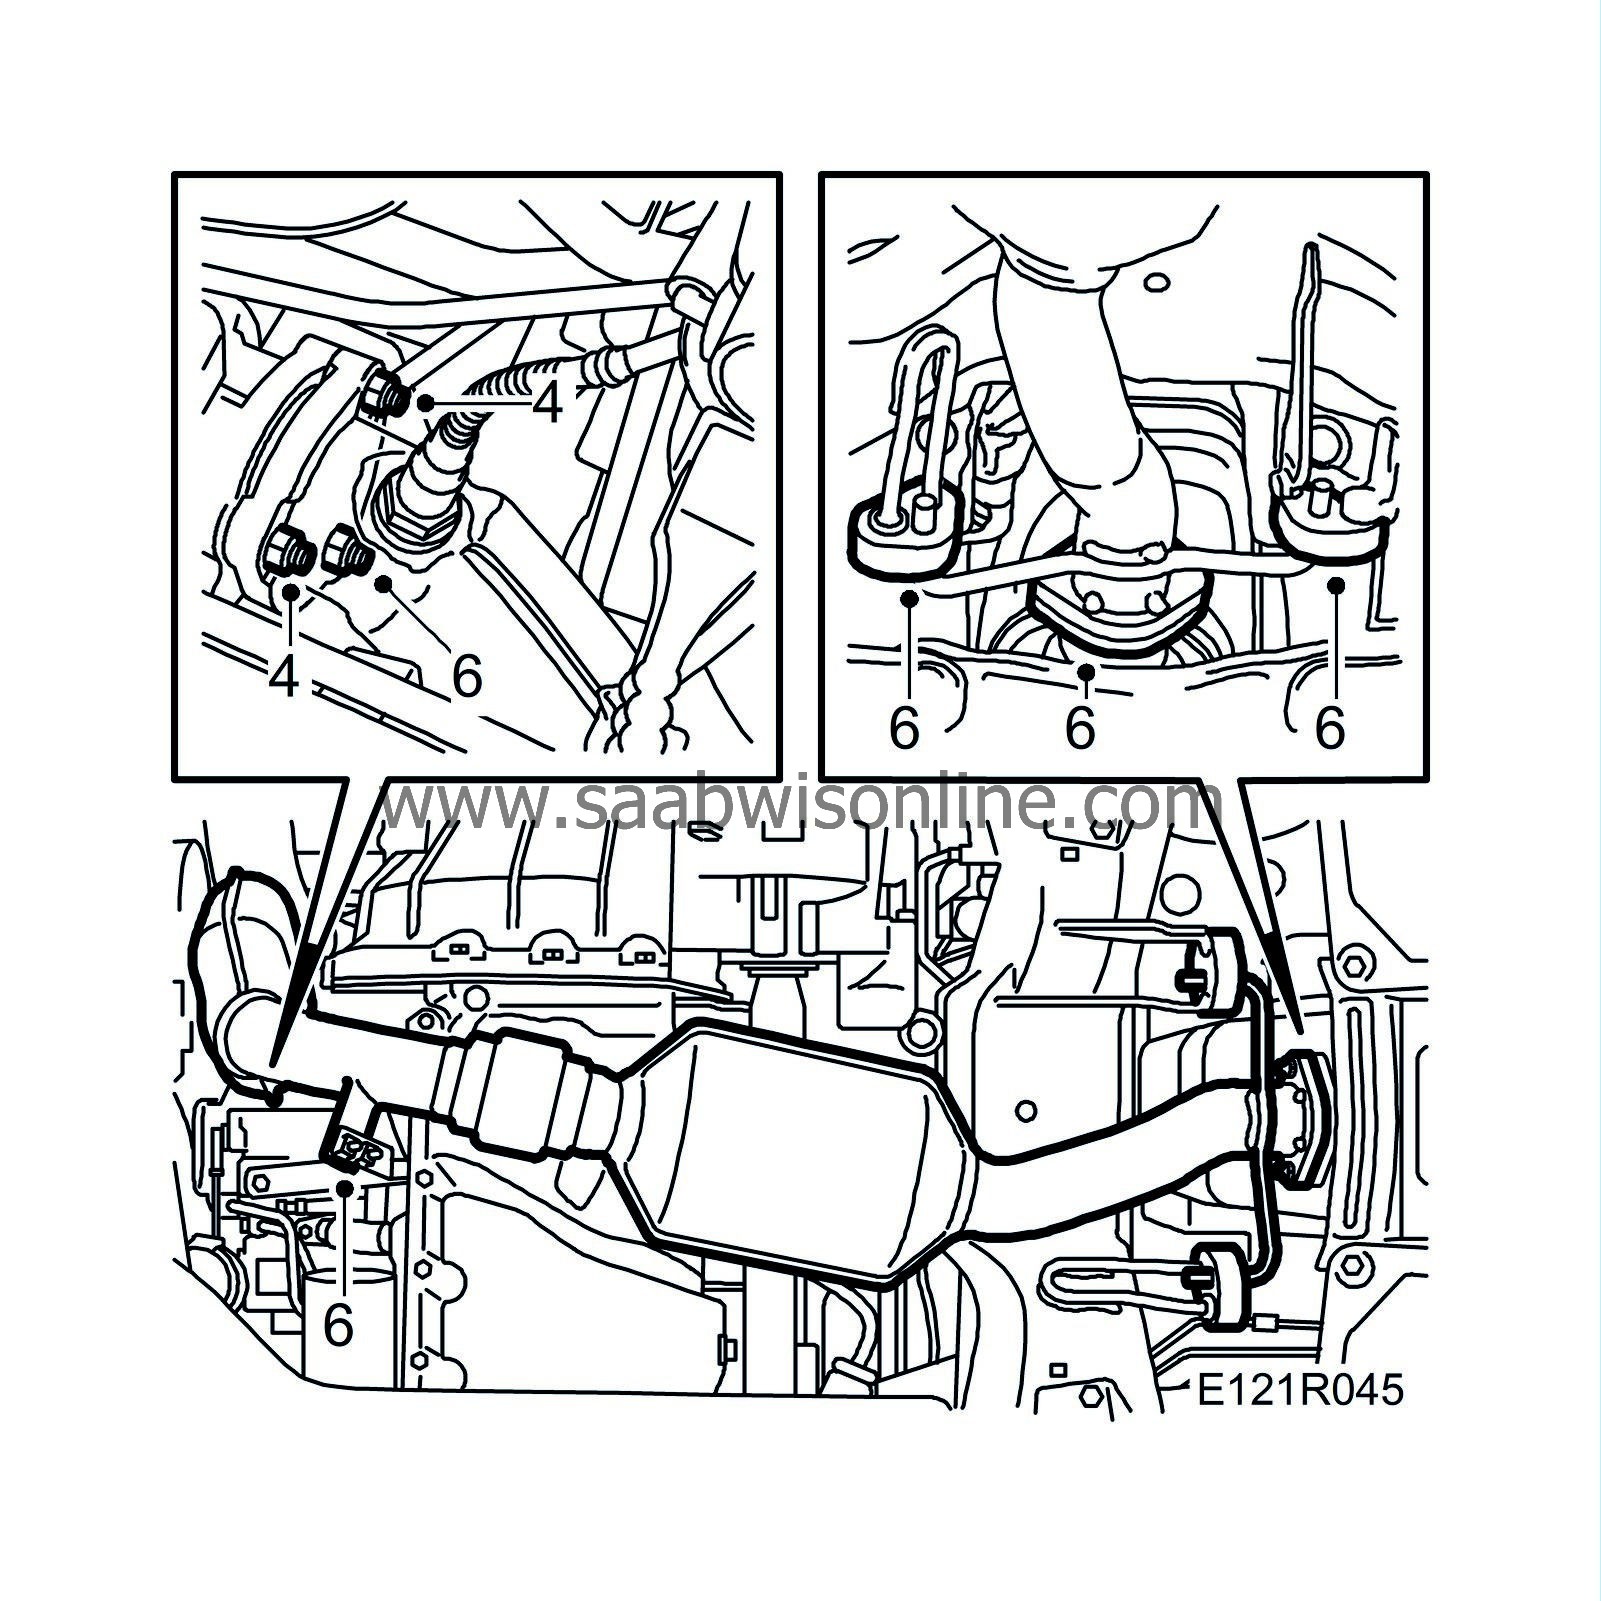
Raise the car and remove the lower engine cover.
|
|
6.
|
Remove the remaining mountings and the lower nut on the exhaust pipe. Lower the front of the exhaust pipe.
|
|
7.
|
Drain the engine oil.
|
|
8.
|
Disconnect the crankcase ventilation hose from the oil sump.
|
|
9.
|
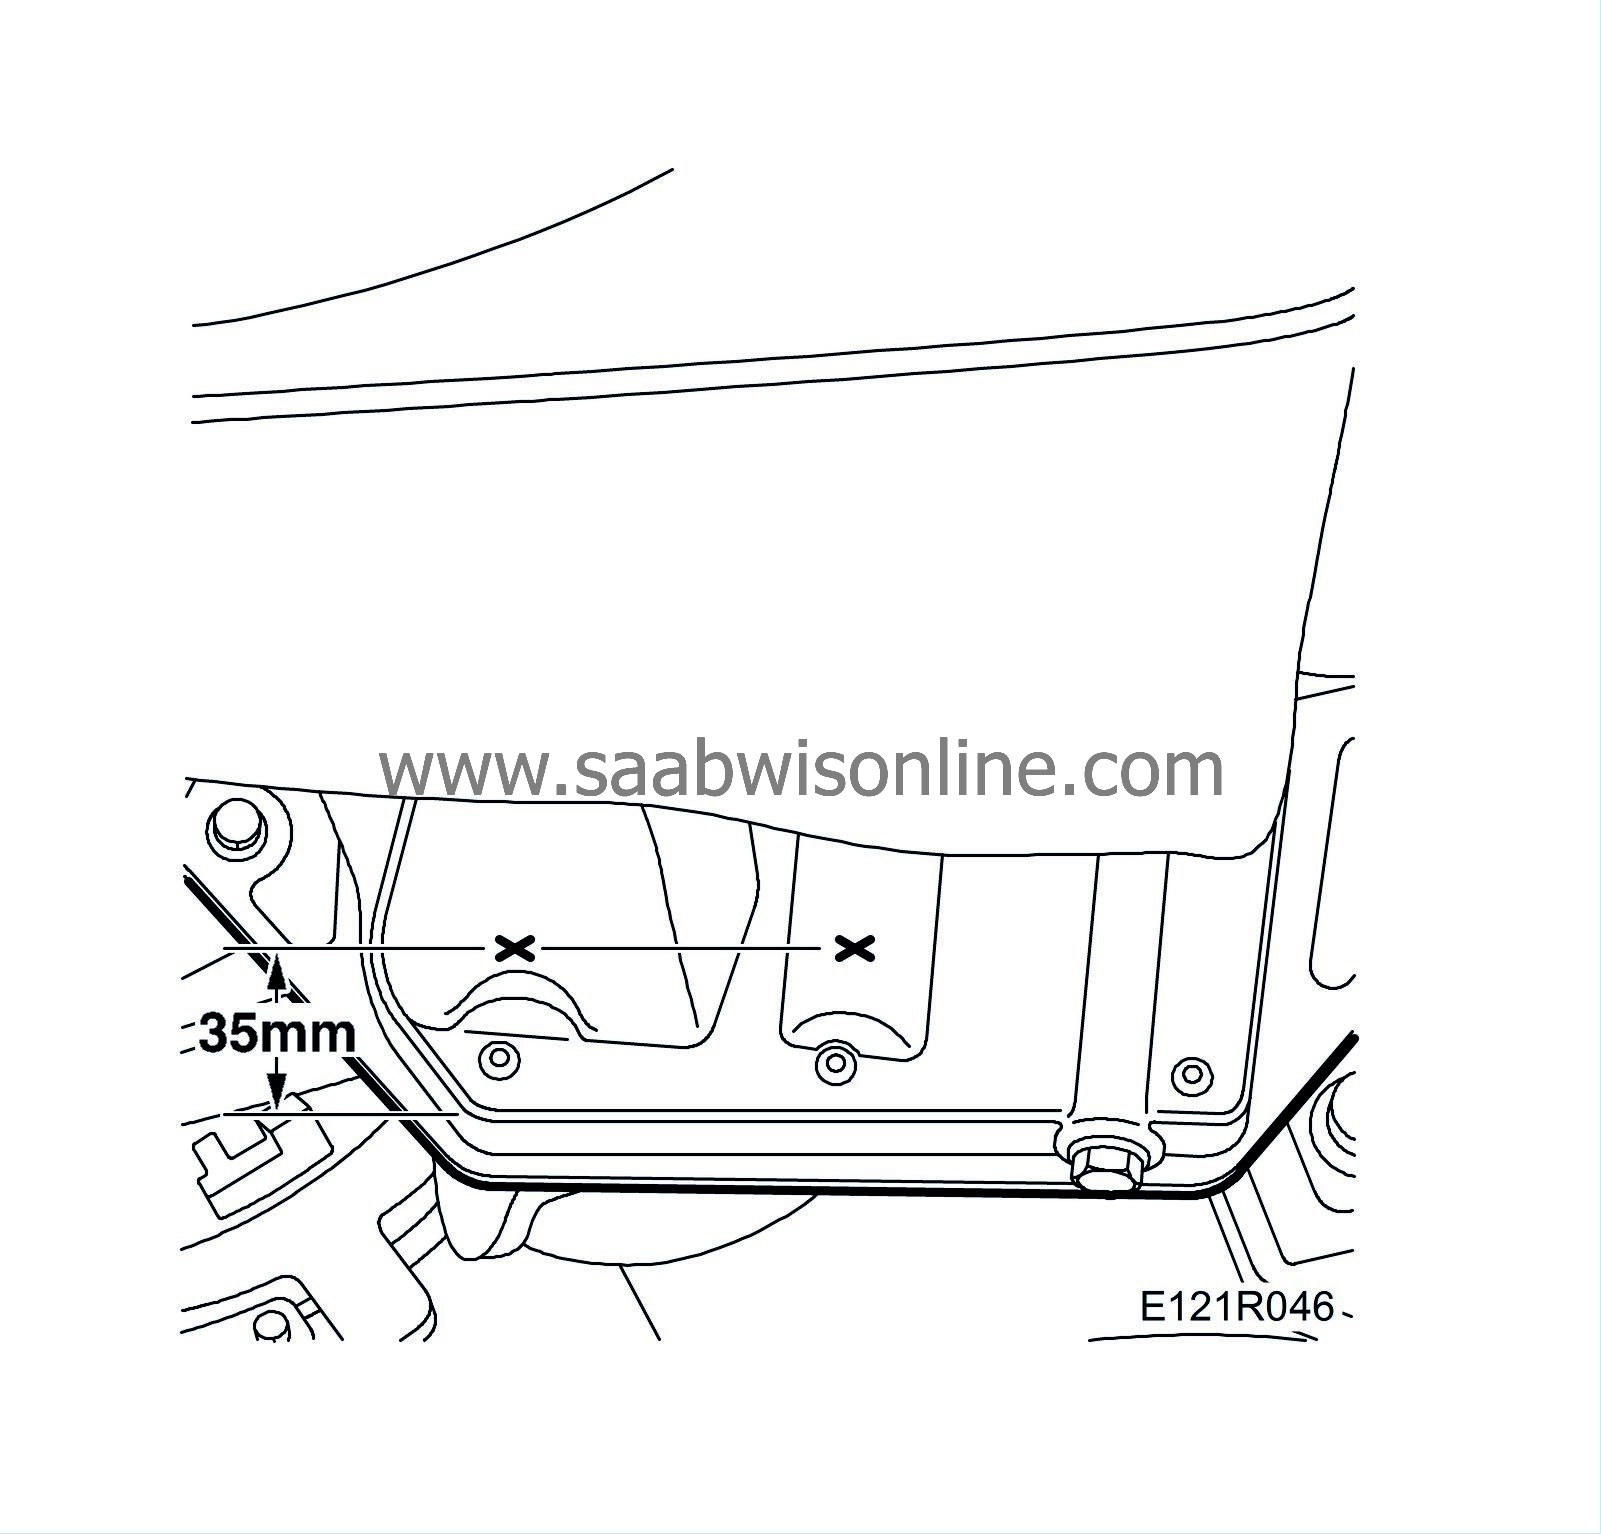
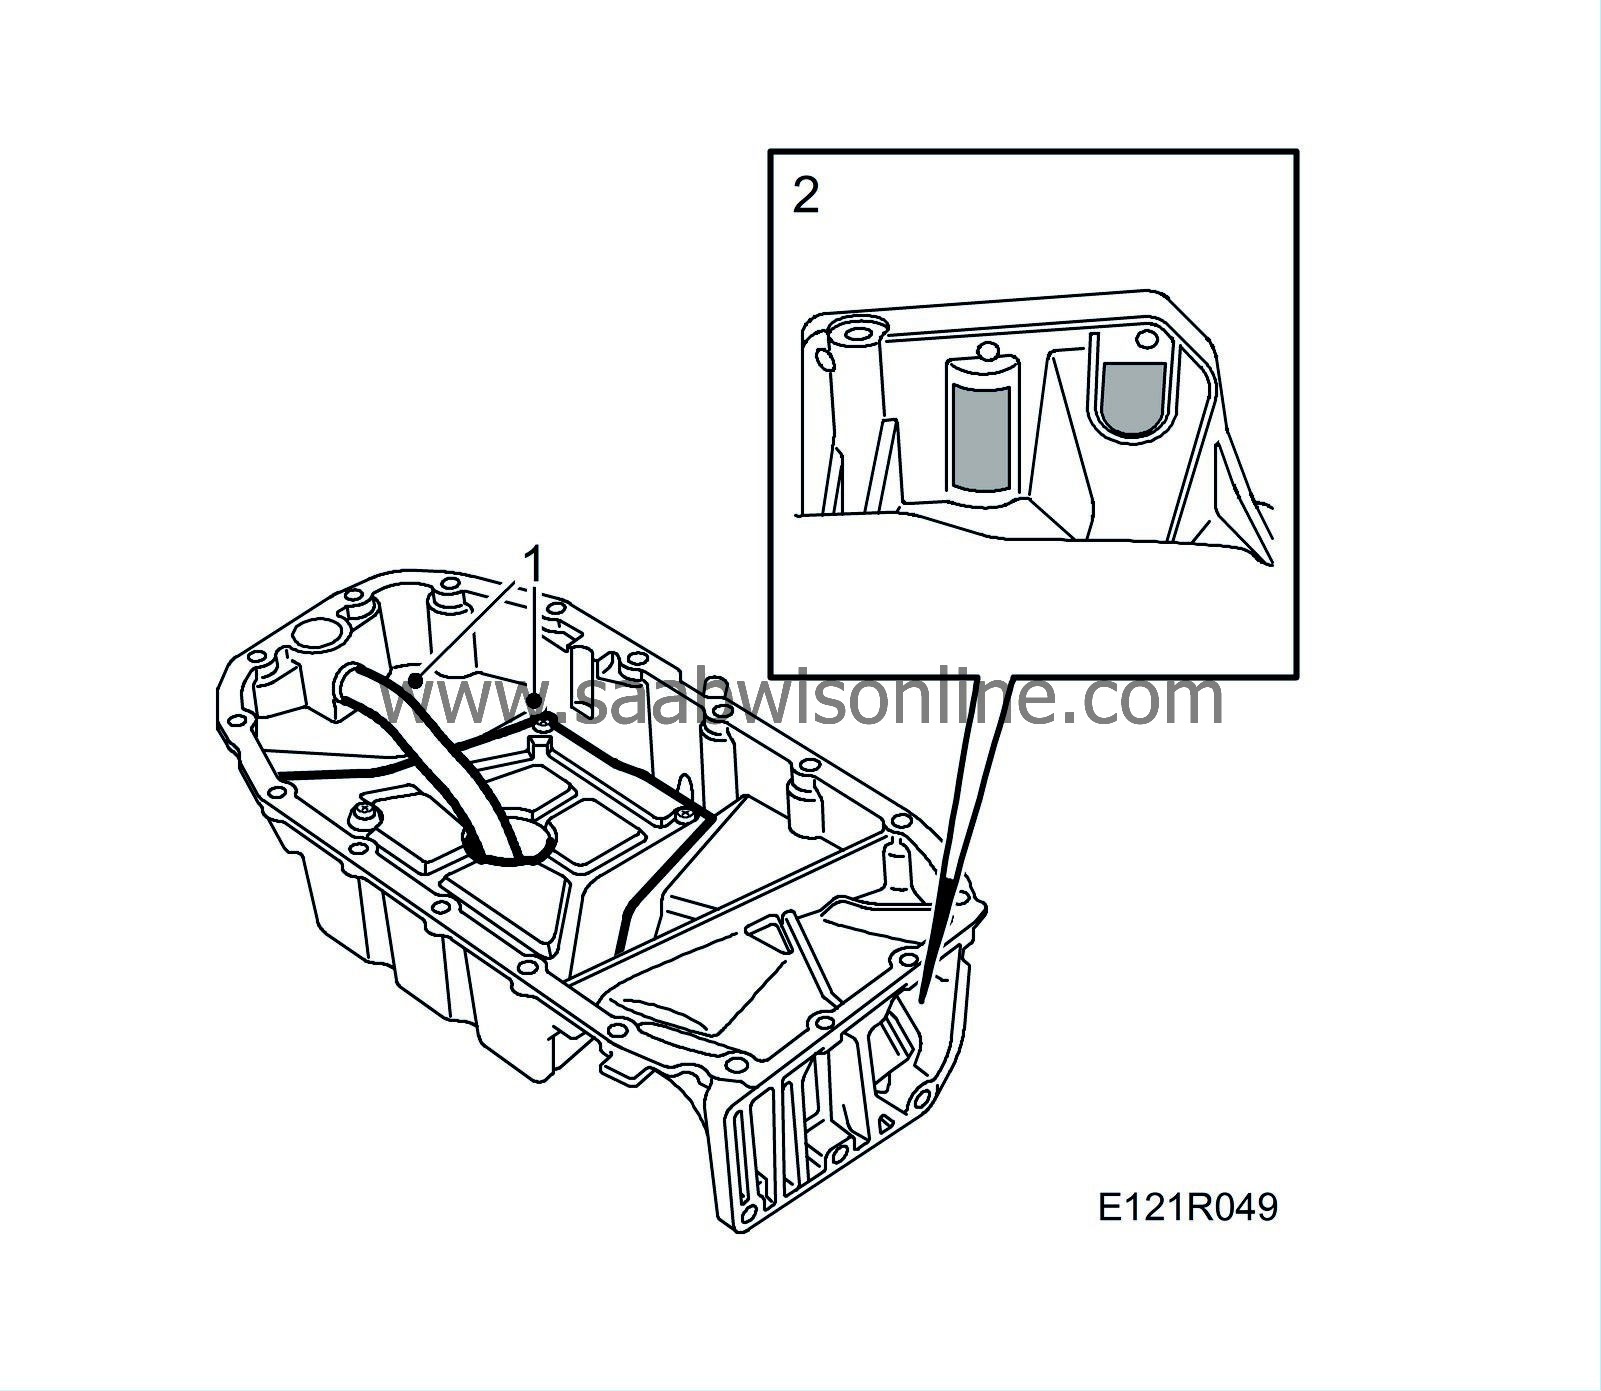
Make a punch mark 35 mm from the edge as in the illustration to mark the drilling point.
|
|
10.
|
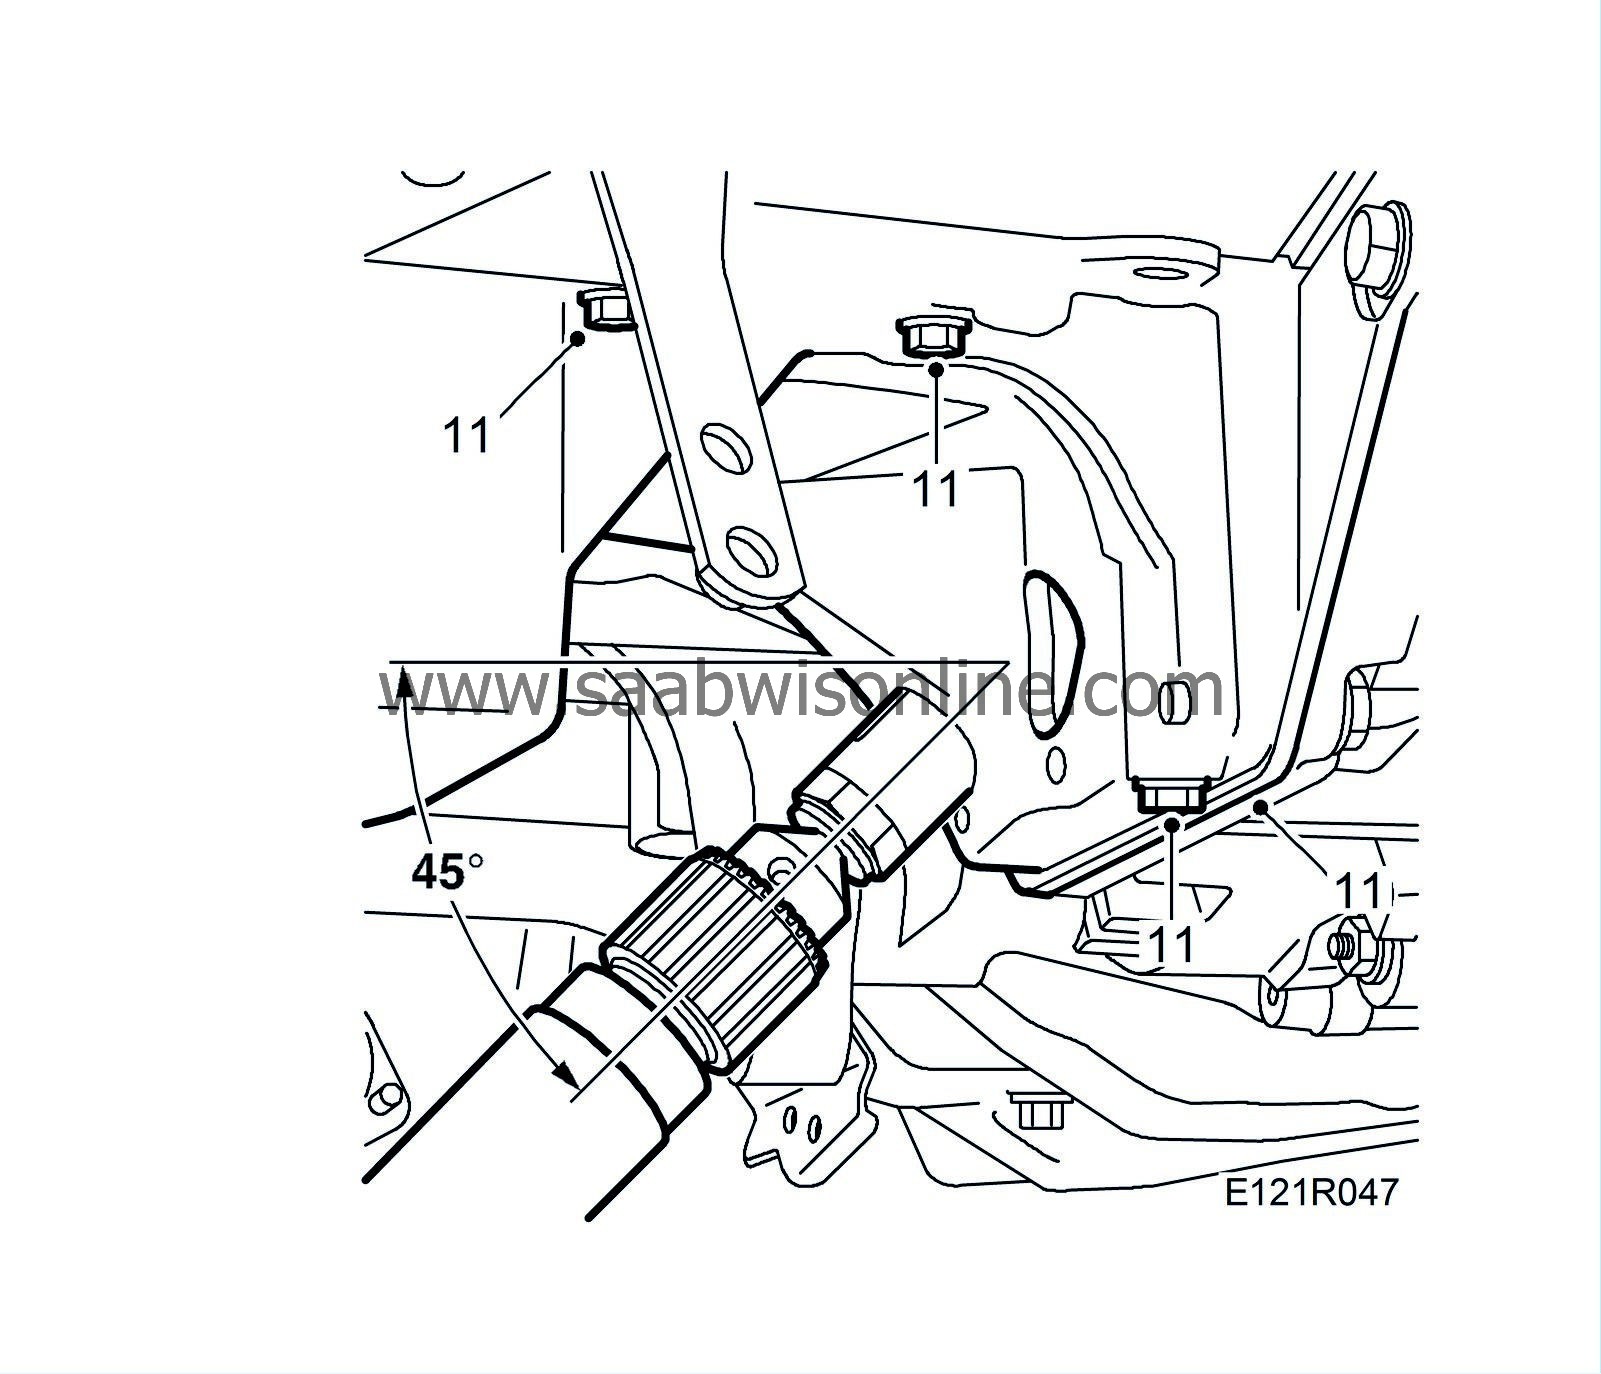
Predrill with a smaller drill. Drill with a drift punch Ø 30 mm at a ca. 45° degree angle to enable access to the hidden oil sump screws. From engine number Y062148-, the motor is equipped with an oil sump that has notchings for the holes. Tap these out with a ball hammer.
|
|
11.
|
Remove the cover plate and the oil sump screws.
|
|
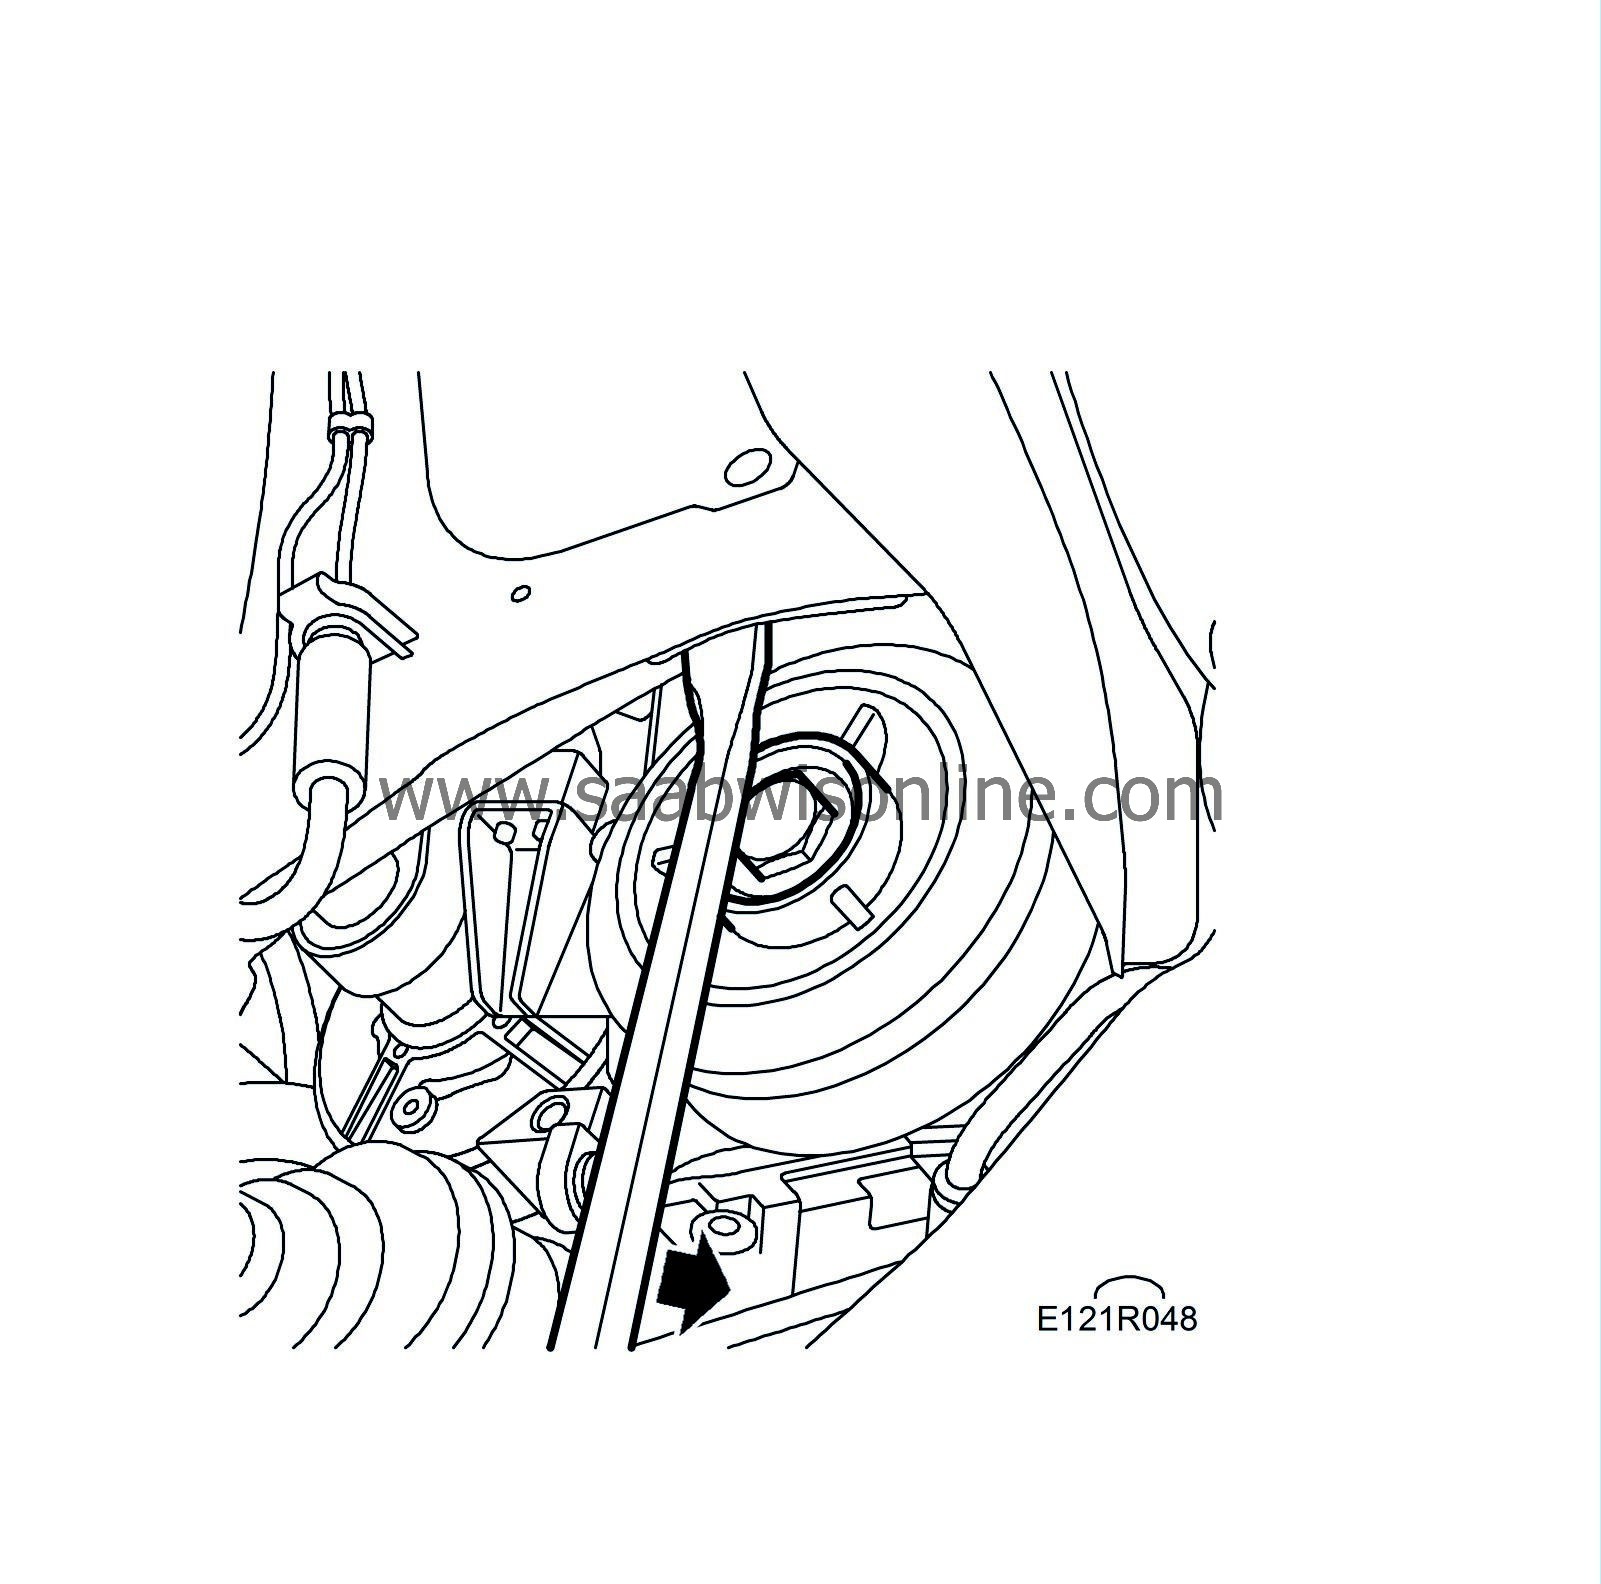
12.
|
Carefully prise open with a crowbar according to the illustration in order to remove the oil sump.
|
|
13.
|
Clean off all oil and filings. Thoroughly clean all surfaces.
|
To fit
|
1.
|
Transfer the splashguard and pipes to the new oil sump. Use new O-rings.
|
|
2.
|
Tap out the holes in the new sump with a ball hammer. Deburr the holes and remove any filings.
|
|
3.
|
Check that there are no impurities in the sump and clean the mating surfaces on the engine and gearbox with a gasket scraper and benzine.

|
|
4.
|
Apply an approximately 2 mm thick bead of flange sealant, part No. 93 21 795 to the oil sump seals.
|
|
5.
|
Check that the pipe to the oil adapter is firmly attached and that it is directed straight into the oil sump. Replace O-rings if necessary.
|
|
6.
|
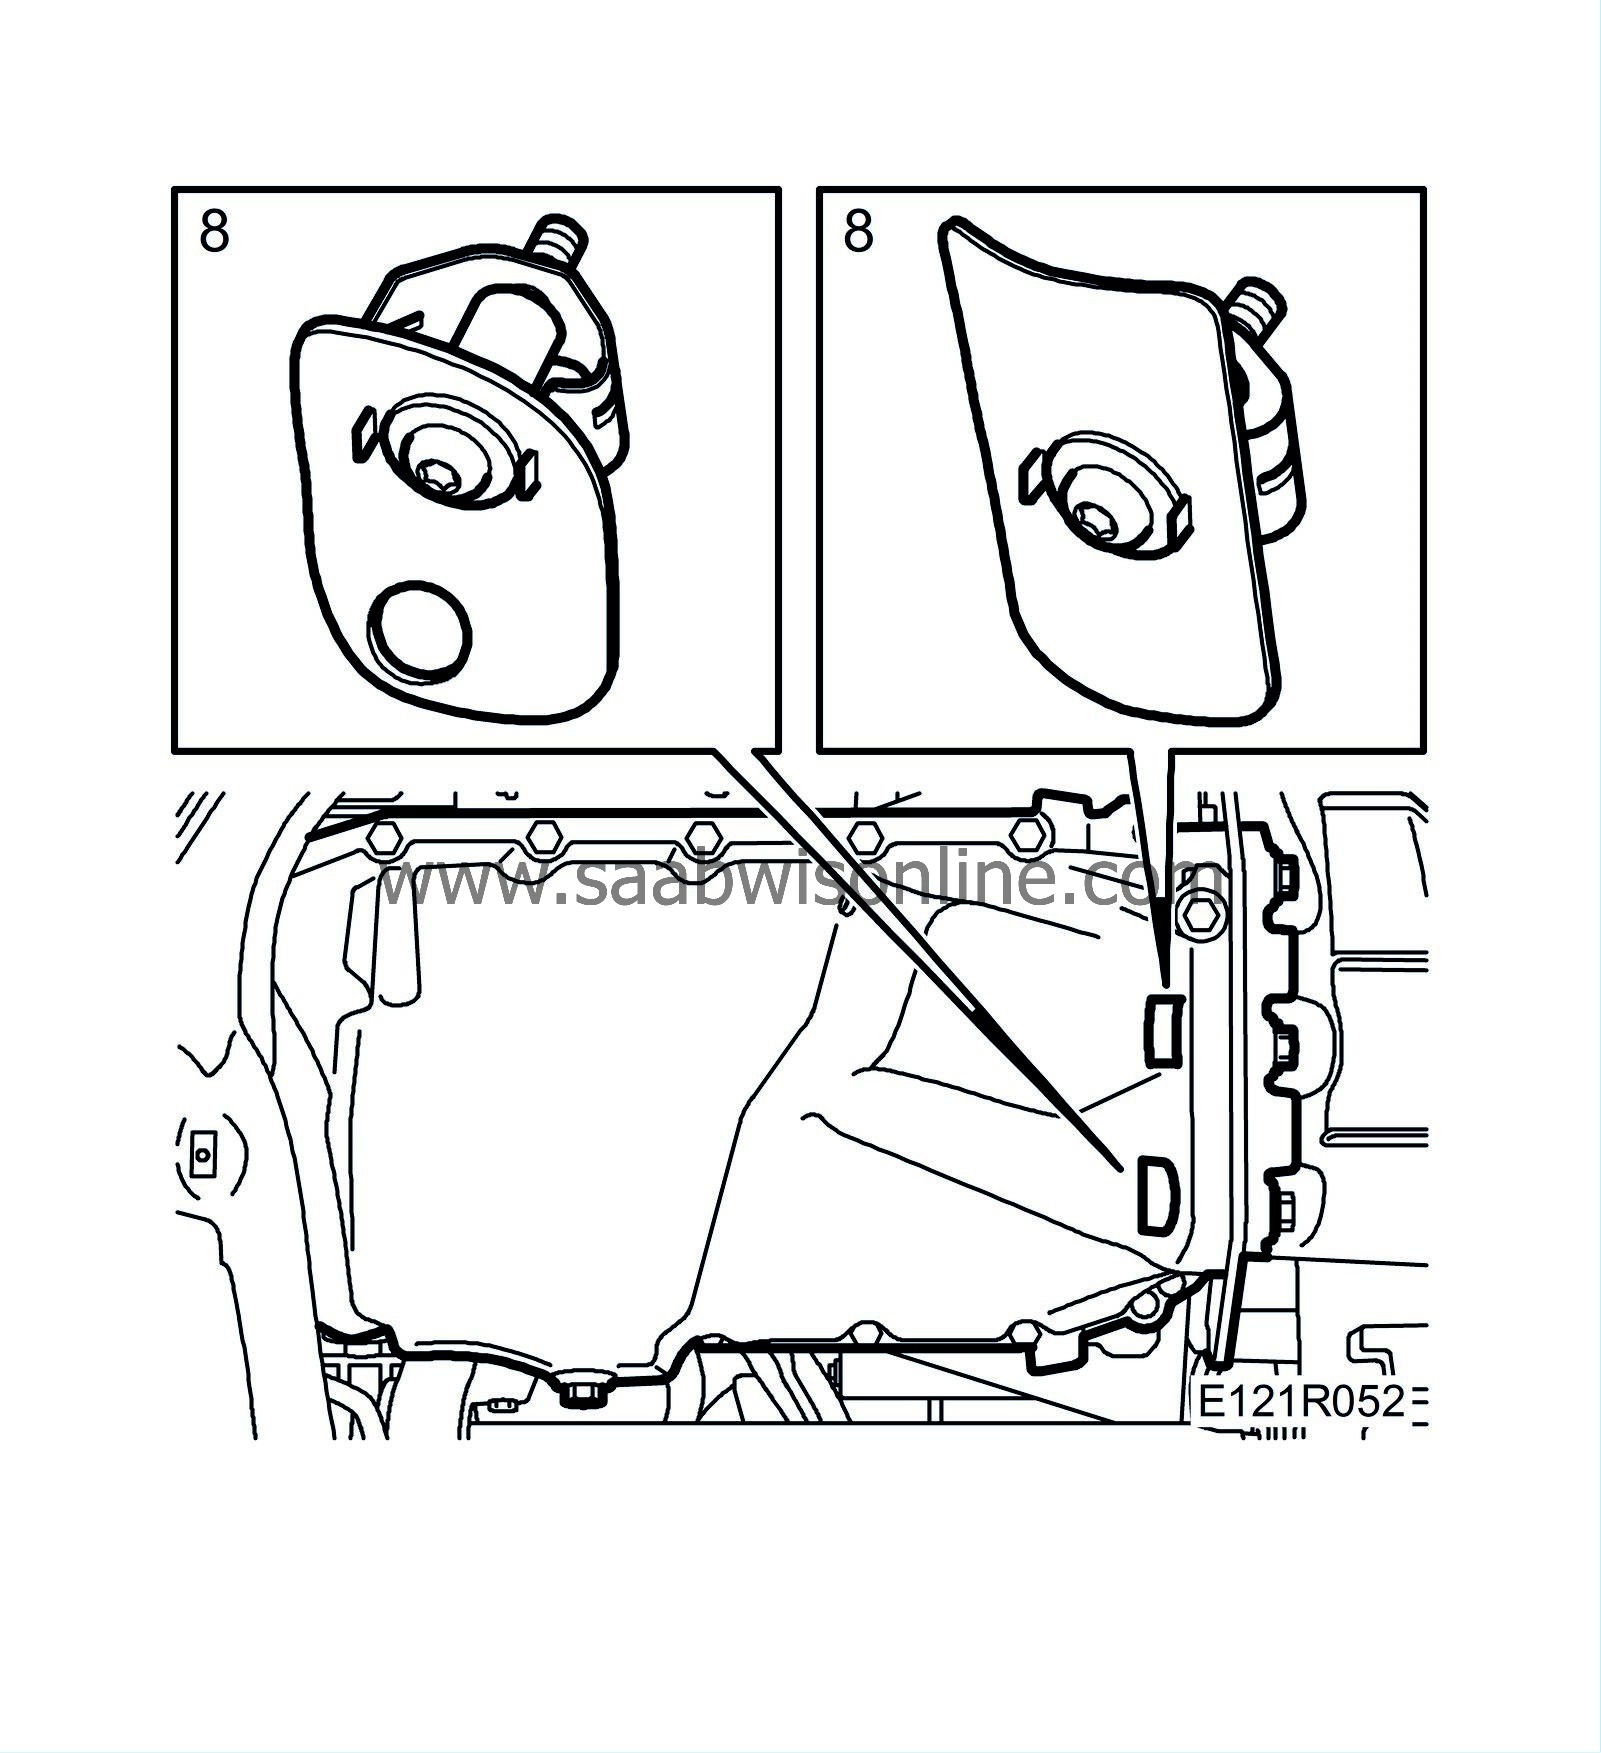
Install the access panel.
|
|
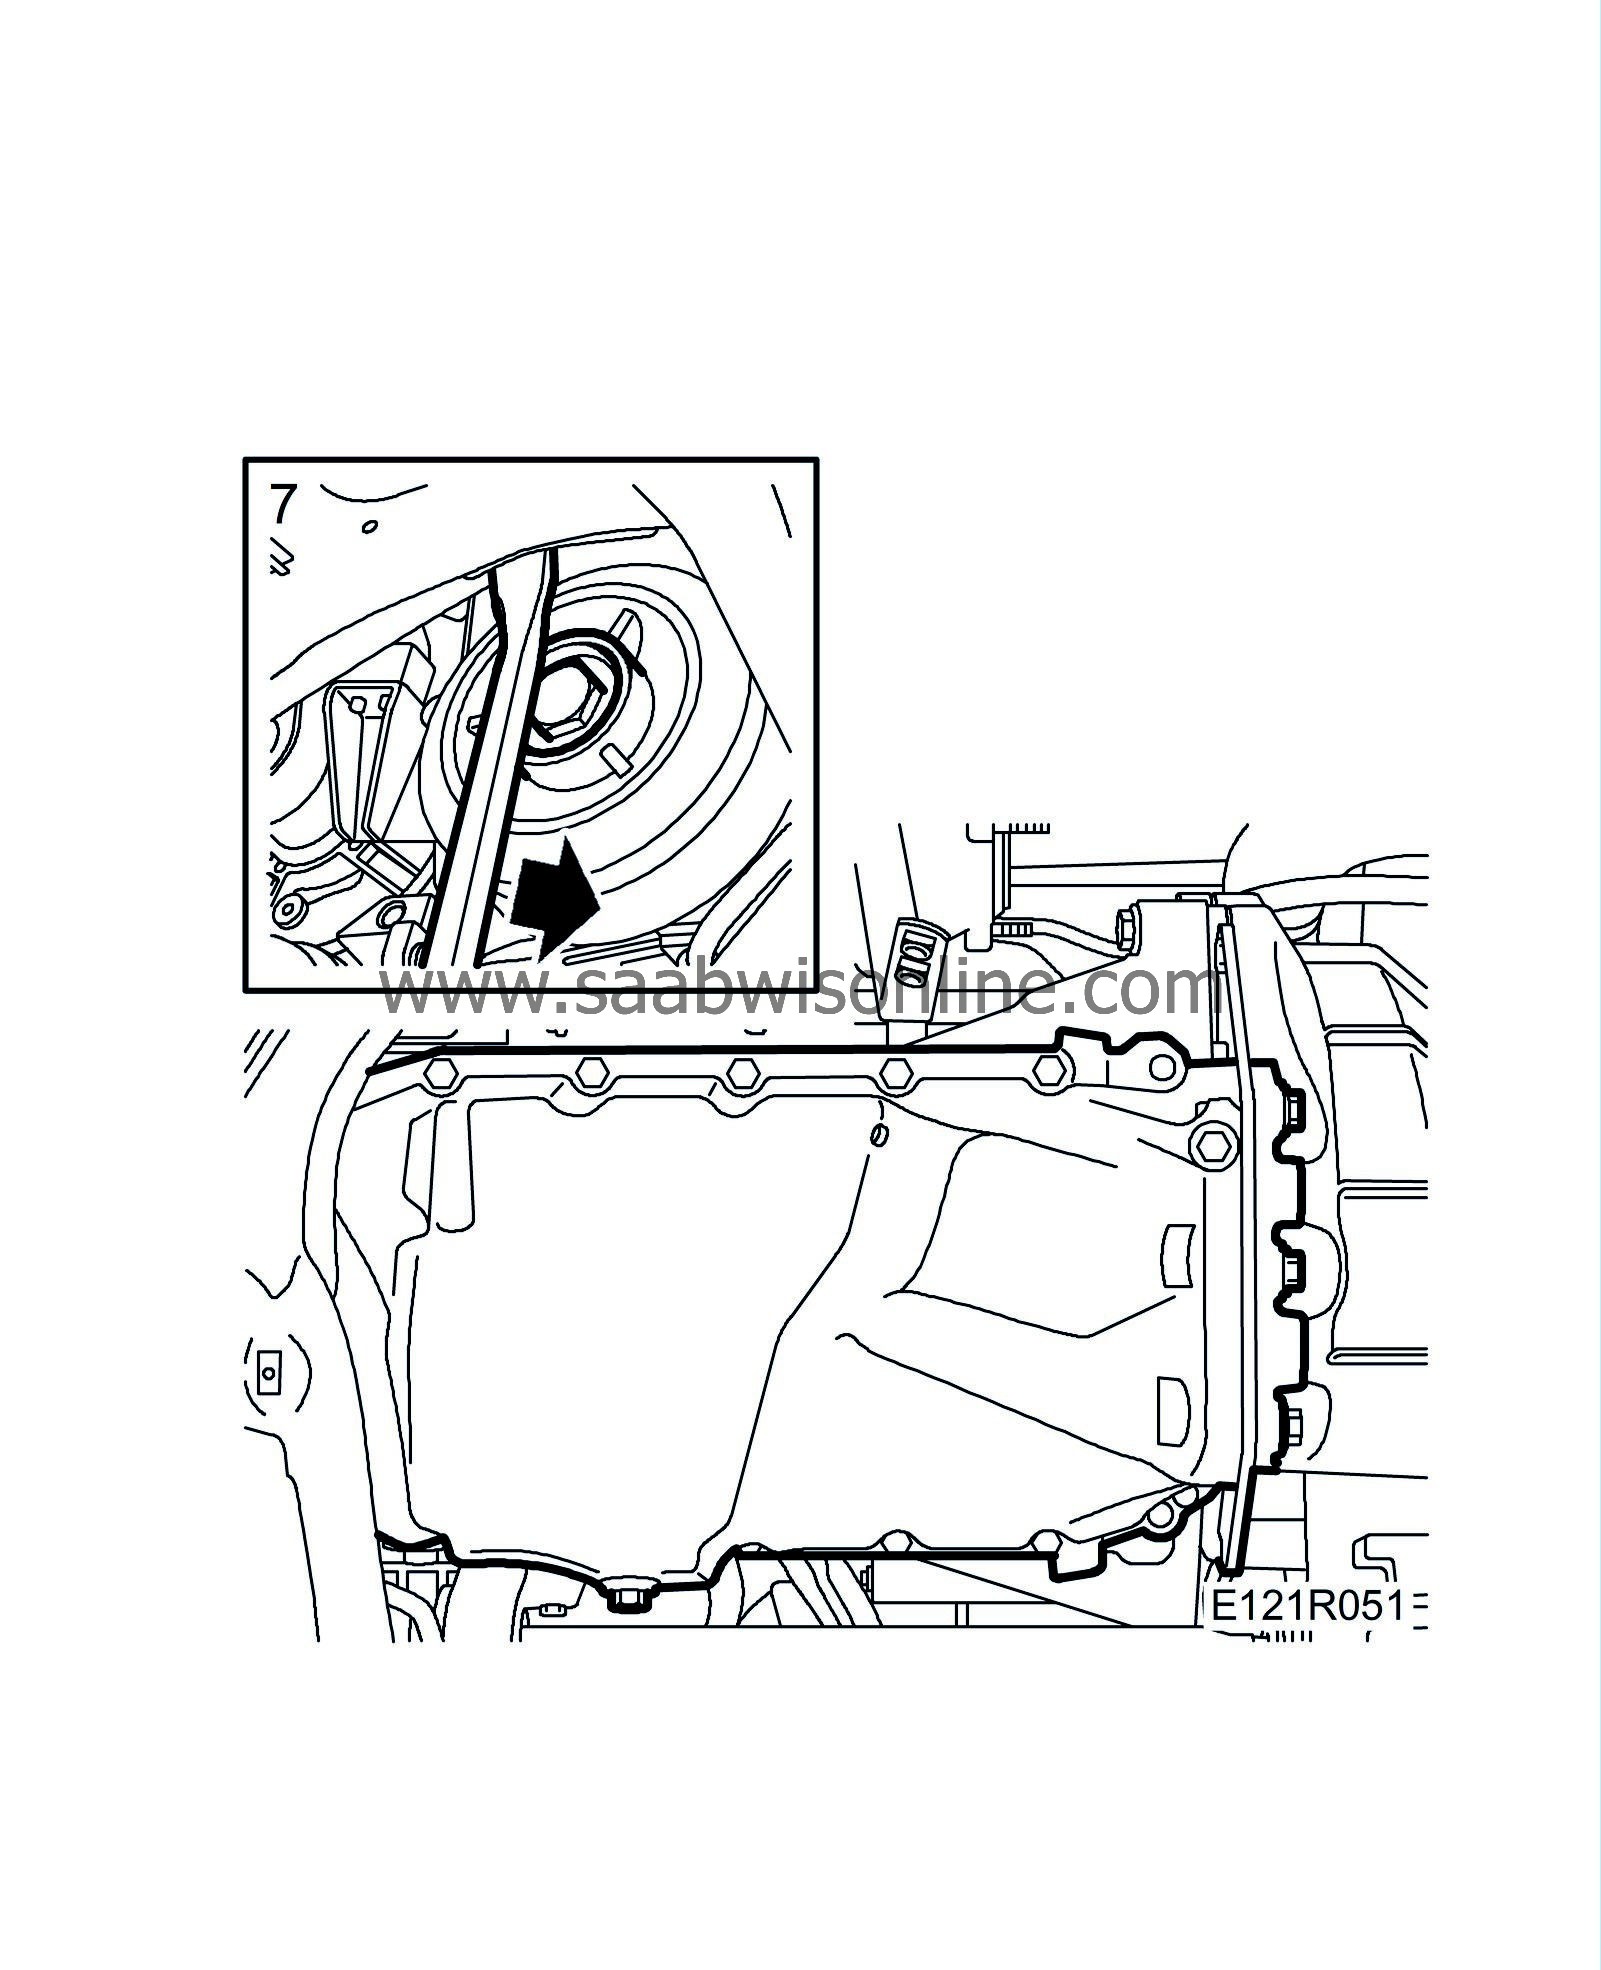
7.
|
Prise laterally somewhat with a crowbar and fit the oil sump. Replace all screws. Tighten the screws to the access panel.
Tightening torque: 7 Nm (5 lbf ft)
|
|
8.
|
Moderately tighten the screws to the engine block. Tighten the three screws to the gearbox and the oil sump's other screws. Finish by tightening the screws in the reinforcements. Replace the cover.
Tightening torque, oil sump 22 Nm (16 lbf ft)
Tightening torques, gearbox screws 47 Nm (35 lbf ft)
|
|
9.
|
Connect the crankcase ventilation hose.
|
|
10.
|
Clean the joints, grease the turbocharger studs with Molycote 1000, part No. 30 20 971 and replace the exhaust pipe.

|
|
11.
|
Check that the oil plug is tightened and lower the car to the floor.
|
|
12.
|
Tighten the other exhaust pipe nuts.
Tightening torque: 25 Nm (18 lbf ft)
|
|
13.
|
Connect the heated oxygen sensor cables.
|
|
14.
|
Fit the heat shield over the exhaust manifold and the turbo bypass pipe.
Tightening torque, nut, heat shield 20 Nm (15 lbf ft) (up to and including engine no. 7011078)
Tightening torque, nut, heat shield 21 Nm (16 lbf ft) (from and including engine no. 7011079)
|
|
15.
|
Add the engine oil and replace the dipstick.
|
|
16.
|
Replace the upper engine cover.
|
|
17.
|
Run the engine to normal temperature and check the mating surfaces.
|
|
18.
|
Fit the lower engine cover.
|
|
19.
|
Lower the car, check the oil level and add oil if necessary.
|


