PRE-RELEASE
Injector (206), Z19
| Injector (206), Z19 |
| To remove |
|
||||||||||||||||||||||
|
|||||||
| Important | ||
|
Be very thorough in terms of cleanliness when working in the fuel system. Malfunctions can also occur due to very small dirt particles. Prevent dirt from entering the fuel system by cleaning the hoses and plugging the pipes and lines upon removal using 93 161 370 Plug set. Store the components so that contaminants cannot enter. |
||
| Important | ||
|
If the injectors are to be refitted, mark the injectors so that they can be refitted to the same cylinder. |
||
| 1. |
Open the bonnet.
|
|
| 2. |
Remove the upper engine cover and insulation.
|
|
| 3. |
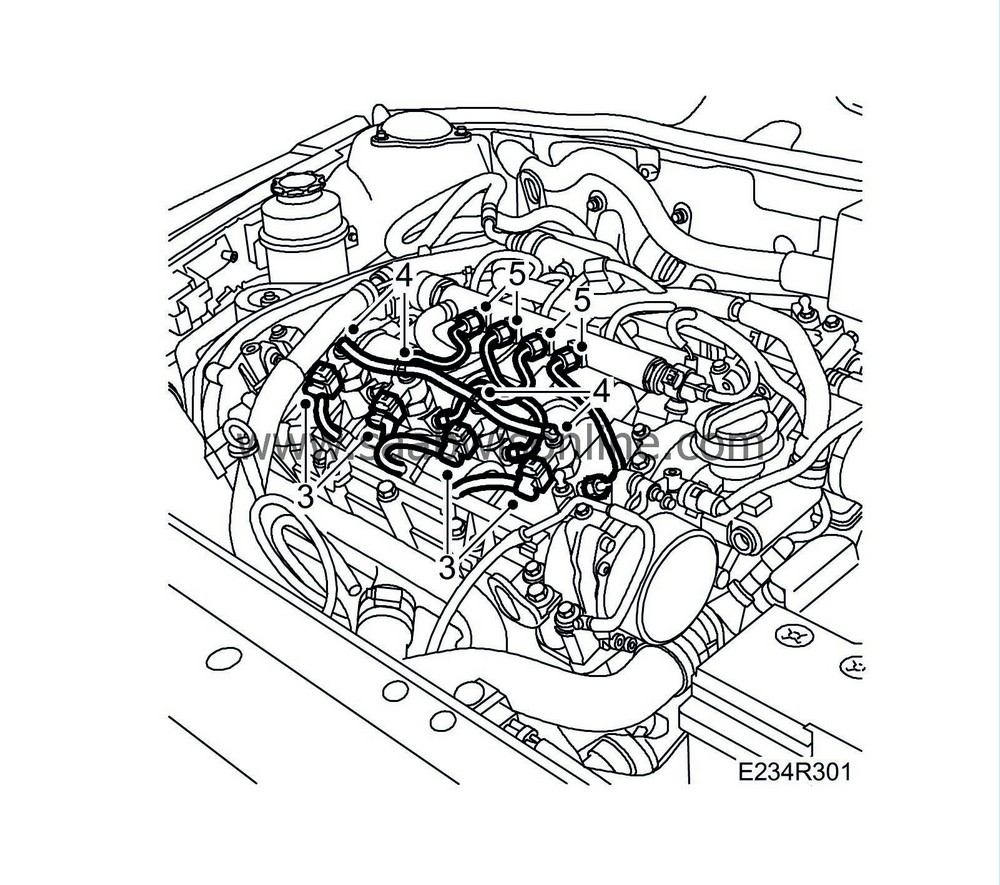
Unplug the injector connectors.
|
|
| 4. |
Detach the return fuel hoses.
|
|
| 5. |
Detach the fuel pipes from the injectors and fuel rail. Use a wrench to counterhold at the injector when removing the pipe.
|
|
| 6. |
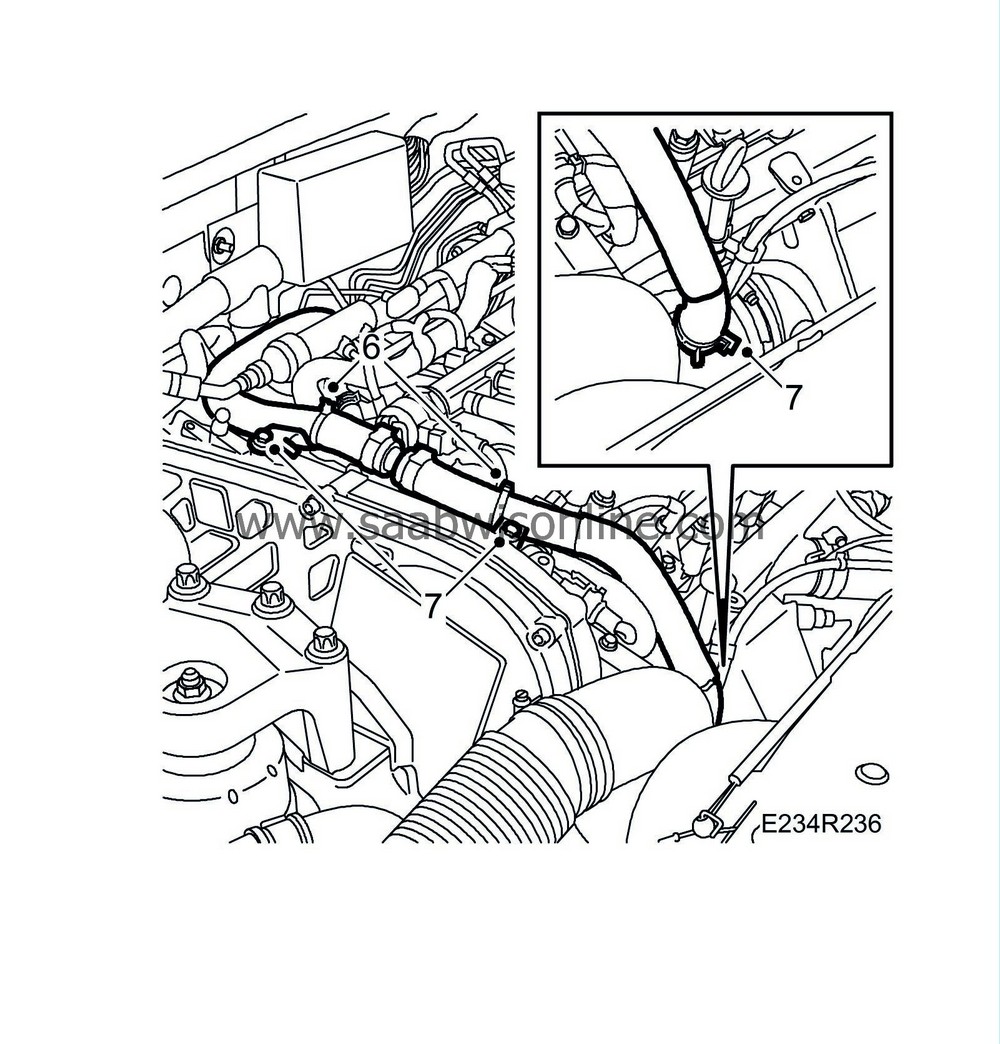
Detach the cables from the crankcase ventilation pipe.
|
||||||||||
| 7. |
Detach the crankcase ventilation pipe and raise it slightly.
|
|
| 8. |
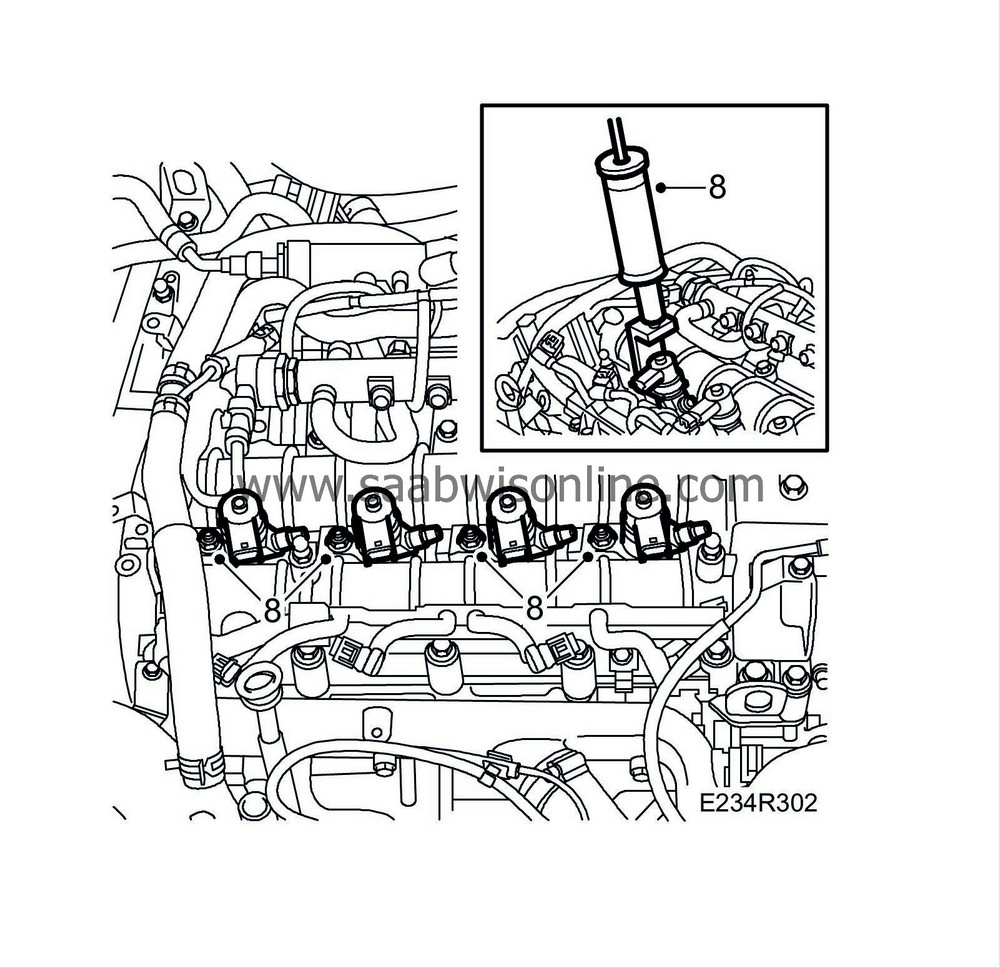
Remove the nuts and washers of the injectors. Remove the injector with holder. If the nozzles cannot be raised by hand, use
32 025 013 Injector removal tool
using
83 90 270 Sliding hammer
and
32 025 012 Sliding hammer adapter
.
|
||||||||||
| 9. |
Remove the injectors in the following order:
1-2-3-4 |
|
| 10. |
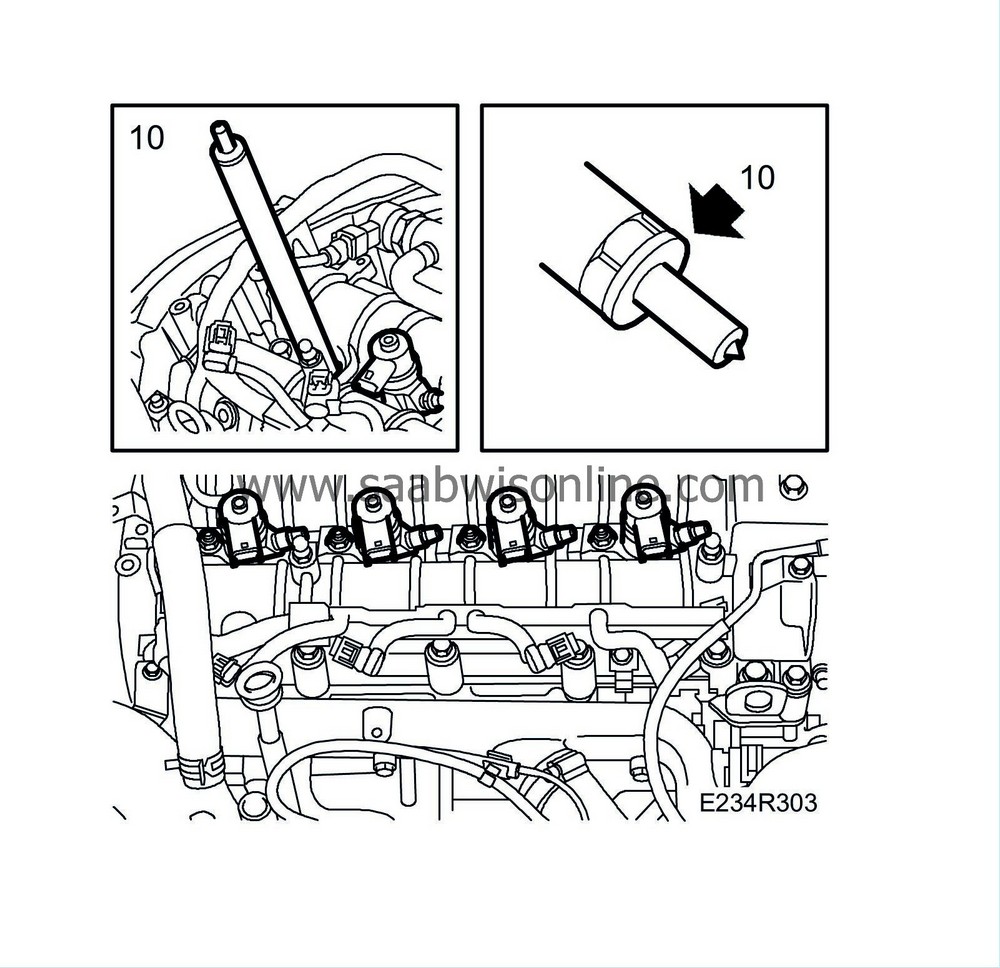
Clean the injector sealing surfaces in the cylinder head using
32 025 010 Cleaning tool
.
|
|
| To fit |
| Important | ||
|
If new injectors are to be fitted, read and make a note of its classification code. The code is to be used when programming using the diagnostic tool. |
||
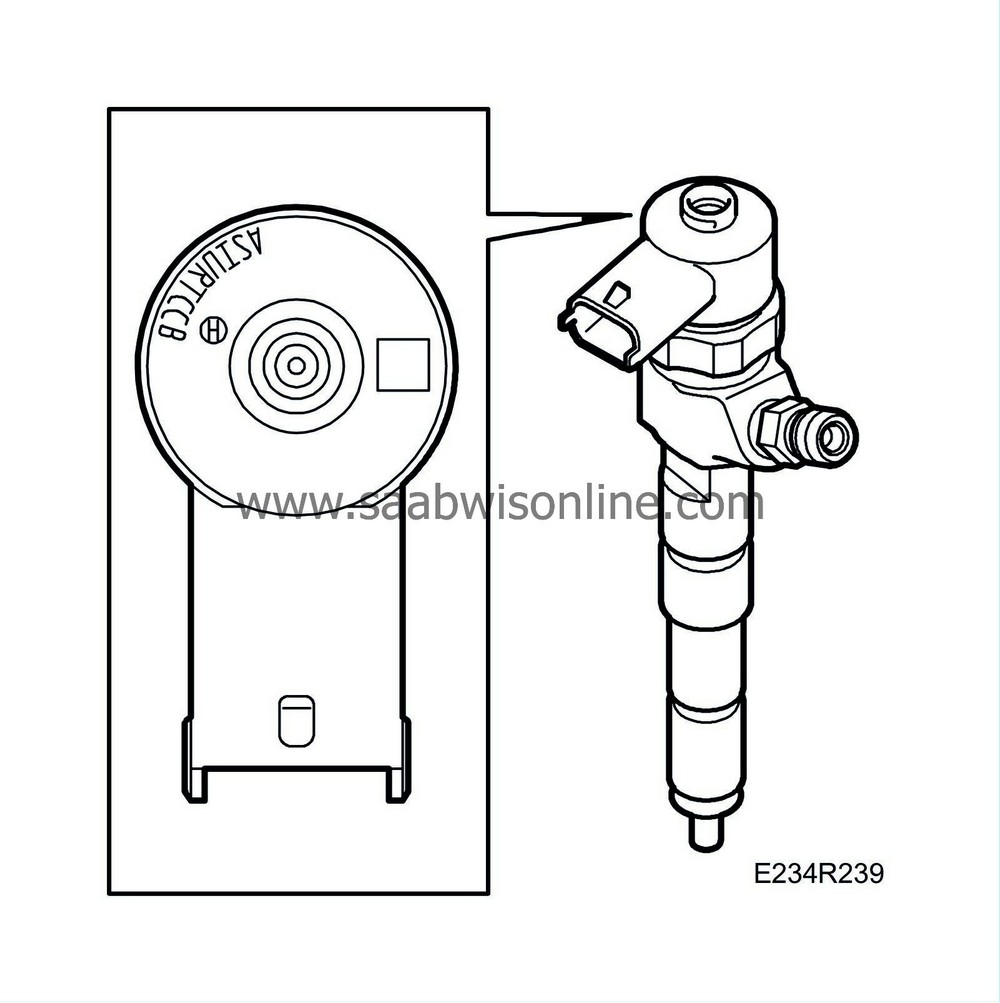
| 1. |
Fit the injectors with holder and new seals in the following order: 4-3-2-1. Fit the washers and nuts.
Tightening torque: 25 Nm (18 lbf ft) 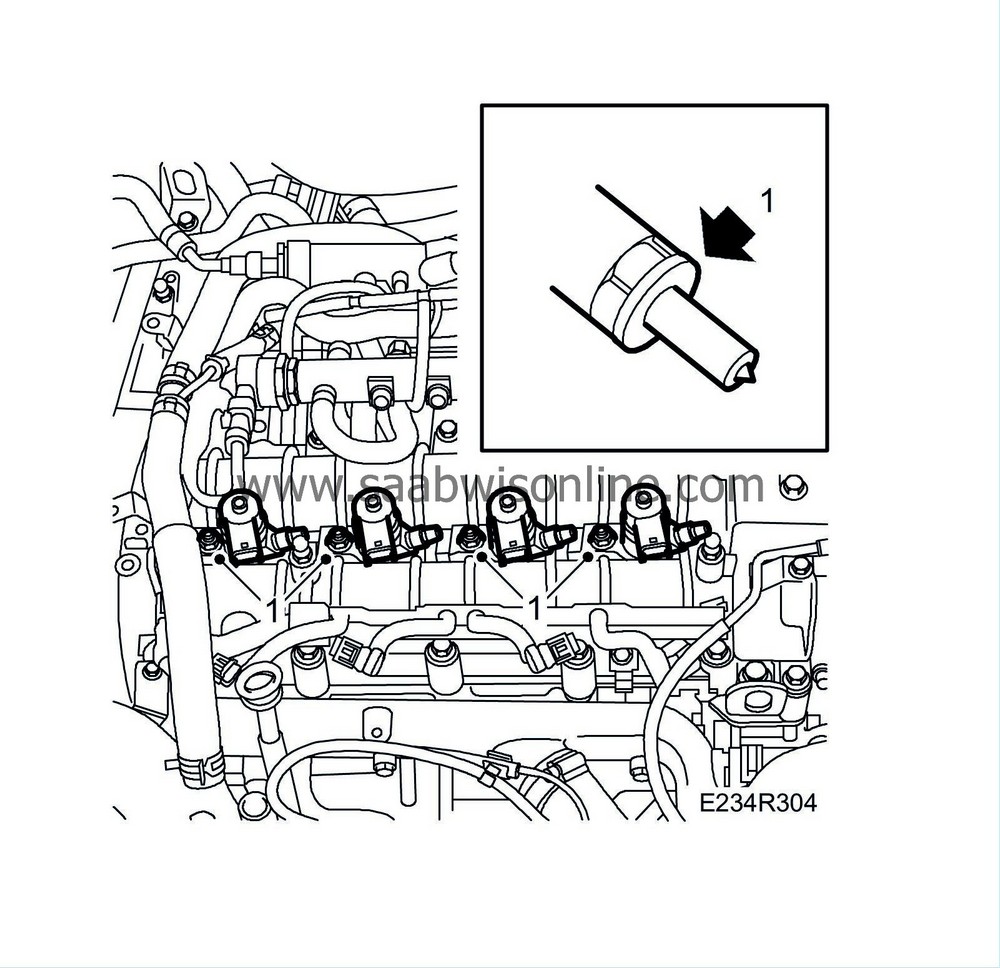
|
|
| 2. |
Fit the crankcase ventilation pipe.
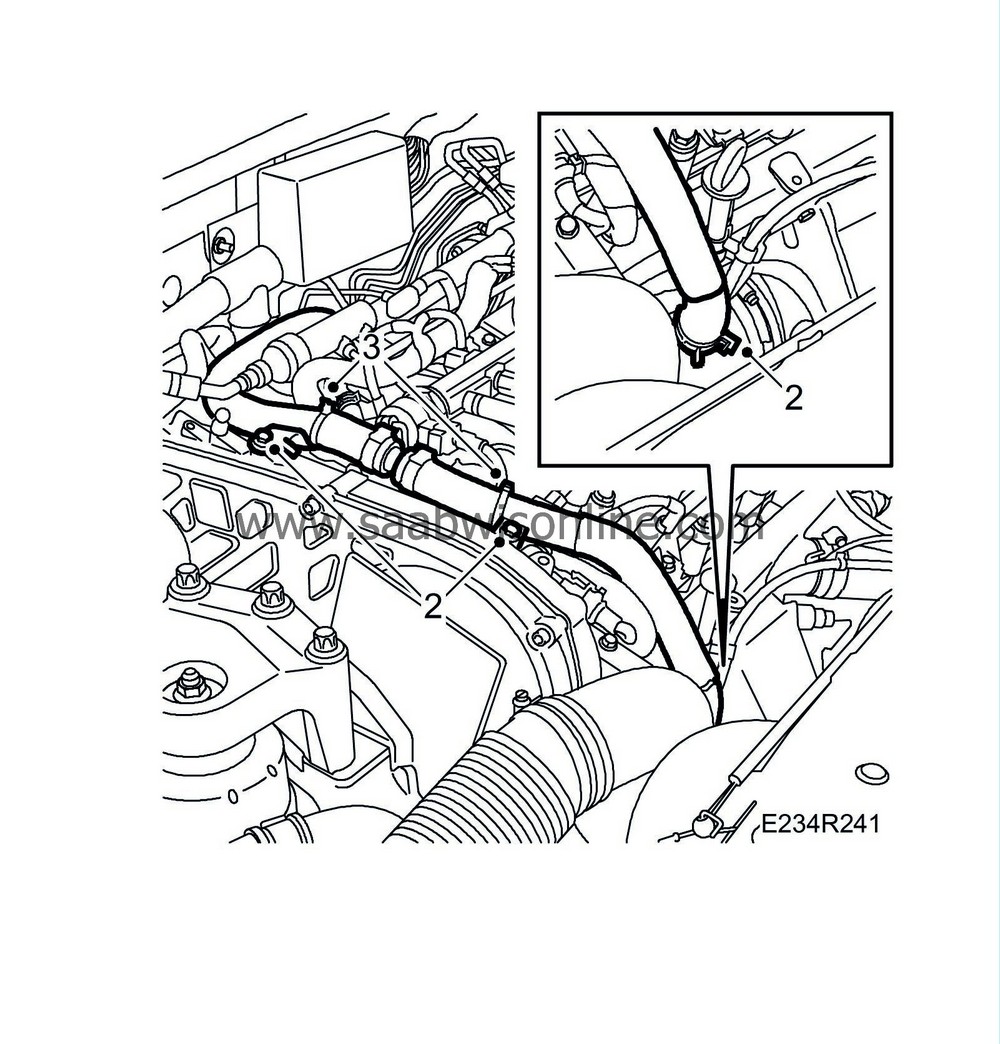
|
|
| 3. |
Attach the cables to the crankcase ventilation pipe.
|
|
| 4. |
Check that the fuel pipe sealing surfaces are clean and undamaged. Fit the pipes with no tension and fit the nuts by hand.
Tightening torque: 25 Nm (18 lbf ft) |
|
| 5. |
Attach the return fuel hoses.
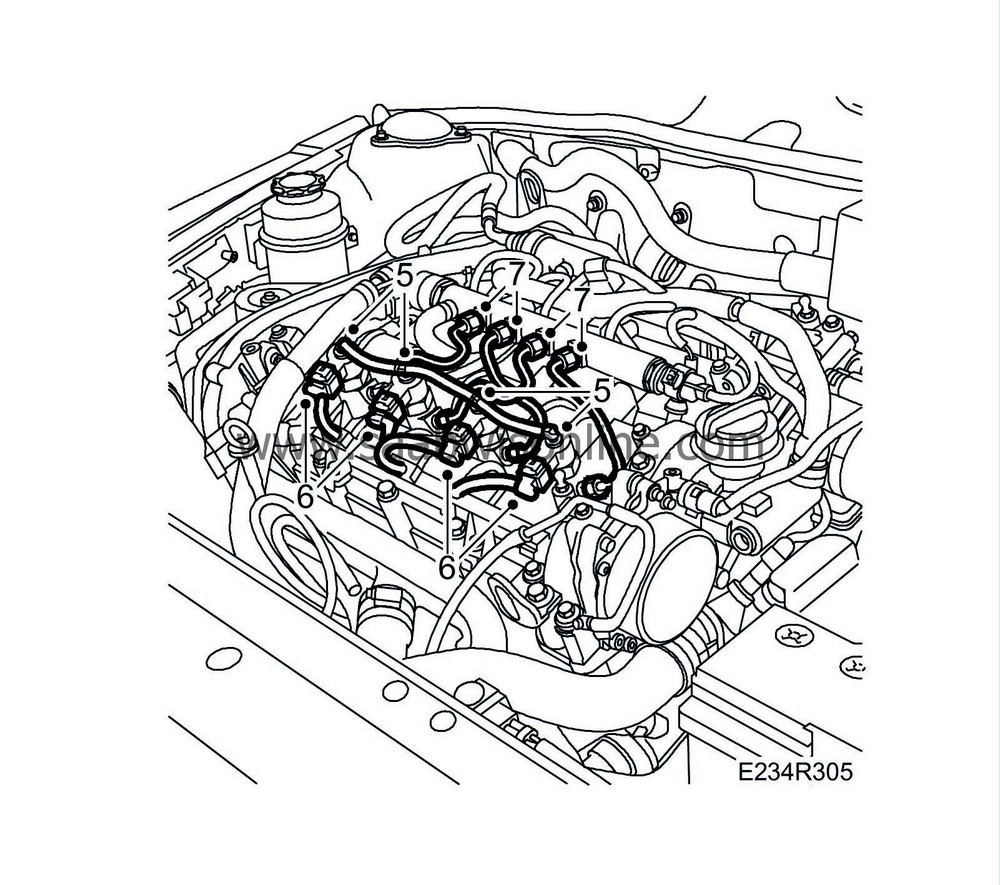
|
|
| 6. |
Plug in the connectors.
|
|
| 7. |
If new injectors have been fitted
: Connect the diagnostic tool for programming. Select Menu - Engine - Engine management system - Adjustment - Injector replaced.
|
|
| 8. |
Start the engine and check the fuel system for leaks.
Connect the diagnostic tool and clear any diagnostic trouble codes. |
|
| 9. |
Fit the insulation and upper engine cover.
|
|

 Warning

