PRE-RELEASE
Fuel tank, US (incl. E85)
| Fuel tank, US (incl. E85) |
|
||||||||||||||||||||||
| Important | ||
|
Be particulary observant regardning cleanliness when working on the fuel system. Loss of function may occur due to very small particles. Prevent dirt and grime from entering the fuel system by cleaning the connections and plugging pipes and lines during disassembly. Use 82 92 948 Plugs, A/C system assembly. Keep components free from contaminants during storage. |
||
| To remove |
| 1. |
Park the car on a lift.
|
|
| 2. |
Drain the fuel from the tank. See
Draining fuel tank
.
|
|
| 3. |
Raise the car.
|
|
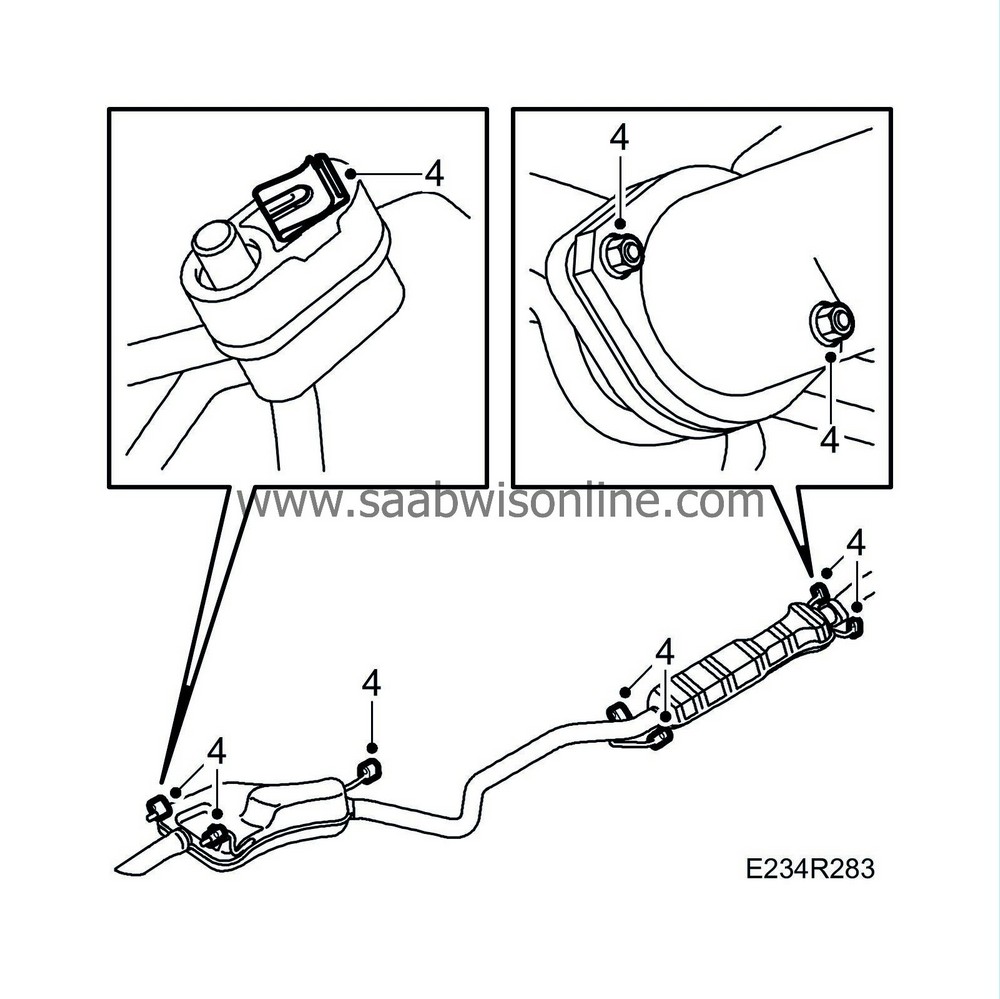
| 4. |
Remove the rear exhaust system.
|
|
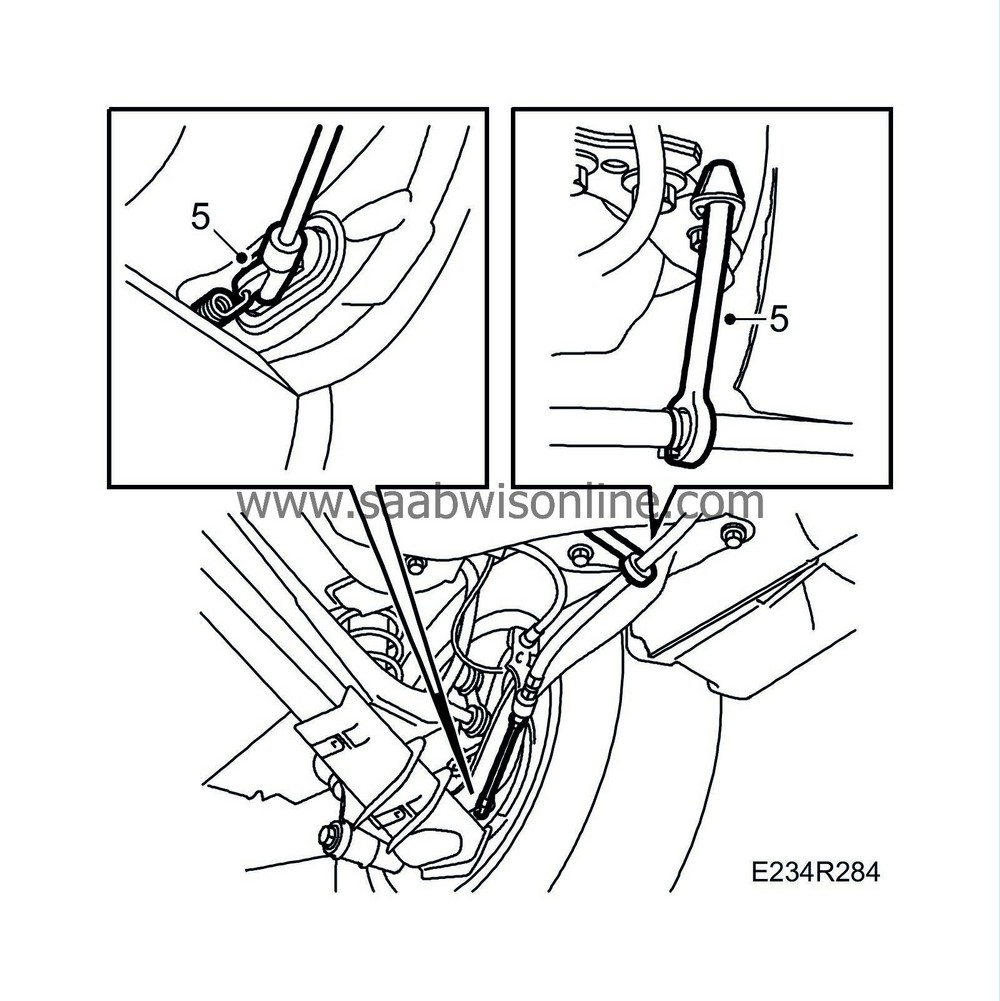
| 5. |
Remove both handbrake cables from the handbrake lever and suspension straps.
|
|
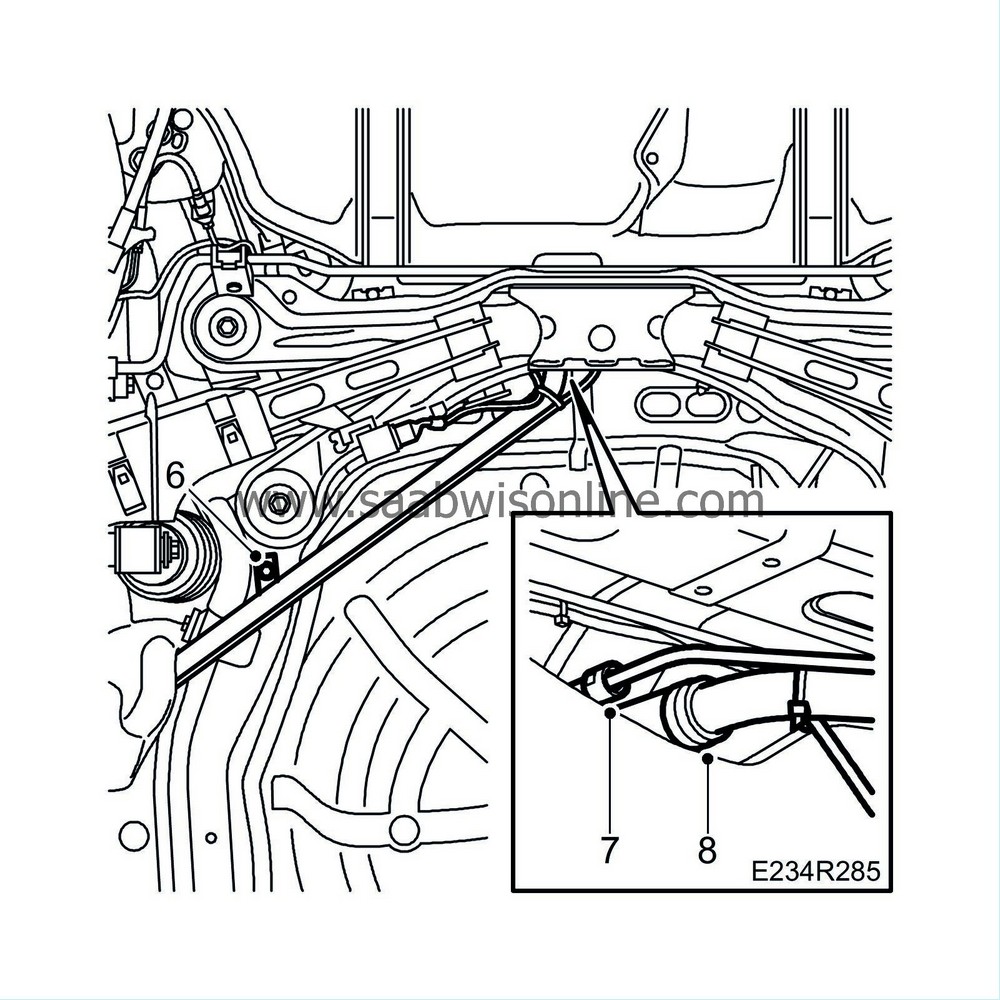
| 6. |
Remove the filler pipe screw.
|
|
| 7. |
Disconnect the bleeder hose with tool 83 95 261 Tool, fuel line.
|
|
| 8. |
Remove the filler pipe hose from the tank.
|
|
| 9. |
Carefully move aside the filler pipe.
|
|
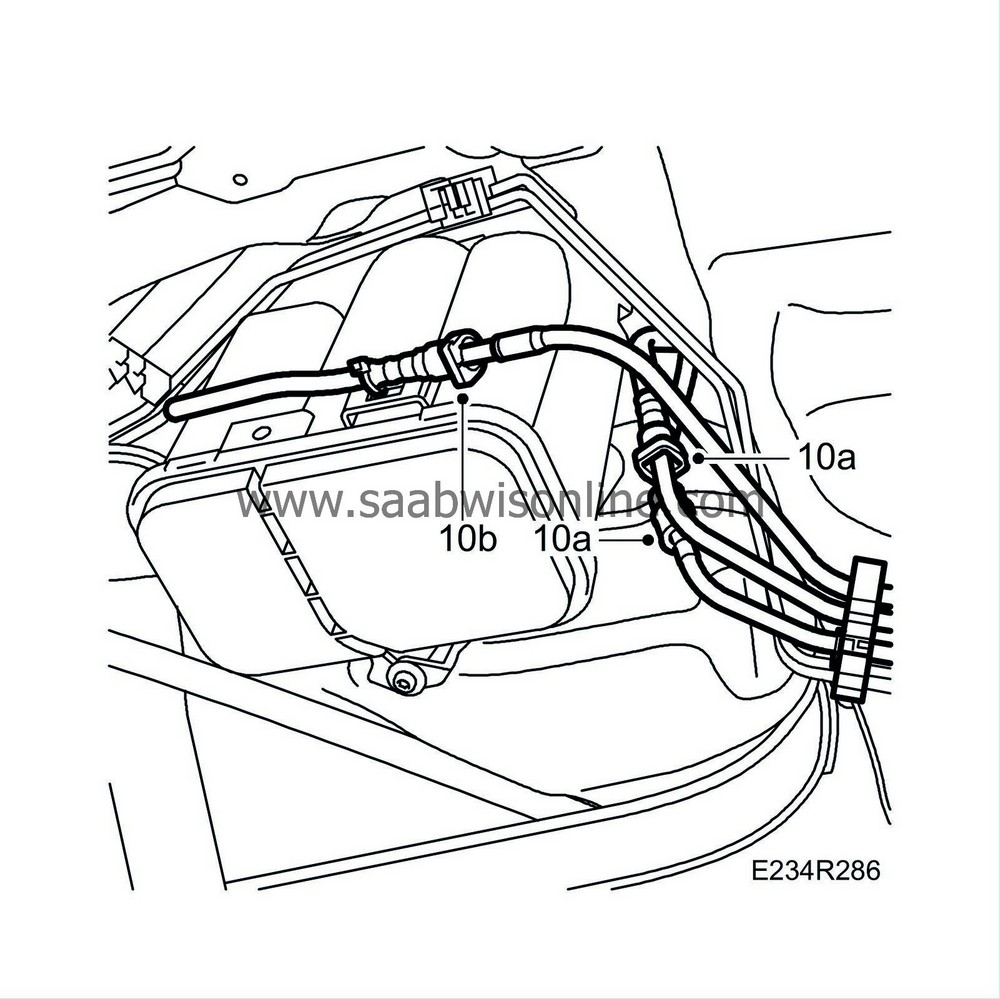
| 10. |
Remove the following fuel lines. Use tool
83 95 261 Tool, fuel line
for one of the lines.
|
|
| 10.a. |
Feed and return lines
|
| 10.b. |
Tank bleeder line
|
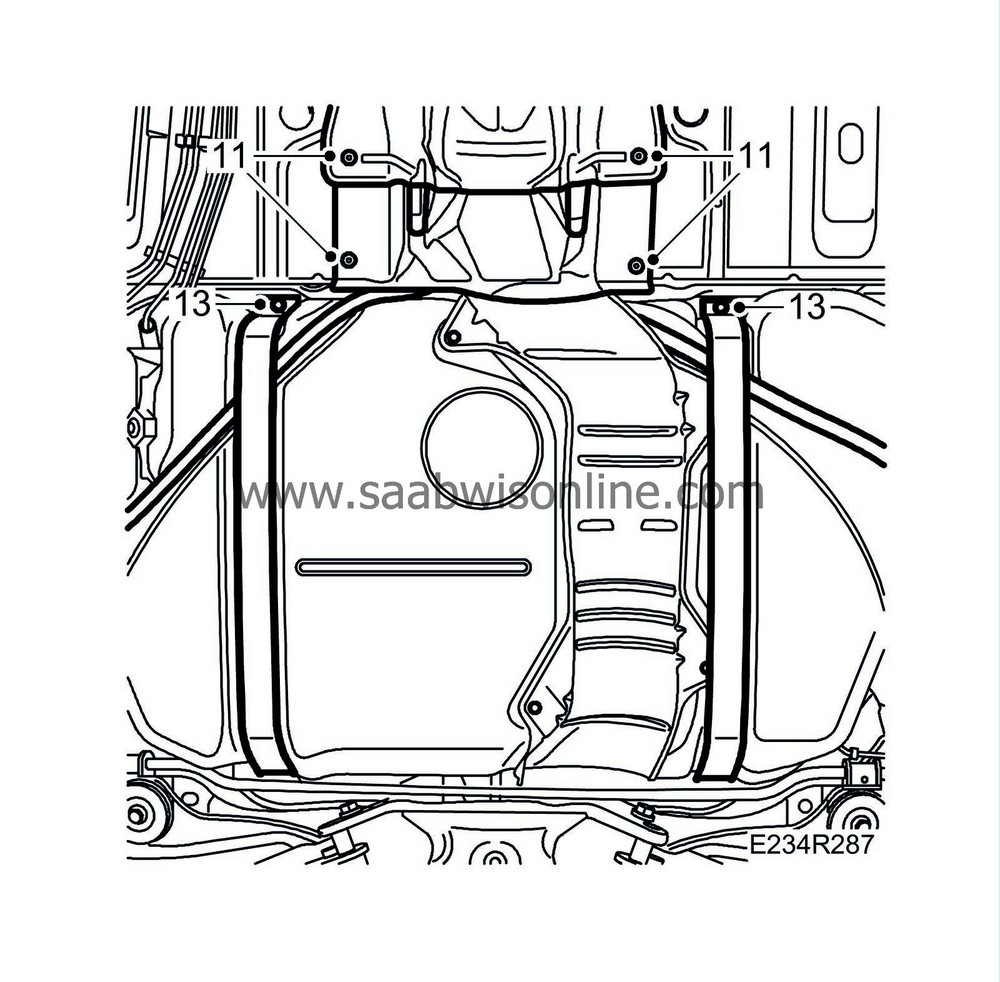
| 11. |
Remove the heat shield from the front of the tank.
|
|
| 12. |
Place a pillar jack under the tank.
|
|
| 13. |
Remove the front bolts of the strap holding the tank.
|
|
| 14. |
Lower the tank.
|
|
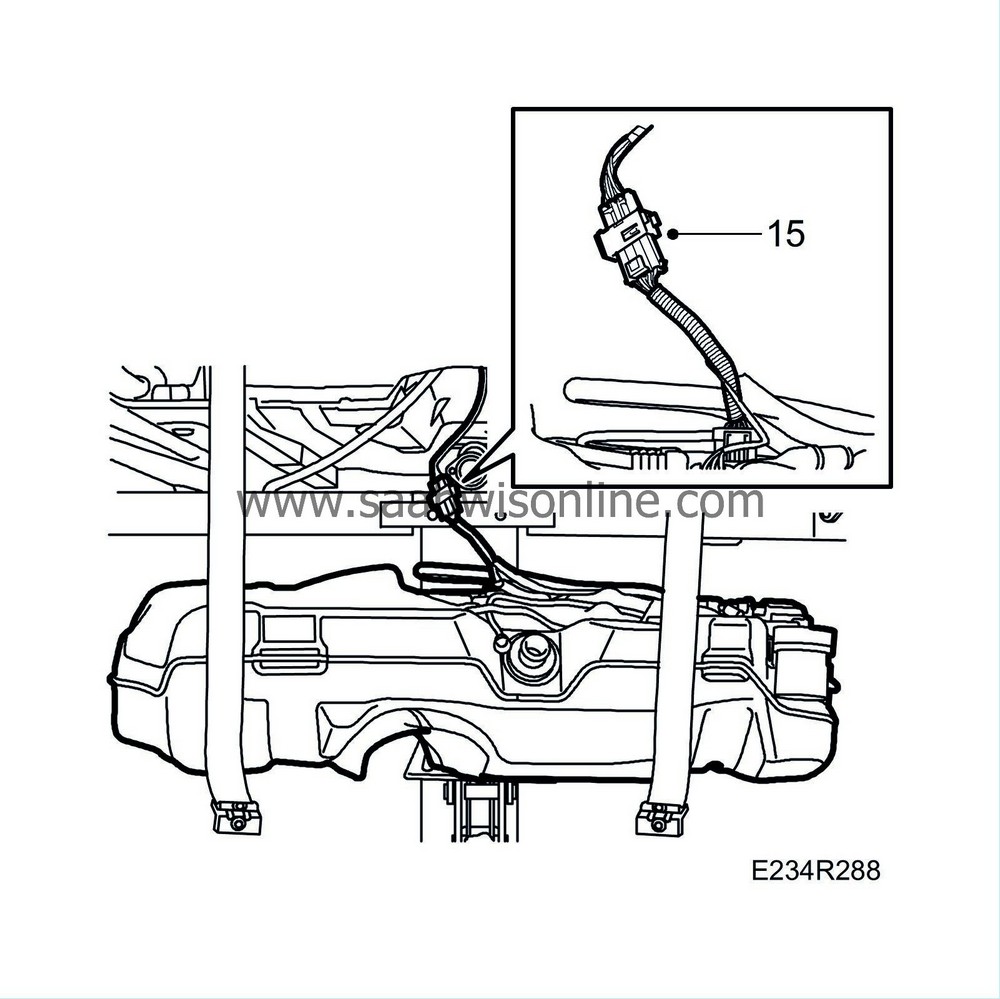
| 15. |
Unplug the connector on the top of the tank.
|
|
| 16. |
Lower the tank.
|
|
| To fit |
| Important | ||
|
When fitting the filler pipe it is important to replace the rubber hoses between the filler pipe and the fuel tank. There is a risk of cracks forming on the hoses after repeated tightening of the hose clips and this can lead to fuel leakage. |
||
| Note | ||
|
Spray the connector with Anti-corrosion agent, Contact Protect before connecting. |
| 1. |
Carefully jack up the tank.
|
|
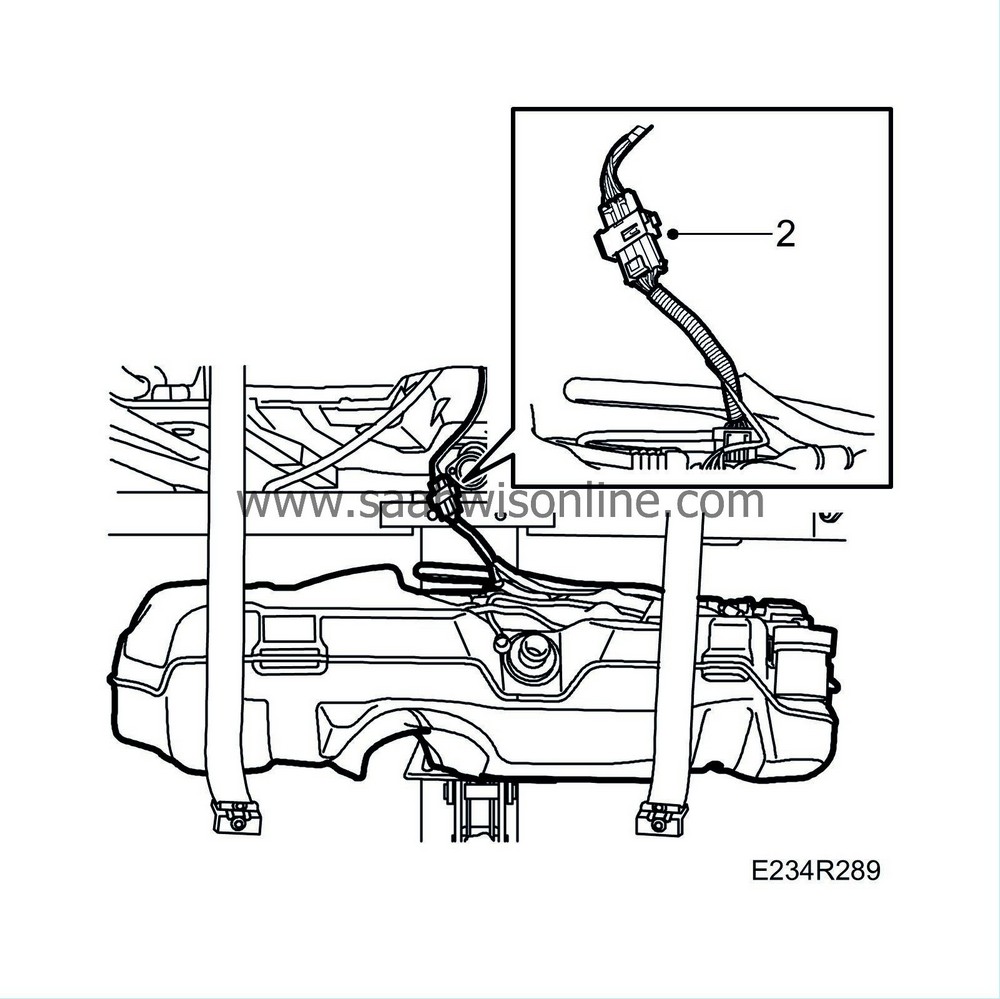
| 2. |
Plug in the connector above the tank.
|
|
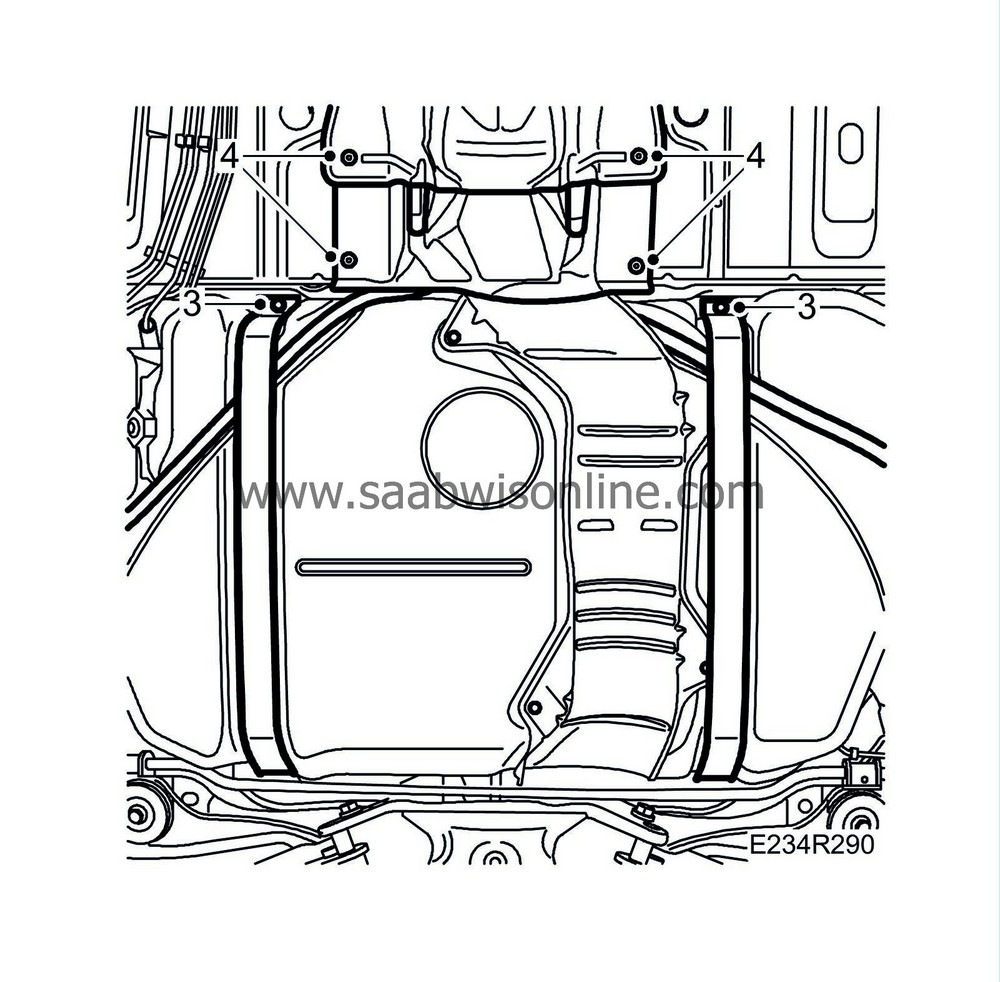
| 3. |
Raise the tank as far as possible, insert the handbrake cables into the grooves on the tank and tighten the straps that hold the tank. Make sure that the cables do not get trapped.
|
|
| 4. |
Fit the heat shield.
|
|
| 5. |
Fit the bleeder hose.
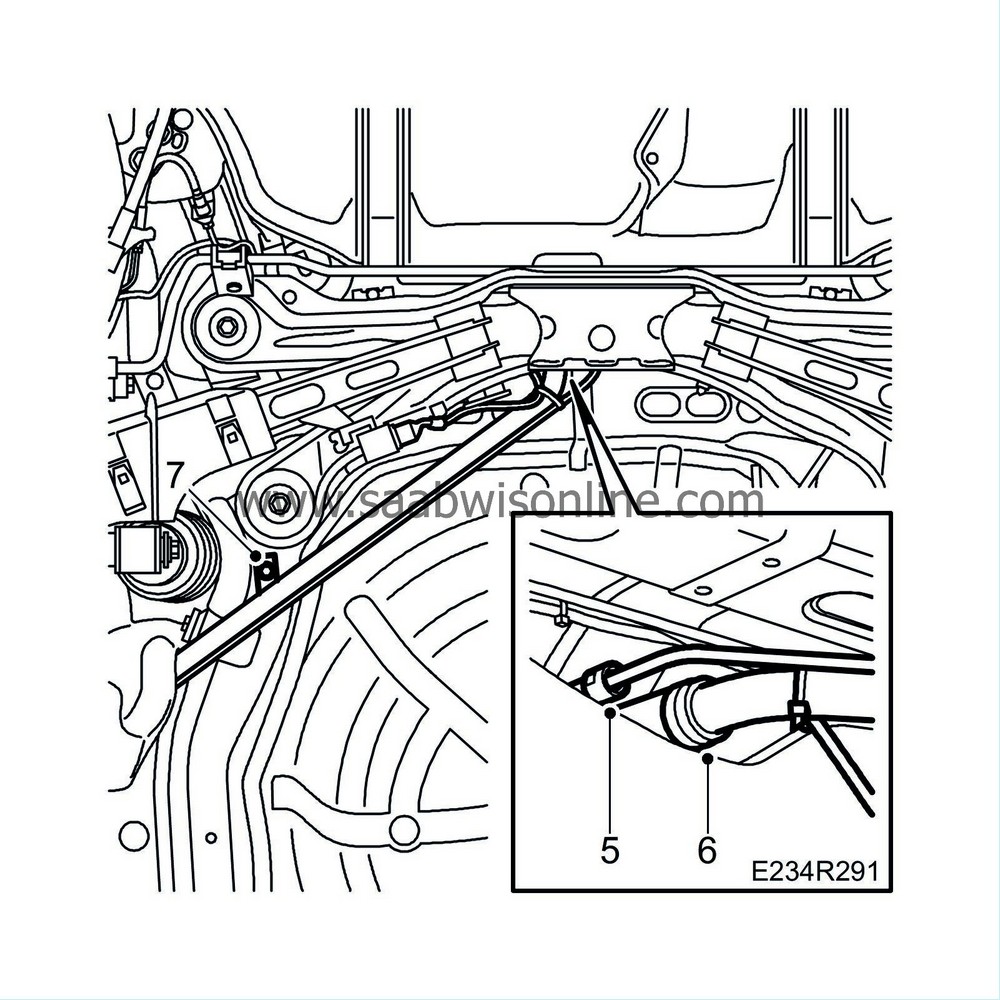
|
|
| 6. |
Fit the filler pipe hose to the tank.
|
|
| 7. |
Fit the filler pipe screw.
|
|
| 8. |
Connect the feed and return lines and the tank bleeder line.
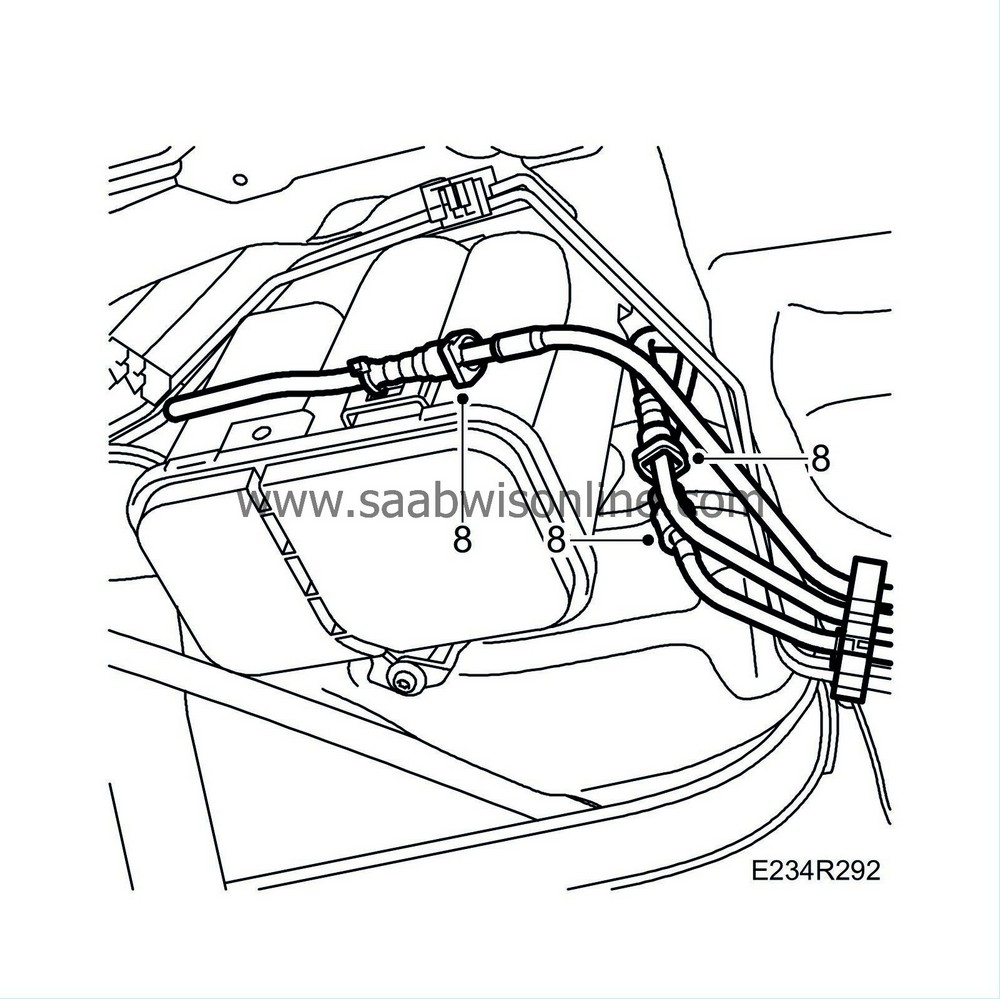
|
|
| 9. |
Fit both handbrake cables to the handbrake lever and suspension straps.
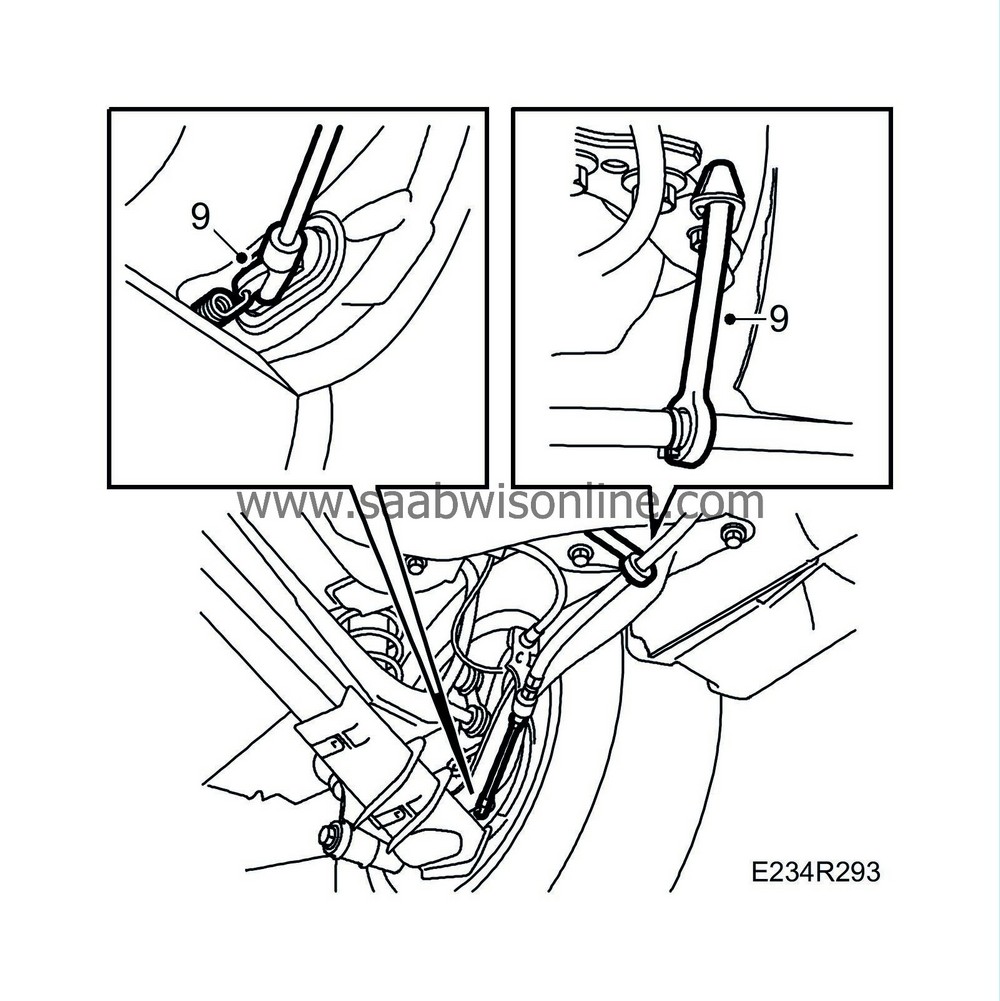
|
|
| 10. |
Fit the rear exhaust system.
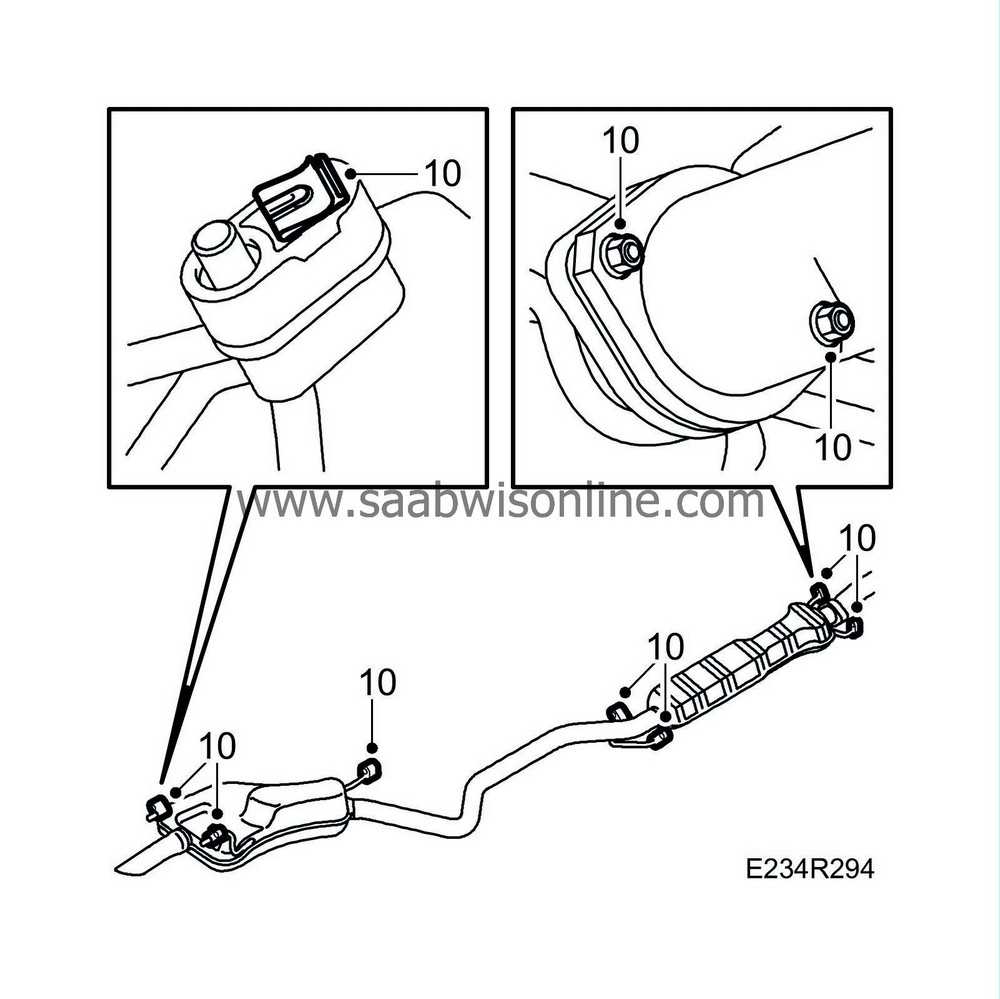
|
|
| 11. |
Lower the car to the floor.
|
|
| 12. |
Fill with any fuel that was drained.
|
|
| 13. |
Start the engine and check the integrity of the system.
|
|

 Warning

