Subframe, diesel engine, replacing
|
|
Subframe, diesel engine, replacing
|
This method is used when the a new subframe is to be fitted.
|
Important
|
|
Cables, hoses, leads, etc., are secured with cable ties made of hard plastic. After tightening, the ties are cut off, leaving more or less sharp ends that can cause cuts if not handled carefully.
|
|
|
|
1.
|
Place the car on a lift.
|
|
2.
|
Lay protection over the wings.
|
|
3.
|
MAN:
Undo the bolts securing the rear engine pad using a long 10 mm socket, two extensions with ball fastening (e.g. 30 17 613) and
82 93 102 Extension 500 mm, 3/8 square
. Leave the bolts in place.
|
|
4.
|
AUT:
Remove the nut of the rear engine mounting and slacken the two visible bolts that hold the rear engine pad in place. Leave the bolts in place.
|
|
5.
|
Raise the car and remove the front wheels.
|
|
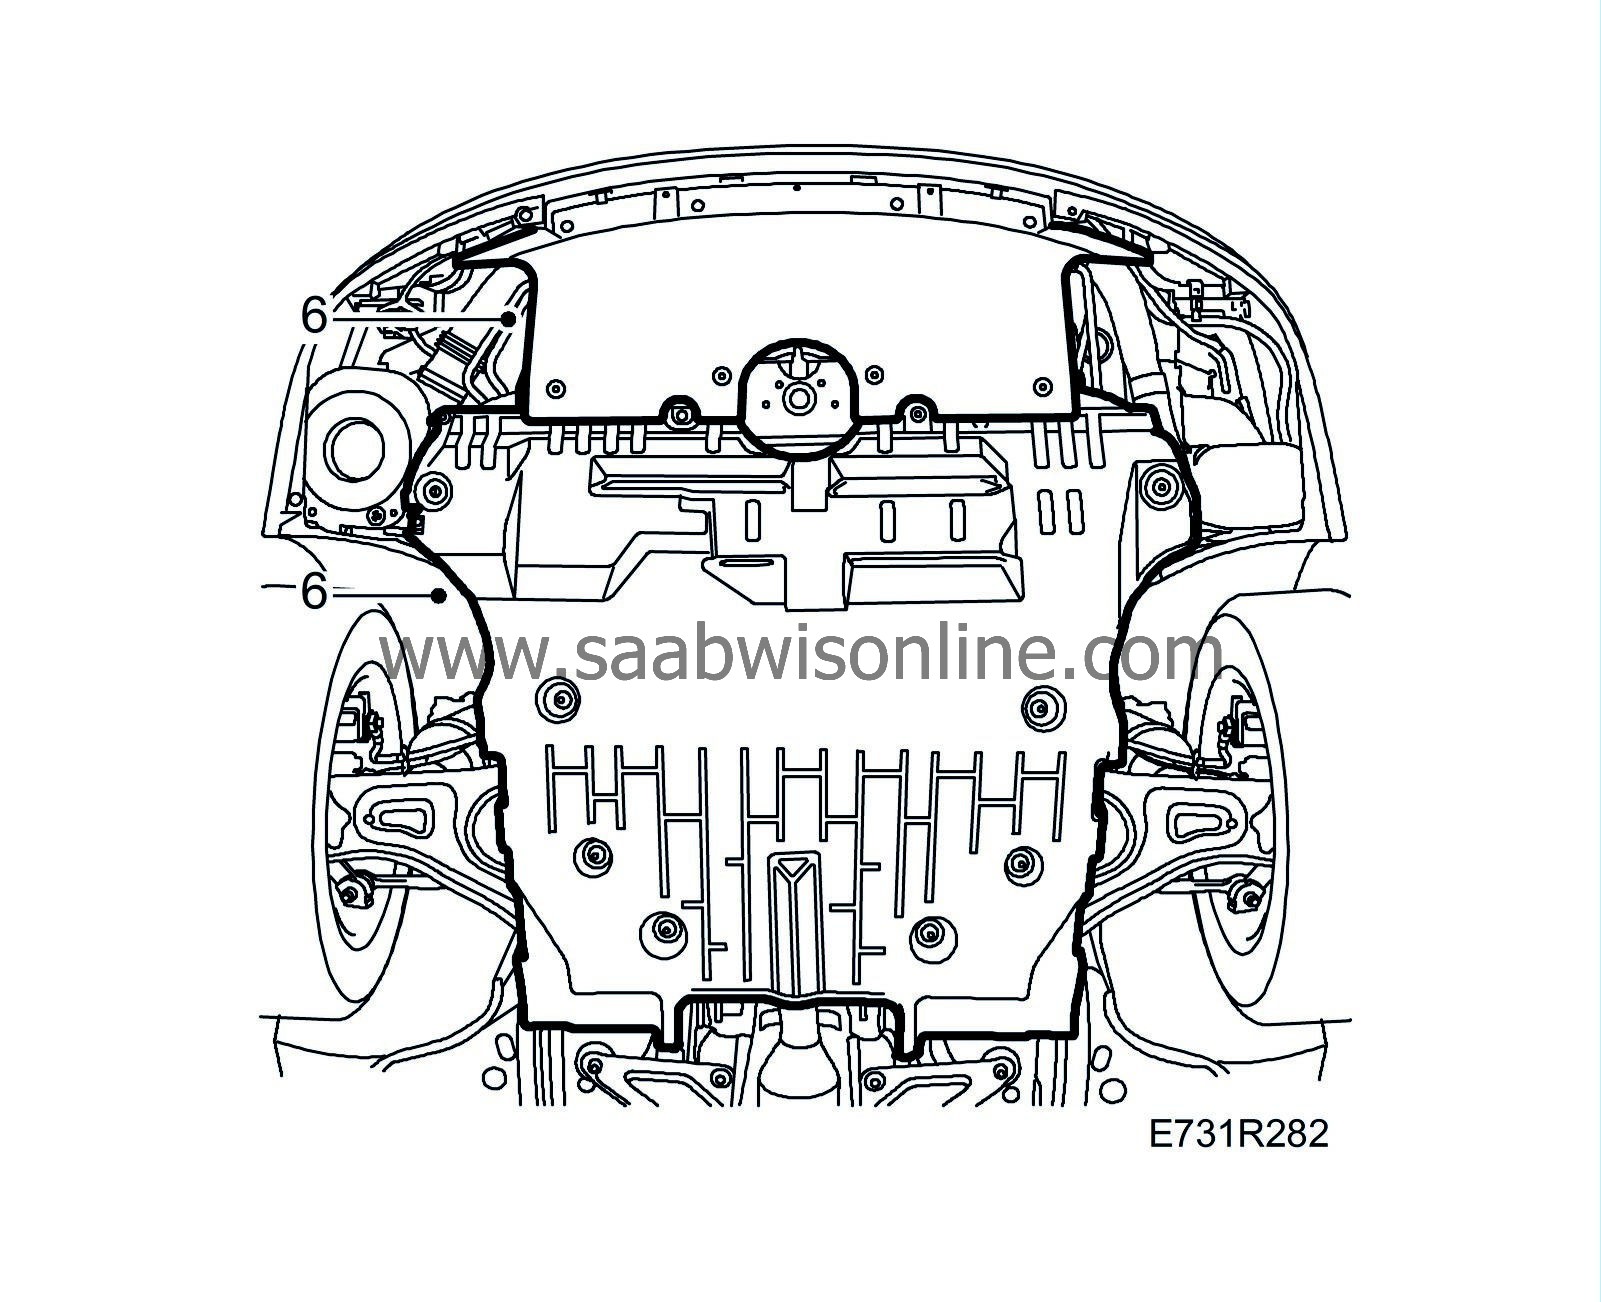
6.
|
Remove both the lower engine covers.
|
|
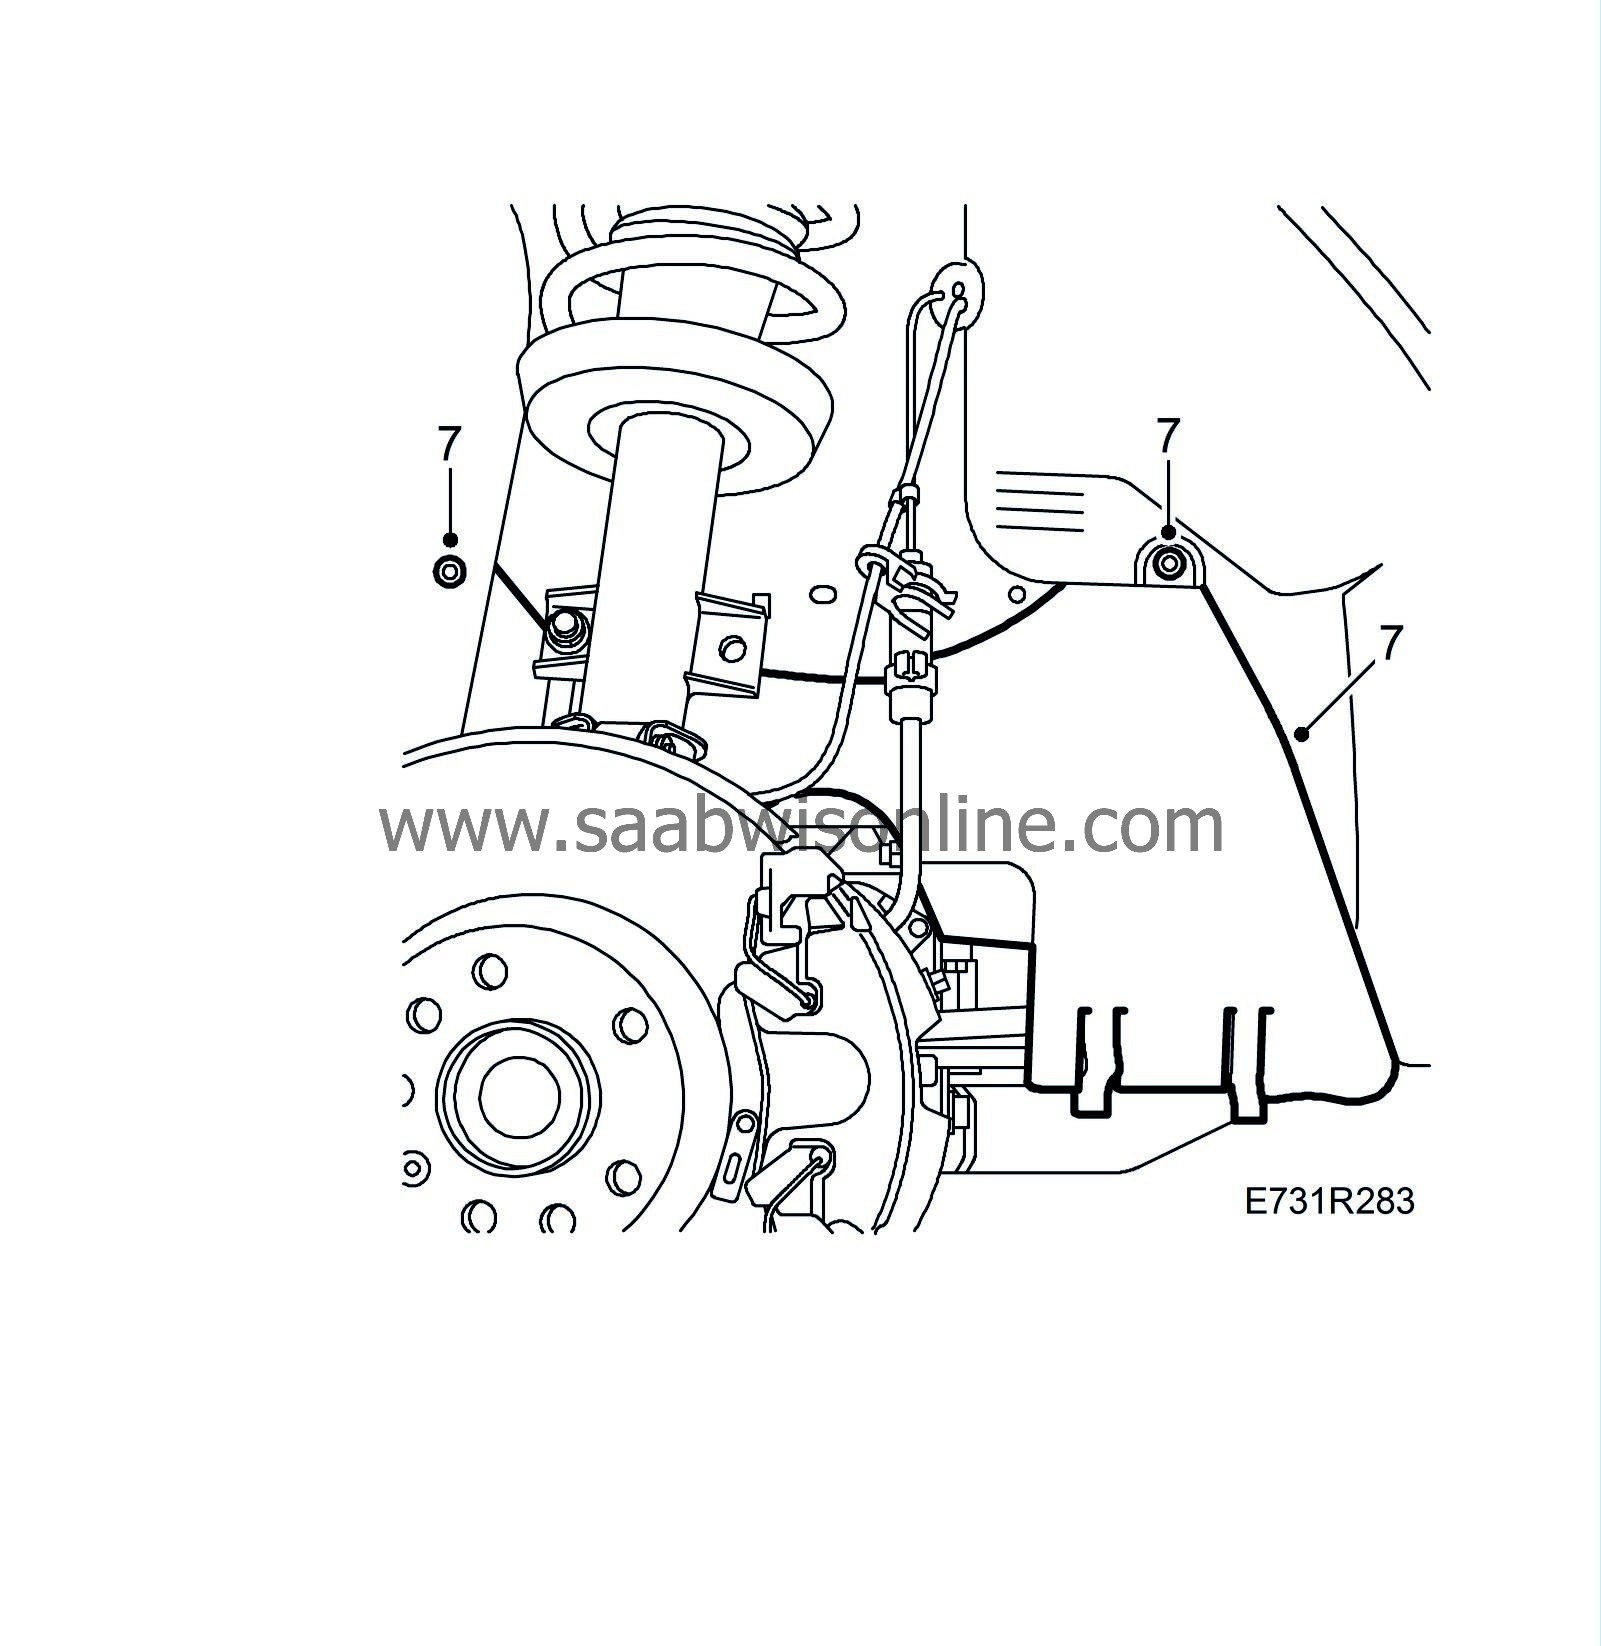
7.
|
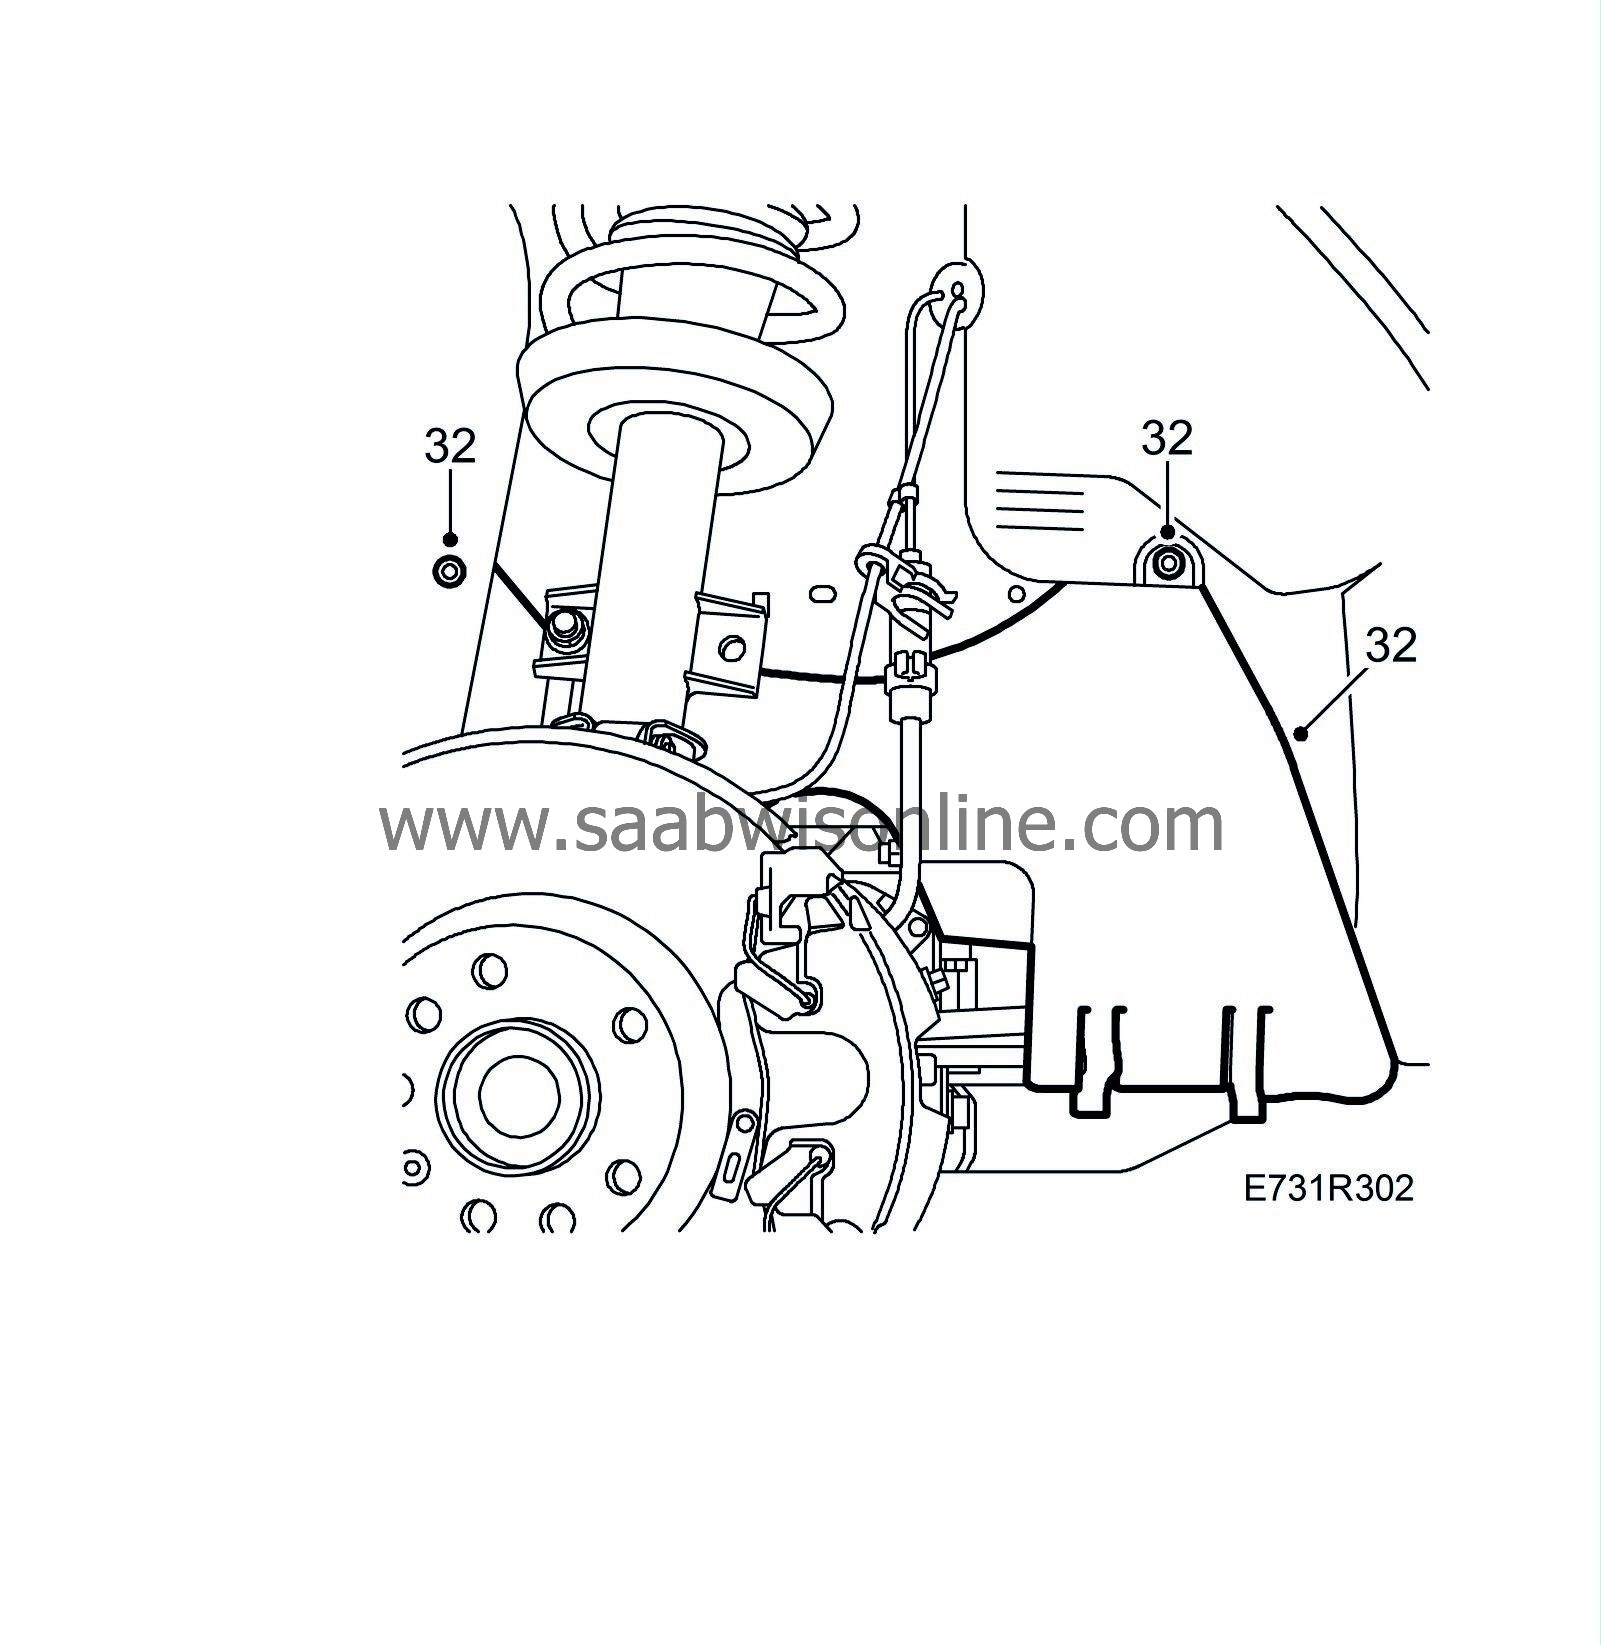
Remove the side covers in both wheel housings.
|
|
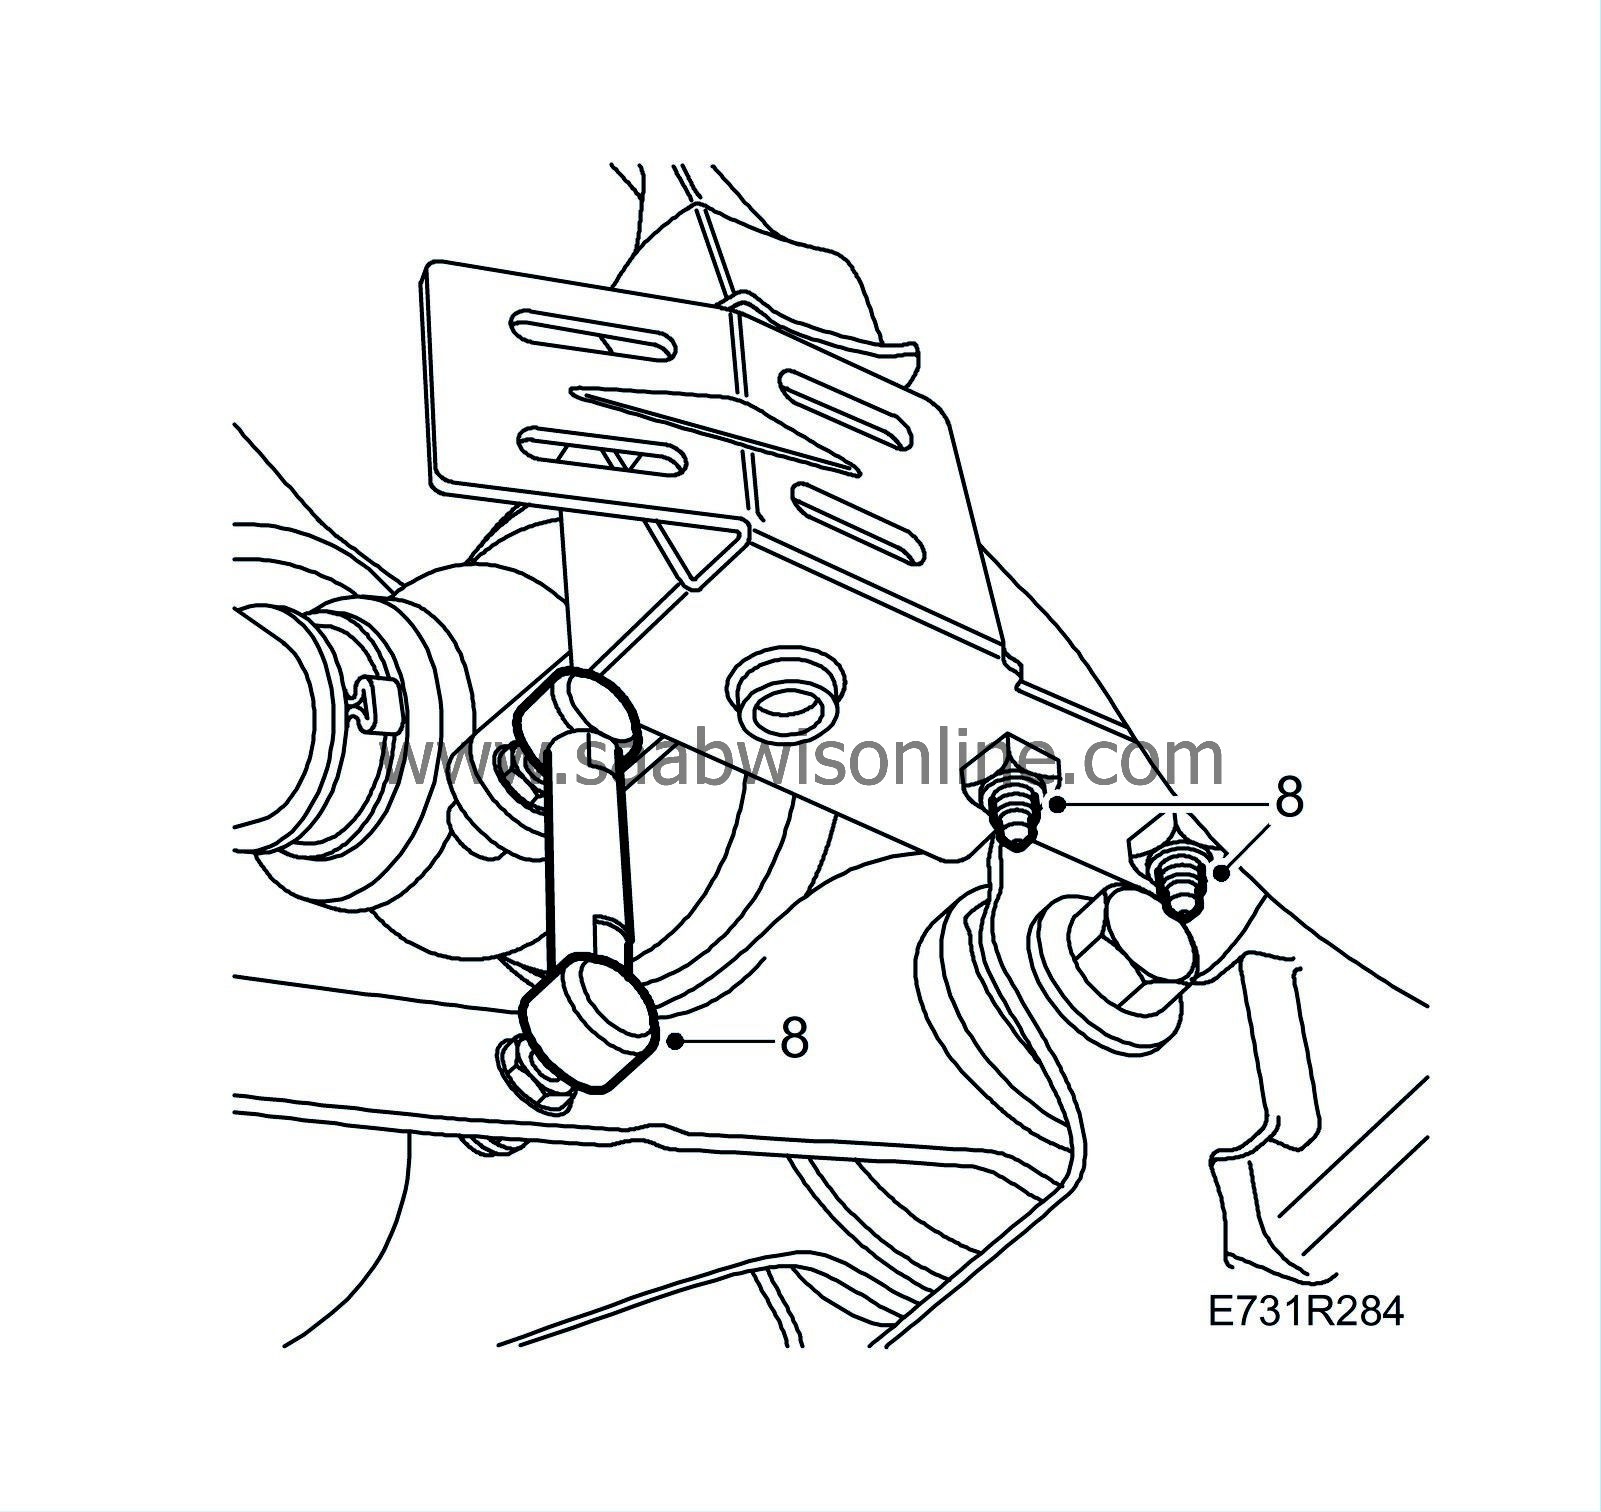
8.
|
Cars with xenon headlamps:
Undo the level sensor for the xenon headlamps from the bracket and move it to one side.
|
|
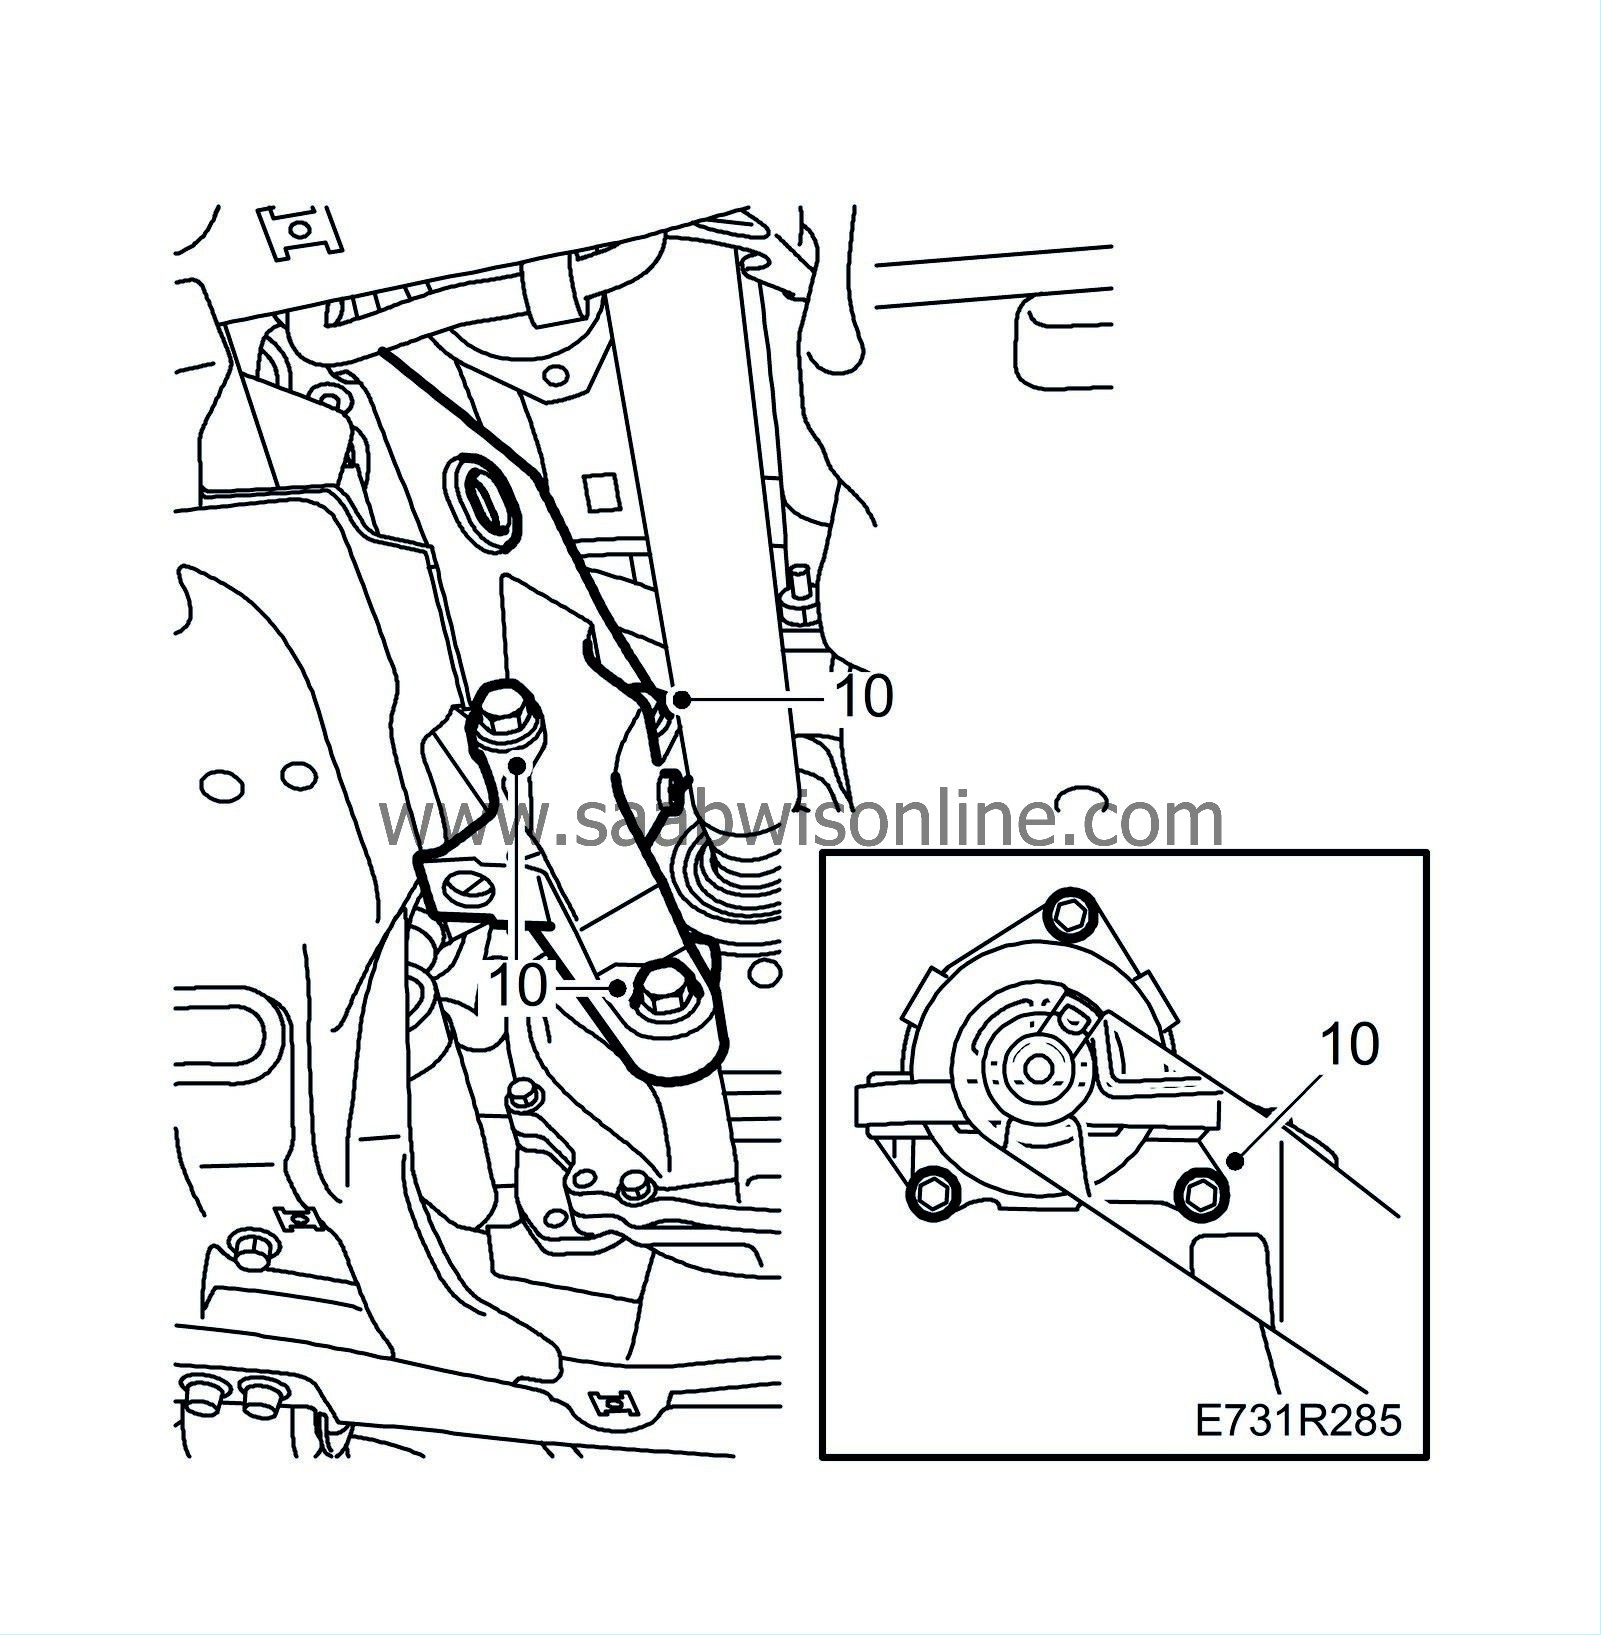
10.
|
AUT:
Remove the rear engine bracket and the engine pad.
|
|
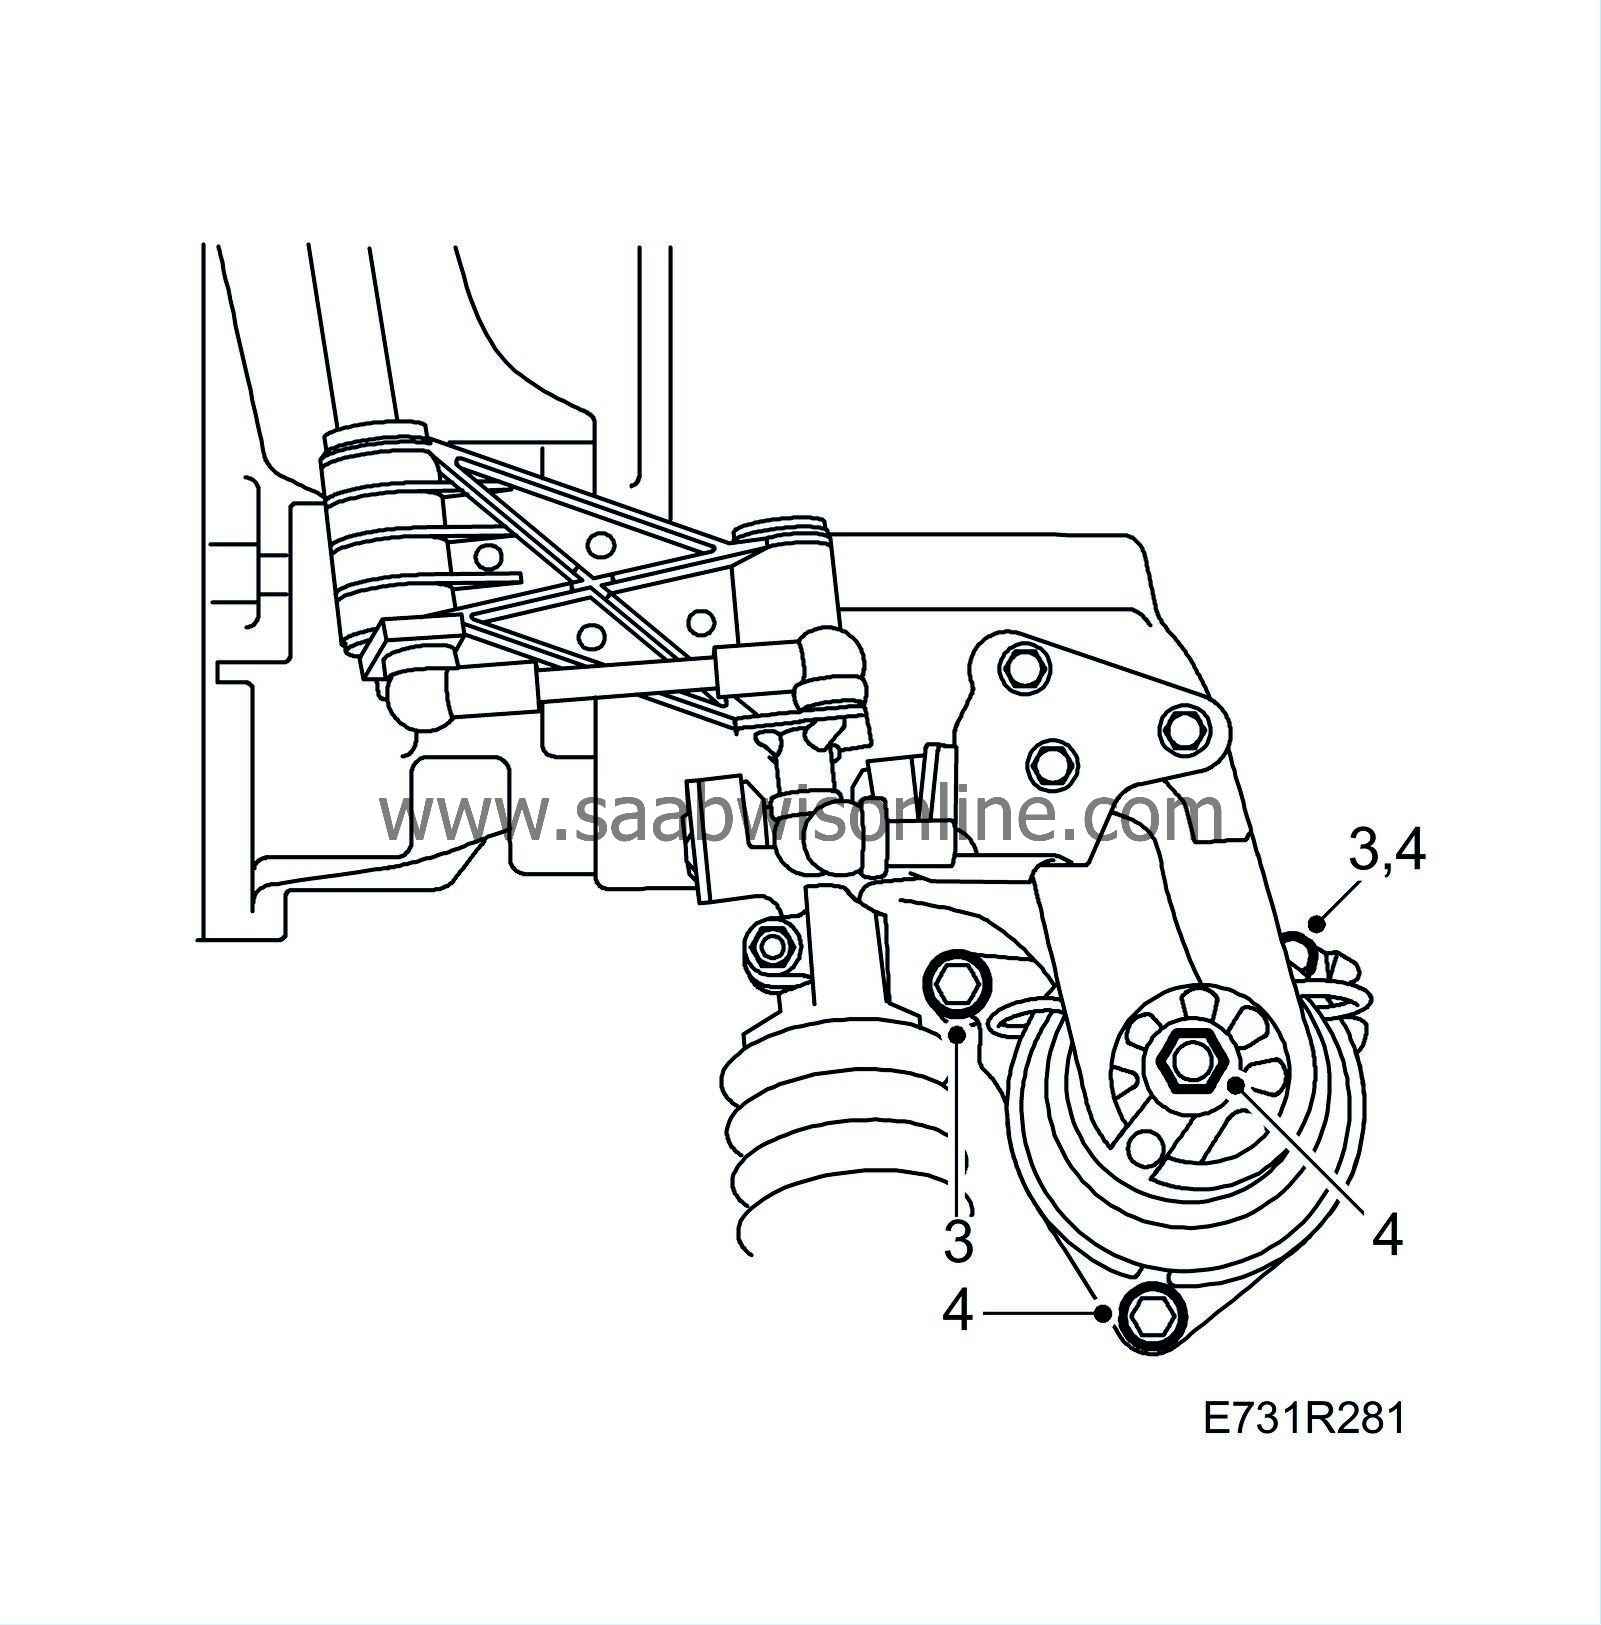
11.
|
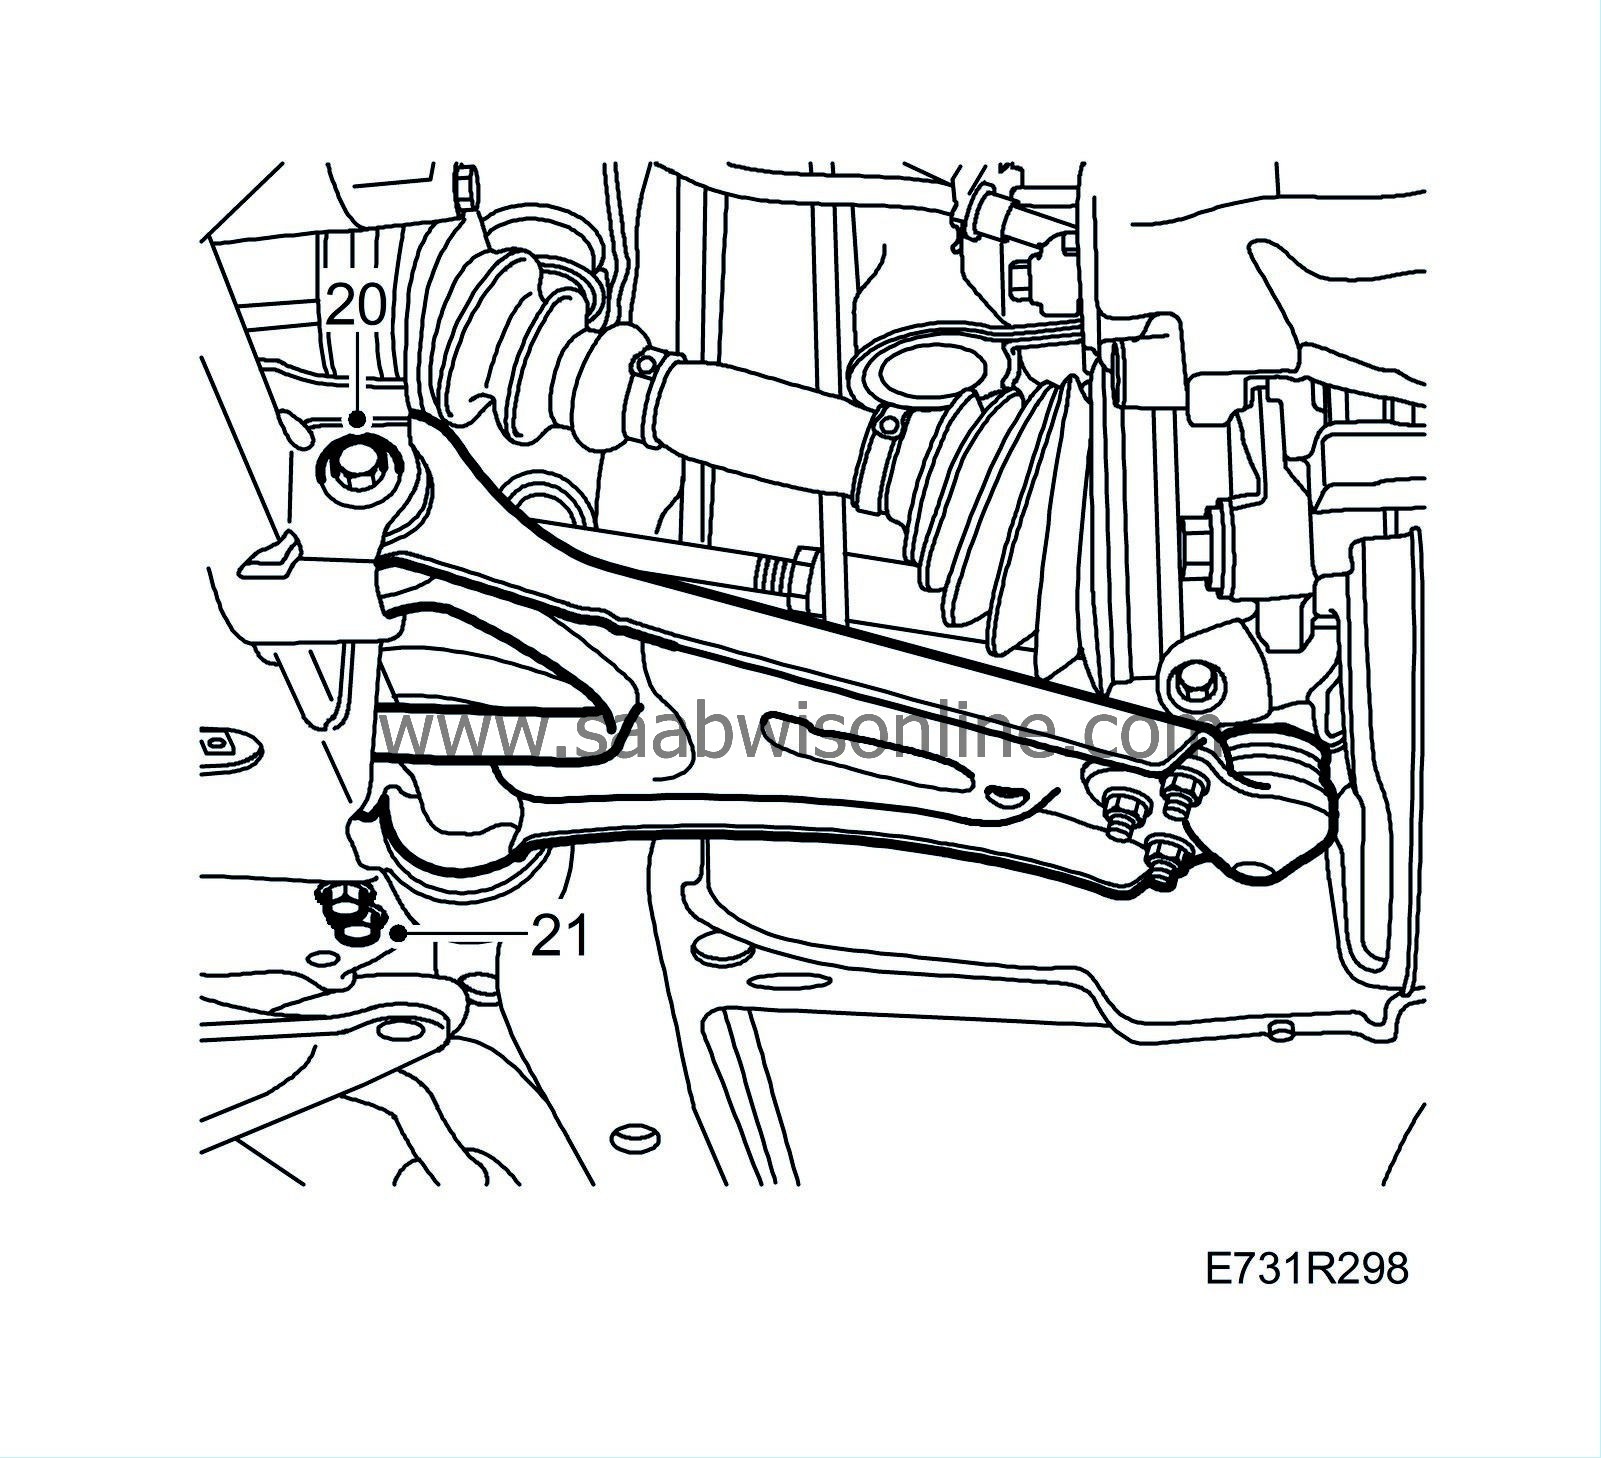
Remove the bolt securing the front torque arm to the subframe.

|
|
12.
|
Remove the suspension arms from the subframe.
|
|
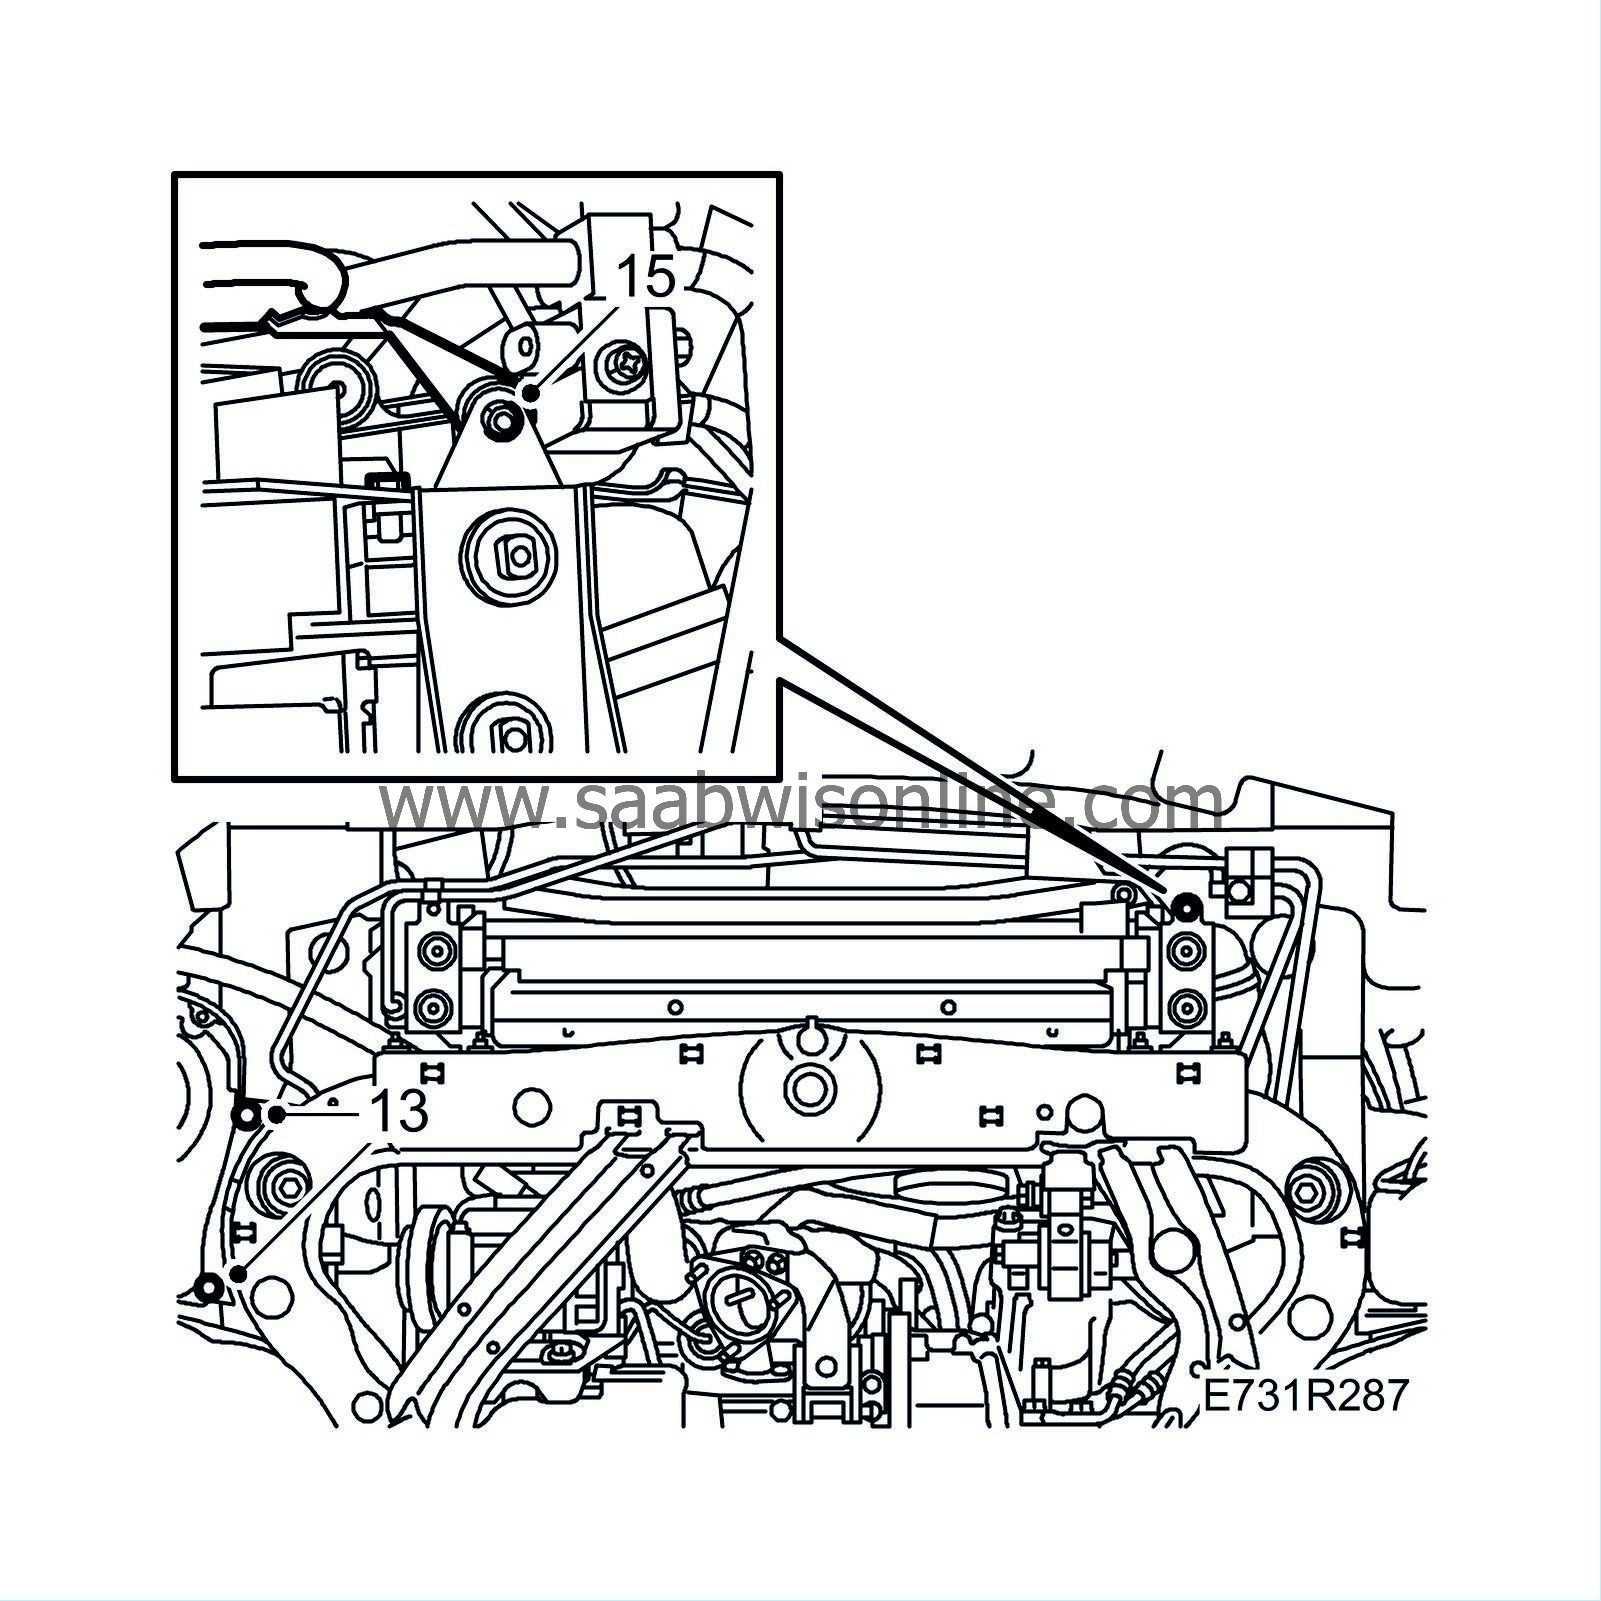
13.
|
Detach the air cleaner casing from the subframe.
|
|
14.
|
Pull strap
83 95 212 Strap
around the radiator assembly and radiator member to hold up the radiator assembly.
|
|
15.
|
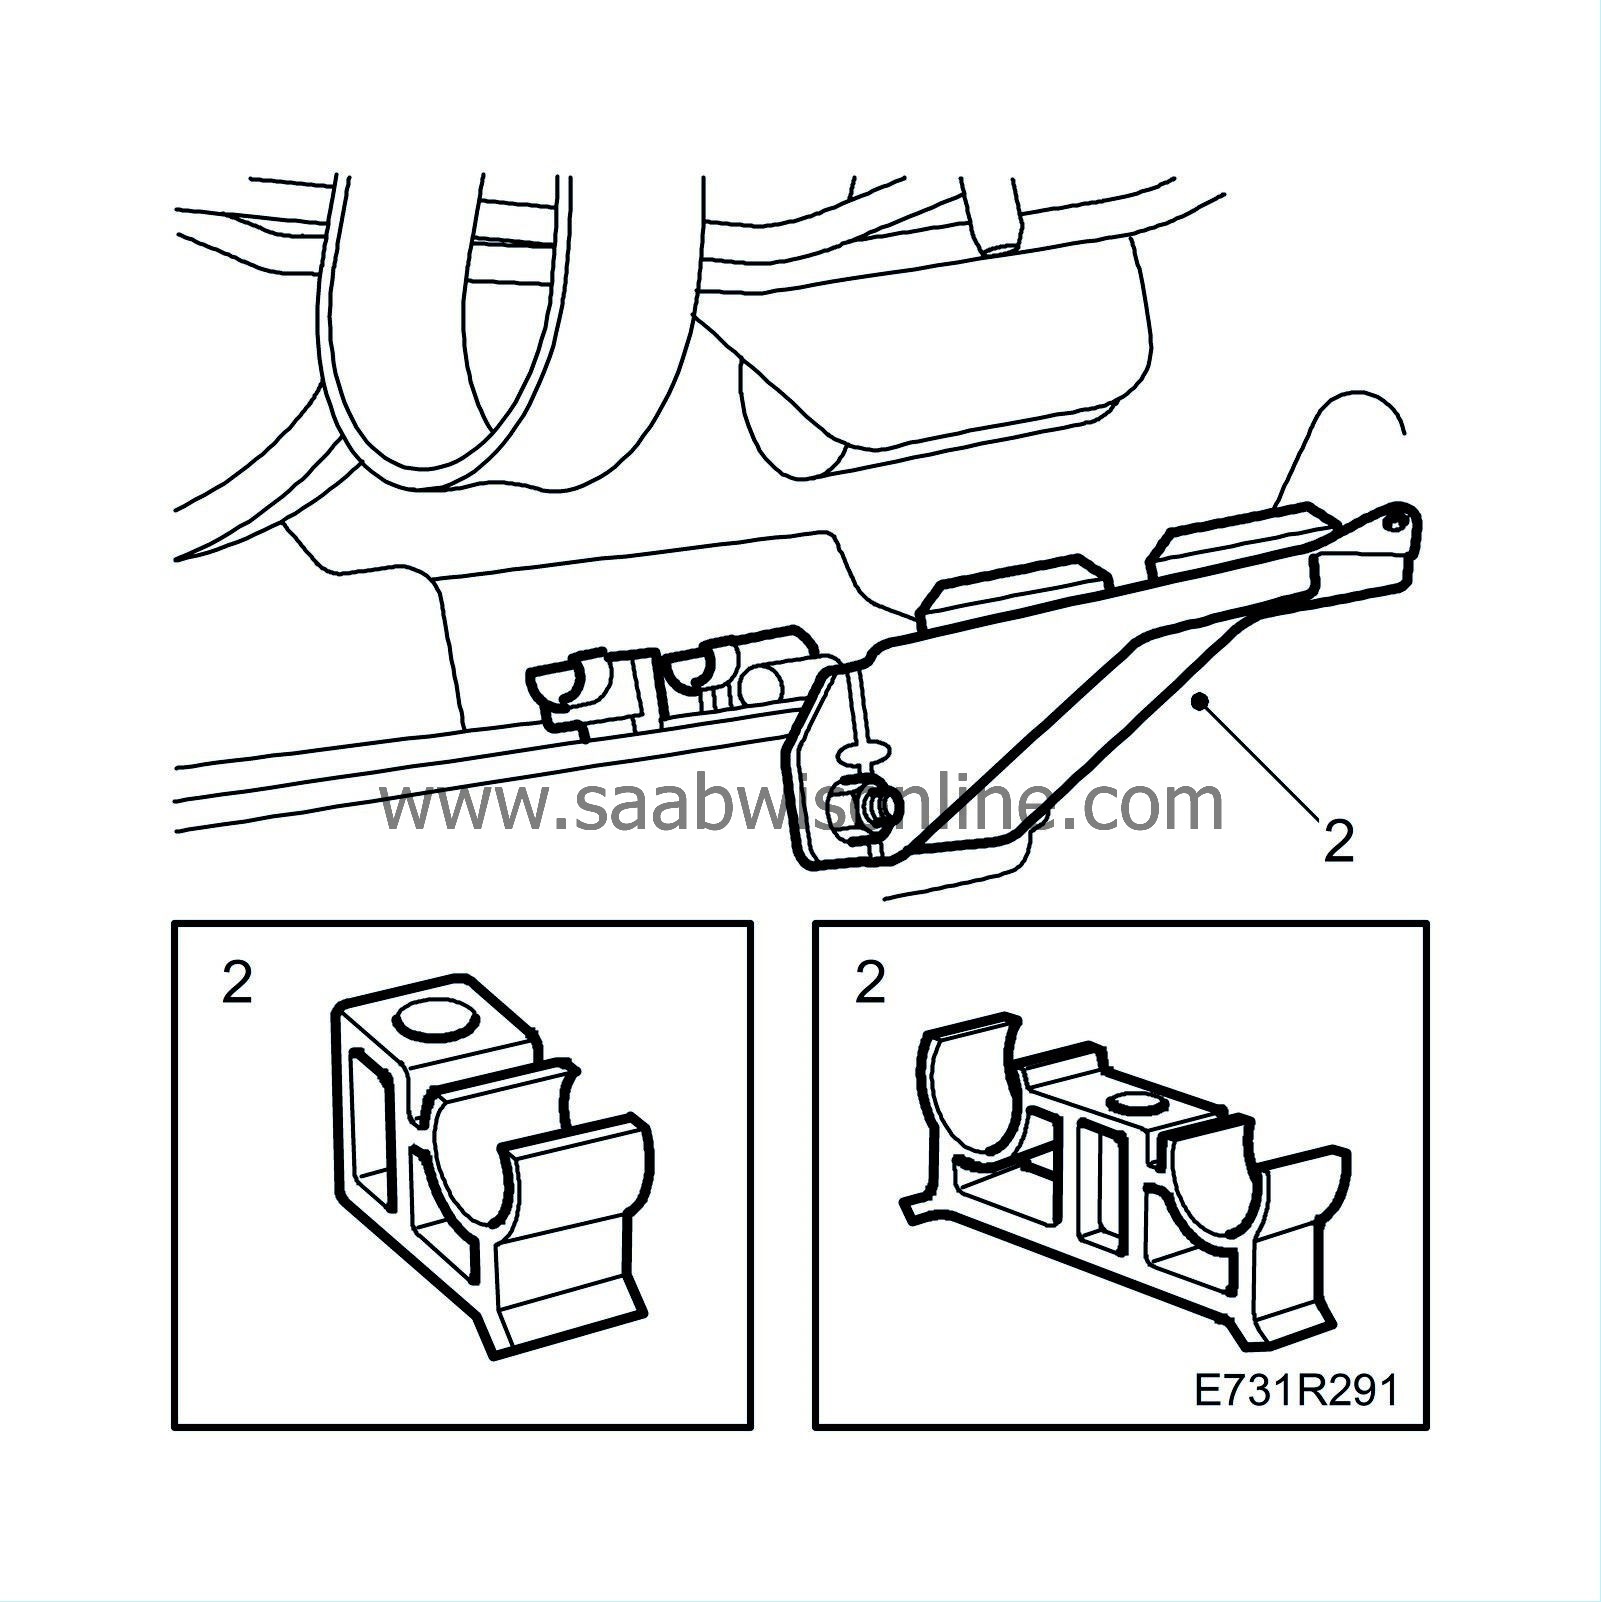
Undo the rubber mountings on the power steering cooling pipe.
|
|
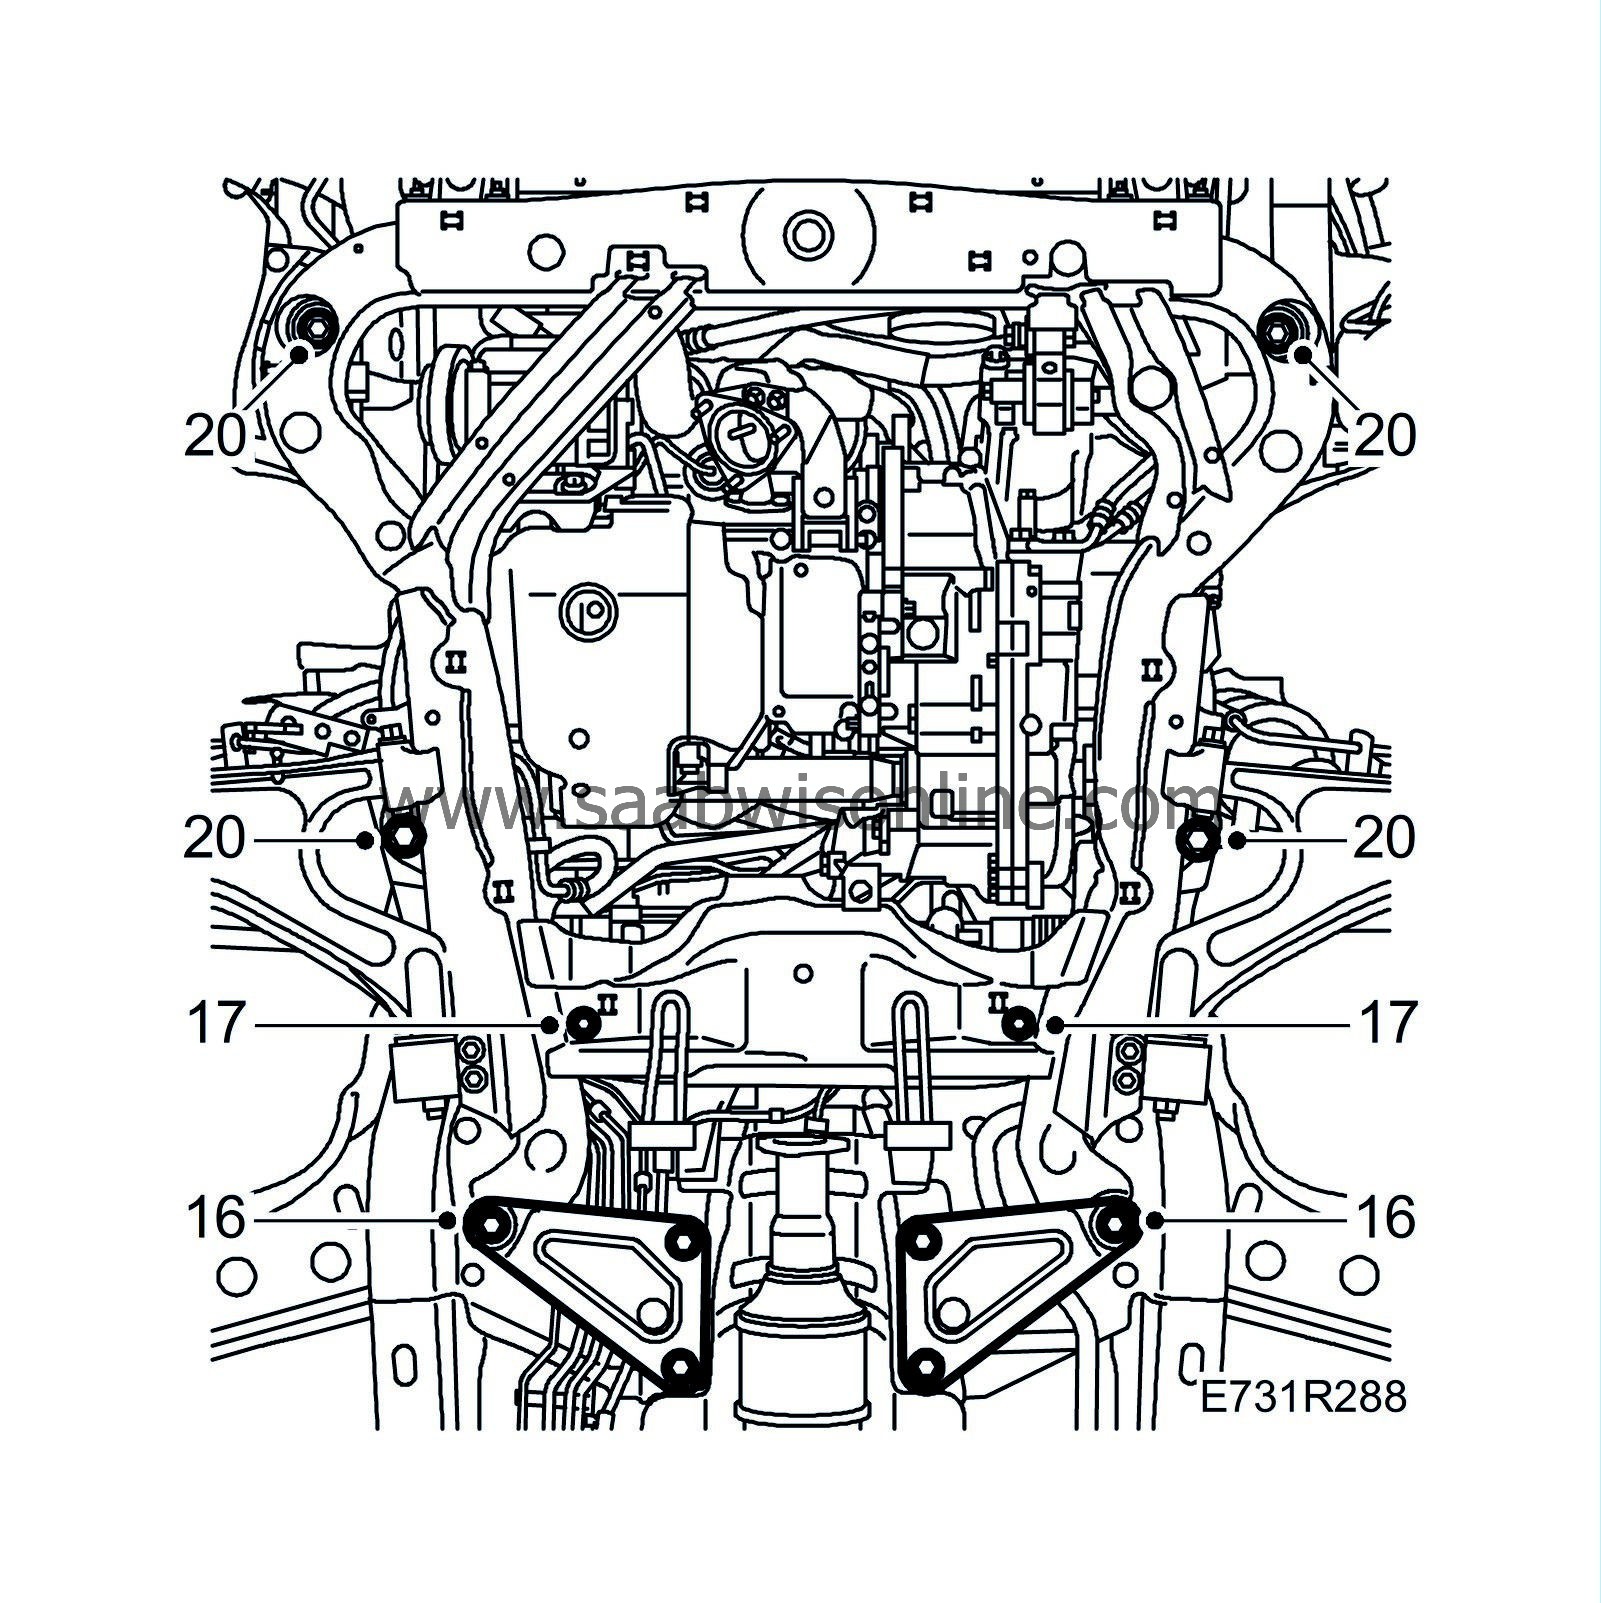
16.
|
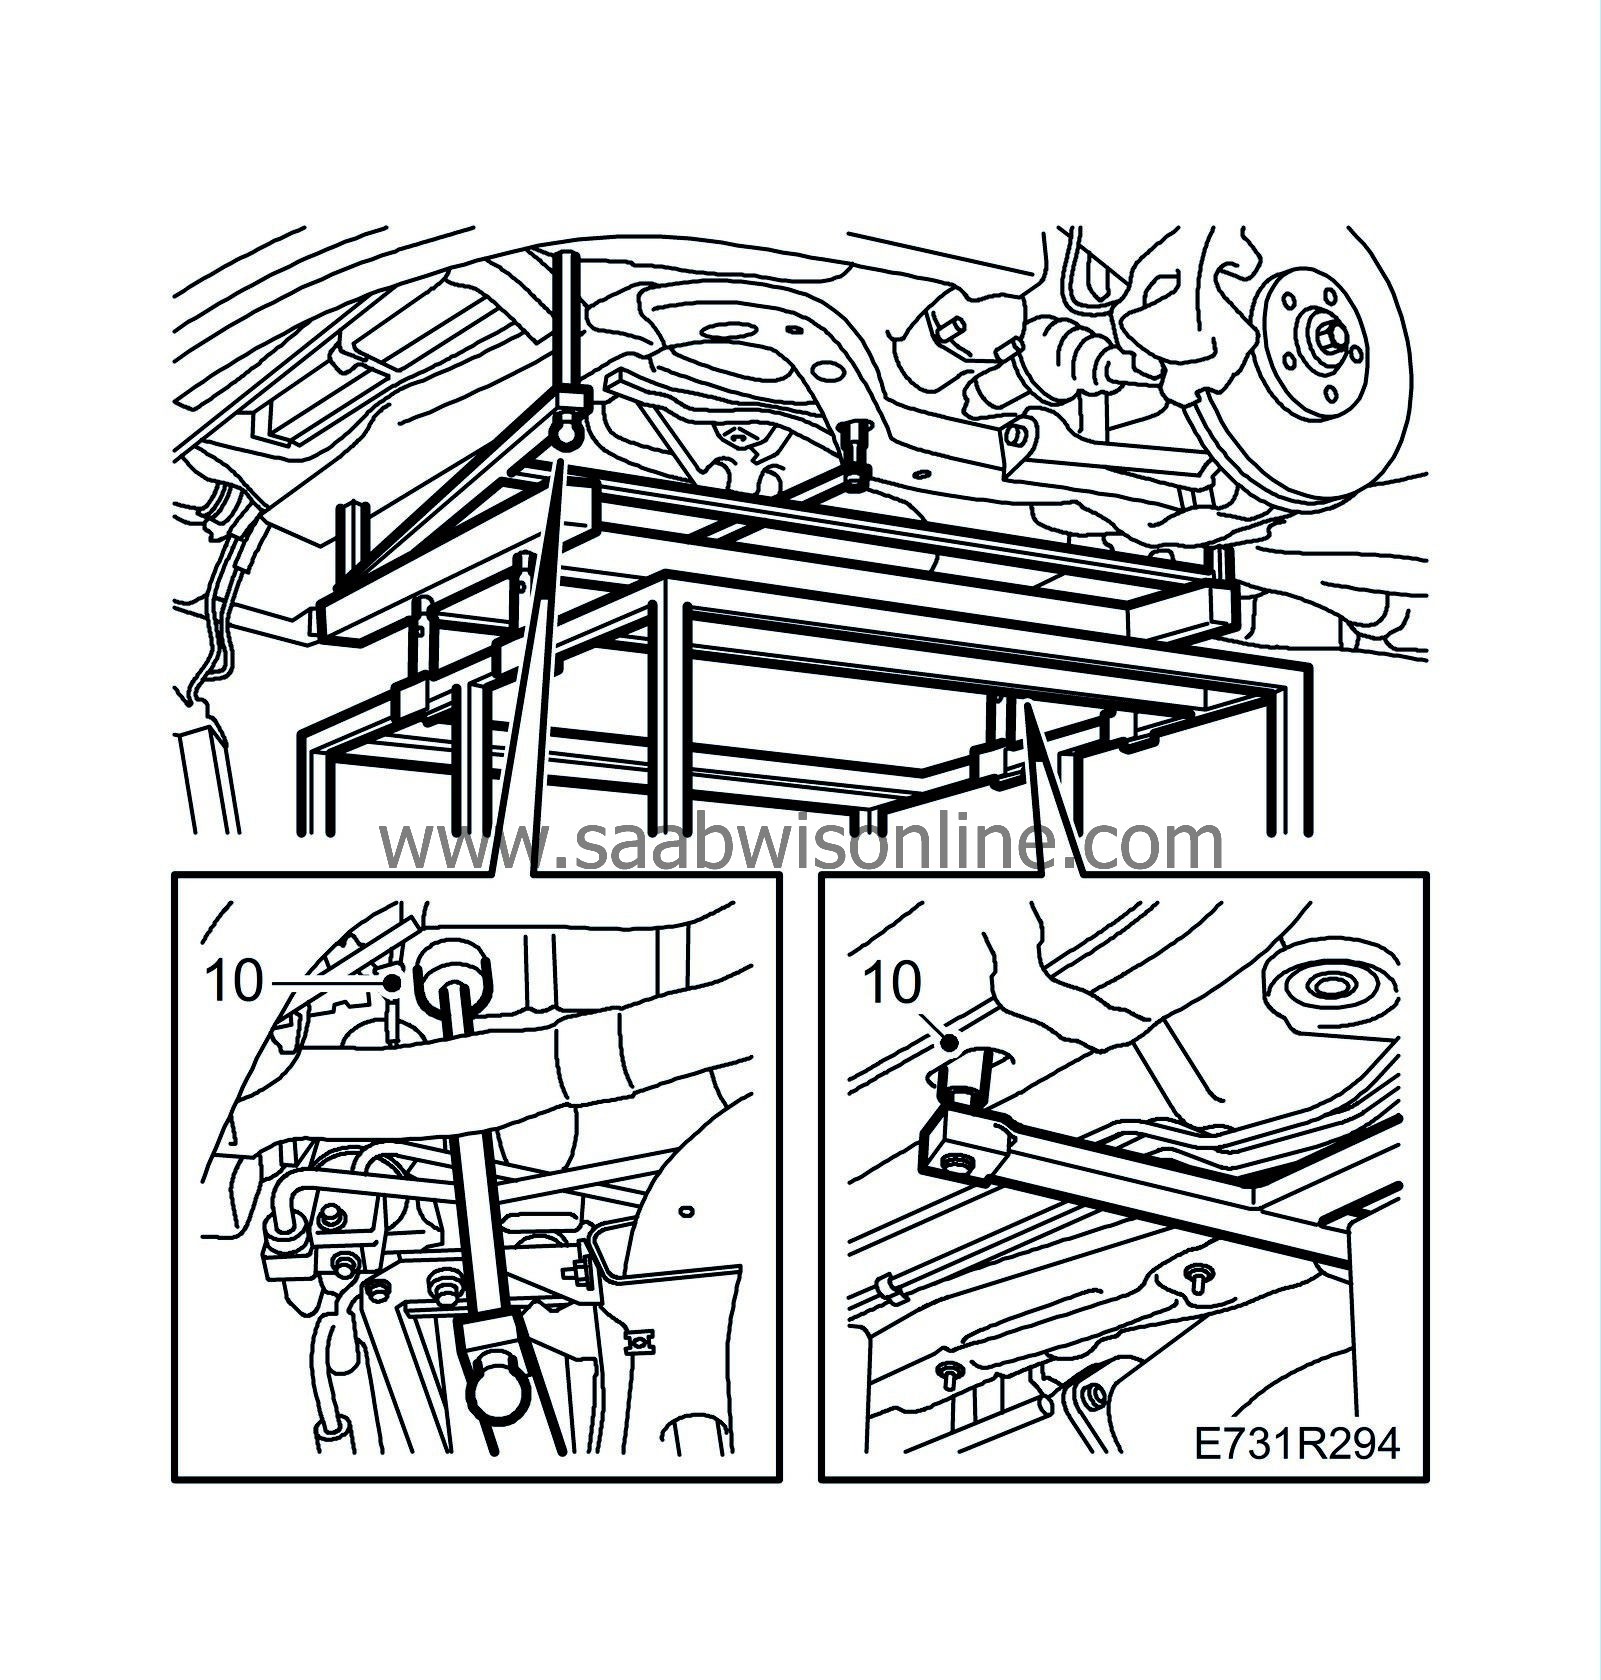
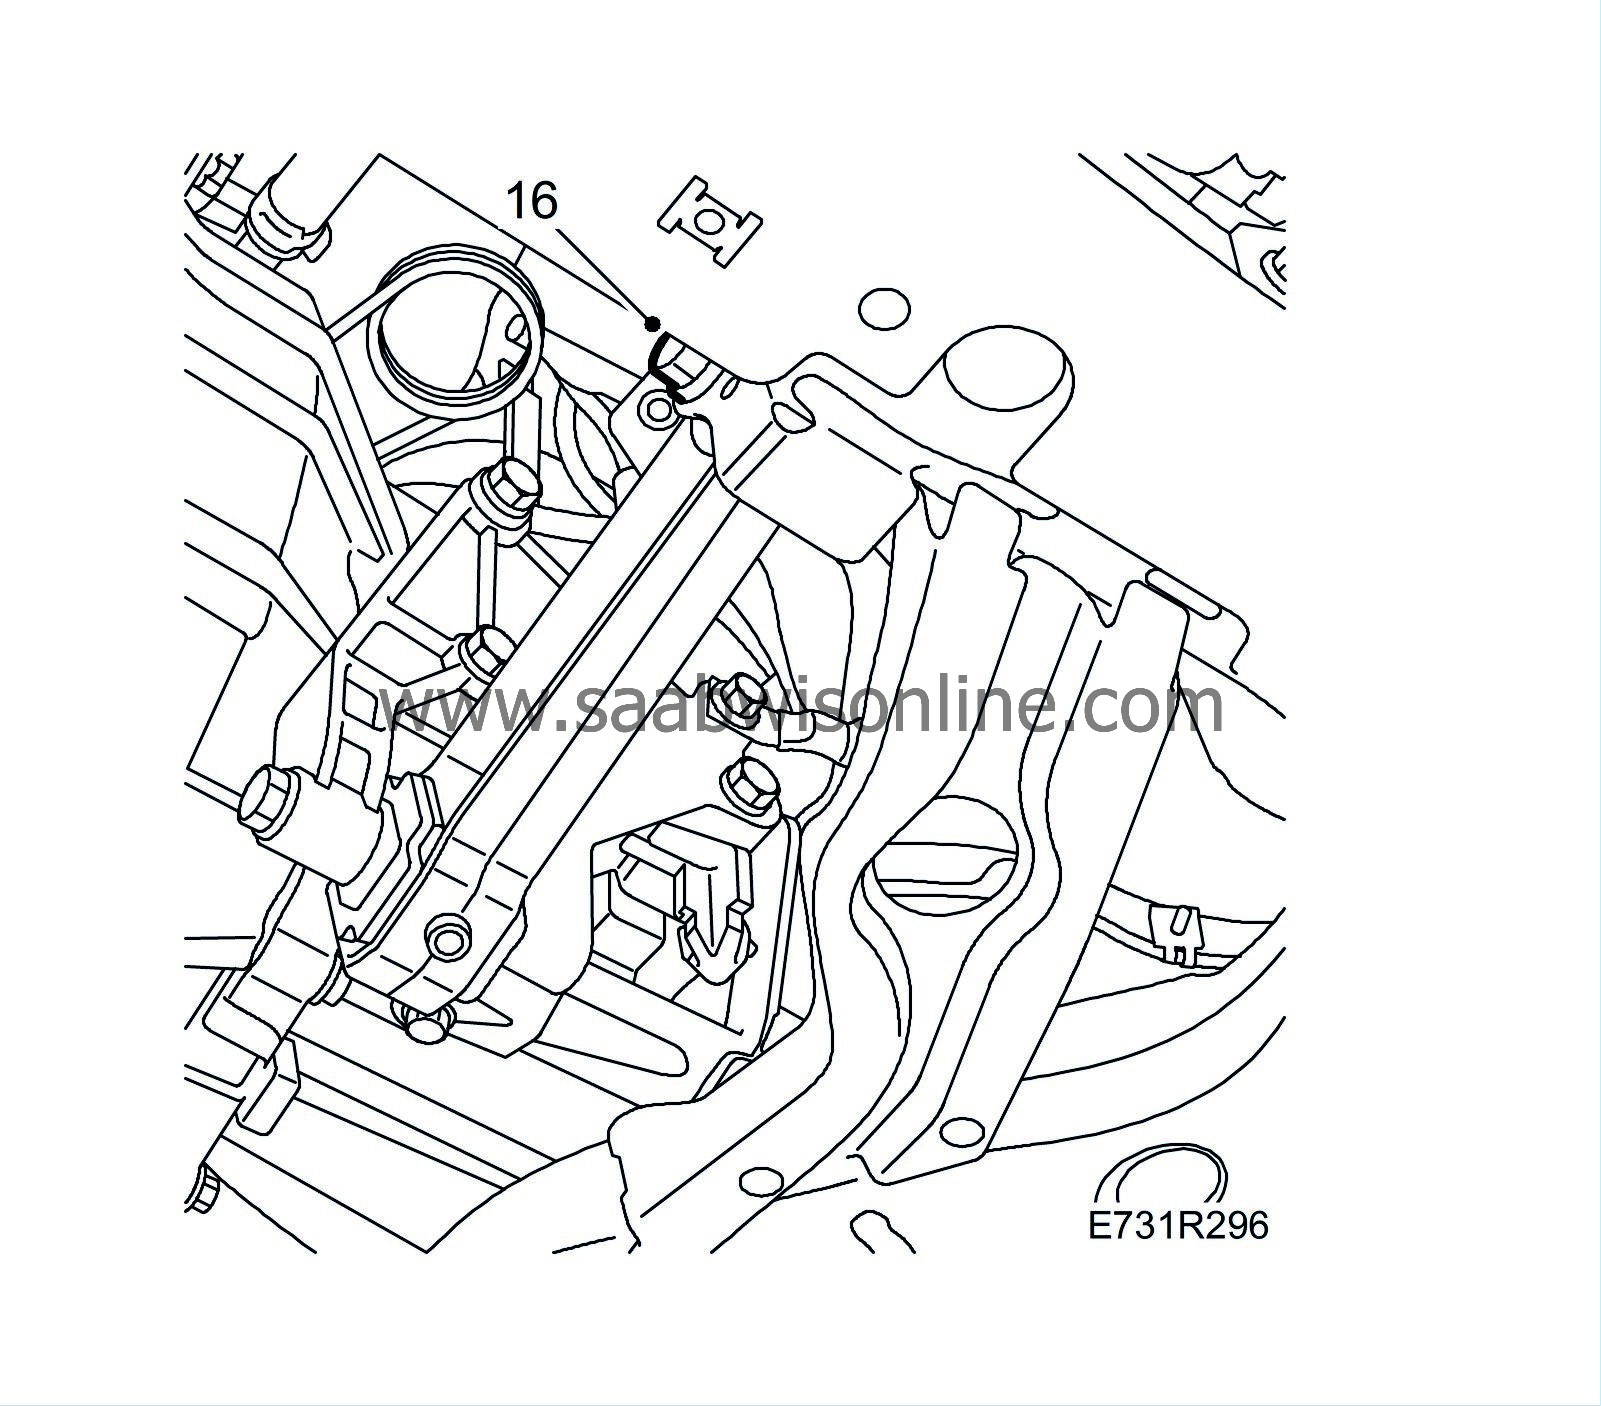
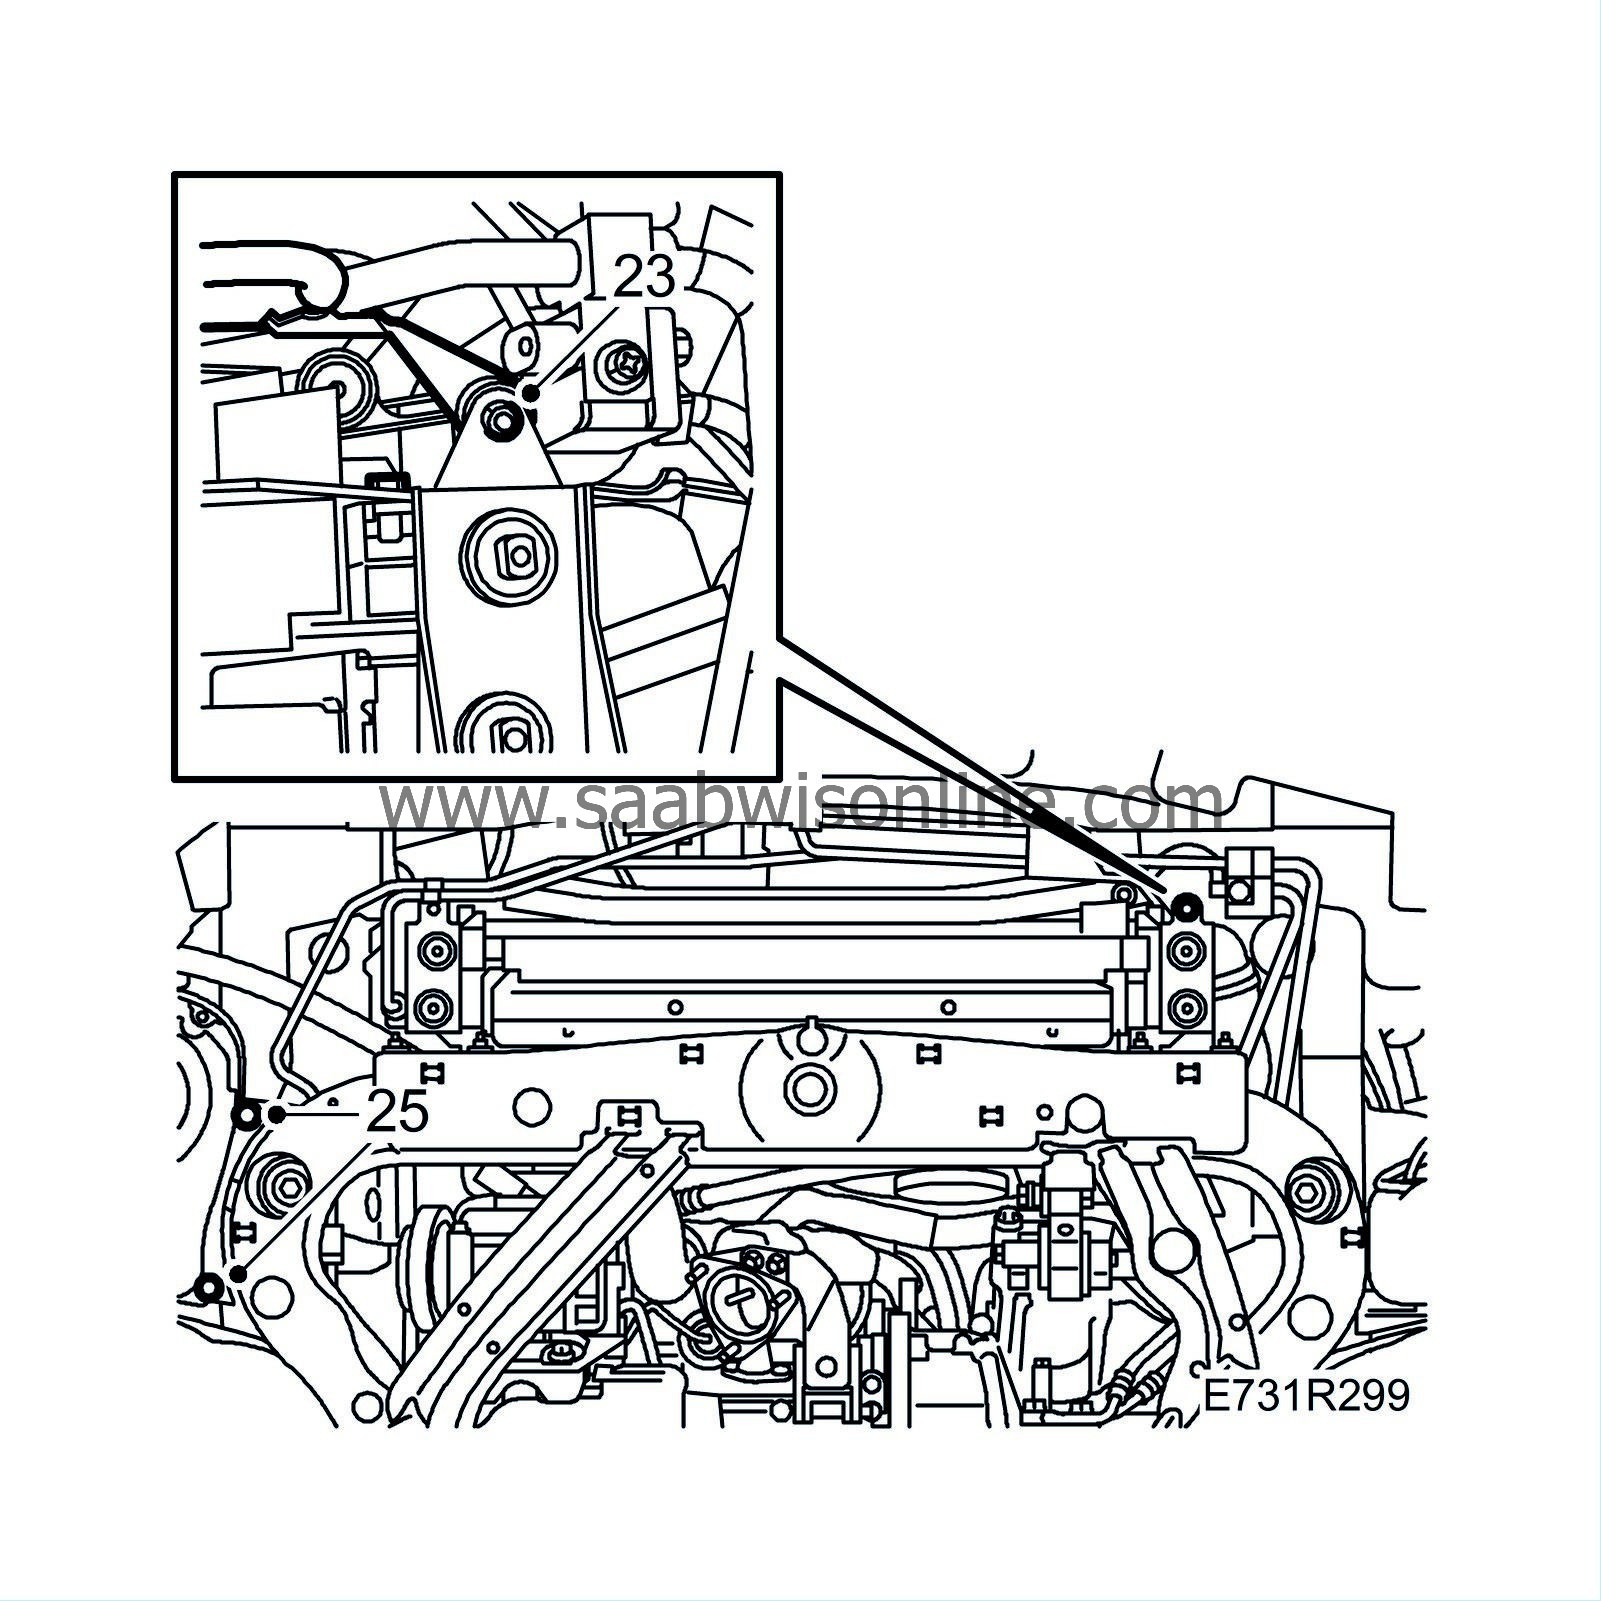
Remove the bolts holding the rear support plates and the rear bolts on the subframe.
|
|
17.
|
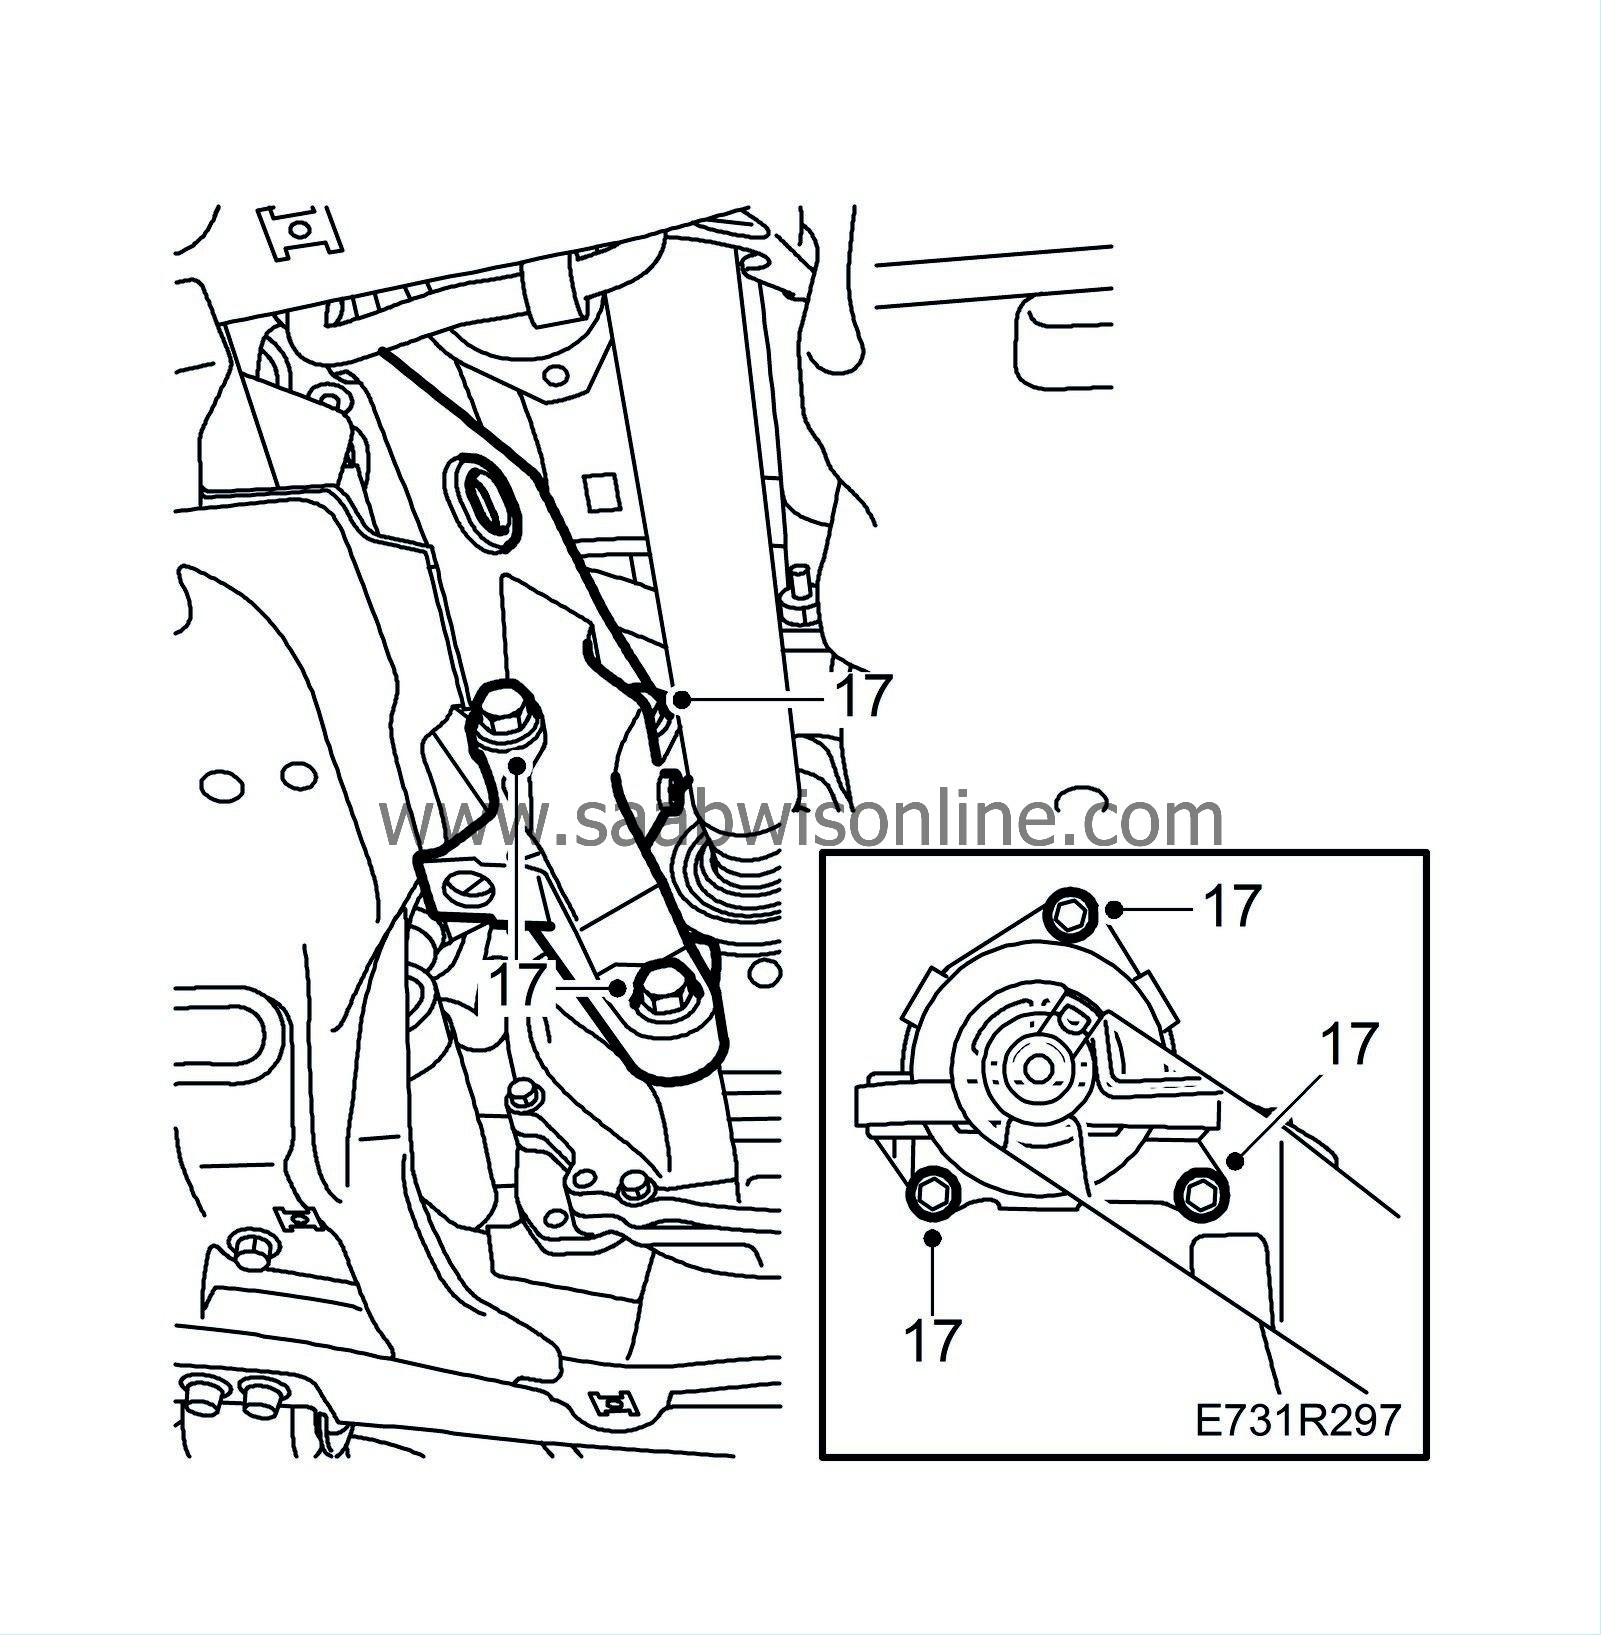
Remove the steering gear bolts.
|
|
18.
|
Separate the pipe for the battery cooling.
|
|
20.
|
Remove the remaining bolts securing the subframe.
|
Note
|
|
Do not get the middle subframe bolts mixed up with the others when refitting (another size and design).
|
|
|
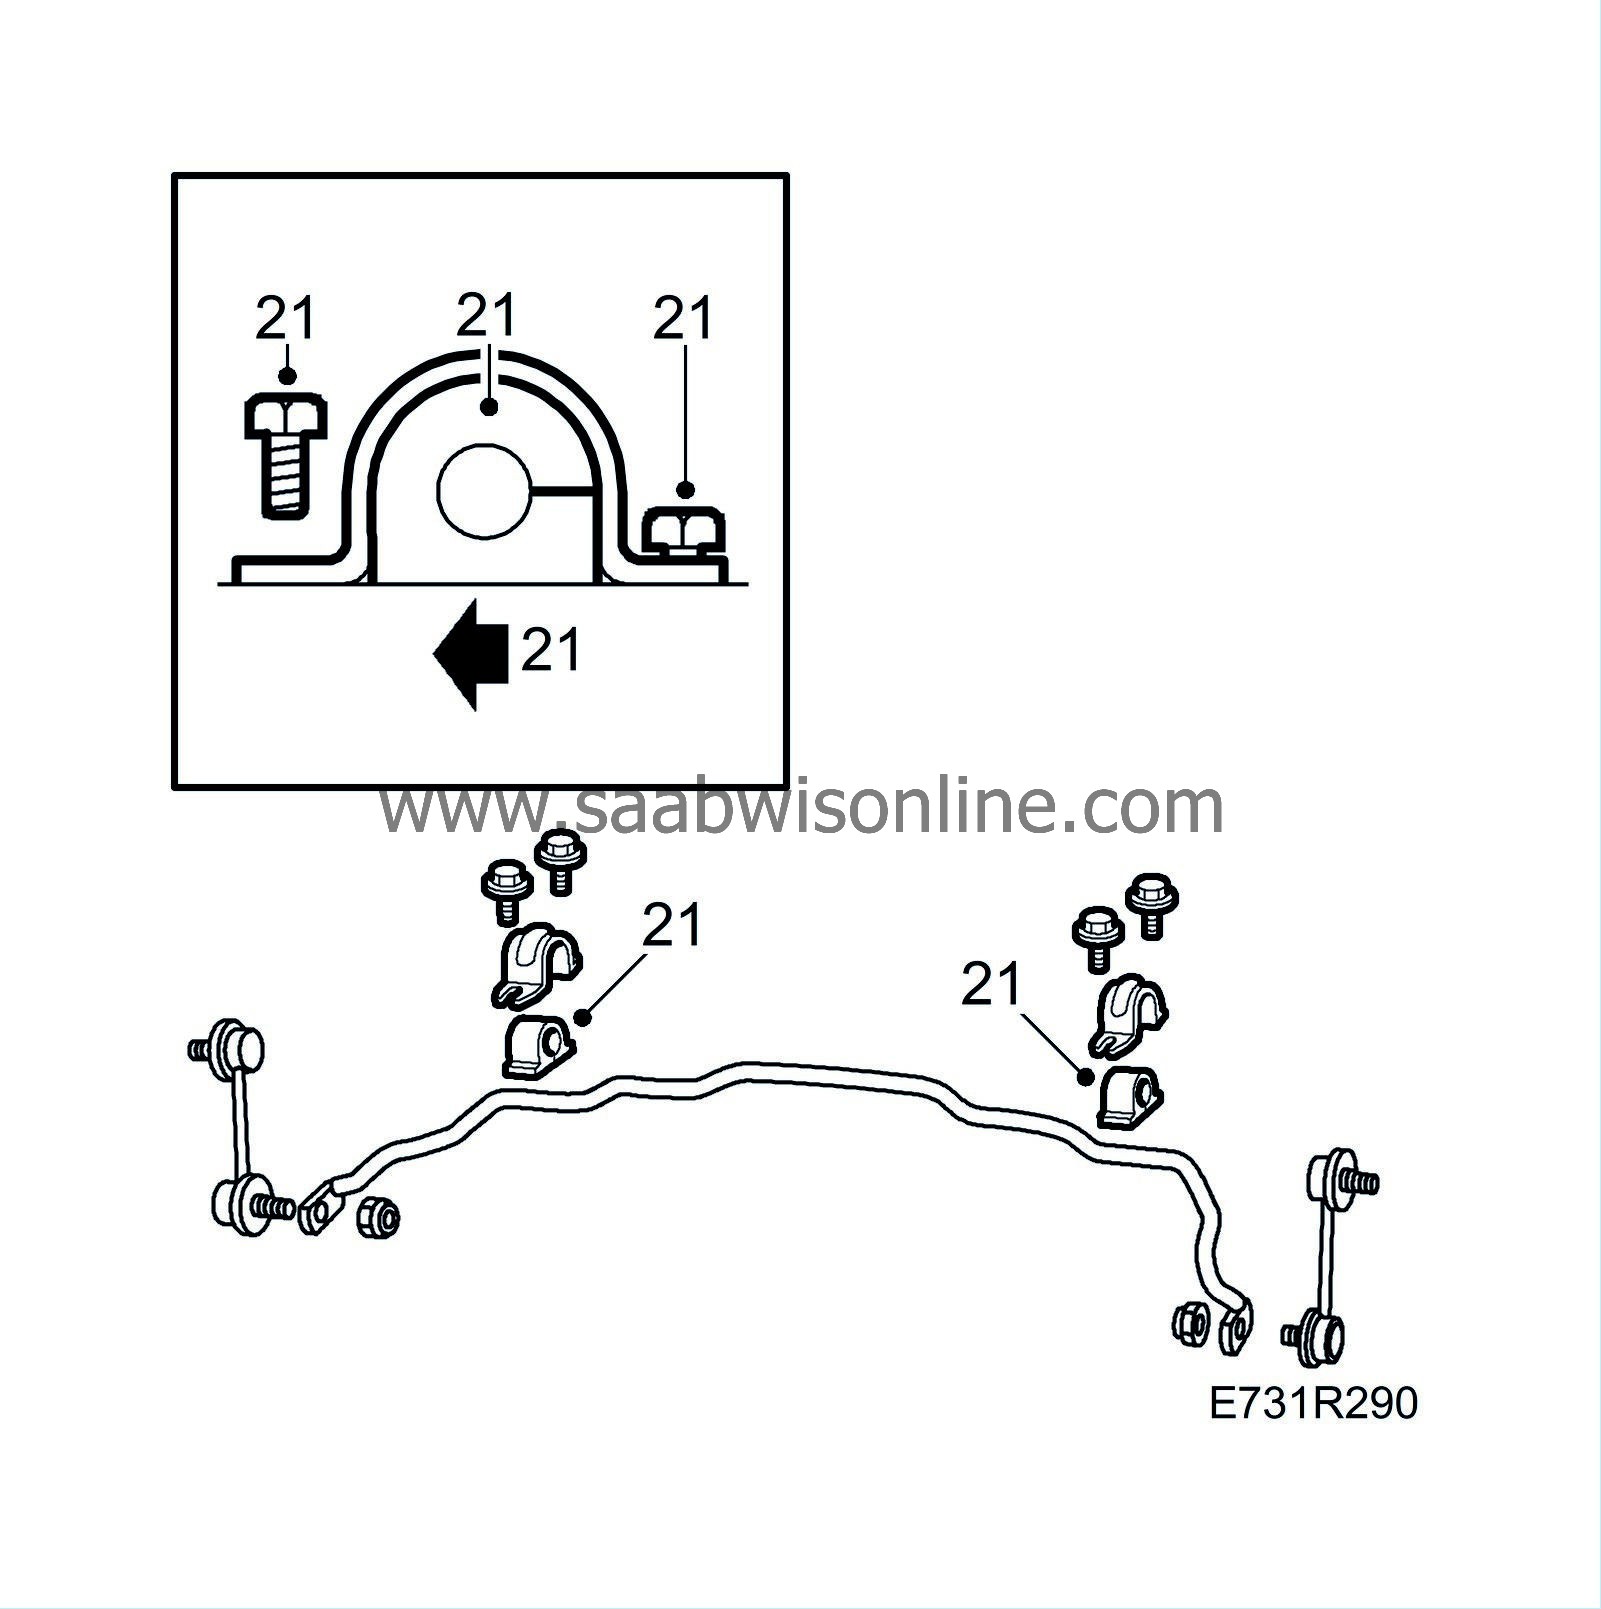
21.
|
Remove the anti-roll bar from the subframe.
|
|
22.
|
Open the clamps securing the power steering pipe and secure the power steering cooling pipe with a cable tie. Detach the A/C pipes from their clips.
|
|
24.
|
Pull away the trolley and lift down the subframe.
|
|
1.
|
Lay the new subframe onto the trolley.
|
|
2.
|
Transfer the AC pipe mountings, power steering pipe and radiator assembly to the new frame.
|
|
3.
|
Make sure the radiator guide pins are fastened correctly in the radiator crossmember.
|
|
4.
|
Place the trolley lift and subframe underneath the car.
|
|
5.
|
Lift the subframe carefully. Make sure the rubber dust excluders on the inner supports do not touch the centre mountings and guide the track rod ends into the steering swivel members.
|
|
6.
|
Do not tighten the anti-roll bar retaining bolts until the subframe is completely raised.

|
|
7.
|
Fit the power steering delivery pipe into the clips.

|
|
8.
|
Guide the radiator guide pins into the subframe. Lubricate with Vaseline to facilitate fitting.
|
|
9.
|
Guide the A/C pipes into their holders on the subframe.
|
|
10.
|
Adjust the position of the subframe so that the bolt holes are in line with the body. There are 2 guide pins on the lifting trolley, front left and rear right, that guide the subframe into the correct position.
|
|
11.
|
Fit the bolts to secure the subframe and the rear support plates. Tighten the bolts just enough so that the subframe does not move out of its position when the lifting trolley and fixture are removed.
|
Note
|
|
Do not get the middle subframe bolts mixed up with the others. The middle bolts have a thinner washer and 20mm head.
|
|
|
12.
|
Move the lifting trolley out of the way.
|
|
13.
|
Tighten the bolts on the subframe.
Tightening torque 100 Nm +45° (74 lbf ft +45°)

|
|
14.
|
Tighten the support plate bolts.
Tightening torque: 63 Nm (46 lbf ft).
|
|
15.
|
Fit the steering gear bolts.
Tightening torque: 90 Nm (66 lbf ft).
|
|
16.
|
Fit and tighten the bolt securing the torque arm to the subframe.
Tightening torque 90 Nm +90° (66 lbf ft +90°)
|
|
17.
|
Cars with automatic gearbox:
|
|
|
•
|
Insert the bolts of the rear engine pad.
|
|
|
•
|
Lower the car and tighten the engine pad bolts from above.
Tightening torque: 24 Nm (18 lbf ft)
|
|
|
•
|
Raise the car and attach the engine bracket to the gearbox.
Tightening torque: 60 Nm (44 lbf ft).
|
|
18.
|
Position the suspension arms on the subframe and fit the bolts for the front and rear attachment points.
|
|
19.
|
Place a jack under the steering swivel member's ball joint and raise until the suspension arm is 1° below the horizontal line.
Alternatively, axle stands or similar can be placed under the steering swivel member's ball joint and the car lowered until the suspension arm is 1° below the horizontal line.
|
|
20.
|
Tighten the front suspension arm mounting to the subframe.
Tightening torque: 110 Nm +90° (81 lbf ft +90°).
|
|
21.
|
Tighten the rear suspension arm mounting to the subframe.
Tightening torque: 120 Nm +90° (88 lbf ft +90°).
|
|
22.
|
Remove the strap holding up the radiator assembly.
|
|
23.
|
Fit the rubber mountings on the power steering pipe.
|
|
24.
|
Connect the pipe for battery cooling.
|
|
25.
|
Fit the air cleaner casing.
|
|
27.
|
Lower the car to the floor.
|
|
28.
|
MAN:
Tighten the bolts on the rear engine pad from the engine bay side starting with the rear bolt.
Tightening torque: 24 Nm (18 lbf ft)

AUT:
Fit the rear engine pad nut.
Tightening torque: 47 Nm (35 lbf ft).
|
|
30.
|
Undo the bolt for the front torque arm on the gearbox, centre the rubber pad in the rod and tighten.
Tightening torque: 70 Nm +90° (52 lbf ft +90°).
|
|
31.
|
Cars with xenon headlamps:
Fit the level sensor for the xenon headlamps.

|
|
32.
|
Fit the side covers in the wheel housings.
|
|
33.
|
Fit the rear and front lower engine covers.

|
|
34.
|
Fit the front wheels. They must be suspended freely when tightening, see
Wheels
.
|
|
35.
|
Lower the car to the floor.
|


