Replacing the Passenger Presence System
|
|
Replacing the Passenger Presence System
|
|
2.
|
Manual front seat:
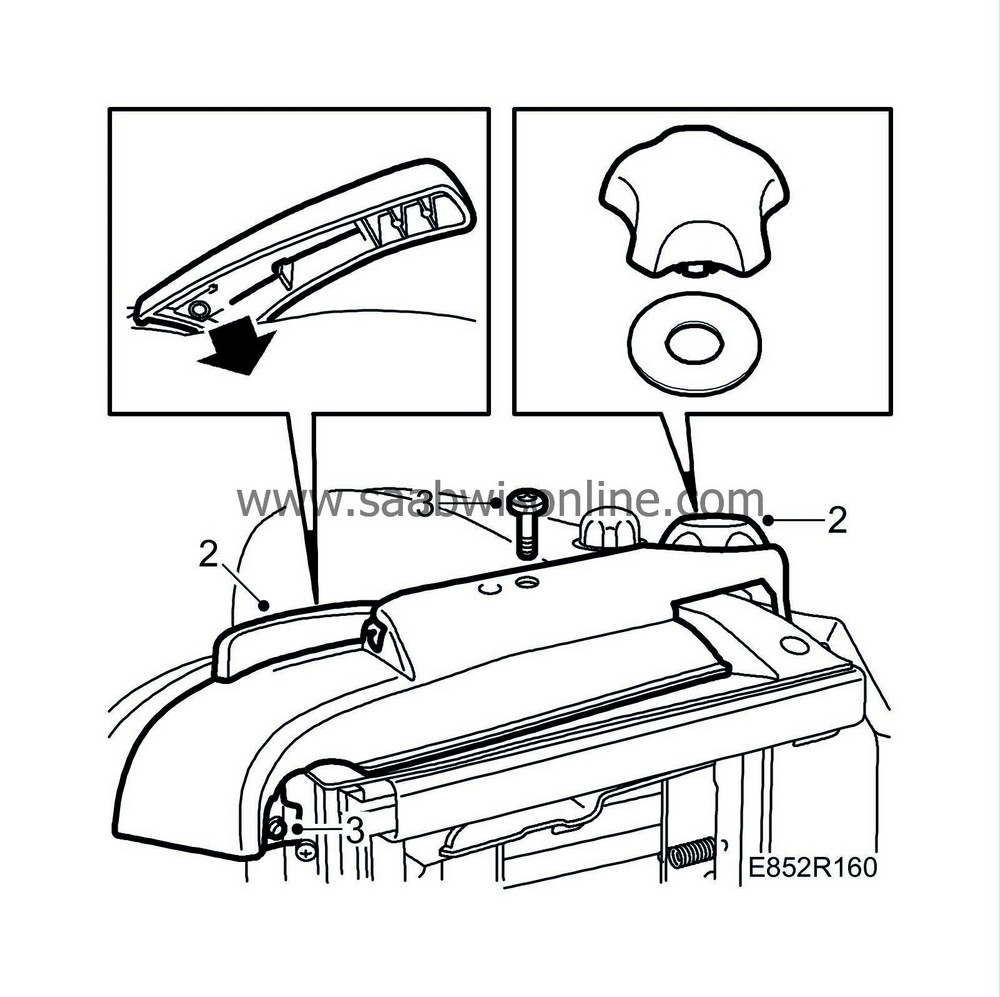
Remove the height adjustment lever and the backrest adjustment knob.
|
Note
|
|
When removing the adjustment knob the backrest rake axle can come out with the knob.
|
|
|
3.
|
Remove the upper seat cowl, 2 covers and 3 screws.
Power seat:
The front bolt has a protective cover on its tip. Keep this cover safe as it must be fitted on the bolt to prevent chafing of the electrical leads.
Pull the cowl backwards and bend up the rear edge, then pull it forwards.
|
|
4.
|
Electrically adjustable front seat:
unplug the connector for the switch and any memory buttons.

|
|
5.
|
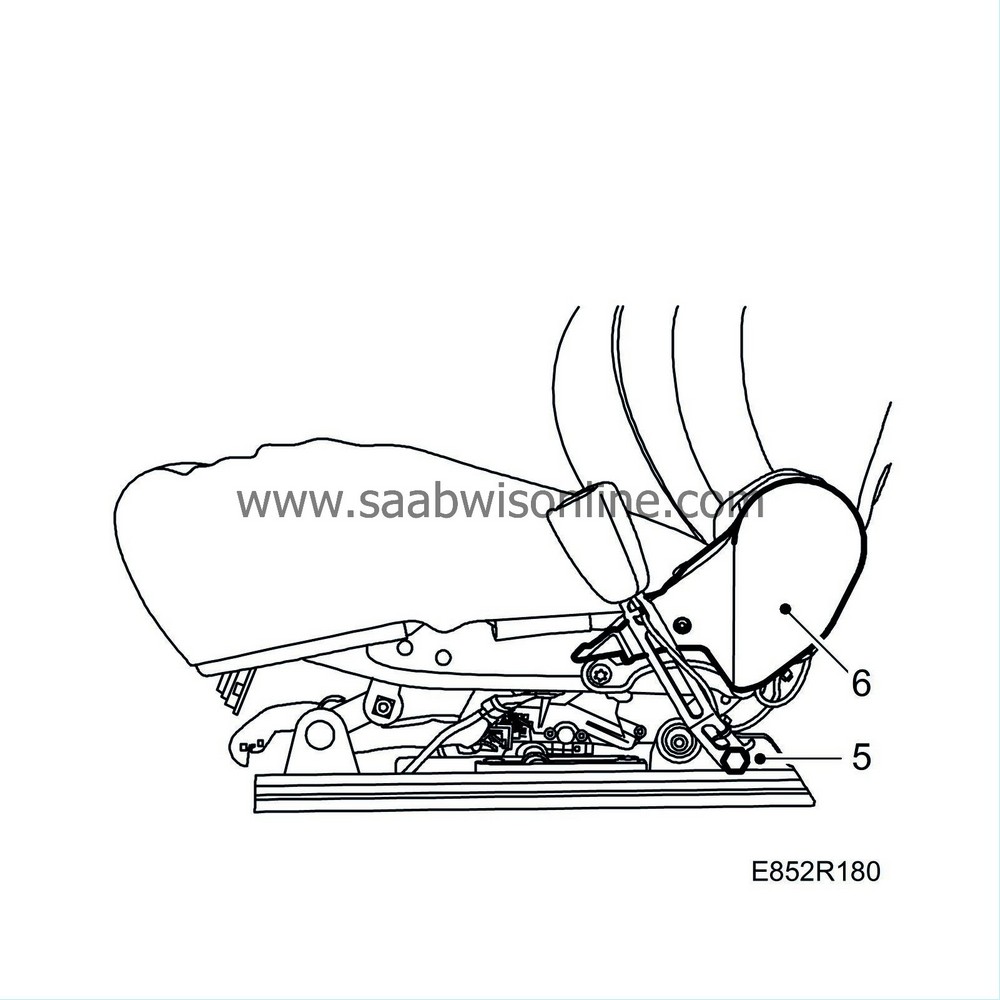
Remove the seatbelt mounting, 1 bolt.
|
|
6.
|
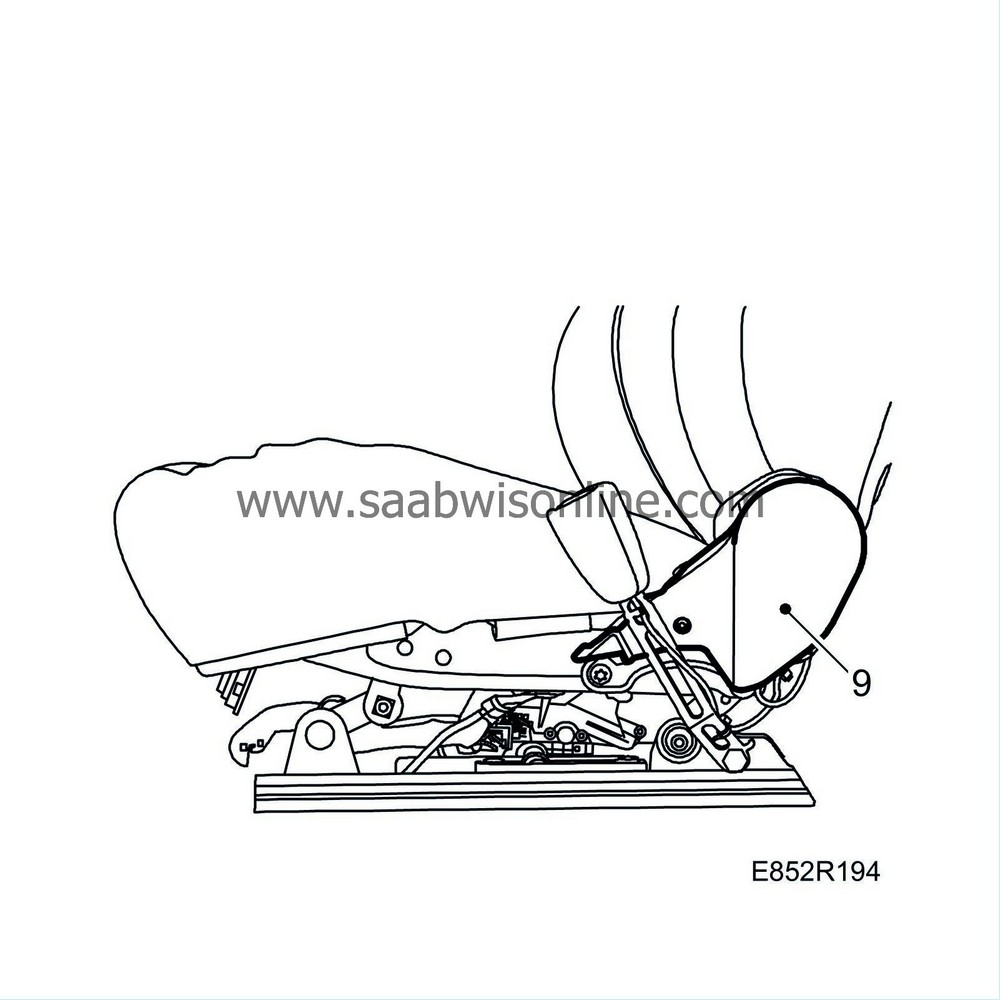
Remove the plastic cover on each side of the backrest joint.
These plastic covers are for holes used to reach the bolts securing the rear edge of the seat.

|
|
7.
|
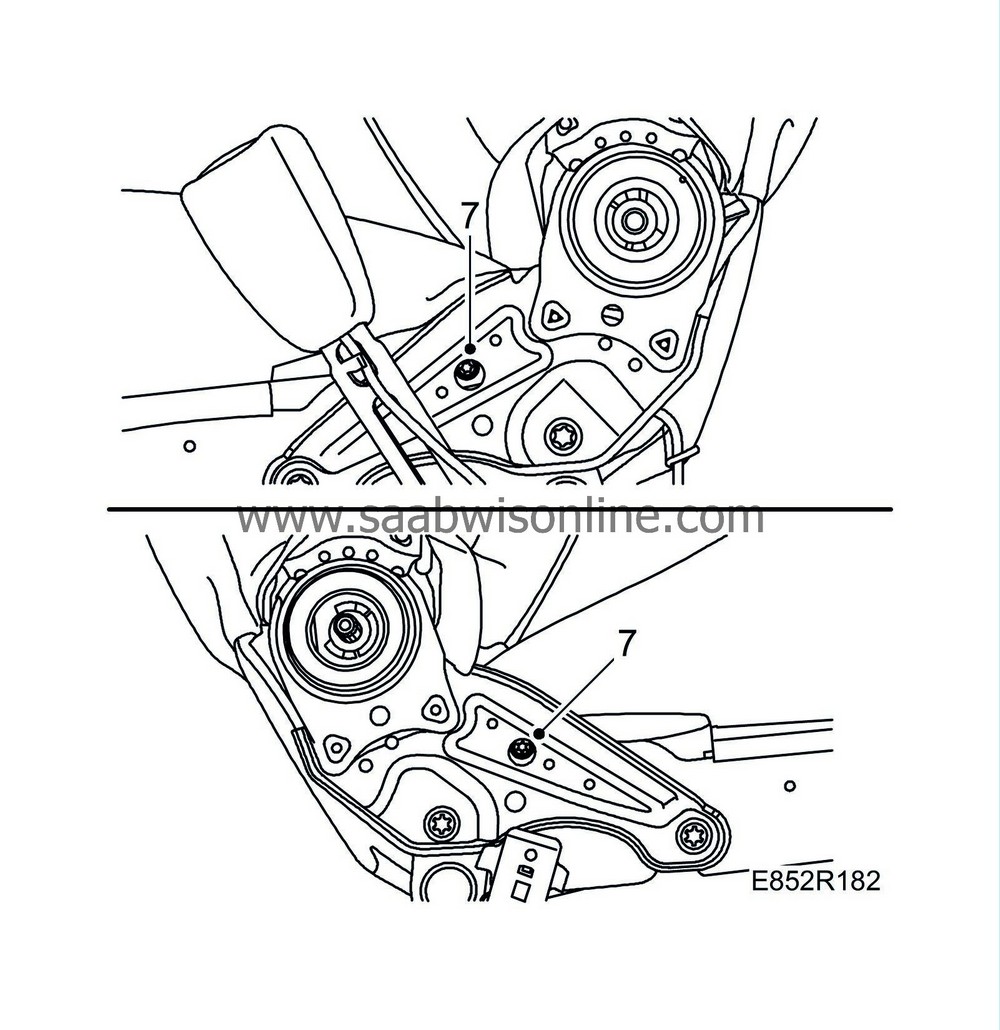
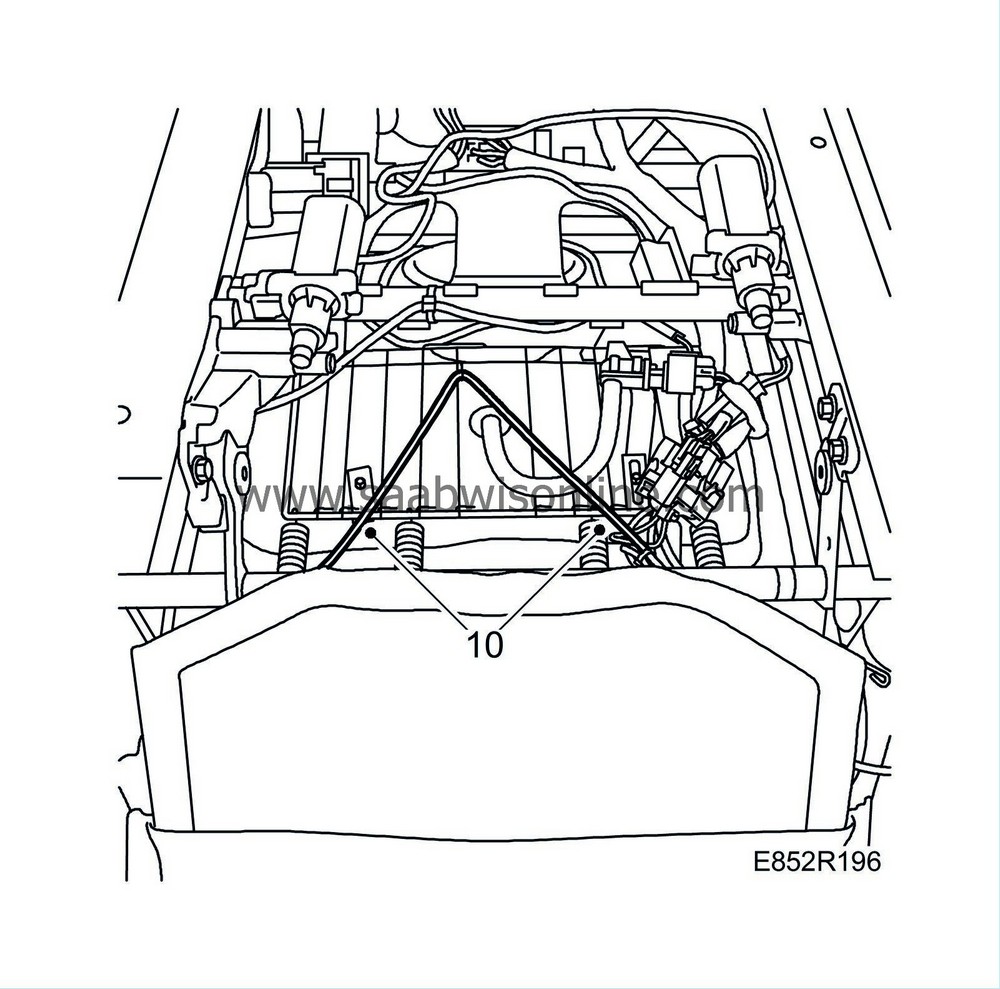
Undo the seat cushion at the rear, 2 screws.
|
|
8.
|
Undo the seat cushion at the front, 2 screws.

|
|
9.
|
Remove the PPS unit. Put the wiring aside.
|
|
10.
|
Undo the rubber cord holding the bottom of the backrest upholstery.
|
Note
|
|
The front of the seat cushion on ventilated seats must be lifted up so that the fan motor goes free from the seat frame.
|

|
|
11.
|
Cut off any cable ties. Unplug and mark the connectors.
Remove the seat cushion.
|
|
12.
|
Release the upholstery strip at the rear of the seat base.

|
|
13.
|
Release the upholstery strip along the edges of the seat base.
|
|
14.
|
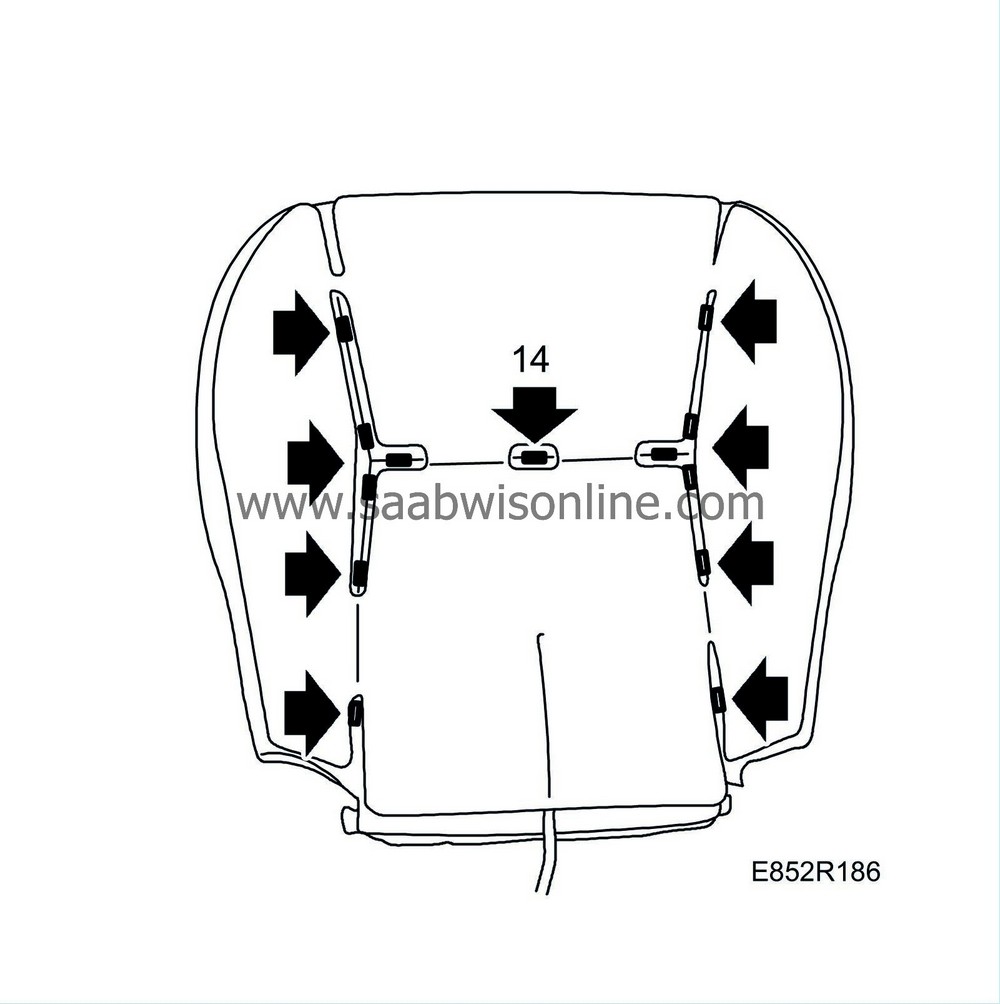
Cut the staples securing the seat upholstery to the foam cushion.
|
|
15.
|
Remove the seat upholstery.
|
|
16.
|
Remove the hooks and lift away the seat base.

|
 Warning
|
|
All parts included in the spare parts kit are calibrated to one another. All of the parts must therefore be installed on the seat in order for the PPS system to be correctly calibrated.
|
|
|
|
|
|
|
|
1.A.
|
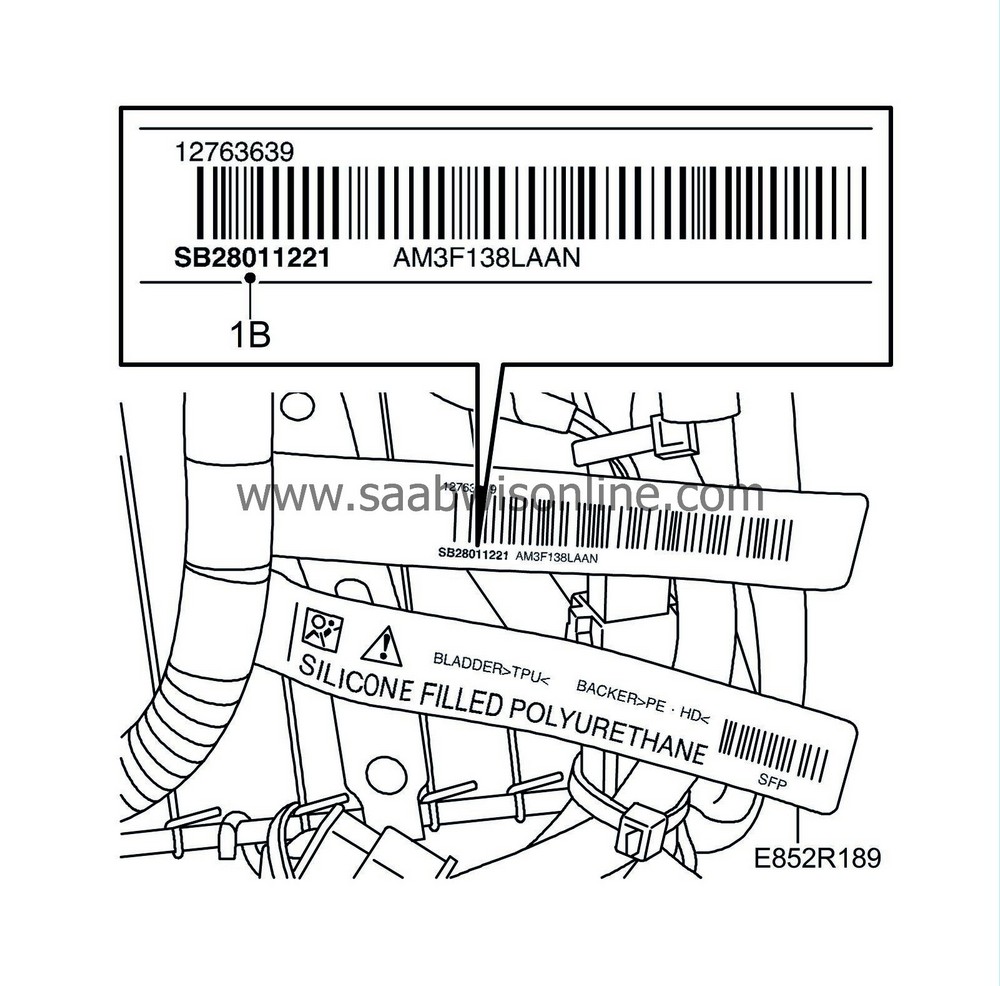
The control module's check number must match the ECU number on the foam cushion label.

|
|
|
1.B.
|
The pressure sensor's PAD no. must match the foam cushion label.
|
|
2.
|
Fit the foam cushion on the seat base.

|
|
3.
|
Fit the seat upholstery over the foam cushion.
|
|
5.
|
Replace the strip along the edge of the seat base.
Check that the upholstery fits correctly.
|
|
6.
|
Align the seat and the PPS control module in position. Fit the screws in the front edge without tightening. Plug in the connector.

|
|
7.
|
Fit the screws in the back of the seat cushion, 2 screws.

|
|
8.
|
Tighten the screws in the front of the seat cushion.
|
|
9.
|
Refit the plastic cover on each side of the backrest joint.

|
|
10.
|
Plug in the connector and fit new cable ties.
|
|
11.
|
Fasten the rubber cord on the bottom of the backrest upholstery under the seat cushion.
|
|
12.
|
Fit the seatbelt mounting, 1 bolt.
Tightening torque 33 Nm (24.4 lbf ft)
|
|
13.
|
On electrically adjustable front seats, first plug in the connector to the switch and to the memory buttons, if any, on the upper seat cowl.

|
|
14.
|
Refit the upper seat cowl by slipping it into the track provided and pressing it down at the back.
Fasten the seat cowl, 3 screws and 2 covers.

|
Important
|
|
Electrically adjustable seat:
Fit the protection on the front bolt.
|
|
|
|
|
15.
|
Manual front seat:
Fit the height adjustment lever and backrest adjustment knob.
|
Note
|
|
If required, removing the backrest upholstery can make it easier to position the backrest rake axle. Check that the backrest upholstery is not pinched between the cowl and the backrest. The upholstery should lie over the axle.
|
|
|
17.
|
Calibrate as follows:
|
|
|
•
|
Sit in the seat and press down the cushion.
|


