PRE-RELEASE
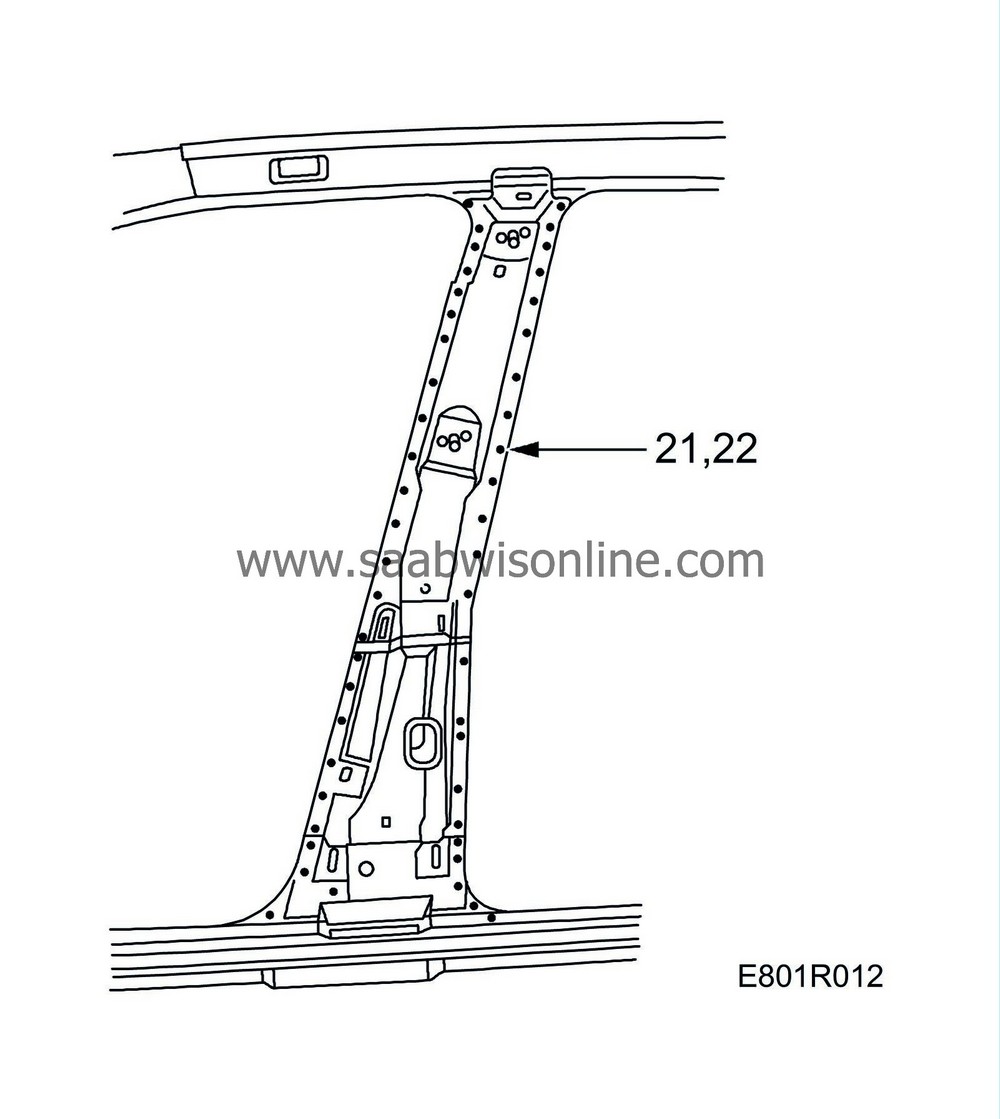
B-pillar
| B-pillar |
Certain weld joints on the car may be MIG brazed whereby the filler material is bronze rod. The characteristic sign of MIG brazing is that the joint is gold coloured. MIG brazing must always be replaced with new MIG brazing.
|
|||||||
| To remove |
| 1. |
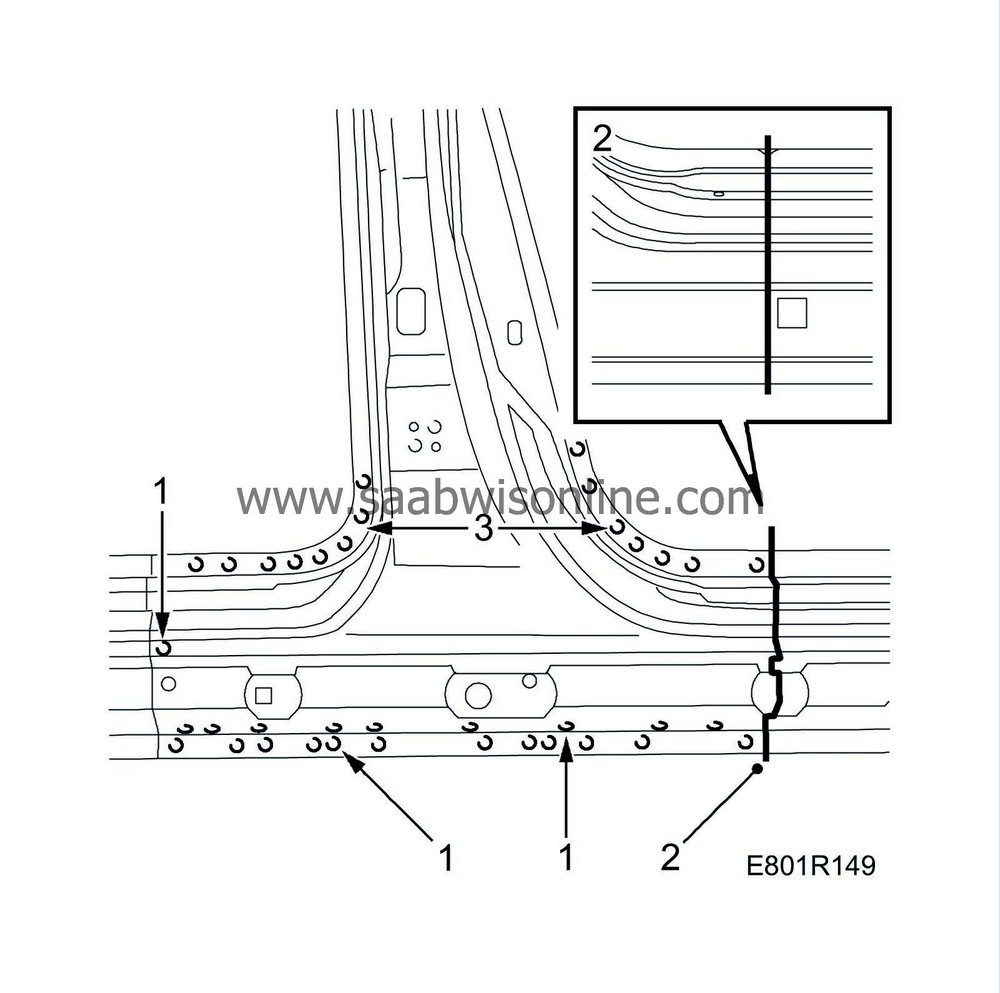
Drill out the lower spot welds under the sill and the spot welds in the rear door frame sill joint. Drill through one layer of metal only.
|
|
| 2. |
Cut the outer sill panel in the front door frame. The sill may be cut in the centre of the rear measuring point or max. 150mm in front of the rear measuring point.
|
|
| 3. |
Drill out the spot welds in the sill and the bottom section of the B-pillar.
|
|
| 4. |
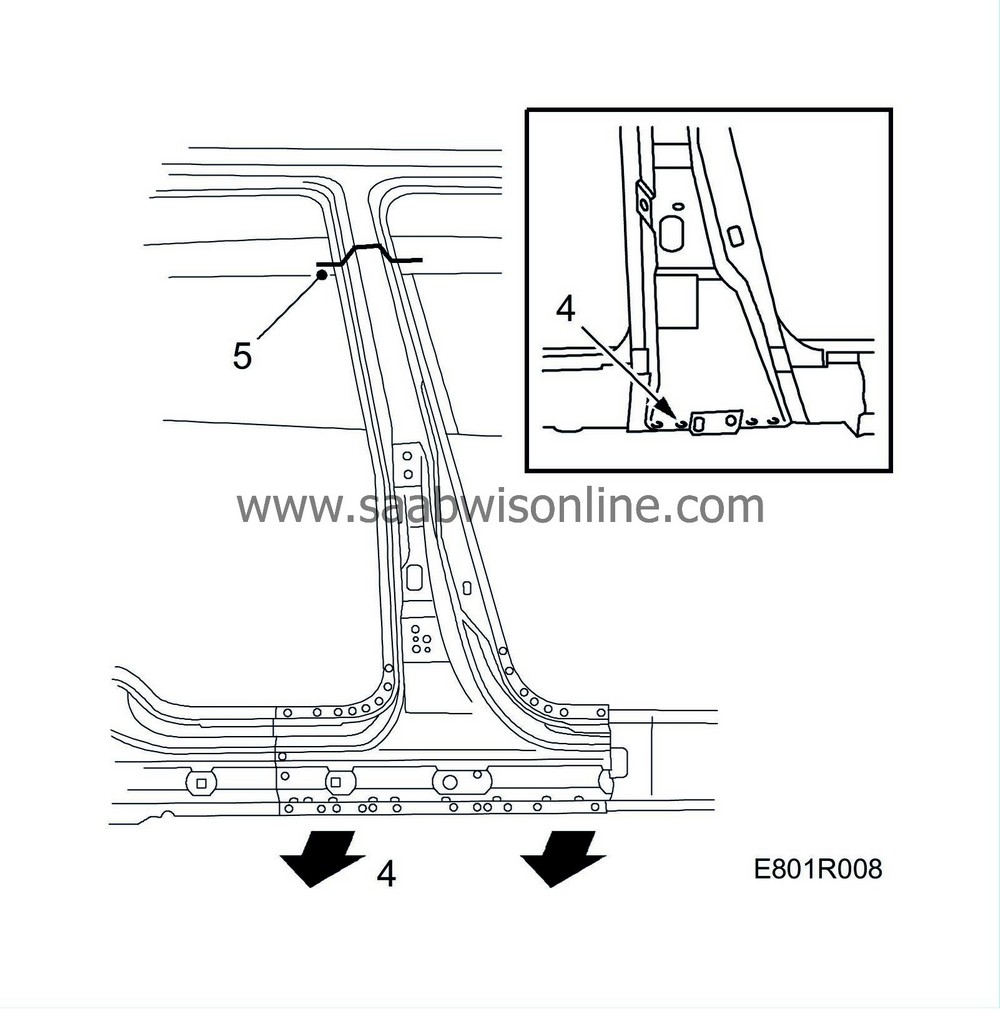
Bend out the bottom section of the sill panel and drill out the spot welds in the B-pillar reinforcement. Drill through one layer of metal only.
|
|
| 5. |
Cut the whole B-pillar at the upper measuring point. Remove the B-pillar.
|
|
| 6. |
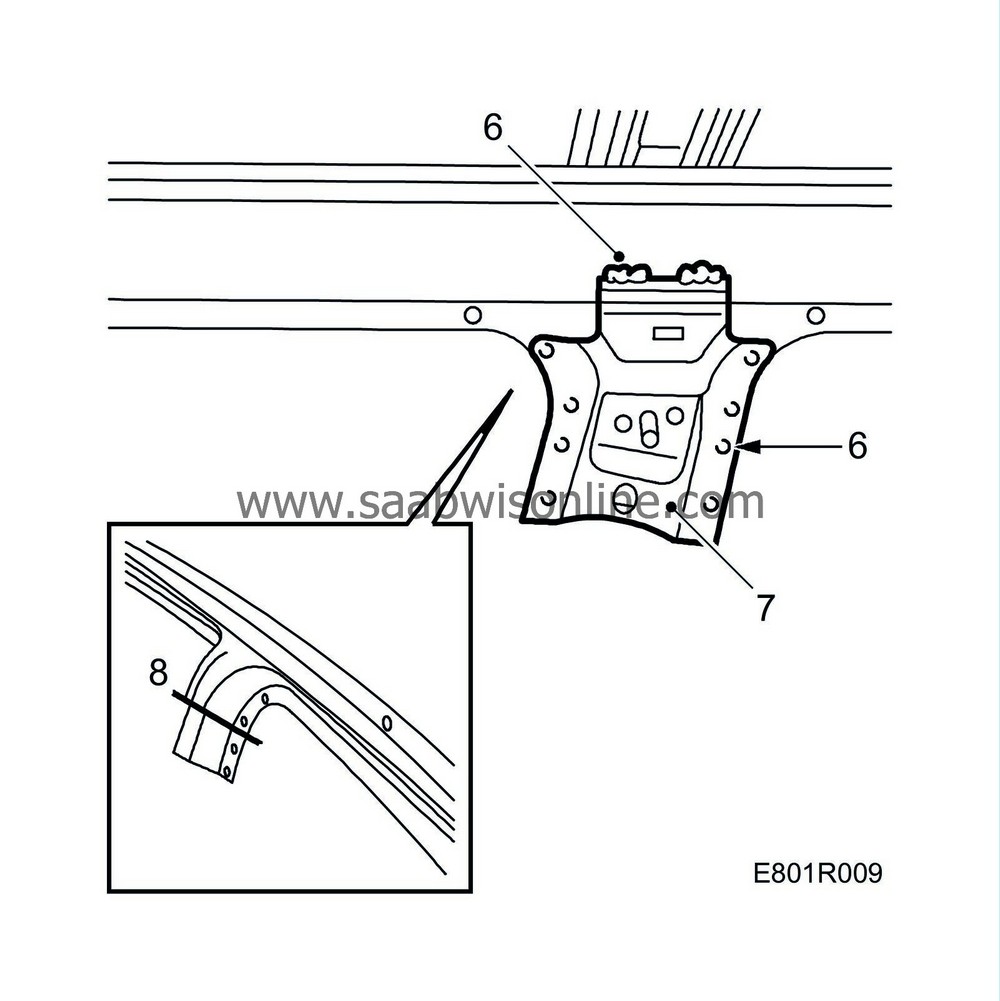
Drill out the spot-welds and grind the welds for the inner reinforcement in the remaining section to the roof. Note that the seam welds may be MIG brazed.
|
|
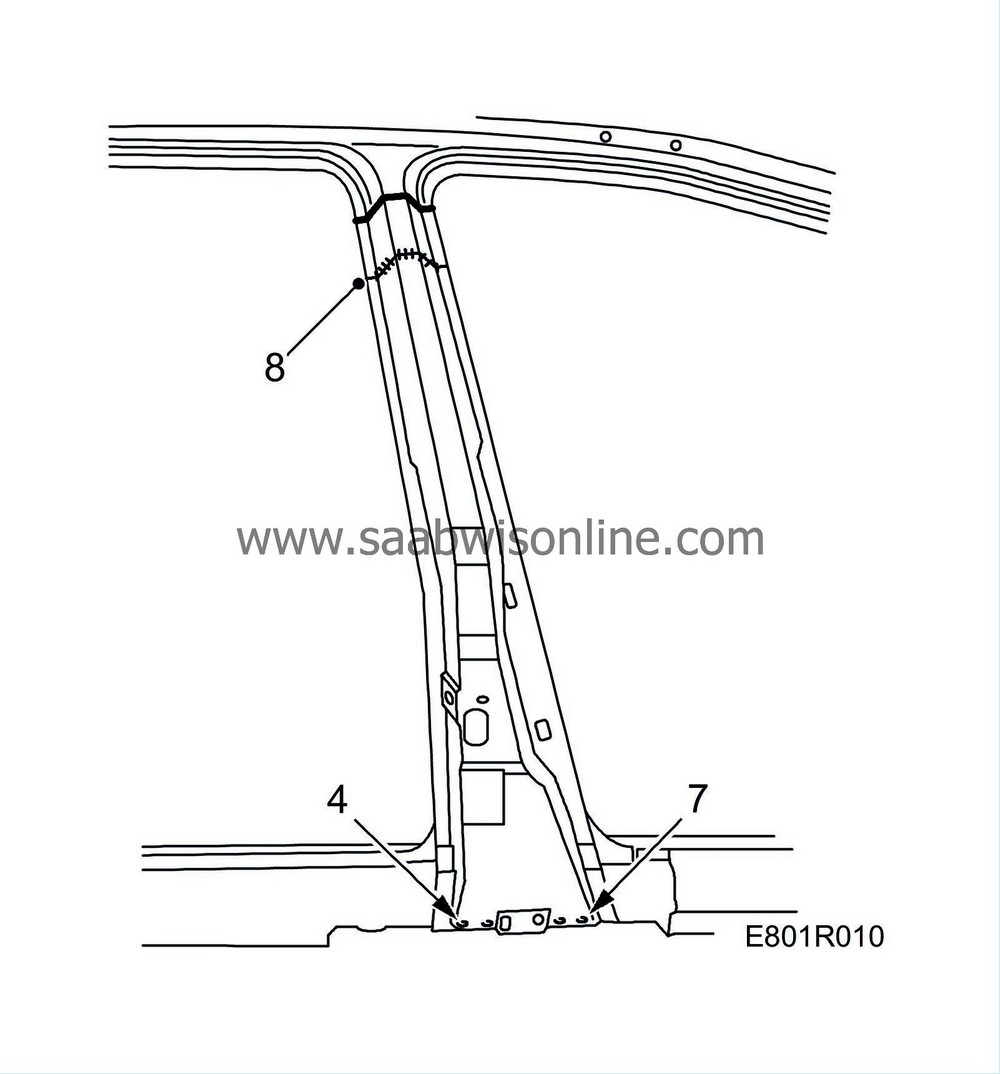
| 7. |
Knock loose the reinforcement.
|
|
| 8. |
Cut the outer panel 40mm from the joint in the remaining section. Drill out the spot welds and knock away the panel. Do not damage the panel underneath.
|
|
| To fit |
| 1. |
Cut the reinforcement roughly so that it overlaps the joint by about three centimetres.
|
|
| 2. |
Align the reinforcement and secure it with several welding clamps in the lower reinforcement.
|
|
| 3. |
Cut the reinforcement and the existing reinforcement on the body together so that the joint can be butt welded.
|
|
| 4. |
Drill 4 holes in the lower section for plug welding.
|
|
| 5. |
Grind away the primer and apply welding primer to the surfaces to be plug welded.
|
|
| 6. |
Align the reinforcement against the lower reinforcement and secure it with several welding clamps.
|
|
| 7. |
Plug weld the bottom edge of the reinforcement.
|
|
| 8. |
All-weld the joint.
|
|
| 9. |
Grind the welds so that the outer panel fits over the reinforcement.
|
|
| 10. |
Cut the outer B-pillar panel roughly from the spare part.
|
|
| 11. |
Position the outer panel and mark the joints.
|
|
| 12. |
Cut the outer panel at the marks.
|
|
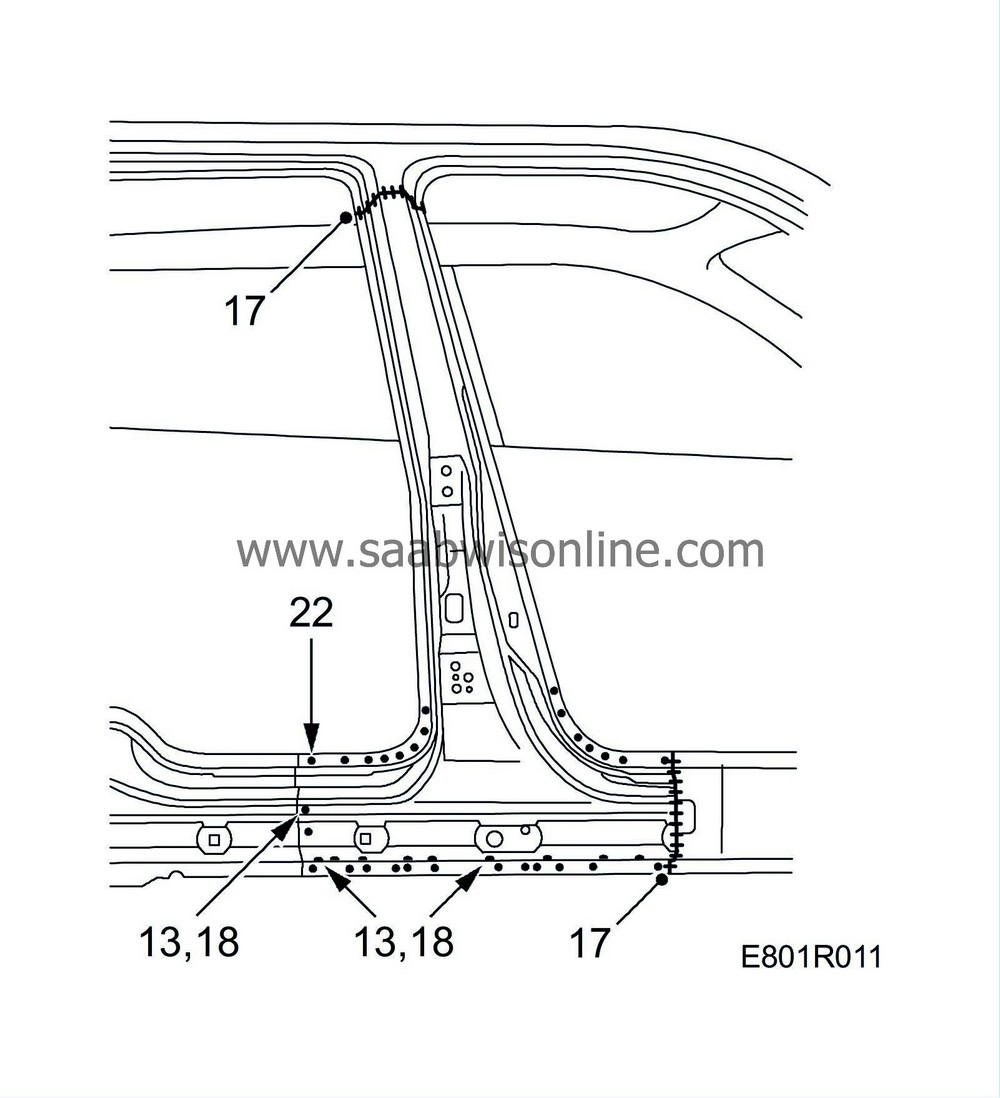
| 13. |
Drill holes in the lower edge and the rear door frame joint for plug welding.
|
|
| 14. |
Grind away the primer on the surfaces to be welded.
|
|
| 15. |
Apply welding primer to the locations to be welded.
|
|
| 16. |
Align the outer panel and secure it with several welding clamps.
|
|
| 17. |
Seam weld the upper joint and the joint in the front door frame.
|
|
| 18. |
Plug weld the lower section of the sill and the joint with the rear door frame.
|
|
| 19. |
Grind away the primer on the surfaces of the inner reinforcement to be welded.
|
|
| 20. |
Apply welding primer to the locations to be welded.
|
|
| 22. |
Spot weld the entire B-pillar reinforcement, the inner reinforcement and the sill.
Replace the MIG brazing or seam welds. |
|
| 23. |
Grind the welds.
|
|
| 24. |
Remove any remaining welding primer. Welding primer reduces adhesion of paint, filler and sealant.
|
|
| 25. |
Apply primer to all bare metal surfaces.
|
|
| 26. |
Seal joints and seams with sealant.
|
|
| 27. |
Apply anti-corrosion agent to the B-pillar and sill after painting. Use Terotex HV 400.
|
|

 Warning
