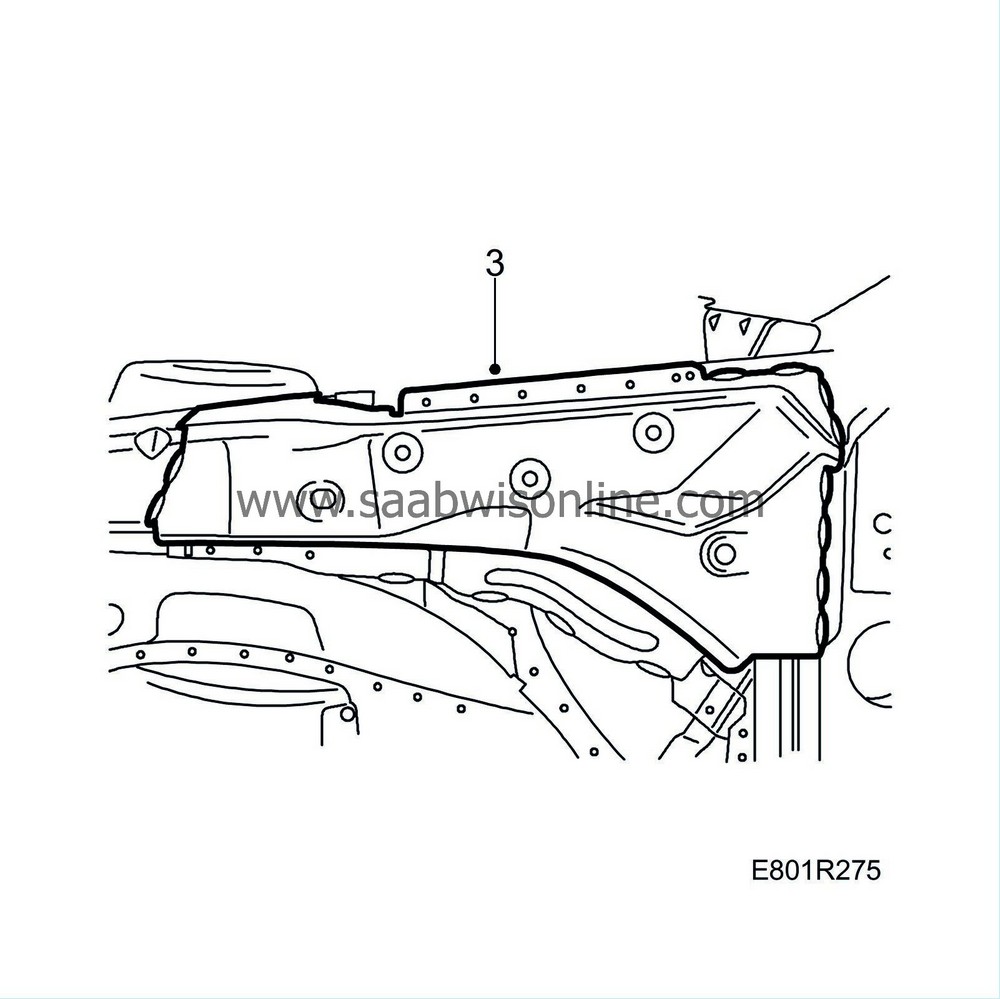
PRE-RELEASE
Upper part of A-pillar, complete
| Upper part of A-pillar, complete |
Certain weld joints on the car may be MIG brazed whereby the filler material is bronze rod. The characteristic sign of MIG brazing is that the joint is gold coloured. MIG brazing must always be replaced with new MIG brazing.
|
|||||||
| To remove |
The A-pillar is reinforced. The reinforcement must not be damaged when cutting the A-pillar.
| Important | ||
|
Body reinforcements must only be cut and joined if they are specifically covered in the description of the methods. Unless otherwise stated, it is mandatory to discard and replace the damaged reinforcement component. |
||
| 1. |
Remove door, front wing, bonnet and door hinge.
|
|
| 2. |
Position the car in an aligning bench and cross-measure if necessary.
|
|
| 4. |
Remove the roof.
|
|
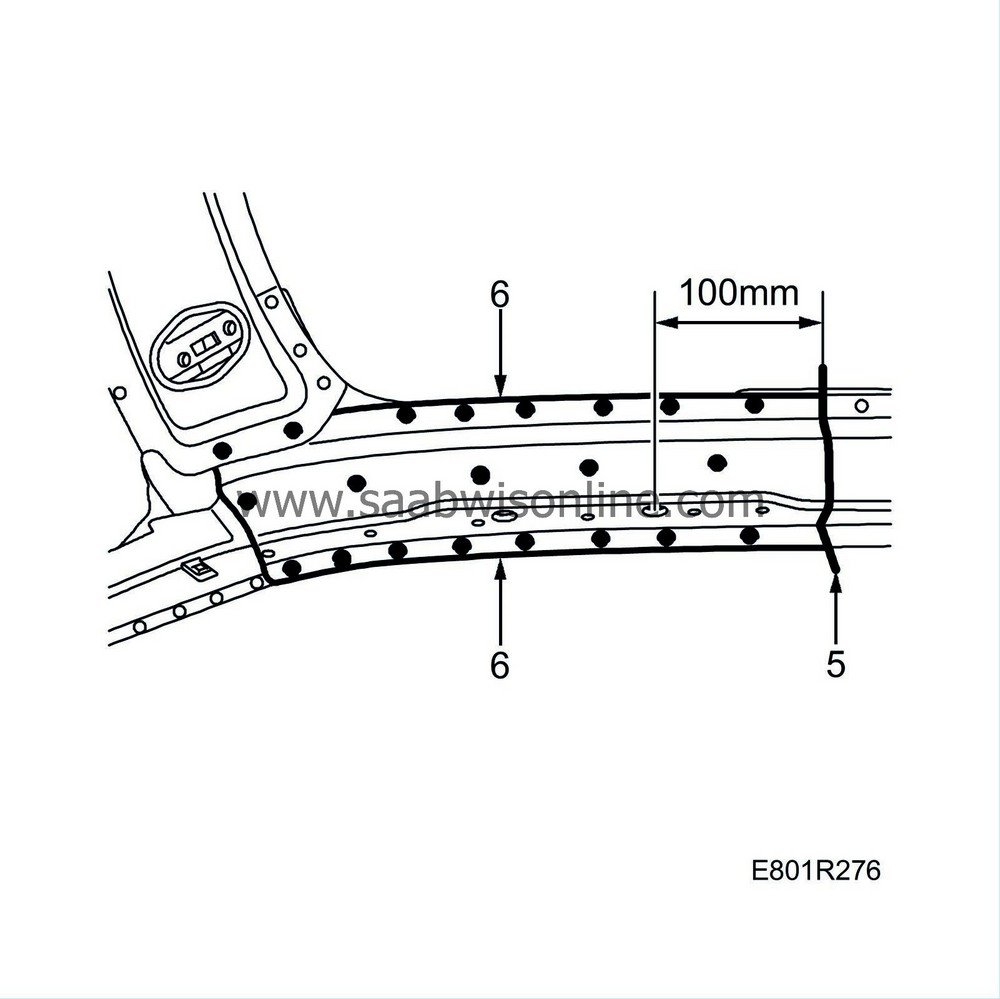
| 5. |
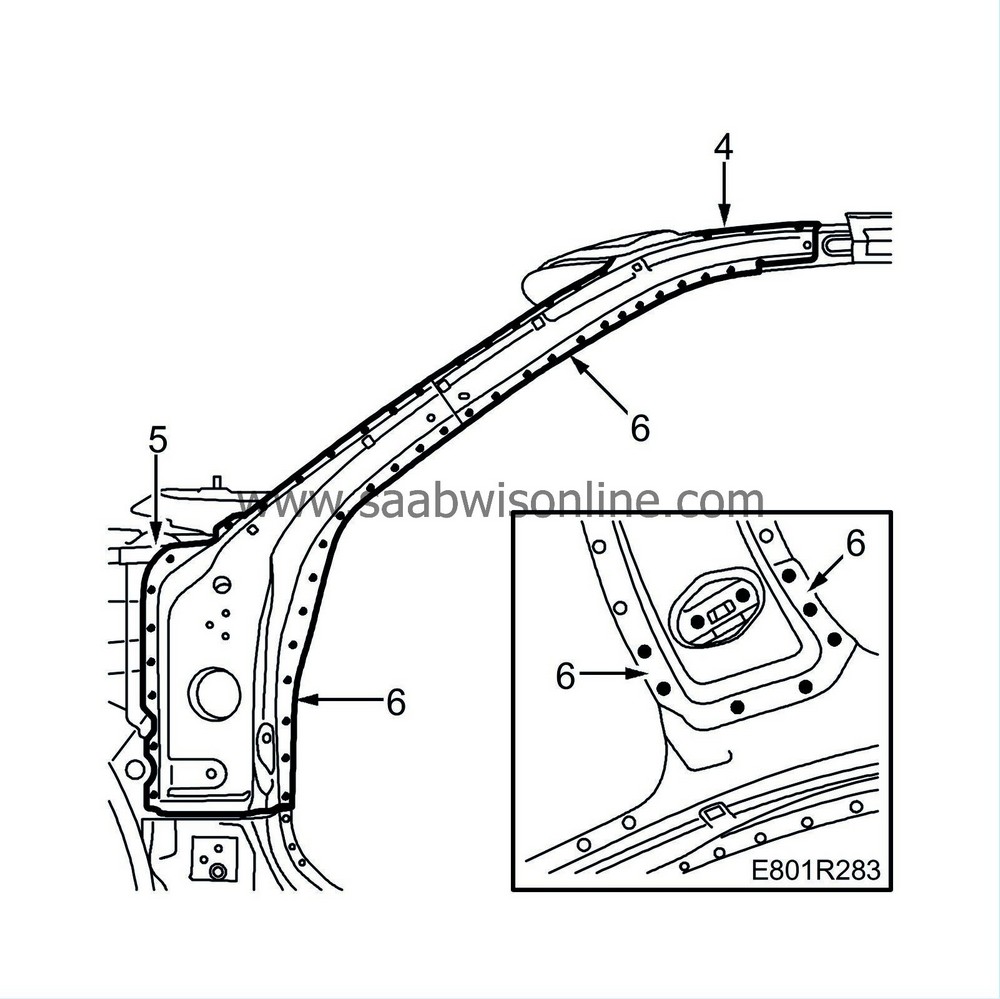
Cut the inner cover panel 100 mm from the oval hole, as shown in the illustration.
|
|
| 6. |
Drill out the spot welds.
|
|
| 7. |
Knock loose the cover panel.
|
|
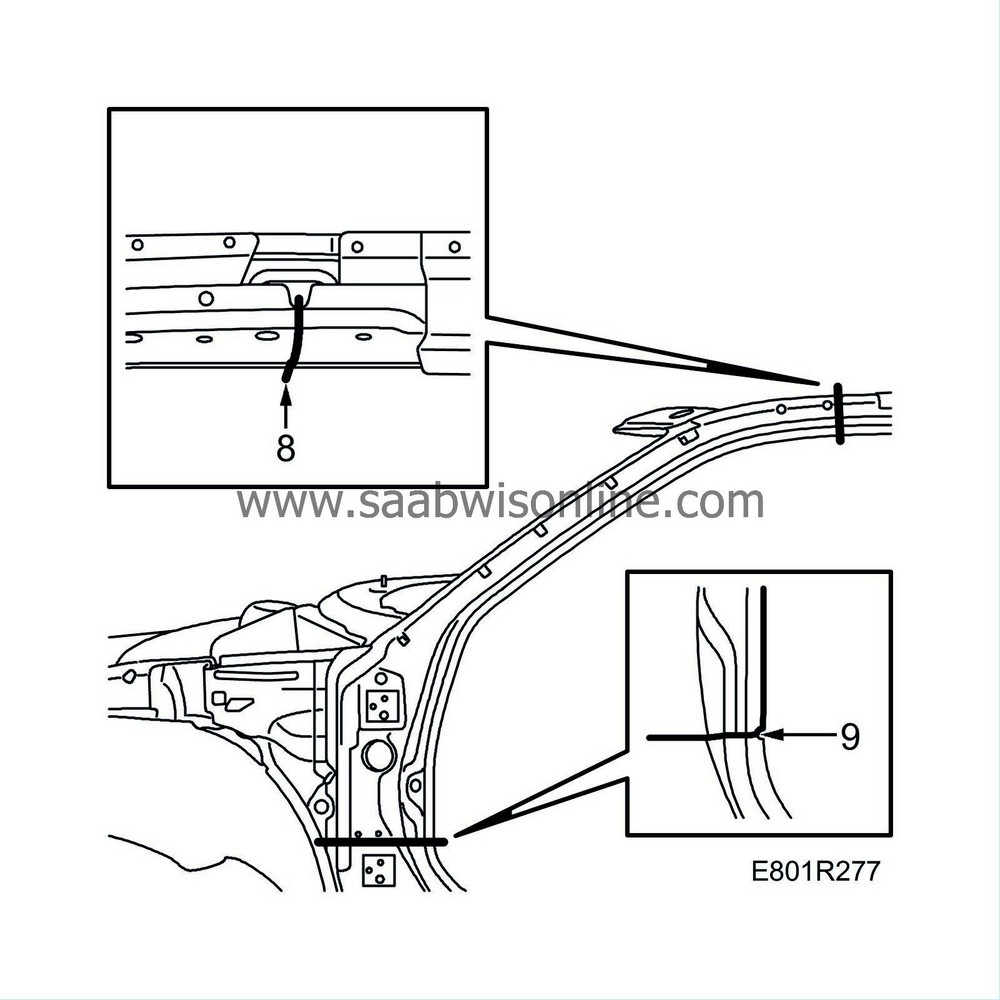
| 8. |
Cut the A-pillar outer panel as indicated. Take care not to damage the panel underneath.
|
|
| 9. |
Cut the A-pillar outer panel at the centre of the measuring point. Take care not to damage the panel underneath.
|
|
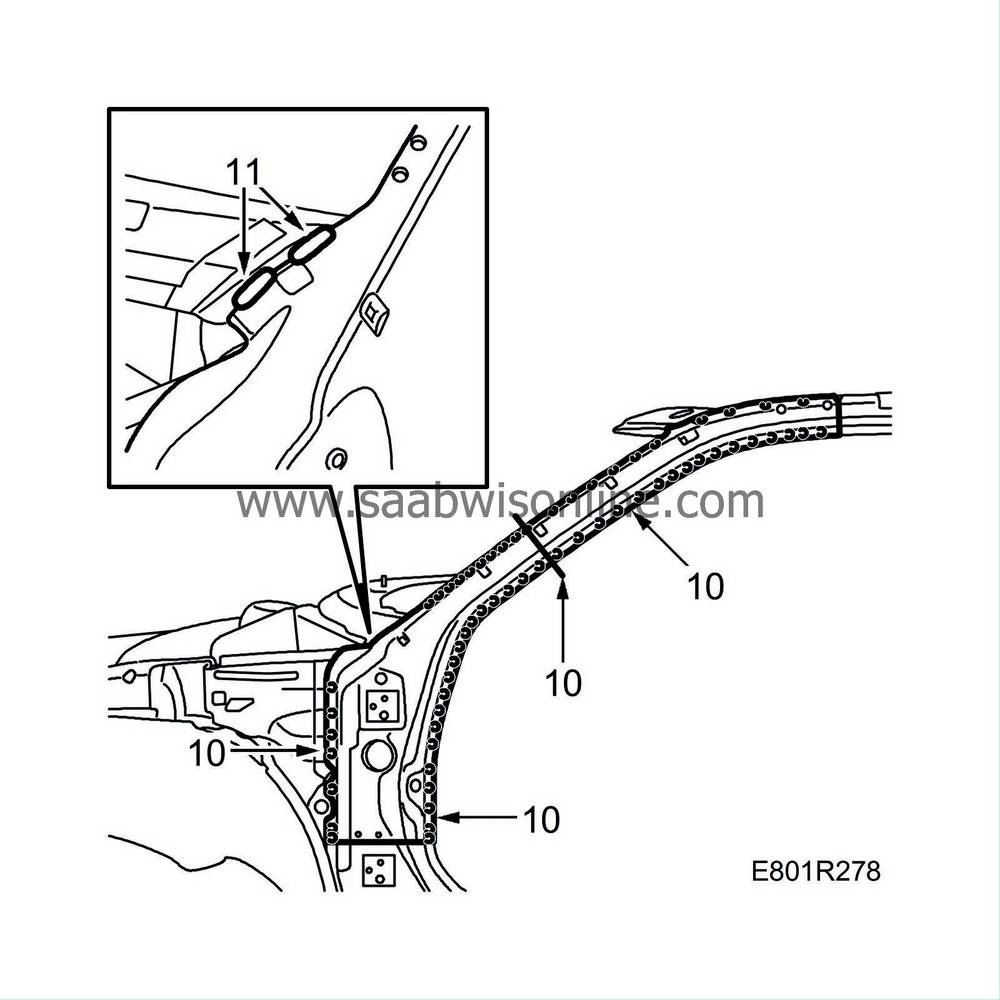
| 10. |
Drill out the spot-welds.
|
|
| 11. |
Grind away the seam welds. Note that the seam welds may be MIG brazed.
|
|
| 12. |
Knock loose the outer A-pillar.
|
|
| 13. |
Drill out the A-pillar reinforcement's spot welds from the roof member and towards the B-pillar.
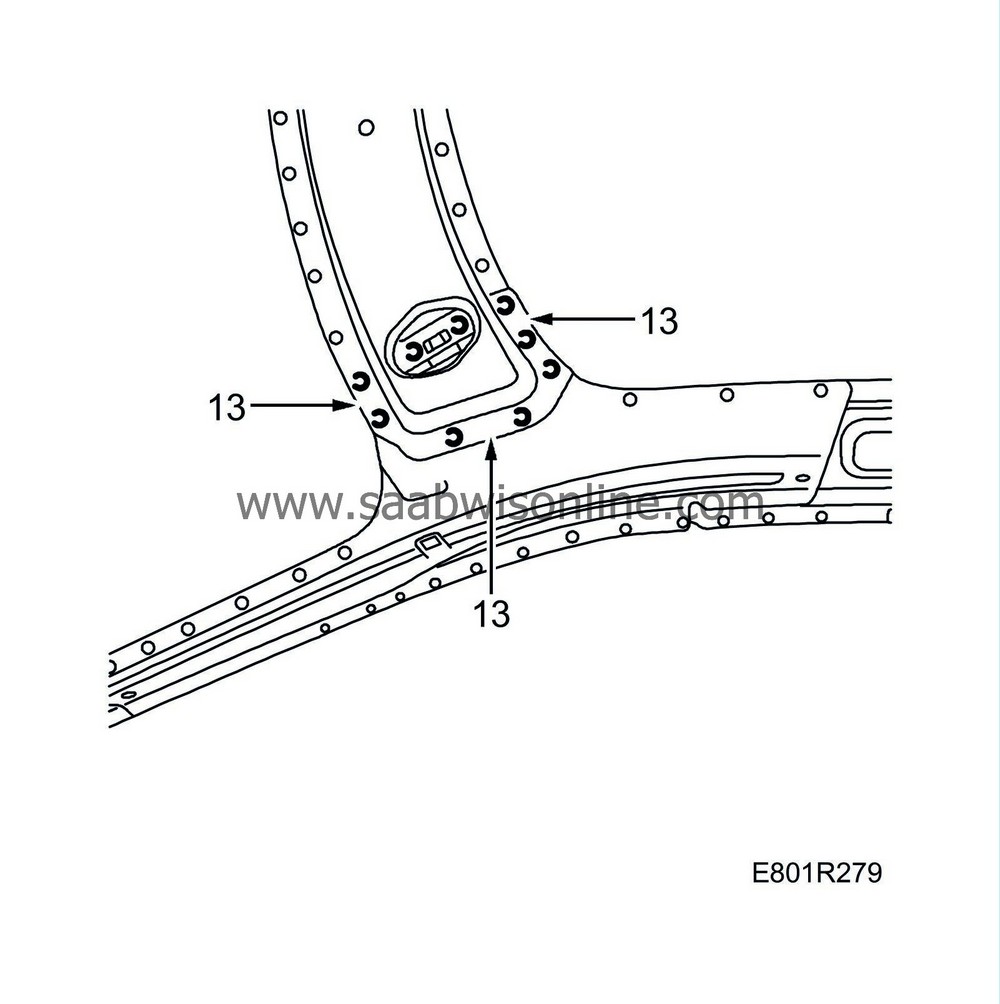
|
|
| 14. |
Drill out the spot welds.
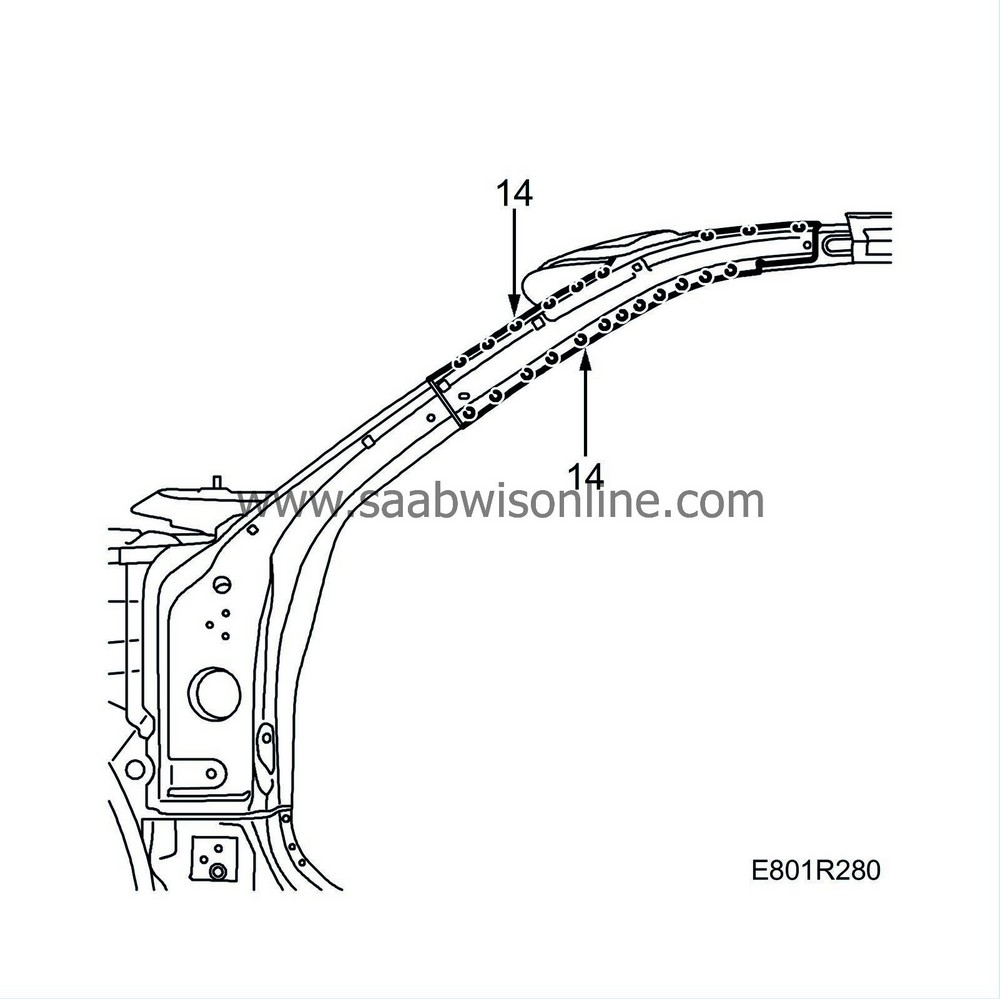
|
|
| 15. |
Drill out the spot welds on the lower A-pillar reinforcement.
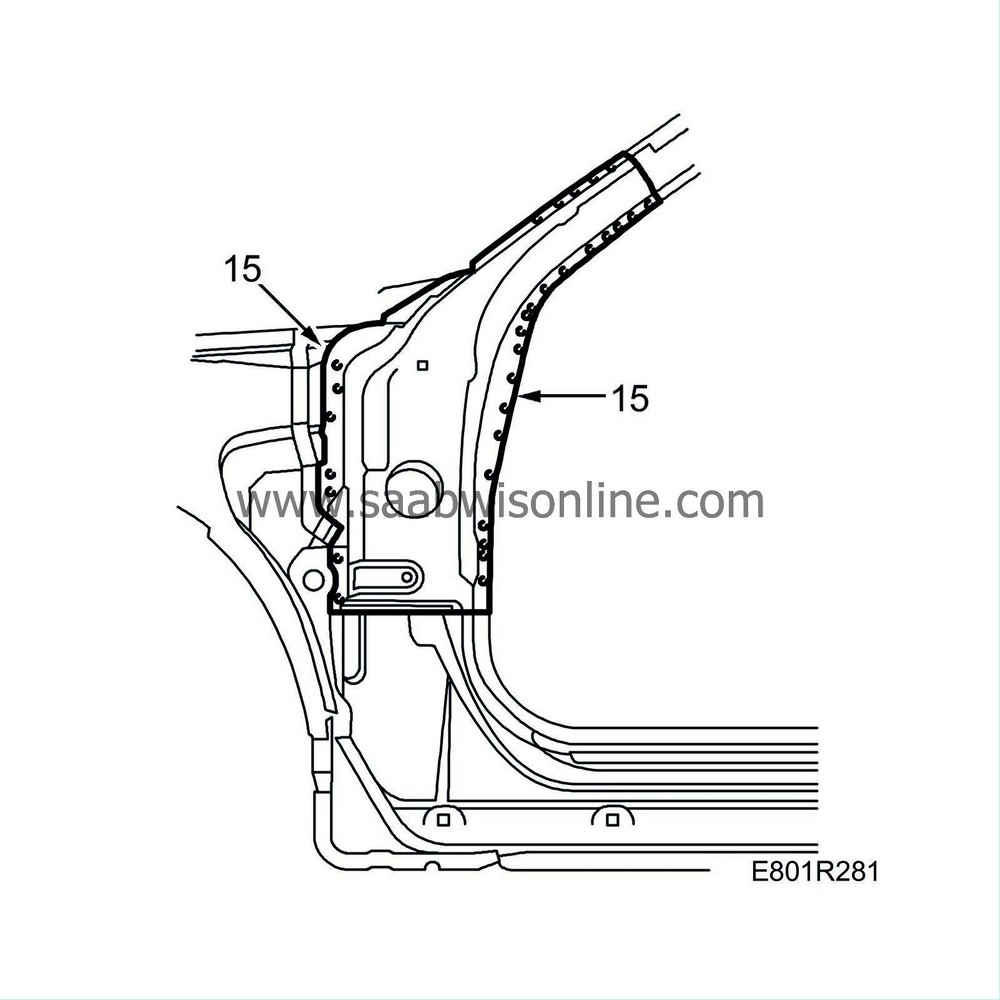
|
|
| 16. |
Grind off the seam welds on the inside of the A-pillar reinforcement.
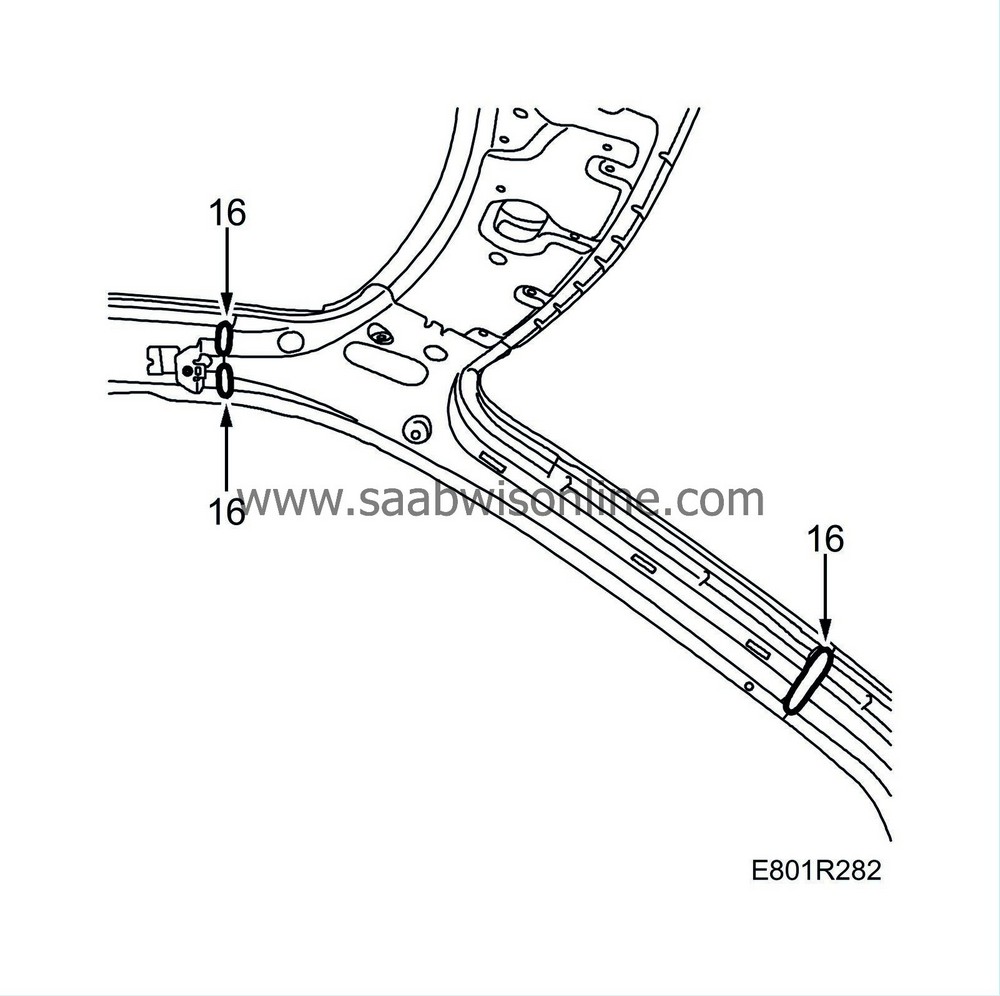
|
|
| 17. |
Knock loose the A-pillar.
|
|
| 18. |
Align any deformed sheet metal or panels.
|
|
| To fit |
| 1. |
Drill holes in the spare A-pillar reinforcement for plug welding.
|
|
| 2. |
Grind clean the surfaces on the body and the spare parts that are to be welded.
|
|
| 3. |
Apply welding primer to the surfaces that are to be welded. Use Terosan Zink spray.
|
|
| 4. |
Place the spare part for the upper inner A-pillar reinforcement in position and secure using several welding clamps.
|
|
| 5. |
Place the spare part for the lower inner A-pillar reinforcement in position and secure using several welding clamps.
|
|
| 6. |
Spot and plug weld the lower and upper A-pillar reinforcements into position.
|
|
| 7. |
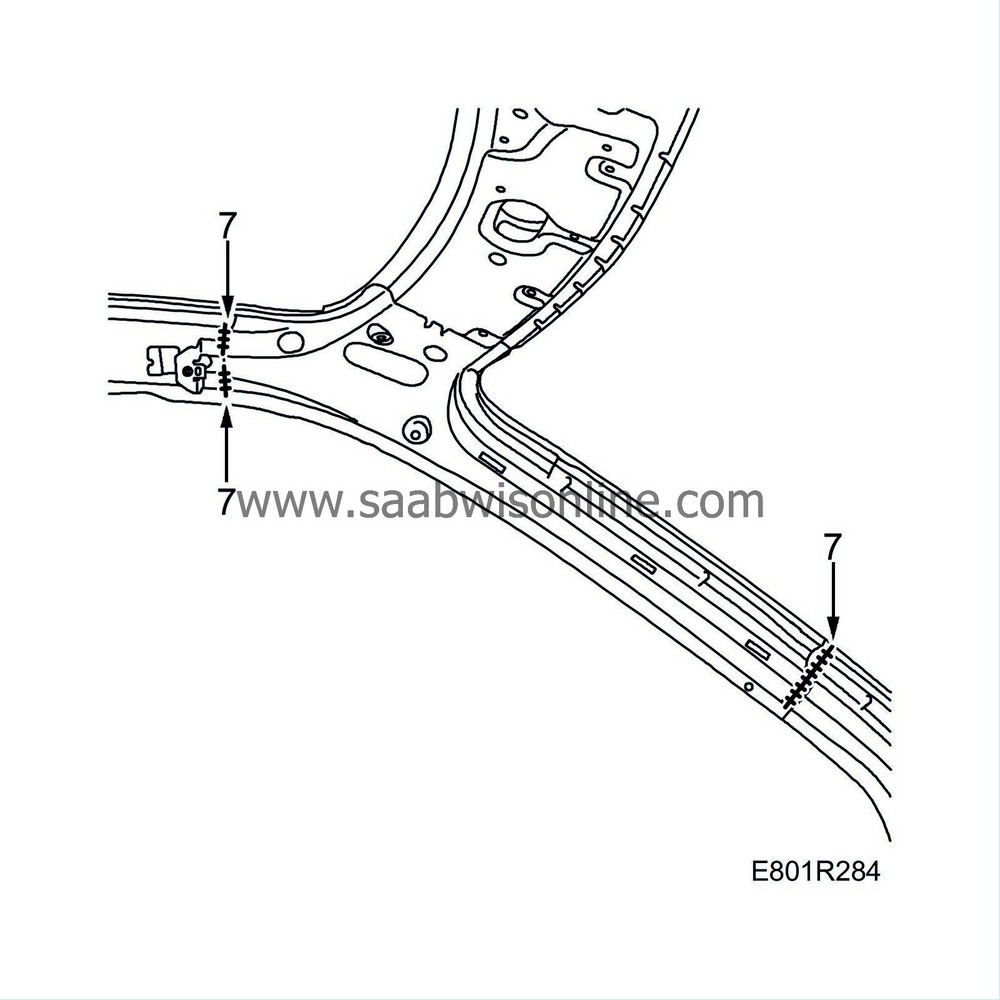
Seam weld the reinforcement on the inside.
|
|
| 8. |
Grind the welds.
|
|
| 9. |
Use the front outer door side as a spare part. Cut the outer panel so that it fits in with the previous cuts.
|
|
| 10. |
Grind clean the surfaces on the spare part and the body that are to be spot and plug welded.
|
|
| 11. |
Apply welding primer.
|
|
| 12. |
Put the spare part in position and secure using welding clamps. Check and adjust the fit.
|
|
| 13. |
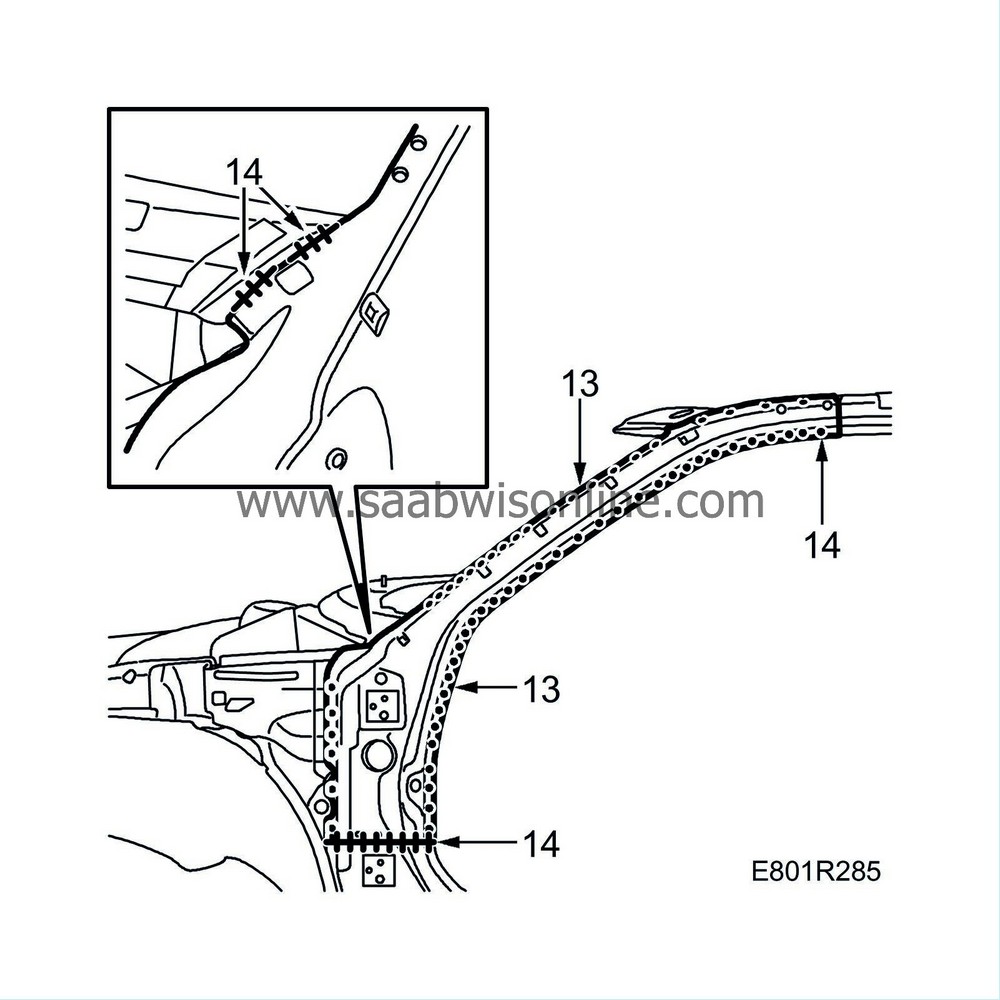
Spot and plug weld the spare part.
|
|
| 14. |
All-weld all joints.
|
|
| 15. |
Grind the welds.
|
|
| 16. |
Cut the inner cover panel so that it fits the previous cut.
|
|
| 17. |
Grind the surfaces that are to be welded.
|
|
| 18. |
Apply welding primer to the surfaces to be spot and plug welded. Use Terosan Zink spray.
|
|
| 19. |
Apply primer to all bare metal surfaces. Use Standox 1K Primer filler.
|
|
| 20. |
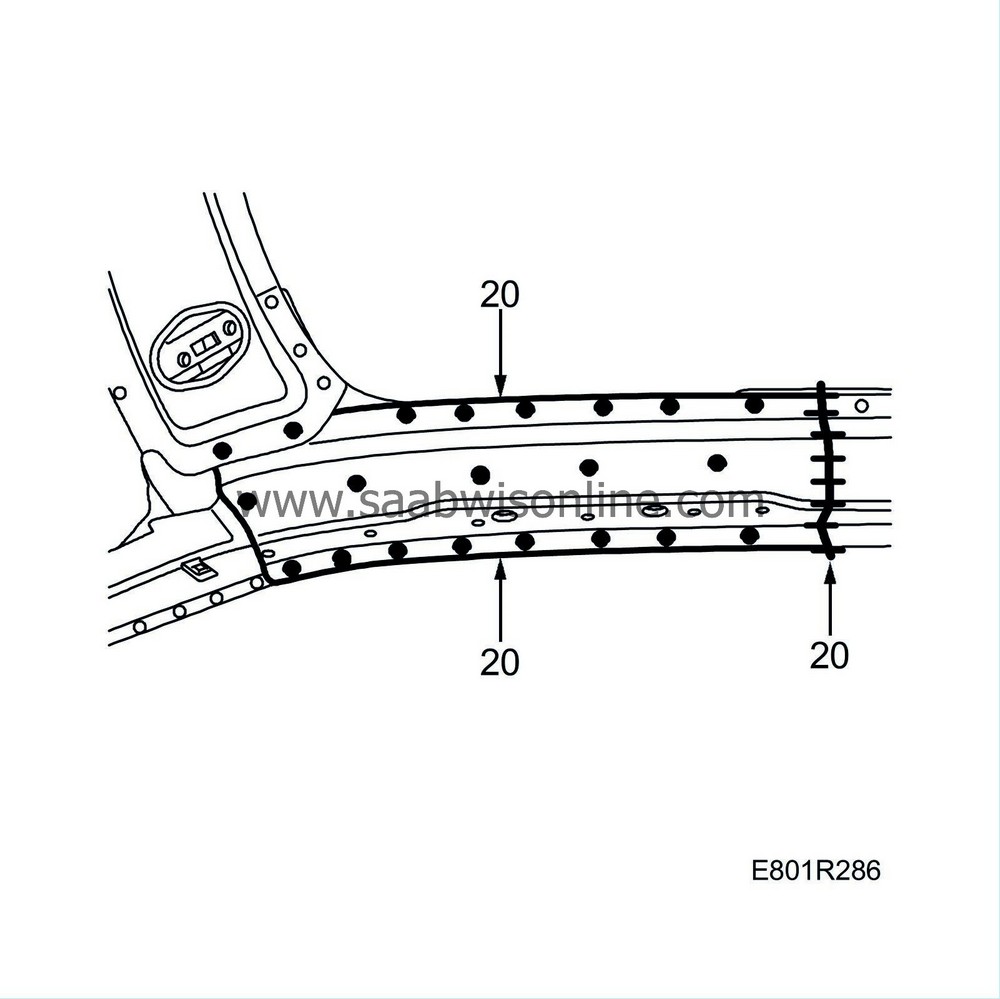
Fit the cover plate. Spot and plug weld it into position. All-weld the joint.
|
|
| 21. |
Grind the welds.
|
|||||||||
| 22. |
Weld on the reinforcement on the outside of the wheel housing.
Certain cars : Replace the MIG brazing 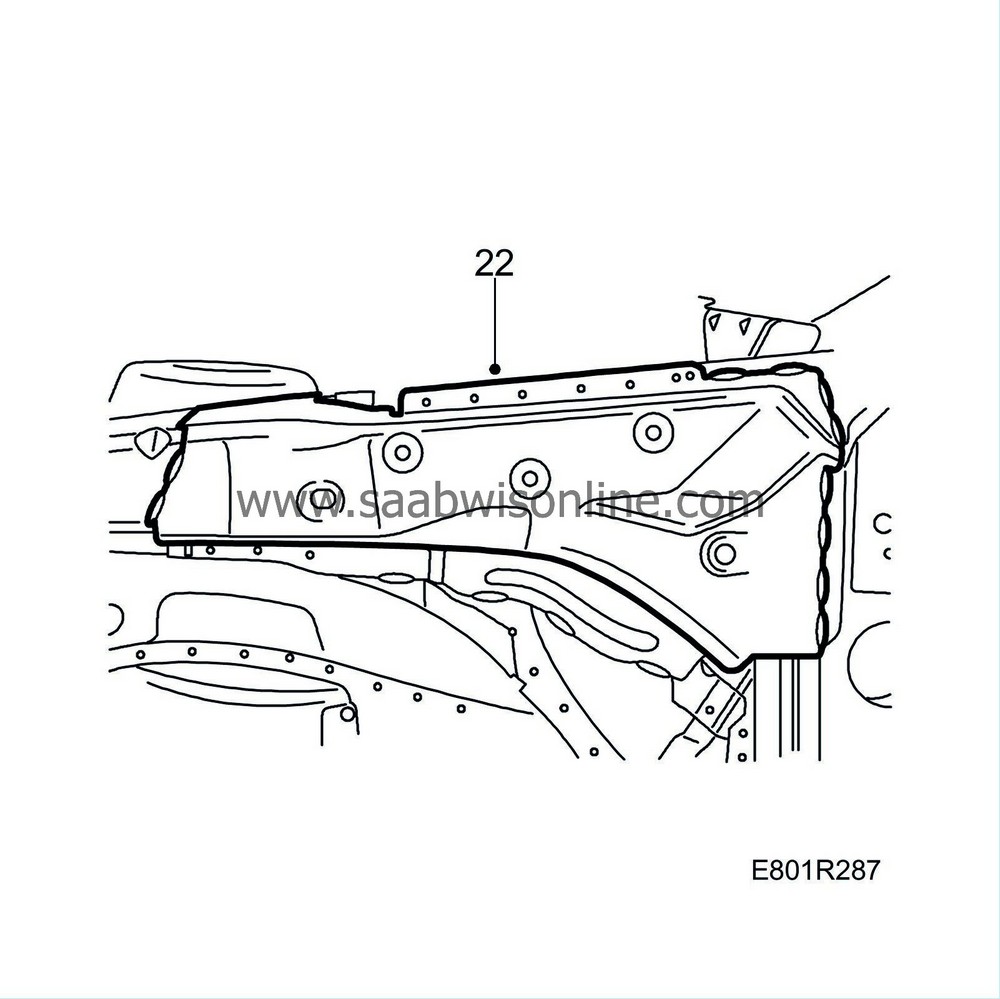
|
|
| 23. |
Fit the roof.
|
|
| 24. |
Remove any remaining welding primer. Welding primer reduces adhesion of paint, filler and sealant.
|
|
| 25. |
Apply primer to all ground surfaces. Use Standox 1K Primer.
|
|
| 26. |
Seal joints and sheet metal flanges with sealant. Use Terostat 1K-PUR.
|
|
| 27. |
Apply anti-corrosion agent to internal surfaces after painting. Use Terotex HV 400.
|
|

 Warning
