Electric motor for sunroof
|
|
Electric motor for sunroof
|
|
Note
|
|
If the sunroof motor is malfunctioning, the hatch can be operated manually with a screwdriver.
|
|
1.
|
Open the sunroof hatch so that the cover strip retaining screws are accessible.
|
|
2.
|
Remove the screws holding the cover strip.
|
|
3.
|
Close the hatch and tilt the rear edge.
|
|
4.
|
Remove the rear edge of the cover strip by pulling it towards the centre of the car so that the clips come undone. Pull the cover strip out through the rear edge of the hatch. Be careful not to scratch the roof.
|
|
5.
|
Remove the cover strips over the screws on the left and right-hand sides of the sunroof hatch. The strips are secured with clips, pull them straight towards the centre of the car.

|
|
6.
|
Close the sunroof hatch.
|
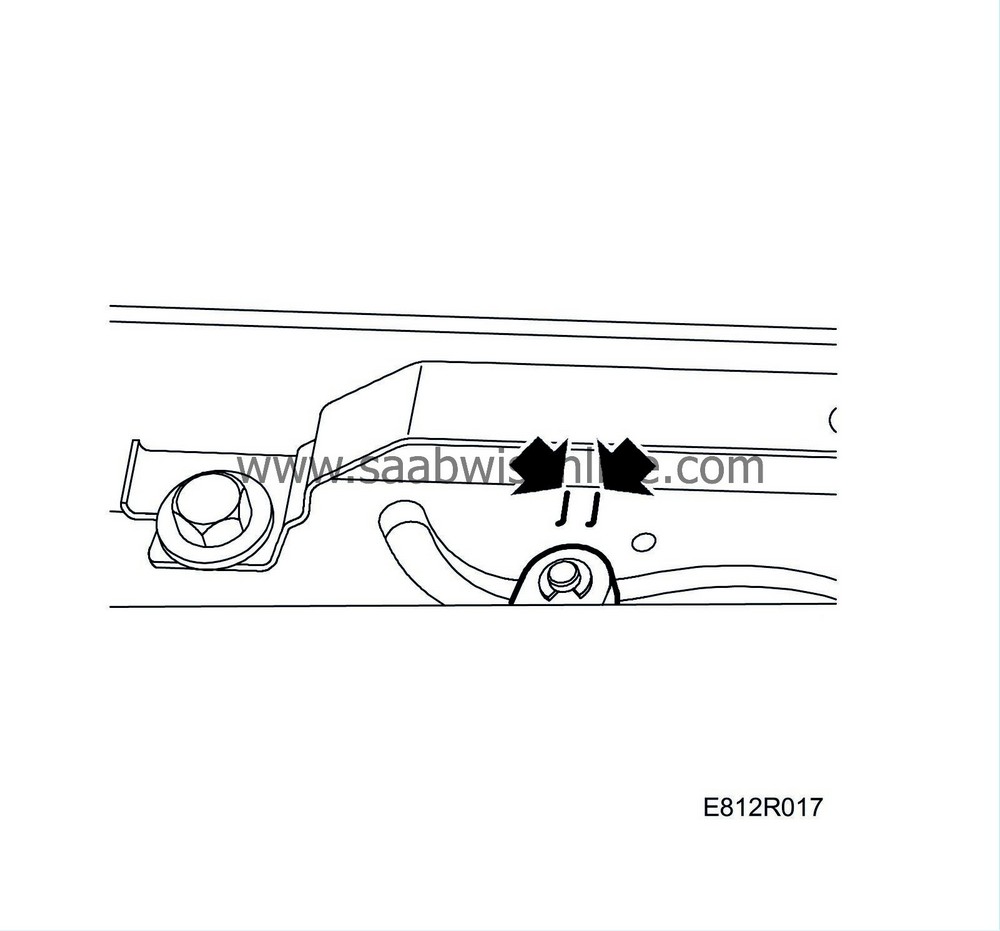
Note
|
|
Check that the sunroof hatch is properly closed. The wires' slide mountings should be centred between the marks on the slide rail.
|
|
The hatch must be closed when the new motor is fitted, as the motor is delivered in the closed position.
|
|
|
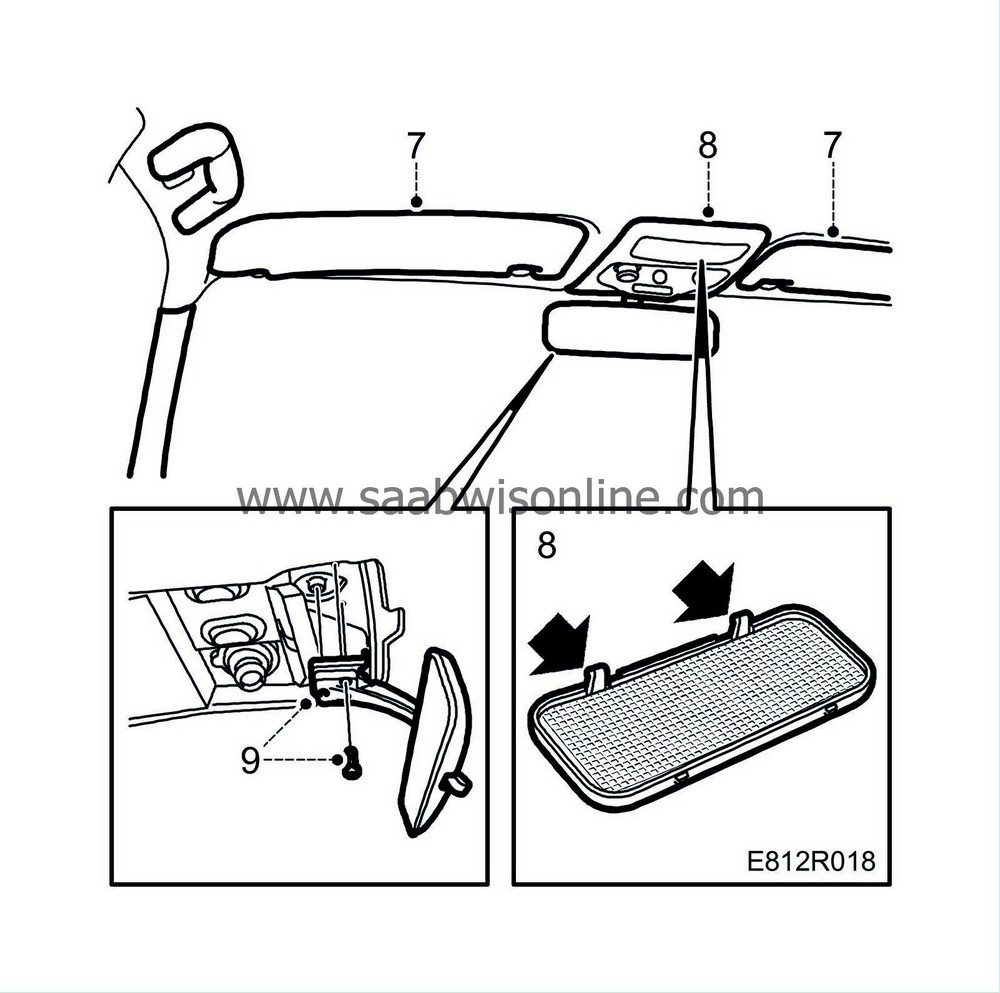
7.
|
Work is made easier by first removing the sun visors. It is then easier to bend down the headlining without damaging it.
Unplug the mirror light connector.
|
|
8.
|
Remove the lamp glass by inserting a screw driver into the clip recesses in the front edge and carefully prising it out.
|
Note
|
|
Proceed with great care, as the glass could easily crack if removed incorrectly.
|
|
Be careful not to scratch the cover.
|
Remove the roof console.
Undo the connectors and lift away the roof console.
|
|
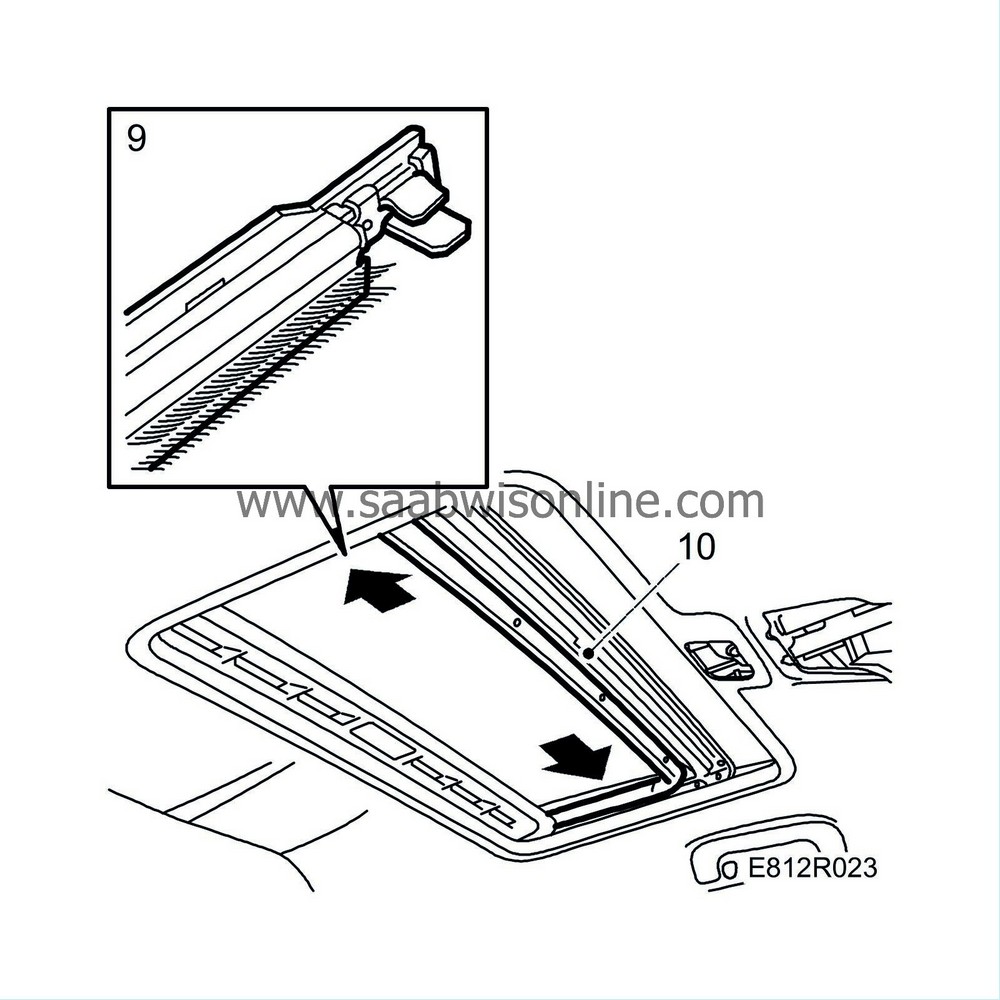
9.
|
Remove the rear-view mirror.
|
|
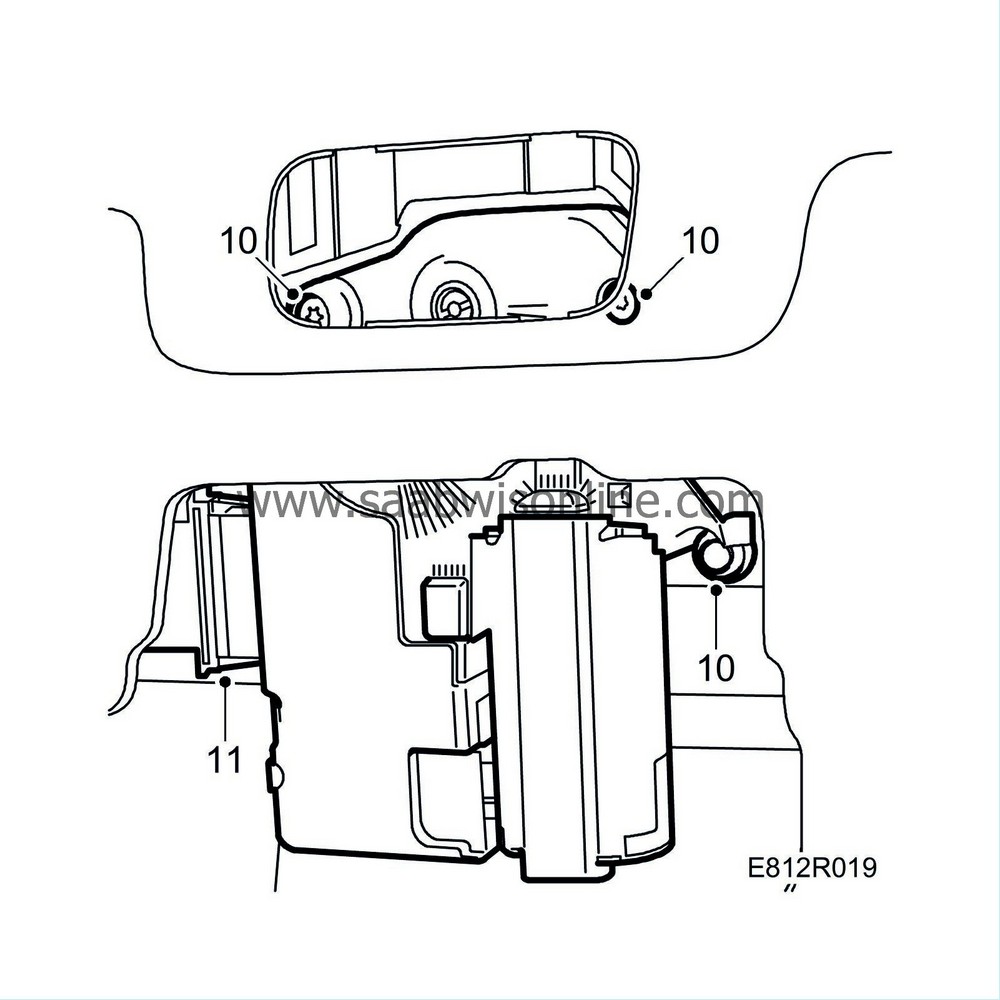
10.
|
Undo the retaining screws securing the motor.
|
|
11.
|
Carefully bend the headlining down and detach the motor from the sunroof assembly. Undo the connector and lift out the motor.
|

|
1.
|
Fit the electric motor by carefully bending down the headlining and then inserting the motor into the sunroof assembly. Giggle the motor backwards and forwards so that the gears engage. Plug in the connector.
|
|
3.
|
Fit the rear-view mirror.

|
|
4.
|
Plug in the connectors in the roof console and fit the console by first inserting one side and then positioning it so that the screws can be fitted. Tighten the screws
|
|
5.
|
Fit the cover and the lamp glass.
|
|
6.
|
Refit the sun visors and their mountings.
|
|
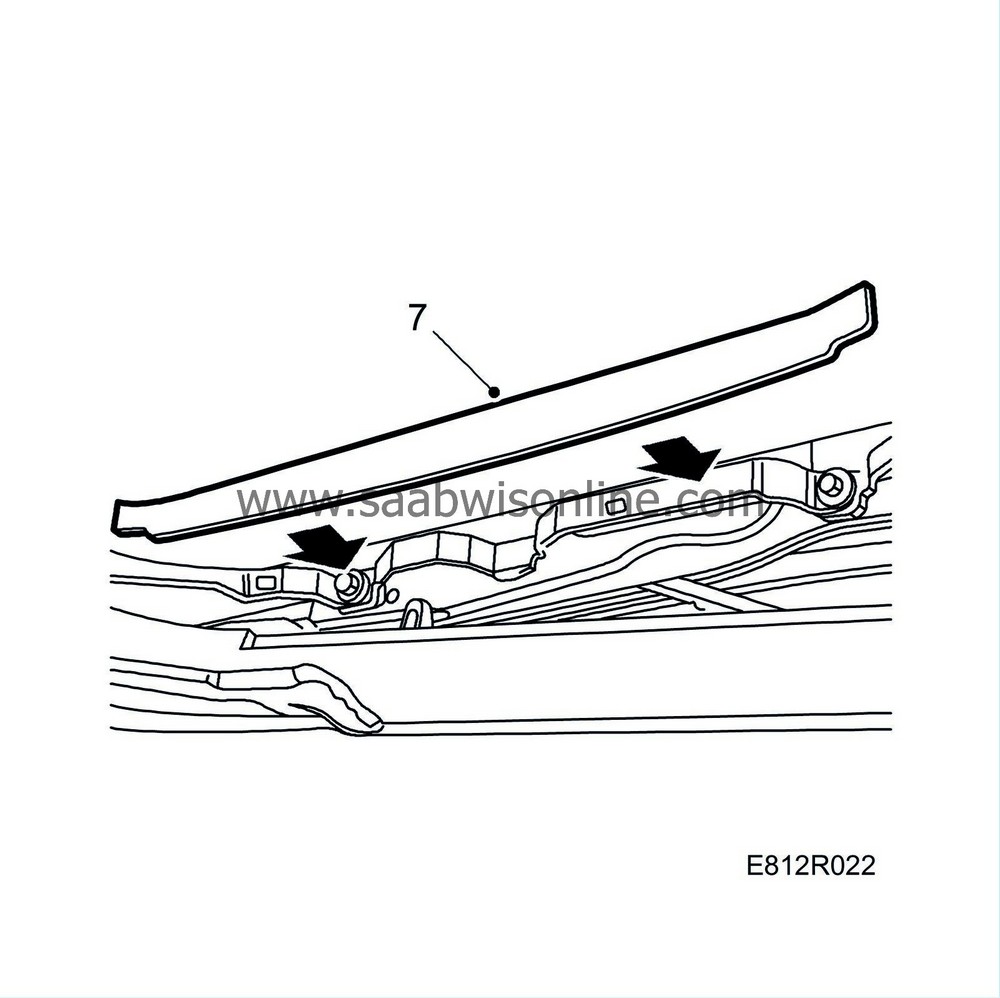
7.
|
Fit the two covers over the screws.
|
|
8.
|
Open the rear of the hatch so that the cover strip can be fitted.
|
|
9.
|
Press on the clips on the back of the cover strip.
|
|
10.
|
Close the rear edge of the hatch and open the hatch slightly so that the screws become accessible. Tighten the screws.
|
|
11.
|
Close the hatch and tilt the rear edge.
|
|
12.
|
Check that the clips remain in place on the rear edge.
|
|
13.
|
Check the function of the sunroof.
|


