Fuel Rail and Injectors Cleaning and Inspection (LDK, LHU)
|
|
Fuel Rail and Injectors Cleaning and Inspection (LDK, LHU)
|
Special Tools
EN-48266
Injector Seal Installer and Sizer
For equivalent regional tools, refer to
Special Tools (LDK, LHU)
.
|
1.
|
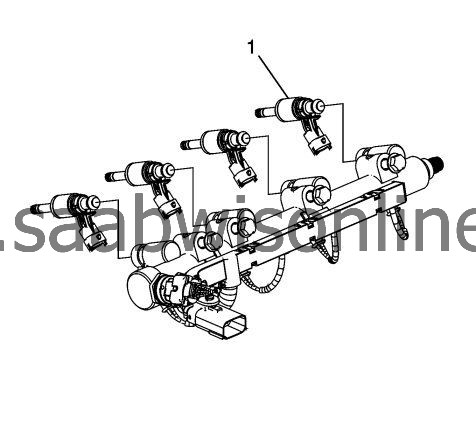
Unplug the electrical connections from the fuel injectors (1).
|
|
2.
|
|
Note
|
|
DO NOT tilt or twist the injector during removal.
|
Remove the injectors from the fuel rail by pulling straight out along the fuel injector axis.
|
|
3.
|
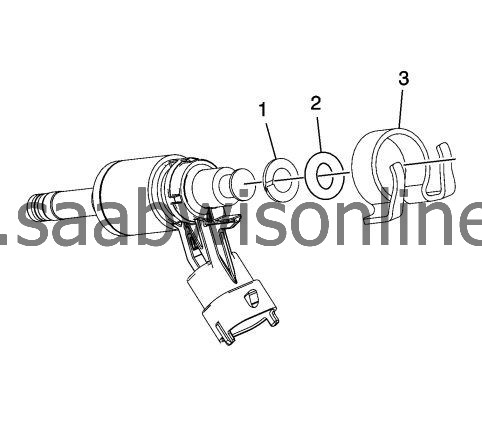
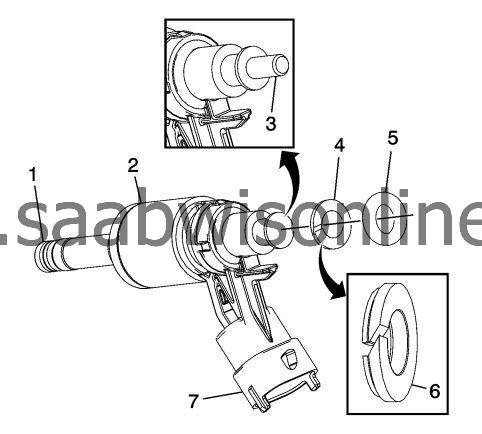
Remove and discard the fuel injector hold-down clamp (3).
|
|
4.
|
Remove and discard the fuel injector O-ring (2) and plastic spacer (1).
|
|
5.
|
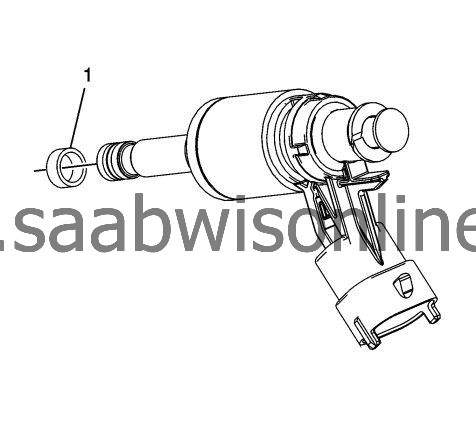
Remove and discard the fuel injector seal (1).
|
|
6.
|
|
Note
|
|
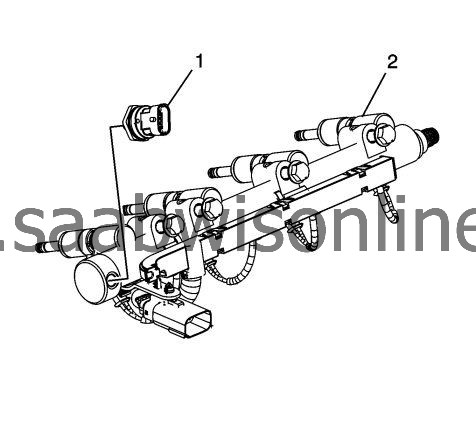
Do not soak or submerge the fuel rail or injectors in solvent.
|
Clean the exterior of the fuel rail (2) and injectors in solvent.
|
|
7.
|
Refer to
Fastener Caution
.
Inspect the high pressure fuel sensor (1) for damage.
|
|
|
7.1.
|
If replacing, dry the fuel pressure sensor bore in the fuel rail with a lint free cloth.
|
|
|
7.2.
|
The bore should be free of fuel, debris, and burrs.
|
|
|
7.3.
|
Lubricate the fuel pressure sensor bore, in the fuel rail, with clean engine oil.
|
|
|
7.4.
|
Lubricate the threads and sealing area on the fuel pressure sensor with clean engine oil.
|
|
|
7.5.
|
Install the fuel pressure sensor hand tight.
|
|
|
7.6.
|
Remove the fuel pressure sensor and re-lubricate the bore, threads, and sealing area.
|
|
|
7.7.
|
Re-install the fuel pressure sensor. Tighten the high pressure fuel sensor to
33 Nm (25 lb ft)
.
|
|
8.
|
Inspect the fuel rail and components for the following conditions:
|
|
|
•
|
Damage, debris, or restrictions to the fuel rail
|
|
|
•
|
Damage, debris, or restrictions to the fuel ports in the fuel rail
|
|
|
•
|
Damage to the mounting area for the fuel rail
|
|
|
•
|
Damage to the fuel rail mounting bolts
|
|
|
•
|
Damage to the threads on the fuel rail fuel feed fitting
|
|
9.
|
Inspect the fuel injectors for the following conditions:
|
|
|
•
|
Damage to the fuel injector connector (7)
|
|
|
•
|
Damage to the fuel injector harness connector
|
|
|
•
|
Damage to the fuel injector tip (1)
|
|
|
•
|
Damage to the tolerance ring (2)
|
|
|
•
|
Damage to the wave guide (3), if equipped
|
|
10.
|
Replace the fuel rail or injector if any damage is found. Do not attempt to repair a fuel rail or injector.
|
|
11.
|
Lubricate the NEW O-ring (5) with 5W30 engine oil.
|
|
12.
|
Install a NEW O-ring and plastic spacer (4) on the injector. The plastic spacer has a top (6) and a bottom. The top, O-ring sealing area, is wider.
|
|
13.
|
|
Note
|
|
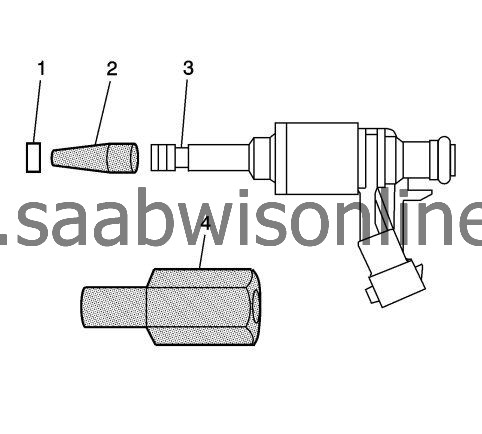
Do not use any type of lubricant when installing the NEW seal (1) on the fuel injector tip.
|
Install
EN-48266
installer (2) onto the fuel injector tip. Install a NEW seal (1) over
EN-48266
installer on the injector. The seal must be installed/slid into the recessed area (3) of the fuel injector. Compress the seal with your fingers before resizing the seal using the
EN-48266
sizer .
|
|
14.
|
Using the
EN-48266
sizer (4) , resize the seal.
|
|
15.
|
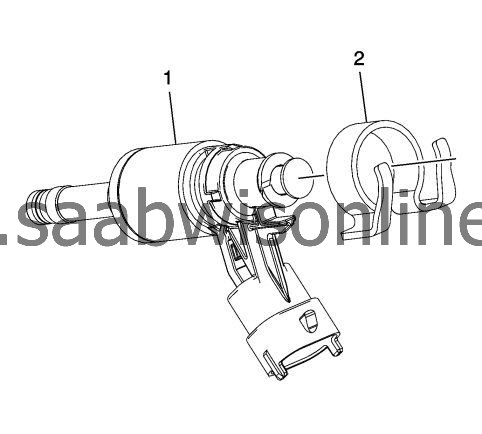
Install a NEW fuel injector hold-down clamp (2) on the fuel injector (1).
|
|
16.
|
Repeat the fuel injector cleaning and inspection process for all 4 fuel injectors.
|
|
17.
|
|
Note
|
|
DO NOT tilt or twist the injector during installation.
|
Install the fuel injectors (1) by pushing the injectors straight into the fuel rail along the fuel injector axis.
|
|
18.
|
Connect the electrical connection to the fuel rail for each injector.
|
