Camshaft Installation - Left Side
|
|
Camshaft Installation - Left Side
|
|
1.
|
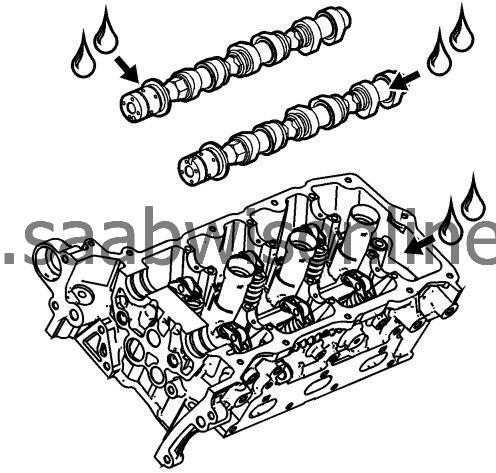
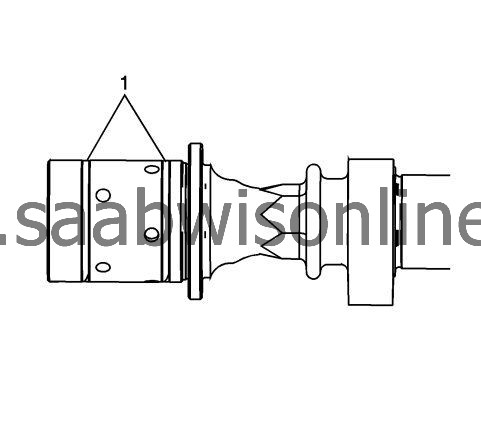
Ensure that the camshaft sealing rings (1) are in place in the camshaft grooves. Camshaft sealing rings must be in place below the surface of the camshaft journal in order to avoid being pinched between the cylinder head and the camshaft caps.
|
|
3.
|
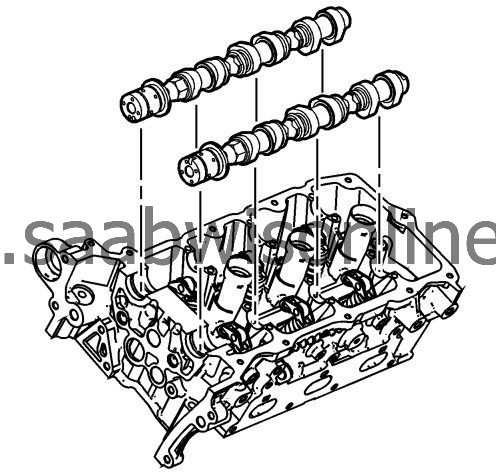
Place the intake and exhaust camshafts bank 2 in position in the cylinder head bank 2.
|
|
4.
|
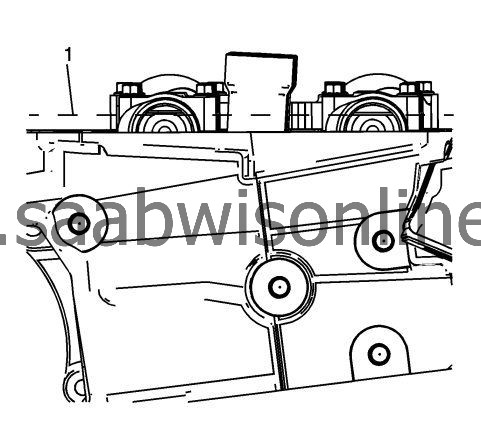
Position the camshaft lobes in a neutral position with the flats on the back of the camshafts up and parallel (1) with the cylinder head camshaft cover rail.
|
|
5.
|
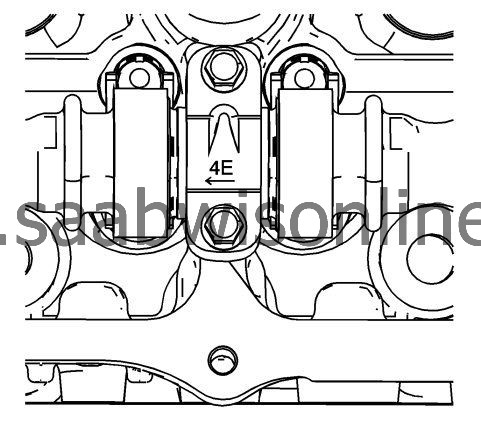
Observe the markings on the camshaft bearing caps. Each camshaft bearing cap is marked in order to identify its location. The markings have the following meanings:
|
|
|
•
|
The raised feature must always be oriented toward the center of the cylinder head
|
|
|
•
|
The I indicates the intake camshaft.
|
|
|
•
|
The E indicates the exhaust camshaft.
|
|
|
•
|
The number indicates the journal position from the front of the engine.
|
|
7.
|
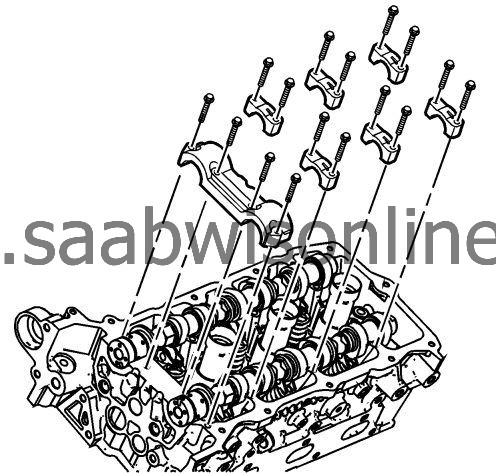
Install the camshaft bearing caps in the first journal of the cylinder head bank 2.
|
|
8.
|
Install the remaining camshaft bearing caps with their orientation mark toward the center of the cylinder head.
|
|
9.
|
Hand start all the camshaft bearing cap bolts.
|
|
10.
|
Refer to
Fastener Caution
.
Tighten the camshaft bearing cap bolts in sequence as shown to
10 Nm (89 lb in)
.

|
|
11.
|
Loosen the center intake camshaft bearing cap bolts (1, 2) and the center exhaust camshaft bearing cap bolts (3, 4).
|
|
12.
|
Retighten the center camshaft bearing cap bolts (1, 2, 3, 4) to
10 Nm (89 lb in)
.
|