PRE-RELEASE
Headlamp Mount Panel Replacement
| Headlamp Mount Panel Replacement |
| Removal Procedure |
Refer to Approved Equipment for Collision Repair Warning .
Refer to Glass and Sheet Metal Handling Warning .
| Note | ||
|
Section in specified areas only. Sectioning outside of these areas may compromise the structural integrity of the vehicle. The sectioning procedures have been developed as a more cost-effective alternative to complete replacement. |
| 1. |
Disable the SIR system. Refer to
SIR Disabling and Enabling
.
|
|
| 2. |
Disconnect the negative battery cable. Refer to
Battery Negative Cable Disconnection and Connection
.
|
|
| 3. |
Repair as much of the damaged area as possible. Refer to
Dimensions - Body
.
|
|
| 4. |
Remove all related panels and components.
|
|
| • |
Remove the battery tray. Refer to
Battery Tray Replacement (Diesel)
Battery Tray Replacement (LDK/A20NHT)
.
|
| • |
Remove the headlamp. Refer to
Headlamp Replacement
.
|
| • |
Remove the windshield washer solvent container. Refer to
Windshield Washer Solvent Container Replacement
.
|
| • |
Remove the front bumper impact bar. Refer to
Front Bumper Impact Bar Replacement
.
|
| • |
Remove the fuse box. Refer to
Underhood Electrical Center or Junction Block Replacement
.
|
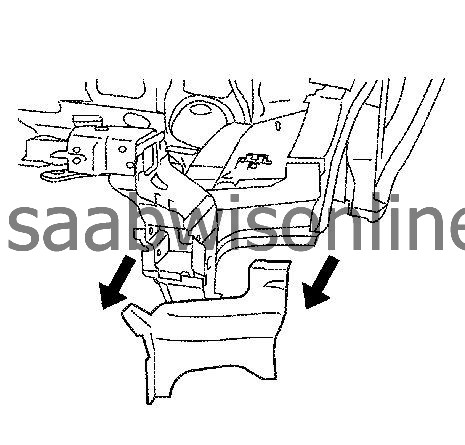
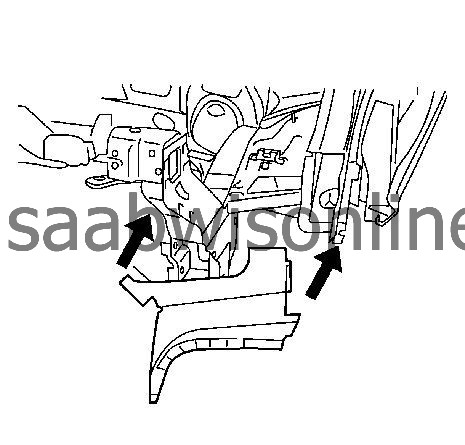
| 5. |
Cut out the headlamp mount panel. 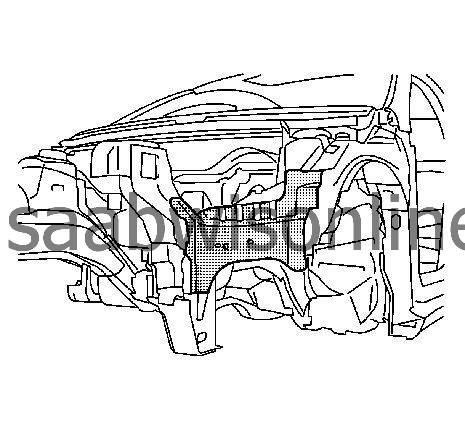
|
||||||||||
| 6. |
Locate and drill out all of the necessary factory welds.
|
|
| 7. |
Remove the damaged headlamp mount panel.
|
|
| Installation Procedure |
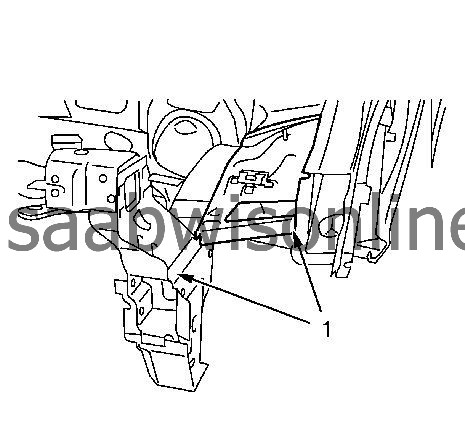
| 1. |
Prepare new headlamp mount panel outer in the area (1).
2x slots 6x20 mm (0.2x0.8 in) . 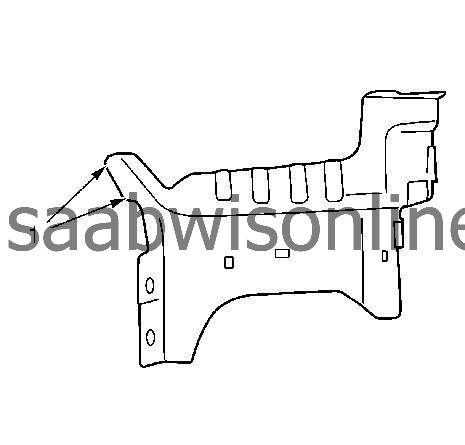
|
|
| 2. |
Apply bodywork repair through structural adhesive (1) to body. Refer to
Structural Adhesive Body Repairs
.
|
|
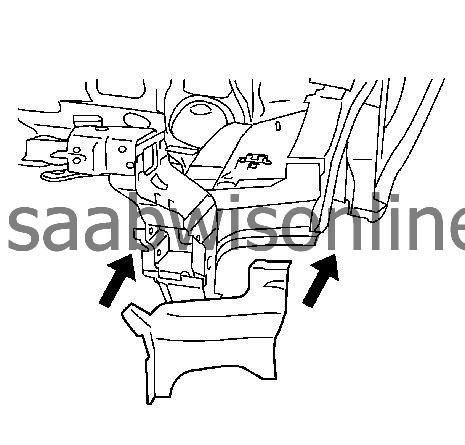
| 3. |
Position the headlamp mount panel.
|
|
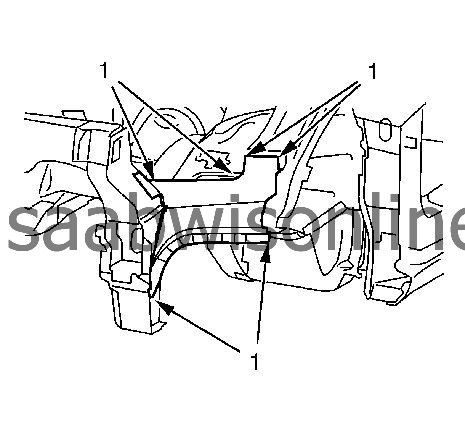
| 4. |
Spot weld (1) the headlamp mount panel inner accordingly. 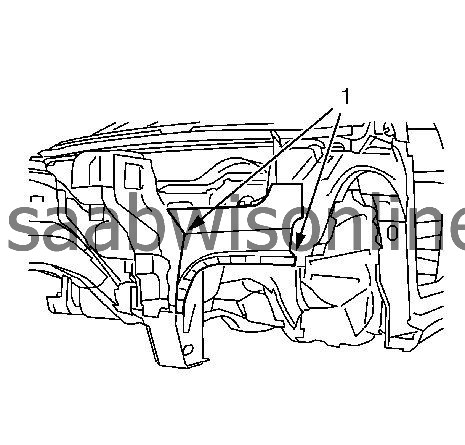
|
|||||||
| 5. |
Apply bodywork repair through structural adhesive (1) to body. Refer to
Structural Adhesive Body Repairs
.
|
|
| 6. |
Position the headlamp mount panel outer.
|
|
| 7. |
Spot weld (1) the headlamp mount panel outer accordingly. 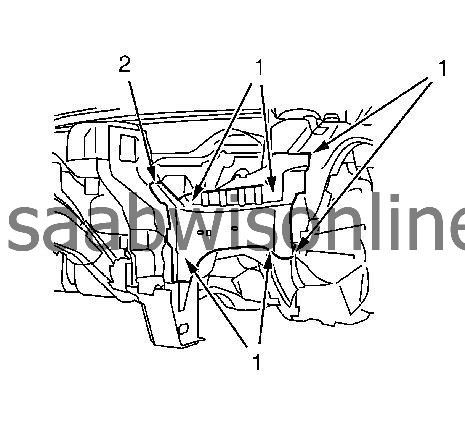
|
|||||||
| 8. |
MIG-braze (2) the headlamp mount panel outer.
|
|
| 9. |
Grind MIG-brazed seams.
|
|
| 10. |
Apply the sealers and anti-corrosion materials to the repair area, as necessary. Refer to
Anti-Corrosion Treatment and Repair (Base)
Anti-Corrosion Treatment and Repair (Corrosion Protection)
.
|
|
| 11. |
Install all related panels and components.
|
|
| • |
Install the battery tray. Refer to
Battery Tray Replacement (Diesel)
Battery Tray Replacement (LDK/A20NHT)
.
|
| • |
Install the headlamp. Refer to
Headlamp Replacement
.
|
| • |
Install the windshield washer solvent container. Refer to
Windshield Washer Solvent Container Replacement
.
|
| • |
Install the front bumper impact bar. Refer to
Front Bumper Impact Bar Replacement
.
|
| • |
Install the fuse box. Refer to
Underhood Electrical Center or Junction Block Replacement
.
|
| 12. |
Connect the negative battery cable. Refer to
Battery Negative Cable Disconnection and Connection
.
|
|
| 13. |
Enable the SIR system. Refer to
SIR Disabling and Enabling
.
|
|
