PRE-RELEASE
Roof Outer Panel Replacement
| Roof Outer Panel Replacement |
Special Tools
BO-49383 Flexible WeightsFor equivalent regional tools, refer to Special Tools .
| Removal Procedure |
Refer to Approved Equipment for Collision Repair Warning .
Refer to Collision Sectioning Warning .
Refer to Glass and Sheet Metal Handling Warning .
| 1. |
Disable the SIR system. Refer to
SIR Disabling and Enabling
.
|
|
| 2. |
Disconnect the negative battery cable. Refer to
Battery Negative Cable Disconnection and Connection
.
|
|
| 3. |
Remove the headlining trim panel. Refer to
Headlining Trim Panel Replacement (With Sunroof)
Headlining Trim Panel Replacement (Without Sunroof)
.
|
|
| 4. |
Visually inspect the damage. Repair as much of the damage as possible.
|
|
| 5. |
Before cutting out the roof outer panel, apply a double layer of masking tape around the perimeter of the upper side panel painted surfaces.
|
|
| 6. |
Remove the sealers and anti-corrosion materials from the repair area, as necessary. Refer to
Anti-Corrosion Treatment and Repair (Base)
Anti-Corrosion Treatment and Repair (Corrosion Protection)
.
|
|
| 7. |
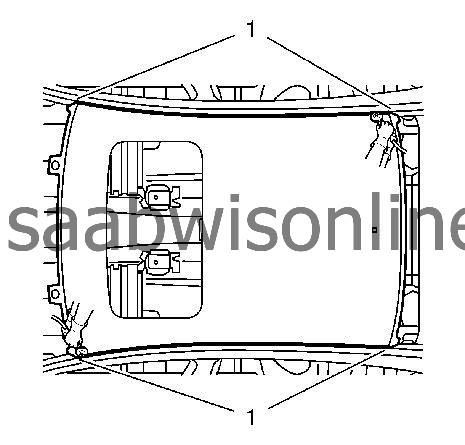
Locate and mark all factory welds.
|
|
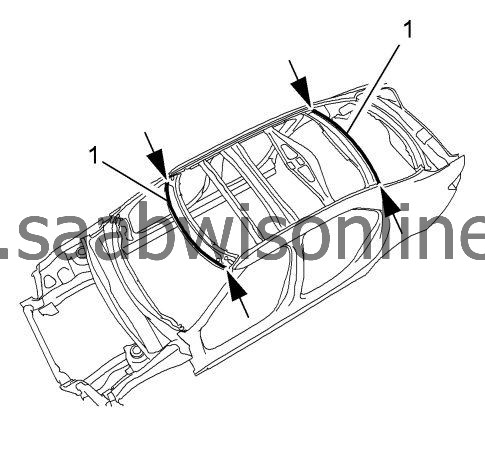
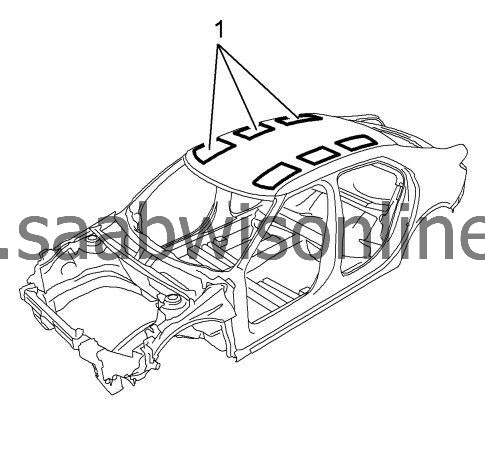
| 8. |
Drill all factory welds (1). Note the number and location of welds for installation of the service assembly.
|
|
| 9. |
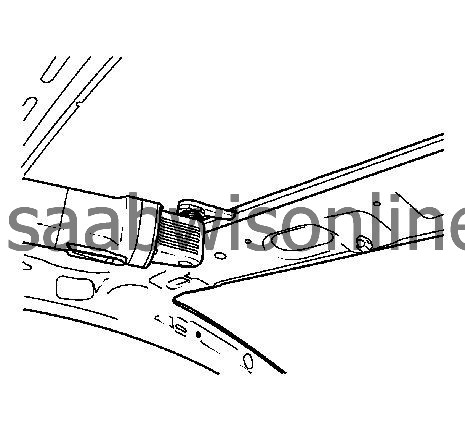
Remove carefully the sealant from the roof outer panel channel (wire brush).
|
|
| 10. |
Cut the roof frames adhesive with an appropriate tool.
|
|
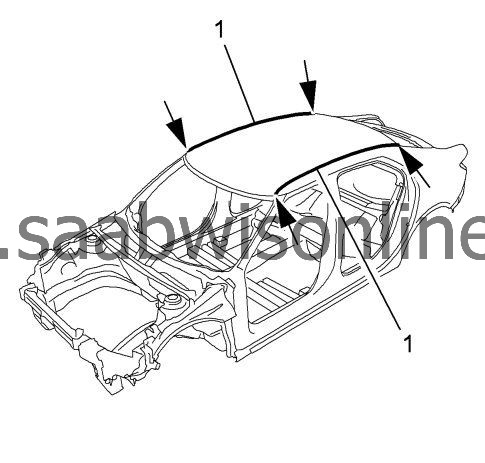
| 11. |
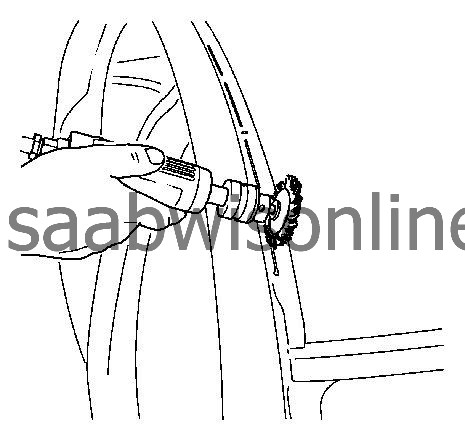
Grind carefully the laser weld seam (1) in the roof outer panel channel.
|
|
| 12. |
When grinding through the laser weld seam on the roof outer panel, preliminary tension must be generated between the roof outer panel and roof frame using a chisel/lever. 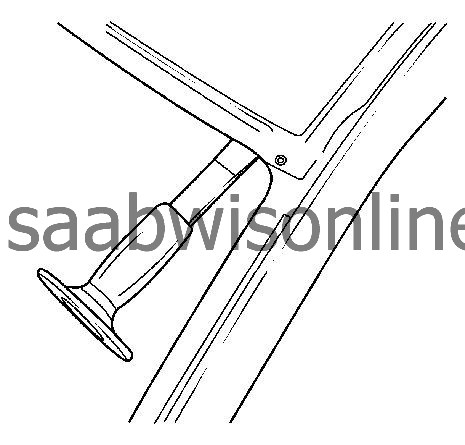
|
|||||||
| 13. |
Grind carefully through the laser weld. 
|
|||||||
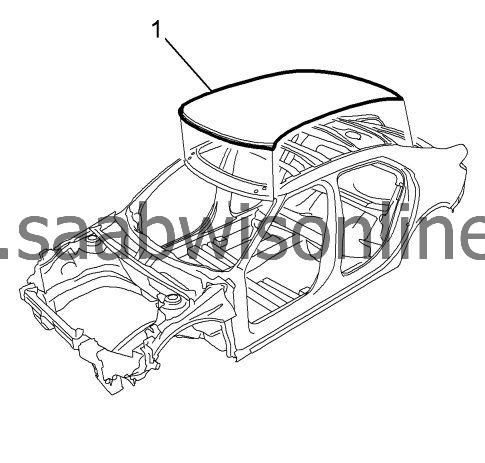
| 14. |
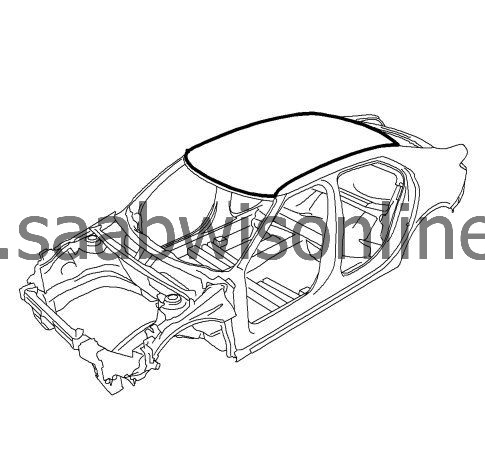
Remove the damaged roof outer panel (1).
|
|
| Installation Procedure |
| 1. |
Clean and prepare the attaching surfaces (1) for welding.
|
|
| 2. |
Apply one-part windshield urethane adhesive as noted from the original roof outer panel.
|
|
| 3. |
Apply bodywork structural adhesive on the roof outer panel channel (1).
|
|
| 4. |
Position the roof outer panel on the vehicle.
|
|
| 5. |
Verify the fit of the roof outer panel.
|
|
| 6. |
Clamp the roof outer panel into position.
|
|
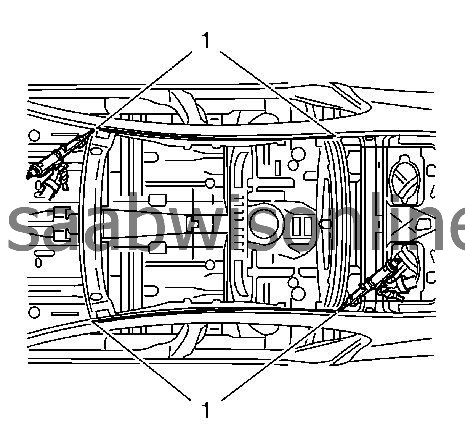
| 7. |
Put weights (1) on both sides of the roof outer panel with
BO-49383
flexible weights.
|
|
| 8. |
Spread surplus bodywork structural adhesive (1) on the roof outer panel channel as a seam sealant and corrosion protection with a spatula or flat paintbrush. Sand down the bodywork structural adhesive after it has cured. To smooth out the surface on the roof outer panel channel, use a liquid filler. Refer to paint systems, paint repair KTA-2207/3.
|
|
| 9. |
Spot weld (1) the roof outer panel accordingly. 
|
|||||||
| 10. |
Apply the sealers and anti-corrosion materials to the repair area, as necessary. Refer to
Anti-Corrosion Treatment and Repair (Base)
Anti-Corrosion Treatment and Repair (Corrosion Protection)
.
|
|
| 11. |
Install the headlining trim panel. Refer to
Headlining Trim Panel Replacement (With Sunroof)
Headlining Trim Panel Replacement (Without Sunroof)
.
|
|
| 12. |
Connect the negative battery cable. Refer to
Battery Negative Cable Disconnection and Connection
.
|
|
| 13. |
Enable the SIR system. Refer to
SIR Disabling and Enabling
.
|
|
