PRE-RELEASE
Engine Block Cleaning and Inspection
| Engine Block Cleaning and Inspection |
| Special Tools |
| • |
EN-7872
Magnetic Base Dial Indicator
|
|
| • |
EN-8087
Cylinder Bore Gauge
|
|
For equivalent regional tools, refer to Special Tools (LDK, LHU) .
| 1. |
Clean the sealing material from the gasket mating surfaces with a suitable tool (1).
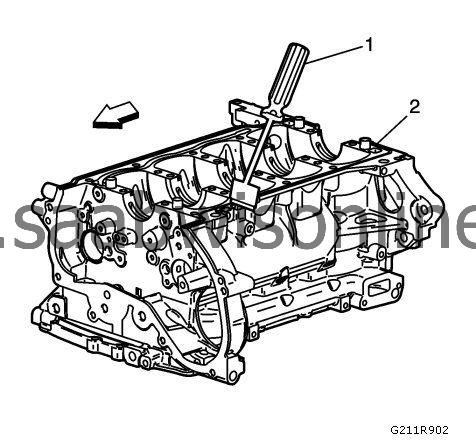
|
|
| 2. |
Clean the engine block and lower crankcase in a cleaning tank with solvent appropriate for aluminum.
|
|
| 3. |
Flush the engine block with clean water or steam.
|
|
| 4. |
Clean the oil passages.
|
|
| 5. |
Clean the blind holes.
|
|
| 6. |
Spray the cylinder bores and the machined surfaces with engine oil.
|
|
| 7. |
Inspect the threaded holes. Clean the threaded holes with a rifle brush. If necessary, drill out the holes and install thread inserts. Refer to
Thread Repair Specifications (LDK, LHU)
.
|
|
| 8. |
Use a straight edge (1) and a feeler gauge (2) to check the deck surface for flatness. Carefully machine minor irregularities. Replace the block if more than 0.254 mm (0.010 in) must be removed. 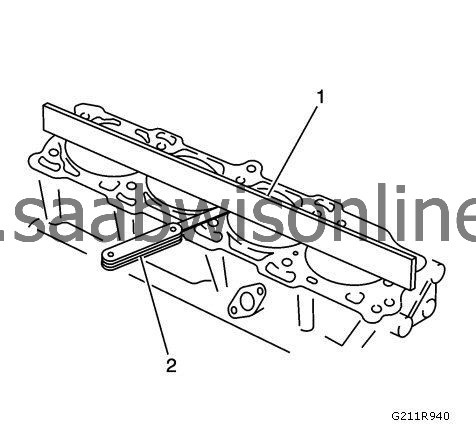
|
|||||||
| 9. |
Inspect the oil pan rail for nicks. Inspect the front cover attaching area for nicks. Use a flat mill file to remove any nicks.
|
|
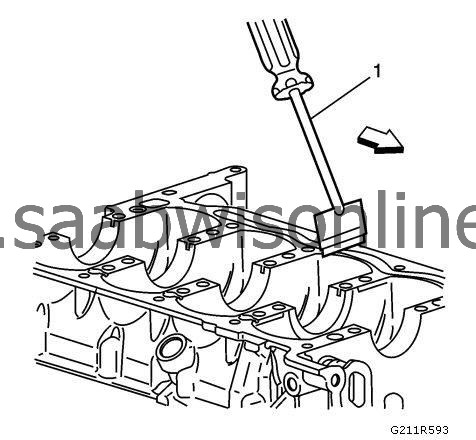
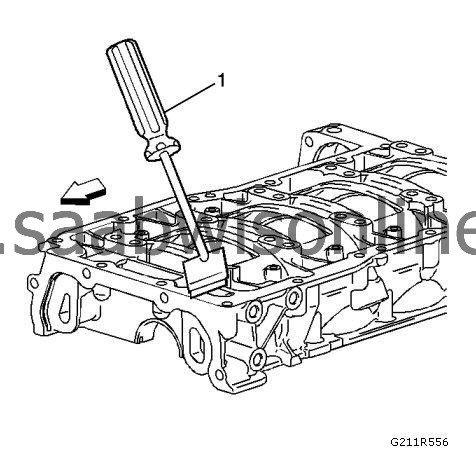
| 10. |
Clean the sealing material from the gasket mating surfaces on the lower crankcase engine block side with a suitable tool (1).
|
|
| 11. |
Clean the sealing material from the gasket mating surfaces on the lower crankcase oil pan side with a suitable tool (1).
|
|
| 12. |
Inspect the mating surfaces of the transmission face.
|
|
| 13. |
Use the following procedure in order to measure the engine block flange runout at the mounting bolt hole bosses: |
|||||||||
 Warning
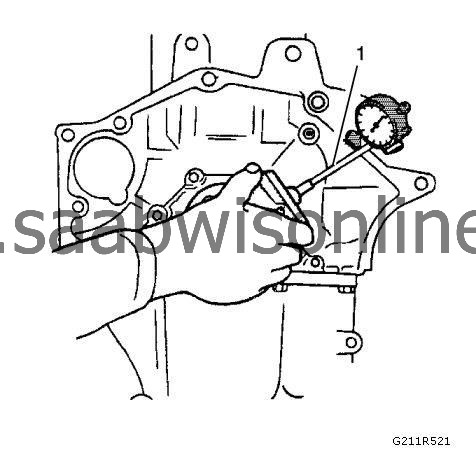
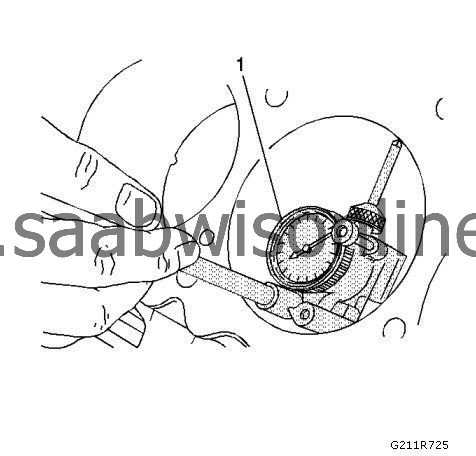
| 13.1. |
Temporarily install the crankshaft and upper bearings. Measure the crankshaft flange run-out using the
EN-7872
dial indicator (1)
|
| 13.2. |
Hold the gauge plate flat against the crankshaft flange.
|
| 13.3. |
Place the dial indicator stem on the transmission mounting bolt hole boss. Set the indicator to 0.
|
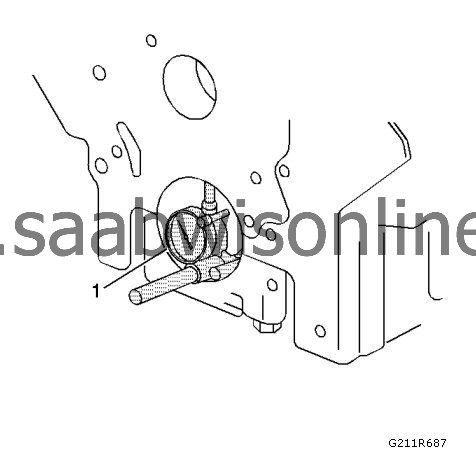
| 13.4. |
Record the readings obtained from all of the bolt hole bosses. The measurements should not vary more than 0.203 mm (0.008 in).
|
| 13.5. |
Recheck the crankshaft flange runout if the readings vary more than 0.203 mm (0.008 in).
|
| 13.6. |
Remove the crankshaft and bearings.
|
| 14. |
Install the bed plate and bolts. Tighten the bed plate bolts to specification.
|
|
| 15. |
Inspect the crankshaft main bearing bores. Use the
EN-8087
gauge (1) to measure the bearing bore concentricity and alignment. Refer to
Engine Mechanical Specifications (LDK, LHU)
.
|
|
| 16. |
Replace the engine block and bed plate if the crankshaft bearing bores are out of specification.
|
|
| 17. |
Remove the bed plate.
|
|
| 18. |
Inspect the cylinder bores using the
EN-8087
gauge (1). Inspect for the following items:
|
|
| • |
Wear
|
| • |
Taper
|
| • |
Runout
|
| • |
Ridging
|
| 19. |
If the cylinder bores are out of specification, install a NEW cylinder bore sleeve. Refer to
Cylinder Sleeve Removal
and
Cylinder Sleeve Installation
.
|
|
