P0335,P0336
Symptom: The engine fails to start or misfires. Other diagnostic trouble codes
(misfiring).
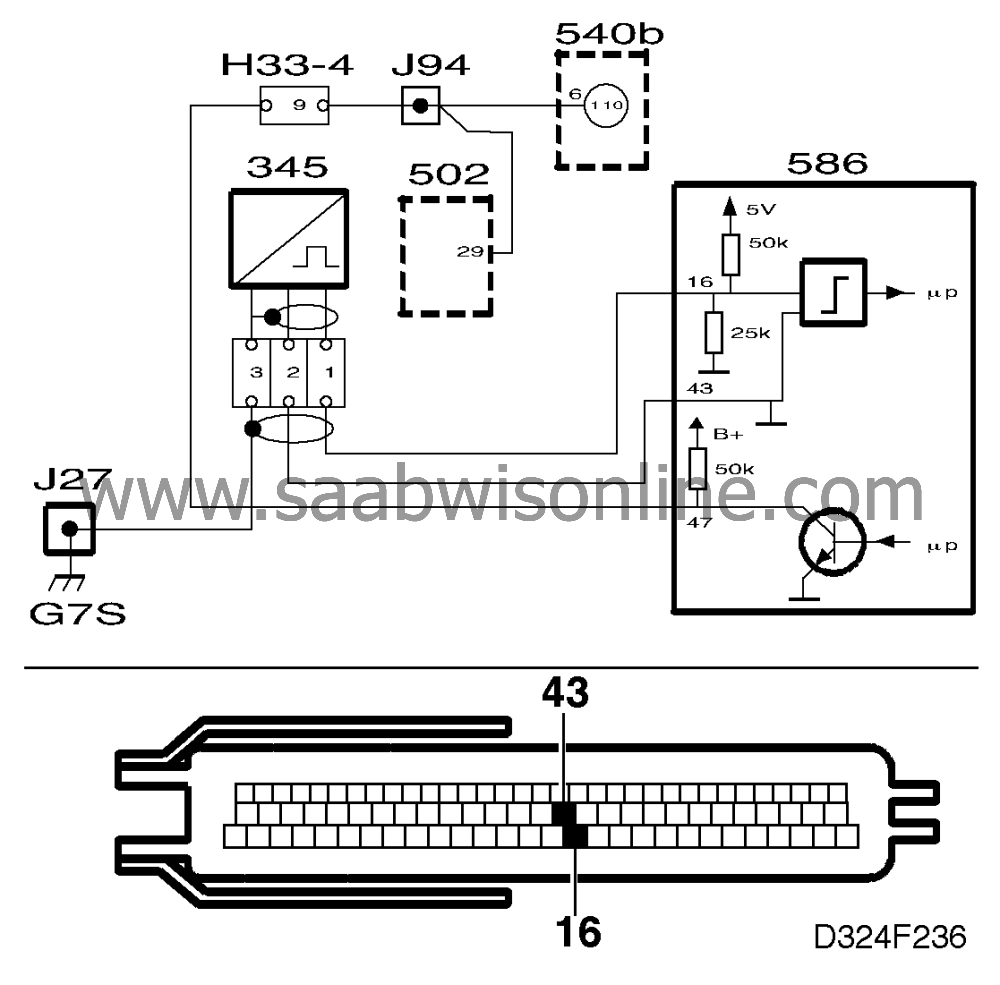
Crankshaft position sensor
Fault symptoms
The engine fails to start or misfires. Other diagnostic trouble codes
(misfiring).
Conditions
P0335
|
•
|
Engine speed > 520
rpm.
|
|
•
|
The crankshaft position sensor reads the wrong number of ribs per crankshaft
revolution.
|
P0336
|
•
|
Engine speed > 520
rpm.
|
|
•
|
The crankshaft position sensor cannot find the gap in the toothed
wheel.
|
Diagnostic help
The diagnostic trouble code usually indicates an intermittent fault. The diagnostic
trouble code could be generated if the slotted ring mounted on the crankshaft has been
damaged in connection with work carried out on the basic engine, for instance.
Check the wiring
Intermittent faults may occur as a result of temporary short circuits and breaks in the
wiring. Jiggle the wiring at several points and in different directions to ascertain whether the
wiring harness, including any connectors, is causing the trouble. Observe the multimeter,
ISAT scan tool or test lamp while doing this.
Diagnostic procedure
1. Check the resistance of the crankshaft position sensor

|
-
|
Unplug the crankshaft position
sensor's 4-pin connector.
|
|
-
|
Take a resistance reading on the contacts of the sensor's connector,
across:
|
|
-
|
Check for possible stray currents between the signal lead and the
screening.
|
Are the readings OK?
Continue with point 2.
Change the crankshaft position sensor. Continue with point 5.
2. Check the mounting of the crankshaft position
sensor
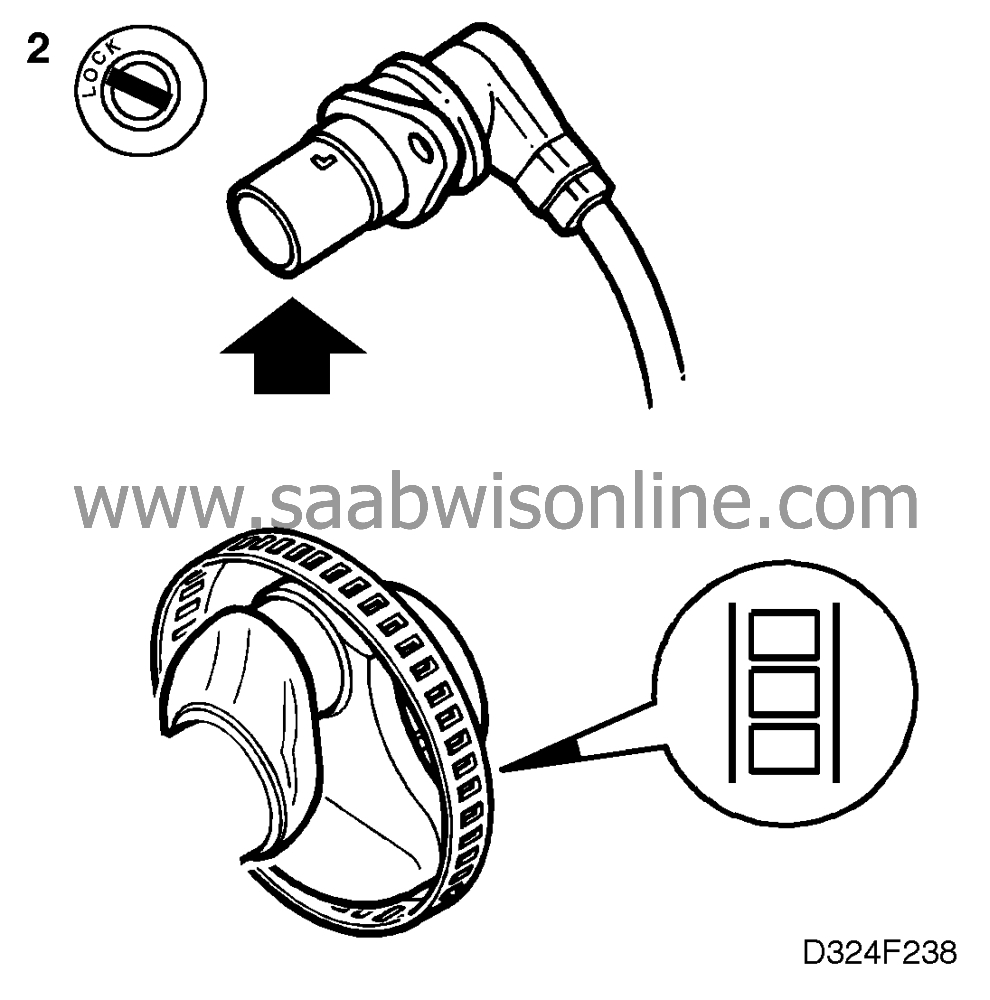
|
-
|
Remove the crankshaft position
sensor and check:
|
|
-
|
Brush any metal filings, etc. off the
sensor and change the engine oil.
|
Is the slotted ring damaged or insecurely mounted?
See Basic engine
 .
.
Continue with point 3.
3. Check the electrical interface between the crankshaft position sensor and the
control module

|
-
|
Turn the ignition switch to the ON
position.
|
|
-
|
Connect the test lamp to the
crankshaft position sensor's connector between:
|
The test lamp should light up in both cases.
|
-
|
Using a multimeter, take a reading
between:
|
Desired reading: about 1.8 V.
Are the readings OK?
Continue with point 4.
Repair or replace the relevant lead between:
• pin 2 and control module pin 43.
• pin 1 and control module pin 16.
• pin 3 and grounding point G7S.
4. Final check

|
-
|
Clear the diagnostic trouble code.
|
|
-
|
Implementation of driving cycle:
|
|
-
|
Evaluation of driving cycle:
|
Has the diagnostic trouble code recurred?
Continue as described in
 .
.
The steps taken to rectify the fault were
correct.
