Diagnostic trouble code P1549
|
|
Diagnostic trouble code P1549
|
Boost pressure control valve
Symptom of fault
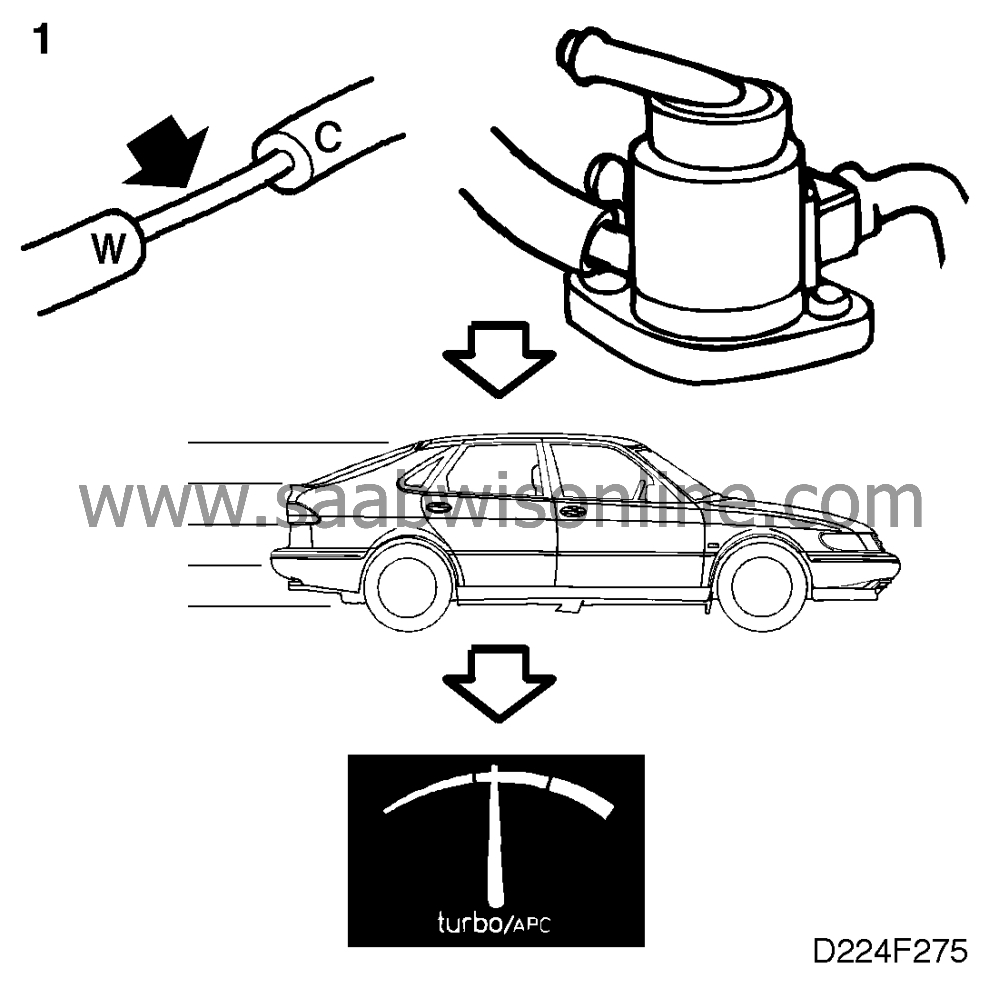
The needle of the Turbo/APC gauge goes far into the red zone. The pressure switch
has opened.
Conditions
|
•
|
The control module has reduced
boost pressure by the maximum amount
|
|
•
|
The pressure switch has opened
|
Diagnostic help
The boost pressure control valve can be activated by means of the ISAT scan
tool.
|
-
|
Connect an ISAT scan
tool.
|
|
-
|
Select
"BOOST PRESS. VALVE".
|
Checking the wiring. Intermittent faults may occur as a result of occasional short
circuits and breaks in the wiring. Jiggle the leads and in-line connectors at several places and
in different directions to reveal faults in the wiring harness. Observe the multimeter, ISAT scan
tool or test lamp while carrying out this check.
Diagnostic procedure
1. Check additional diagnostic trouble codes in the Trionic
system
|
-
|
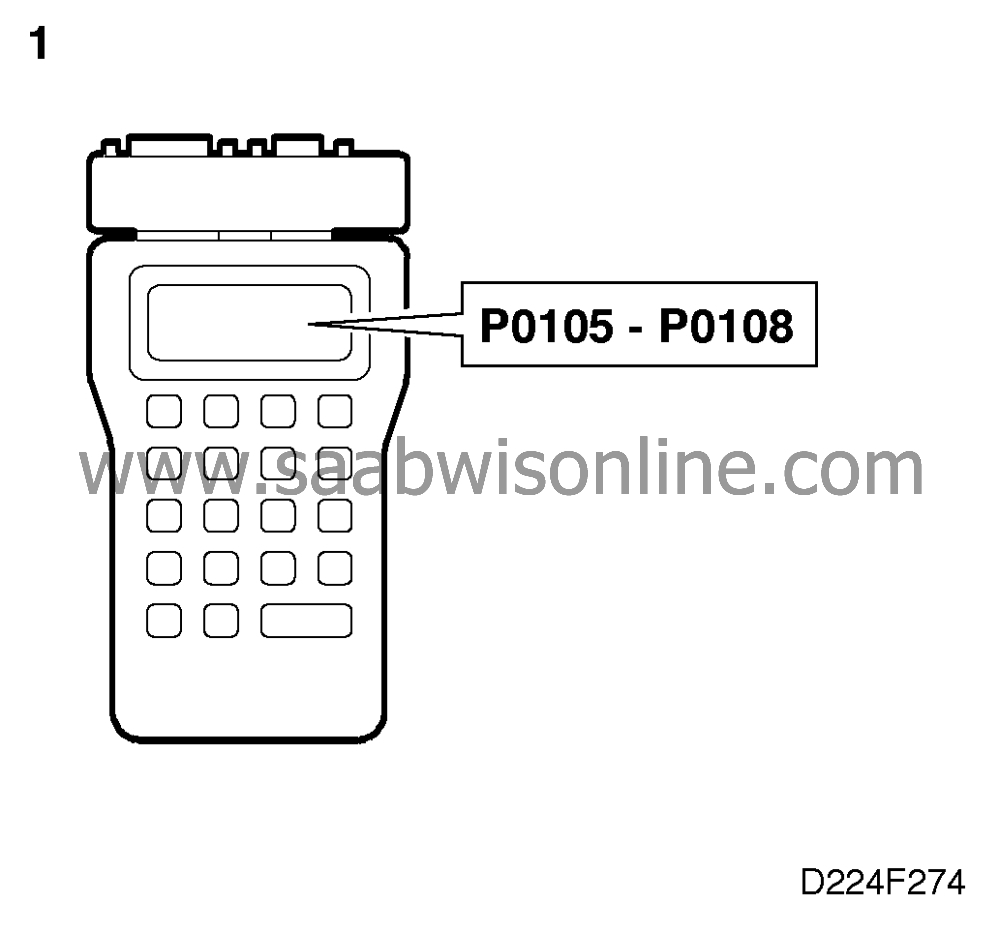
Read out all the diagnostic trouble
codes with the ISAT scan tool. P0105 - P0108
|
Are any of the above diagnostic trouble codes present?
Continue fault diagnosis as described for the appropriate diagnostic trouble
code.
Continue with point 2.
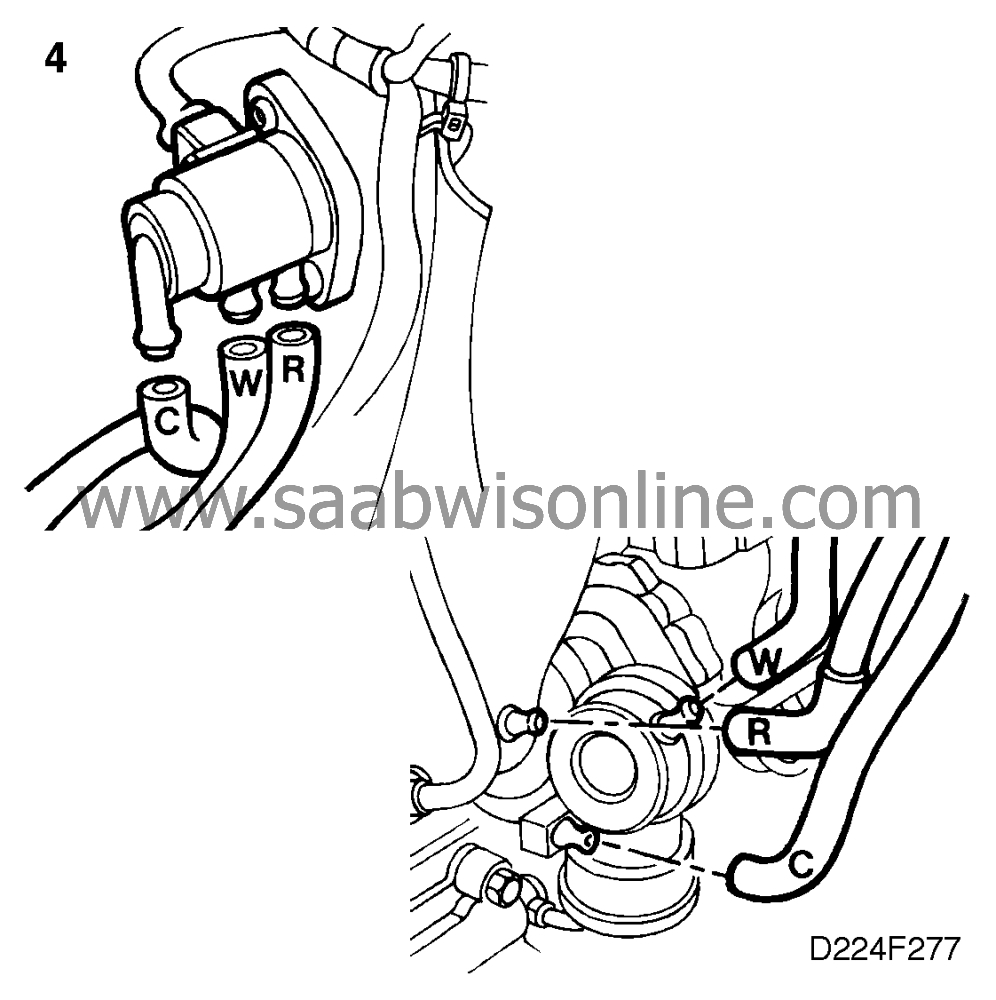
2. Investigate the cause of the fault
 In the following it will be determined whether the fault is a control fault or a basic
engine/turbo fault.
In the following it will be determined whether the fault is a control fault or a basic
engine/turbo fault.
|
-
|
Disconnect the air hoses marked
"W" and "C" from the boost pressure control valve and connect them to each other with a
length of pipe.
|
|
-
|
Only basic boost pressure should
be obtained when driving at wide open throttle from low engine rpm and when opening the
throttle suddenly at higher engine rpm.
|
Is only basic boost pressure obtained?
Continue with point 3.
Check and, if necessary, rectify the following:
• Binding wastegate
• Defective diaphragm unit
• Defective or incorrectly connected control hoses
• Incorrect or poorly adjusted basic boost pressure
Rectify as necessary and continue with point 9.
3. Check fuse 24
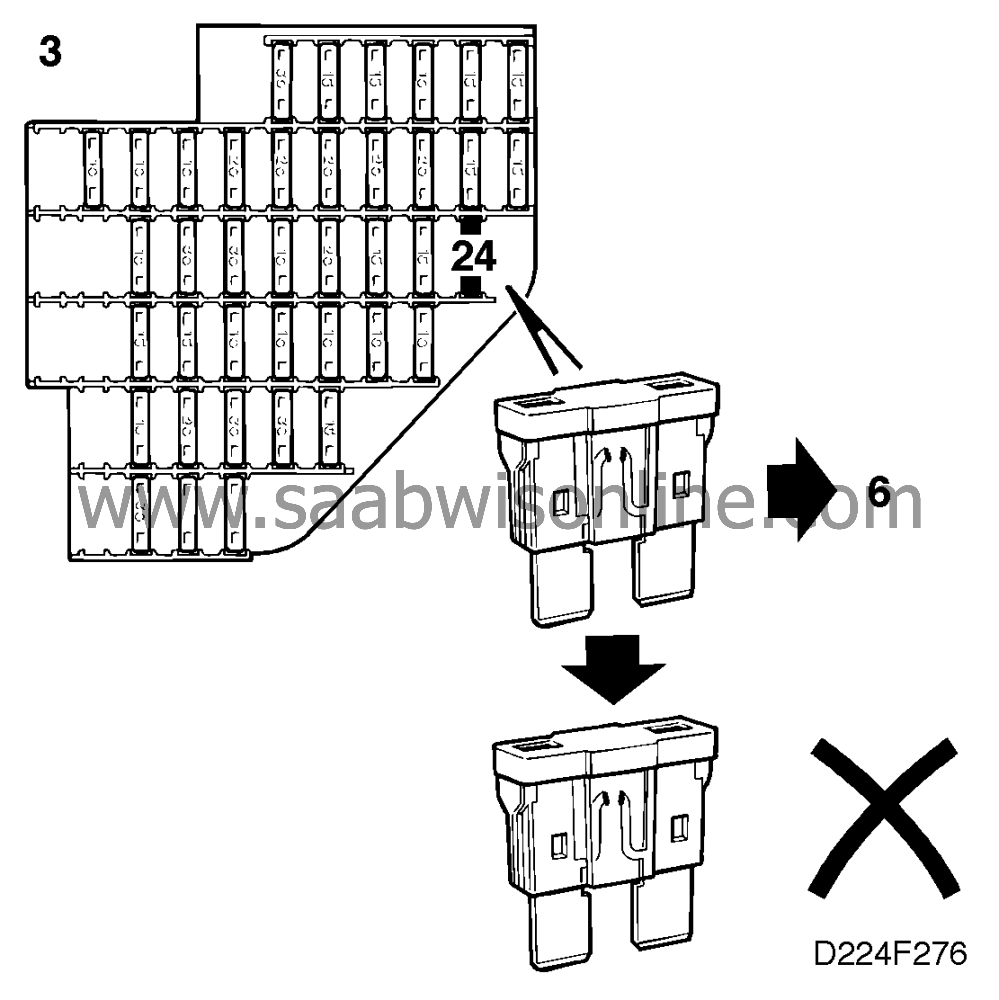
Is the fuse OK?
Continue with point 4.
Continue with point 6.
4. Check the air hoses
|
-
|
Inspect the valve's three
control hoses, making sure that they are in good condition and correctly connected.
|
Are the air hoses OK?
Continue with point 5.
Rectify the fault and continue with point 9.
5. Check the power supply

|
-
|
Ignition switch in ON
position.
|
|
-
|
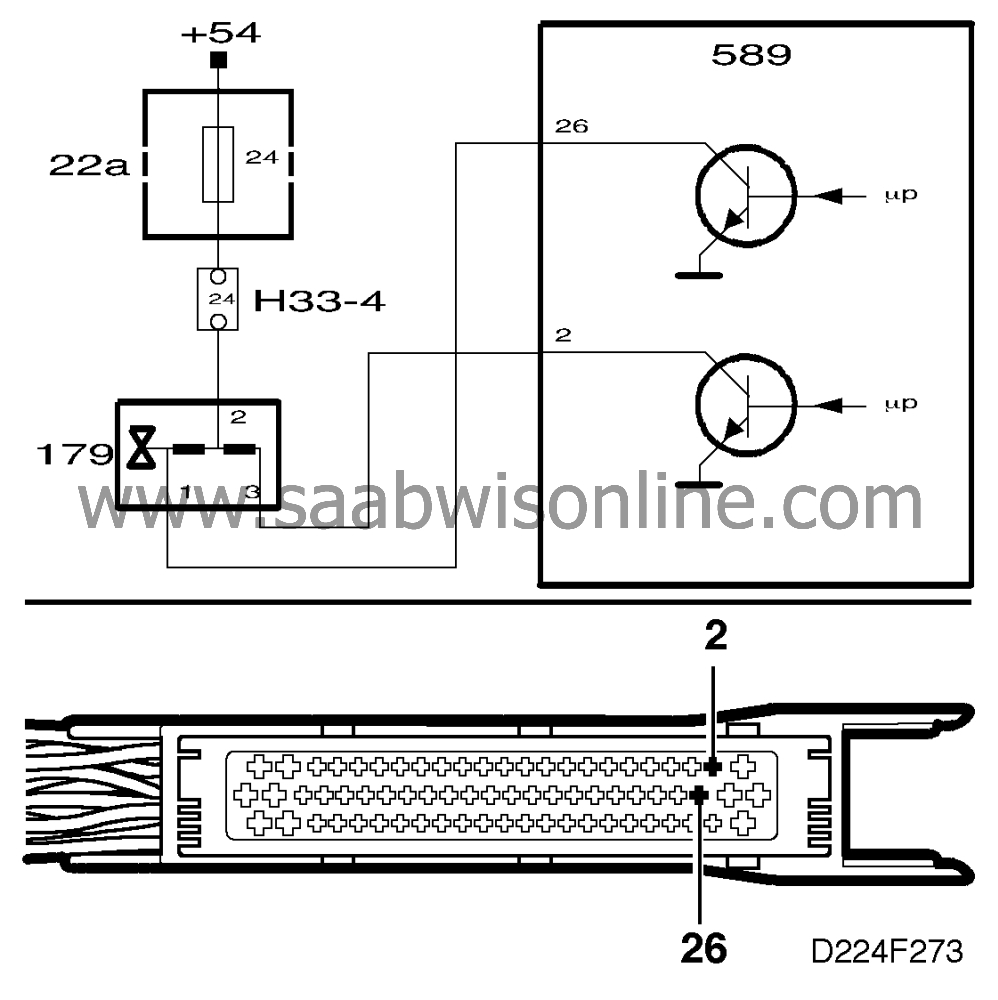
Check that the valve is supplied
with power (+54 circuit) by connecting a test lamp to pin 2 of the valve's connector and
a good grounding point.
|
The test lamp should light up.
Is the test lamp on?
Continue with point 6.
Repair or replace the lead between pin 2 of the connector and fuse 5. Then
continue with point 9.
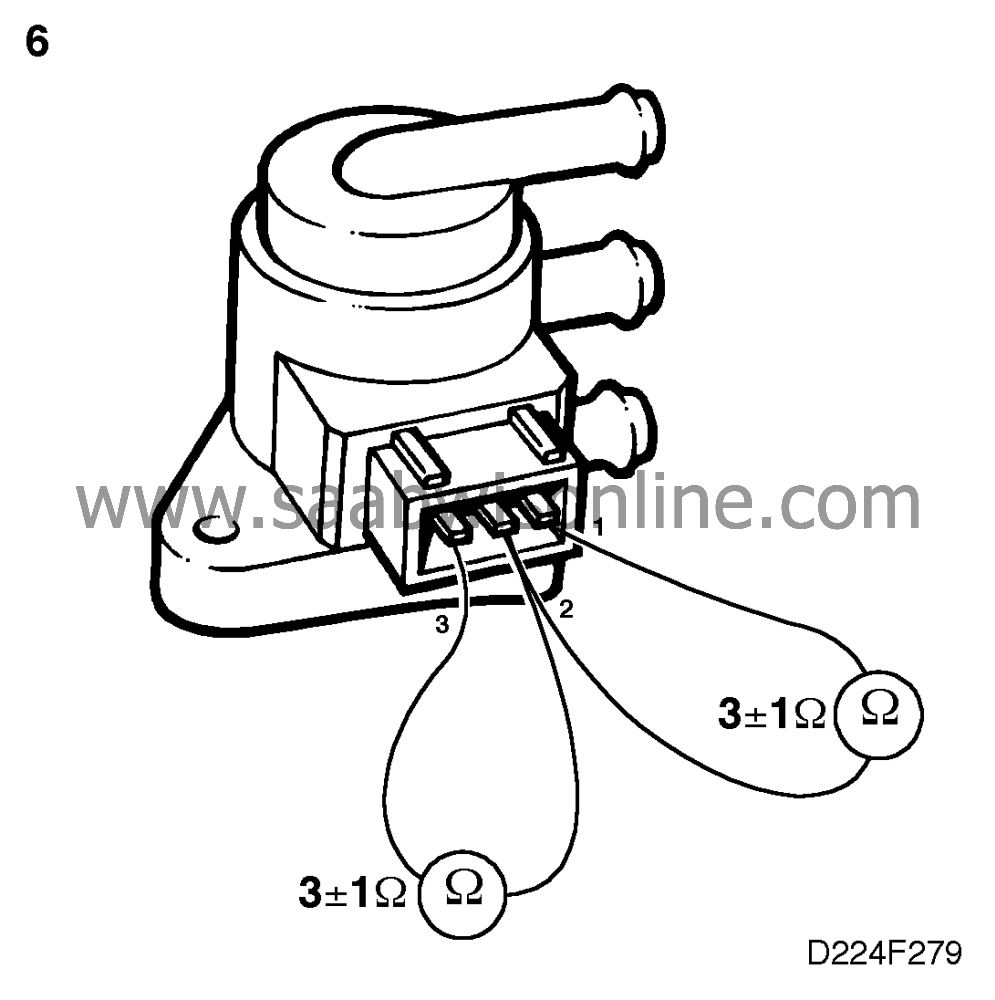
6. Check the resistance of the valve
|
-
|
Take resistance readings in the
valve's connector across:
• Pins 1 and 2
• Pins 2 and 3
|
Nominal resistance is 3±1 ohms in both cases.
Are the readings OK?
Continue with point 7.
Change the boost pressure control valve and continue with point
9.
|
Important
|
|
If there is a short circuit in any winding the control module will probably also be
damaged. If a new valve is then fitted it will inevitably be rendered unserviceable. In the event
of a short circuit, both valve and control module must therefore be changed at the same
time .
|
|
|
If necessary, change fuse 24 afterwards.
7. Check the lead connected to pin 3 of the
valve

|
-
|
Ignition switch in ON position.
|
|
-
|
Plug in the valve's
connector. A weak buzzing sound should be heard.
|
Can a sound be heard?
Continue with point 8.
Check the lead between pin 3 of the valve's connector and pin 2 of the
control module. Repair or replace the lead if necessary. Continue with point 9.
8. Check the lead connected to pin 1 of the valve

|
-
|
Ignition switch in ON
position.
|
|
-
|
Plug in the valve's
connector.
|
|
-
|
Select
"BOOST PRESS. VALVE".
|
A loud buzzing sound should be heard.
Can a sound be heard?
Change the boost pressure control valve and continue with point 9.
Check the lead between pin 1 of the valve's connector and pin 26 of the
control module. Repair or replace the lead if necessary. Continue with point 9.
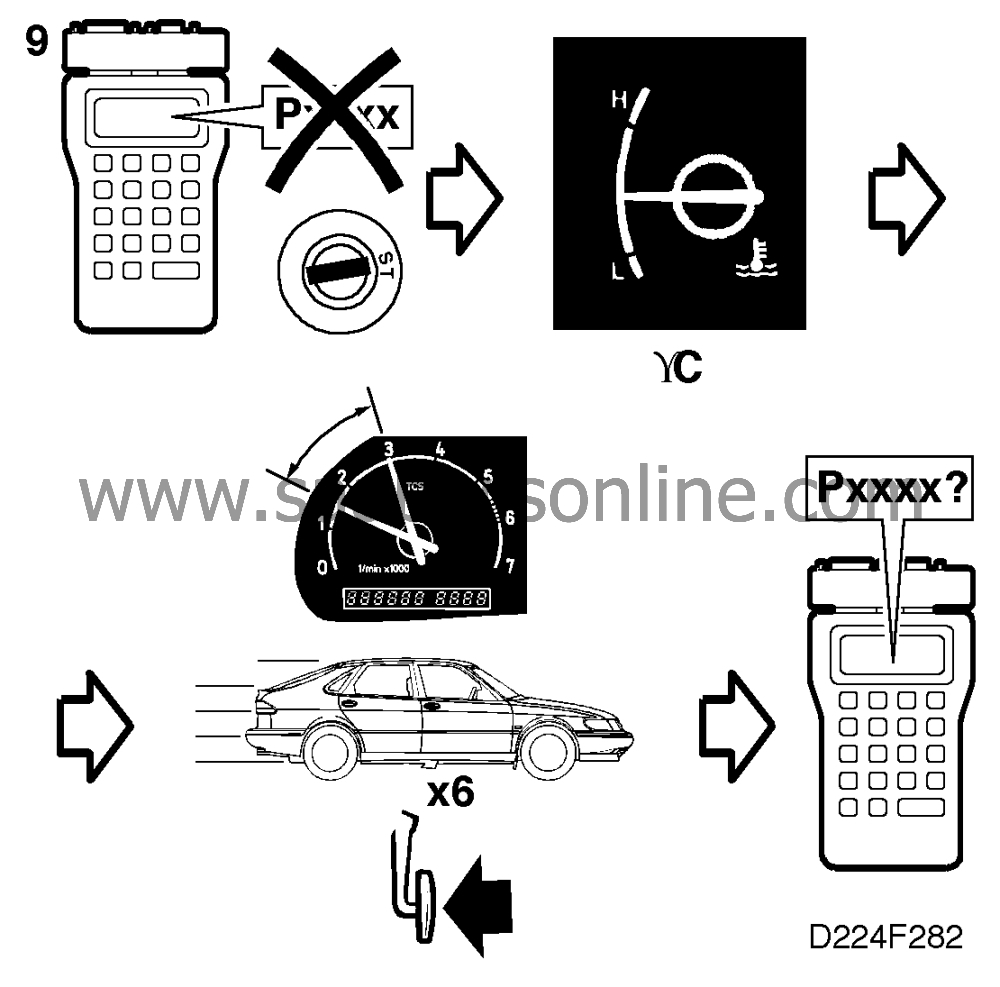
9. Final check
|
-
|
Clear the diagnostic trouble
code.
|
|
-
|
Perform a driving
cycle:
|
|
|
•
|
Accelerate at wide open throttle from 1500 rpm to at least 3000 rpm 6
times.
|
|
-
|
Evaluation of the driving cycle:
Check whether the diagnostic trouble code has recurred and whether the pressure switch has
opened during the driving cycle.
|
Has the diagnostic trouble code recurred or has the pressure switch opened during
the driving cycle?
Proceed to
 .
.
The remedial measure taken was correct.
