P0136,P0138, P0140
Symptom: The CHECK ENGINE lamp (MIL) is on.
Rear heated oxygen sensor (oxygen sensor 2)
Symptom of fault
The CHECK ENGINE lamp (MIL) is on.
Conditions
P0136: All-embracing DTC
P0138: Ignition switch in ON position. sensor voltage >1500 mV for more than 5
sec.
P0140: Diagnosis not yet performed this trip.
|
•
|
Coolant temperature >70°C (>158°F).
|
|
•
|
The oxygen sensor's voltage has not climbed above 0.4 V nor changed by
more than 0.5 V in 500 seconds.
|
Diagnostic help
Operation of the oxygen sensor can be ascertained using an ISAT scan
tool.
|
-
|
Select
"READ FUNCTIONS".
|
|
-
|
Select
"OXY SENSOR REAR".
|
At full load the ISAT scan tool should show a reading of >0.7 V. At fuel shut-
off the ISAT scan tool should show a reading of about 0 V.
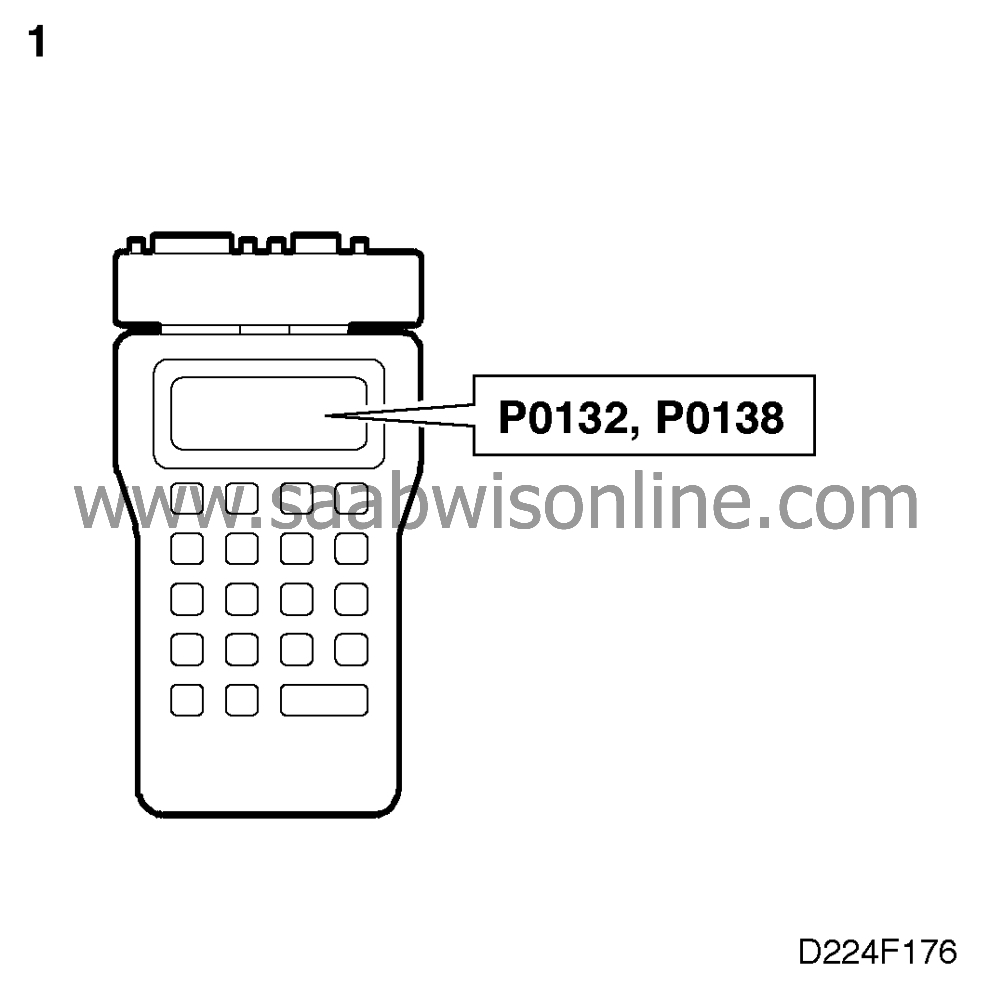
If the reference ground or sensor voltage of any of the oxygen sensors is short-circuited
to battery positive (B+) in the wiring harness or in any of the oxygen sensors, DTCs P0132
and P0138 will probably both be generated.
The control module inputs of the oxygen sensors are high-ohmic. If moisture gets into
the connectors of some of the oxygen sensors, a diagnostic trouble code will be
generated.
Checking the wiring. Intermittent faults may occur as a result of occasional short circuits
and breaks in the wiring. Jiggle the leads and in-line connectors at several places and in
different directions to reveal faults in the wiring harness. Observe the multimeter, ISAT scan
tool or test lamp while carrying out this check.
Diagnostic procedure
1. Check additional diagnostic trouble codes in the Trionic
system
|
-
|
Obtain readouts of all diagnostic
trouble codes using the ISAT scan tool
|
Are P0132 and P0138 present?
Continue with point 2.
Continue with point 3.
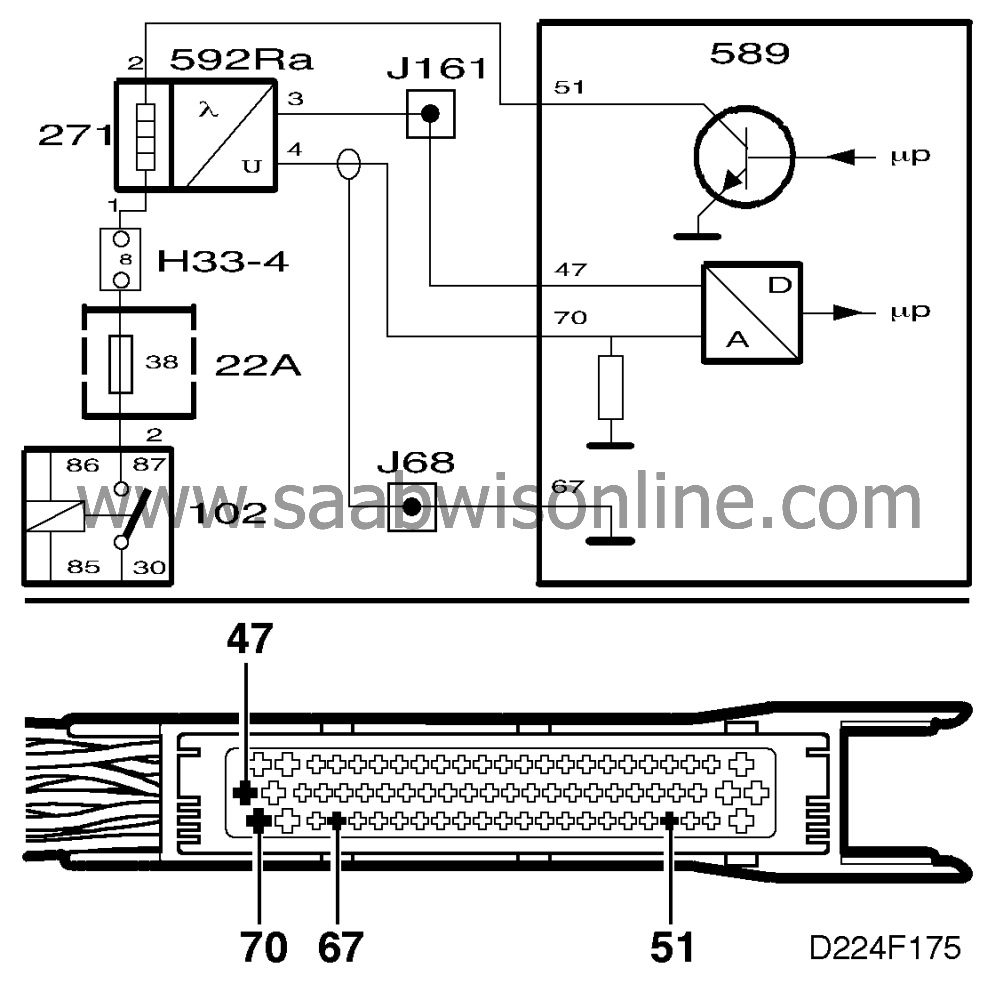
2. One of the oxygen sensor leads connected to electronic control
module pin 23, 70 or 47 is short-circuited to battery positive (B+) in the wiring harness or in
one of the oxygen sensors.
 Check the insulation of the oxygen sensors.
|
-
|
Unplug the 4-pin connectors of
both oxygen sensors.
|
|
-
|
Check the resistance of both
sensors:
•pins 1-3
__________ar;_______
_______ O L (Over Load = infinite
resistance)
•pins 1-4
__________ar;_______
_______ O L (Over Load = infinite
resistance)
|
Are all readings OK?
Rectify the lead between the connectors of both sensors and pin 23, 70 or 47
of the electronic control module and then proceed to point 4.
Change the relevant oxygen sensor and proceed to point 4.
3. Check the oxygen sensor's electrical
interfaces
|
-
|
Unplug the oxygen sensor's
4-pin connector.
|
|
-
|
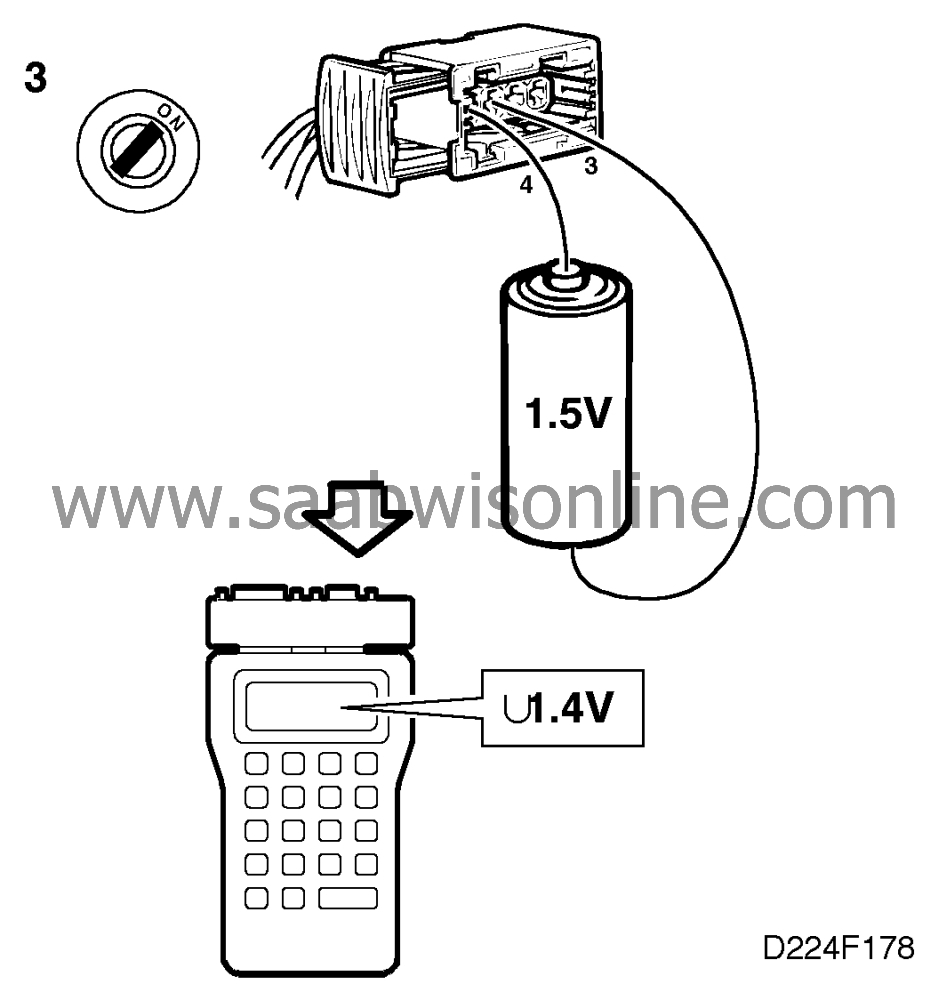
Replace the sensor with a
conventional 1.5 V battery in good condition.
|
|
-
|
Connect the battery's
positive (+) pole to pin 4 of the connector.
|
|
-
|
Connect the battery's
negative (-) pole to pin 3 of the connector.
|
|
-
|
Ignition switch in ON
position.
|
|
-
|
Connect an ISAT scan
tool.
|
|
-
|
Select
"READ FUNCTIONS".
|
|
-
|
Select
"OXY SENSOR REAR".
|
The ISAT scan tool must show approx. 1.4 V.
Does the ISAT scan tool show about "1.4 V"?
Change the oxygen sensor and continue with point 4.
Check the leads between
pin 4 of the connector and pin 23 of the electronic control module and between
pin 3 of the connector and pin 47 of the electronic control module for continuity or shorting and
rectify them as necessary. Then continue with point 4.
4. Final check

|
-
|
Clear the diagnostic trouble
code
|
|
-
|
Implementation of driving cycle:
Start the engine and run it at idling speed until the temperature of the coolant exceeds
60°C (140°F) or for at least 1 minute if this temperature is reached
earlier.
|
|
-
|
Connect an ISAT scan
tool.
|
|
-
|
Select
"READ FUNCTIONS".
|
|
-
|
Select
"OXY SENSOR REAR".
|
|
-
|
Drive the car and check that the
ISAT scan tool readings are:
|
|
|
•
|
about 0 V at fuel shut-off in
connection with engine braking (manual gearbox: 3rd, 4th or 5th gear and engine speed
above 2,000 rpm)
|
Are the readings OK?
Proceed to
 .
.
The remedial measure taken was correct.
