PRE-RELEASE
OPERATION
| OPERATION |
| READ DIAGNOSTIC TROUBLE CODE |
Prepare the Vehicle Diagnostic Interface kit.
Connect the diagnosis cable to Vehicle Diagnostic Interface.
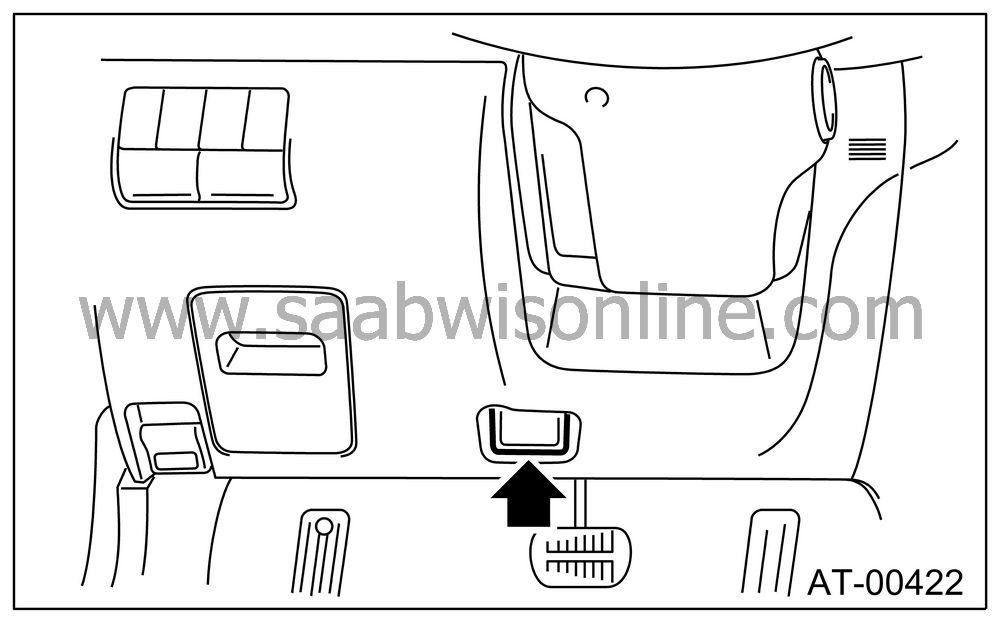
Connect the Vehicle Diagnostic Interface to data link connector.
Data link connector located in the lower portion of instrument panel (on driver’s side).

| Note | ||
|
Do not connect scan tools except for Vehicle Diagnostic Interface. |
Turn the ignition switch to ON (engine OFF), and start the Vehicle Diagnostic Interface.
On the «Main Menu» display screen, select the {Each System Check}.
On the «System Selection Menu» display screen, select the {Transmission Control System}.
Select the {OK} after the information of transmission type is displayed.
On the «Transmission Diagnosis» display screen, select the {Diagnostic Code(s) Display}.
| Note | ||
| • |
For detailed operation procedure, refer to the Vehicle
Diagnostic Interface OPERATION MANUAL.
|
|
| • |
For details concerning the DTC, refer to the DTC LIST.

|
|
| READ CURRENT DATA |
On the «Main Menu» display screen, select the {Each System Check}.
On the «System Selection Menu» display screen, select the {Transmission Control System}.
Select the {OK} after the information of transmission type is displayed.
On the «Transmission Diagnosis» display screen, select the {Current Data Display & Save}.
On the «Transmission Diagnosis» display screen, select the {Data Display}.
Using the scroll key, move the display screen up or down until desired data is shown.
| • |
A list of the support data is shown in the
following table.
|
||||||||||||||||||||||||||||||||||||||||||||||||||||||||||||||||||||||||||||||||||||||||||||||||||||
| CLEAR MEMORY MODE |
On the «Main Menu» display screen, select the {2. Each System Check}.
On the «System Selection Menu» display screen, select the {Transmission Control System}.
Select the {OK} after the information of transmission type is displayed.
On the «Transmission Diagnosis» display screen, select the {Clear Memory}.
When the “Done” is shown on display screen, turn the Vehicle Diagnostic Interface and ignition switch to OFF.
| FACILITATION OF LEARNING CONTROL |
Shift the select lever to “P” range, and apply parking brake.
Lift-up the vehicle.
Connect the Vehicle Diagnostic Interface to data link connector, and then turn the ignition switch to ON.
Perform the {Clear Memory 2} using Vehicle Diagnostic Interface.

Using Vehicle Diagnostic Interface, check that the DTC is not output.

Warm-up the engine until the ATF temperature which is displayed on the Vehicle Diagnostic Interface is within 60 — 90°C (140 — 194°F).

Shift the select lever to “R” range.
Turn all switches including headlight, air conditioner, seat heater, rear defogger and etc. to OFF.
Turn the ignition switch to OFF.
Depress the brake pedal fully until the facilitation of learning control is completed when the “Communication Failed!” is displayed on Vehicle Diagnostic Interface.
Turn the ignition switch to ON.
Read the current data to check that the Vehicle Diagnostic Interface is returned to normal operation.

Shift the select lever to “P” range, and then wait for more than 3 seconds.
Shift the select lever to “R” range, and then wait for more than 3 seconds.
Shift the select lever to “N” range, and then wait for more than 3 seconds.
Shift the select lever to “D” range, and then wait for more than 3 seconds.
Shift the select lever to “N” range, and then wait for more than 3 seconds.
Slowly depress the accelerator pedal fully.
Slowly release the accelerator pedal fully.
Start the engine, and idle it.
Shift the select lever to “D” range.
Start the facilitation of learning control. At this time, the AT OIL TEMP warning light in combination meter blinks at 2 Hz. When the AT OIL TEMP warning light does not blink, turn the ignition switch to OFF and repeat the procedures from step 4). When the AT OIL TEMP warning light which blinking at 2 Hz changes to blink at 0.5 Hz, facilitation of learning control is completed.
| Note | ||
|
When blinking of AT OIL TEMP warning light changes from 2 Hz to 4 Hz during facilitation of learning control, repeat the procedure from step 4). |
Shift the select lever to “N” range, and then turn the ignition switch to OFF.
Shift the select lever to the “P” range, and then complete the facilitation of learning control.


