Fitting the power train, B235R, B205L/R
|
|
Fitting the power train, B235R, B205L/R
|
 Warning
|
|
A large number of hoses, cables, etc., are secured with cable ties. After tightening, the ties are cut off and leave more or less sharp edges at the fastening point. Watch out for the risk of cuts due to these sharp ends on the cable ties!
|
|
|
|
|
|
|
1.
|
Place the lifting trolley with power train under the raised car. Raise the lifting trolley so that the power train can be positioned. Insert the drive shafts into the hubs and thread on the nuts to the swivel arms and hub.
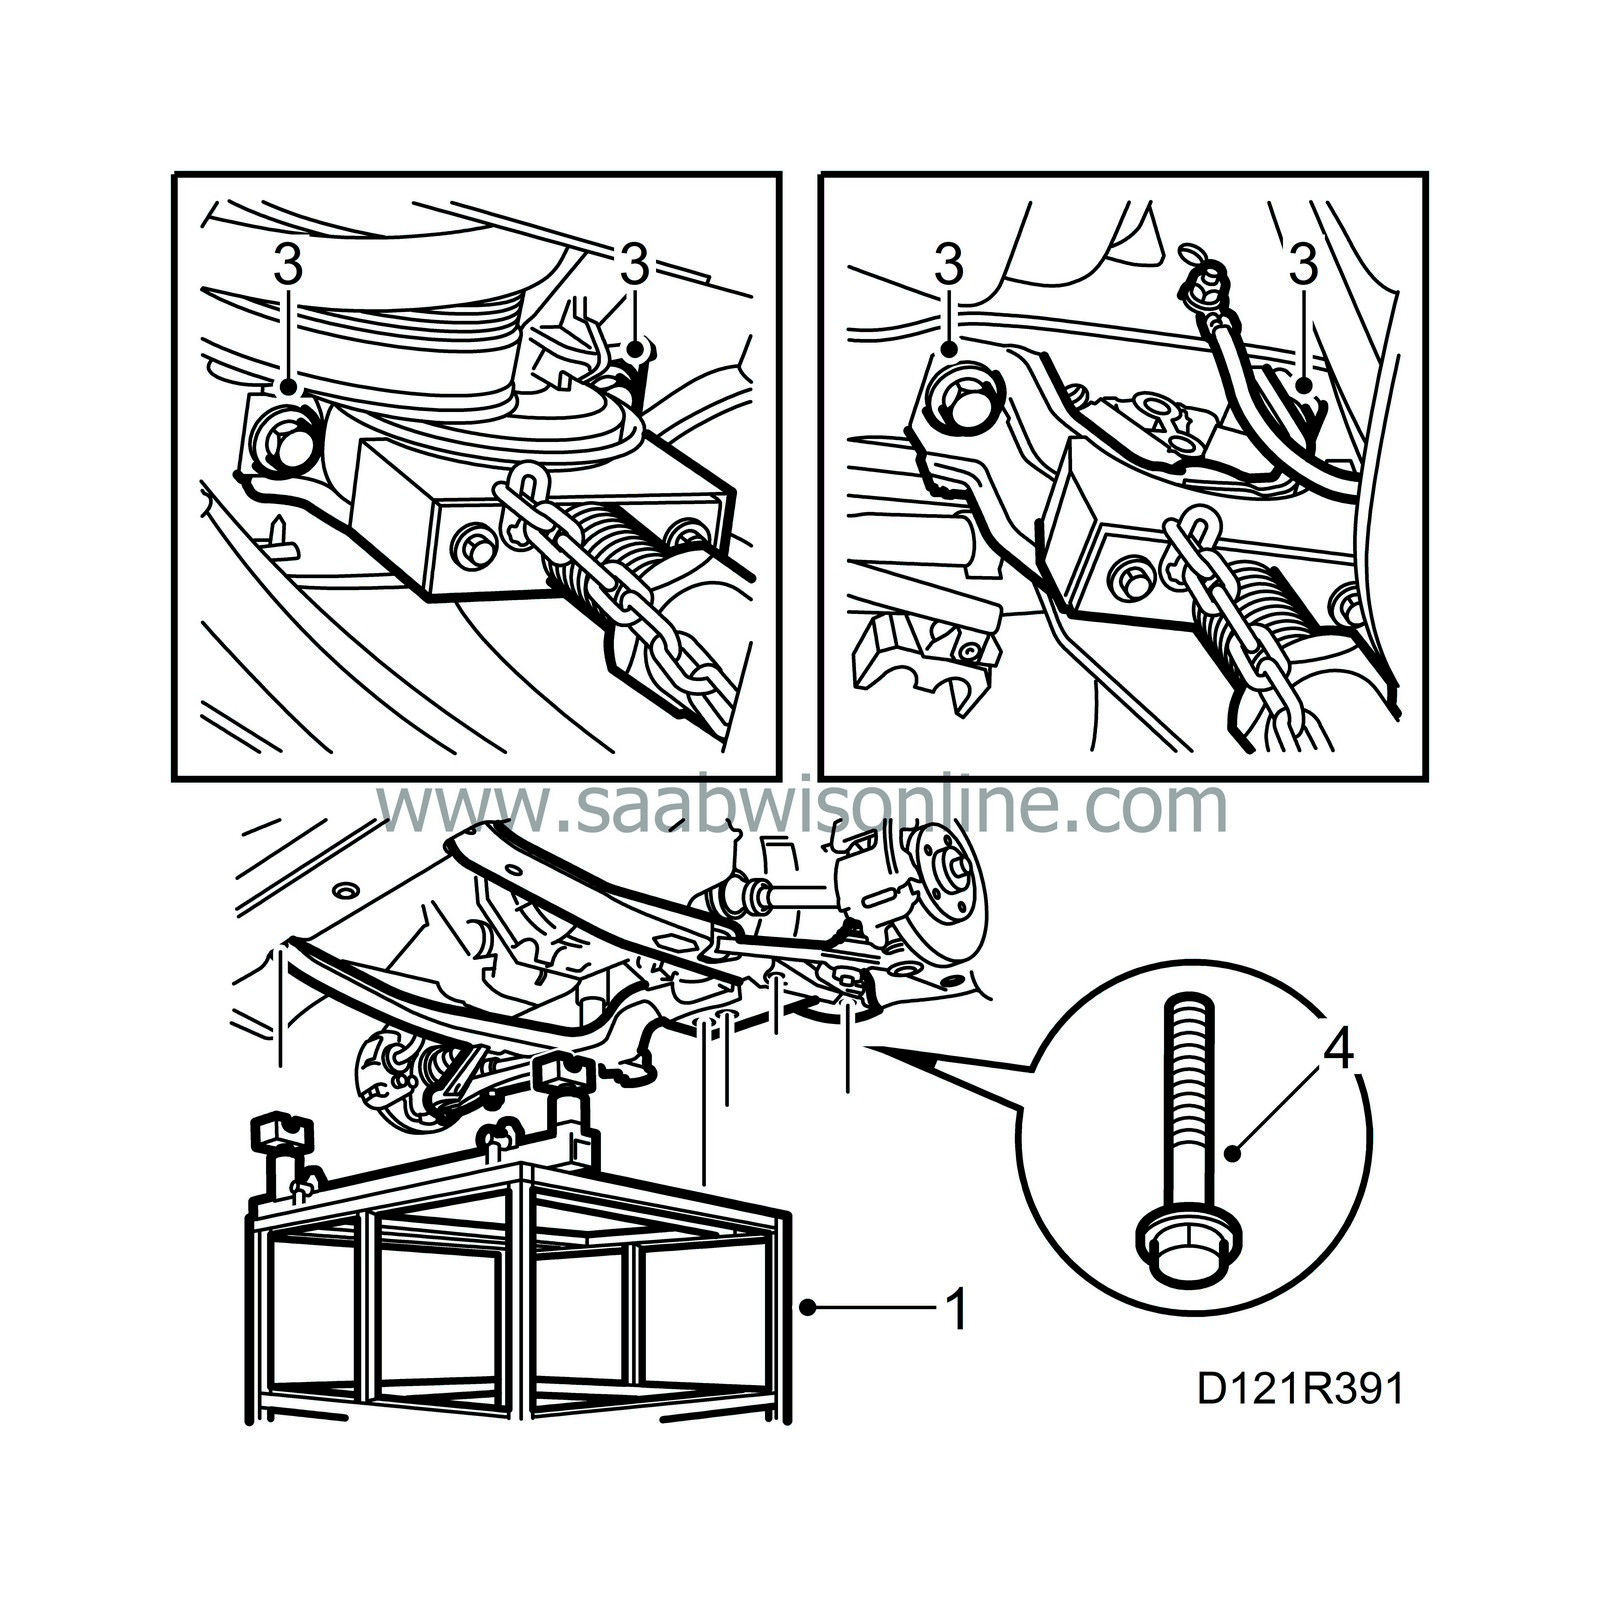
|
|
2.
|
Raise the lifting trolley higher and carefully position the power train. Make sure that the AC compressor follows along over the subframe and fit the lower bolt.
|
|
3.
|
Thread all subframe and engine mounting bolts. Make sure the washers of the rear bolts do not fall off. Secure the engine pads.
Tightening torque: 50 Nm (37 lbf ft)
|
|
4.
|
Fit the bolts for the subframe.
Tightening torque front: 115 Nm (85 lbf ft)
Tightening torque centre: 190 Nm (141 lbf ft)
Tightening torque rear: 110 + 75° Nm (82 lbf ft + 75°)
|
|
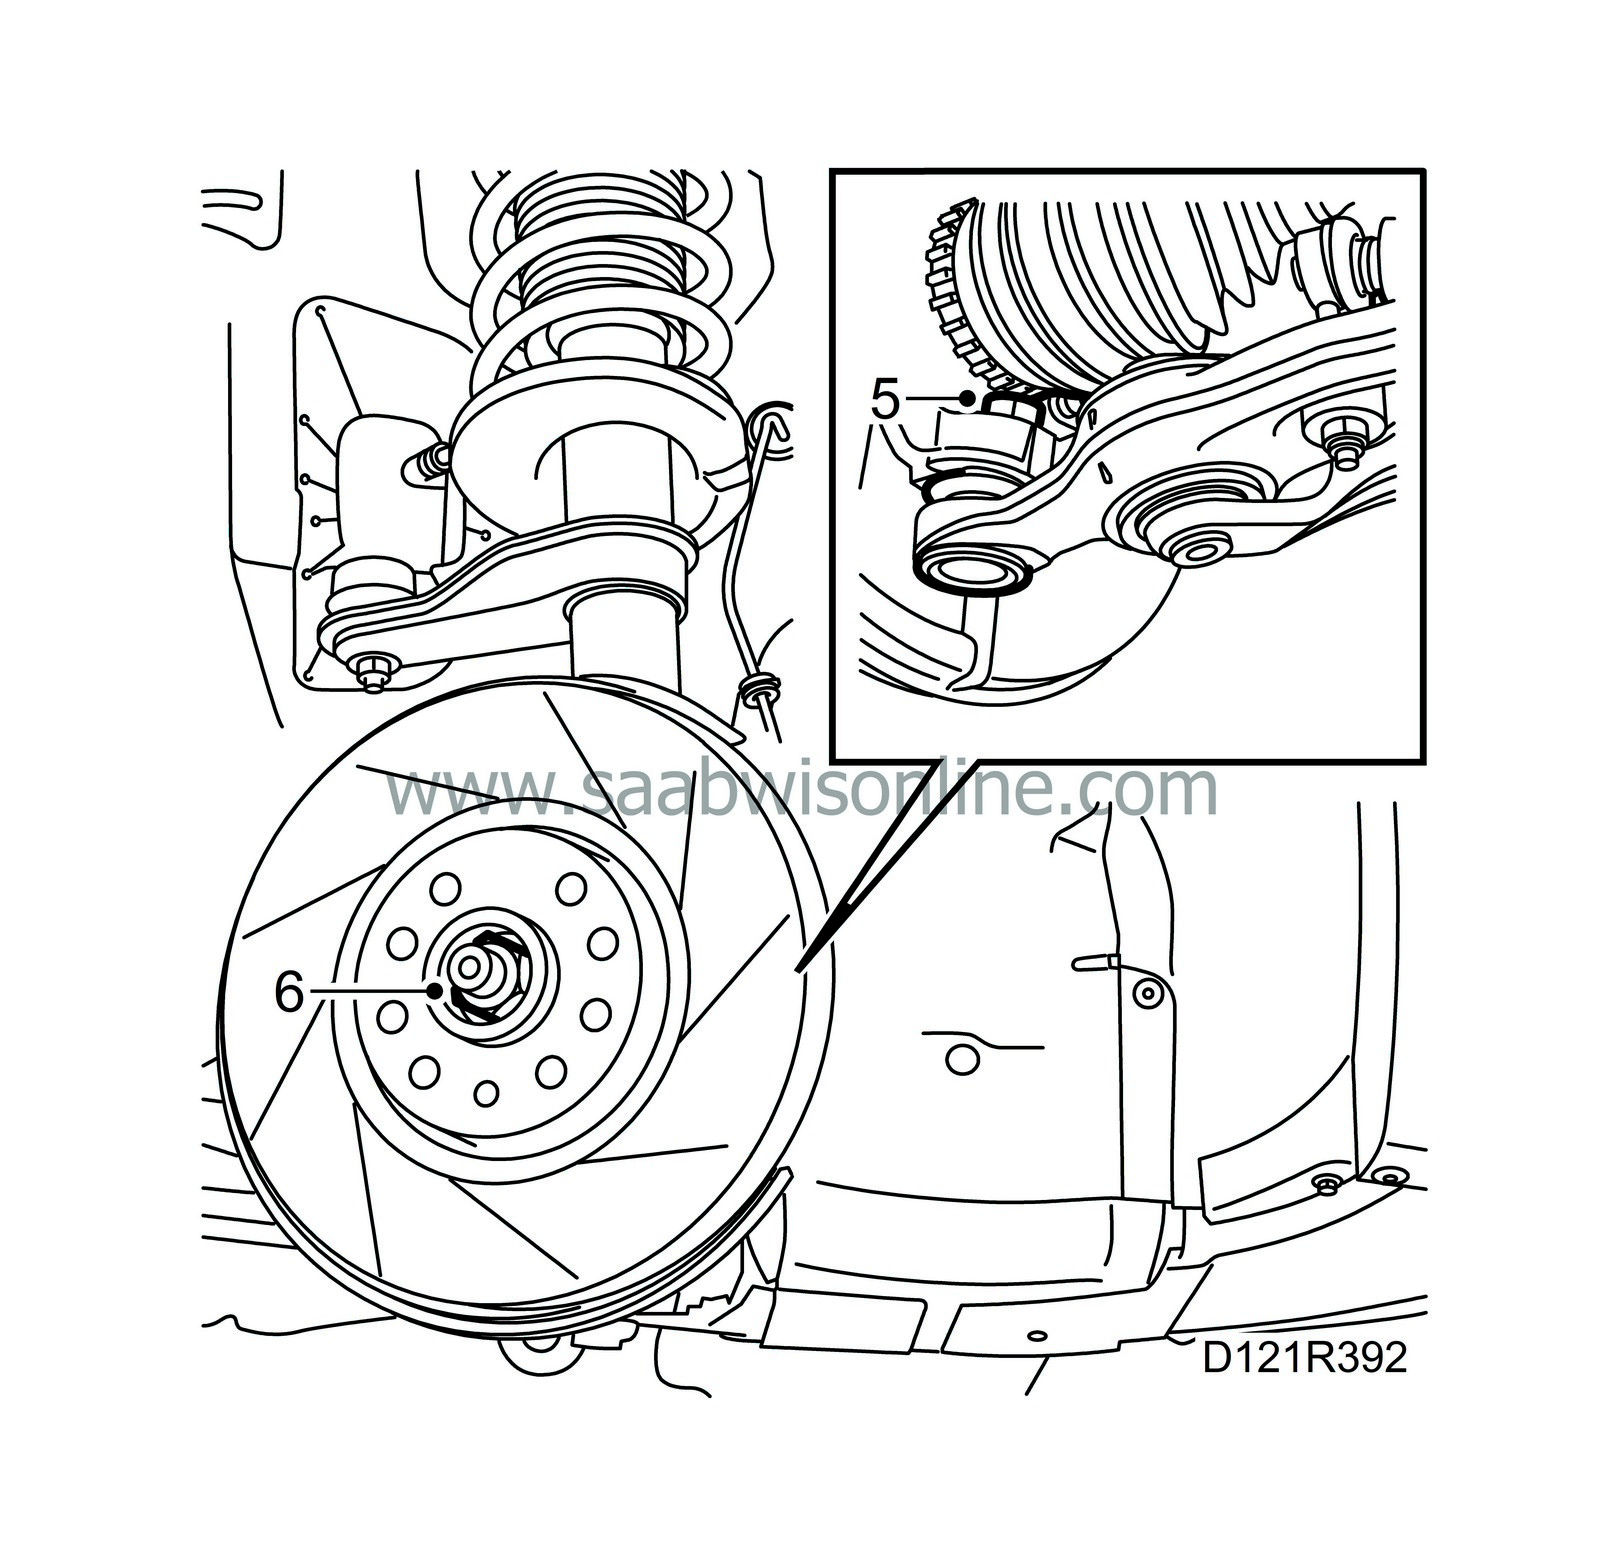
5.
|
Remove the lifting trolley and tighten the swivel arm nuts. Be sure to use new nuts.
Tightening torque: 100 Nm (74 lbf ft)
|
|
6.
|
Fit the hub centre-nuts but do not tighten them.
|
Important
|
|
Always use new hub centre-nuts with top groove
|
|
|
|
|
7.
|
Fit the lower AC compressor bolt but do not tighten it.
|
|
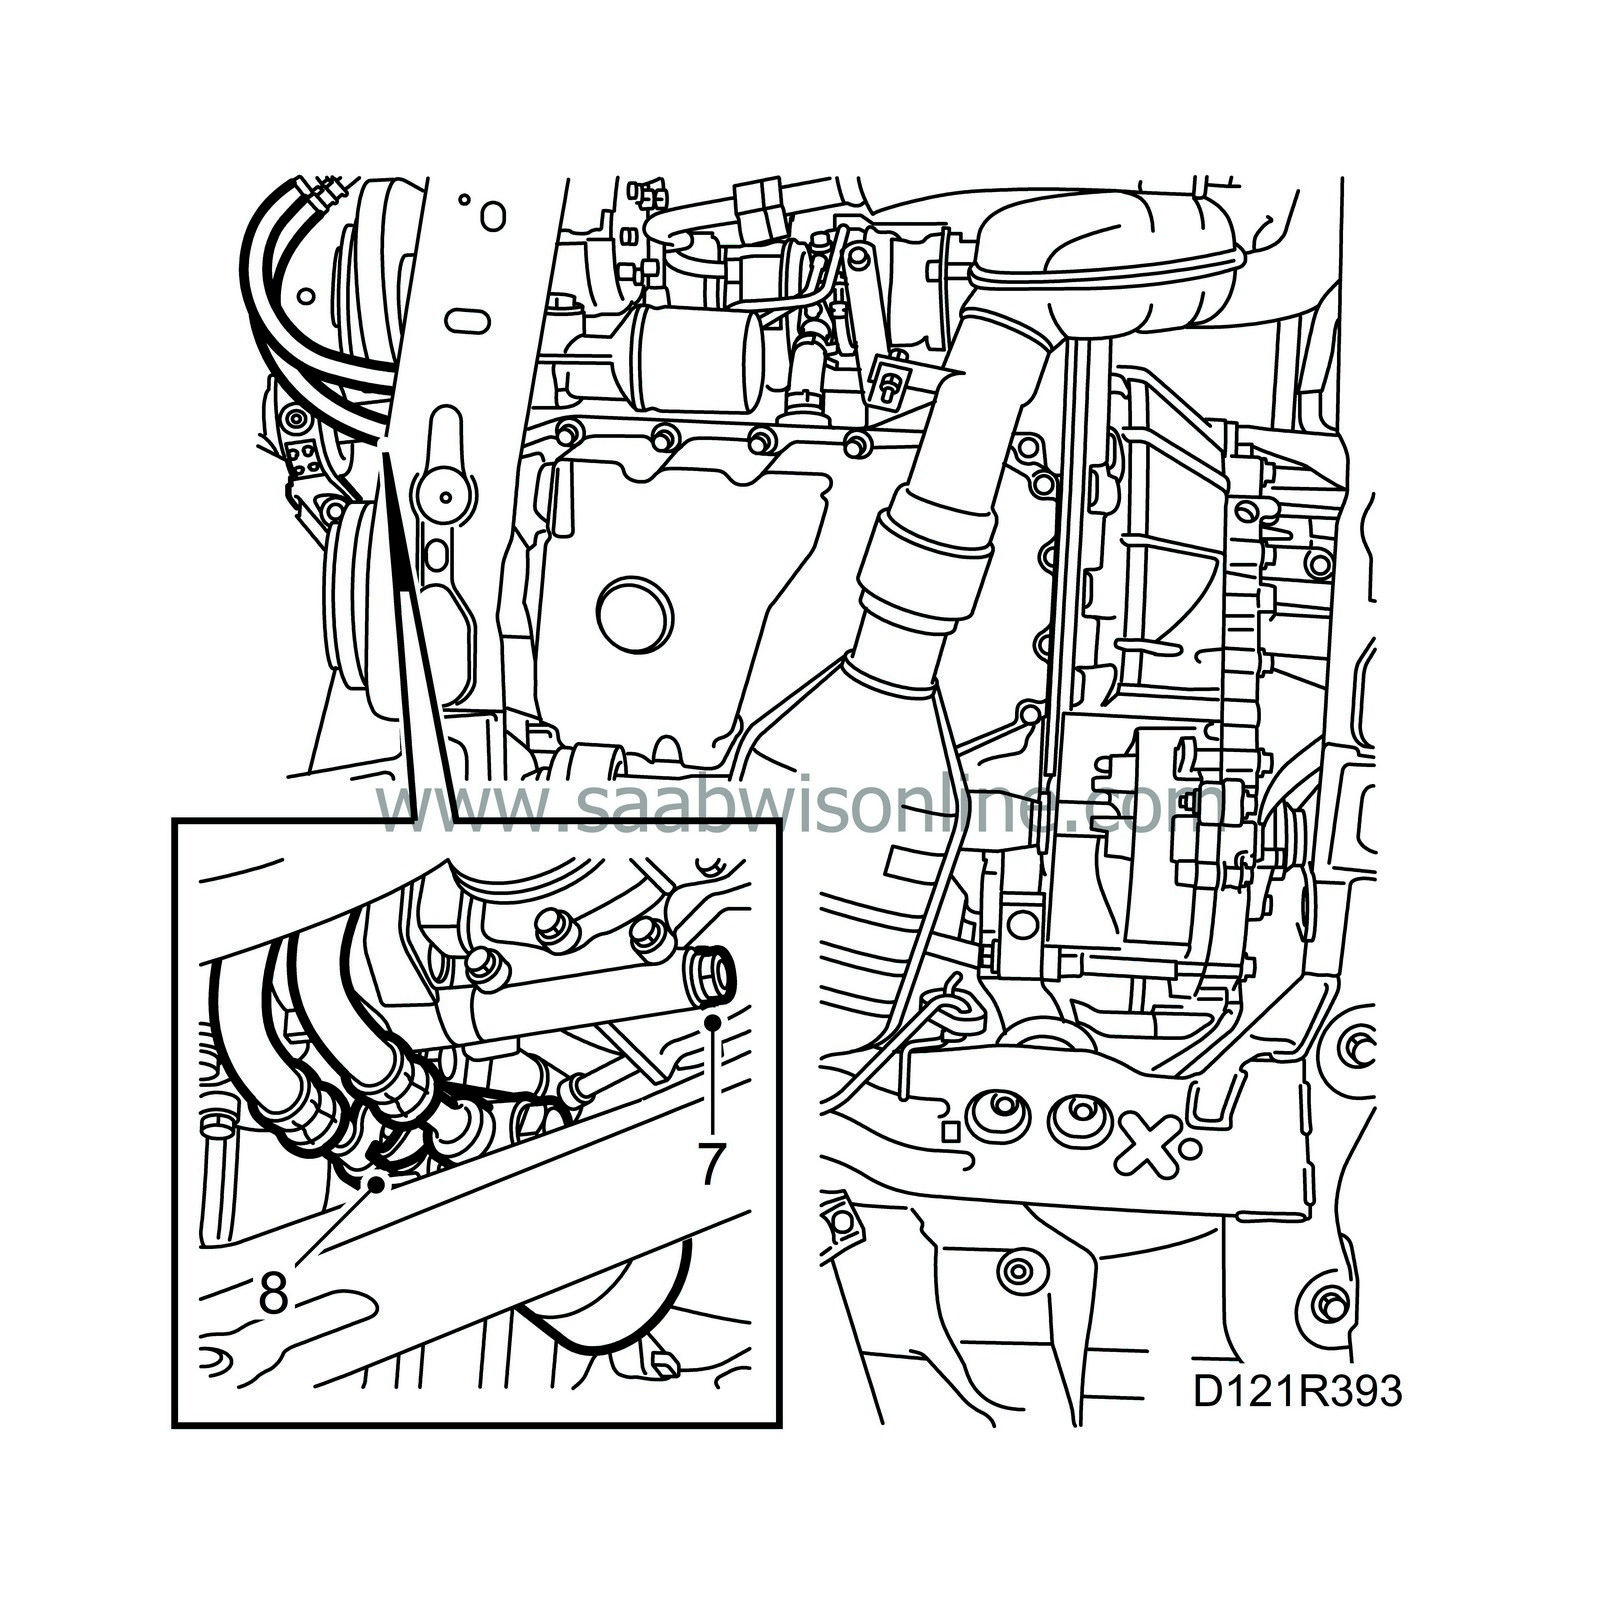
8.
|
Attach the hoses to the oil filter housing. Tighten the nut. Use new O-rings and a new nut.
Tightening torque: 8 Nm (6 lbf ft)
|
|
9.
|
Clean the joints of the exhaust pipe and fit the holders, nuts and bolts.
|
|
10.
|
Attach the coolant hoses to the heater core.

|
|
11.
|
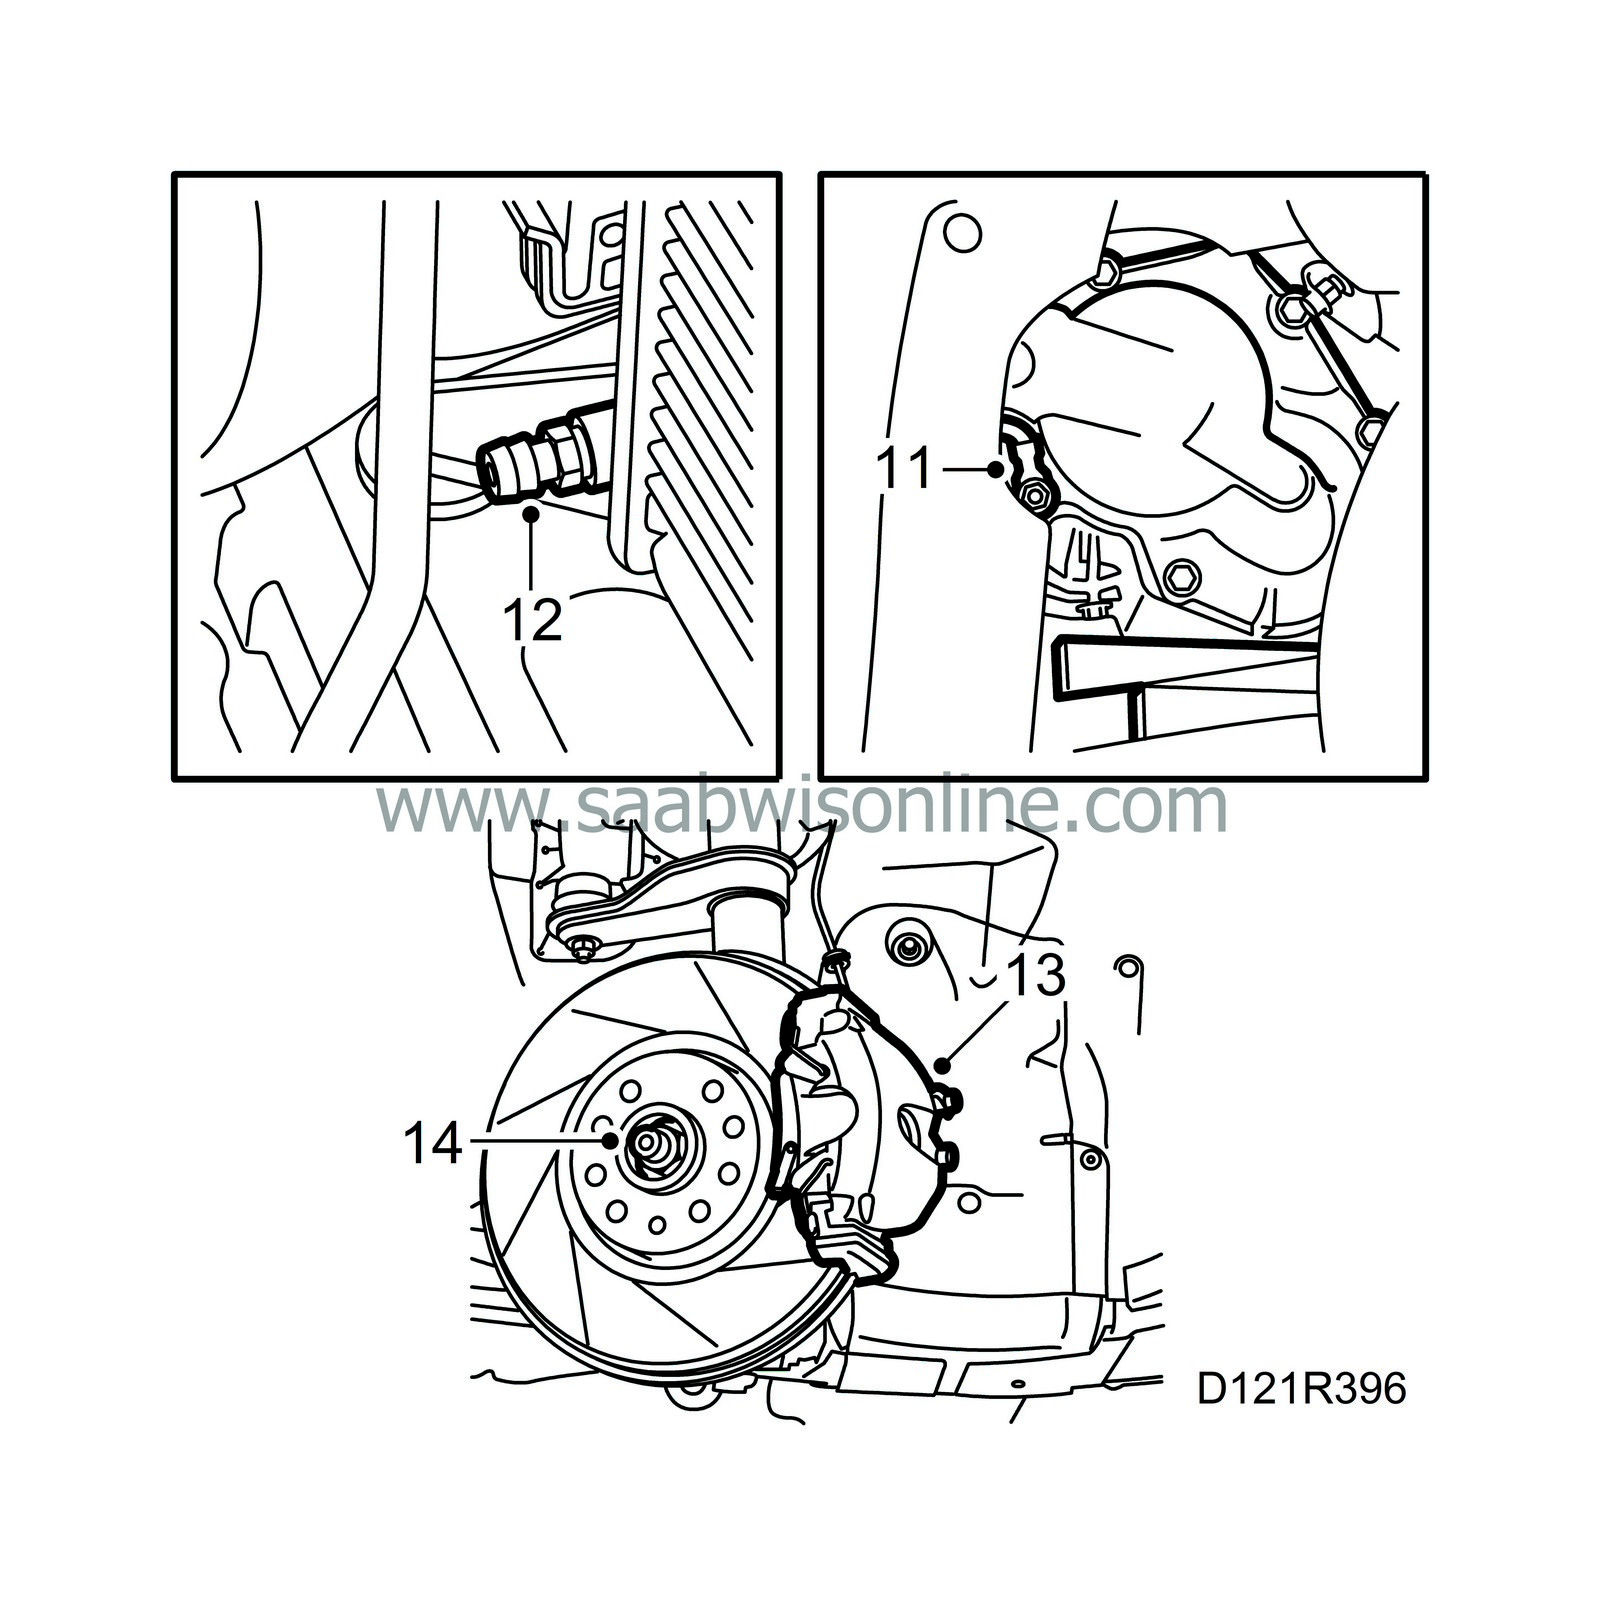
Connect the ground cable to the gearbox and left-hand wheel housing.
|
|
12.
|
Close the coolant drain plug and fit the engine covers.
|
|
13.
|
Lower the car to a comfortable working height and fit the brake calipers on both sides.
Tightening torque: 105 Nm (78 lbf ft)
|
|
14.
|
Fit the wheels. Lower the car. Tighten the hub centre-nuts.
Tightening torque, wheel 110 Nm (81 lbf ft).
Tightening torque hub centre-nut with top groove: 170 Nm +45° (126 lbf ft + 45°)
Refit the centre emblems on the wheels
|
|
15.
|
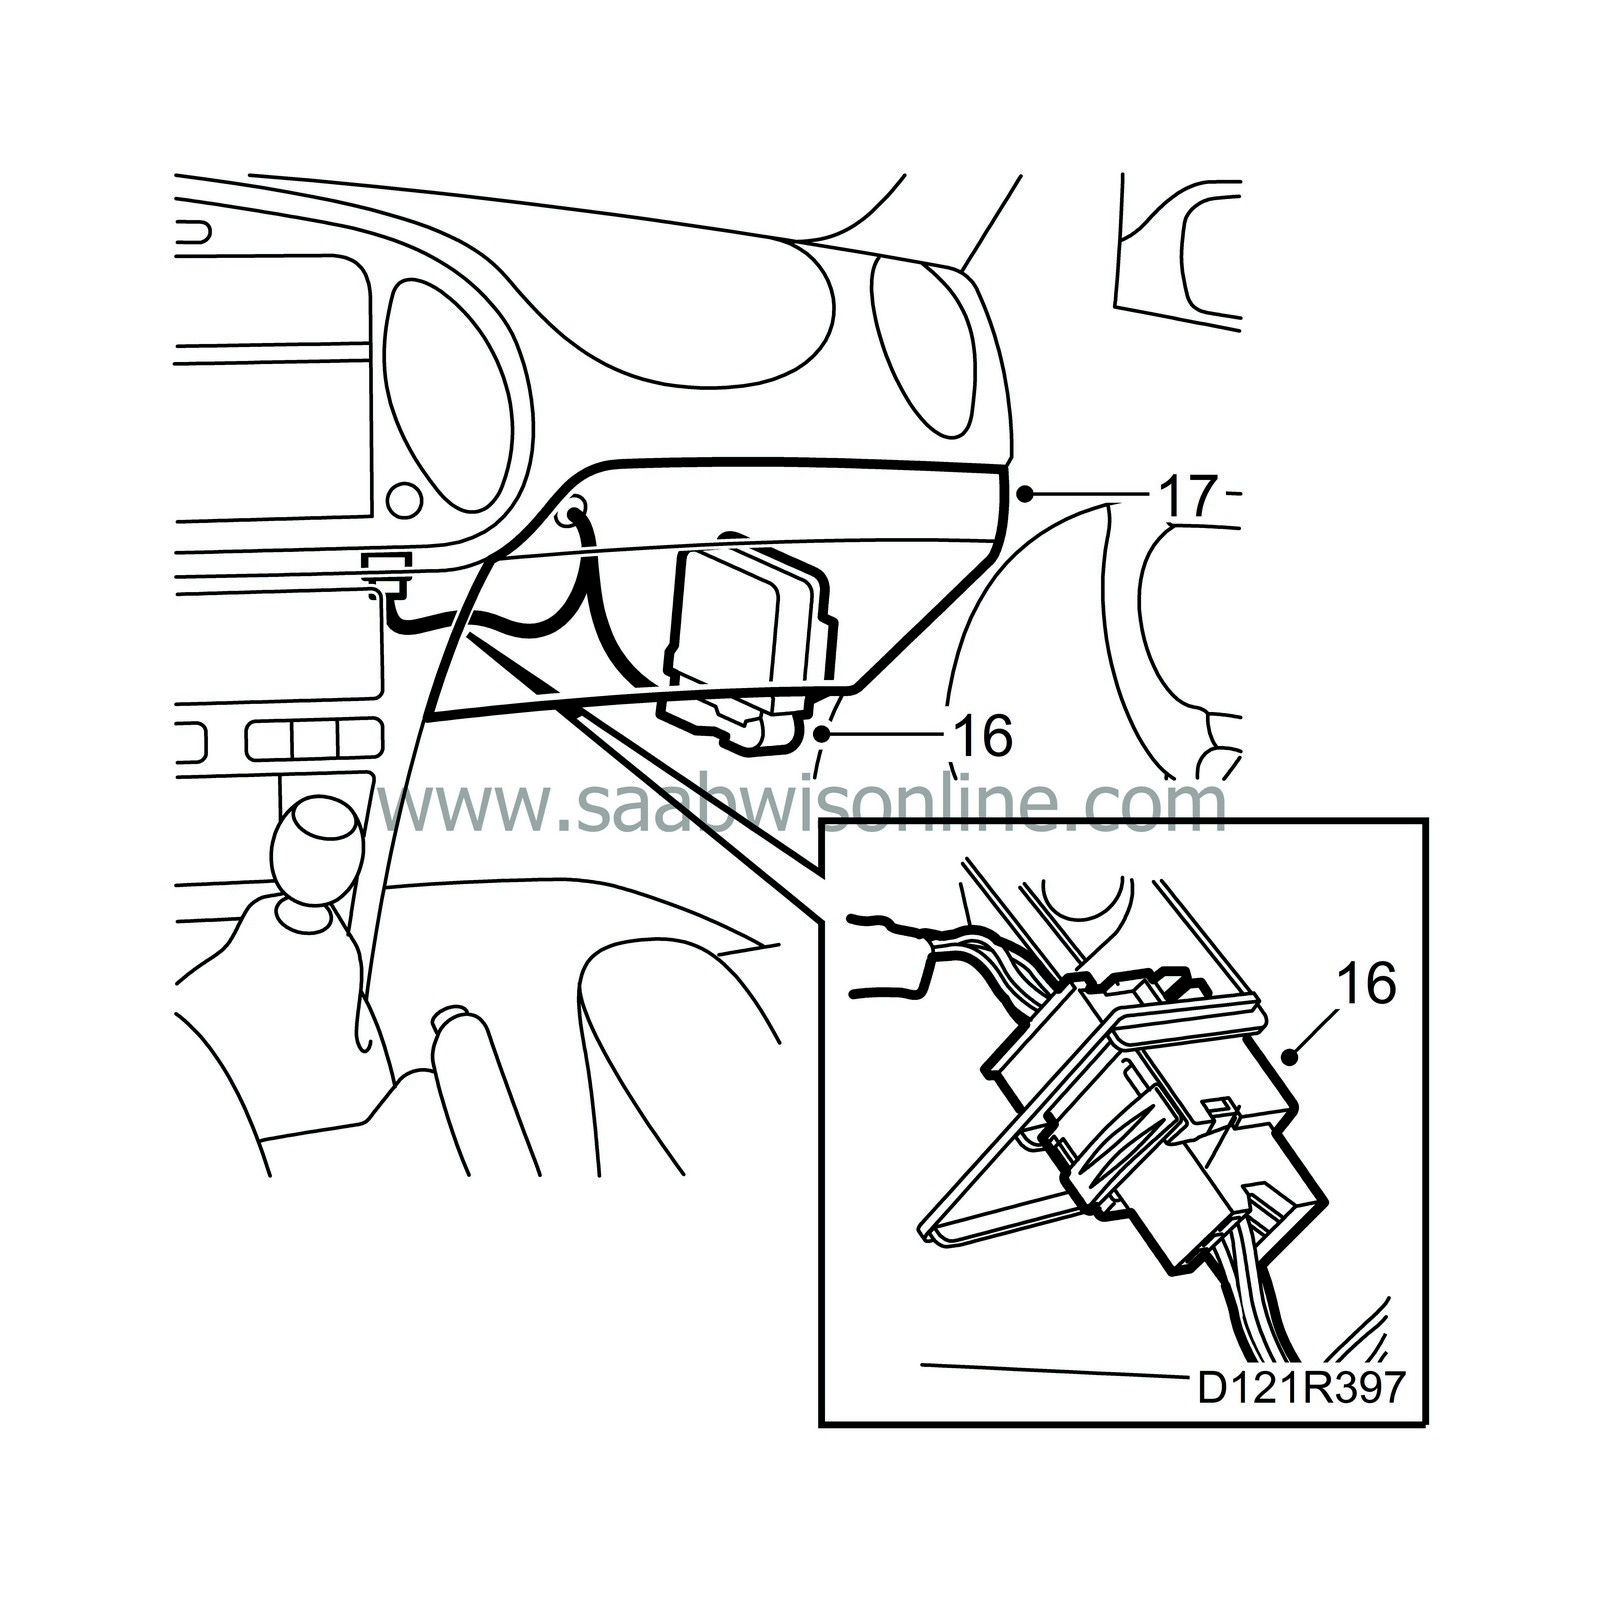
Insert the wiring harness through the bulkhead. Check the seal.
|
|
16.
|
Plug in the engine wiring harness under the dashboard. Fit the air duct.
|
|
17.
|
Fit the glove box or the lower part of the panel and refit the mat. Make sure the rubber grommet is correctly positioned. Do not forget the connection in the engine bay above the cable grommet.
|
|
19.
|
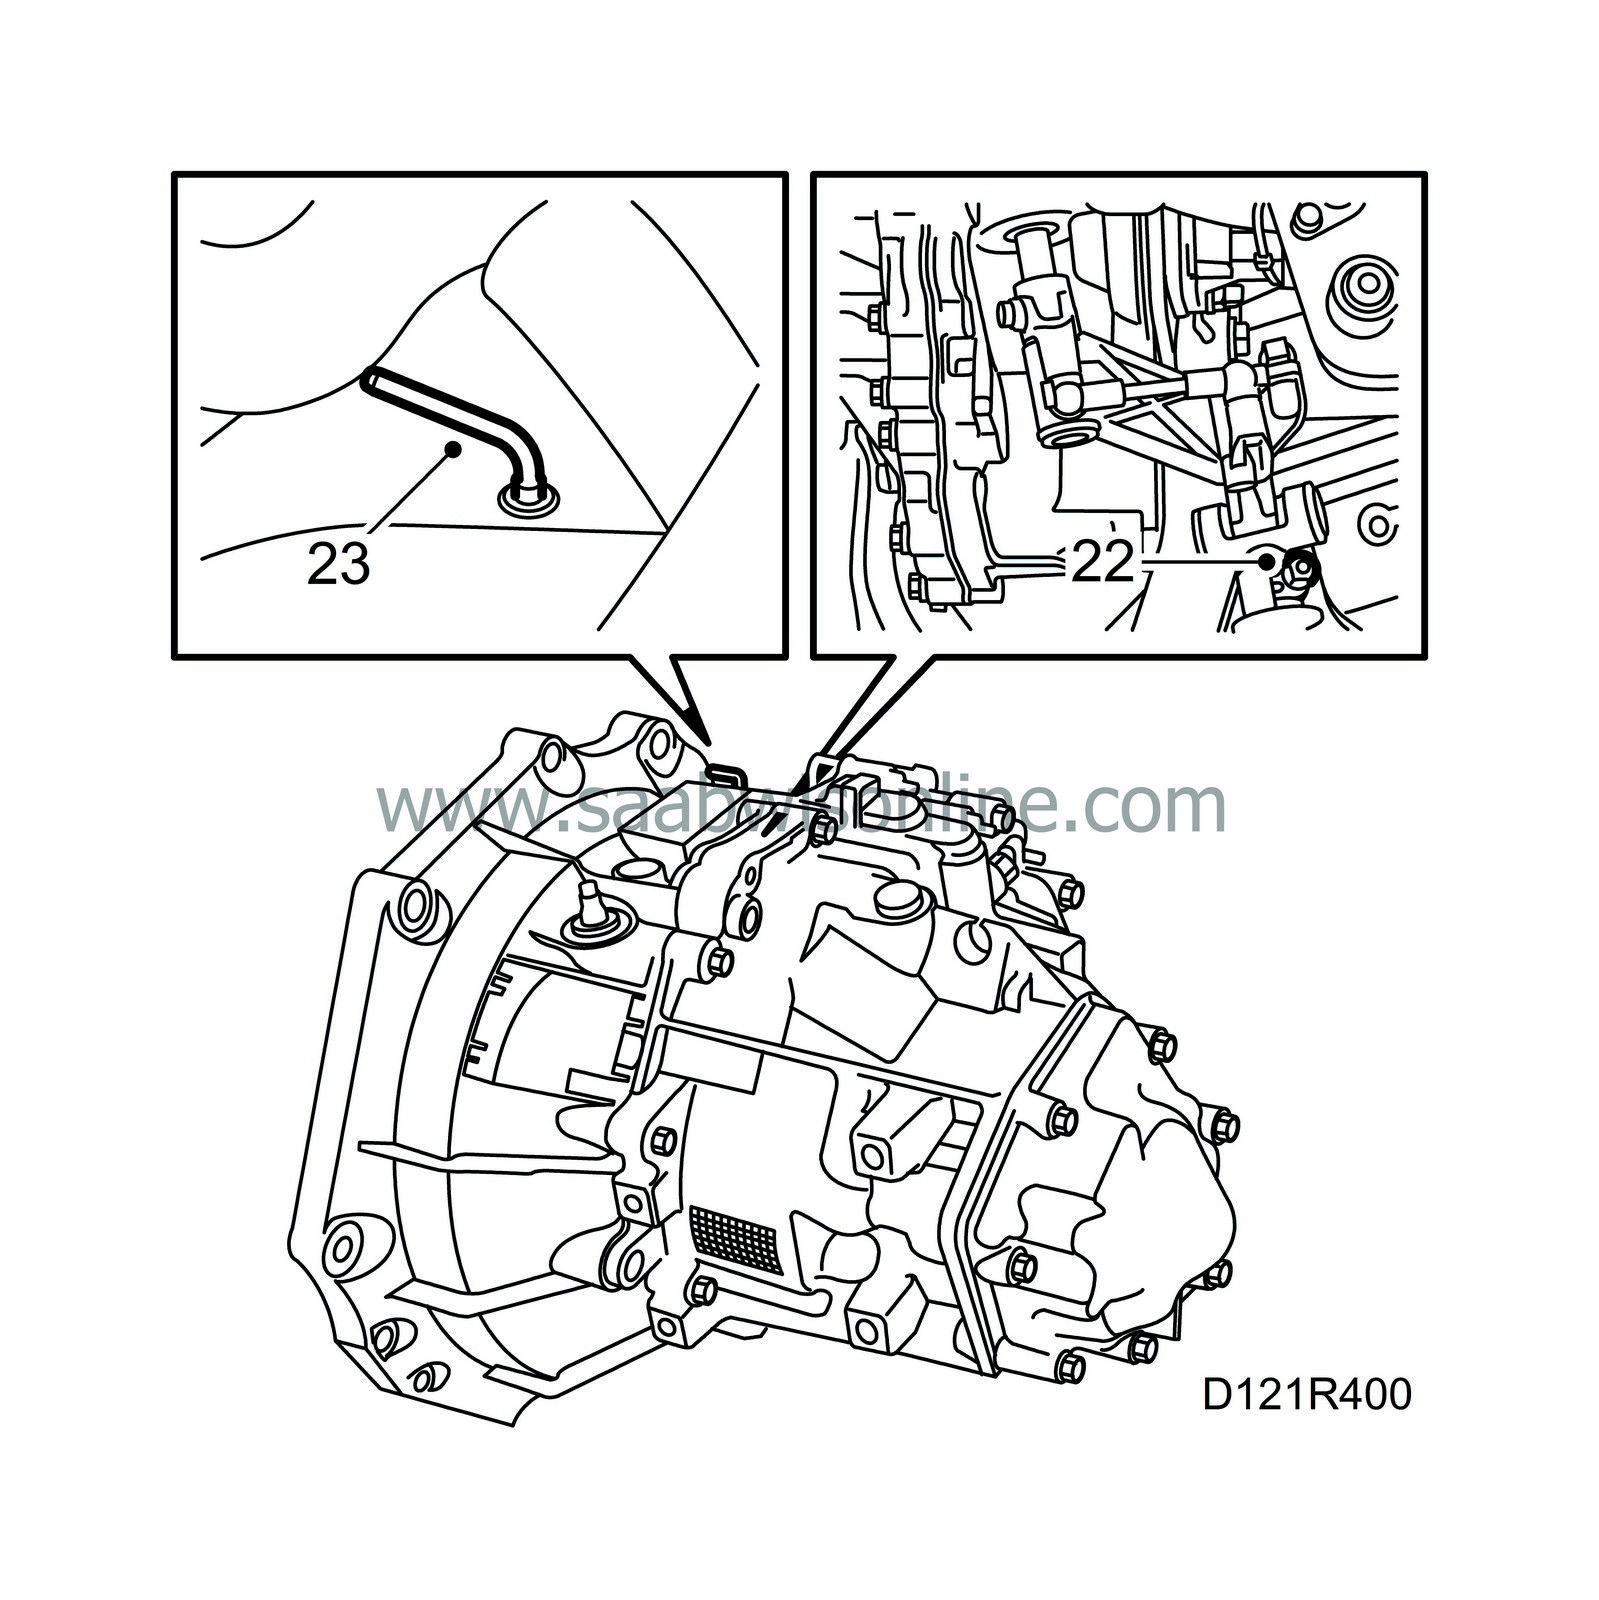
Fit the reverse gear sensor connection on the gearbox
|
|
20.
|
Remove the lock pin from the gear lever housing and engage 4th gear. Insert and fit the pin in the gear lever rod. Fit the guard on the gear lever.
|
|
21.
|
Aut:
Plug in the gearbox electrical connections (located on a bracket behind the battery).
|
|
|
•
|
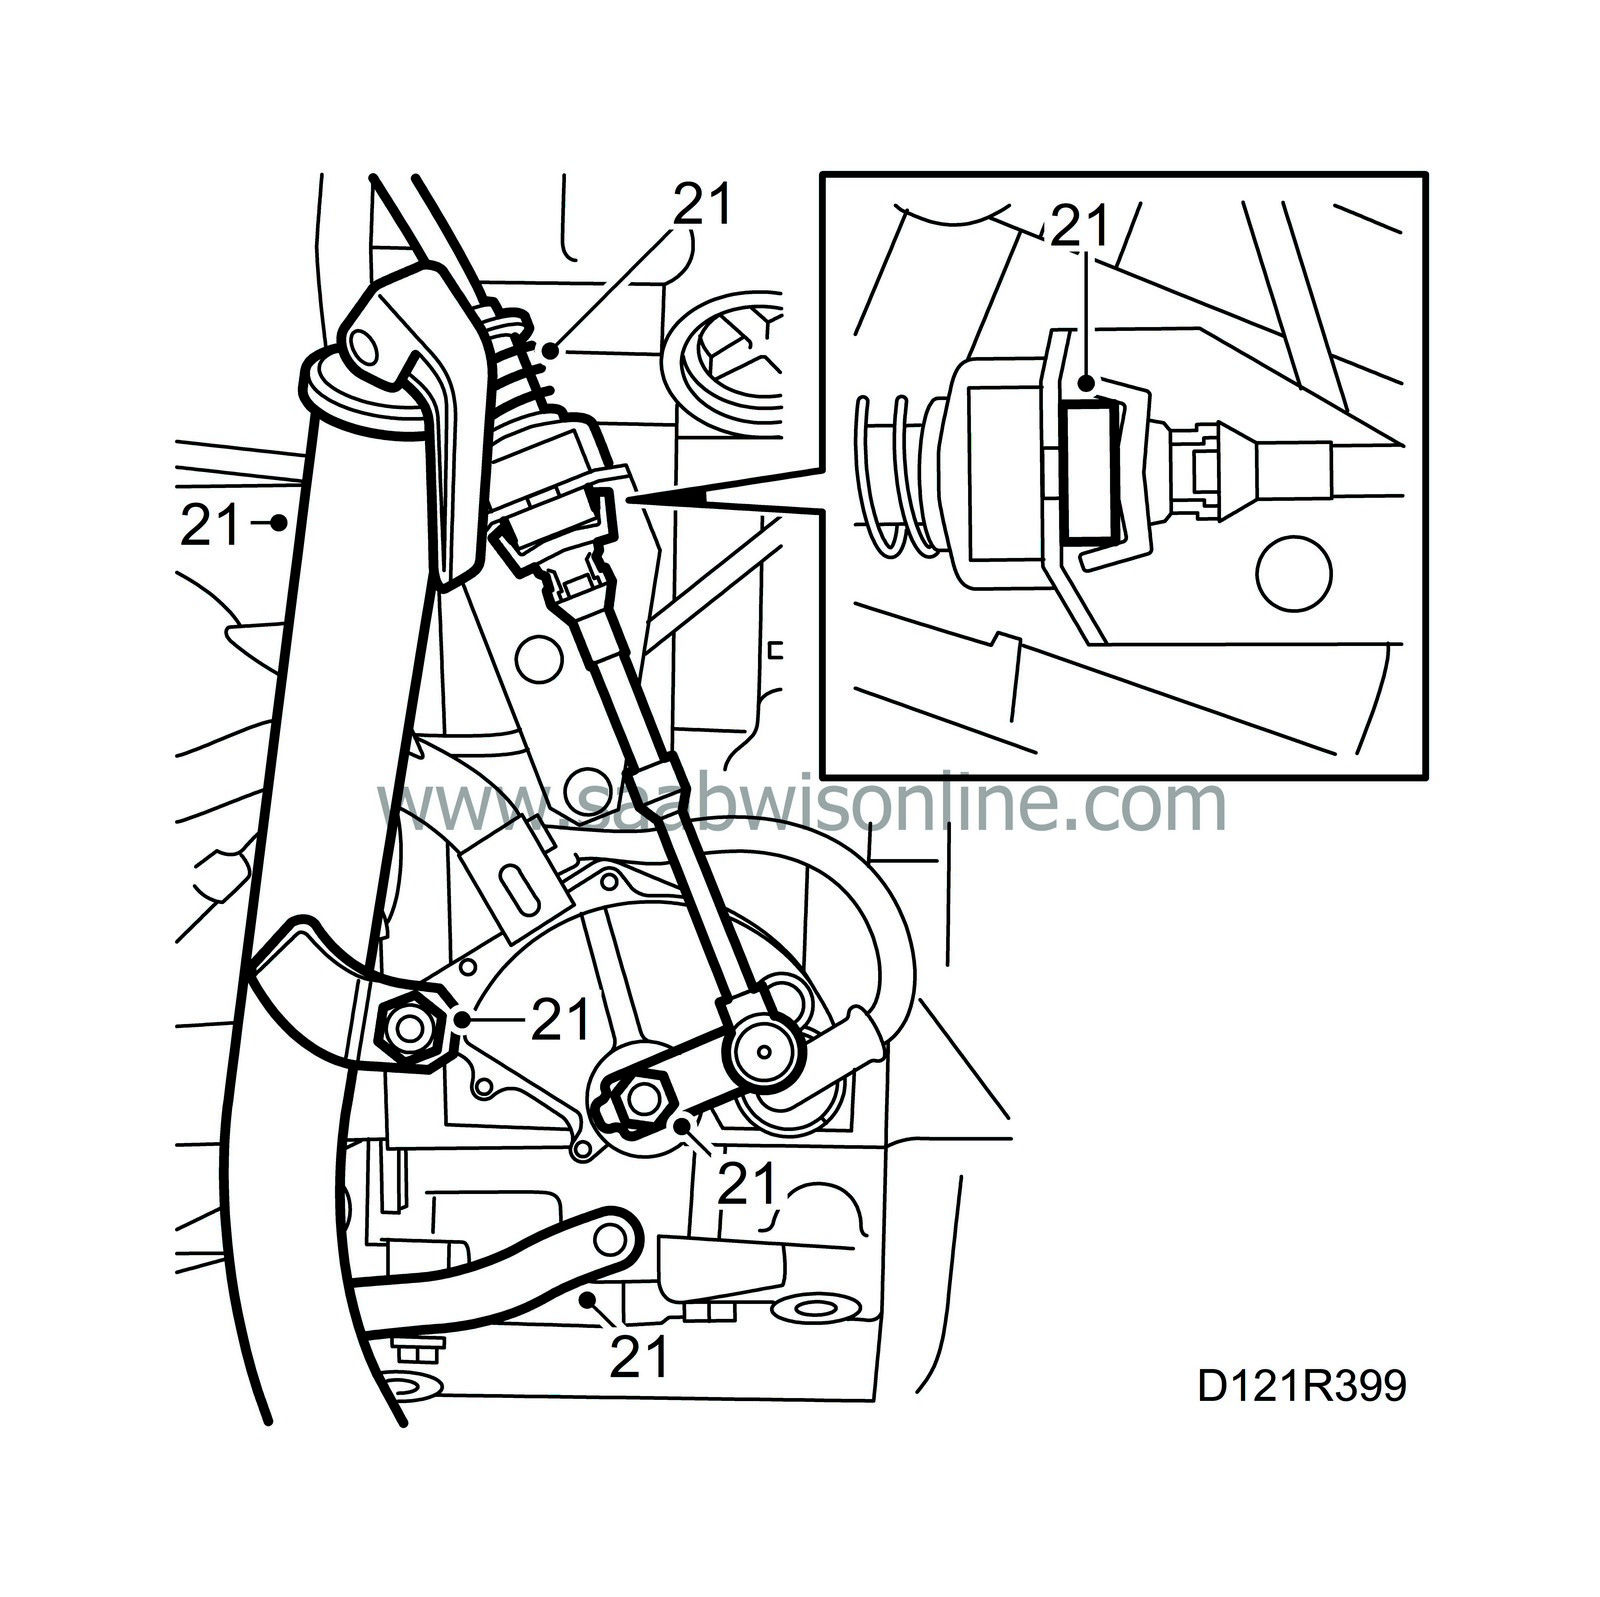
Fit the gear selector cable to the mounting on the gearbox. Fit the circlip.
|
|
|
•
|
Fit the gear selector cable to the gear selector.
|
|
|
•
|
Connect the pipes to the oil cooler in the gearbox. Use new O-rings lubricated with Vaseline.
|
|
22.
|
Man:
Fit the gear lever rod to the gear linkage.
|
|
23.
|
Pull up the locking pin and refit the plastic plug.
|
|
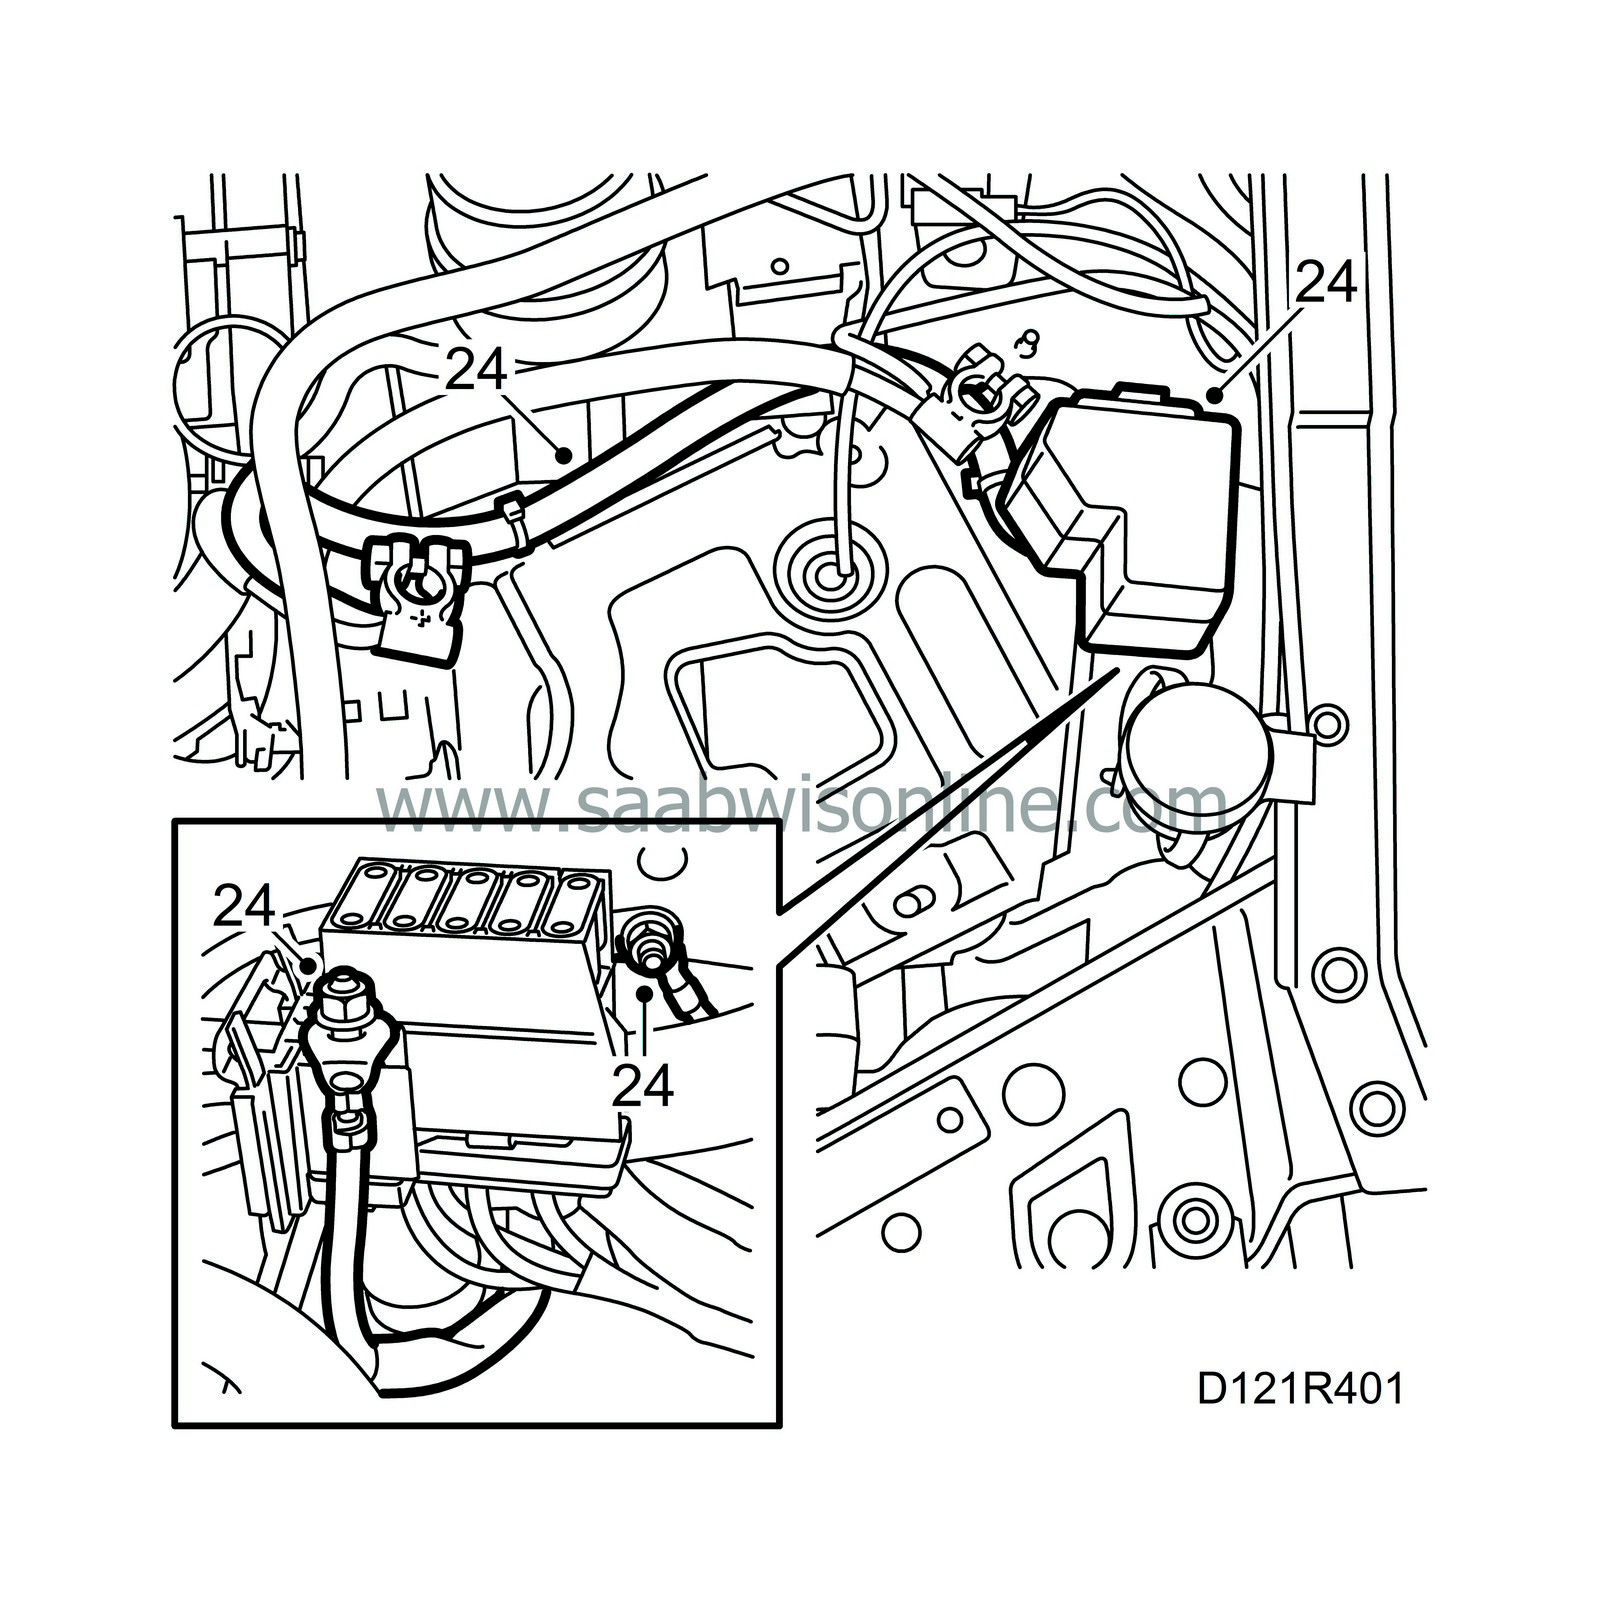
24.
|
Connect the positive table to the positive terminal block in the maxi fuse board and the ground cable behind the board. Replace the cover.
|
|
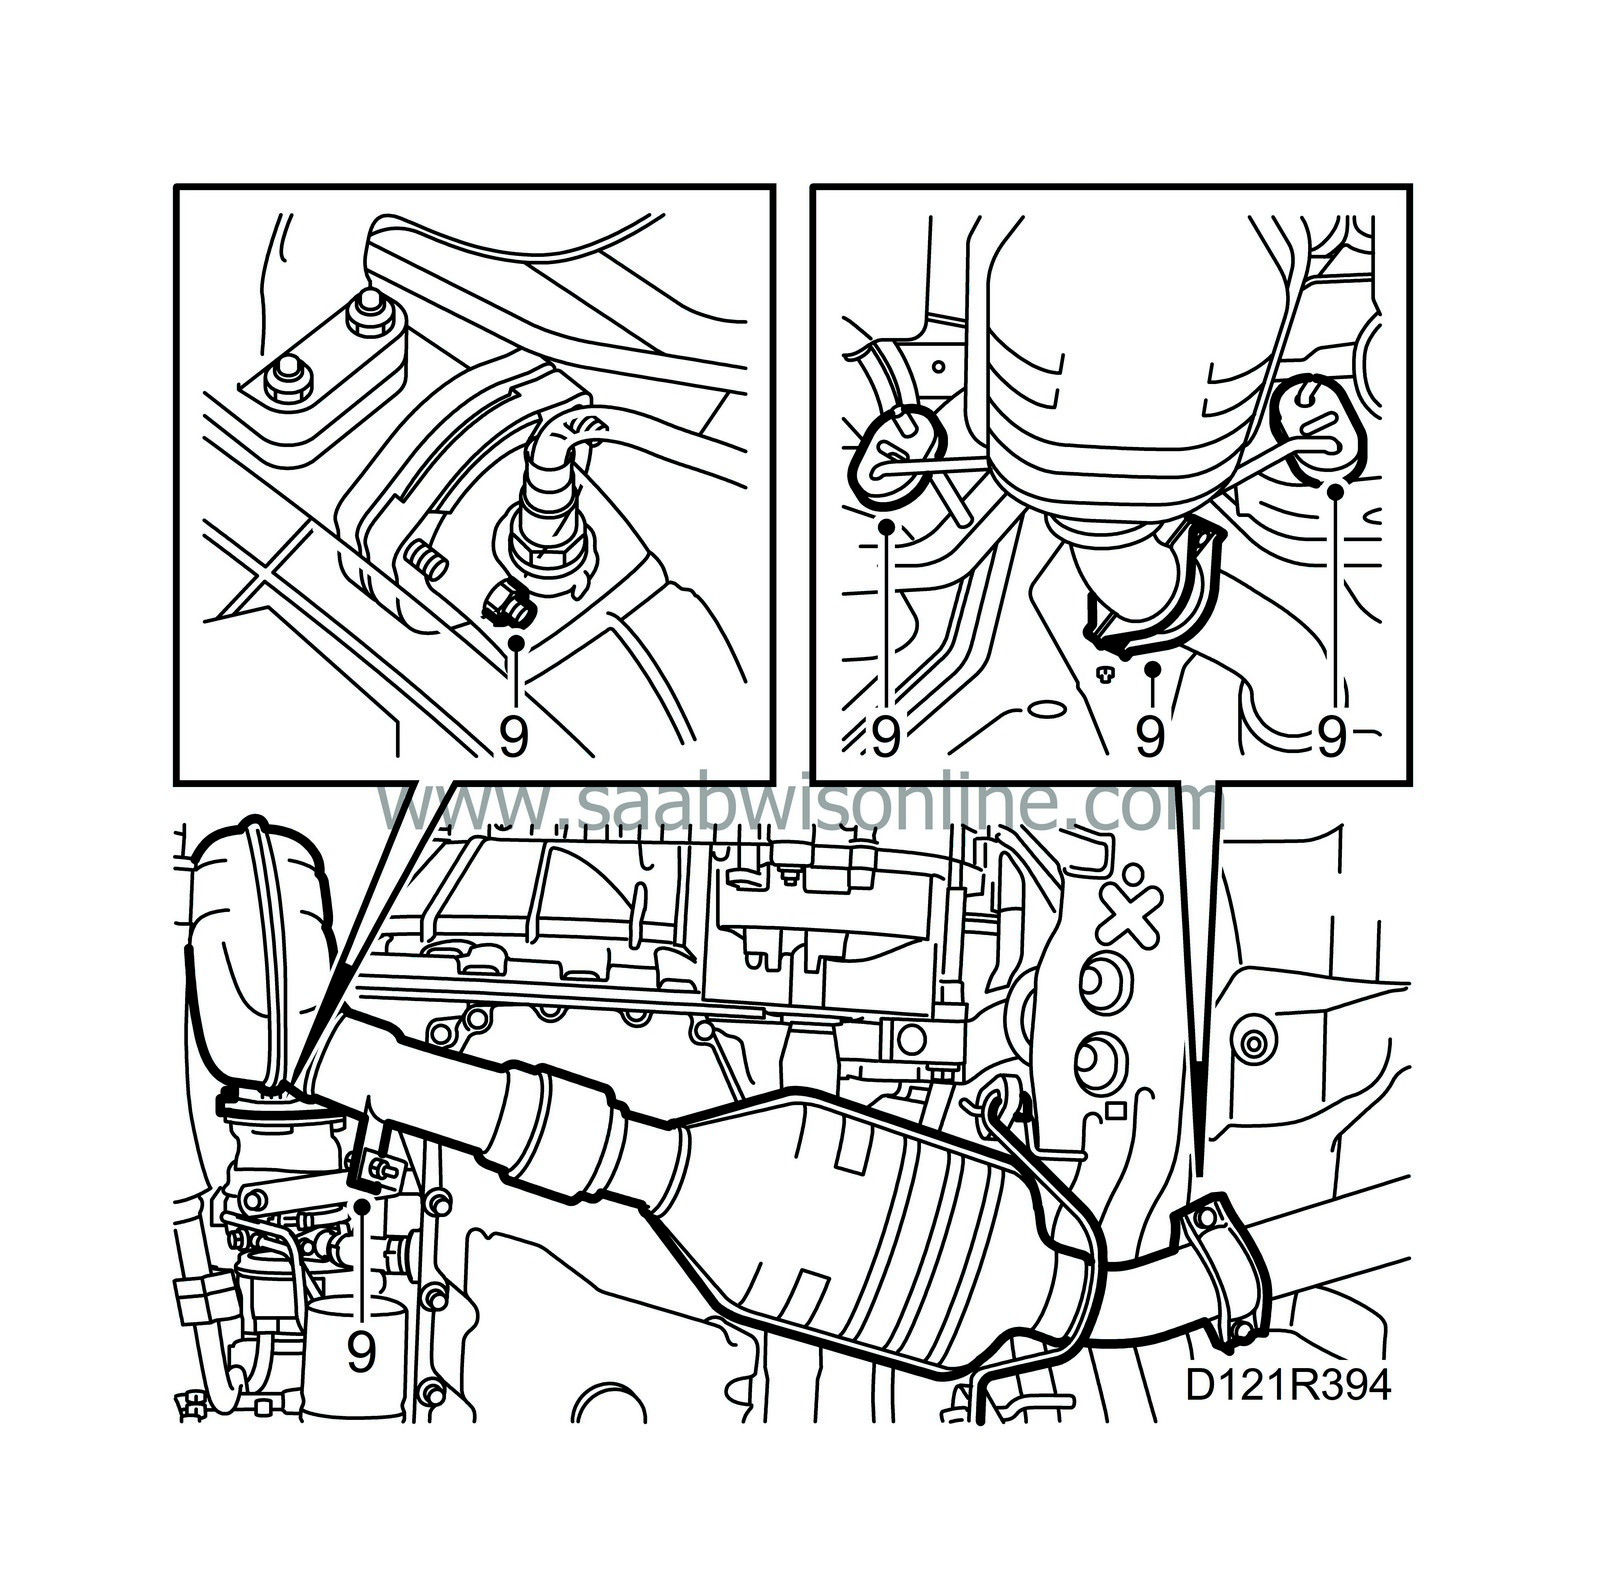
25.
|
Tighten the top bolt to the A/C compressor and reconnect the electric connection.
|
|
26.
|
Tighten the top exhaust pipe nuts.
Tightening torque 25 Nm (18 lbf ft)
|
Important
|
|
To reduce the risk of hoses mounted on the delivery side of the turbocharger coming loose due to low friction at high air pressures, the hoses and connecting pieces must be cleaned thoroughly before fitting. Use a rag dampened with 30 15 815 Cleaning agent to wipe clean inside the ends of the hoses. Clean also the connecting pieces. If hose clips are rusty or damaged, they must be replaced with new ones to maintain the correct clamping force.
|
|
|
|
|
27.
|
Fit the hose between the water cooler and the coolant pump and the hose between the charge air cooler and turbo.
|
|
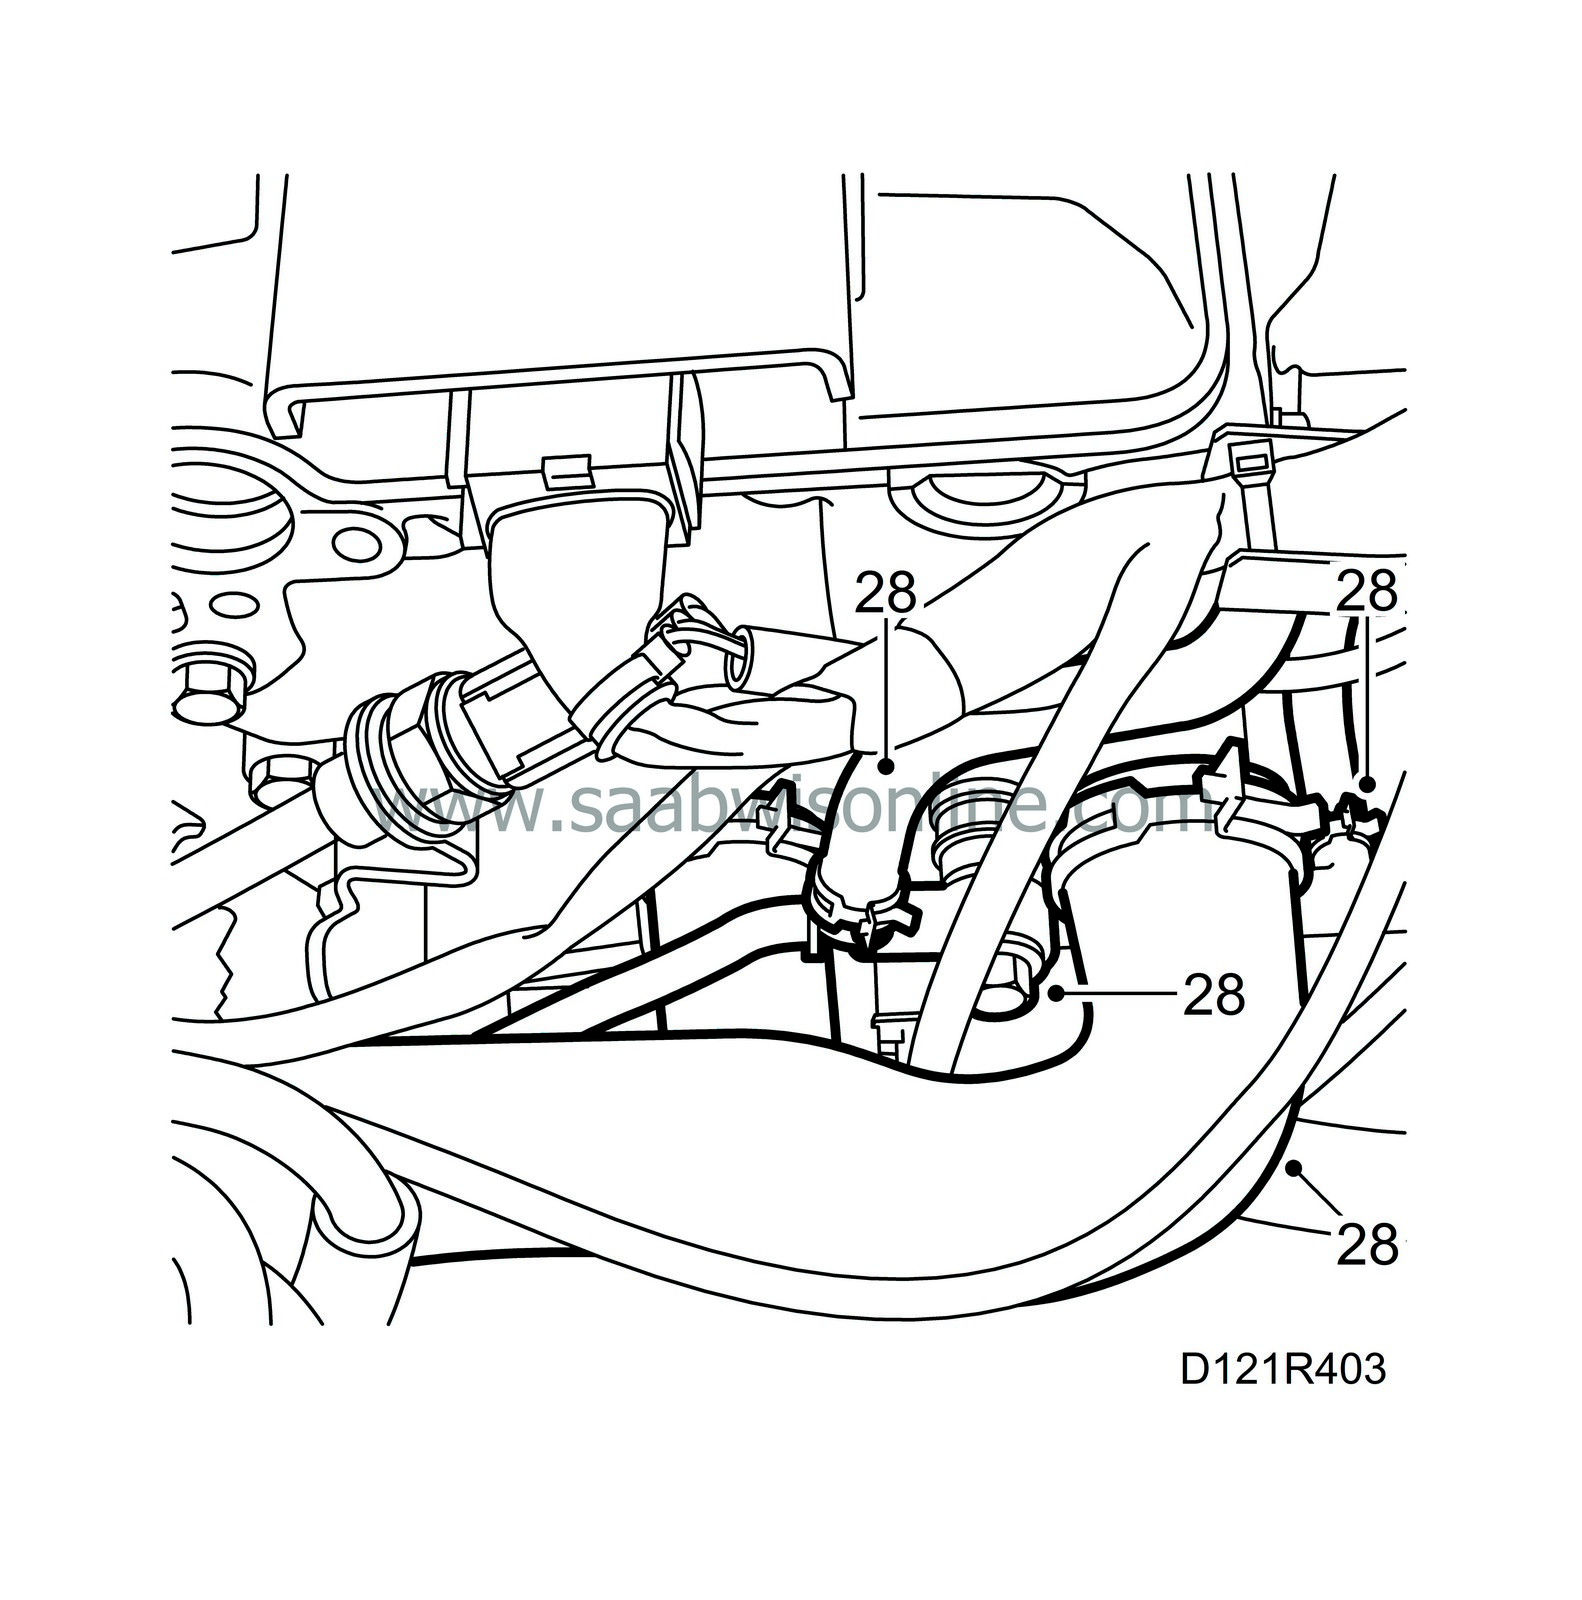
28.
|
Attach the hose to the expansion tank. Fit the upper hose from the radiator to the cylinder head.
|
|
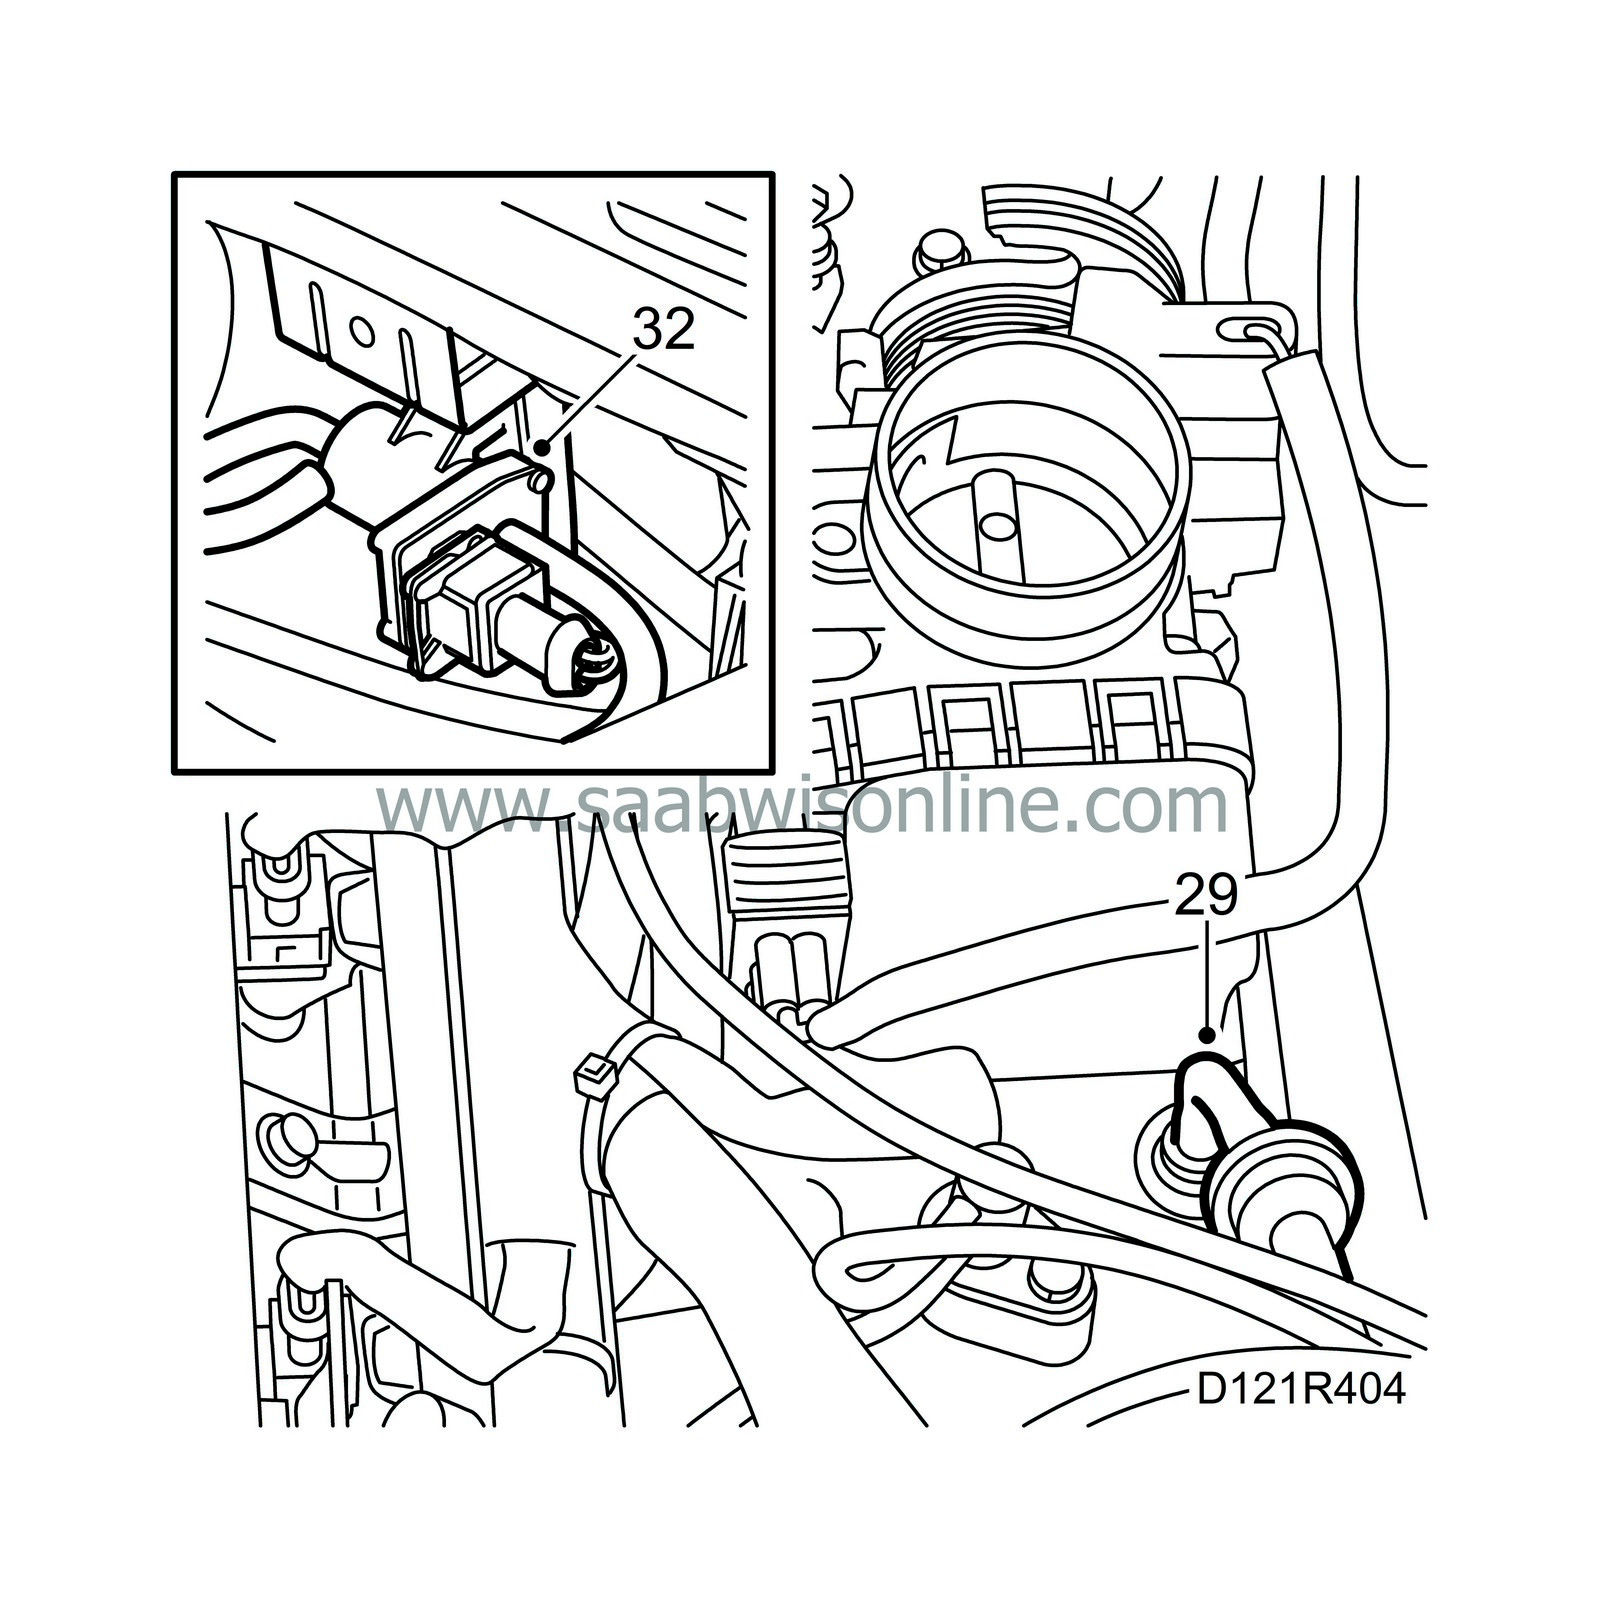
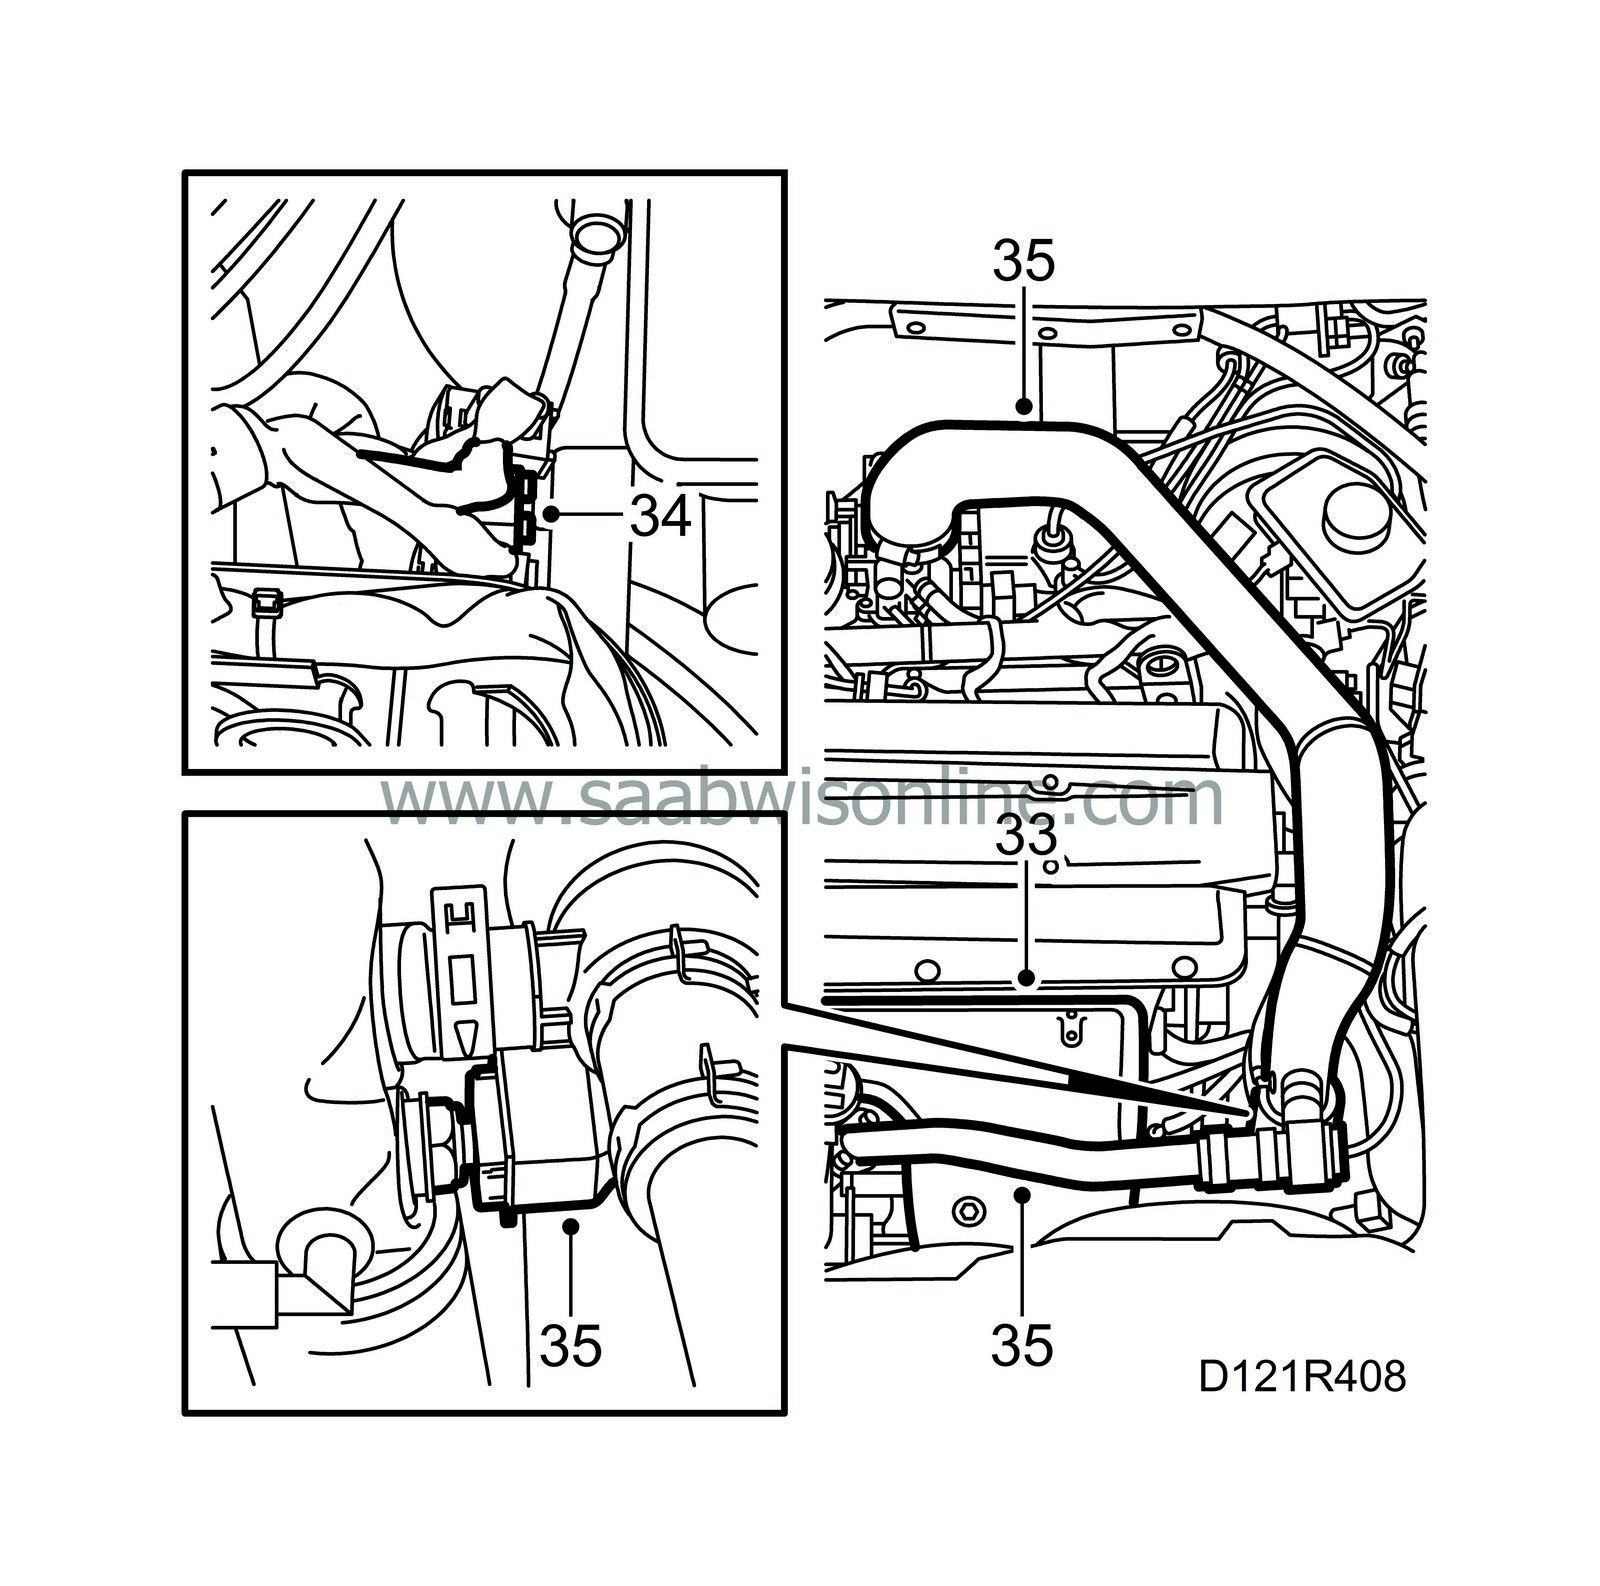
29.
|
Fit the vacuum pipe to the brake servo and the bracket with bypass valve for the throttle body.
|
|
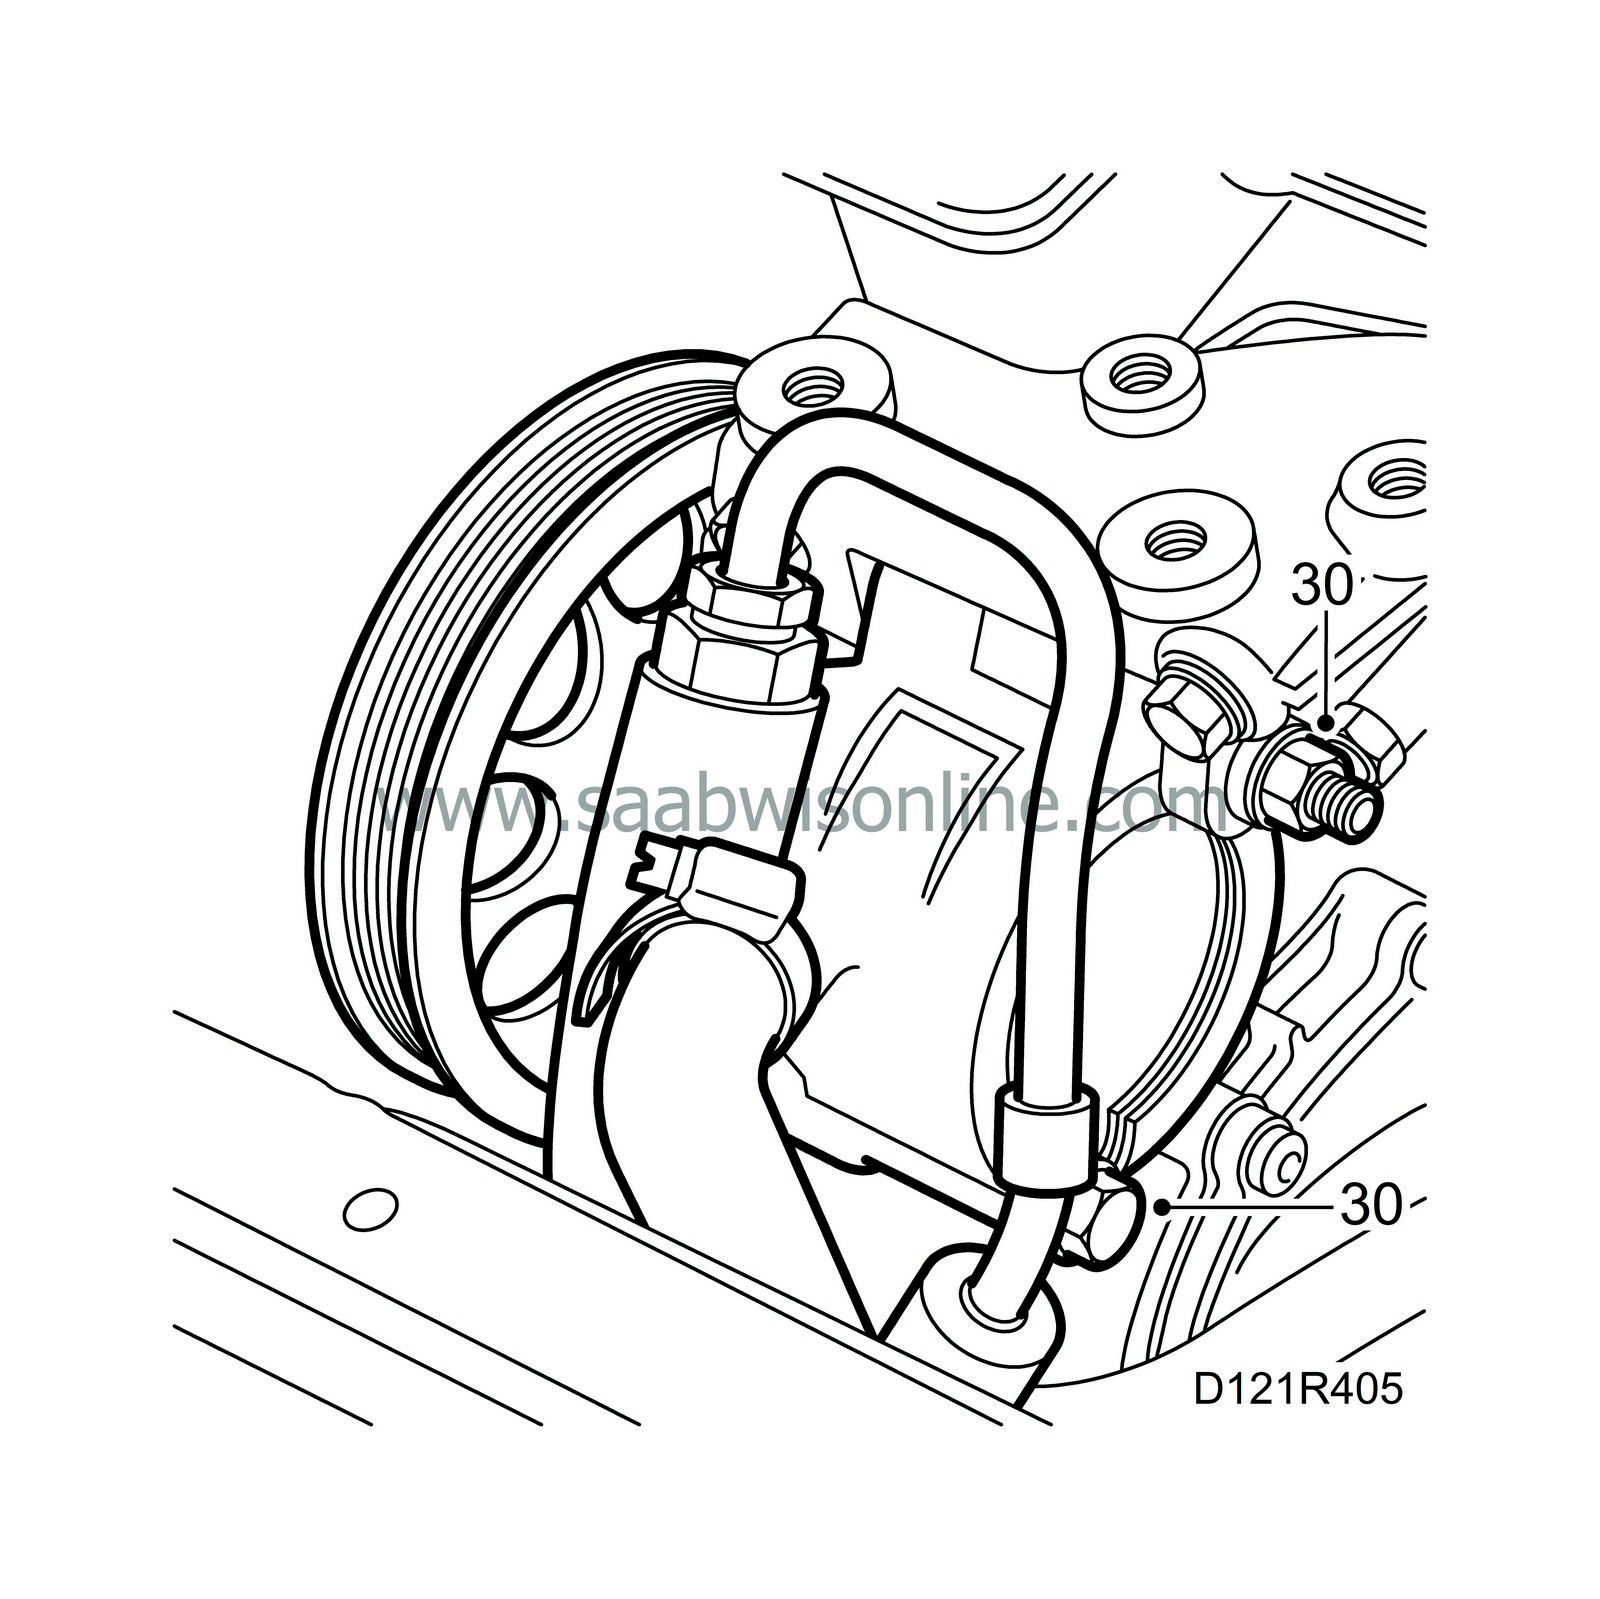
30.
|
Fit the power steering pump, mount the belt and check the position of all the belt pulleys.
|
|
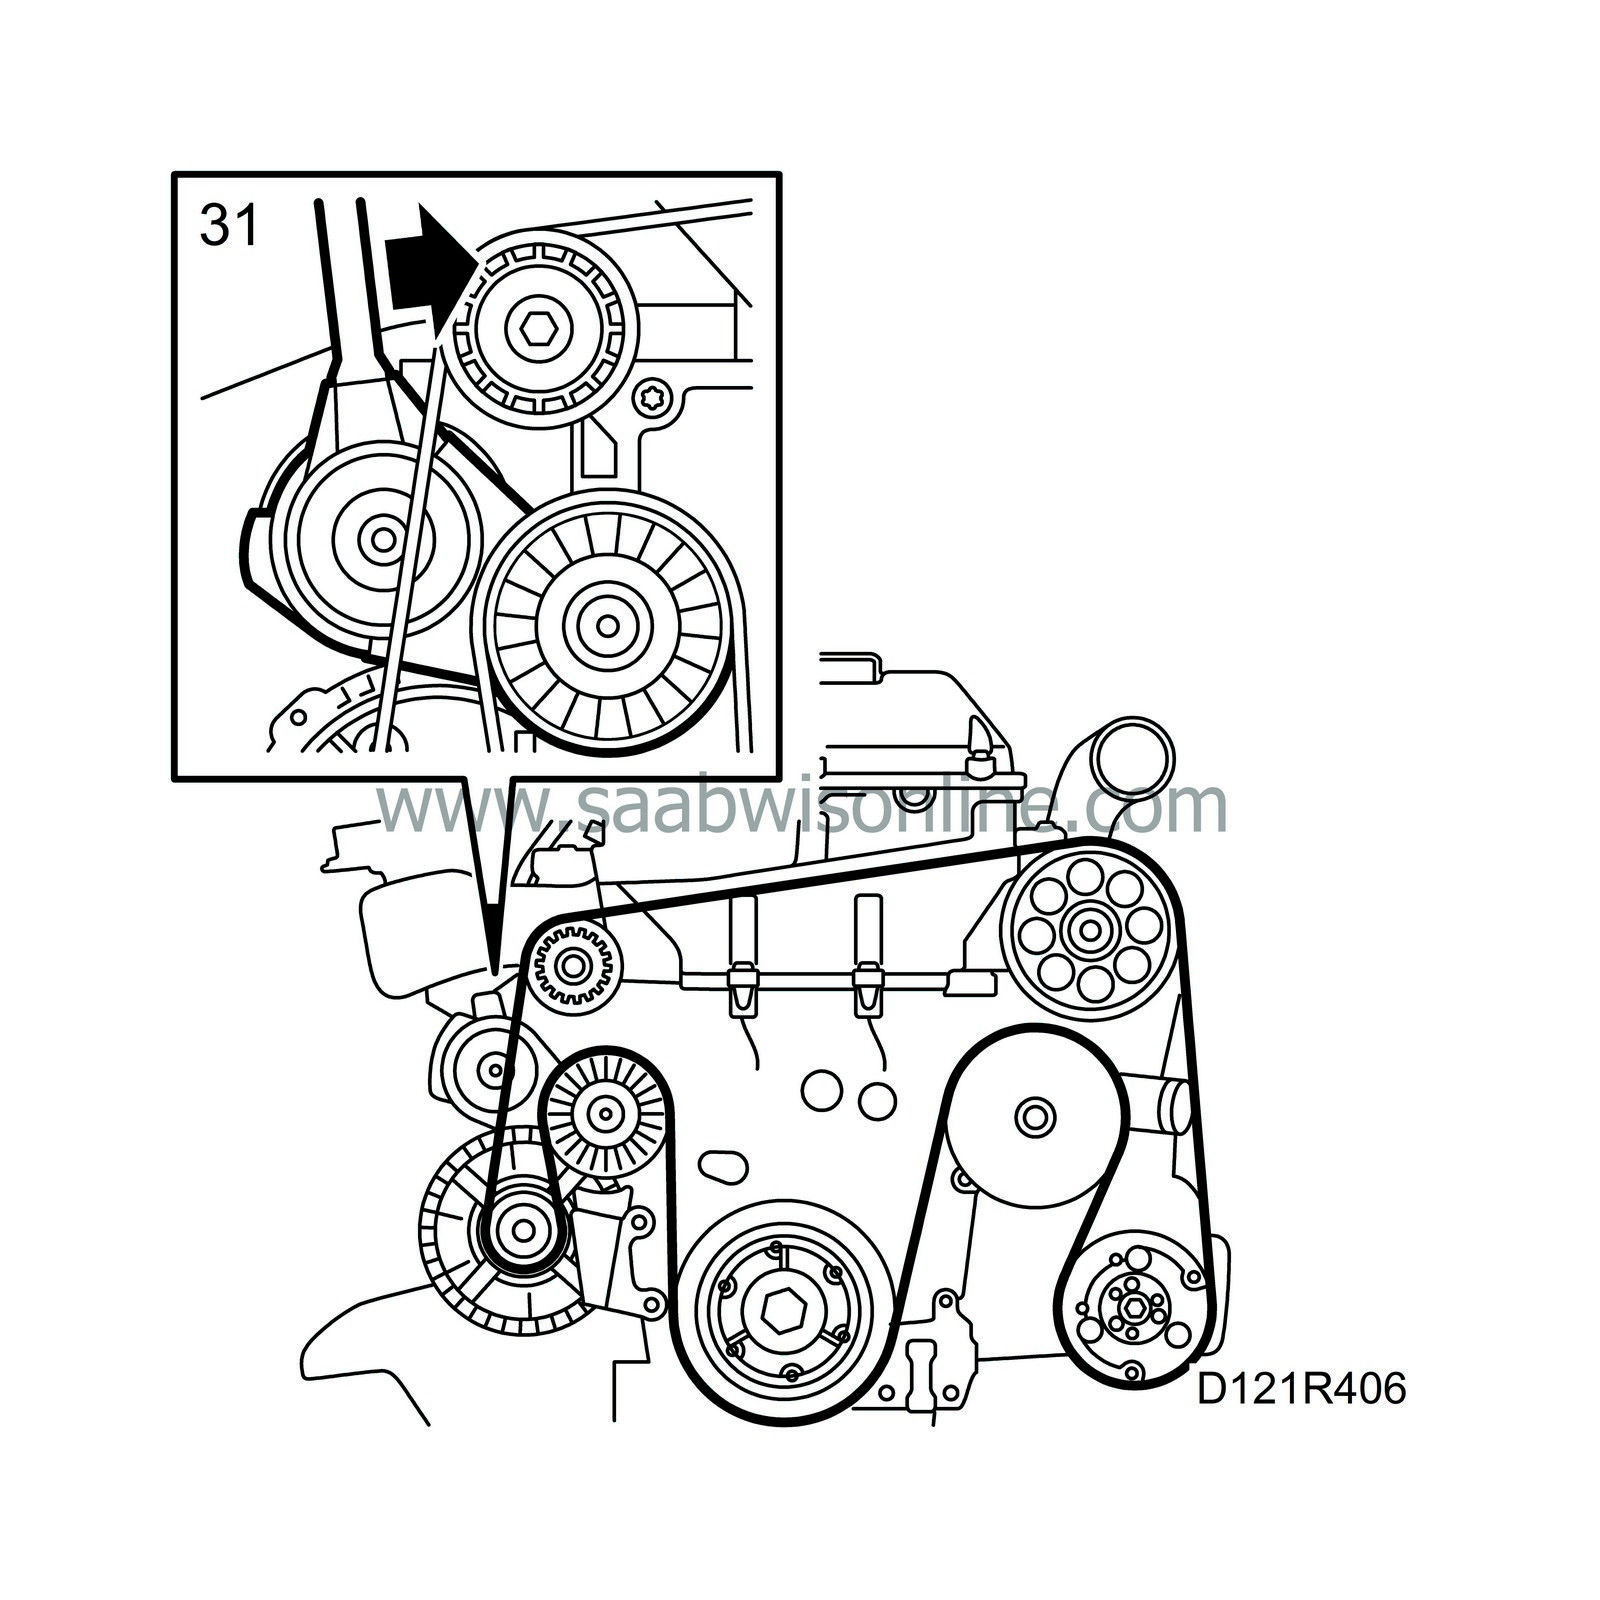
31.
|
Relieve the tension on the belt tensioner with a jointed handle and remove the drill.
|
|
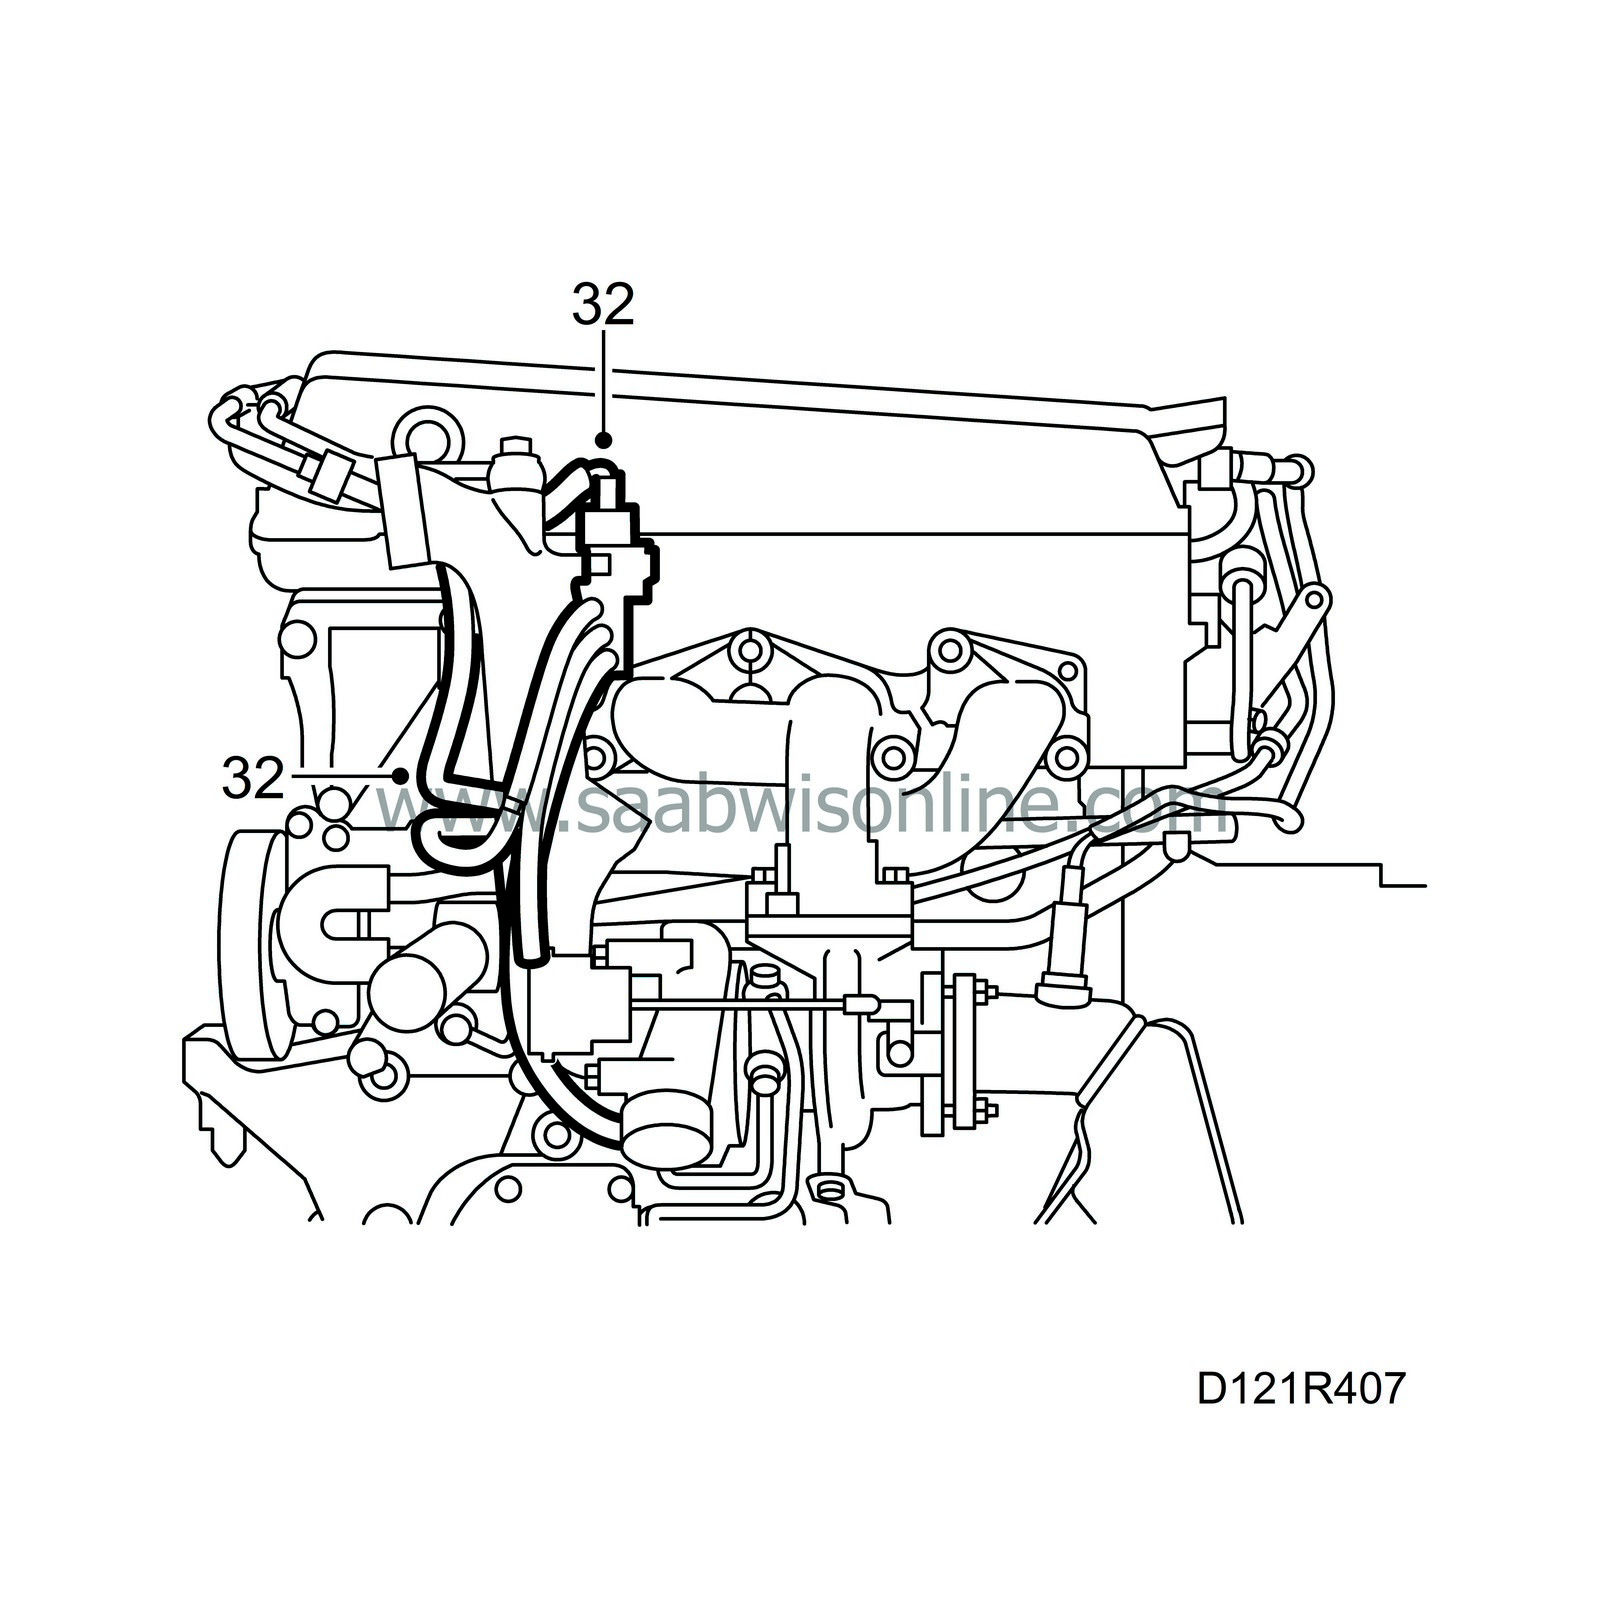
32.
|
Attach the hose with vacuum hose to the crankcase ventilation. Plug in the connector to the solenoid valve on the bracket.
|
|
33.
|
Fit the heat shield over the exhaust manifold and charge air pipe.
|
|
34.
|
Plug in the connectors to the oxygen sensors and secure the cables.
|
|
35.
|
Fit the temperature sensor connector and hose on the intake manifold. Fit the charge air pipe with accessories.
|
|
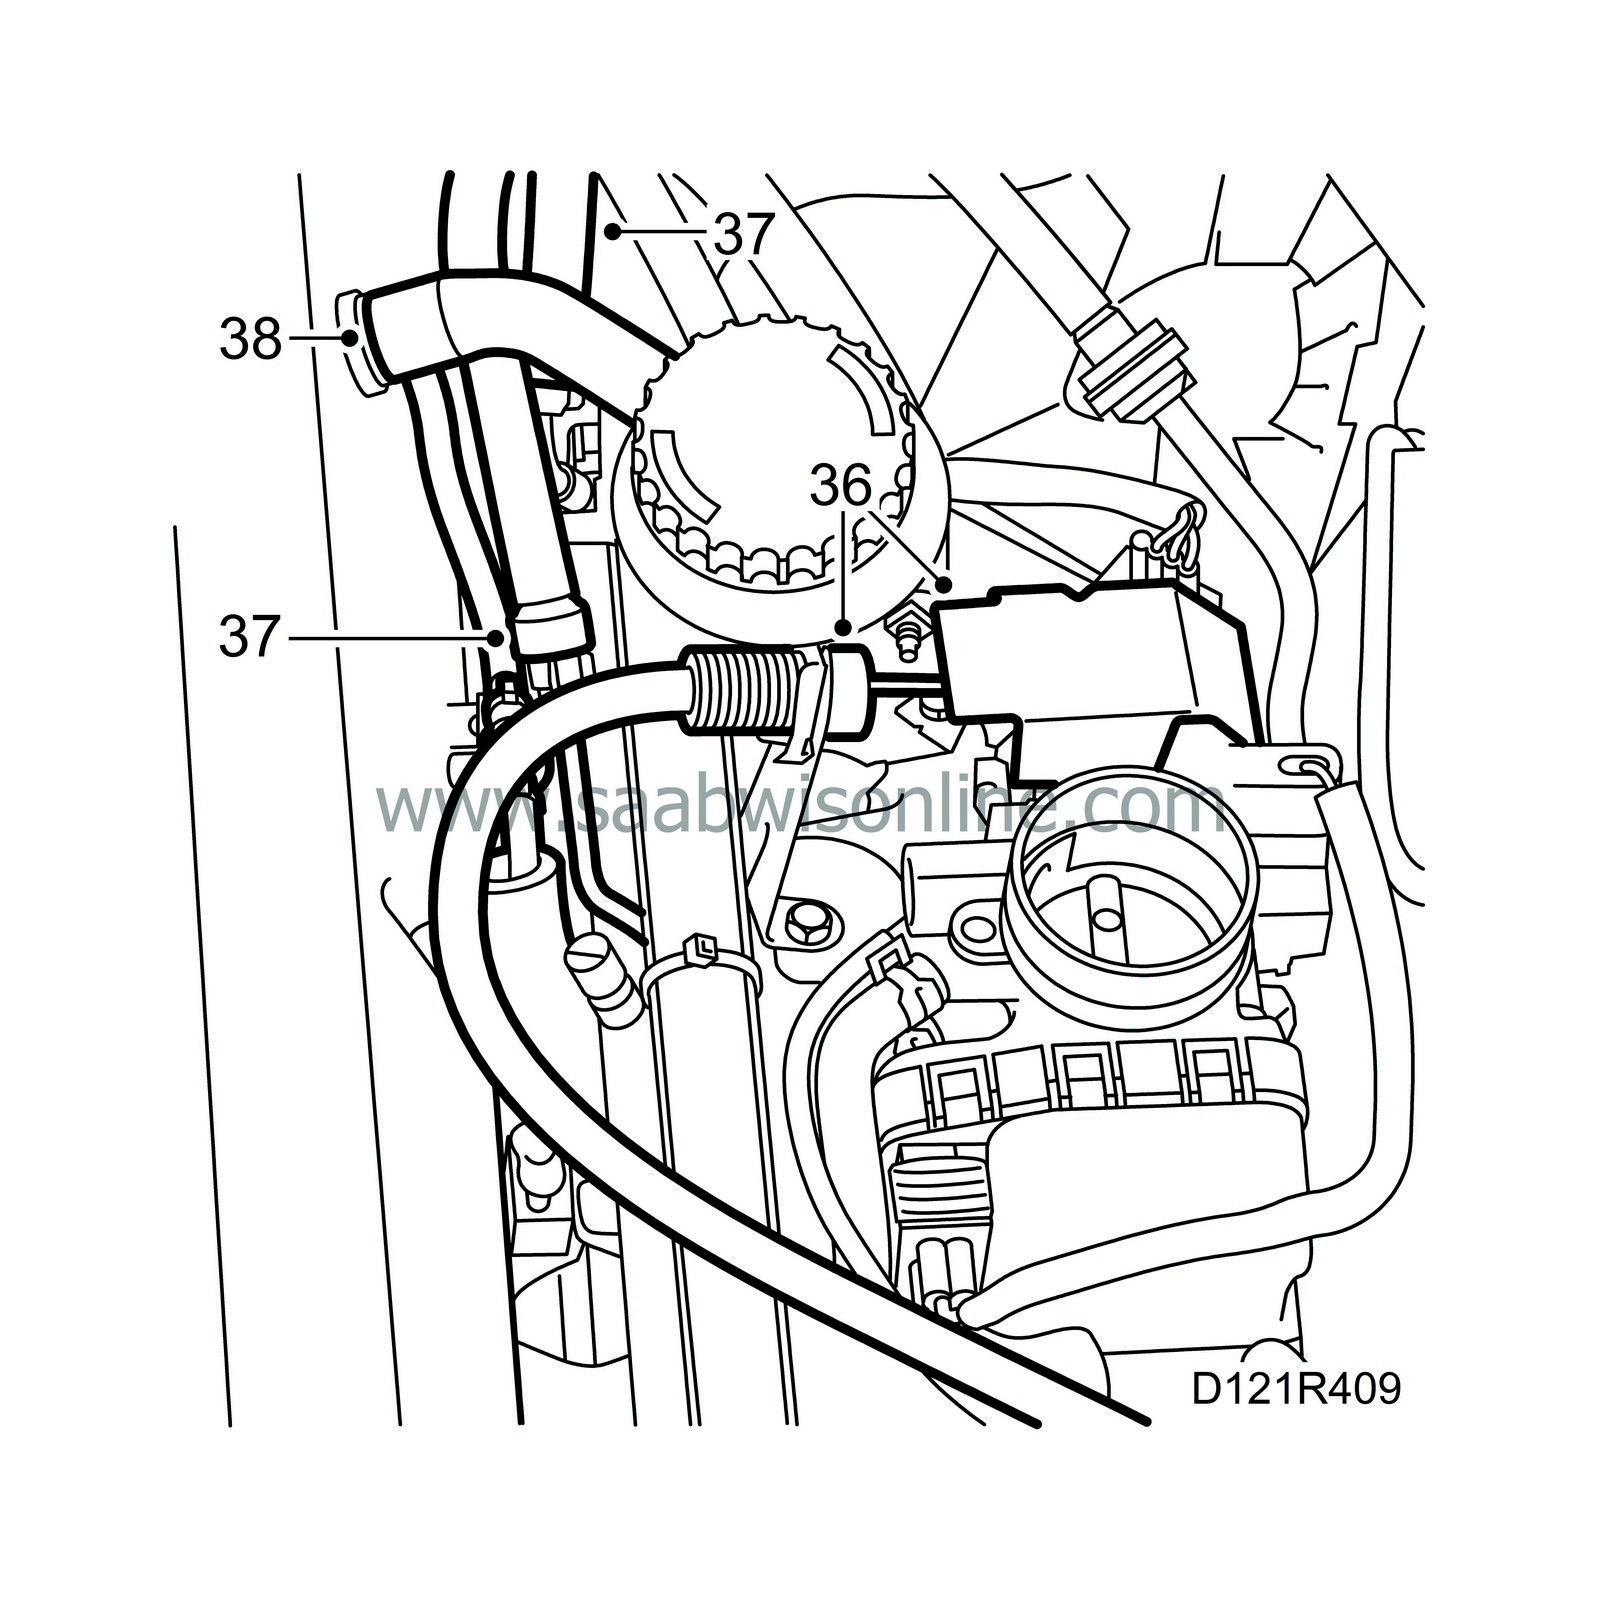
36.
|
Fit the accelerator cable with protective cap. Adjust the accelerator cable as necessary.
|
|
37.
|
Fit the fuel lines.
|
|
38.
|
Attach the hose to the crankcase ventilation
|
|
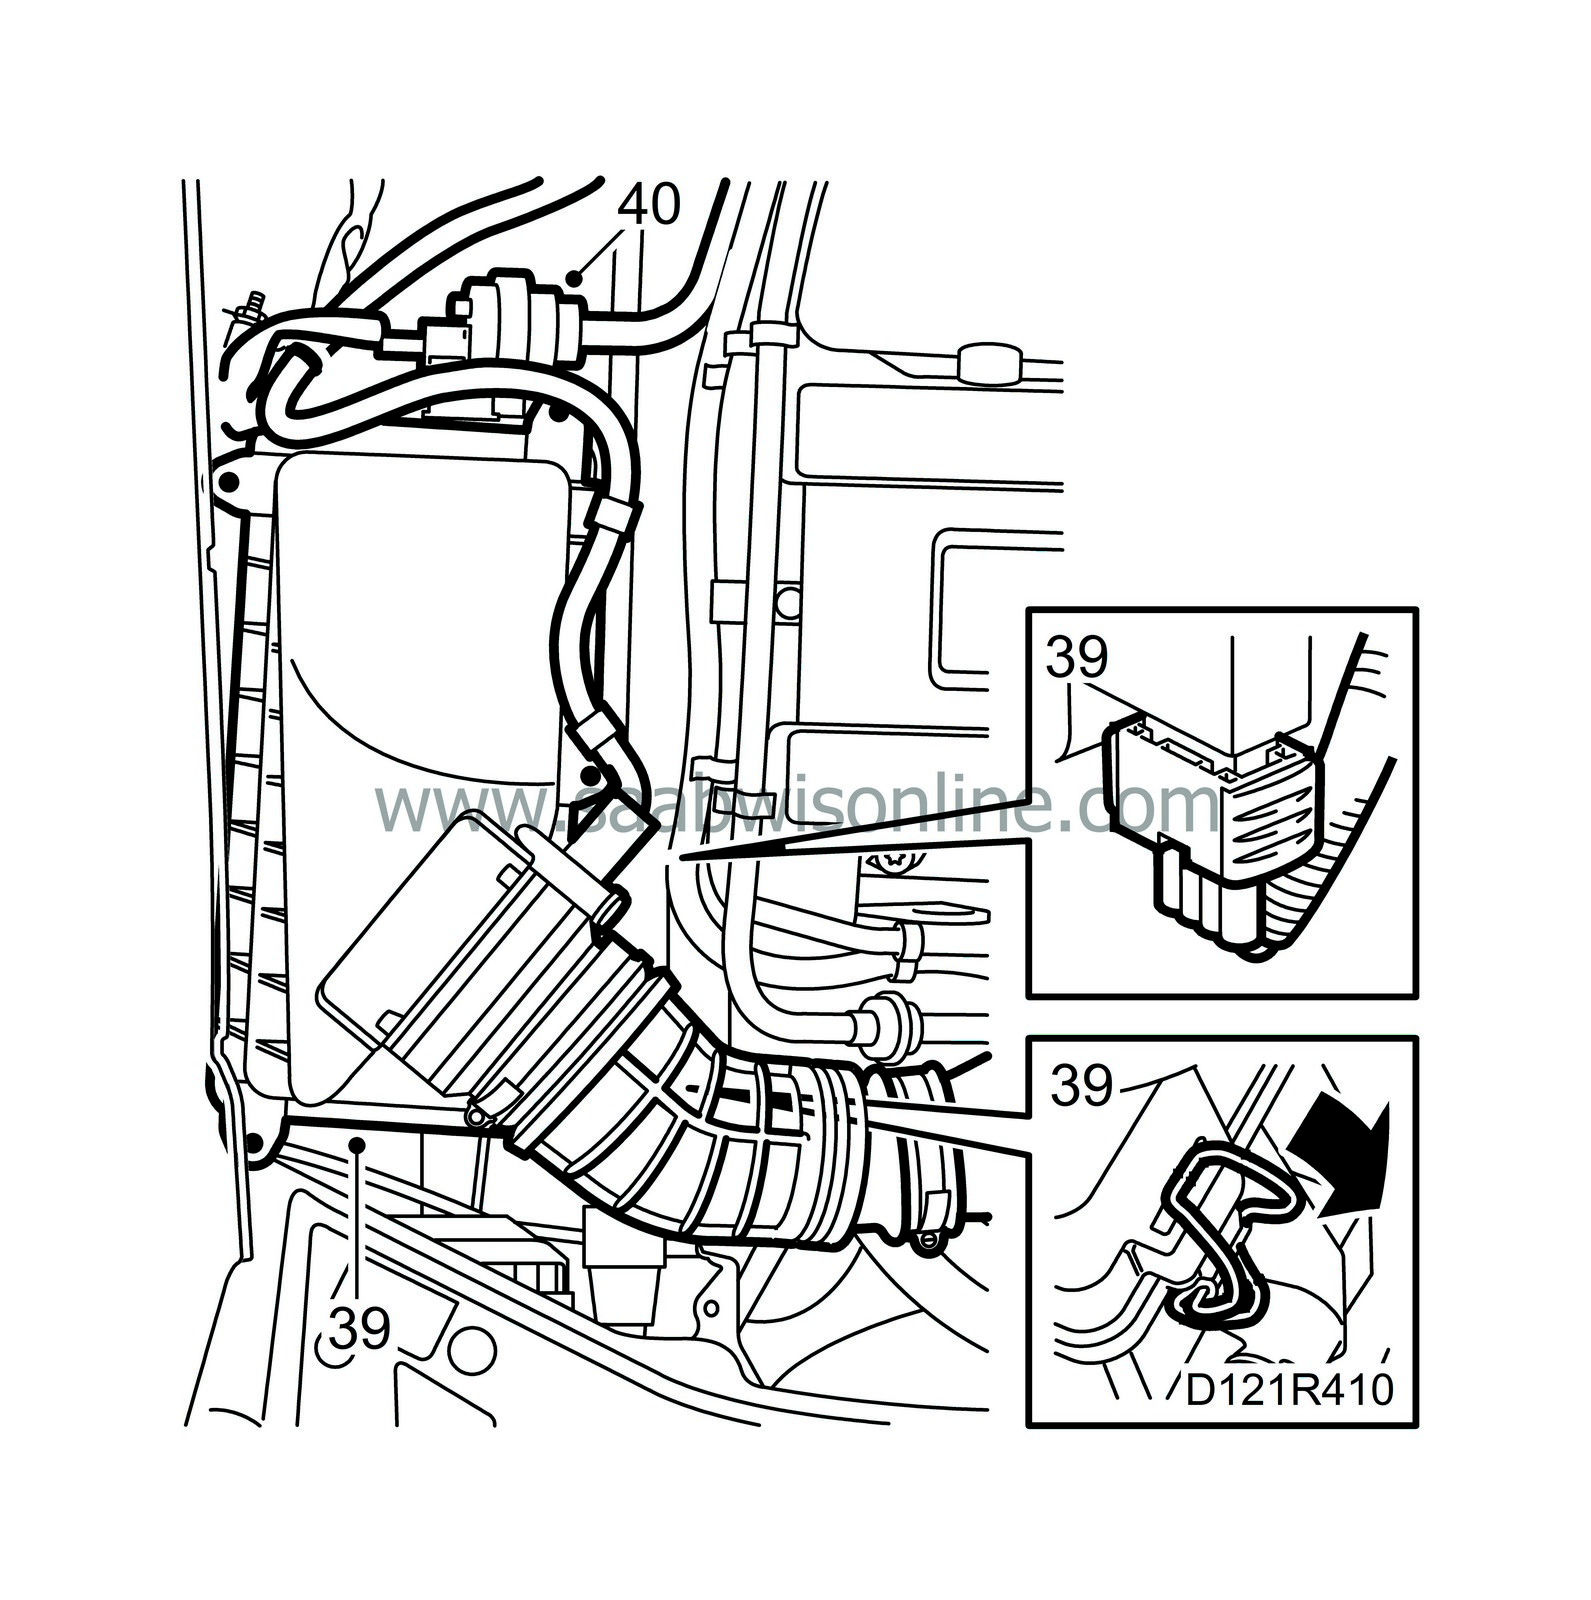
39.
|
Fit the air cleaner with hose and connector for the mass air flow sensor. See
Air collection box
.
|
|
40.
|
Fit the evap canister purge valve with hose and the connector.
|
|
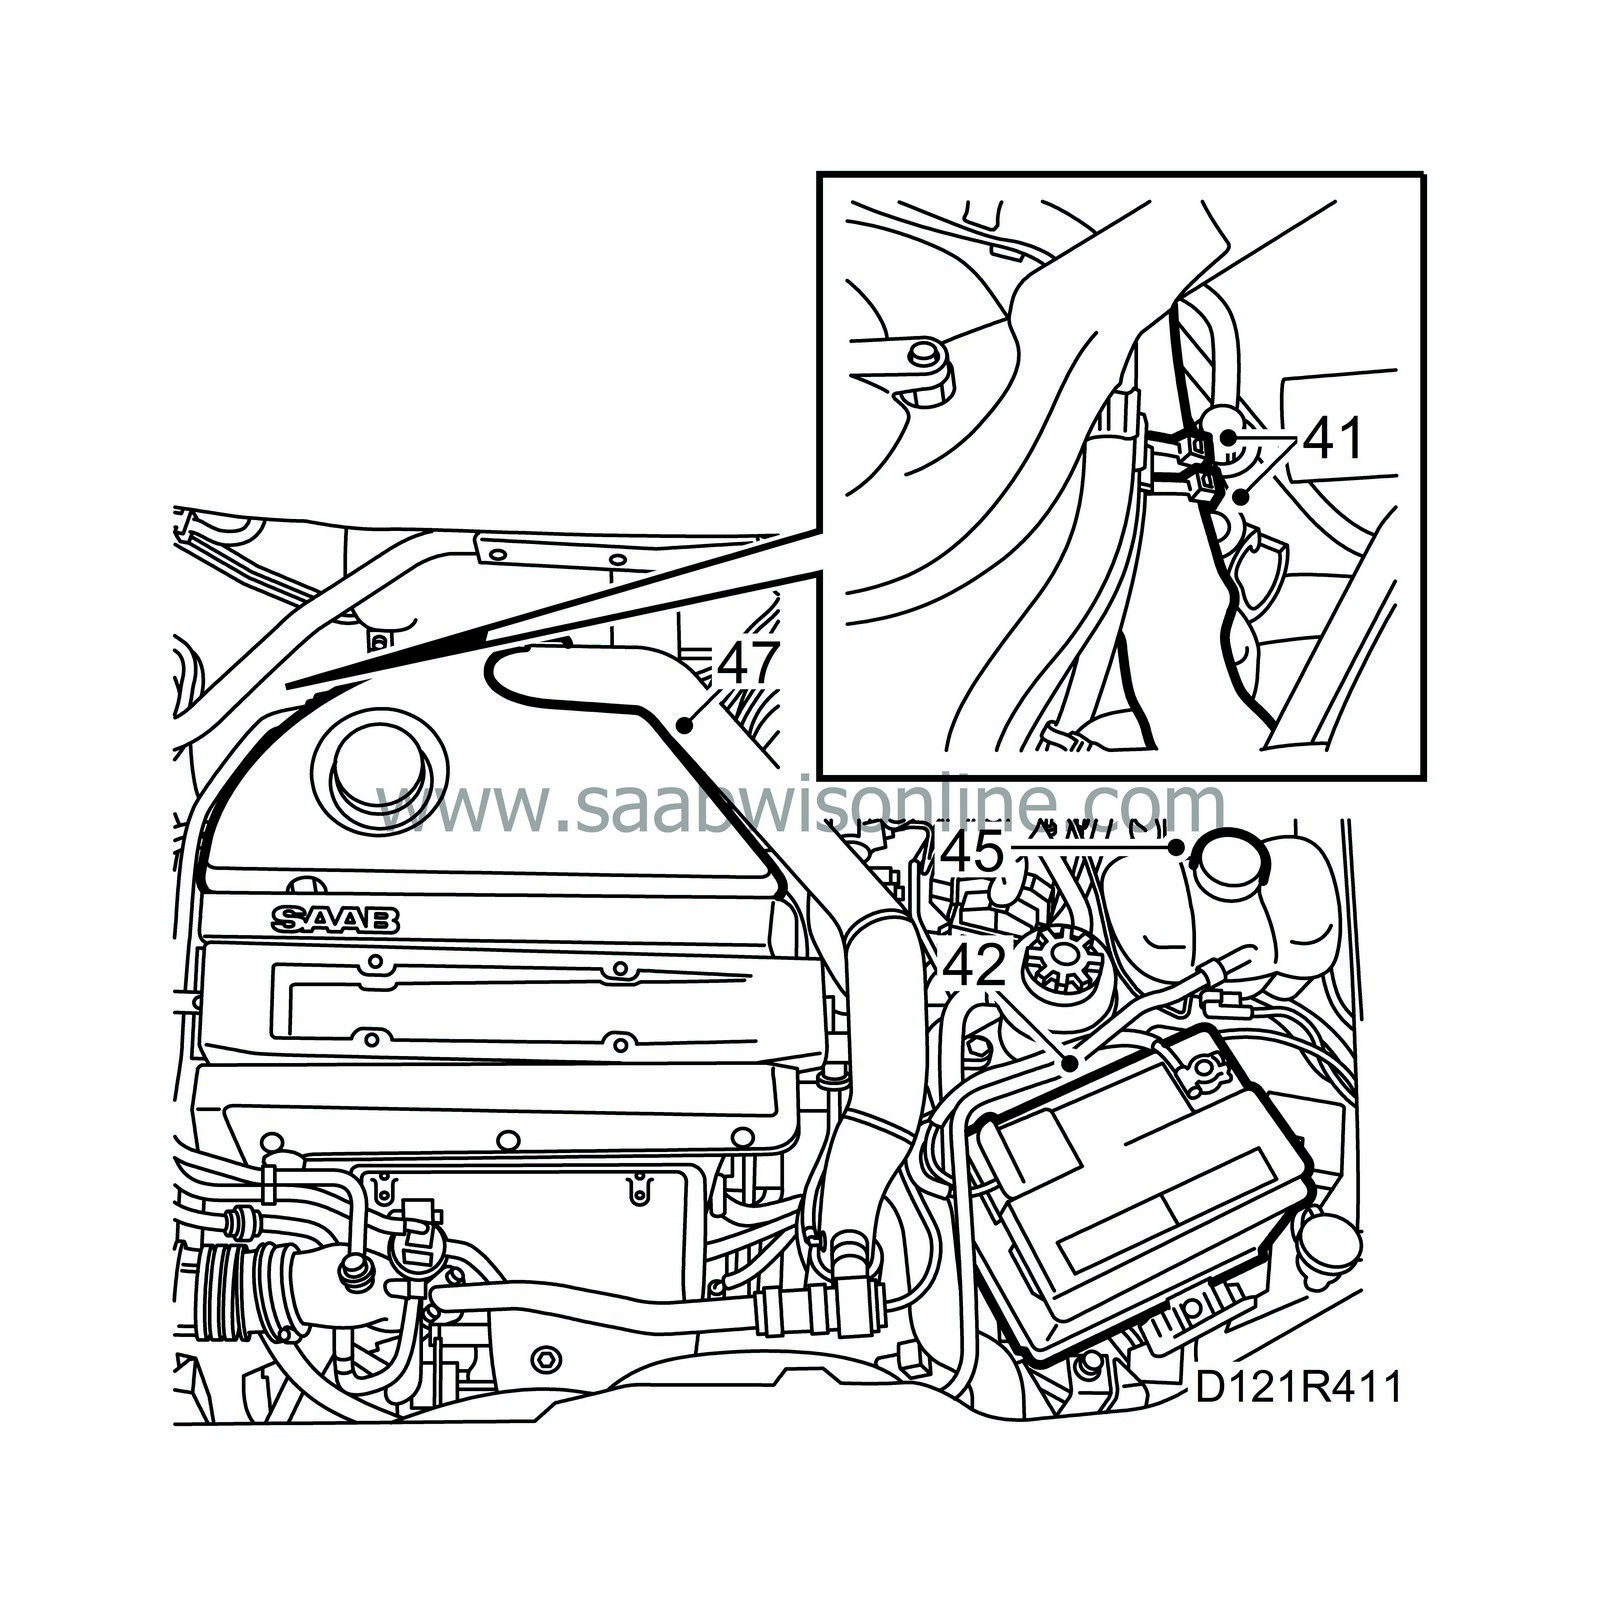
41.
|
Fit the wiring harness to the MacPherson strut with cable ties
|
|
42.
|
Fit the battery and attach the negative and positive cables and battery ventilation. Secure the cables.
|
|
43.
|
Raise the car. Tighten the lower AC compressor bolt.
Tightening torque 47 Nm (35 lbf ft)
|
|
44.
|
Fit the belt circuit cover and the lower engine covers.
|
|
45.
|
Top up to the correct level and bleed the cooling system in the following way:
|
Note
|
|
AC/ACC should be OFF.
|
Fill the system to MAX level. Check for leaks. Close the cap on the expansion tank, start the engine and run it warm without load at varying speeds until the radiator fan cuts in. Open carefully and top up to MAX level.
|
|
46.
|
Fit the engine cover, remove the wing protectors and make sure the engine bay is clean.
|
|
47.
|
Program SID and the radio. Start the engine and check all functions. Calibrate the ACC. Conduct a road test.
|


