PRE-RELEASE
Clutch pedal and pedal bracket LHD
| Clutch pedal and pedal bracket LHD |
| 1. |
Drain the clutch system (brake fluid) through the bleed nipple on the slave cylinder using
88 19 096 Bleeding equipment
.
|
|
| 2. |
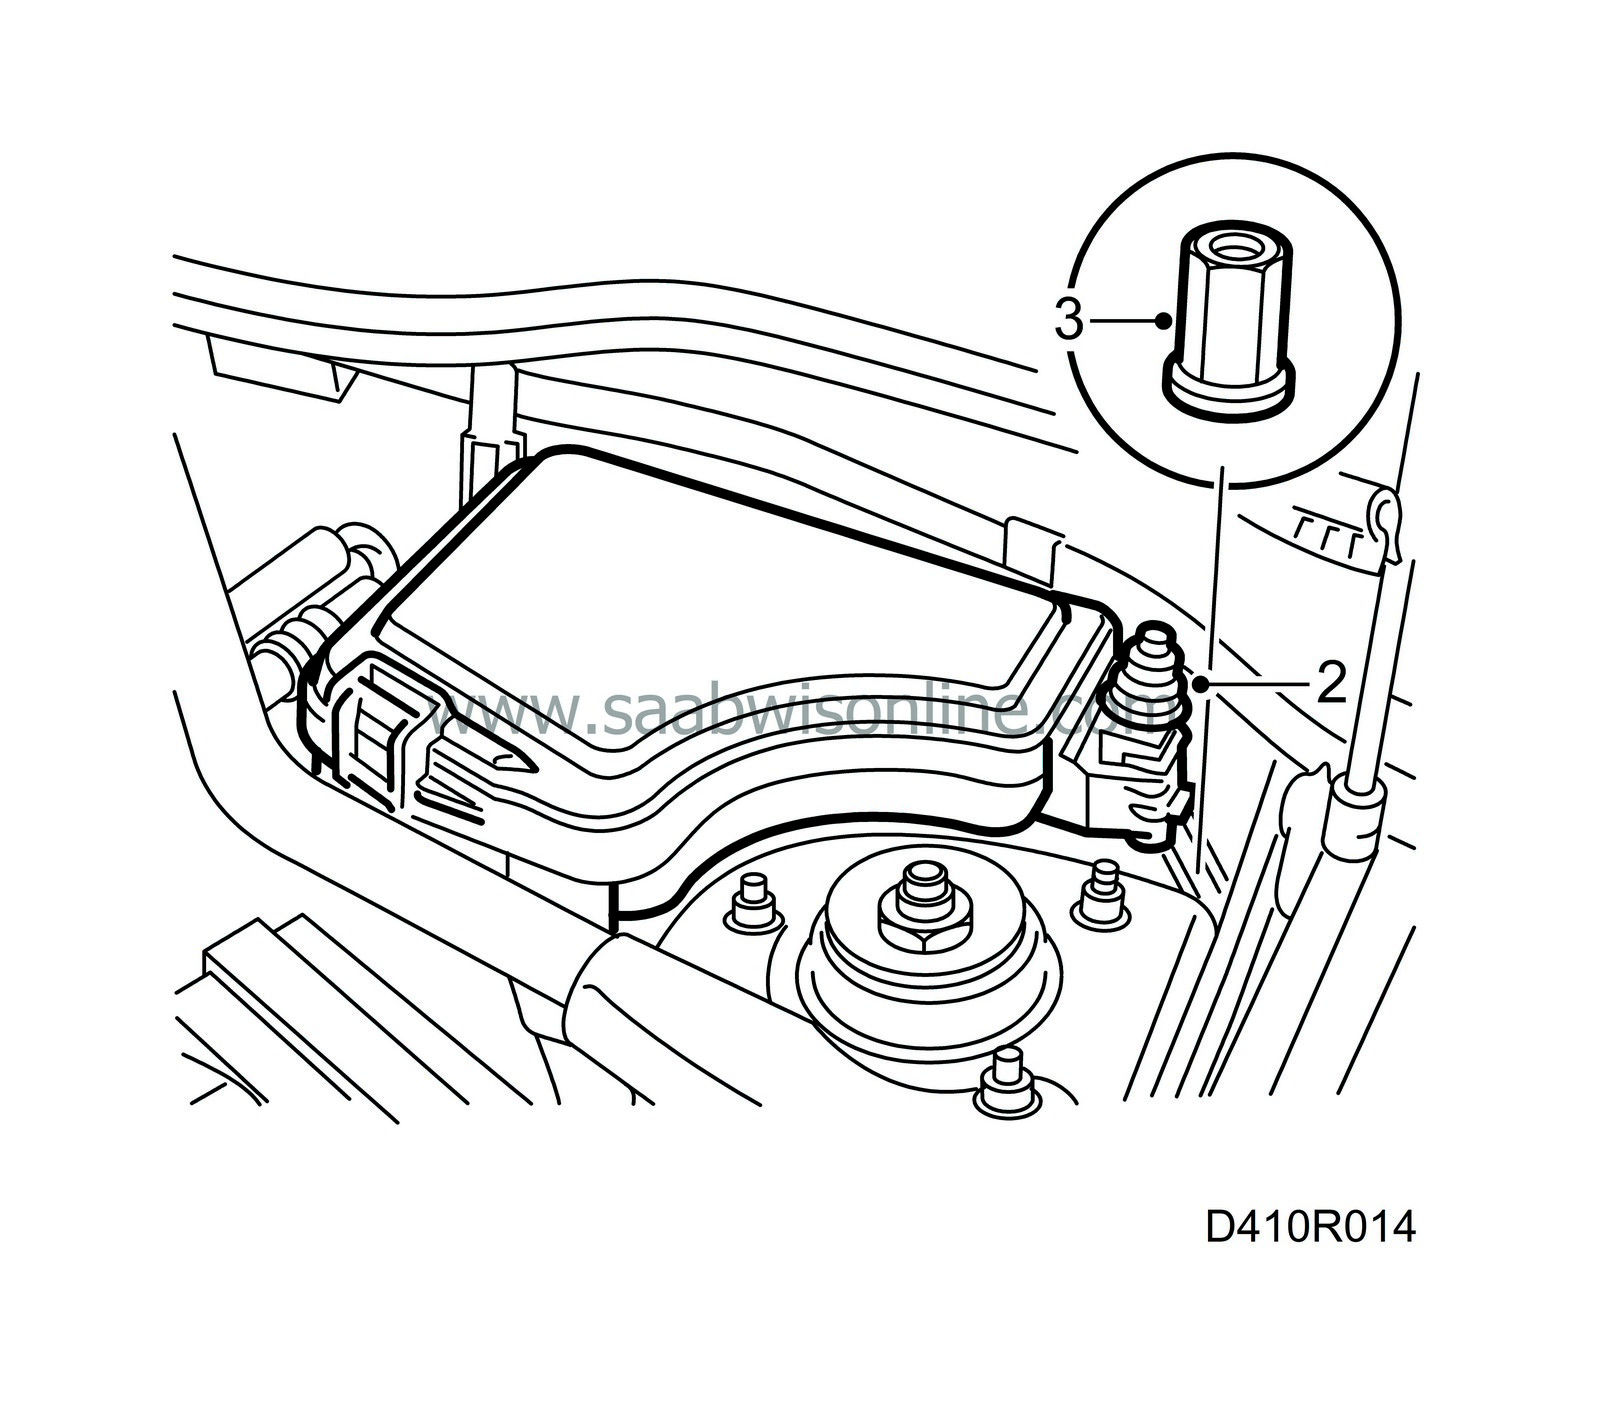
Unplug the connector to the alarm's bonnet switch, if applicable.
|
|
| 3. |
Detach the main fuse box and put it to the side.
|
|
| 4. |
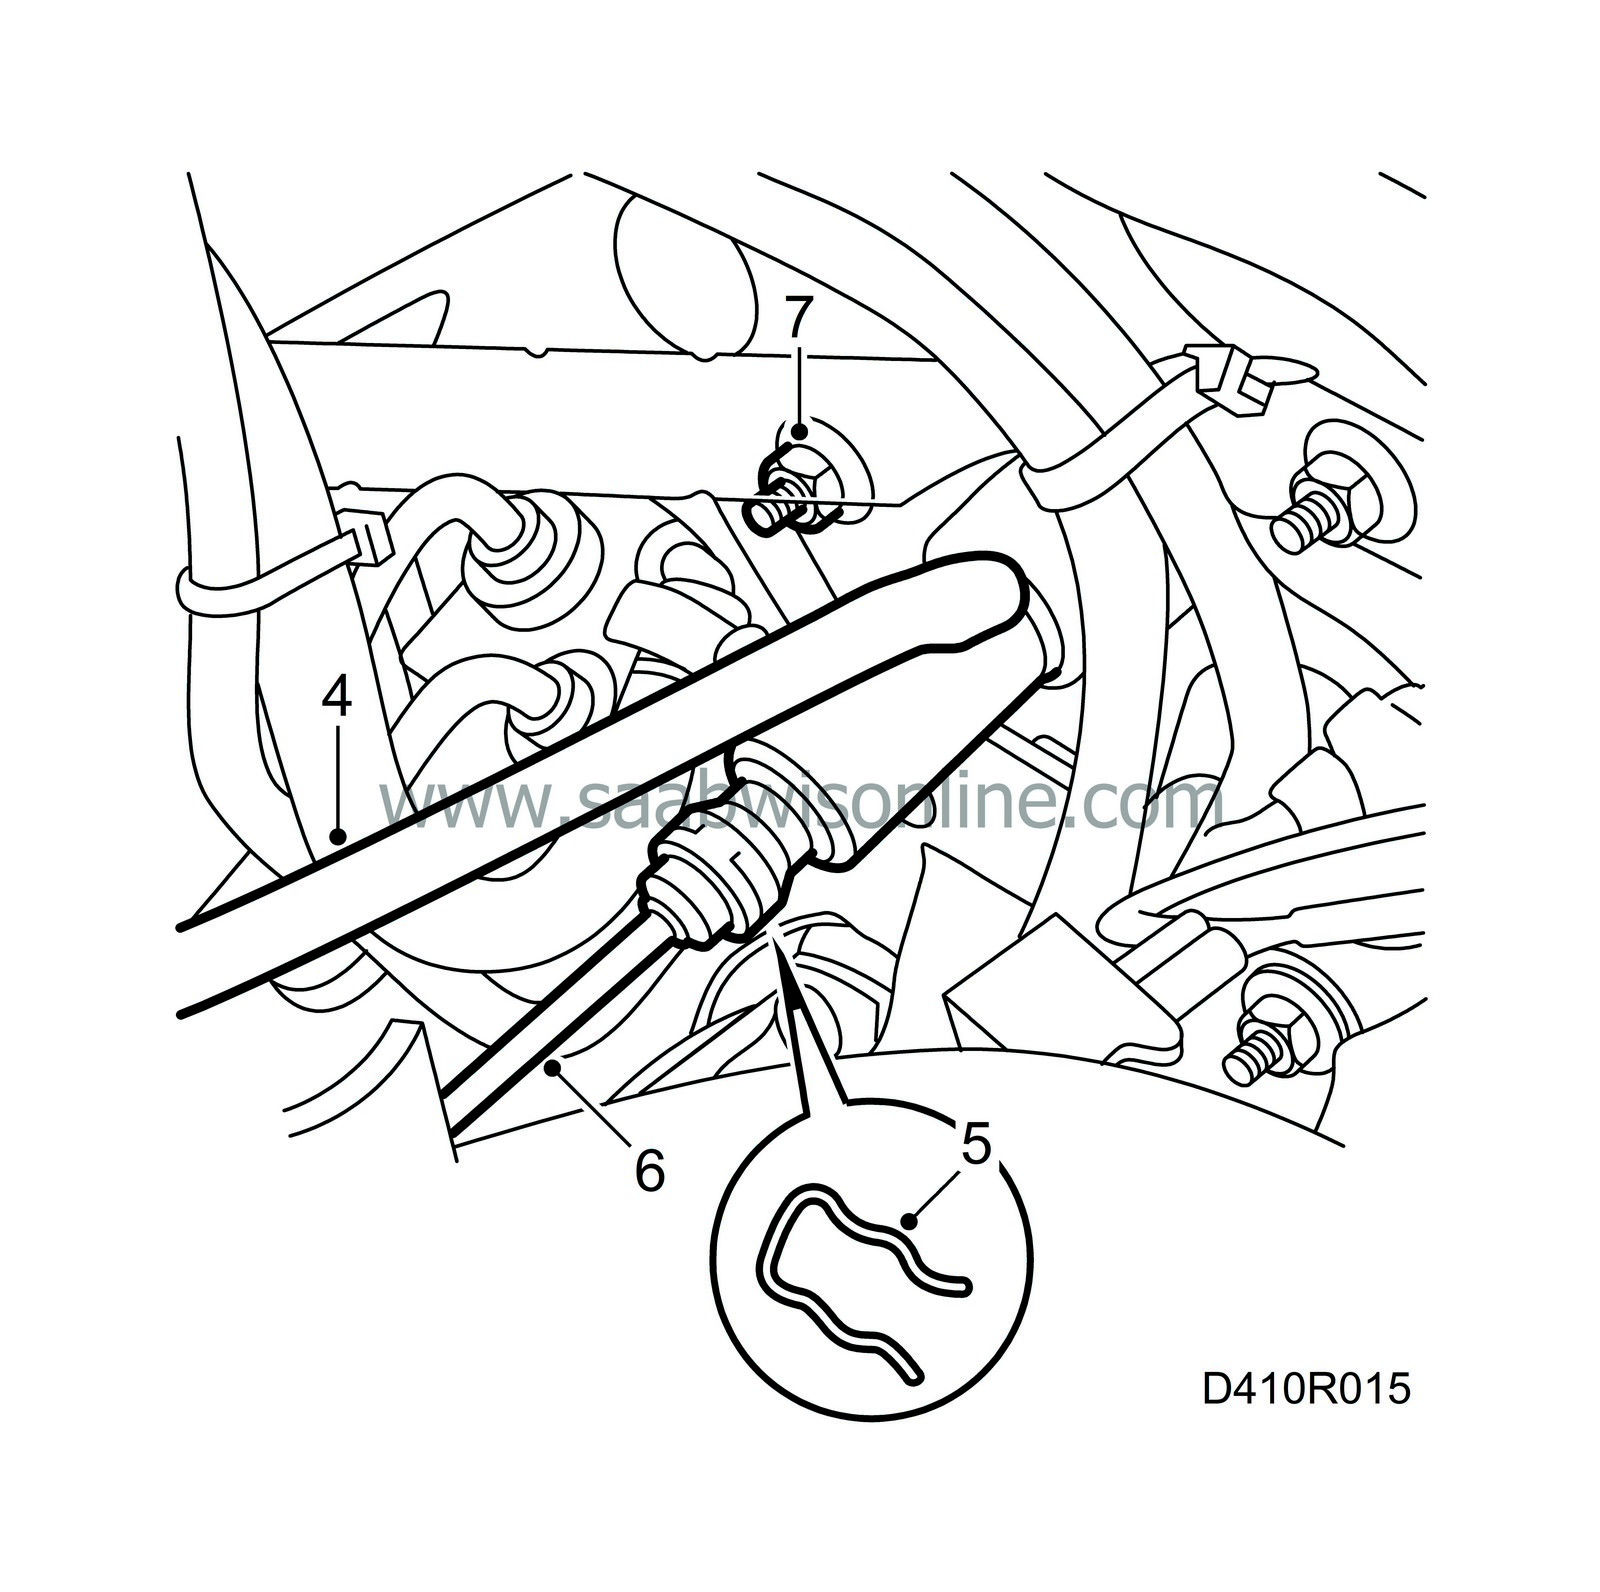
Detach the supply hose from the master cylinder.
|
|
| 5. |
Detach the clip holding the delivery pipe at the master cylinder.
|
|
| 6. |
Detach the delivery pipe.
|
|
| 7. |
From the engine bay, remove the nut holding the right-hand portion of the clutch pedal bracket to the scuttle panel.
|
|
| 8. |
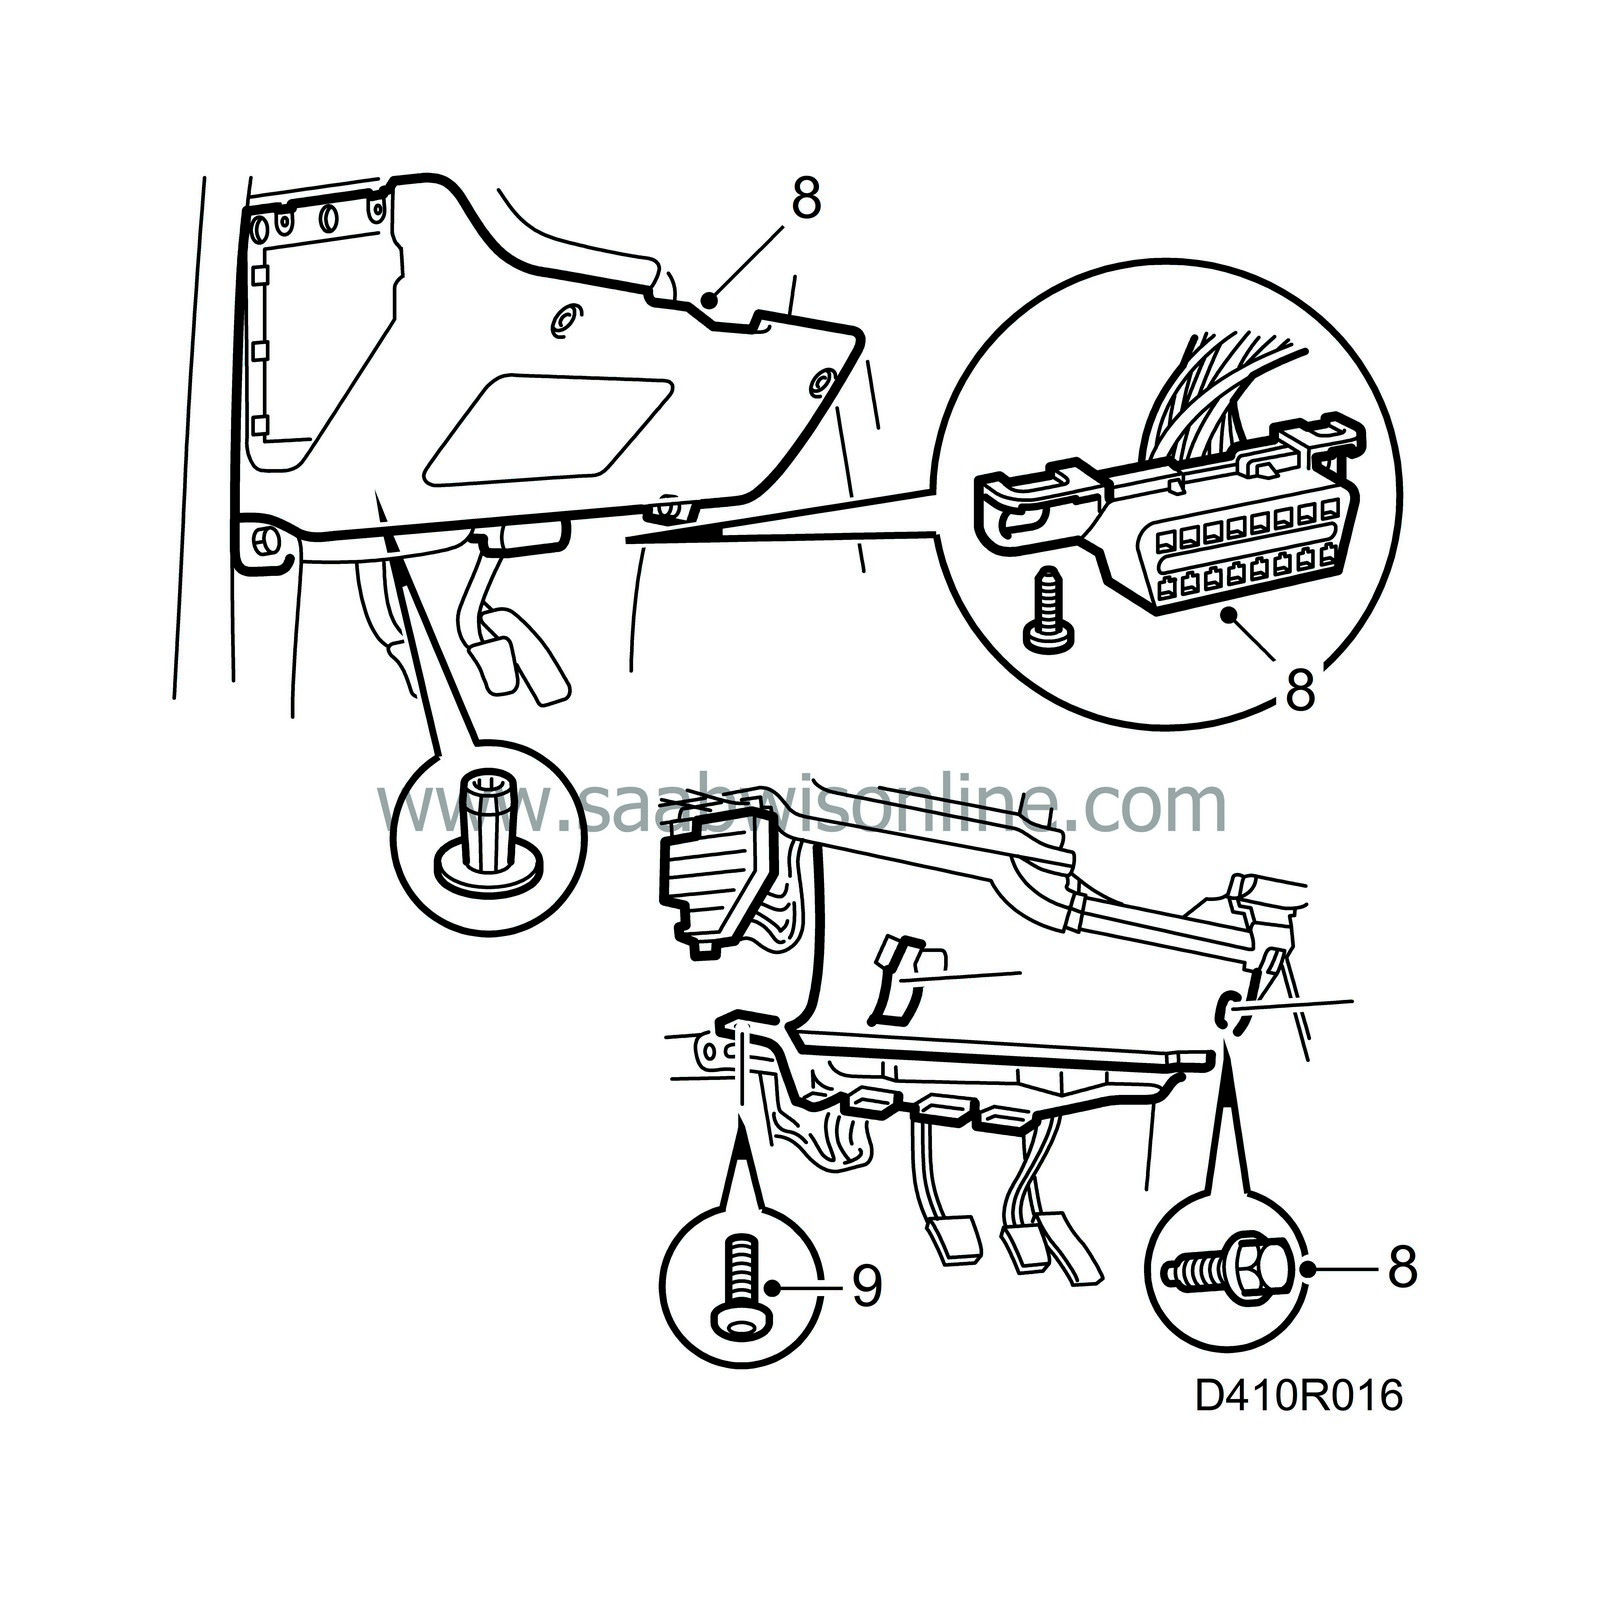
Remove the lower panel and the knee shield under the steering wheel.
|
|
| 9. |
Remove the floor air duct and the pedal switch.
|
|
| 10. |
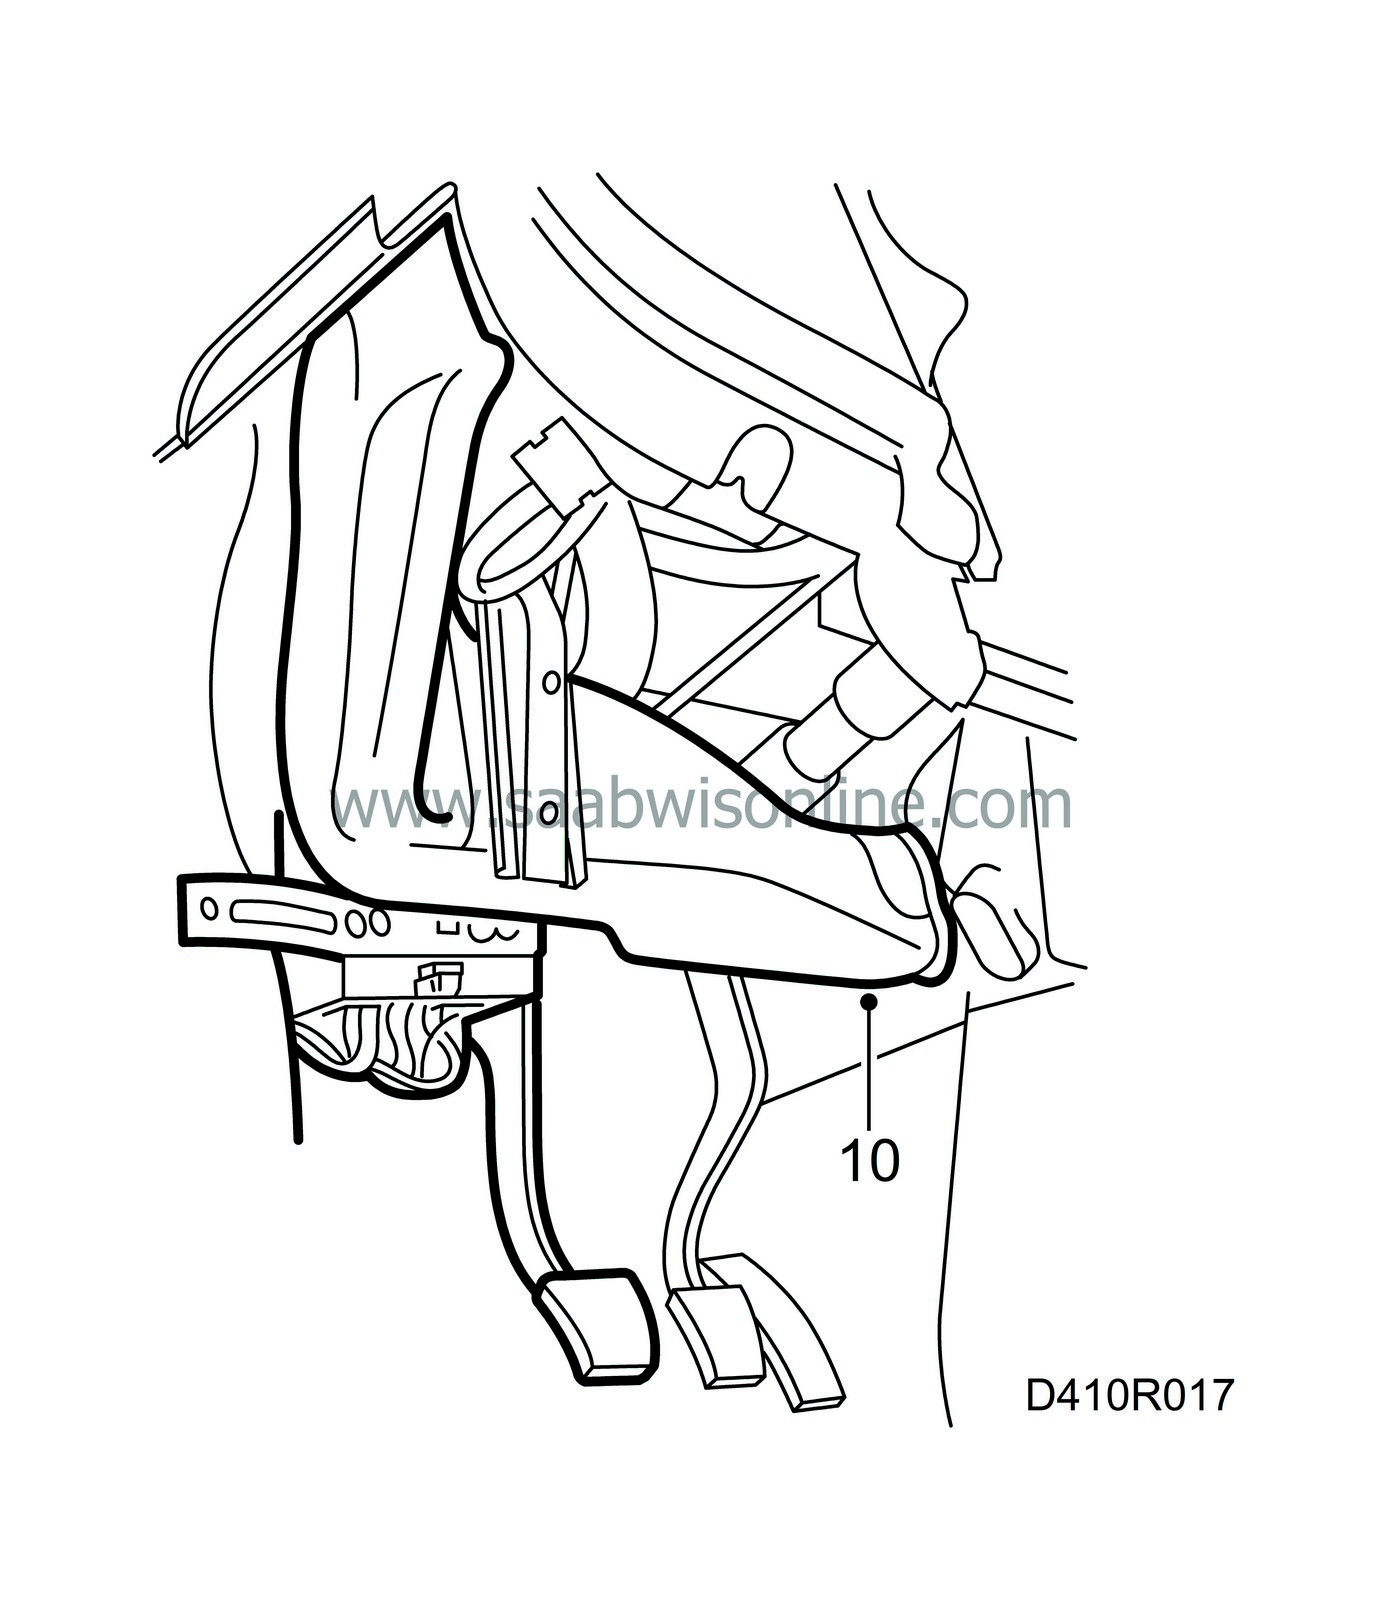
Remove the air duct of the side defroster and the cable tie of the wiring harness.
|
|
| 11. |
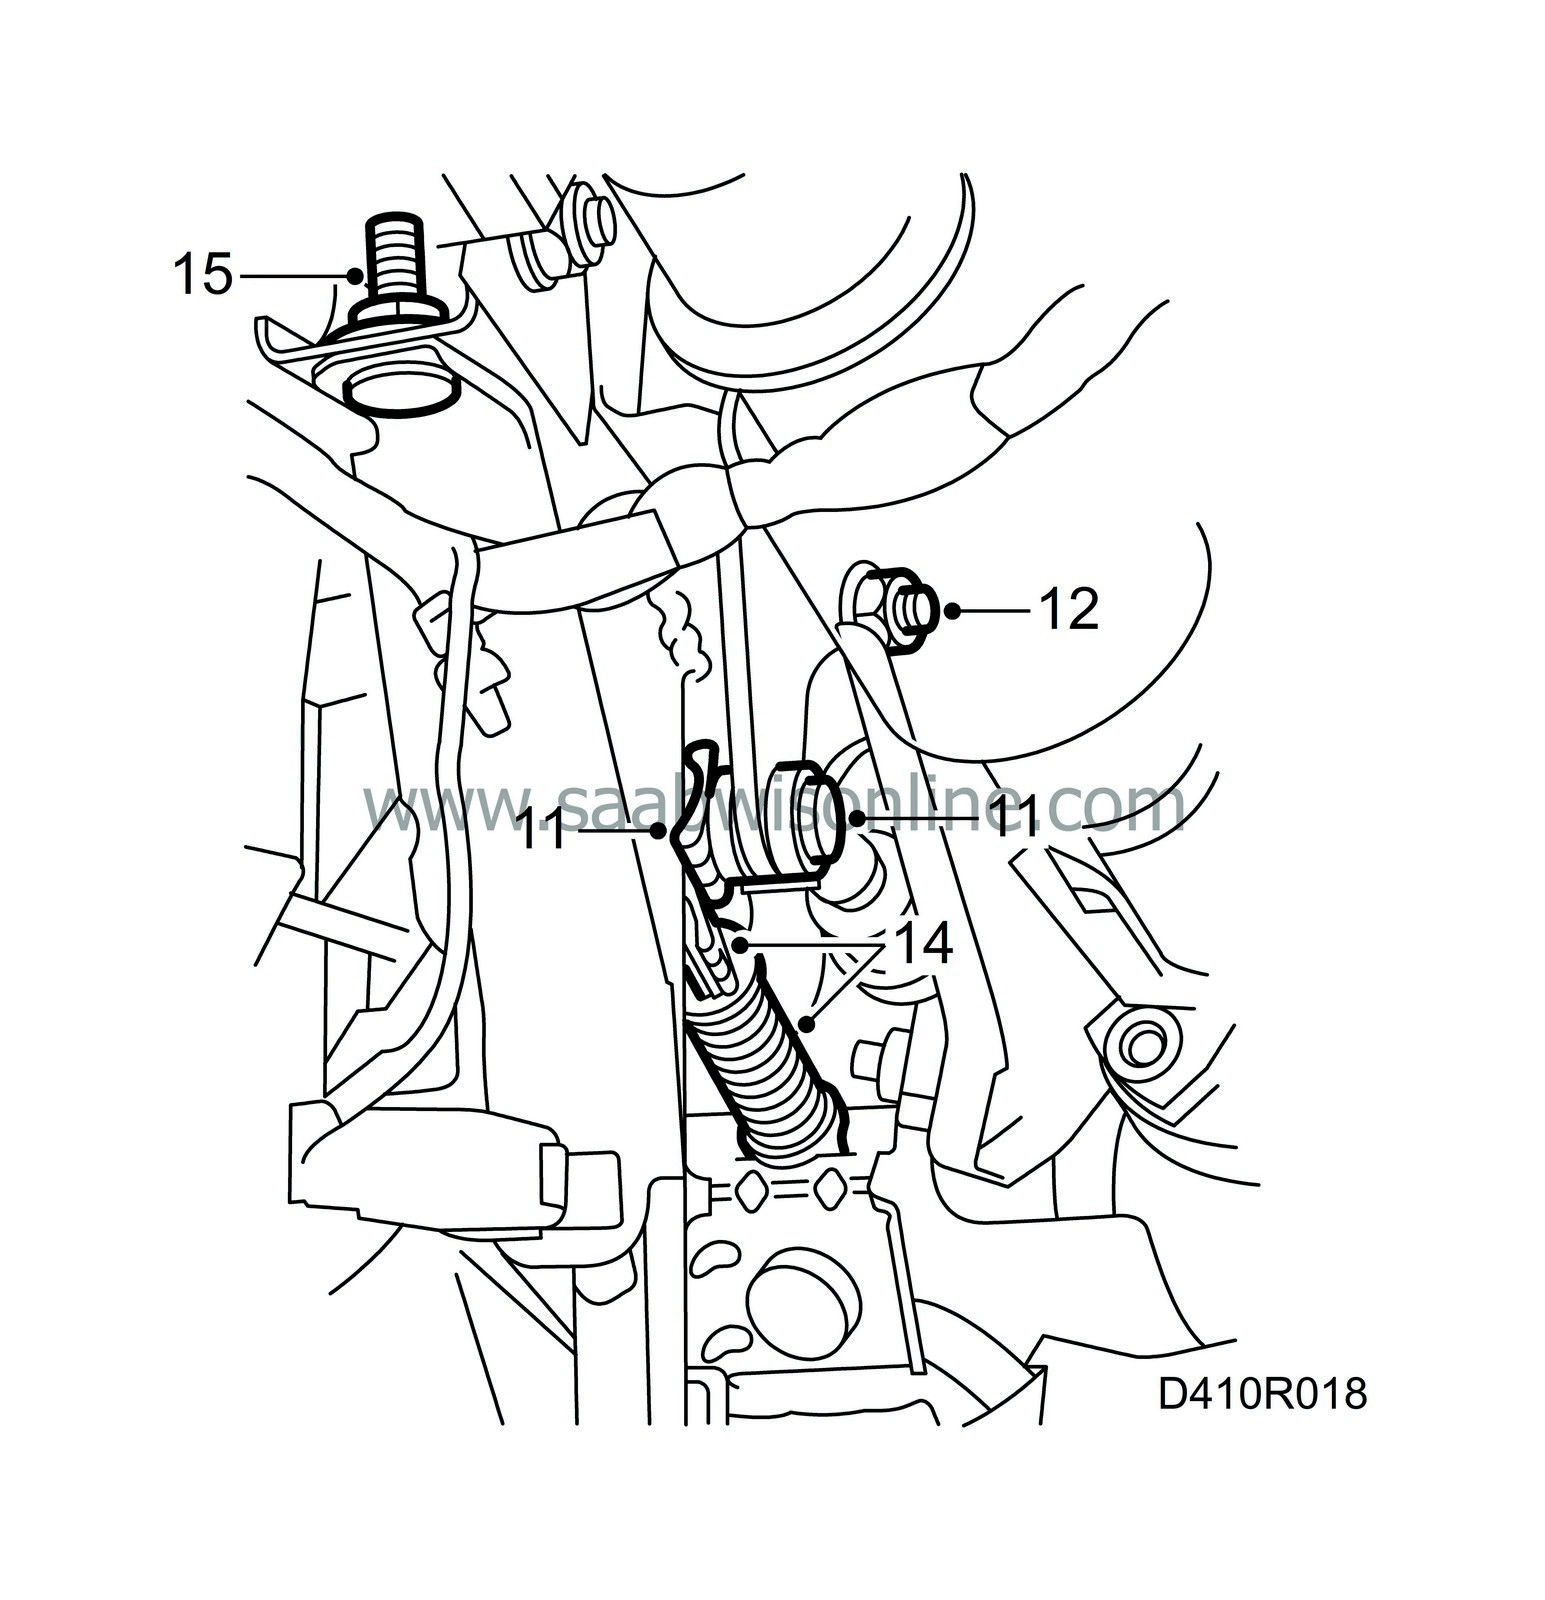
Remove the clip and pin from the clutch pedal.
|
|
| 12. |
Remove the nut holding the clutch pedal.
|
|
| 13. |
Lift out the right-hand portion of the clutch pedal bracket with the master cylinder.
|
|
| 14. |
Detach the clip and remove the auxiliary spring from the clutch pedal.
|
|
| 15. |
Loosen the nut under the dashboard slightly.
|
|
| 16. |
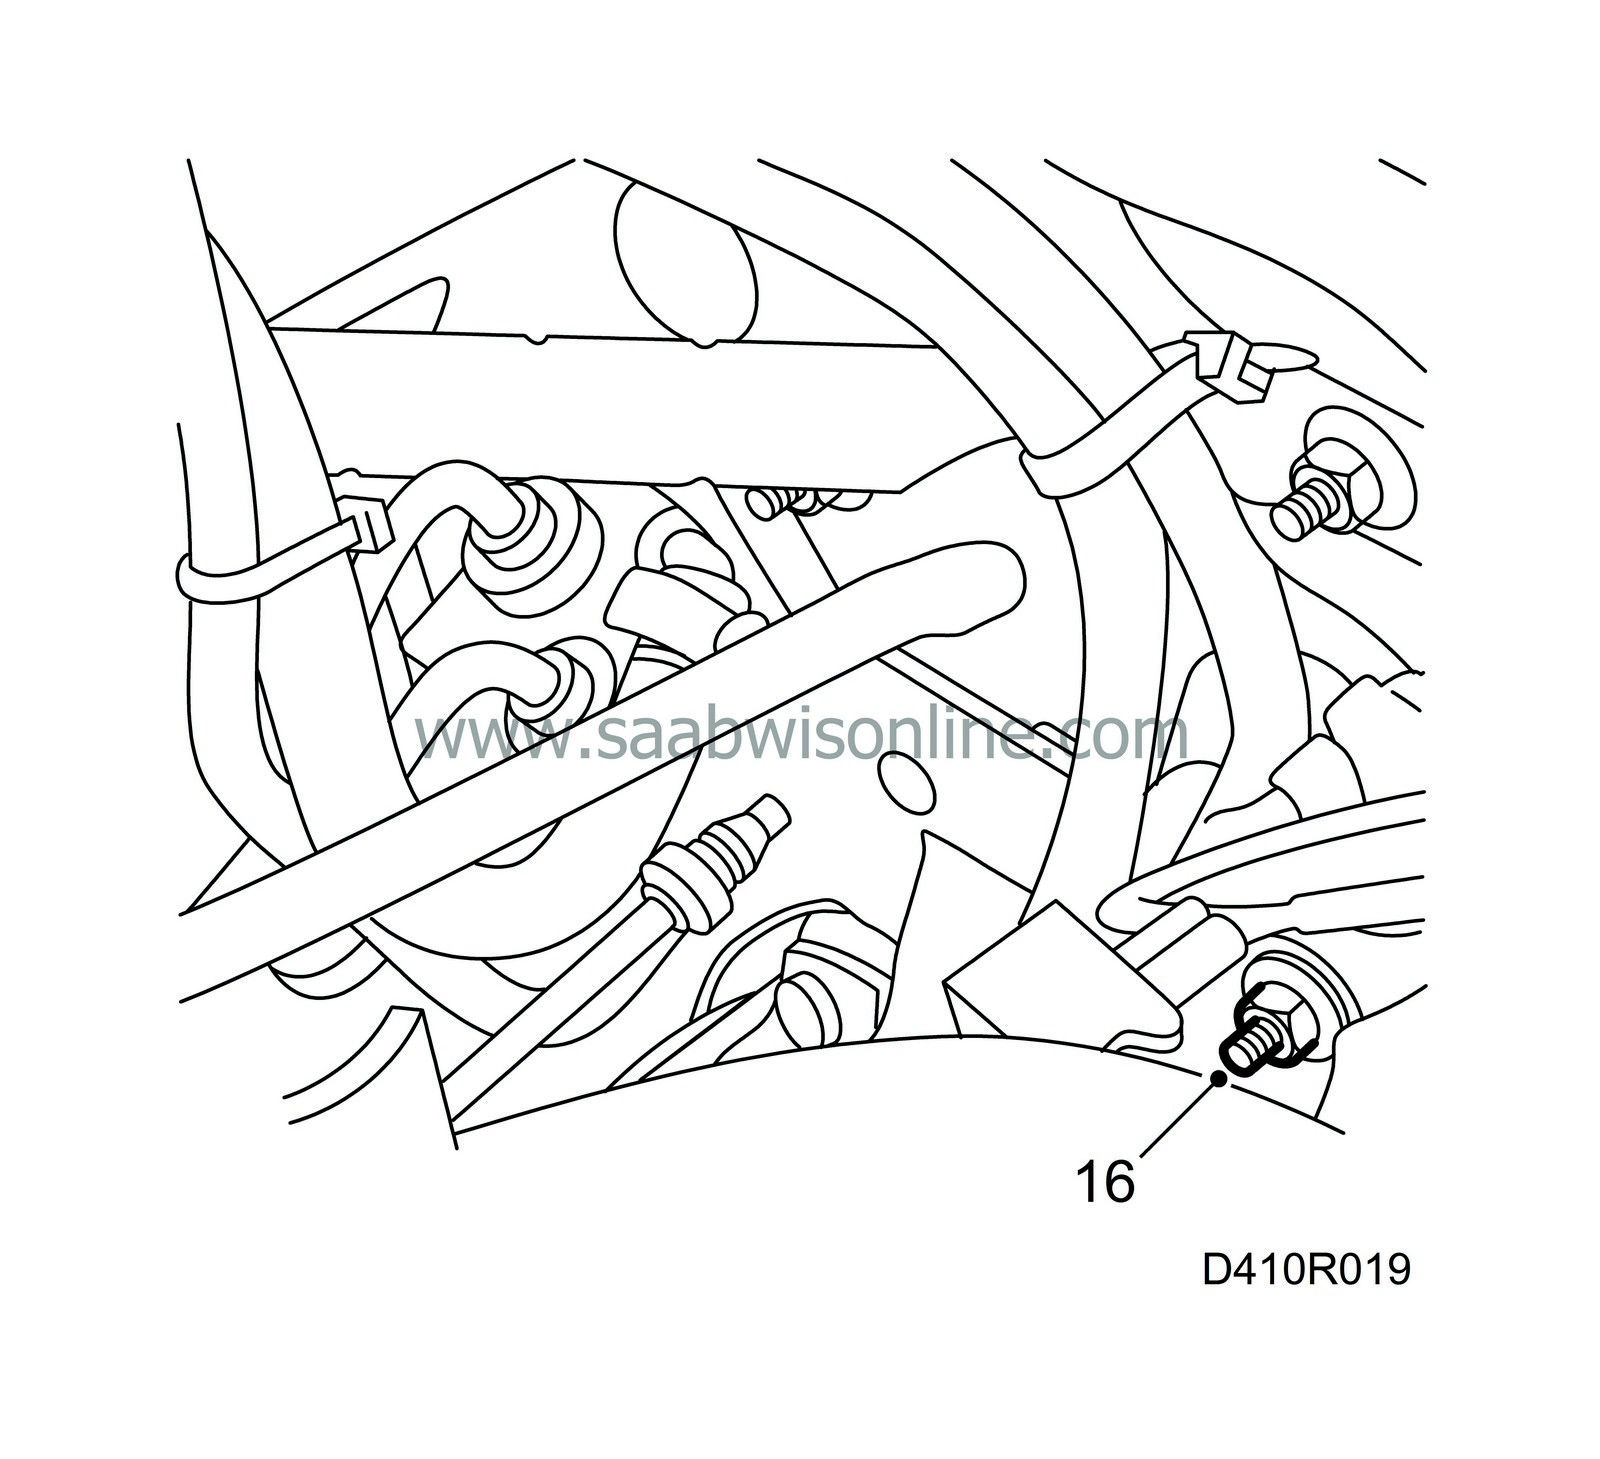
Remove the nut to the clutch pedal's left-hand bracket on the outside of the scuttle panel.
|
|
| 17. |
Pull out the bracket with clutch pedal.
|
|
| 18. |
Remove the clutch pedal from the bracket.
|
|
| To fit |
| 1. |
Fit the clutch pedal on the bolt.
|
|
| 2. |
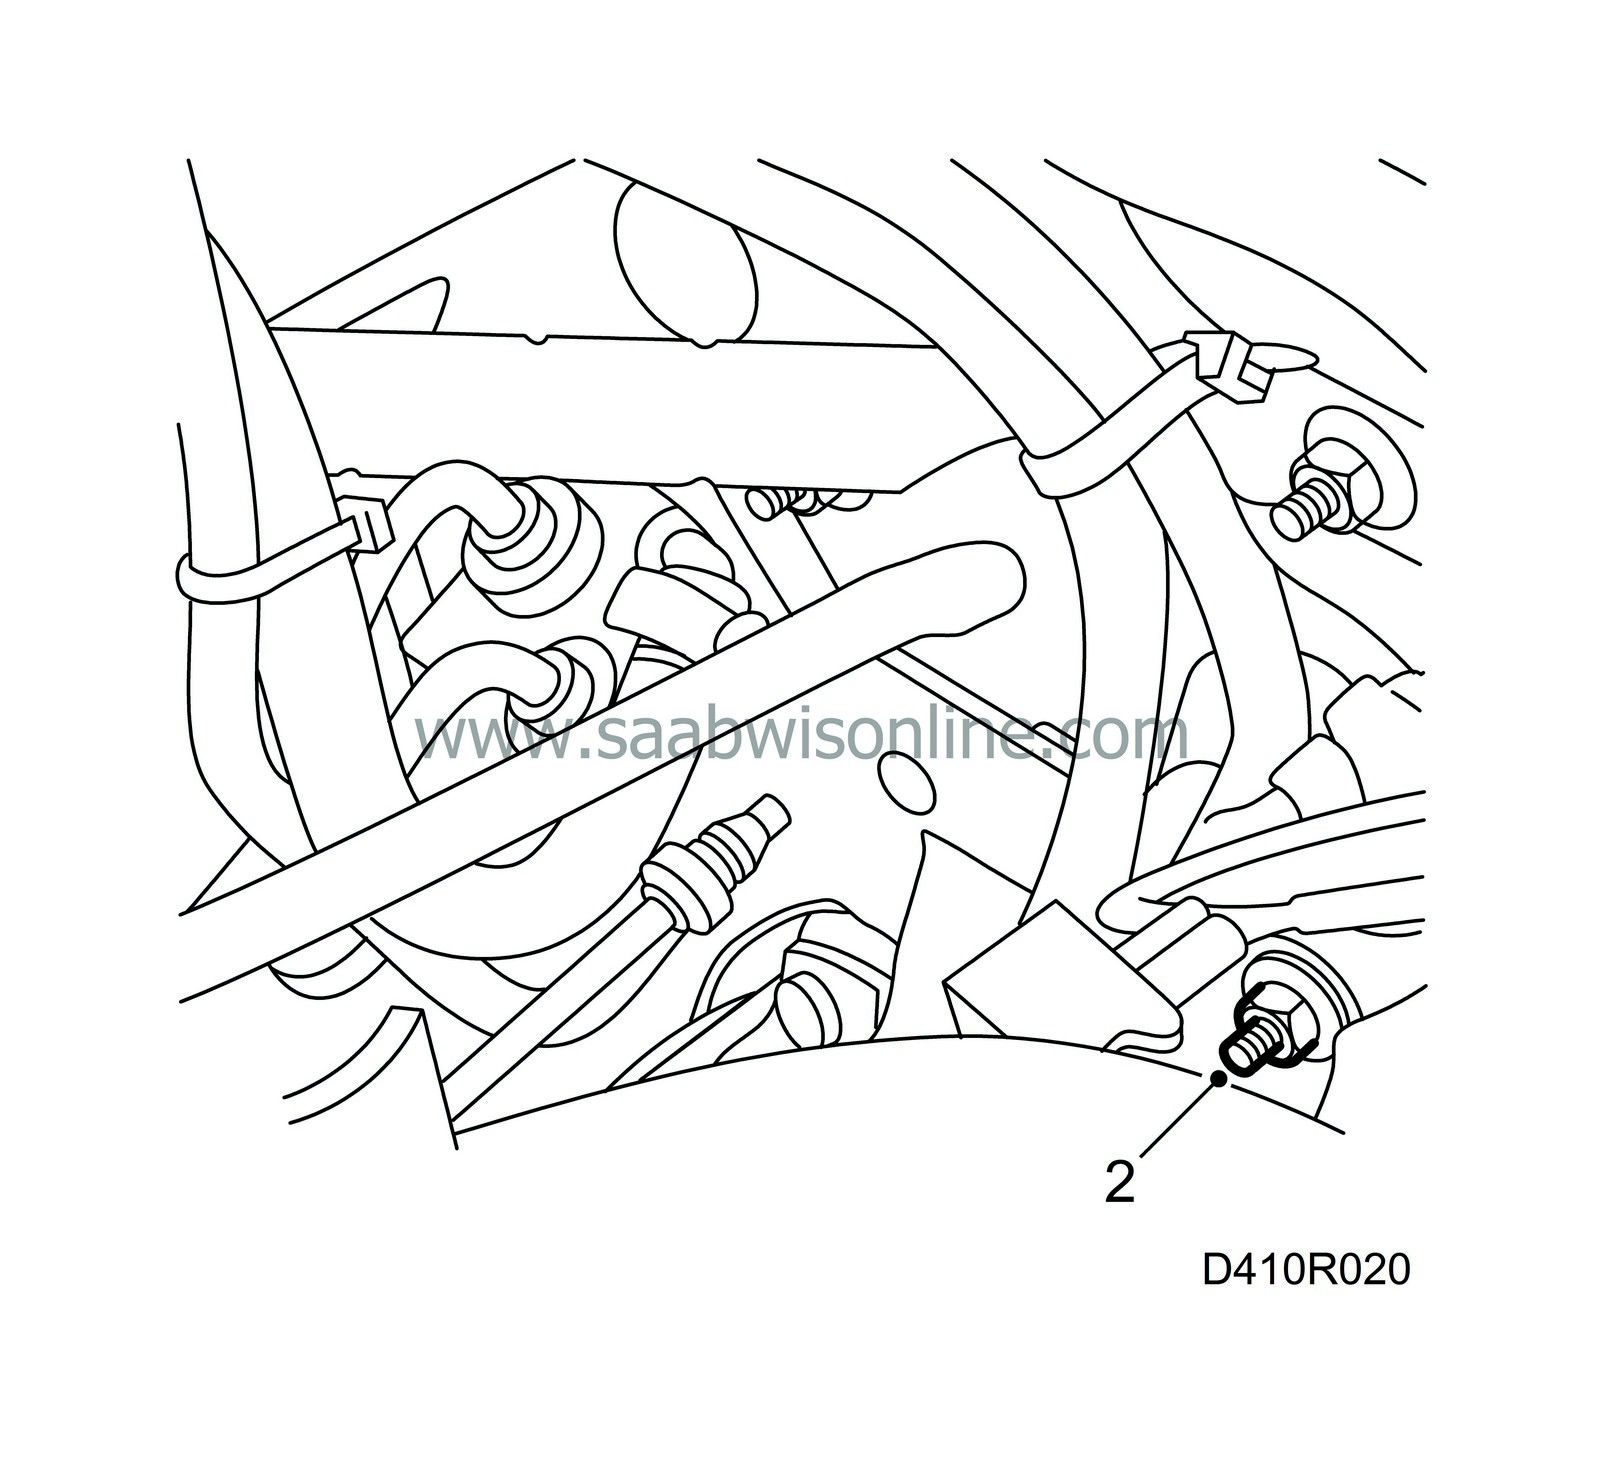
Fit and secure the left-hand clutch pedal bracket. Begin with the nut in the engine bay.
Tightening torque 24 Nm (18 lbf ft) |
|
| 3. |
Tighten the pedal bracket's retaining nut under the dashboard.
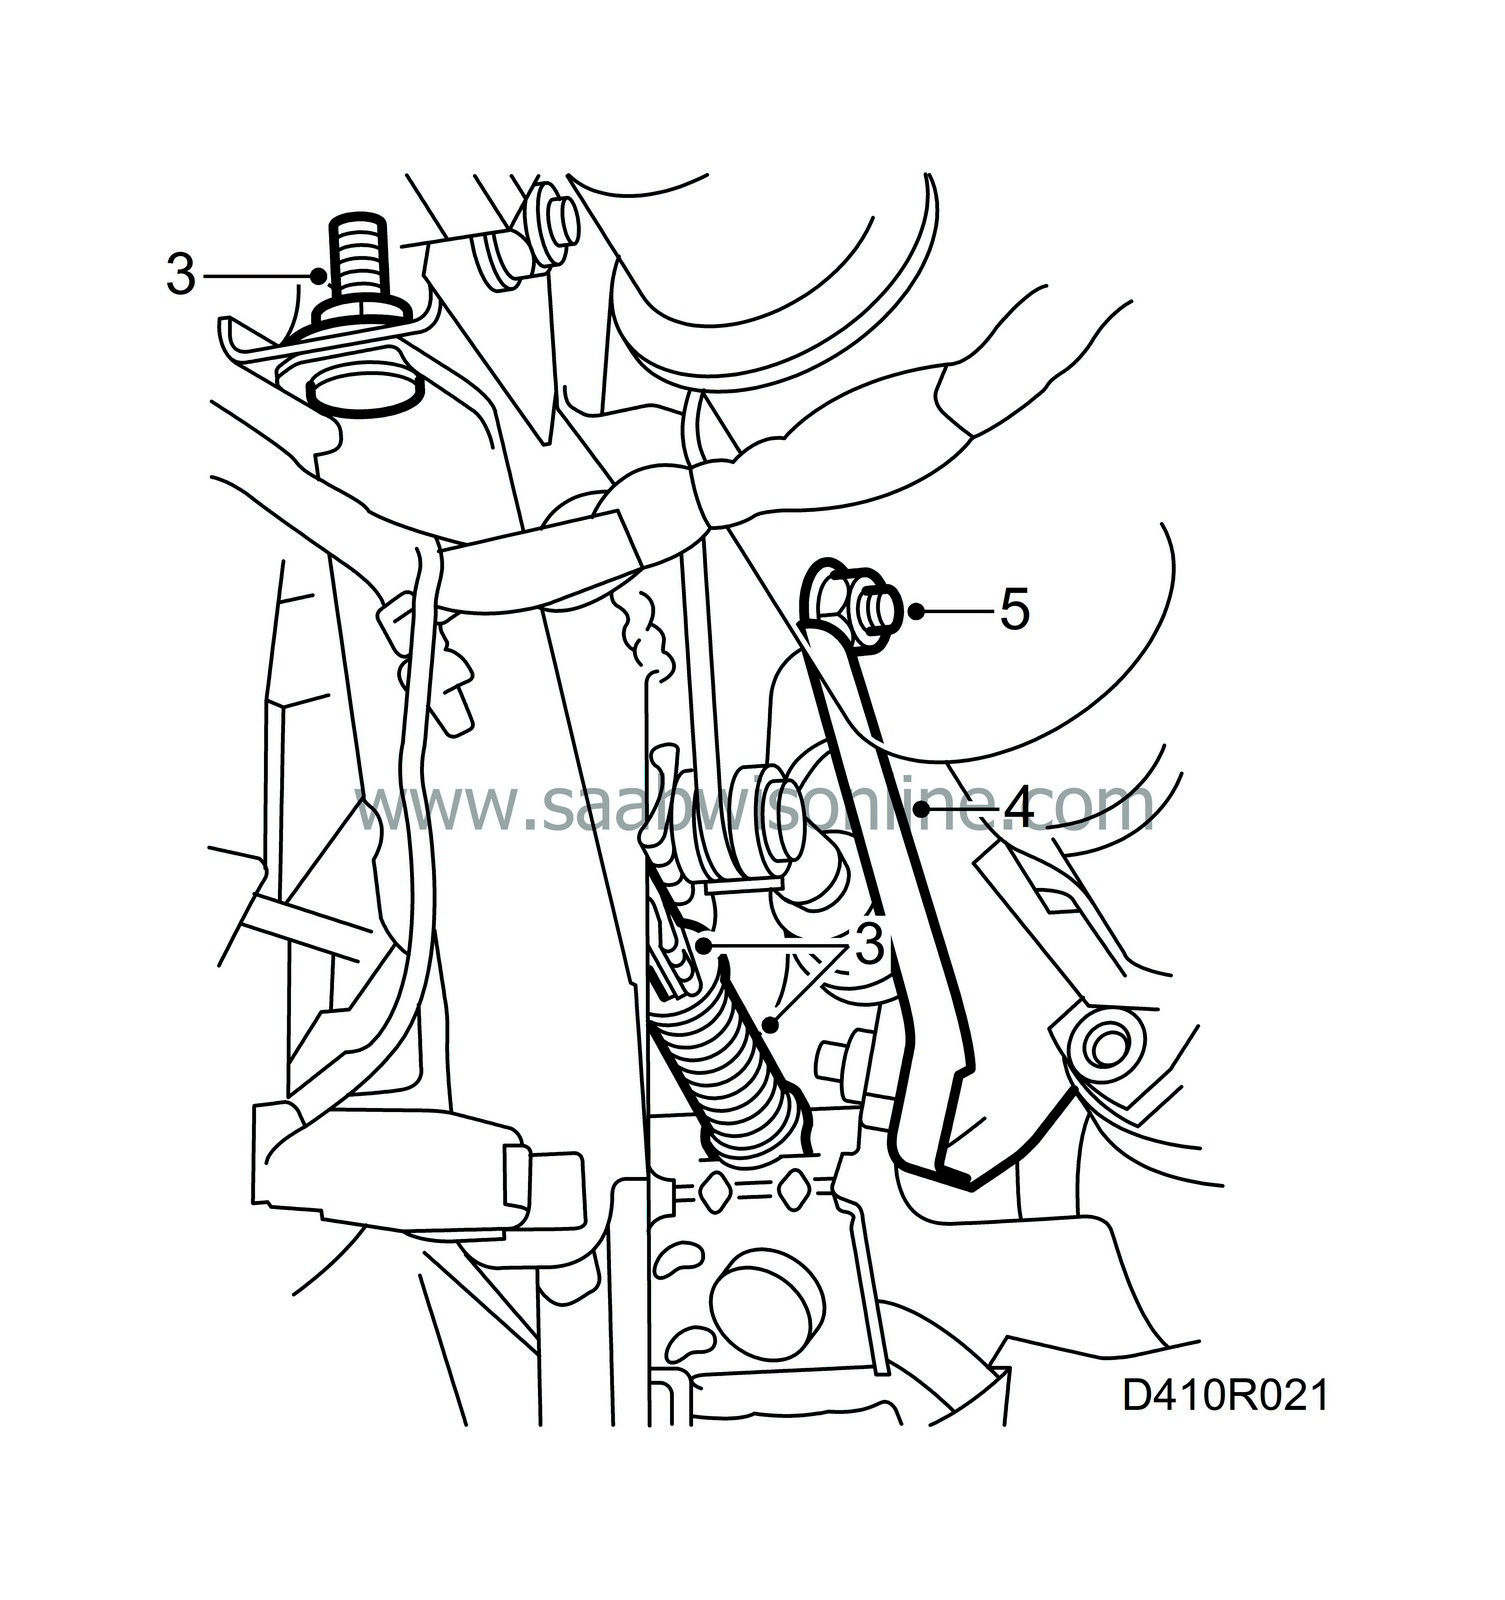
Tightening torque 24 Nm (18 lbf ft) Fit the auxiliary spring and clip on the clutch pedal. |
|
| 4. |
Fit the right-hand portion of the clutch pedal bracket with the master cylinder at the scuttle panel and the clutch pedal bolt.
|
|
| 5. |
Fit the nut on the clutch pedal bolt, but do not tighten.
|
|
| 6. |
Check that the auxiliary spring of the clutch pedal is correctly mounted.
|
|
| 7. |
Tighten the right-hand portion of the clutch pedal bracket to the scuttle panel.
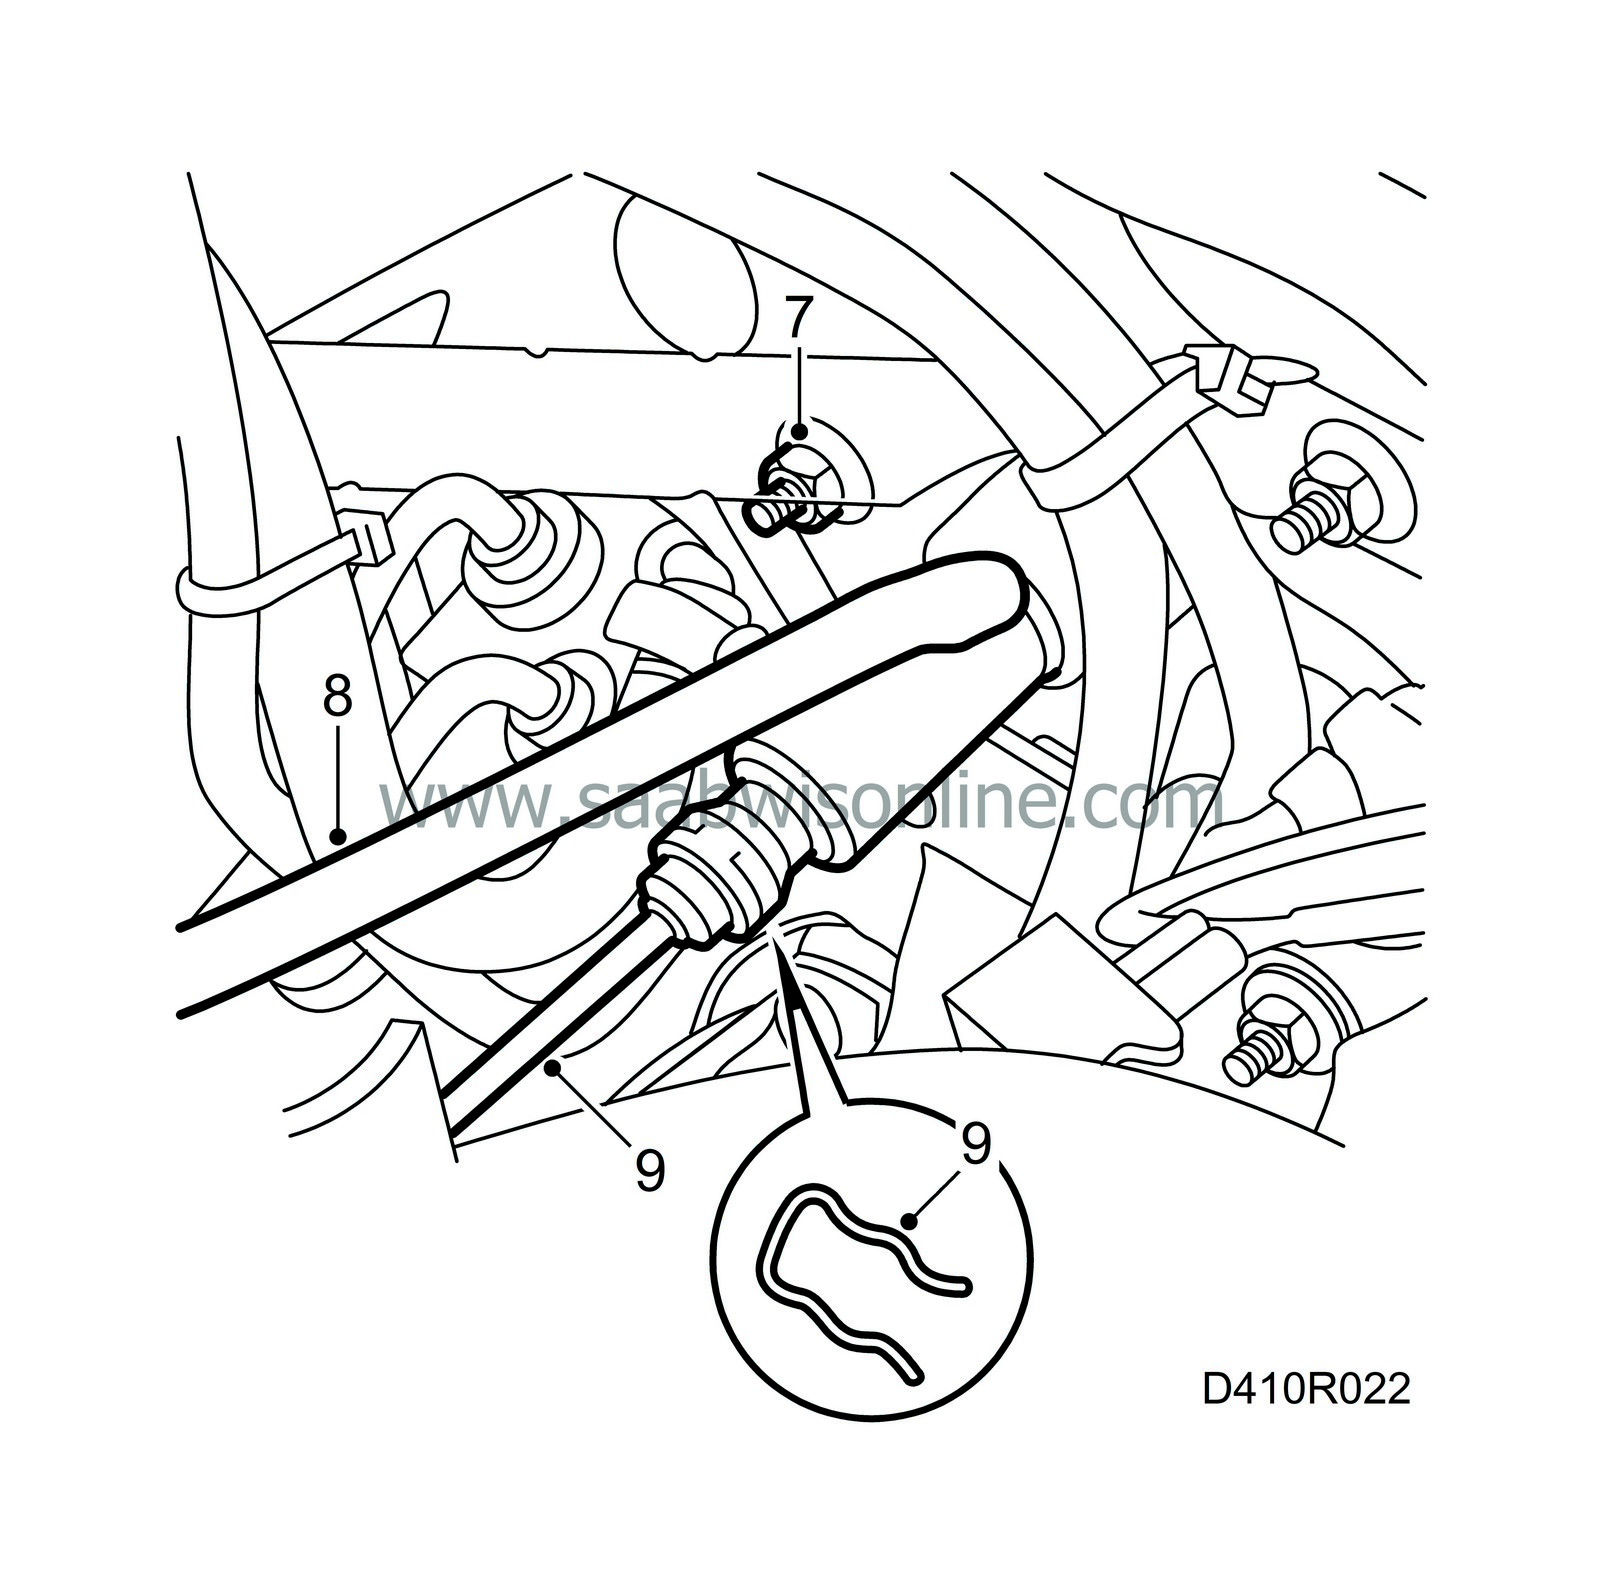
Tightening torque 24 Nm (18 lbf ft) |
|
| 8. |
Connect the supply hose to the master cylinder.
|
|
| 9. |
Connect the delivery pipe and refit the clip.
|
|
| 10. |
Fit the main fuse box and connect the alarm's bonnet switch.
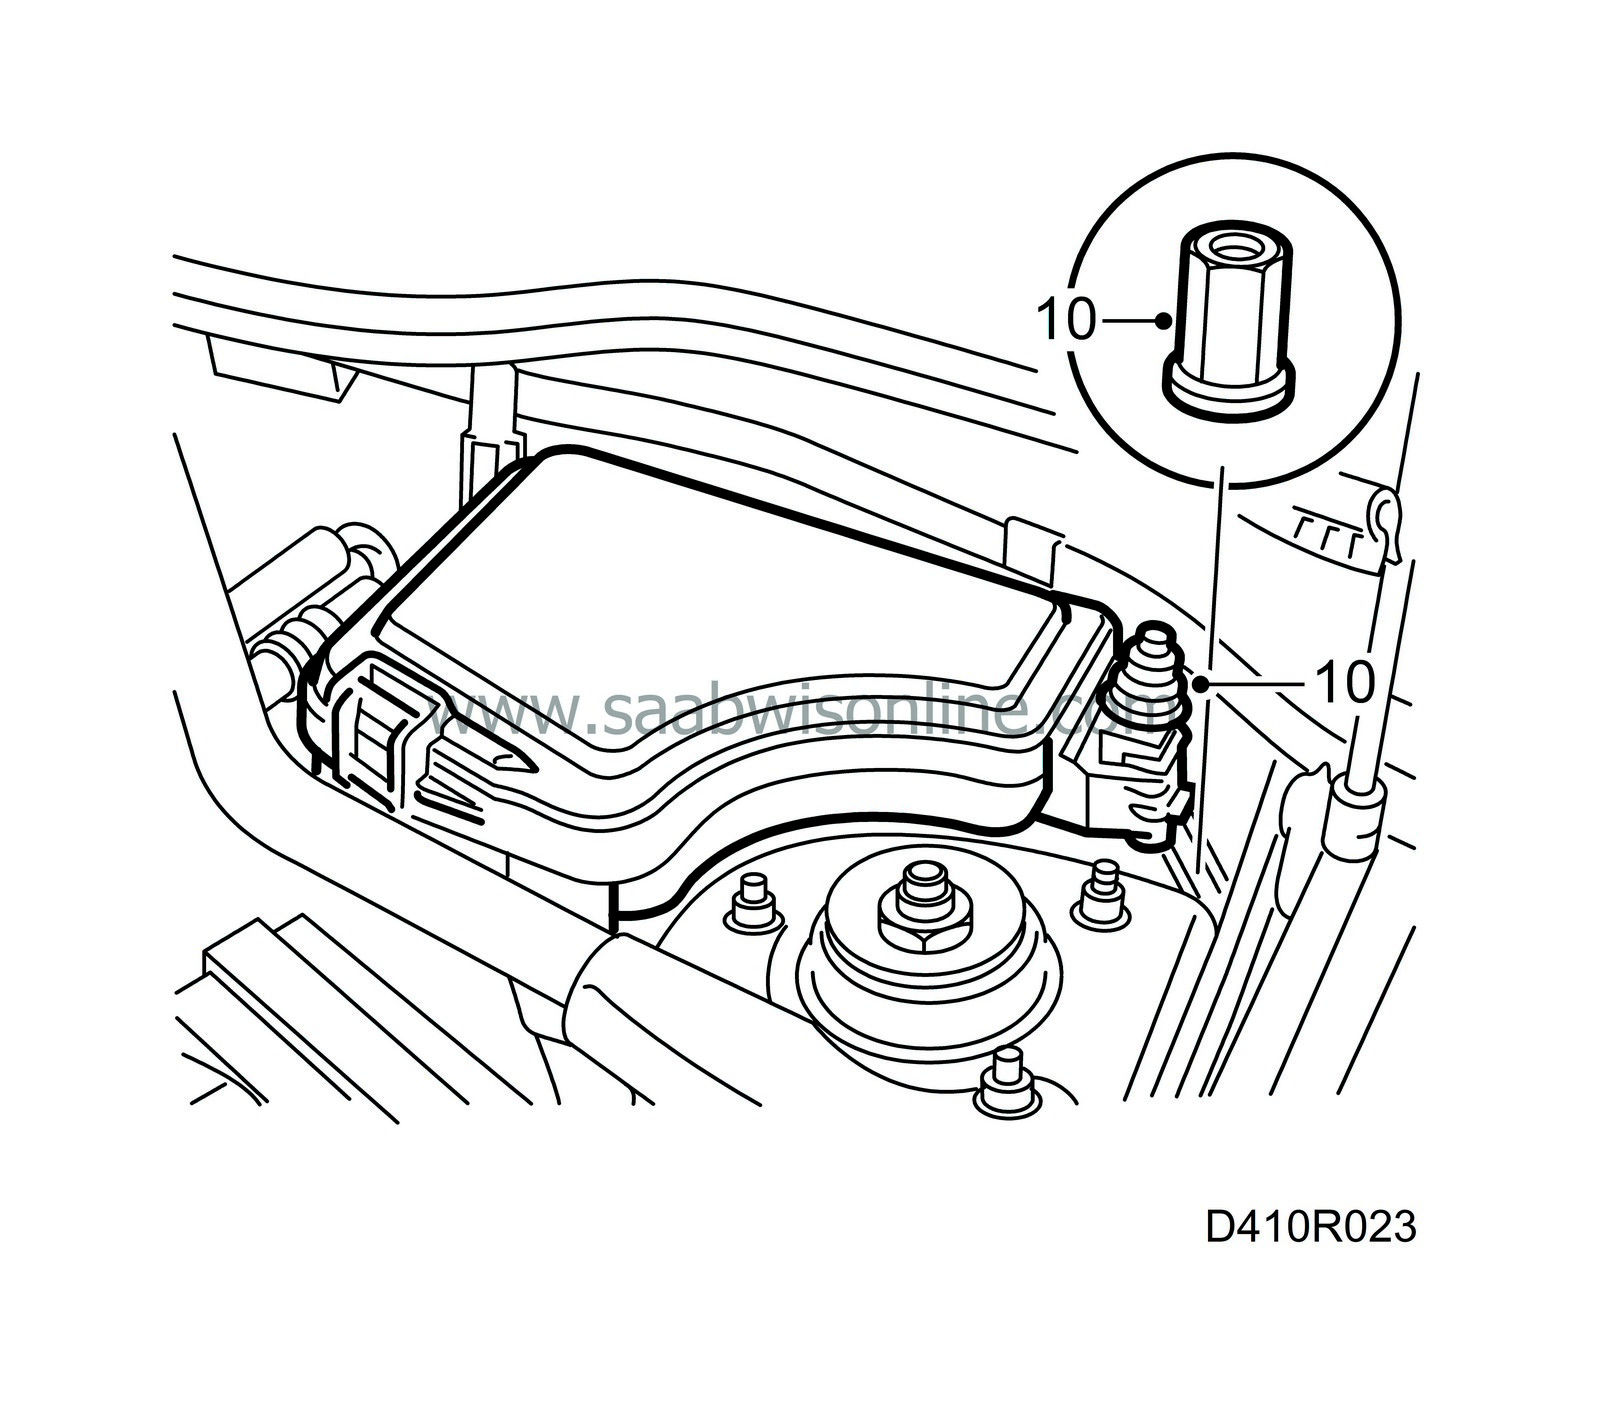
|
|
| 11. |
Tighten the clutch pedal nut.
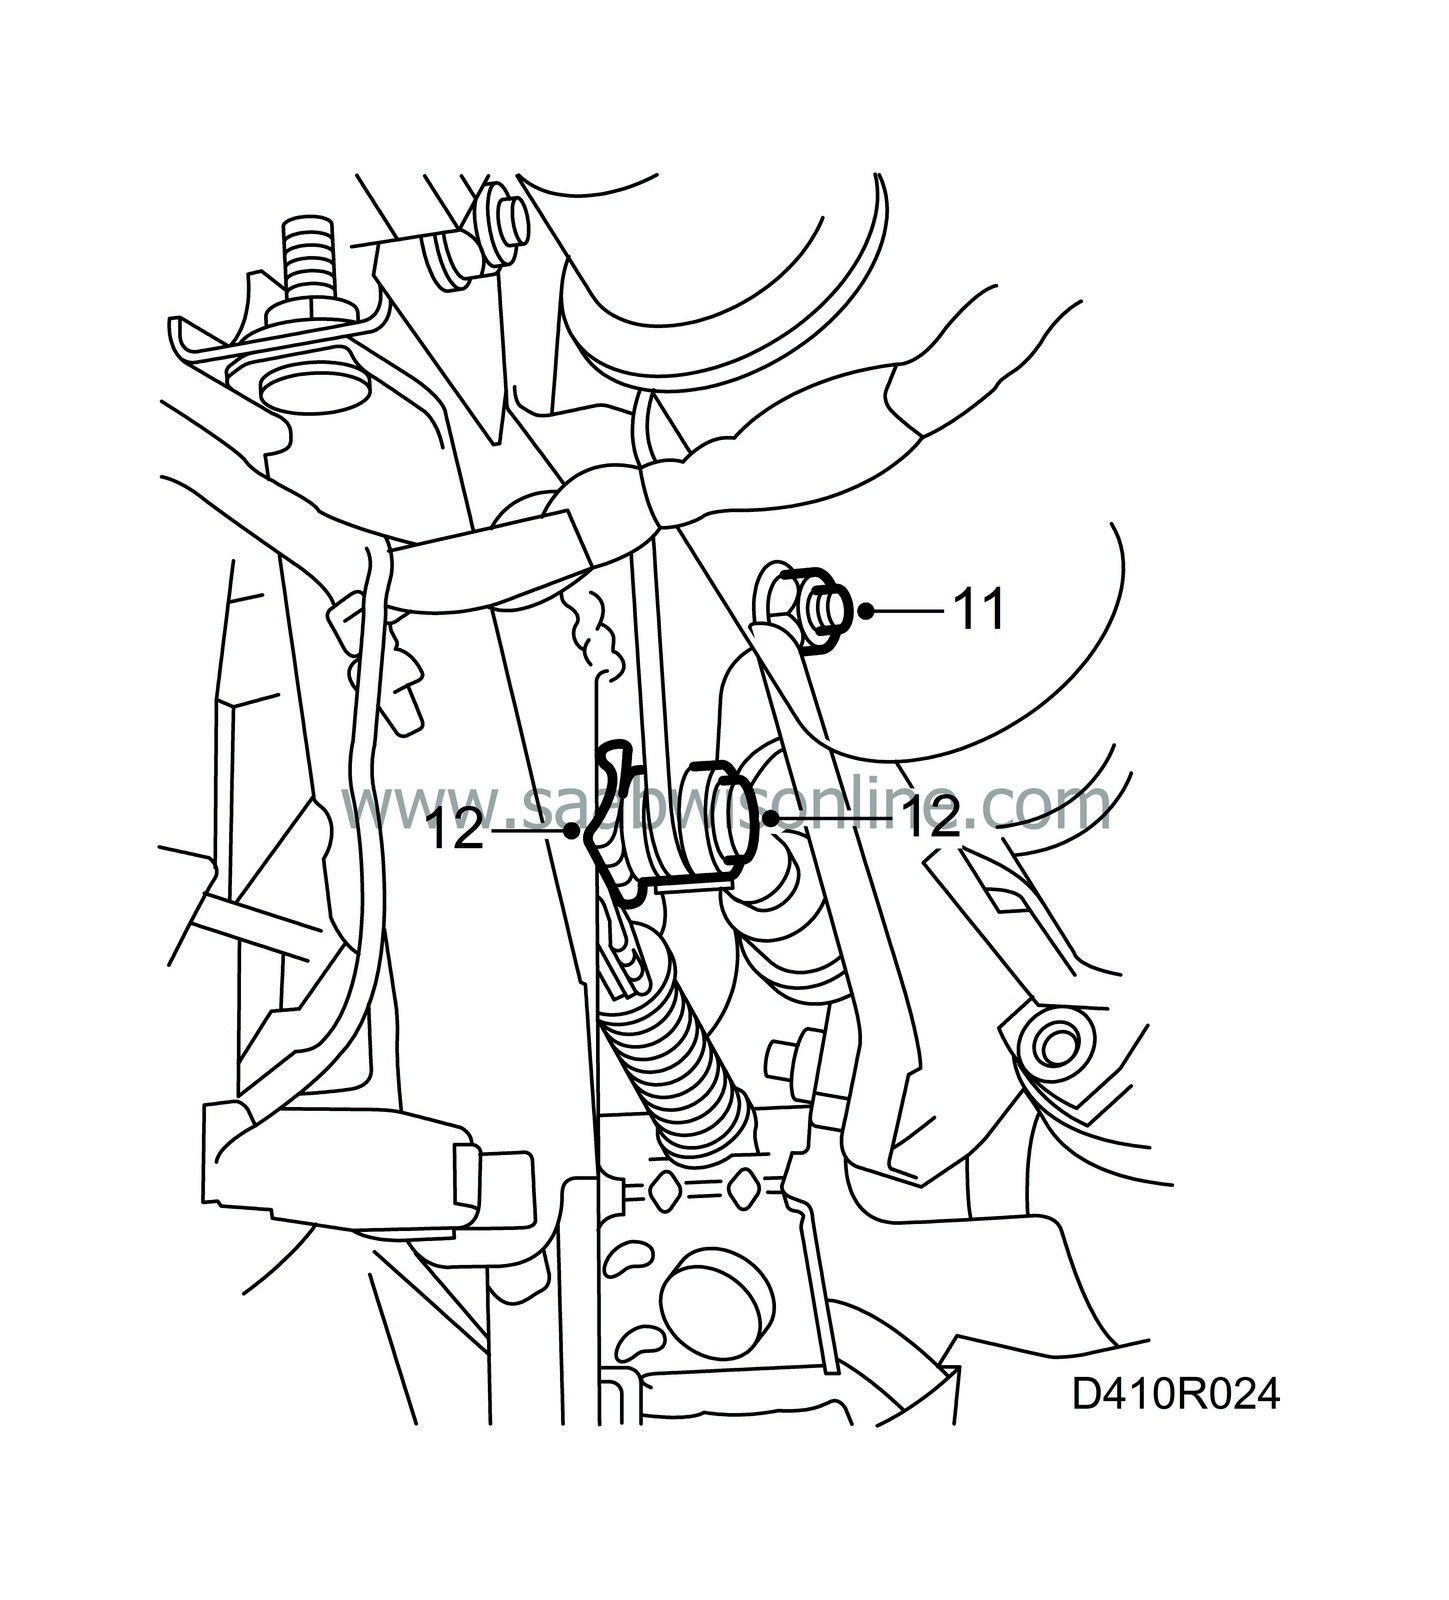
Tightening torque 47 Nm (35 lbf ft) |
|
| 12. |
Fit the pin and clip to the pedal.
|
|
| 13. |
Fit the air duct to the side defroster and secure the wiring harness.
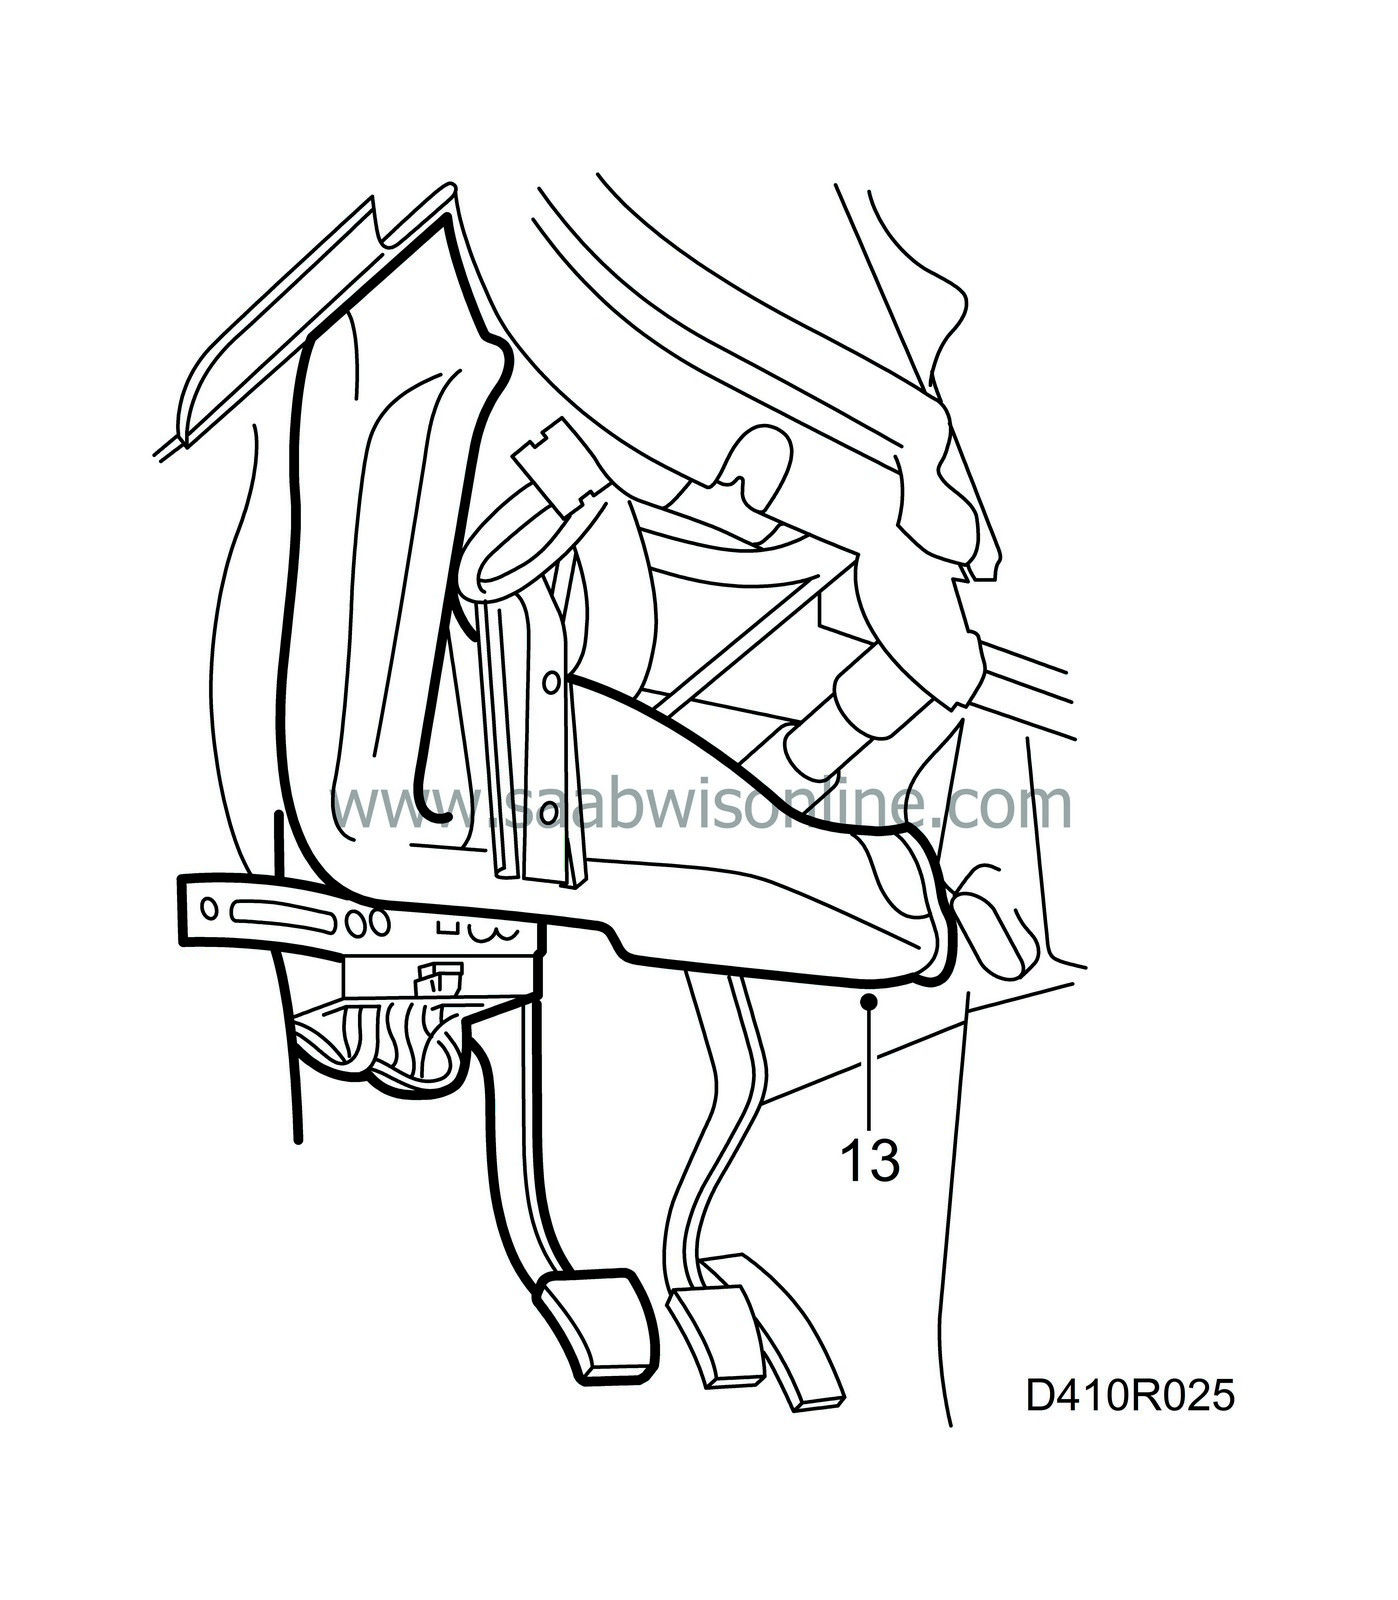
|
|
| 14. |
Fit the pedal switch.
|
|
| 15. |
Pull back the clutch pedal so that the switch is adjusted to the correct position. If the switch presses the pedal down, there may be malfunctions.
|
|
| 16. |
Fit the knee shield, floor air duct and lower panel.
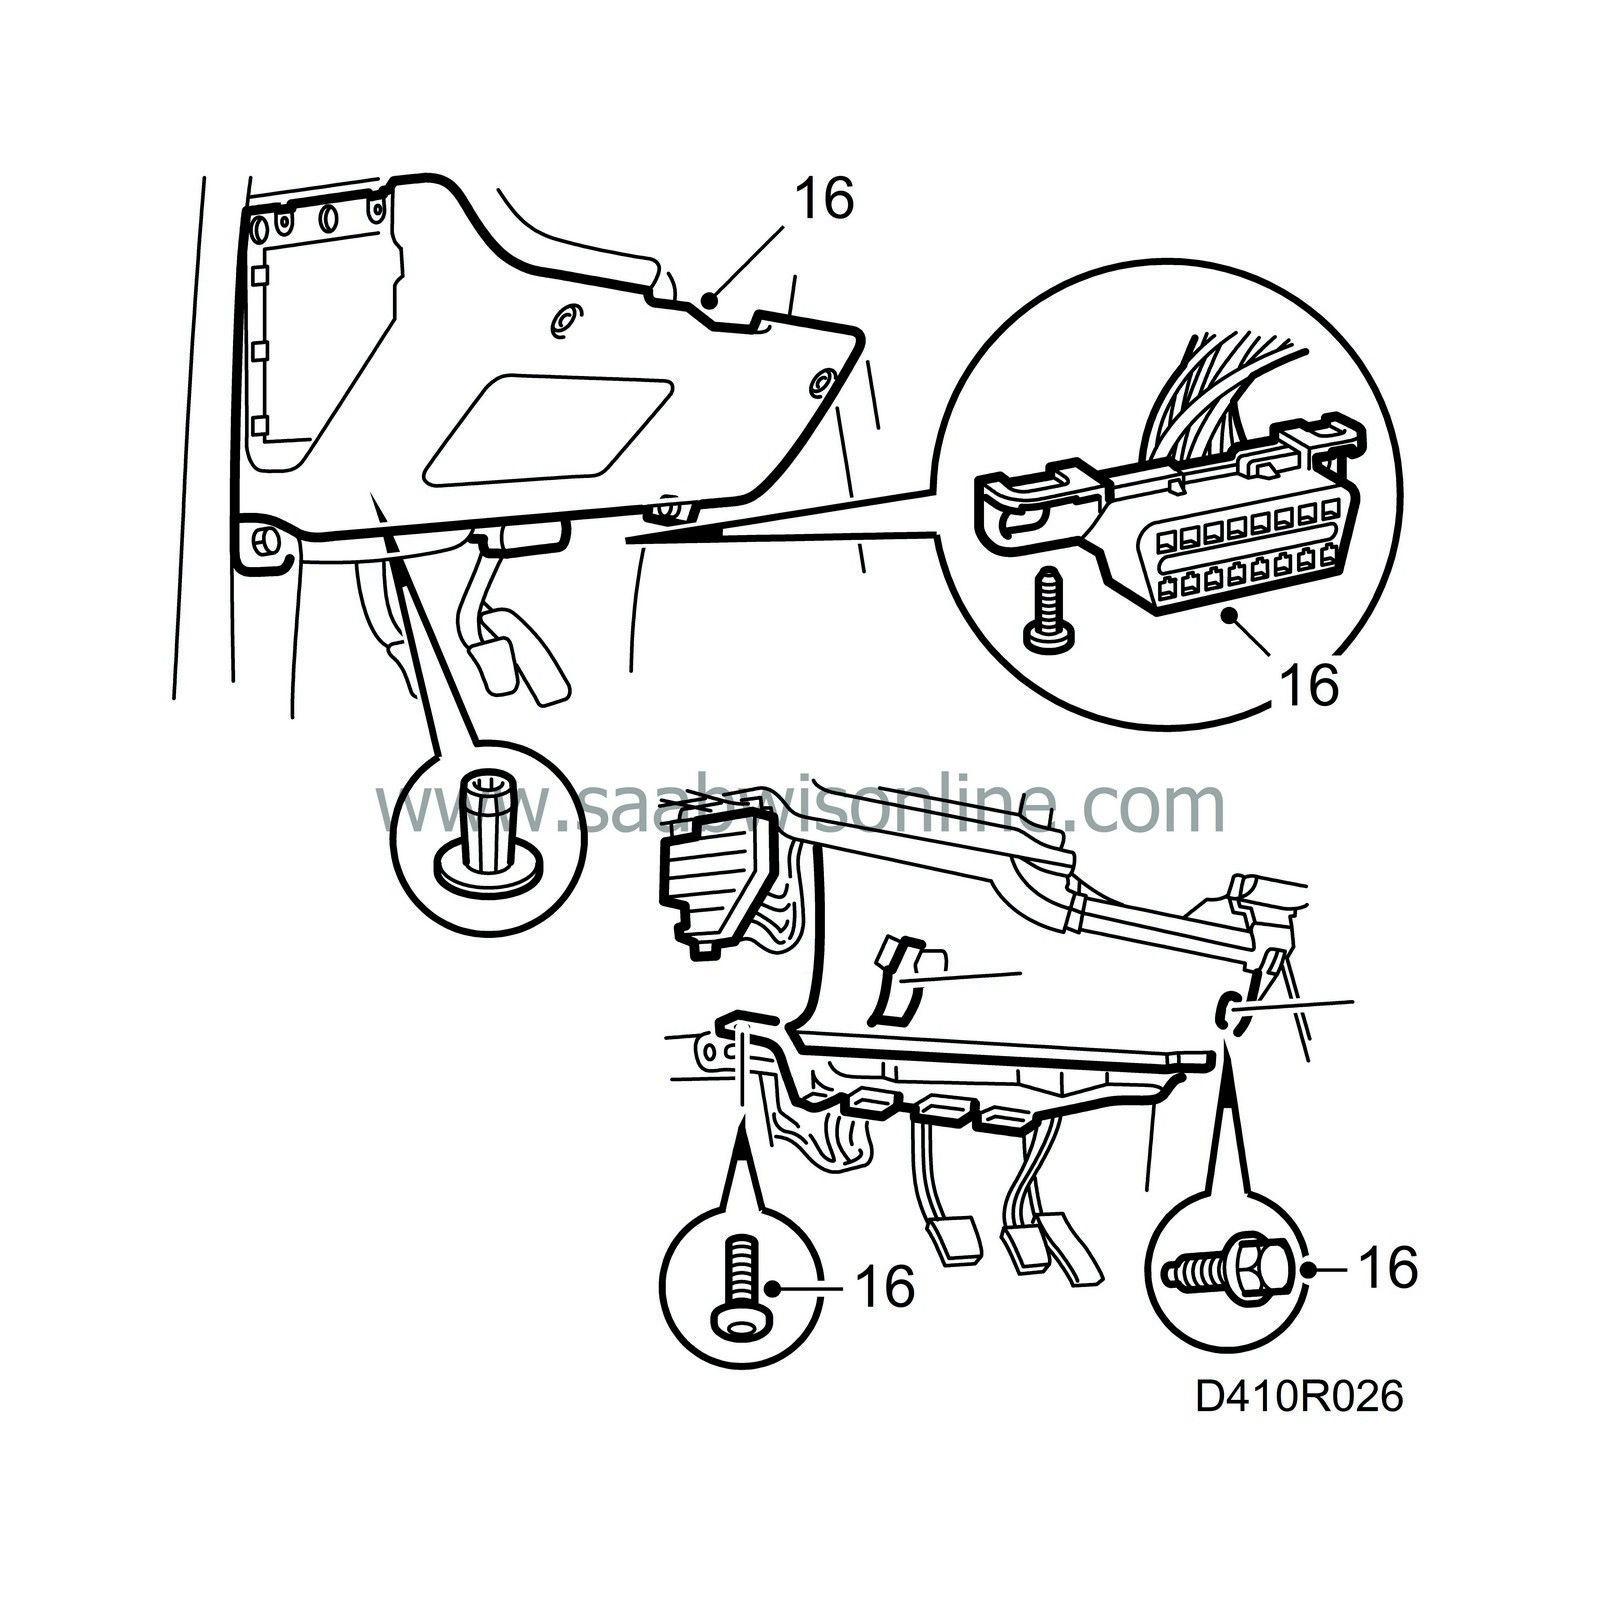
|
|
| 17. |
Fill with brake fluid.
|
|
| 18. |
Bleed the clutch. See
 .
.
|
|
| 19. |
Test the clutch and cruise control.
|
|

