PRE-RELEASE
B-pillar, 5D
| B-pillar, 5D |
The sill is provided with reinforcements. These must not be damaged when the B-pillar is cut.
| Important | ||
|
Body reinforcements must only be cut and joined if they are specifically covered in the description of the methods. Unless otherwise stated, it is mandatory to discard and replace the damaged reinforcement component. |
||
| 1. |
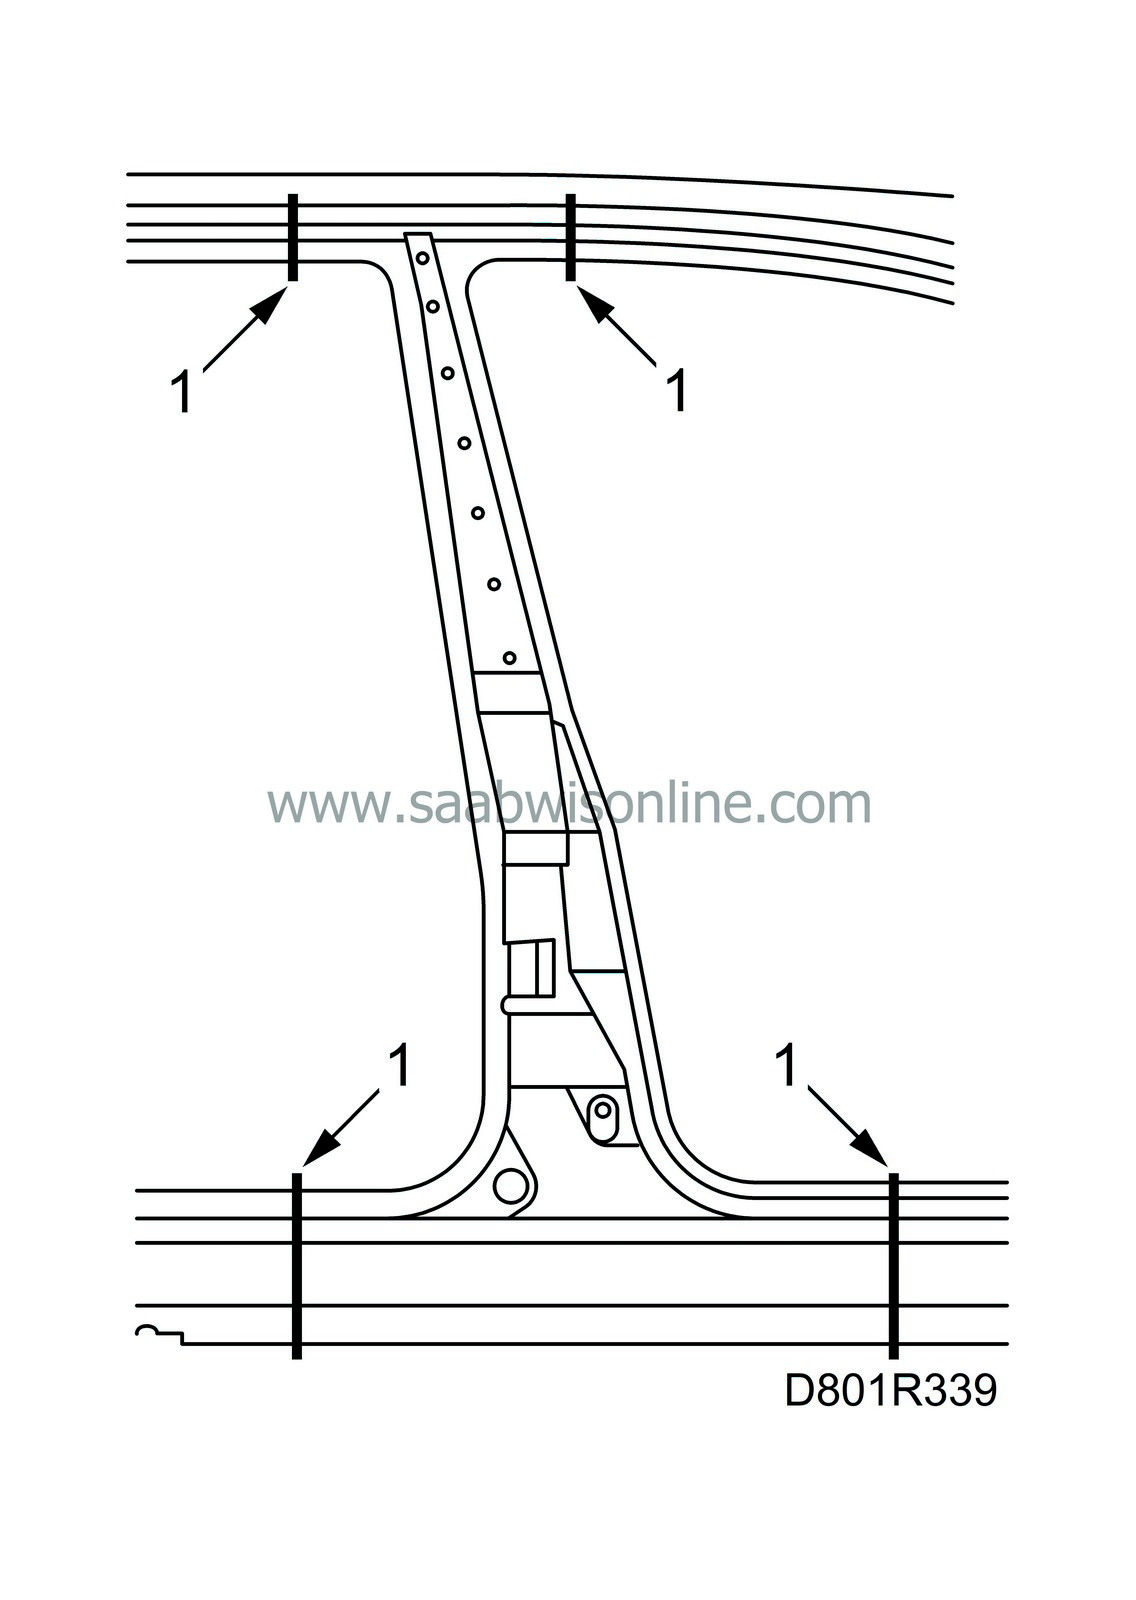
Cut away the B-pillar. B-pillar joints, see
Permissible joints
. Be careful not to damage the sheet metal below.
|
|
| 2. |
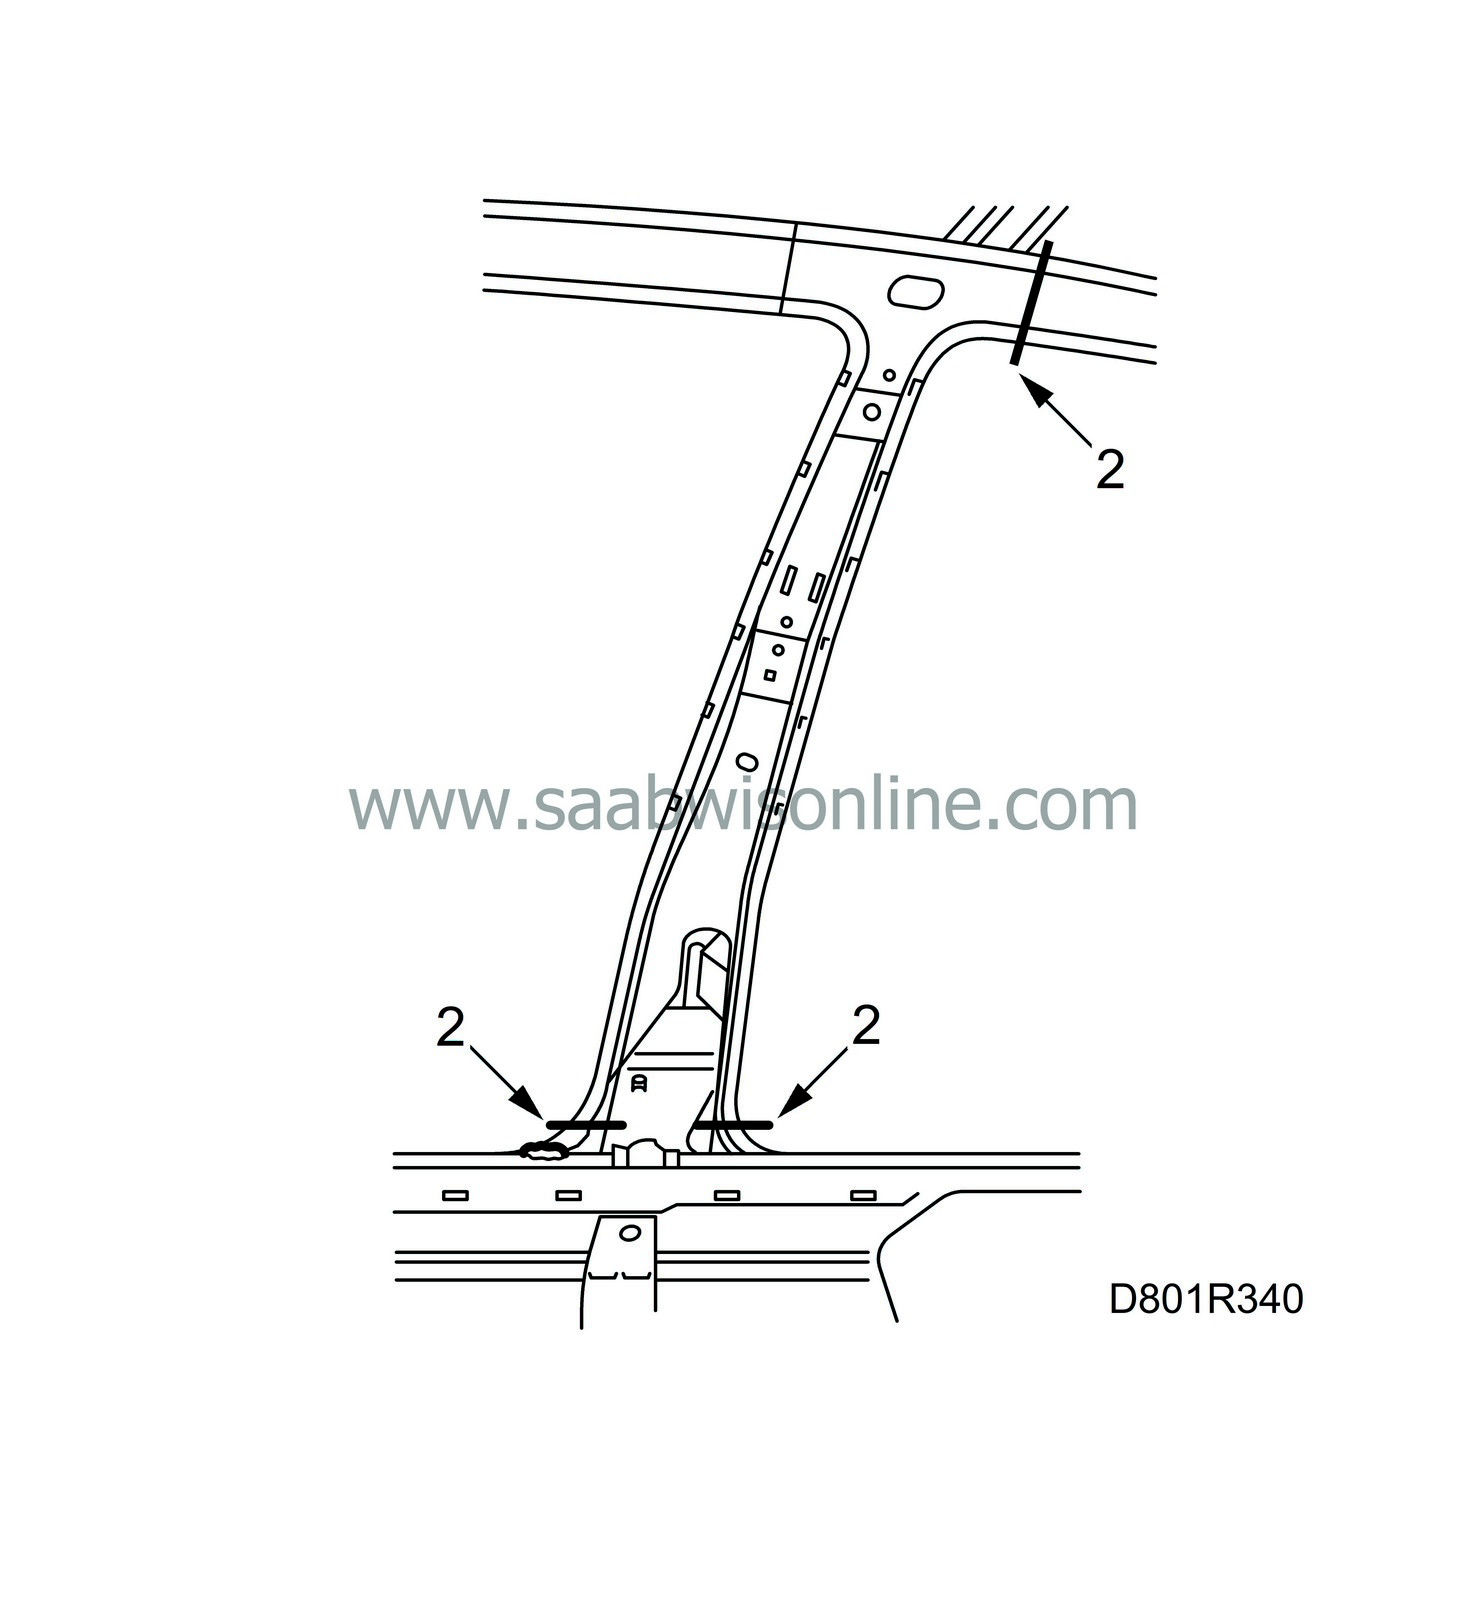
Cut the inner part of the B-pillar above the seam-welds at the lower end.
|
|
| 3. |
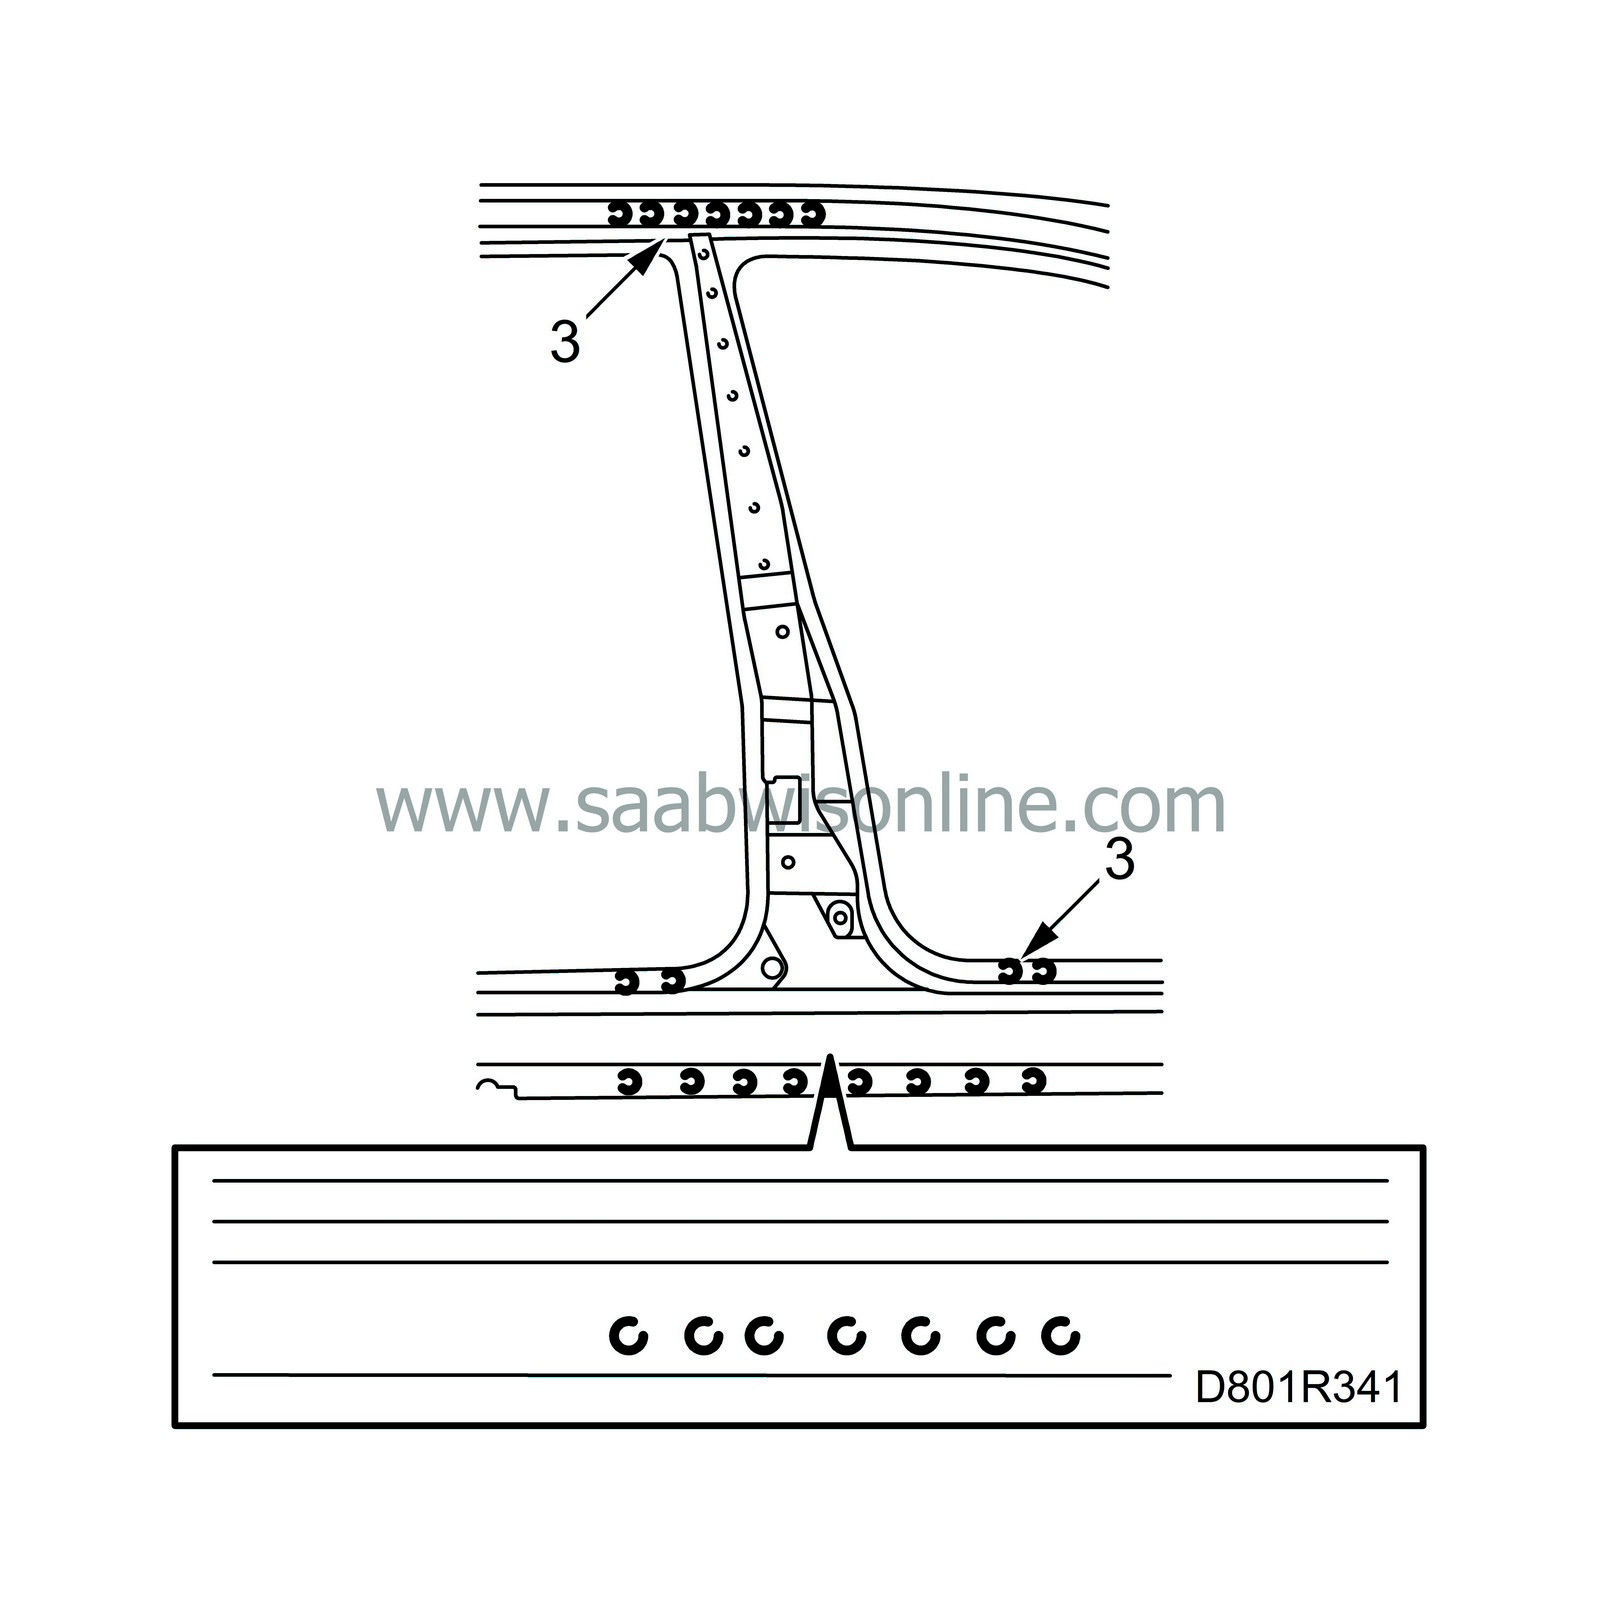
Drill out the spot-welds.
|
|
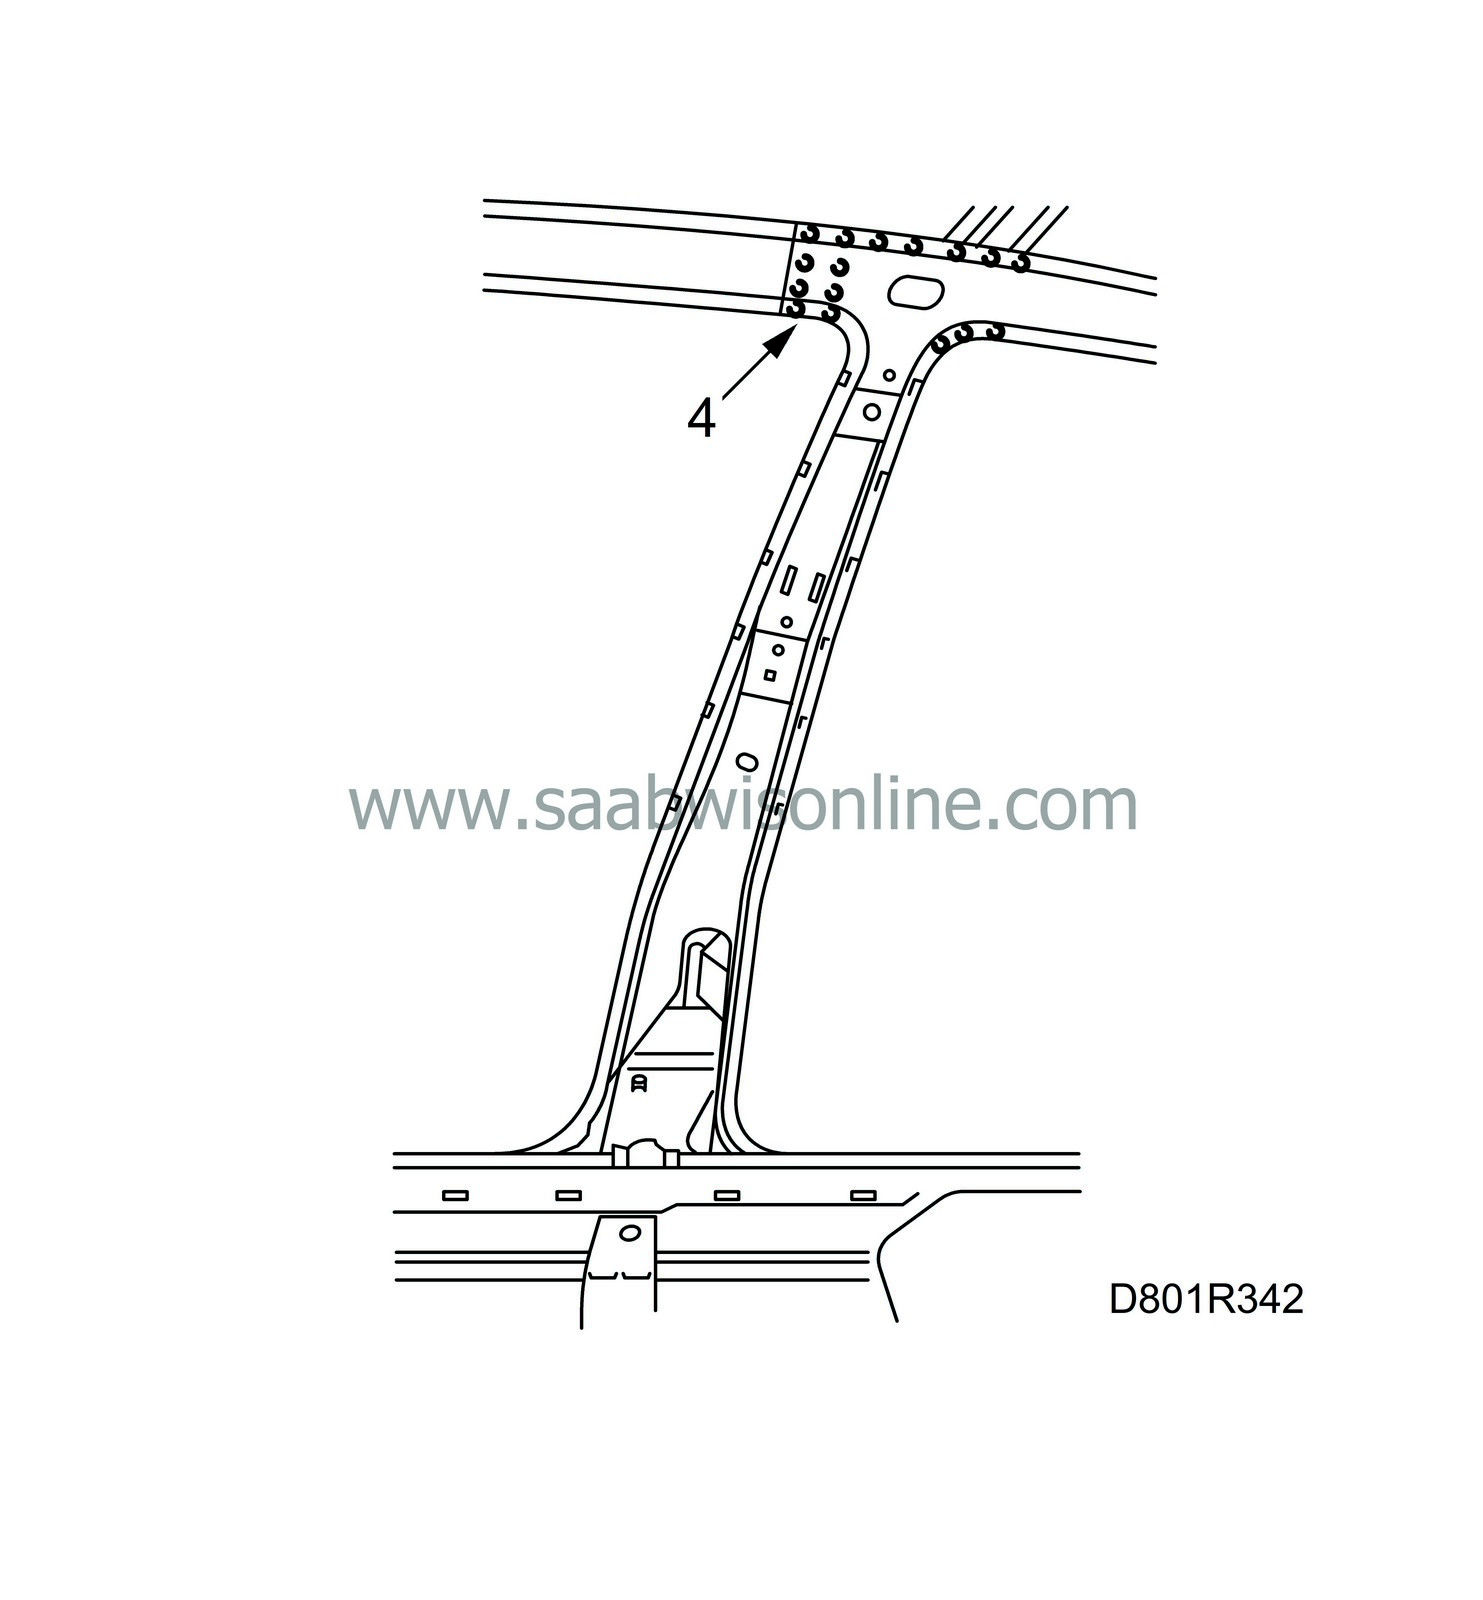
| 4. |
Drill out the spot-welds at the upper end on the inside of the B-pillar and remove the B-pillar.
|
|
| 5. |
Align any deformed sheet metal or panels.
|
|
| 6. |
Grind clean the surfaces to be welded on the new reinforcement and body.
|
|
| 7. |
Fit the reinforcement and fixate with a couple of welding clamps.
|
||||||||||
| 8. |
Cut the B-pillar outside panel so that it overlaps the intended joint line by approximately three centimetres.
|
|
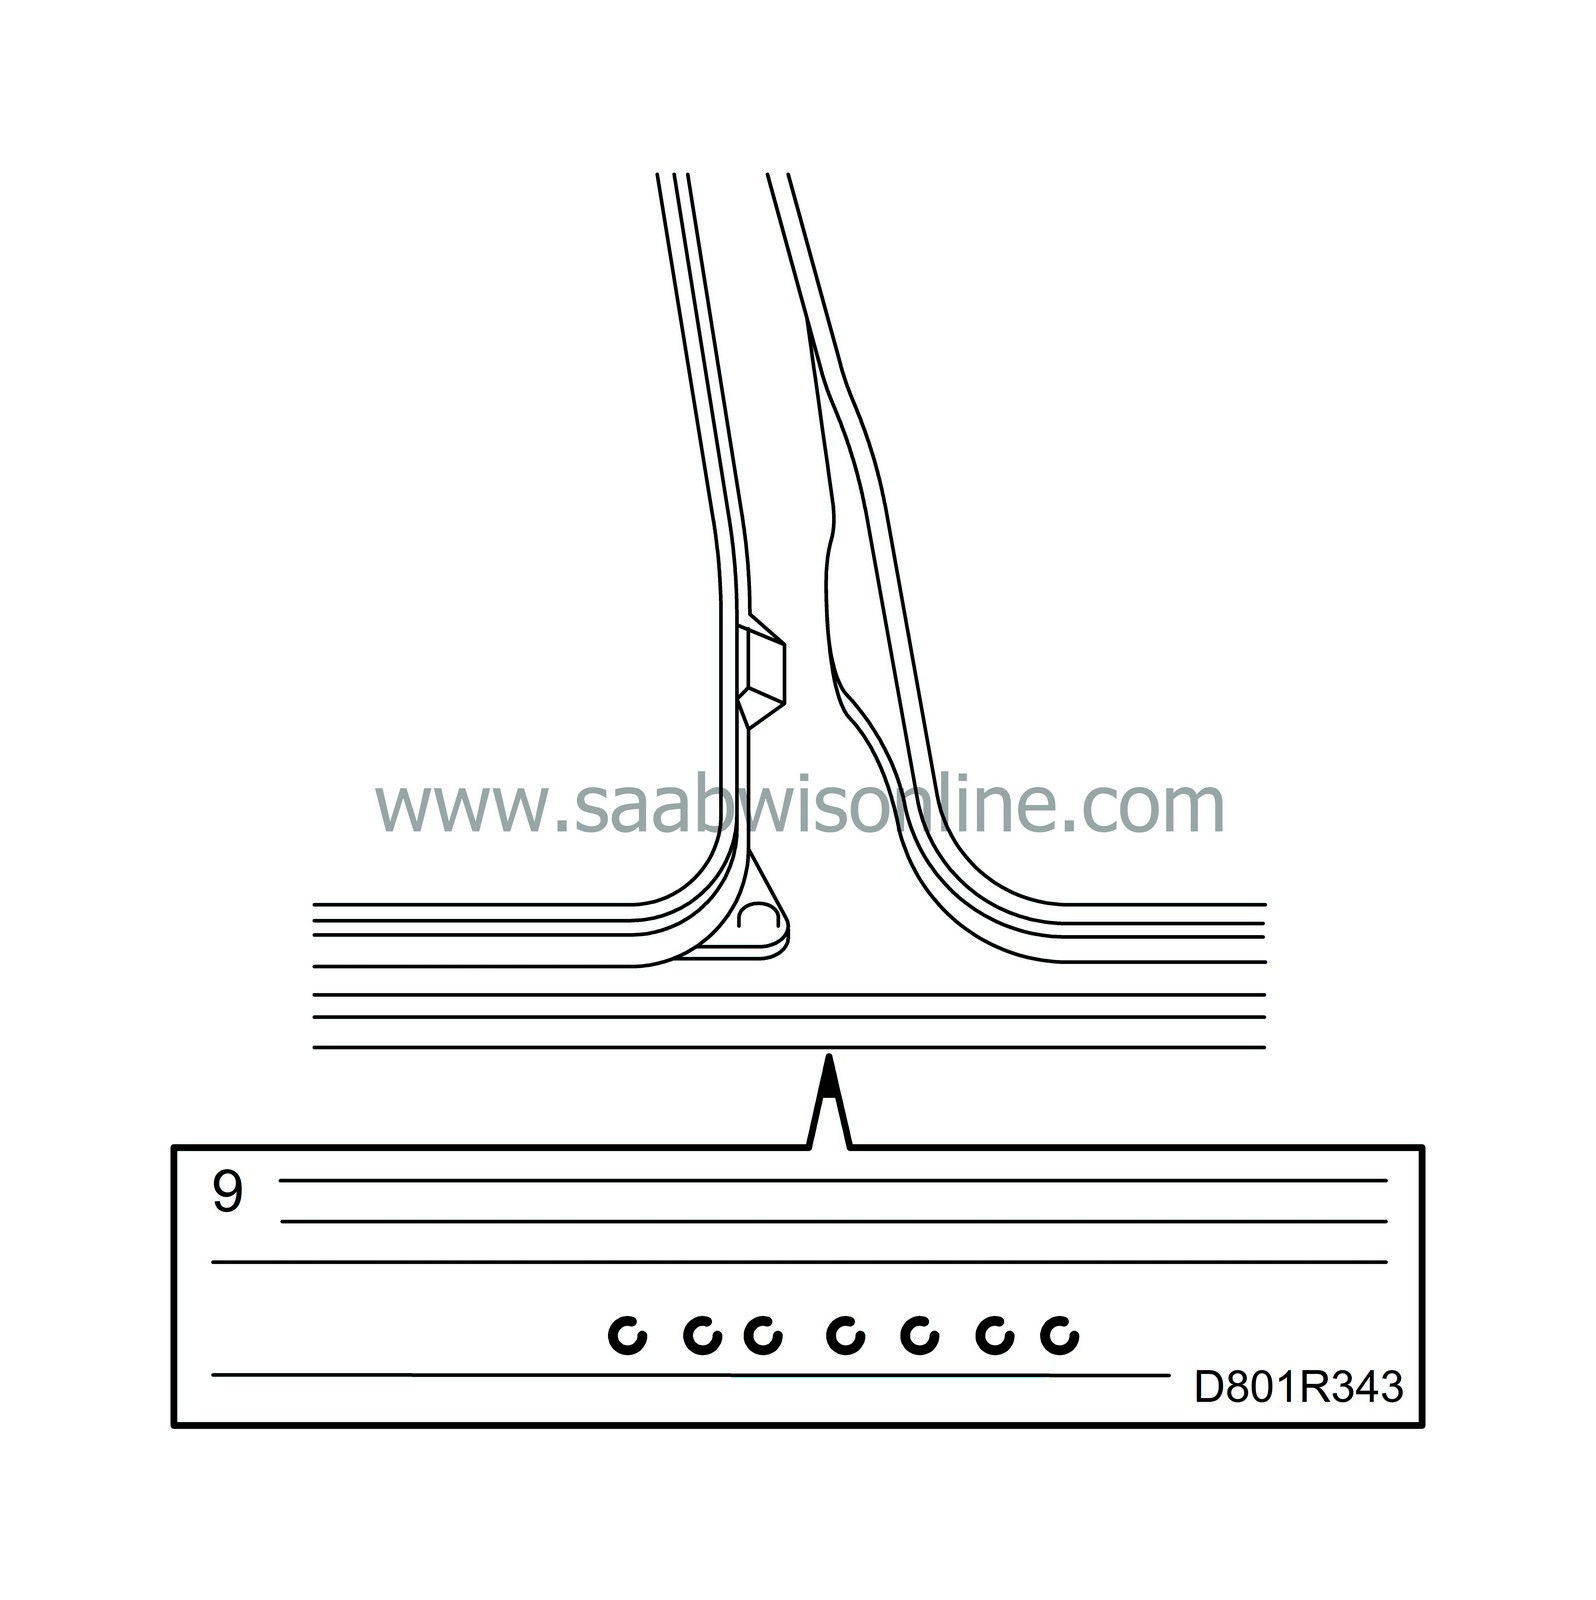
| 9. |
Drill holes for plug-welding in the outer panel.
|
|
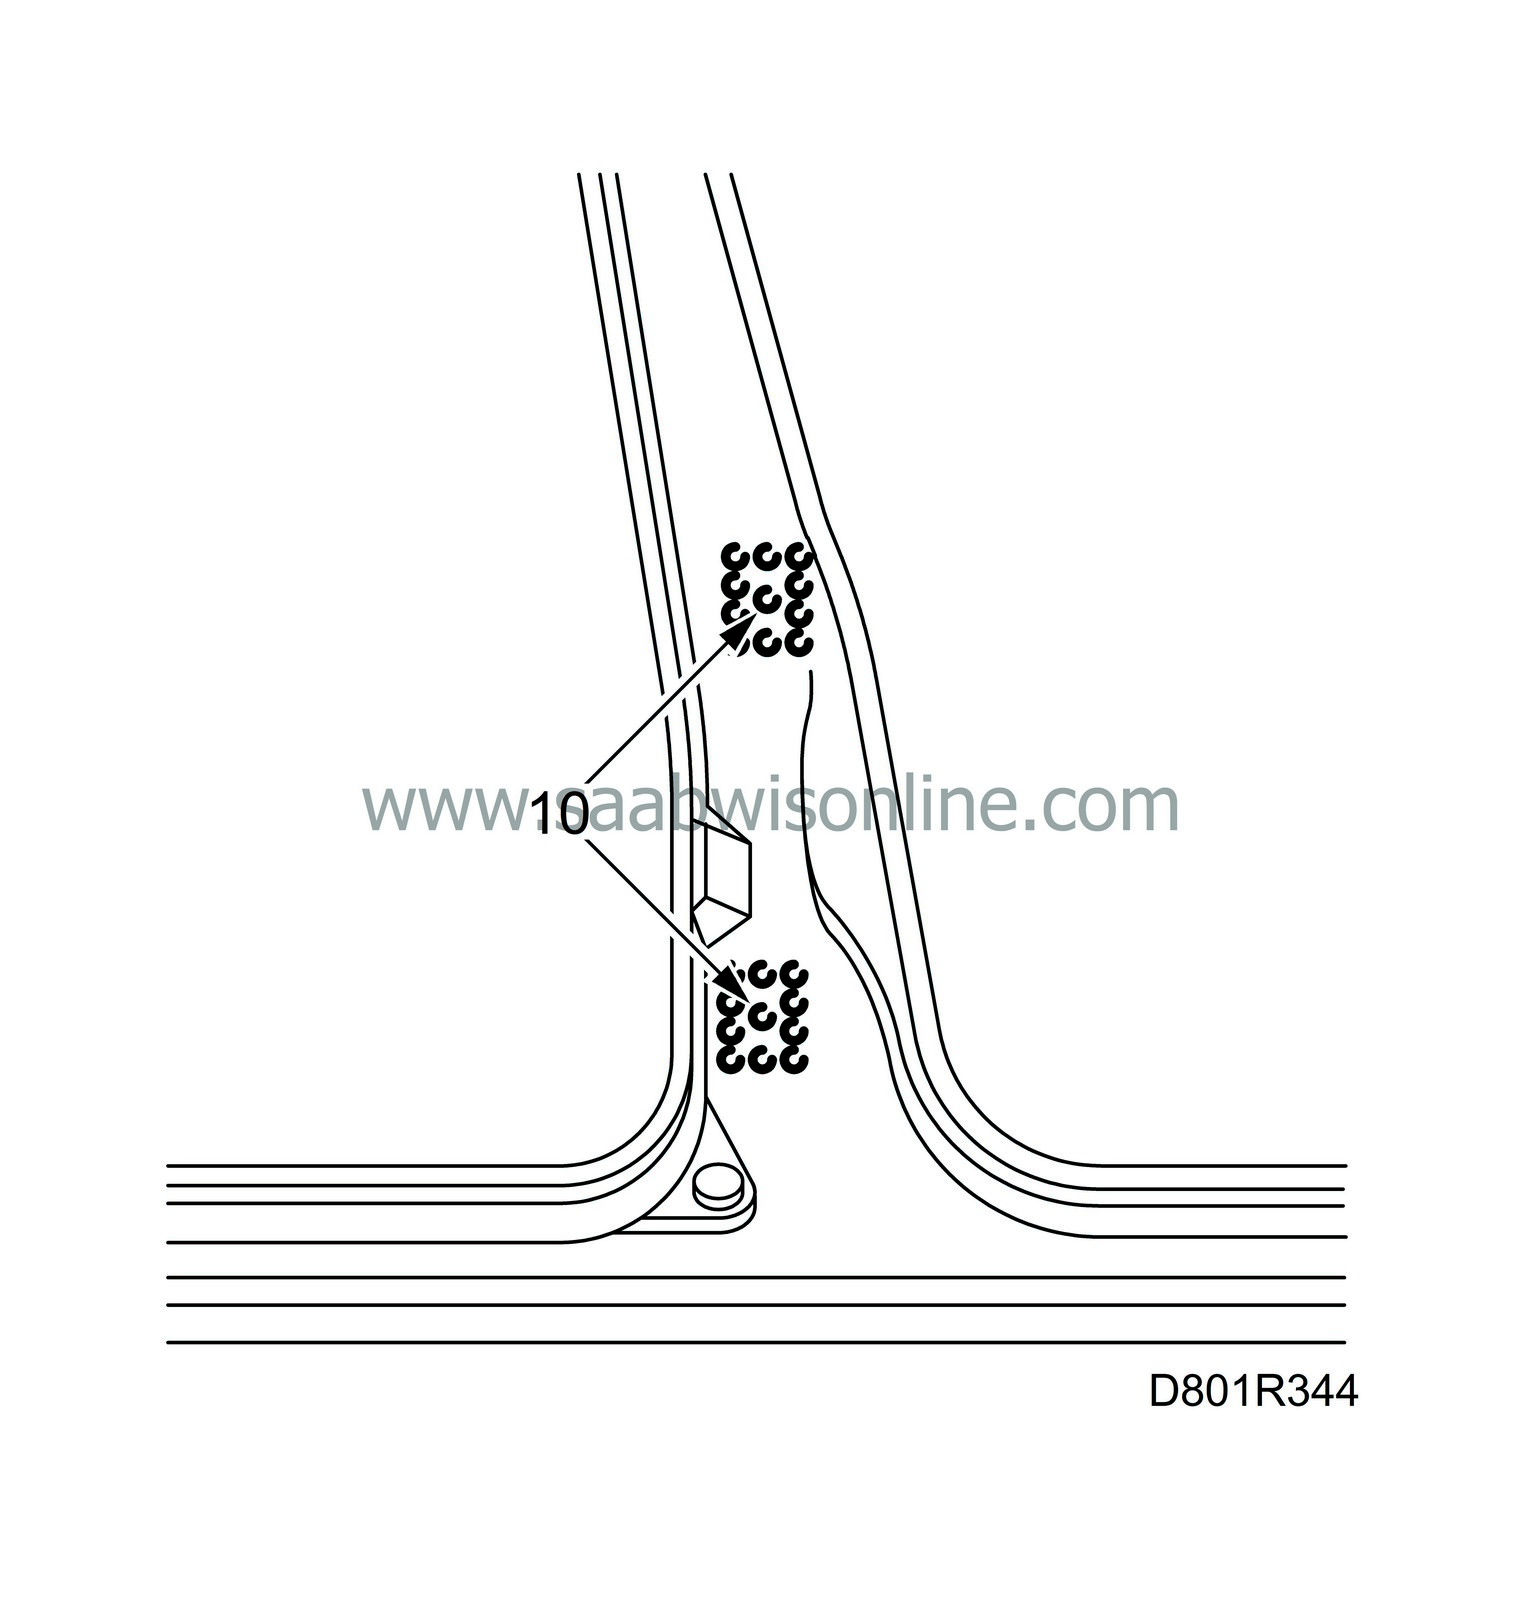
| 10. |
Drill holes for the hinge mountings in the pre-stamped punch marks in the outer panel.
|
|
| 11. |
Drill holes in the hinges as shown on the illustration.
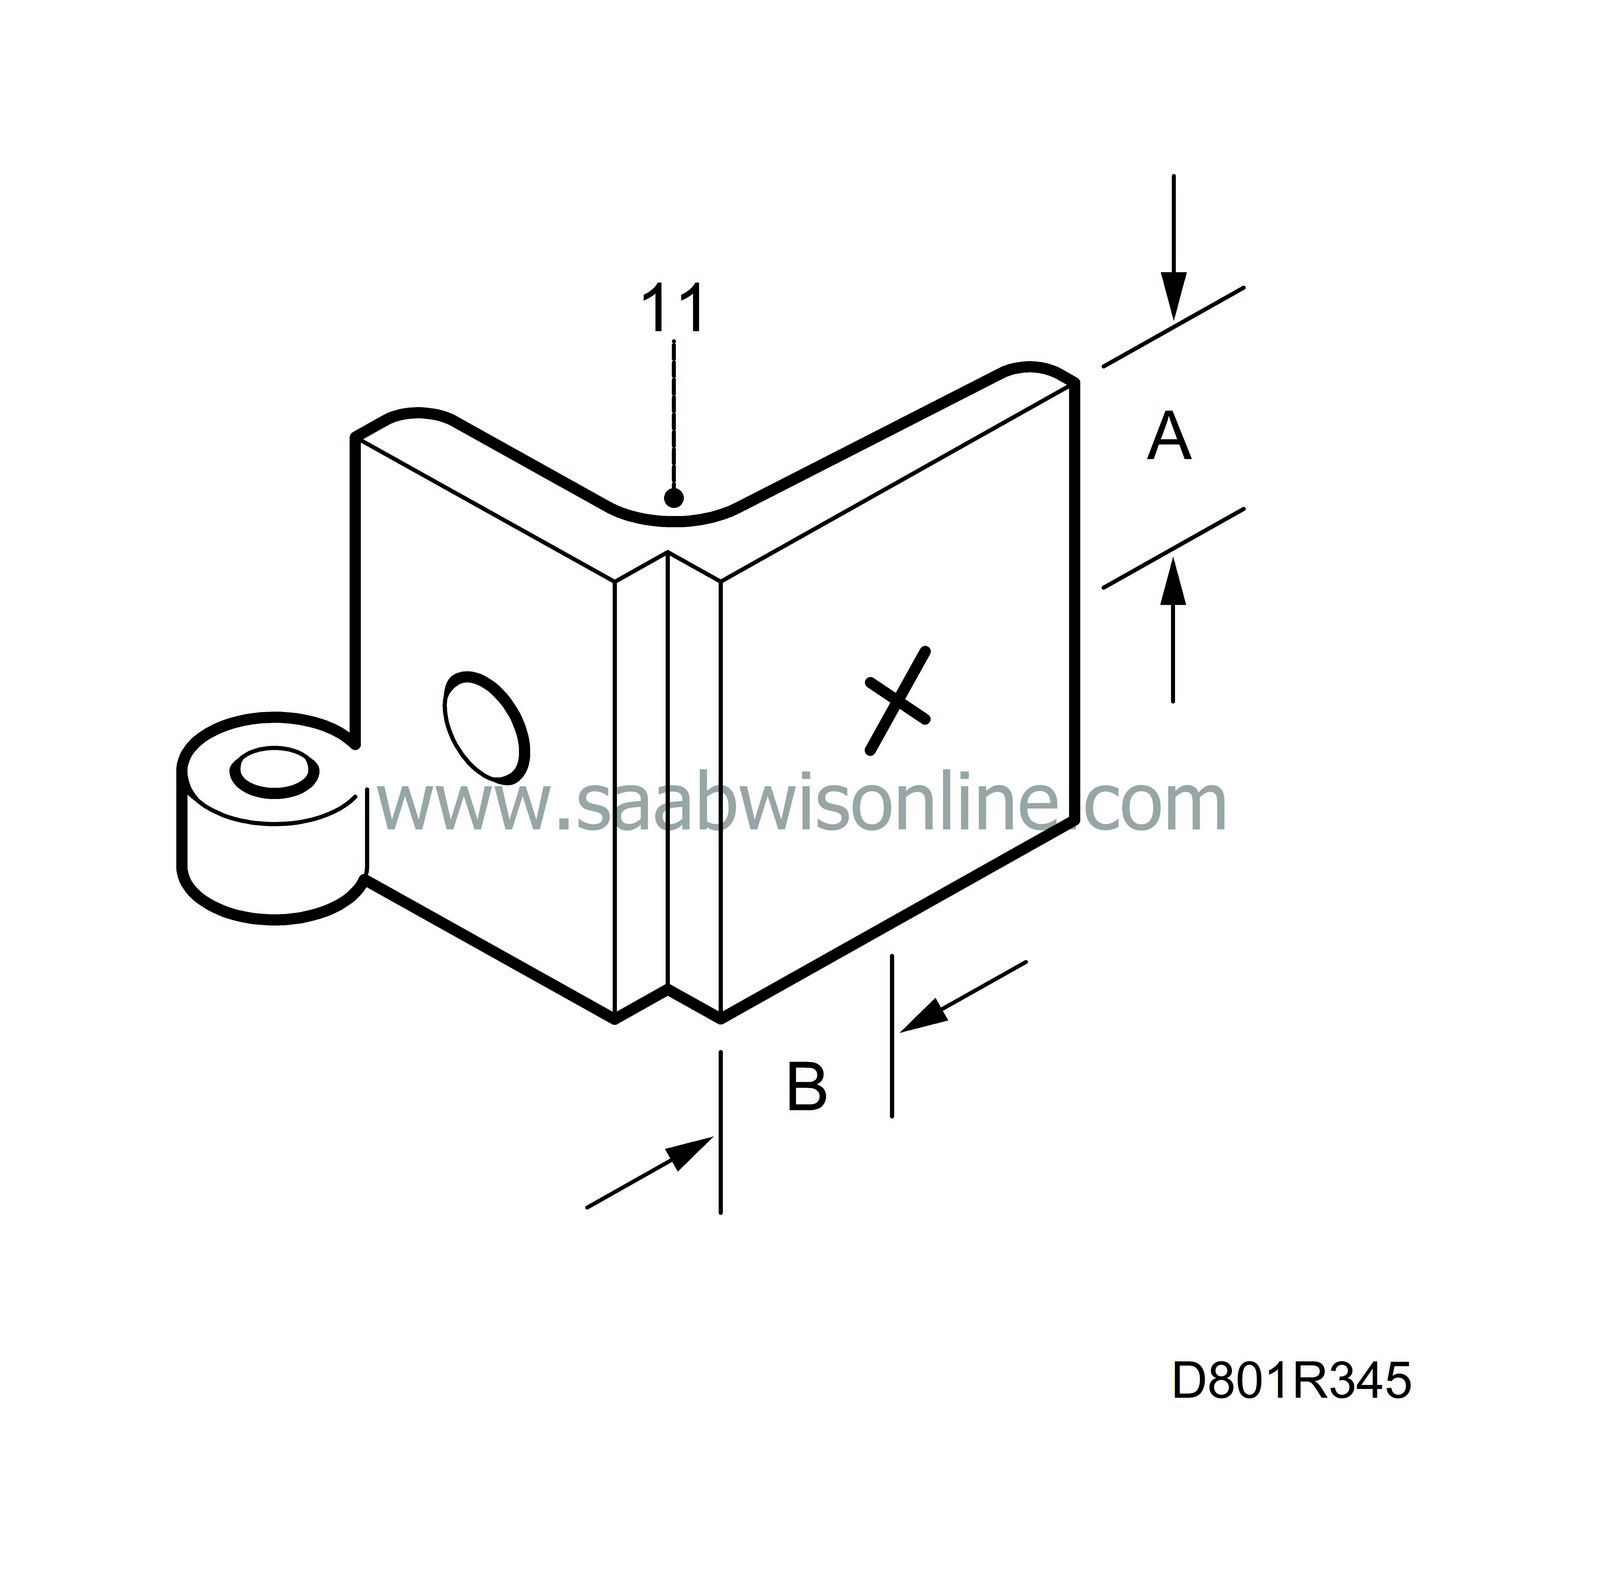
Upper hinges: A = 24.1 mm, B = 30.2 mm Lower hinges: A = 25.1 mm, B = 30.2 mm |
|
| 12. |
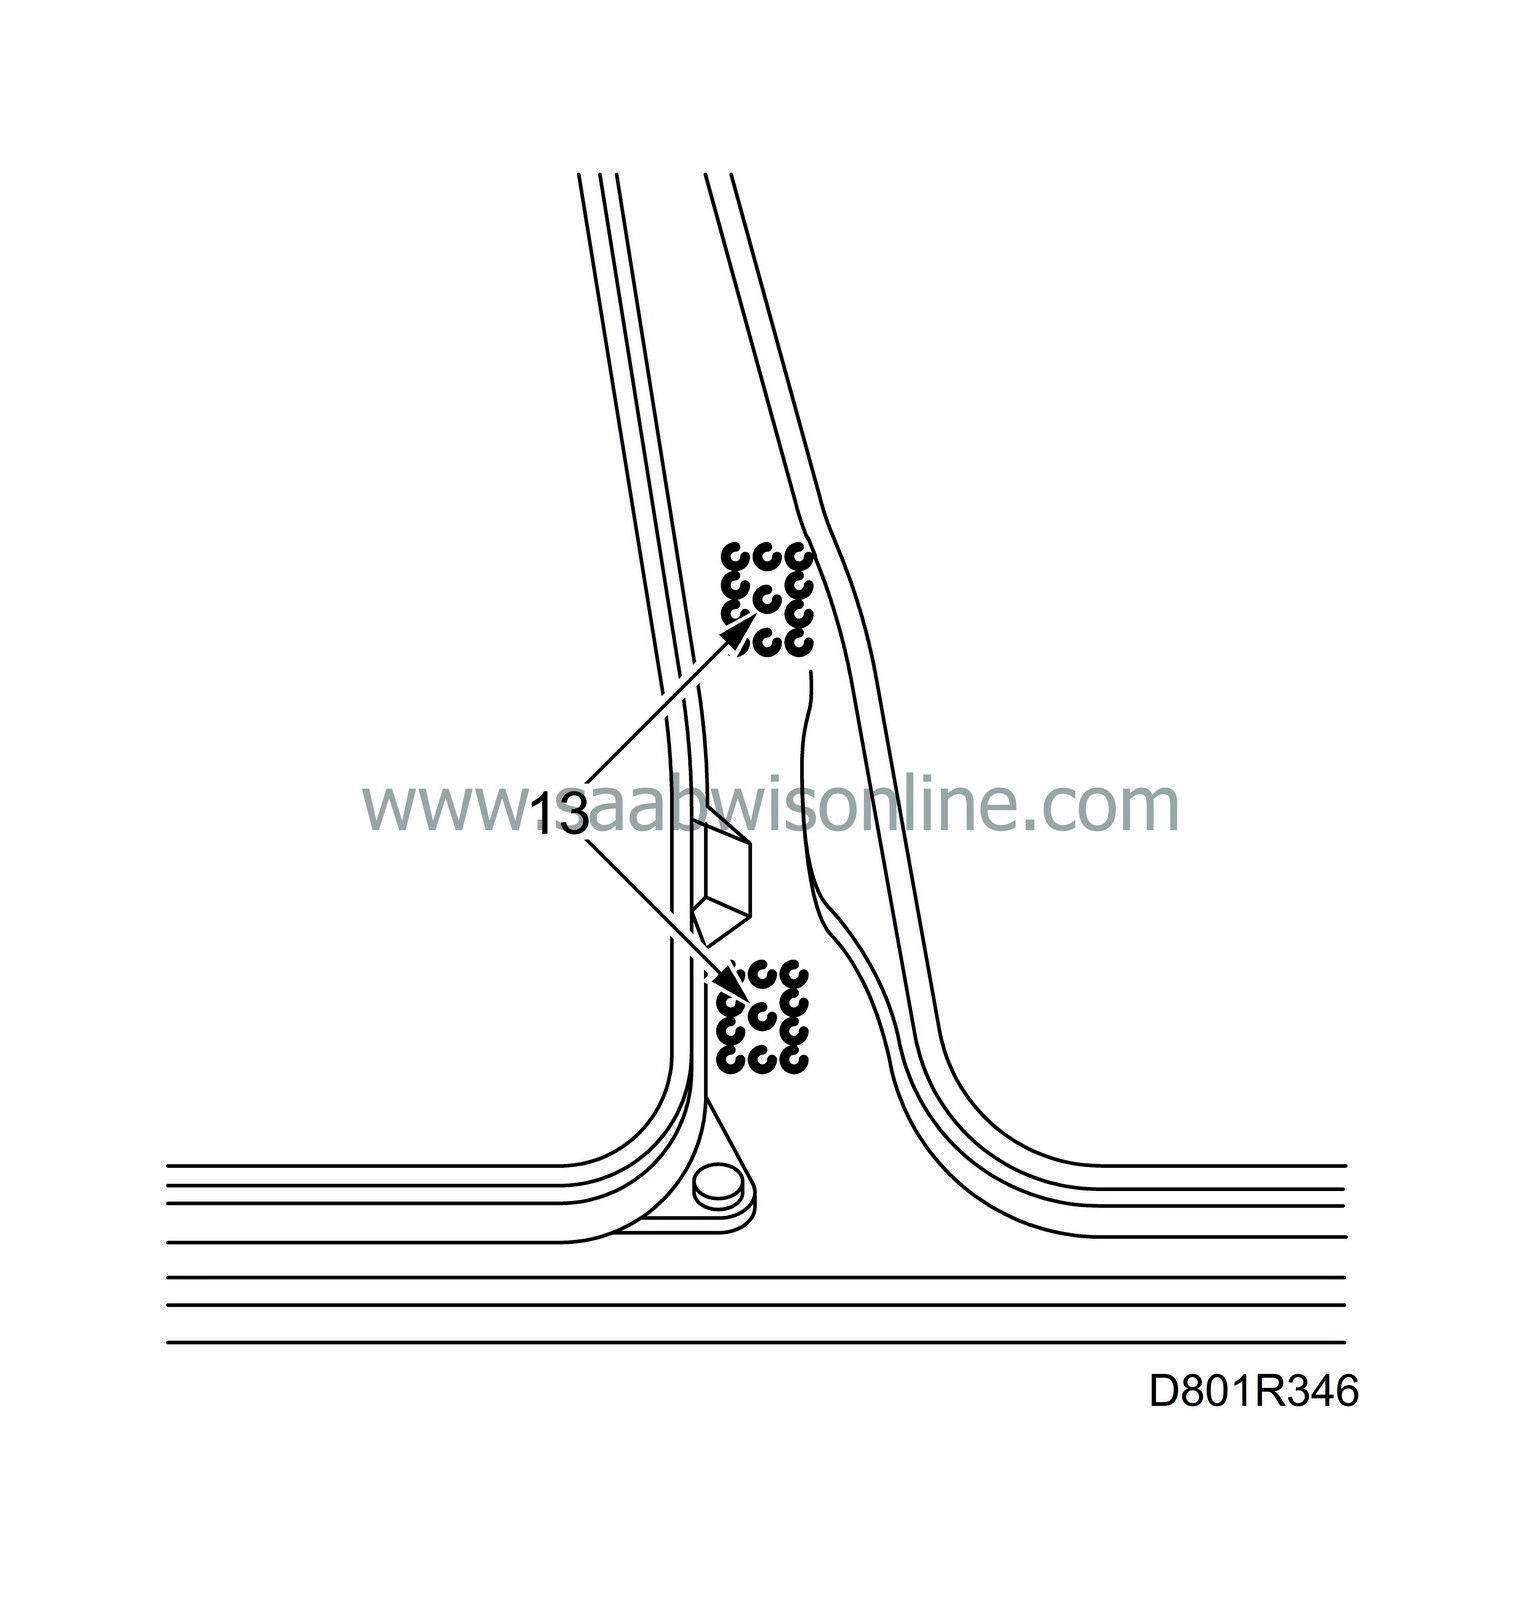
Tighten the hinges on the outer panel with nuts and bolts. Scratch around the hinge to mark the position on the outer panel.
|
|
| 14. |
Grind clean the surfaces to be welded on the outer panel and body.
|
|
| 15. |
Fit the outer panel and fixate with a couple of welding clamps.
|
|
| 16. |
Cut the B-pillar new inner part.
|
|
| 17. |
Fit the spare part, fixate with a couple of welding clamps. Cut through the rear edge of the spare part and roof member at the same time so that the joint can be welded edge-to-edge.
|
|
| 18. |
Cut through the B-pillar outer panel and door frame at the same time so that the joints can be welded edge-to-edge.
|
|
| 19. |
Mark out locations where holes must be drilled for plug-welding in the top of the inside part.
|
|
| 20. |
Remove the spare part and drill holes for plug-welding.
|
|
| 21. |
Grind clean the surfaces to be welded on the spare part and on the body.
|
|
| 22. |
Apply welding primer on the surfaces to be spot and plug-welded. Use Teroson Zinkspray.
|
|
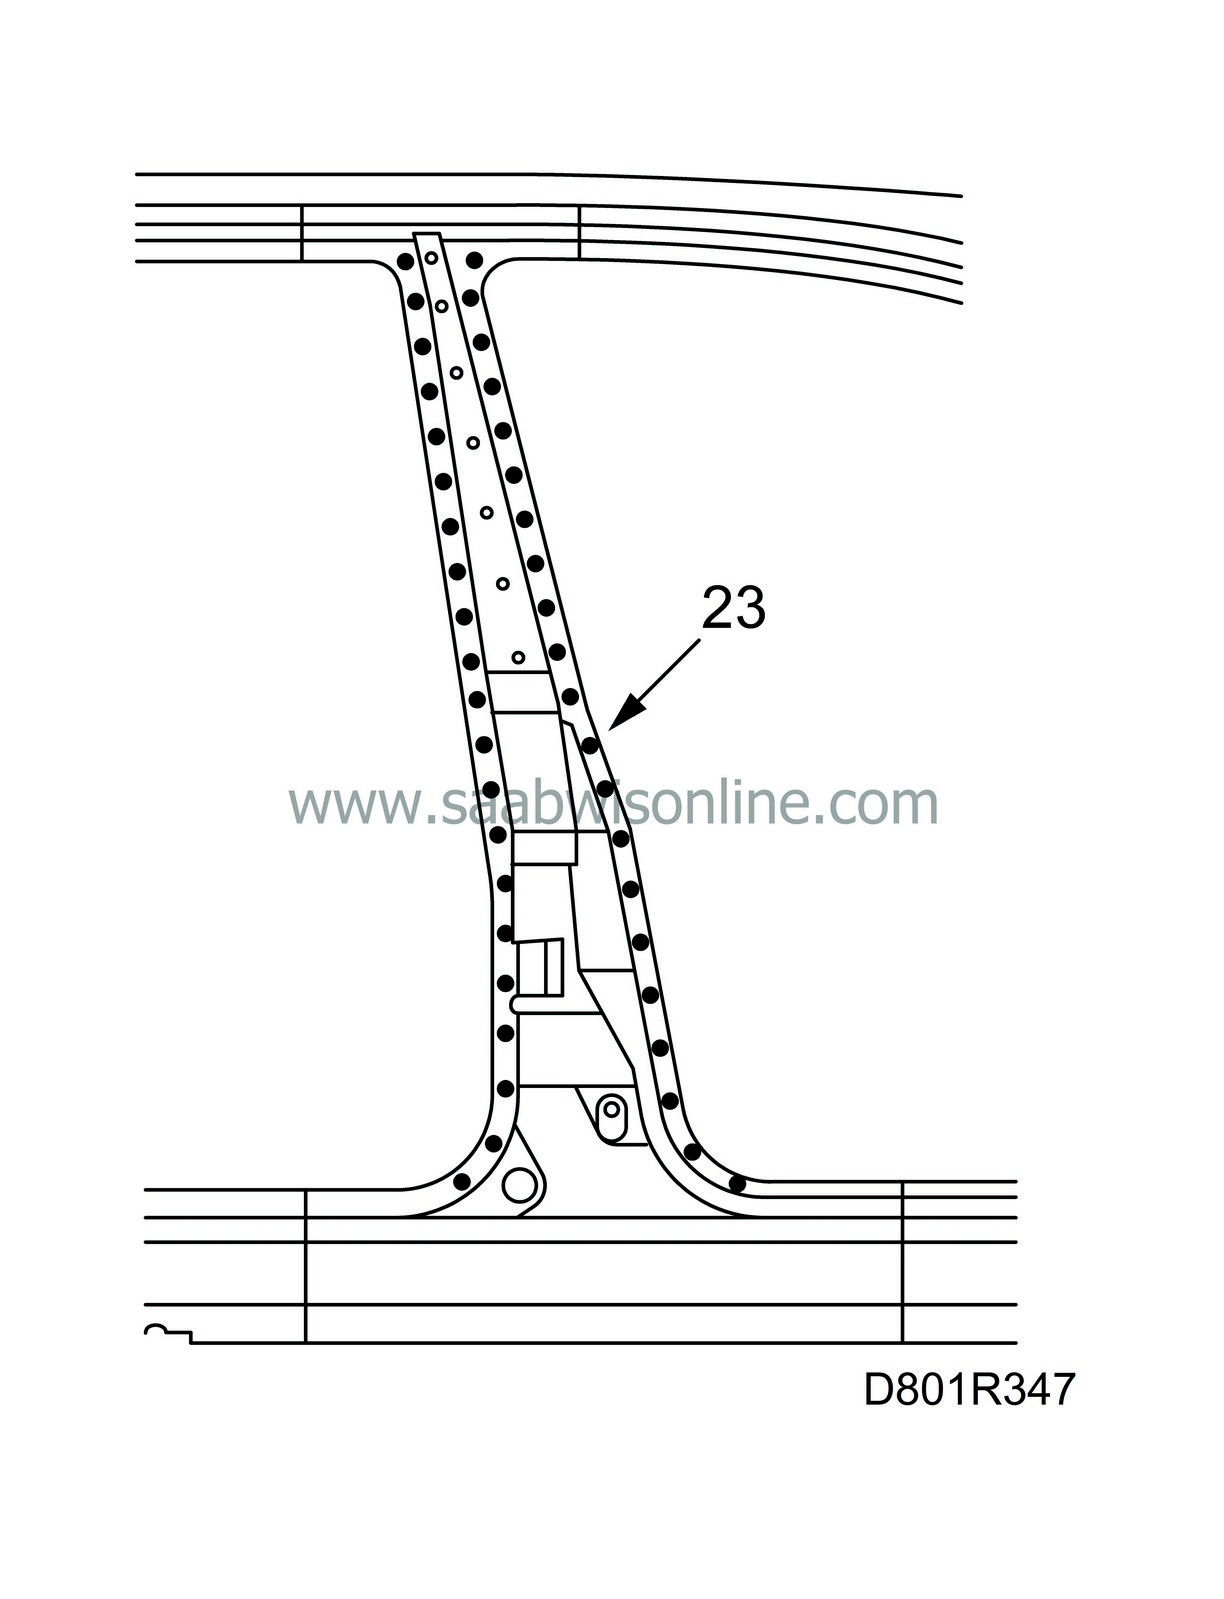
| 23. |
Fit the spare part and fixate with a couple of welding clamps. Spot-weld the inside part to the outer part and reinforcement.
|
|
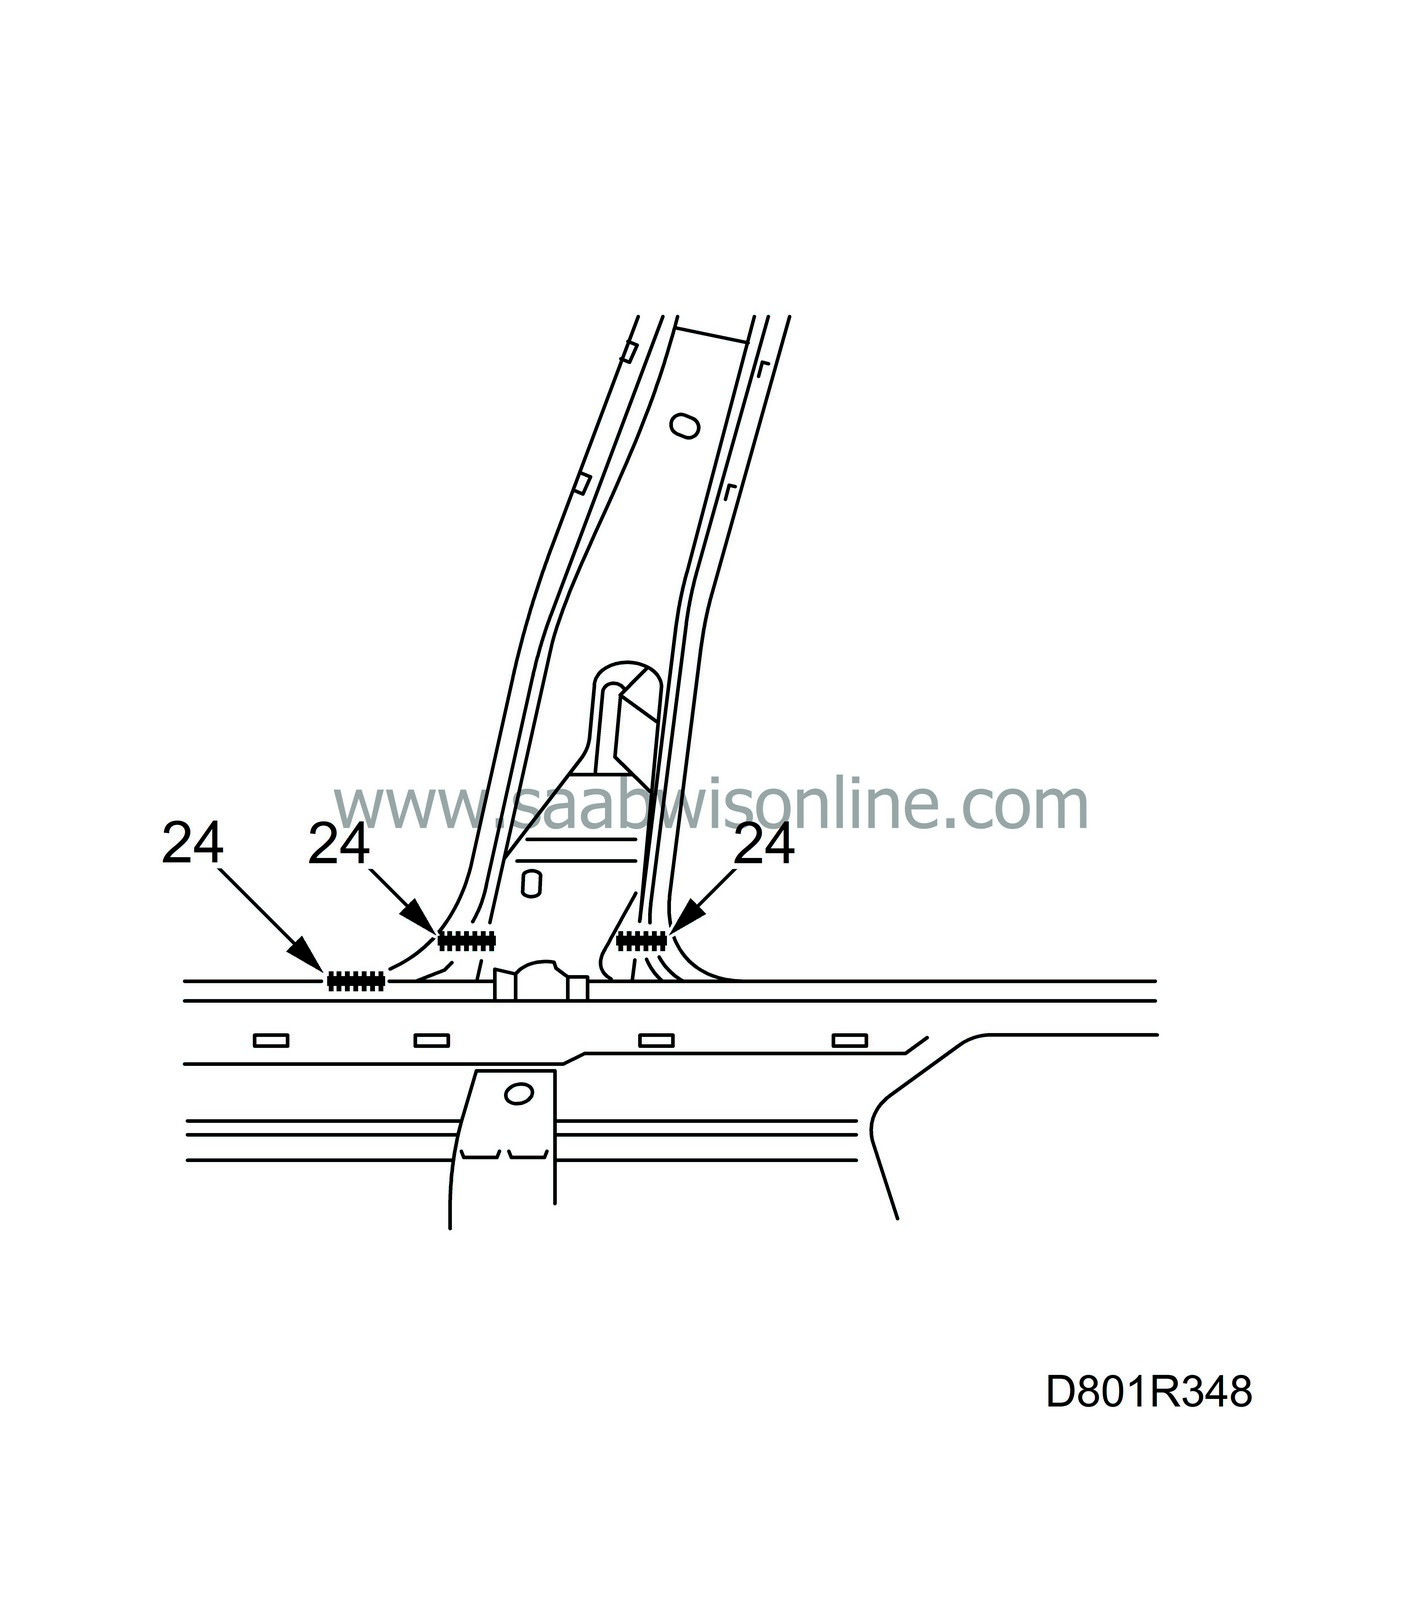
| 24. |
All-weld the joint at the lower end of the inner part.
|
|
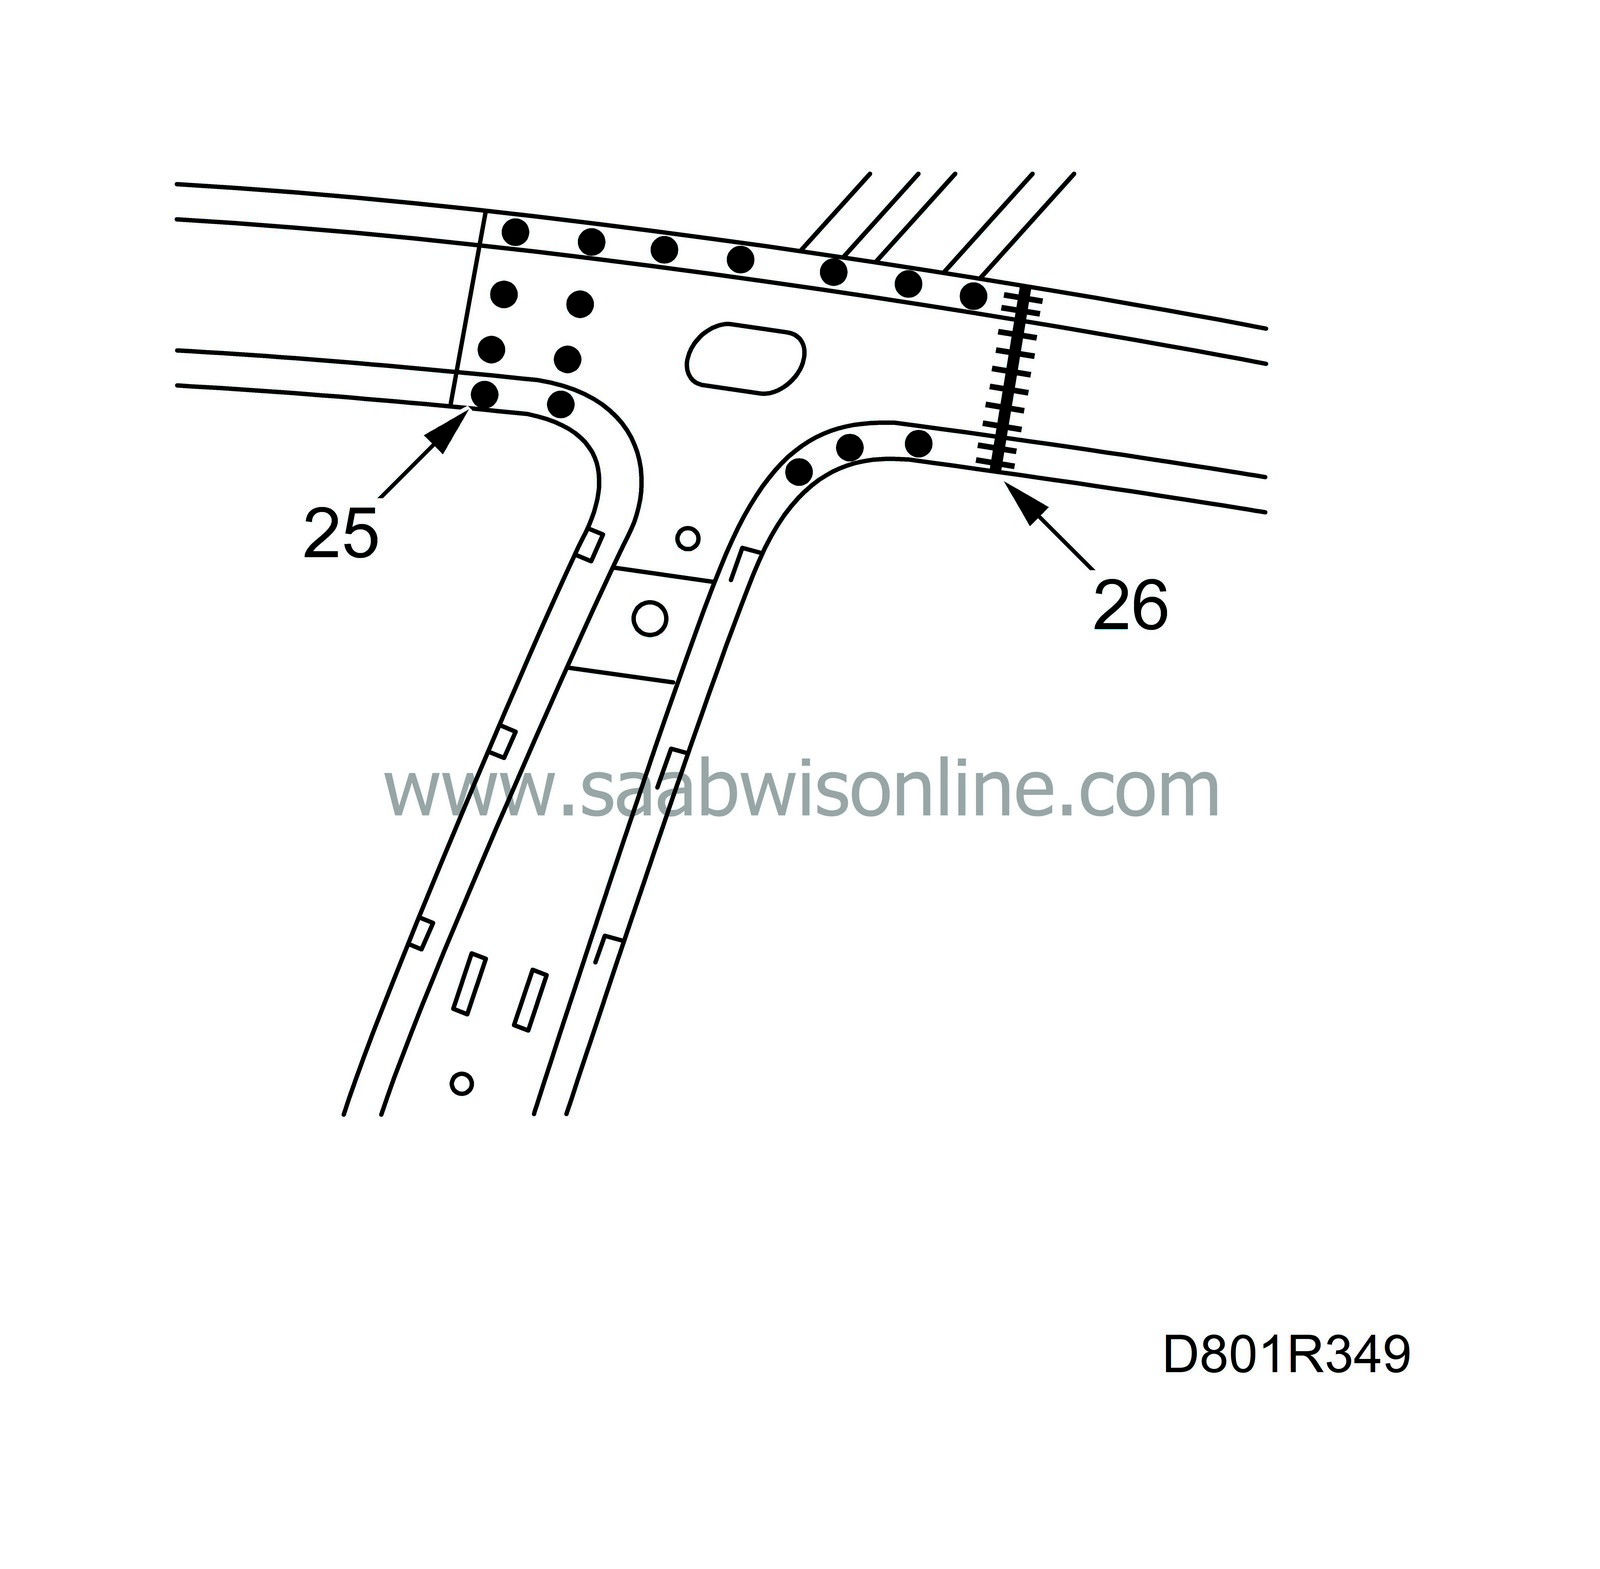
| 25. |
Plug-weld the inside part and reinforcement upper ends to the roof member.
|
|
| 26. |
All-weld the joint between the inside part and roof member.
|
|
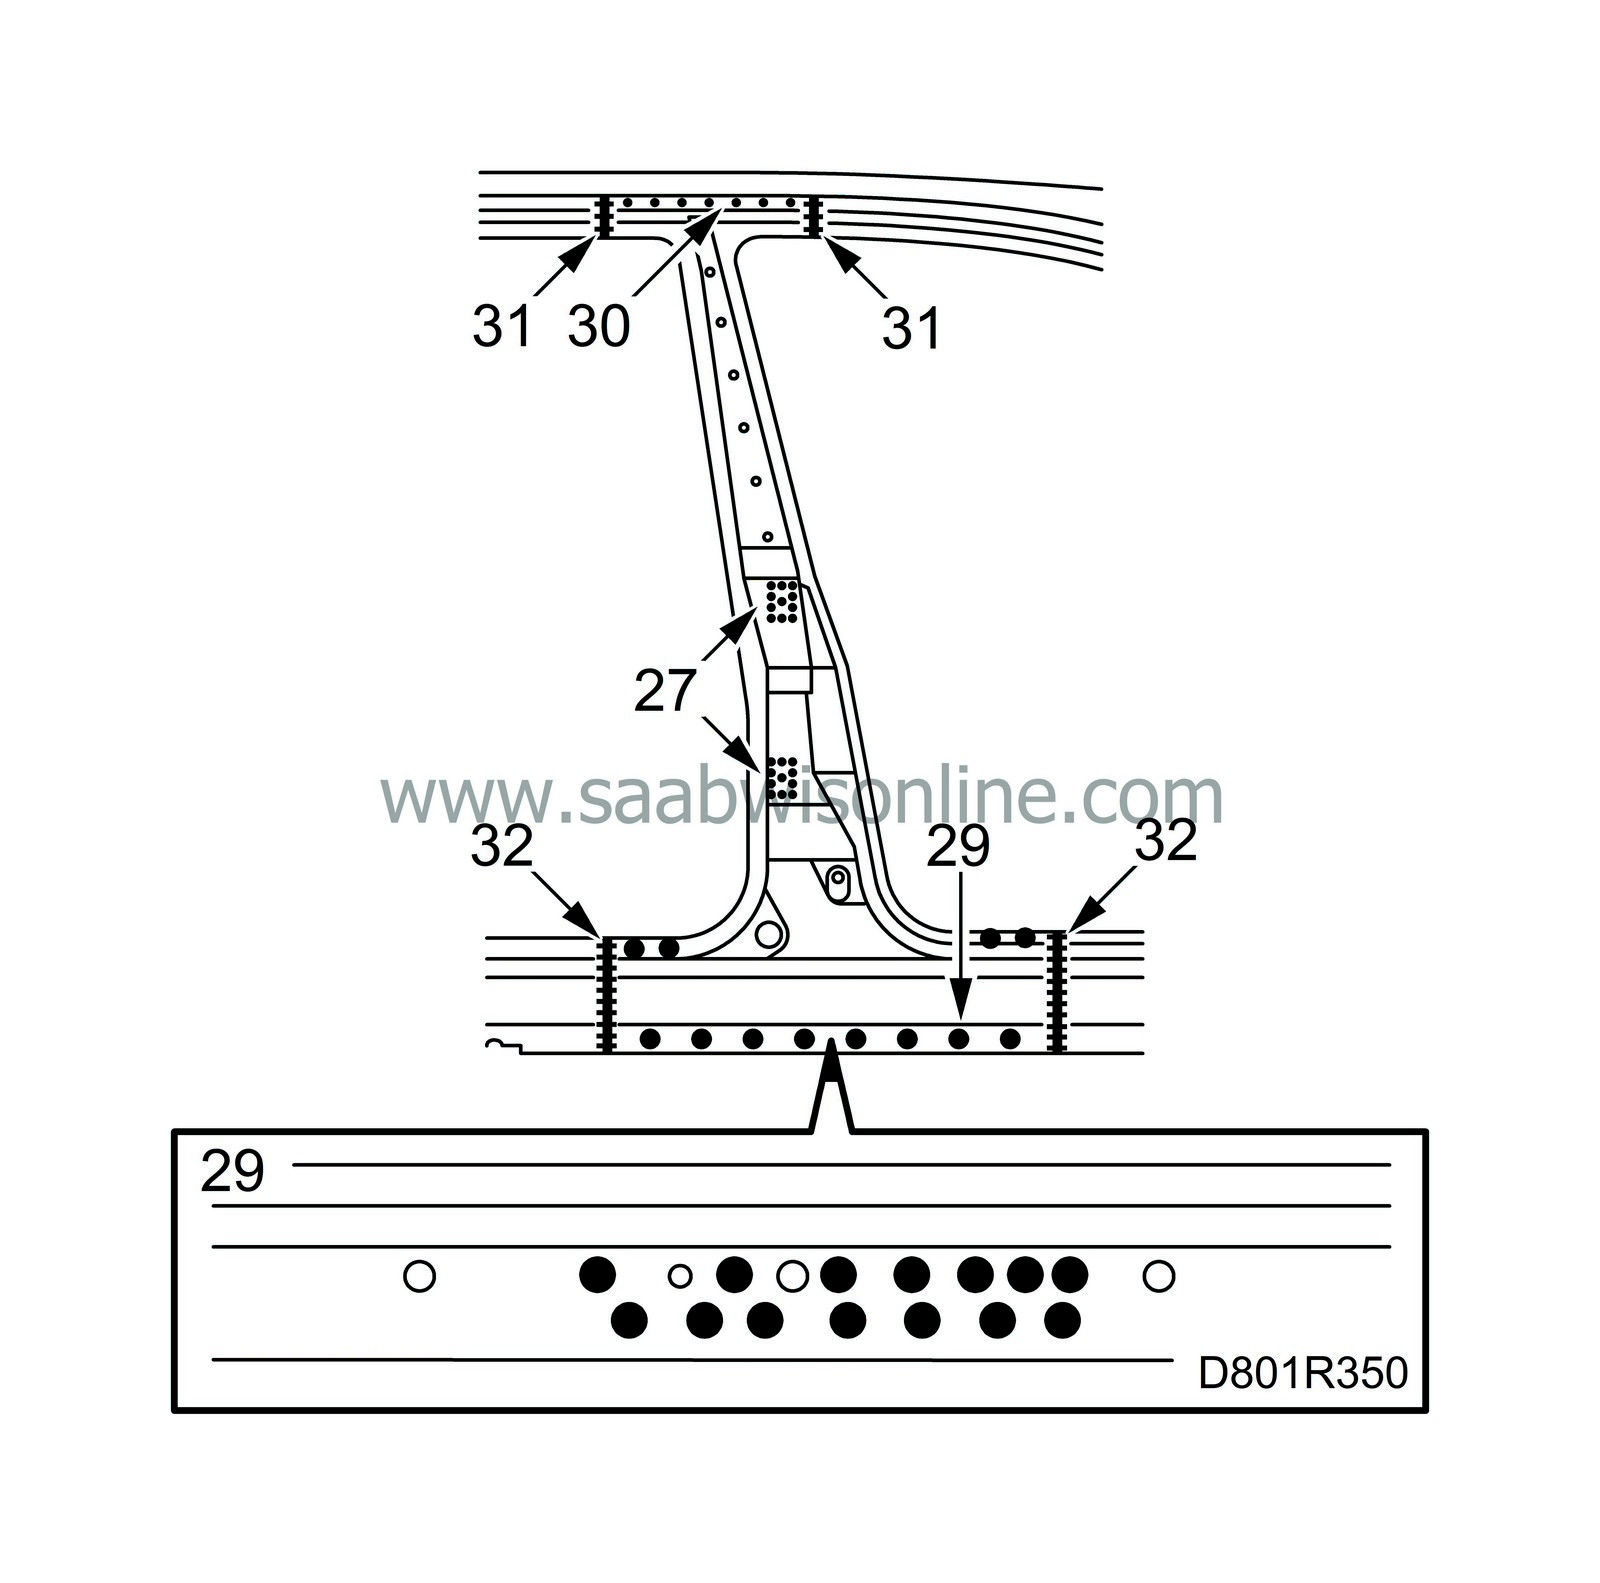
| 27. |
Plug-weld the outer panel to the reinforcement.
|
|
| 28. |
Grind the welds.
|
|
| 29. |
Weld the lower end of the outer panel.
|
|
| 30. |
Spot-weld the B-pillar top end.
|
|
| 31. |
All-weld the joints on the roof member.
|
|
| 32. |
All-weld the joints on the sill.
|
|
| 33. |
Apply welding primer to the ground surfaces. Use Teroson Zinkspray.
|
|
| 34. |
Tighten the hinges with nuts and bolts.
|
|
| 35. |
Fit the door and check the fit. Adjust if necessary and then fasten the hinges with a couple of welds.
|
|
| 36. |
Weld the hinges into place.
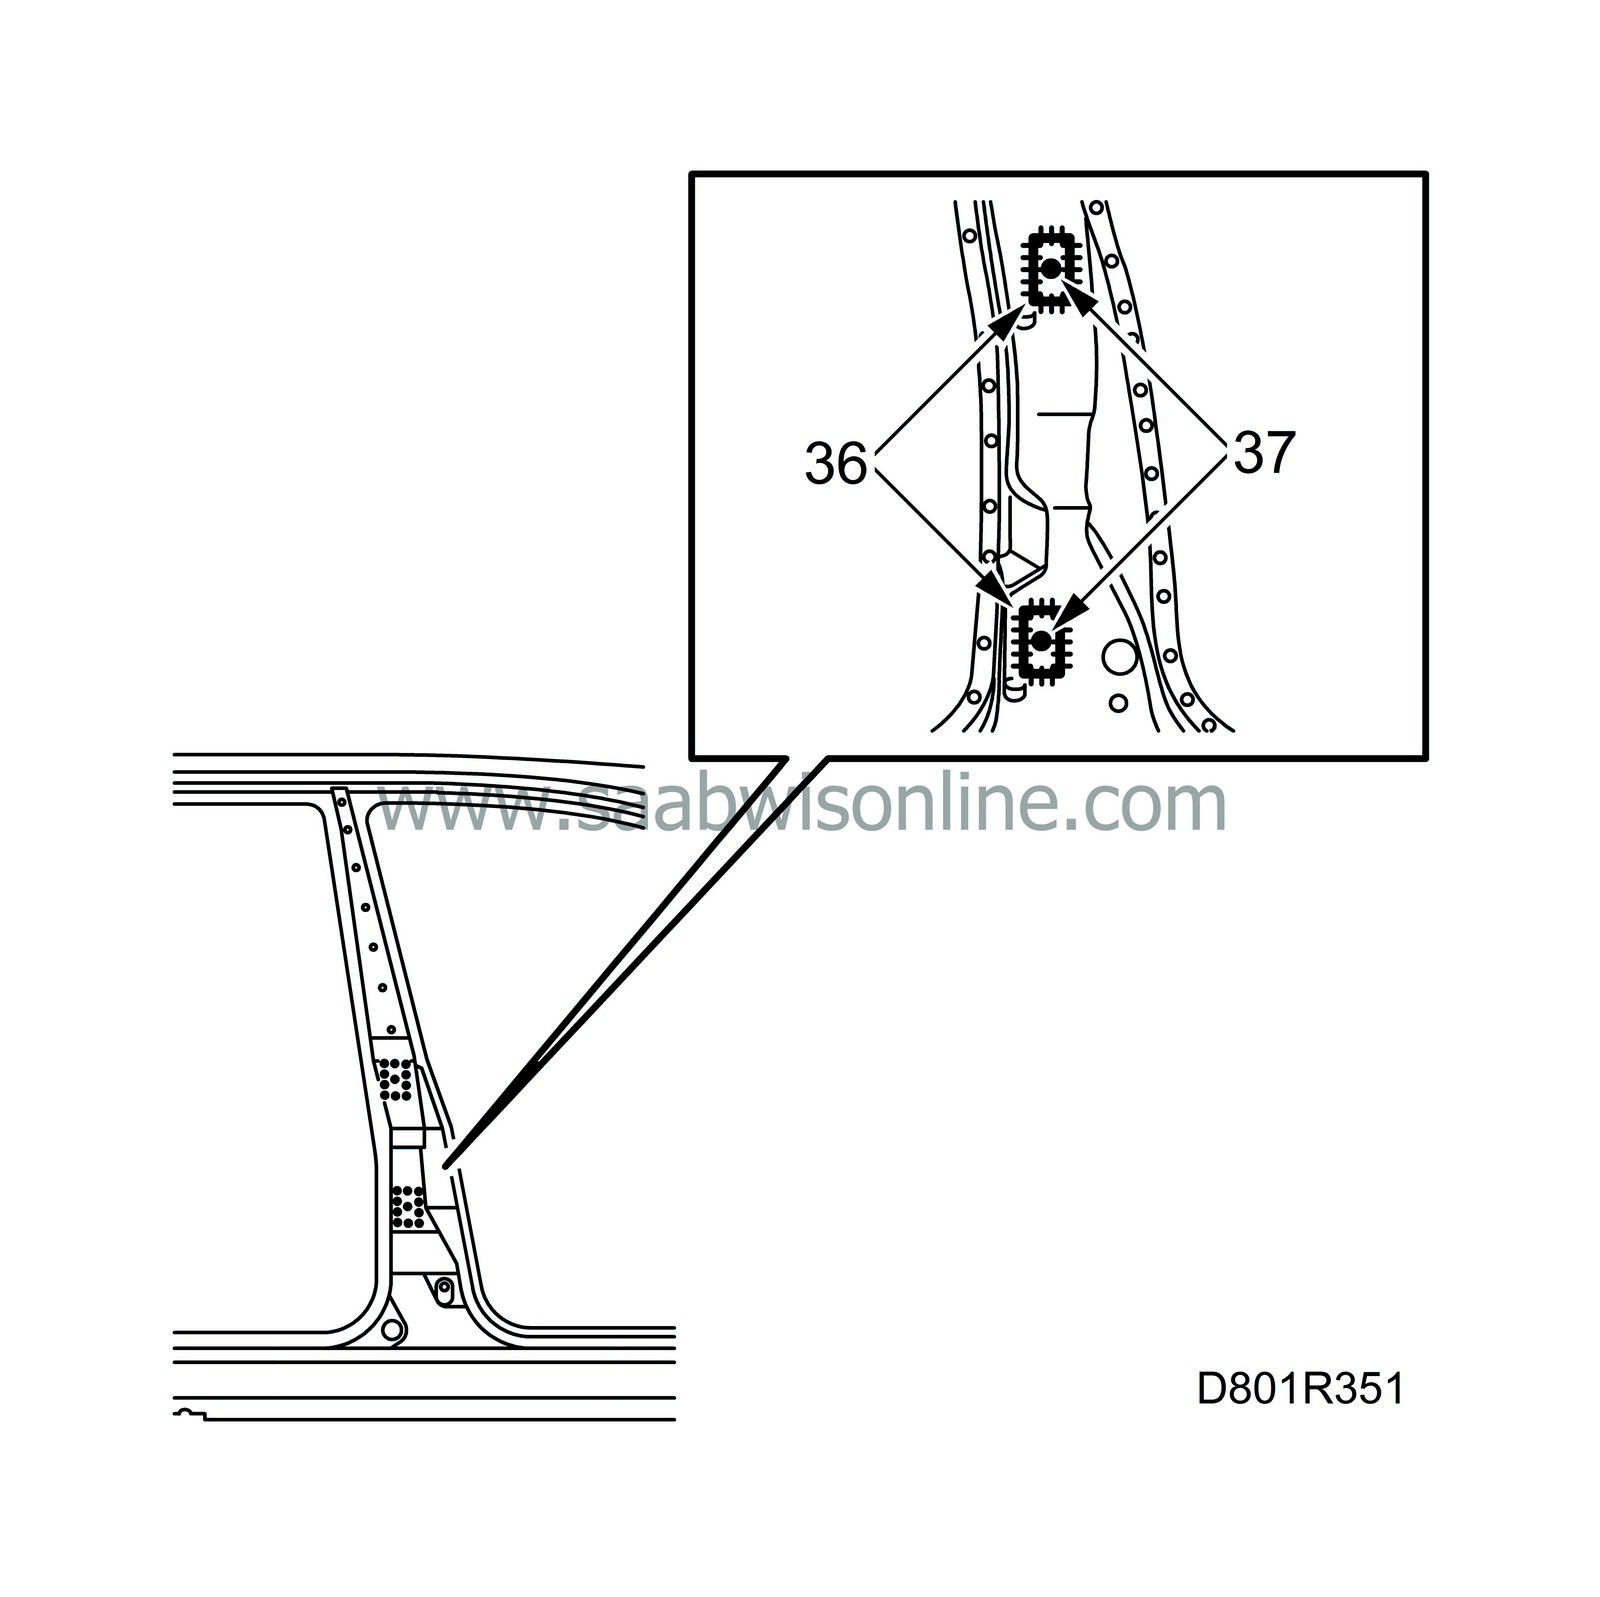
|
|
| 37. |
Remove the nut and bolt, weld shut the holes in the hinges.
|
|
| 38. |
Grind the welds.
|
|
| 39. |
Remove any remaining welding primer. Welding primer reduces adhesion of paint, filler and sealant.
|
|
| 40. |
Apply primer to all ground surfaces. Use Standox 1K Primer.
|
|
| 41. |
Seal joints and sheet metal flanges with sealant. Use Terostat 1K-PUR.
|
|
| 42. |
Apply anti-corrosion agent to the interior of the B-pillar lower end after painting. Use Terotex HV 400 or Mercasol 1.
|
|

