PRE-RELEASE
Cylinder head, gasket, rear (new version camshaft drive)
| Cylinder head, gasket, rear (new version camshaft drive) |
| To remove |
| 1. |
Remove the front catalytic converter; see:
Aut: Front catalytic converter, aut. B284 . |
|
| 2. |
Raise and fit the unit to the left engine pad.
|
|
| 3. |
Remove
Rear intermediate exhaust pipe
.
|
|
| 4. |
Remove
Timing cover in situ
.
|
|
| 5. |
Rotate the crankshaft so that the camshaft nodes (A) on cylinder 1 point upward and inward at a slight angle so that the installation marks on the crankshaft sprocket and oil pump are aligned.
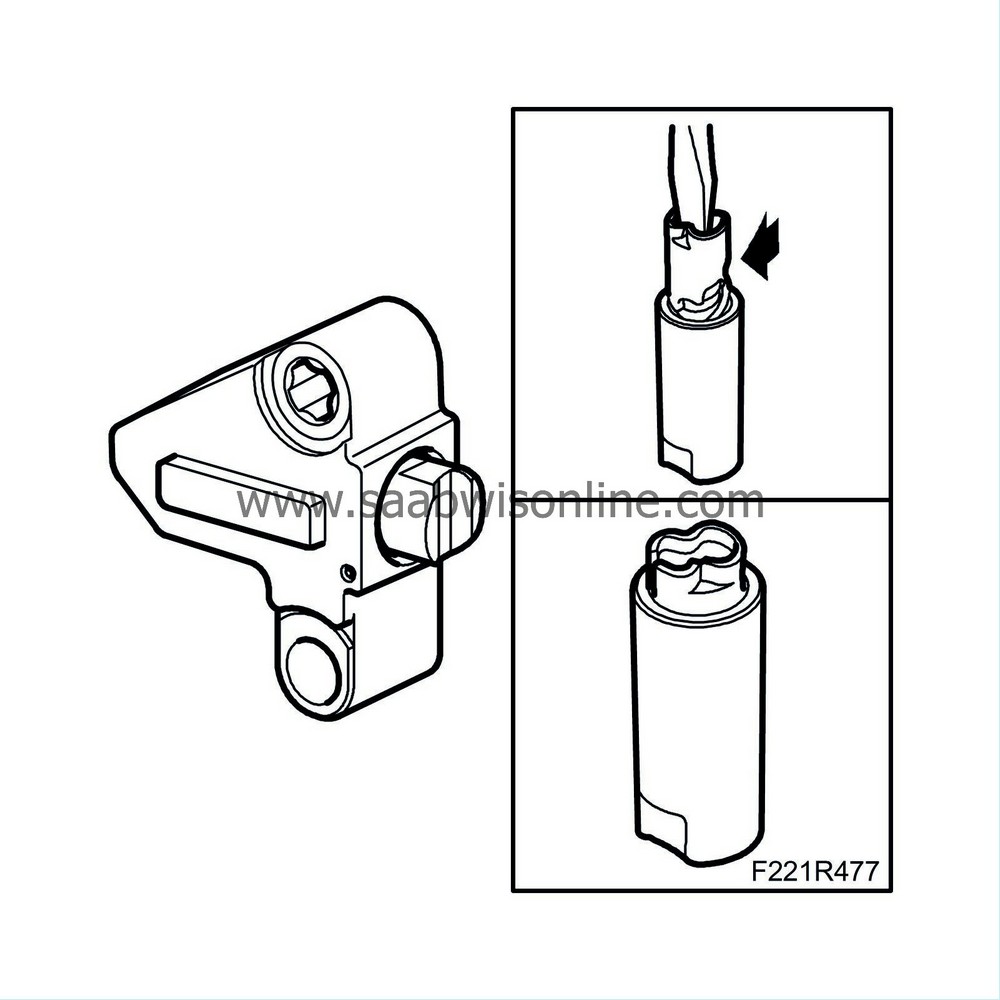
The engine is now approx. 15 degrees after TDC. Use EN-46111 Sleeve to turn the engine around. 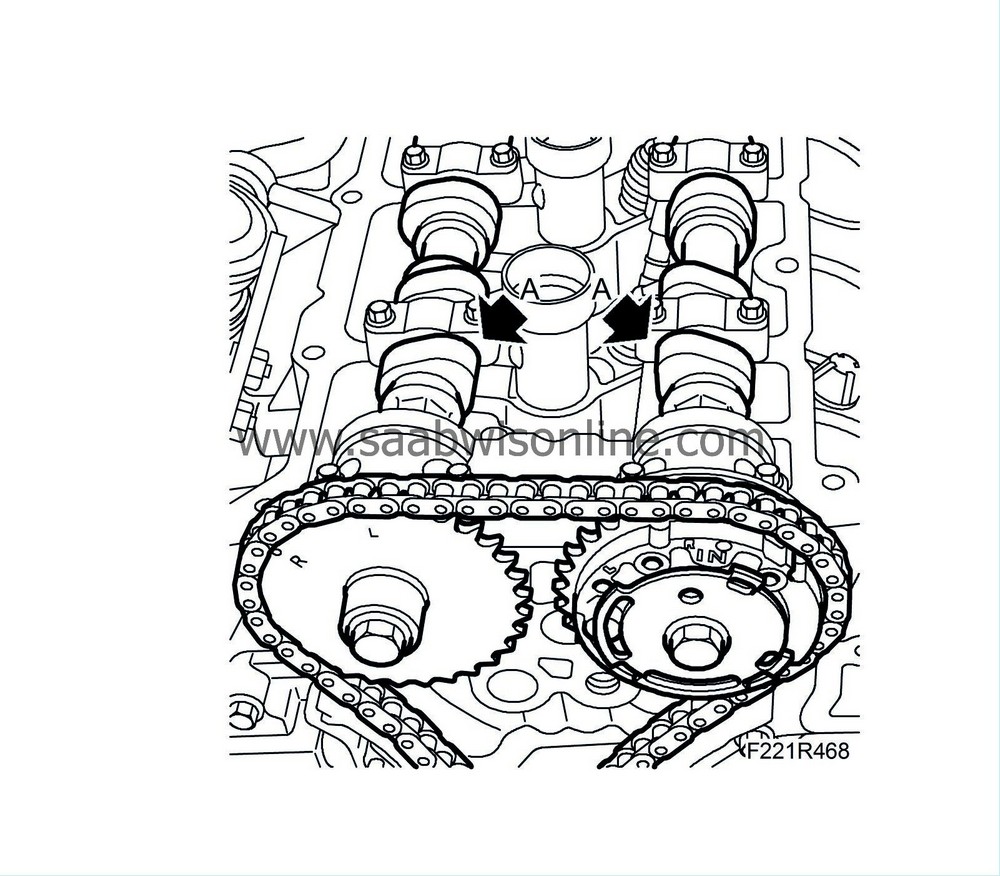
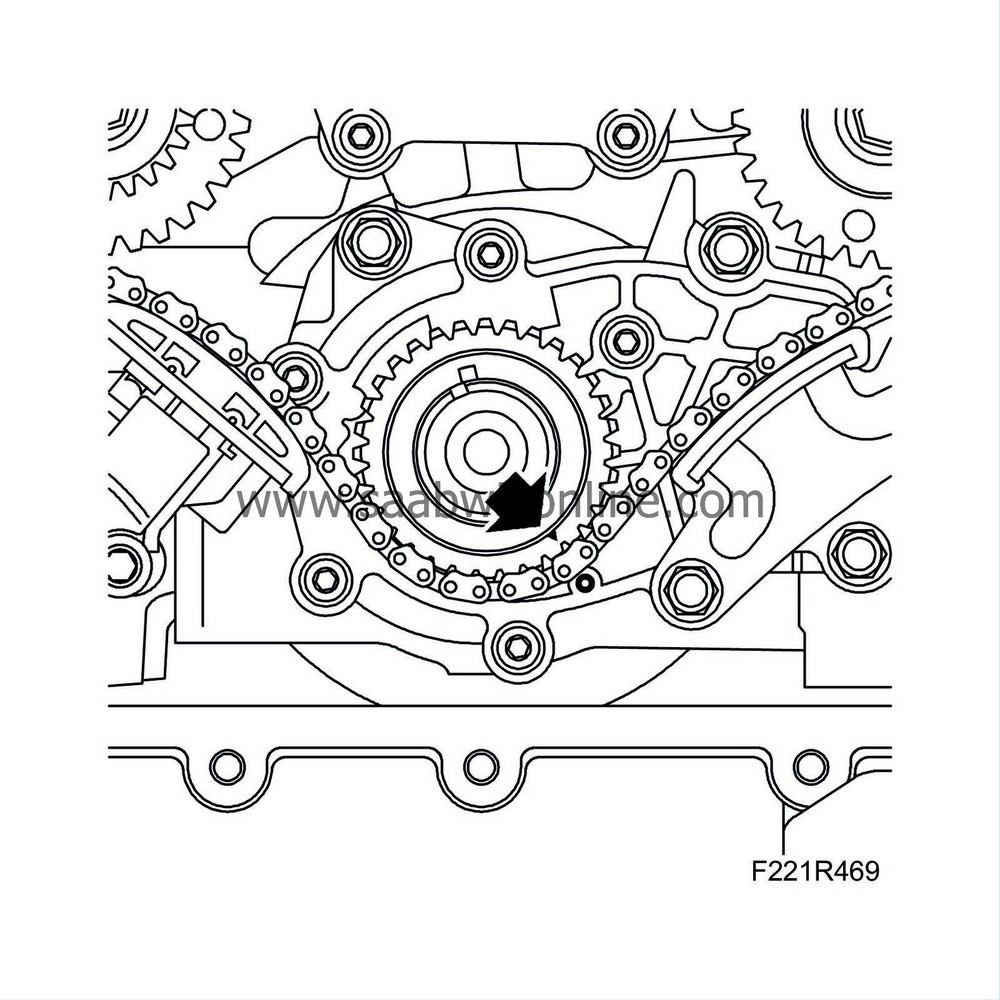
Rotate the crankshaft forward approx. ¼ turn, approx. 100° ATDC, so that the marking on the crankshaft sprocket is aligned with the marking on the oil pump (A). 
|
|
| 6. |
Fit
EN-48383-3 Adjustment tool
on the camshafts.

|
|
| 7. |
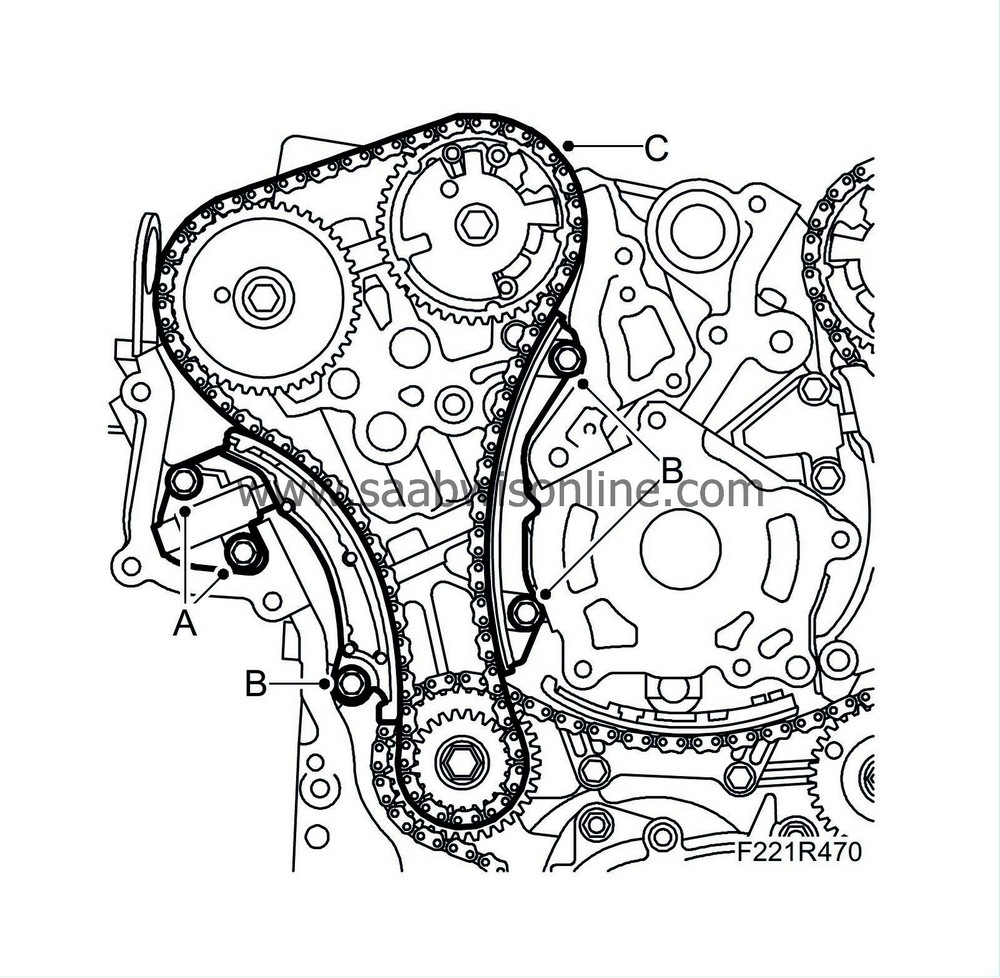
Remove the timing chain tensioner for the rear cylinder bank (A).
|
|
| 8. |
Remove the chain tensioner gasket.
|
|
| 9. |
Remove the chain guides (B) and lift off the chain (C).
|
|
| 10. |
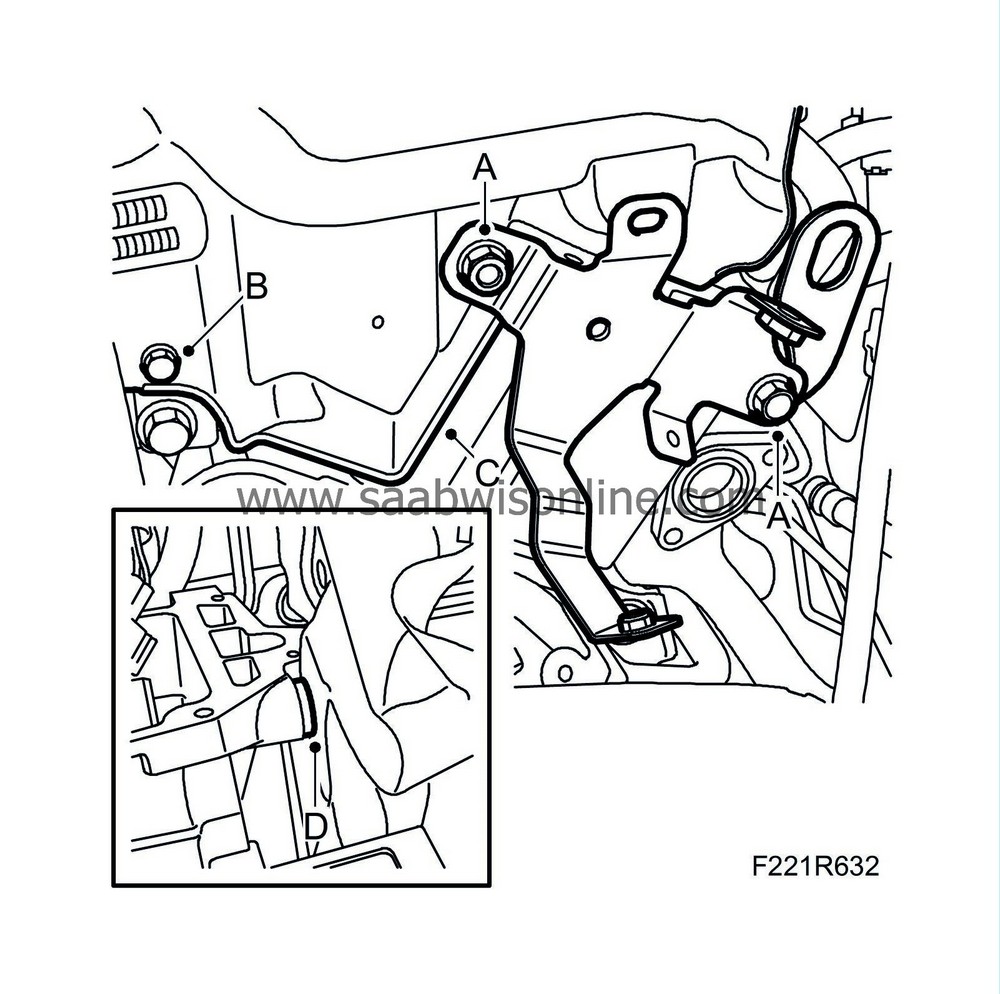
Remove the front catalytic converter bracket (A) from the engine.
|
|
| 11. |
Remove the bolt (B), move aside the heat shield (C) slightly and keep track of any spacer washer (D).
|
|
| 12. |
Raise the car.
|
|
| 13. |
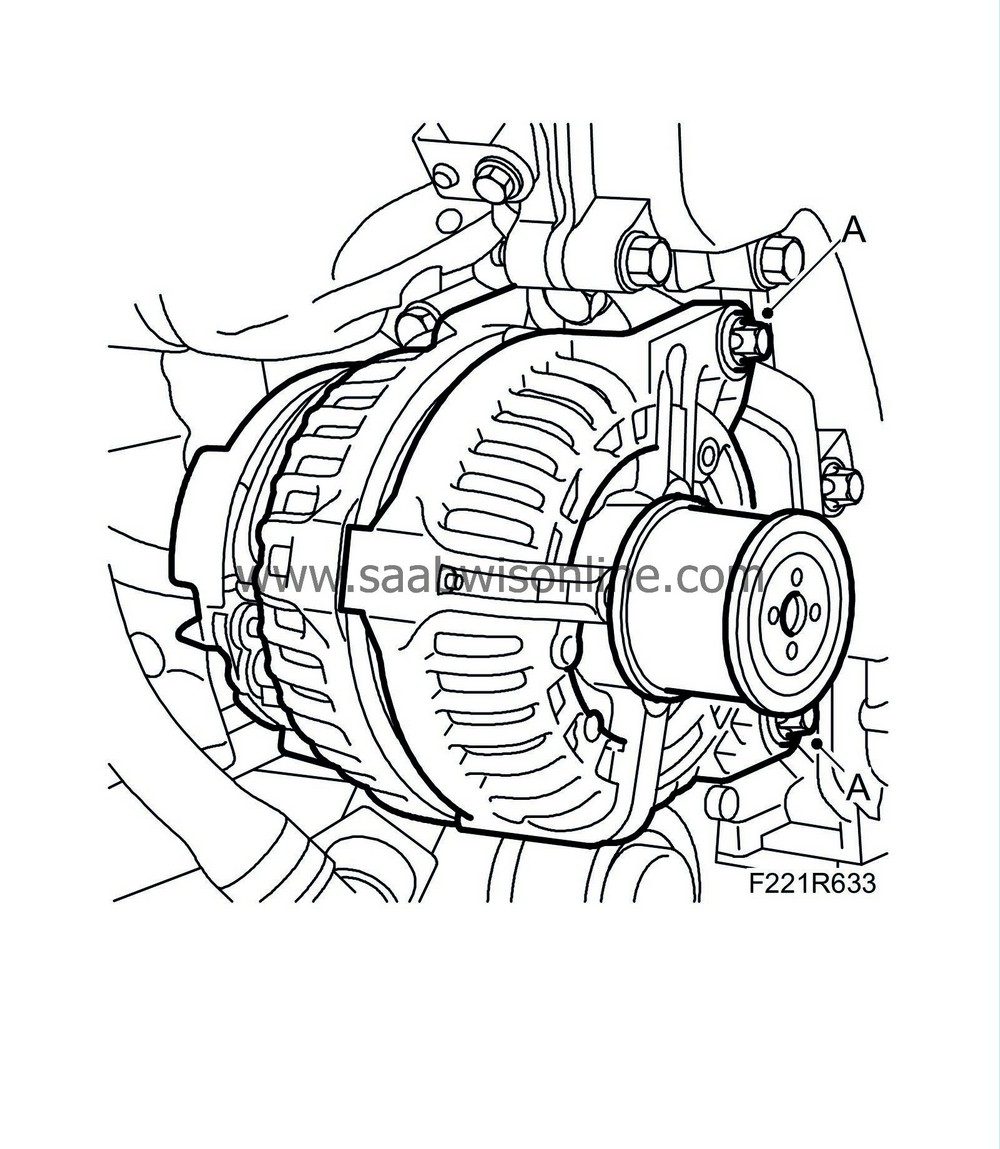
Remove the alternator retaining bolts (B). Prise the engine slightly to the left if necessary.
|
|
| 14. |
Remove the alternator from the alternator bracket. Secure the alternator with a strap.
|
|
| 15. |
Remove the upper bolt of the alternator bracket (A) and slacken the bolts (B) approx. 1 turn.

|
|
| 16. |
Lower the car.
|
|
| 17. |
Remove the power steering hose (A) and coolant hose (B) from the bracket on the cylinder head.

|
|
| 18. |
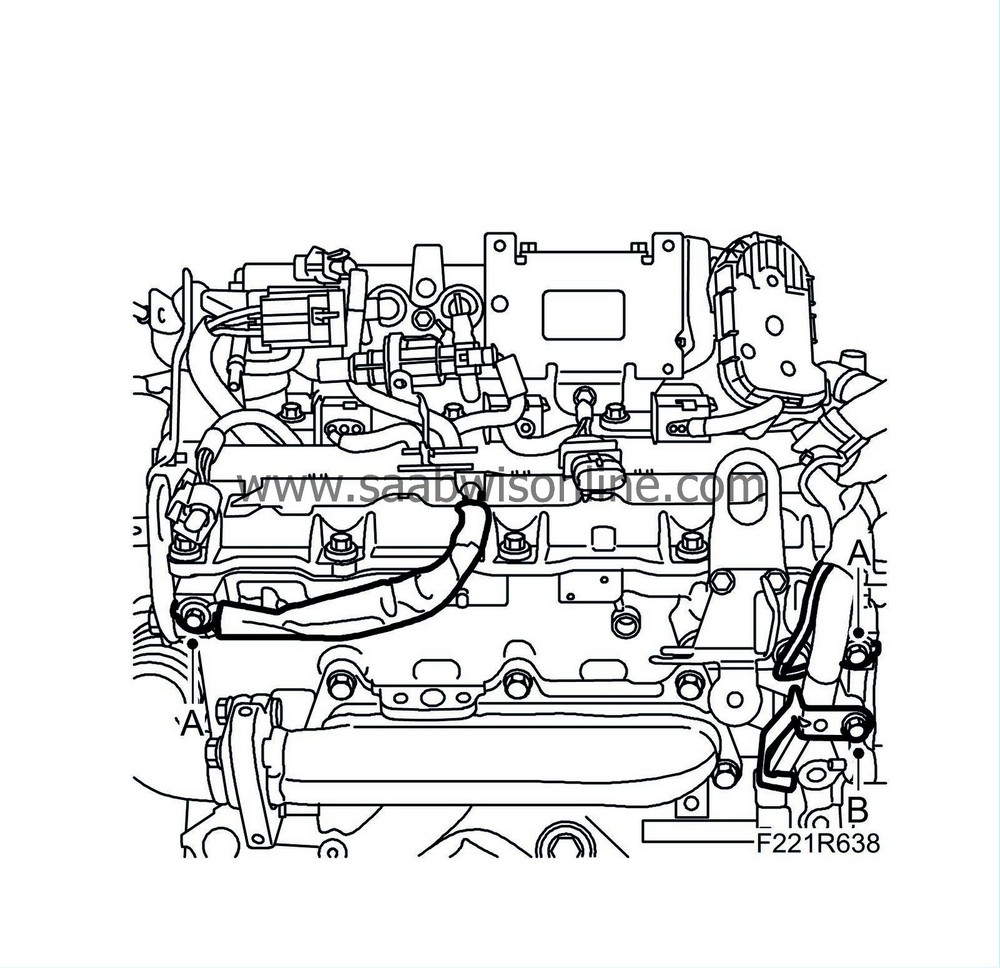
Remove the ground lines (A) and the wiring harness bracket (B).
|
|
| 19. |
Remove the cylinder head bolts in the order depicted.

|
|
| 20. |
Lift off the cylinder head.
|
|
| 21. |
Clean the gasket and clean the sealing surfaces.
|
|
| 22. |
Check the sealing surfaces for damage or distortion.
|
|
| To fit |
| 1. |
Place a new gasket on the cylinder block.
|
|
| 2. |
Fit the cylinder head. Tighten the bolts in the depicted order. Use new bolts.
Tightening torque: Stage 1: 45 Nm (33 lbf ft) Stage 2: Tighten the bolts 120° 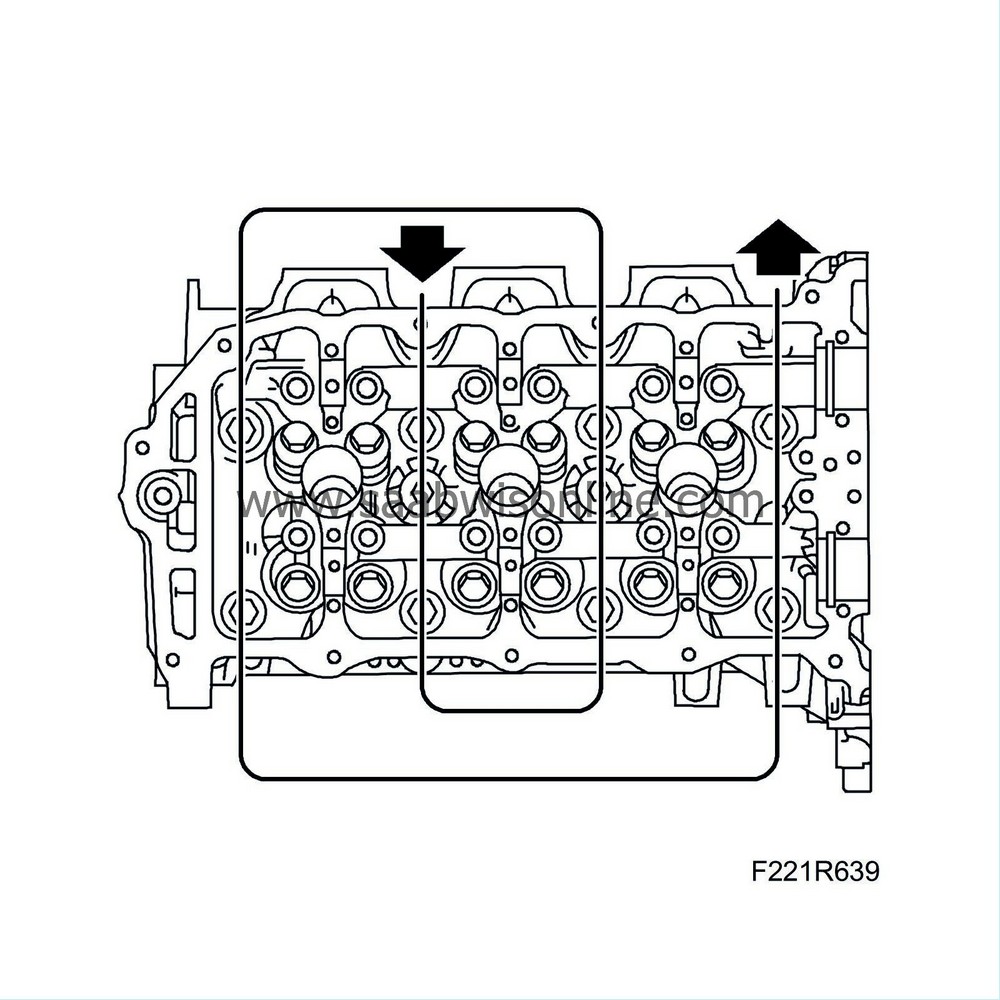
|
|
| 3. |
Raise the car.
|
|
| 5. |
Fit the alternator to the alternator bracket. First tap the nuts out of the alternator slightly.
|
|
| 6. |
Fit the alternator bolts (B). Prise the engine slightly to the left if necessary.
Tightening torque 24 Nm (18 lbf ft). 
|
|
| 7. |
Lower the car.
|
|
| 9. |
Fit
EN-48383-3 Adjustment tool
on the camshafts.
|
|
| 11. |
Fit the chain guides (B). Apply thread locking adhesive to the bolt of the movable guide.
Tightening torque 25 Nm (18 lbf ft) |
|
| 12. |
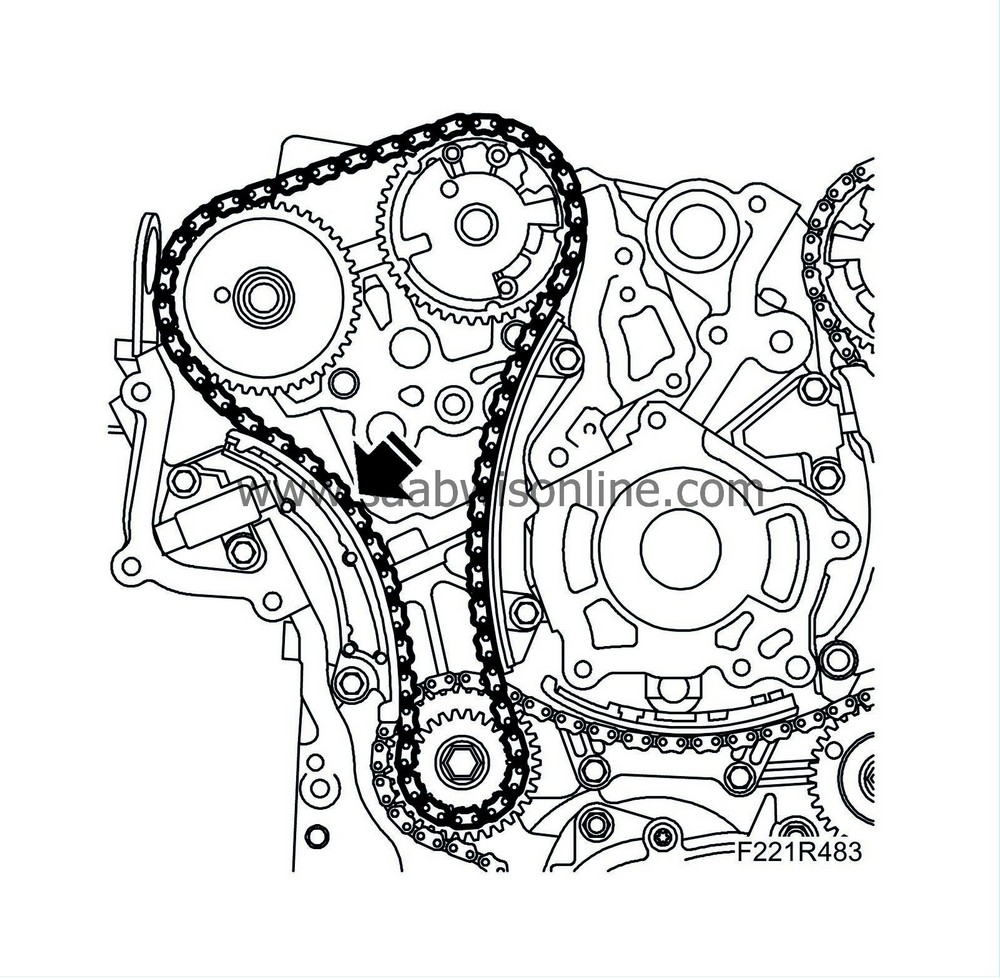
Fit the chain tensioner (A) using a new gasket. Note the position of the gasket.
Tightening torque 25 Nm (18 lbf ft) |
|
| 13. |
Trigger/activate the chain tensioner by carefully pressing on the timing chain or guide.
|
|
| 14. |
Remove the adjustment tool from the rear cylinder row.
|
|
| 15. |
Rotate the crankshaft 1 3/4 turn to check and ensure that all chain tensioners have been triggered and that the chain is correctly seated in the guides.
|
|
| 16. |
Set the crankshaft sprocket's marking against the oil pump's marking.

|
|
| 17. |
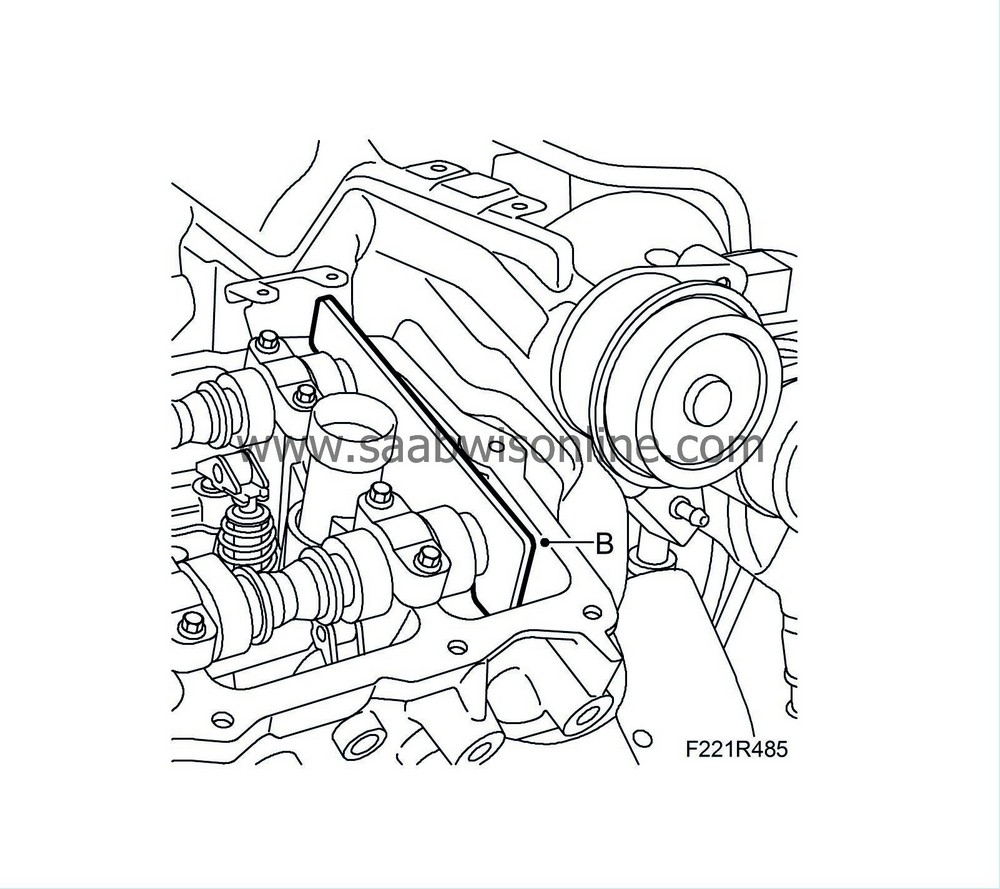
Fit
EN-48383-3 Adjustment tool
(B) on the front cylinder row camshafts and
EN-48383-2 Adjustment tool
(A) to the rear cylinder row camshafts.
Check that the marking on the crankshaft sprocket is aligned with the oil pump marking. If the tools fit and the markings are aligned, the camshaft drive is correctly fitted. 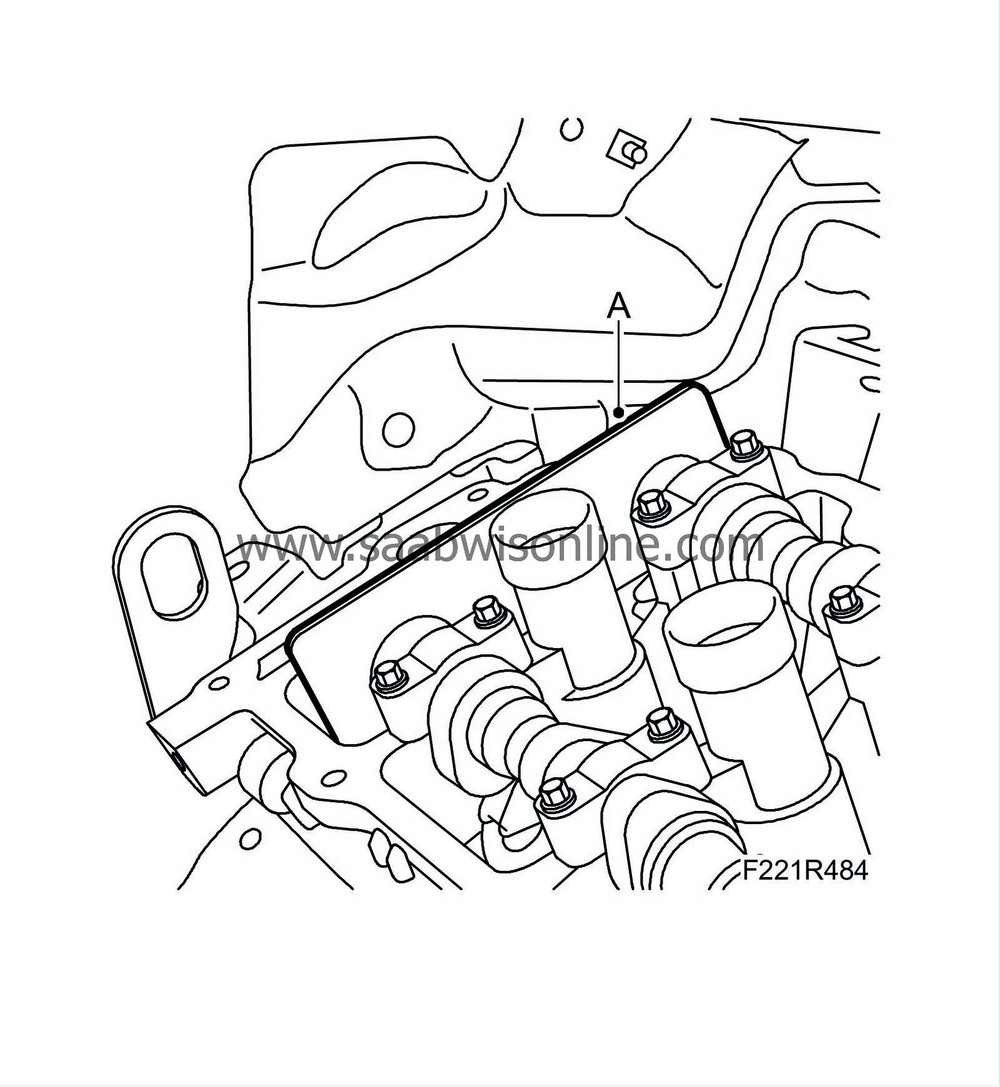
|
|
| 18. |
Remove the adjustment tools.
|
|
| 19. |
Fit any spacer washer (D), the heat shield (C) and the bolt (B).

|
|
| 20. |
Fit the front catalytic converter bracket (A) to the engine.
|
|
| 21. |
Fit
Timing cover in situ
.
|
|
| 22. |
Fit the ground lines (A) and the wiring harness bracket (B).

|
|
| 23. |
Fit the power steering hose (A) and coolant hose (B) to the bracket on the cylinder head.

|
|
| 24. |
Fit
Rear intermediate exhaust pipe
.
|
|
| 25. |
Detach and lower the unit from the left engine pad.
|
|
| 26. |
Fit the front catalytic converter; see:
Aut: Front catalytic converter, aut. B284 . |
|

