PRE-RELEASE
Lower suspension arm
| Lower suspension arm |
| To remove |
| 1. |
Raise the car.
|
|
| 2. |
Remove the wheel.
|
|
| 3. |
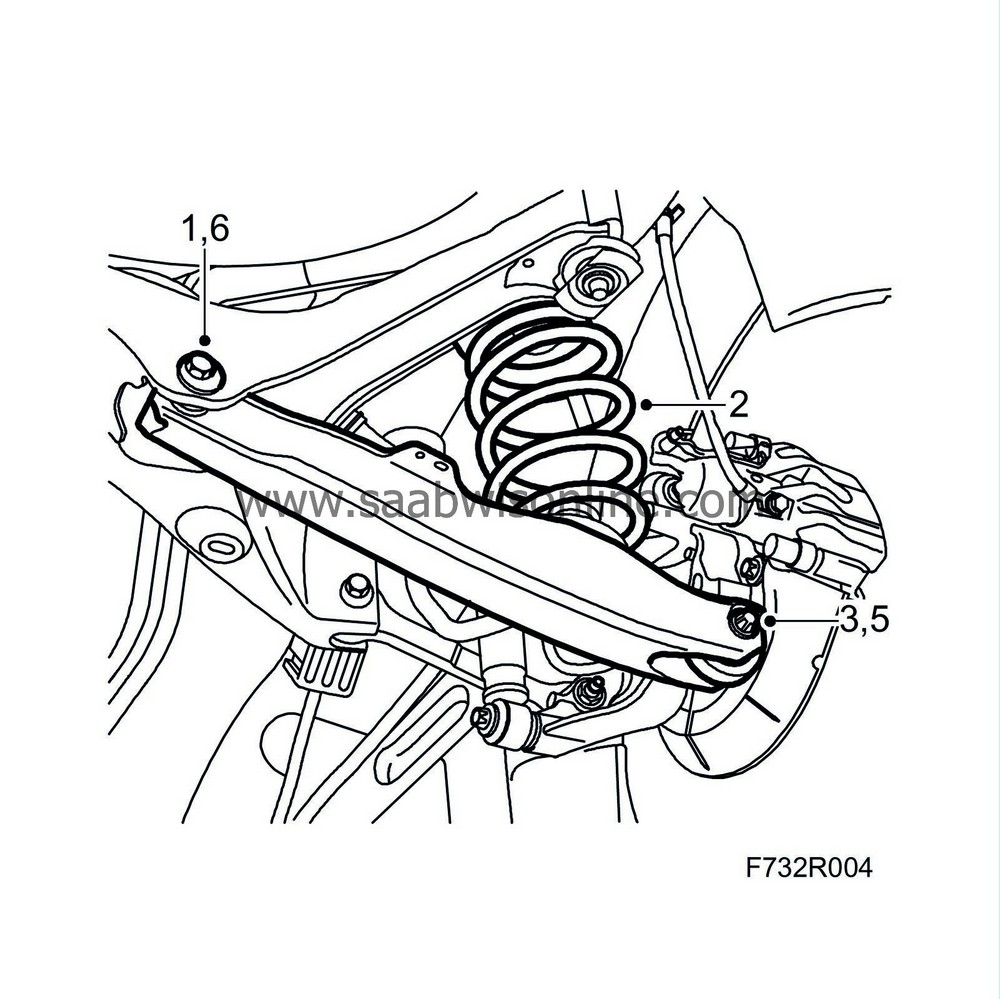
Left-hand suspension arm and cars with xenon lights:
Remove the level sensor.
|
|
| 5. |
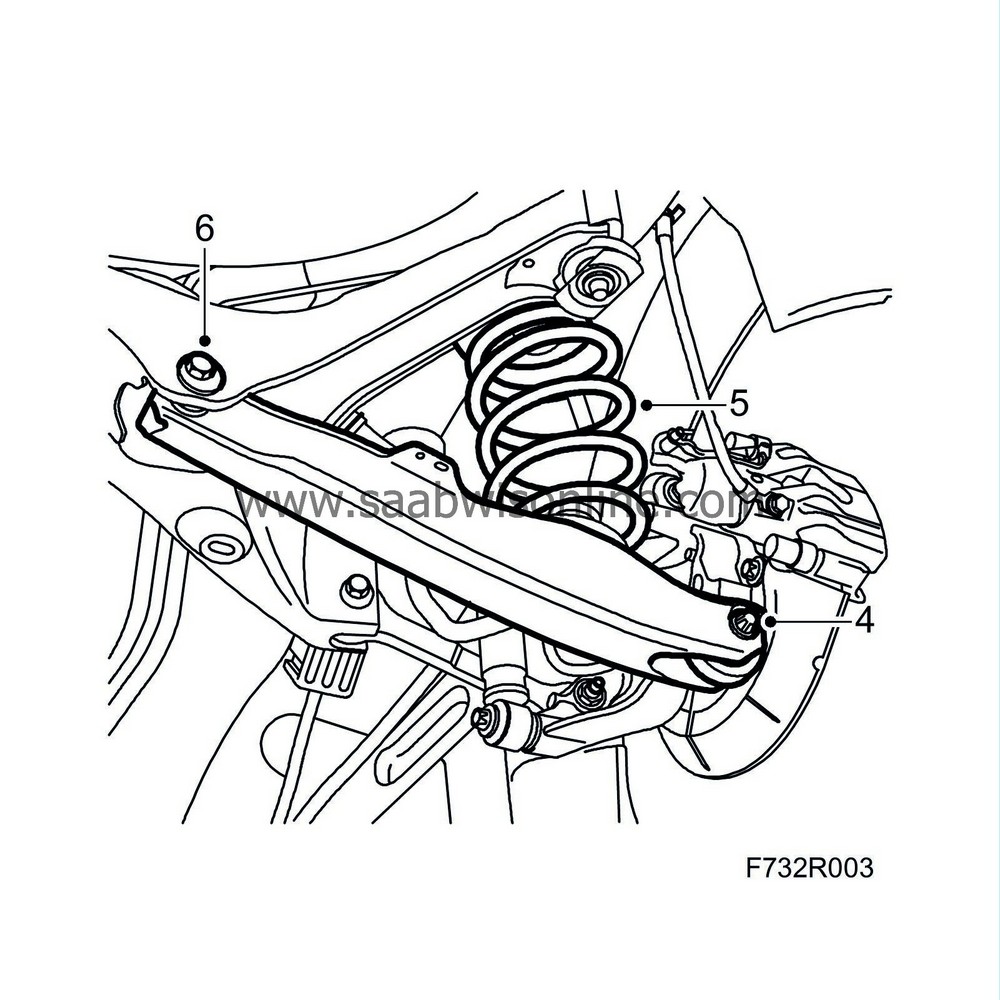
Pull the suspension arm down and remove the spring and the spring support.
|
|
| 6. |
Mark the position of the adjustment bolt. Remove the adjustment bolt and nut. Lift the link arm away.
|
|
| To fit |
| 1. |
Fit the link arm with the adjustment bolt and fit a
new
nut.

|
|
| 2. |
Fit the spring and spring support.
|
|
| 3. |
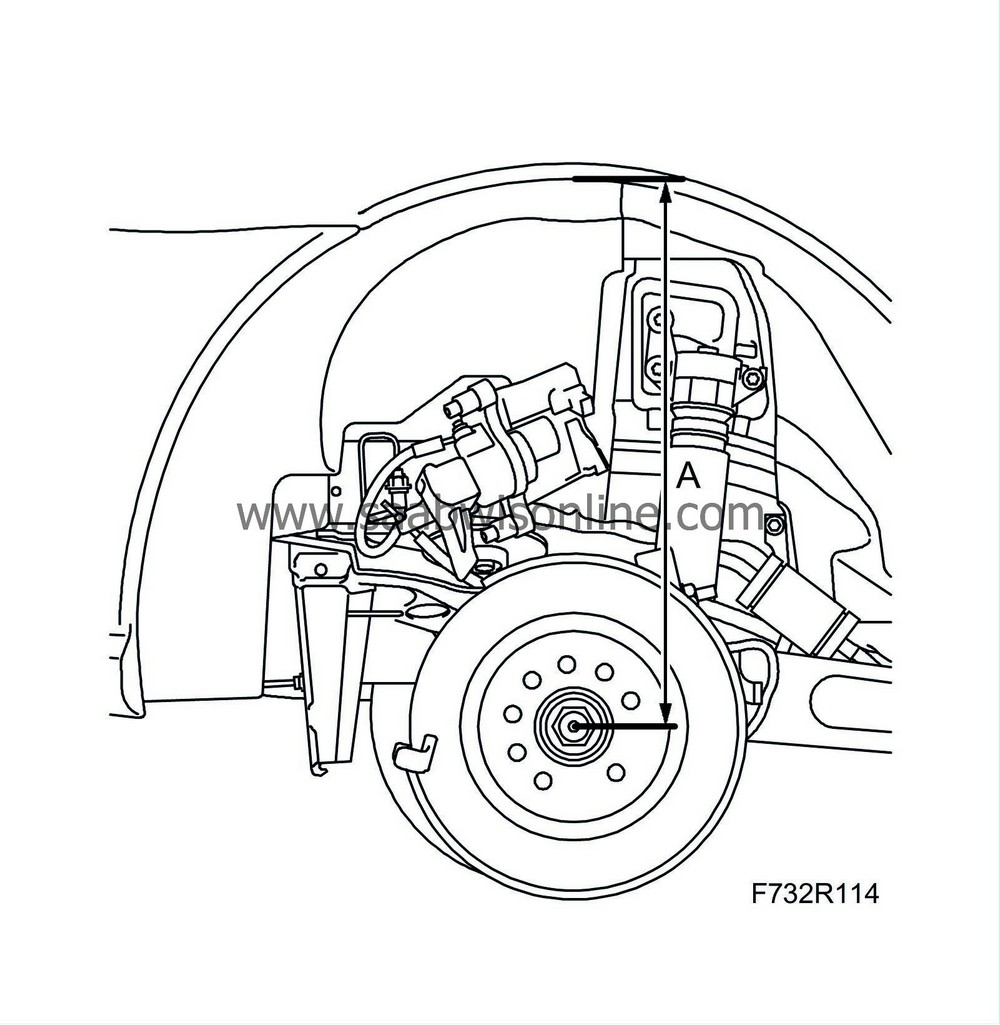
Lift up the lower suspension arm with a jack and fit the bolt. Lift the steering swivel member to normal position, 374 mm, 9-3X 390 mm (A) between the centre of the drive shaft and the edge of the wing.

|
||||||||||
| 4. |
Remove the anti-roll bar from the steering swivel member on each side.
|
|
| 5. |
Lift the lower suspension arm to normal position with a jack and fit the nut.
Tightening torque 75 Nm +90° (55 lbf ft +90°) 
|
|
| 6. |
Tighten the nut on the lower suspension arm adjustment bolt.
Tightening torque 75 Nm +60° (55 lbf ft +60°) |
|
| 7. |
Remove the jack.
|
|
| 8. |
Fit the anti-roll bar to the steering swivel member.
Tightening torque 53 Nm (39 lbf ft) |
|
| 9. |
Left-hand suspension arm and cars with xenon lights:
Fit the level sensor.
|
|
| 10. |
Fit the
wheel
.
|
|
| 11. |
Lower the car to the floor.
|
|
| 12. |
Carry out four wheel checking and alignment, see
Four wheel alignment
.
|
|
| 13. |
Cars with xenon lights:
Carry out light alignment/calibration.
|
|


