Complete gearbox, B207 4WD
|
|
Complete gearbox, B207 4WD
|
|
1.
|
Place covers over the wings to keep the paintwork clean and protect it from damage.
|
|
2.
|
Remove the upper engine cover.
|
|
3.
|
Remove the battery cover.
|
|
4.
|
Disconnect the battery terminals and remove the battery with cooling pipe.
|
|
5.
|
Undo the cable clamp under the battery tray.
|
|
6.
|
Disconnect the bonnet switch.
|
|
7.
|
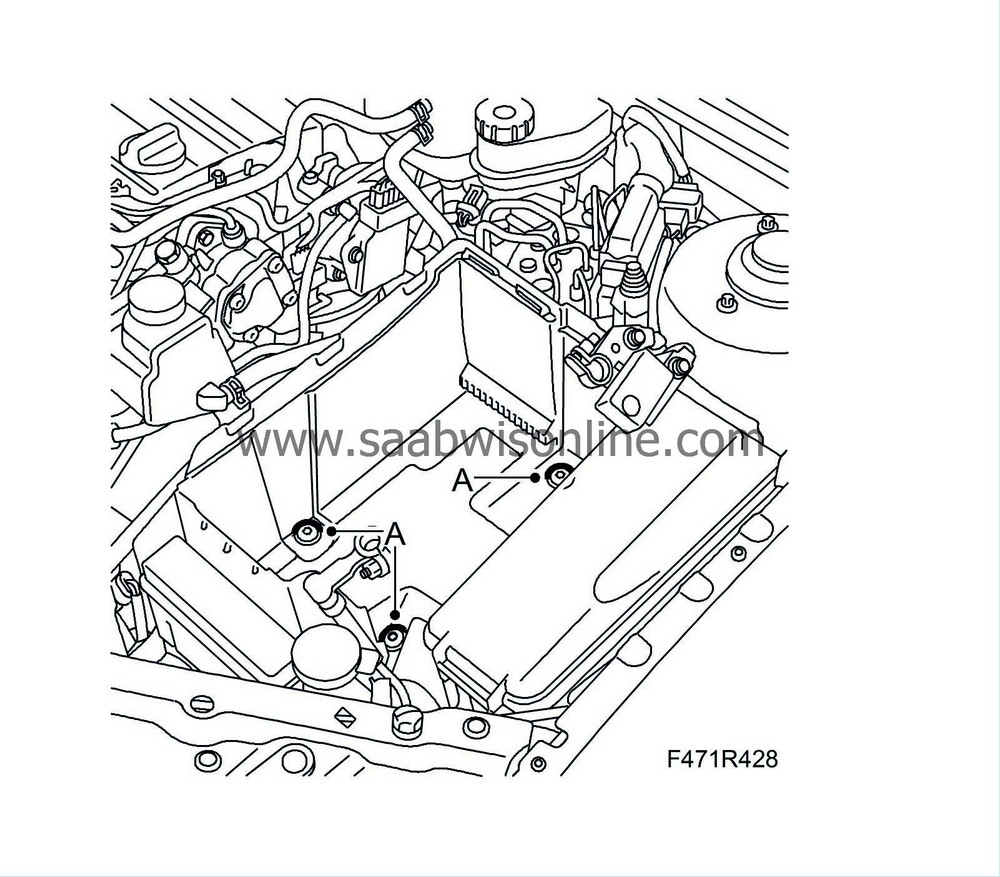
Remove the battery tray (A).
|
|
8.
|
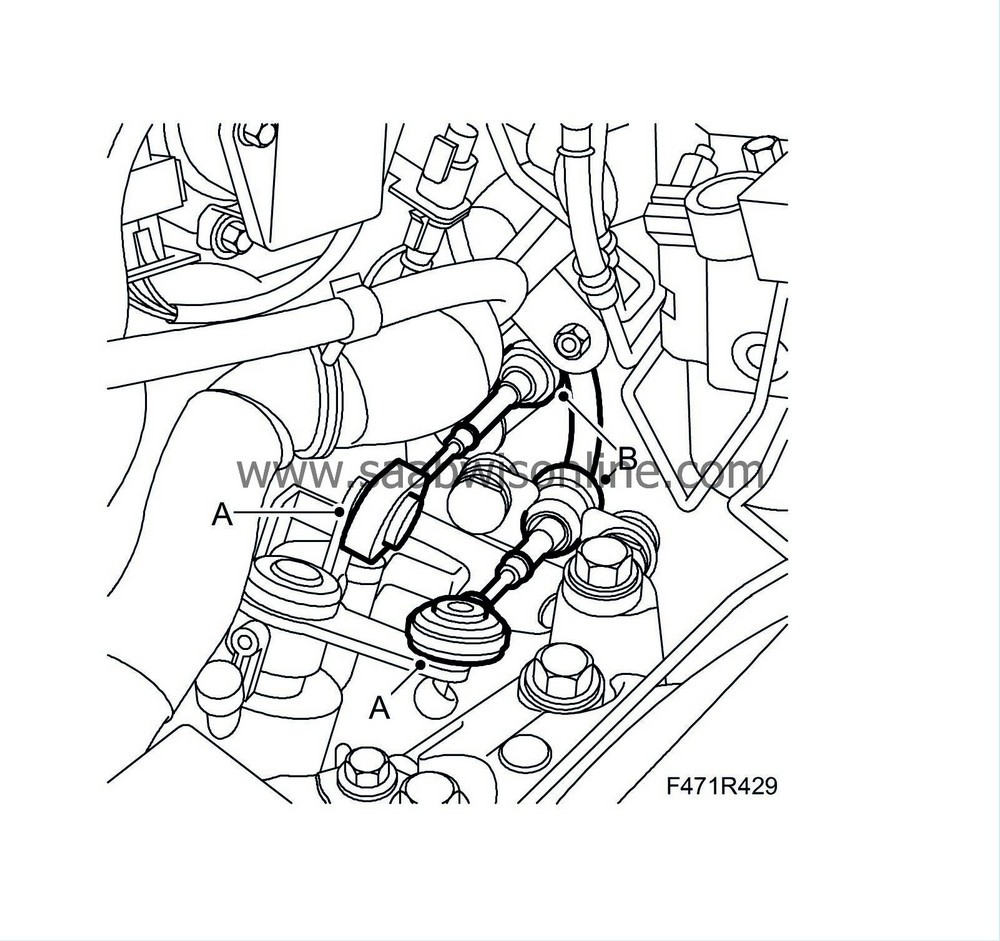
Lift up the cables (A) from the levers.
|
|
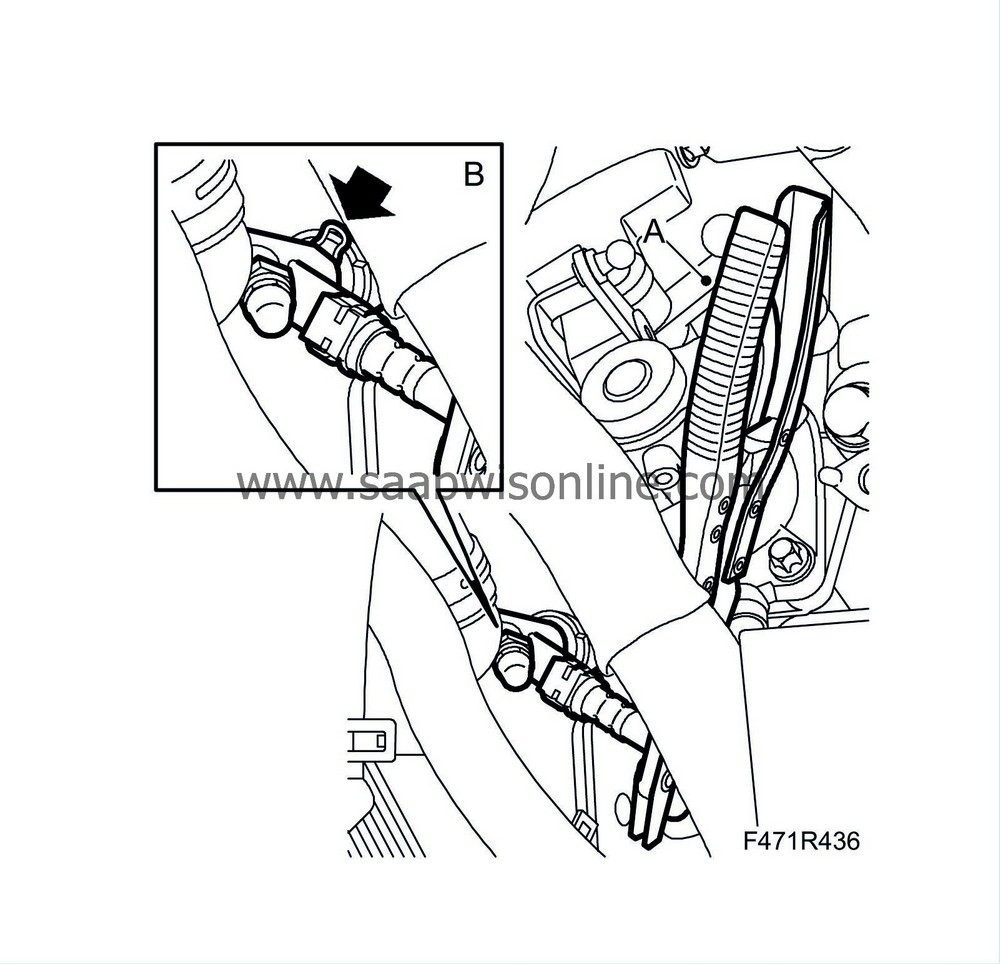
9.
|
Remove the gear cables from the gearbox by pulling back on the locking sleeves (B).
|
|
11.
|
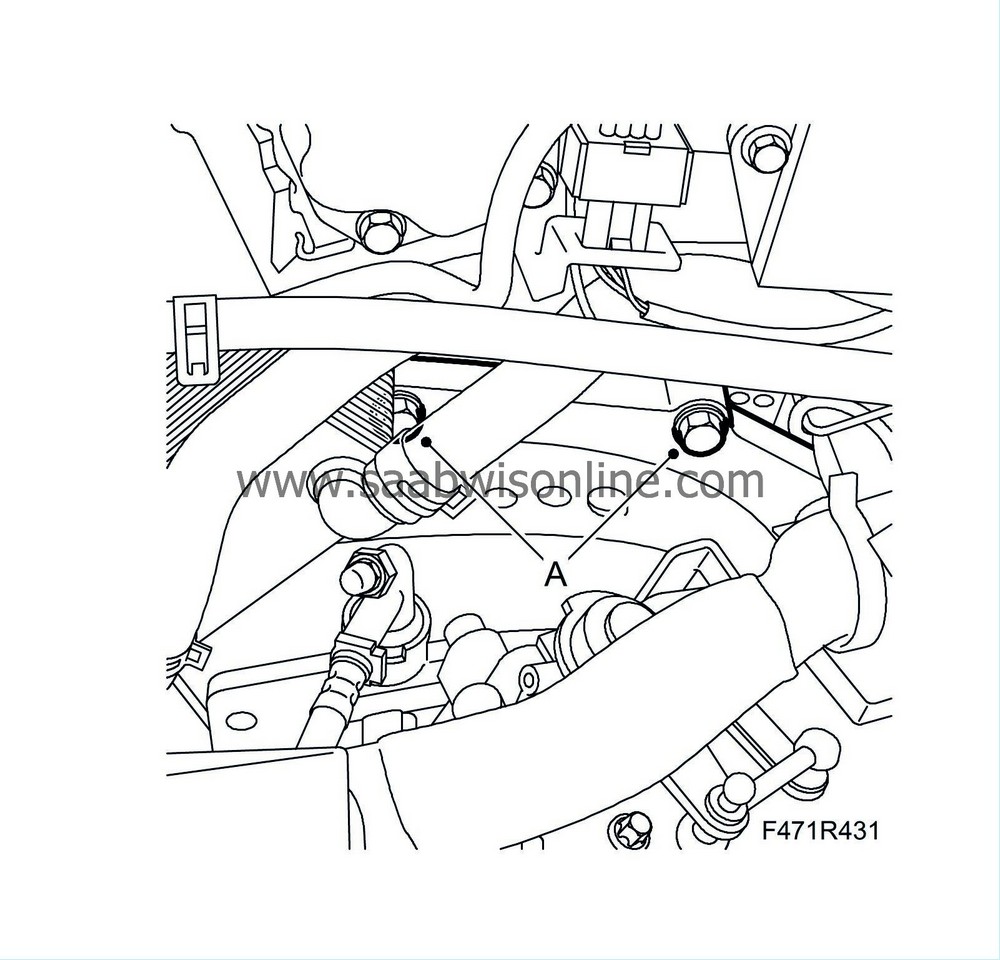
Remove the upper bolts from the gearbox (A).
|
|
15.
|
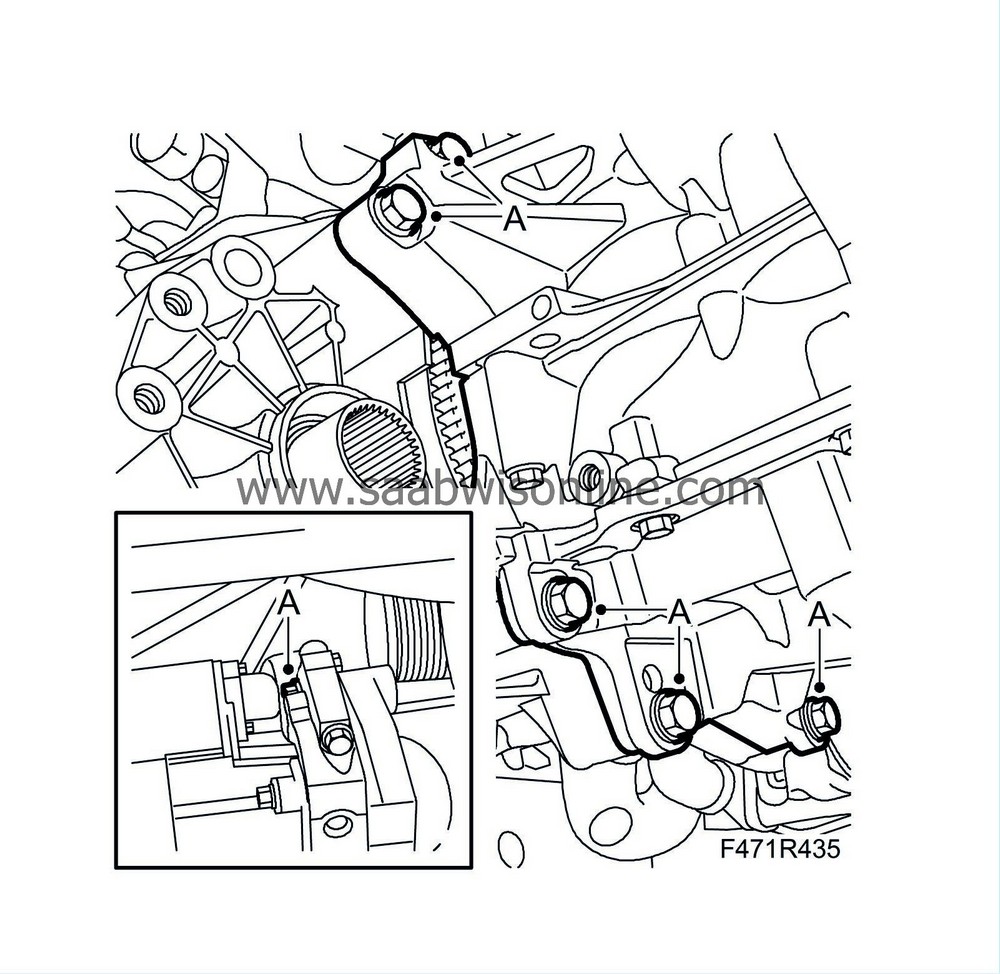
Lower the car and mark the location of the bolts on the left engine mounting with a marker pen to ensure correct refitting and then remove the screws (A) from the mounting.

|
|
16.
|
Lower the drive unit approx. 70 mm from the lifting beam to facilitate the removal of the gearbox. Measure the distance at the left-hand engine mounting.
|
|
18.
|
When replacing the gearbox, remove the front torque rod bracket from the gearbox.
|
|
19.
|
Remove the lower gearbox bolts (A). Leave one bolt in place.
|
|
23.
|
Remove the last bolt, pull out the transmission and lower it.
|
Important
|
|
The jack can tip over. Be careful.
|
|
|
|
|
24.
|
Lift the transmission down from the column jack with an engine lift and
87 92 442 Lifting cable
while undoing the lifting tool from the transmission.
|
|
1.
|
When replacing the gearbox, transfer the cable bracket and engine mounting.
Tightening torque nuts 22 Nm (16 lbf ft)
Tightening torque, bolts 70 Nm +45° (52 lbf ft +45°)
|
|
3.
|
Lubricate the primary shaft splines, see List of lubricants and sealants.
|
|
4.
|
Lubricate the guide sleeves on the engine with anti-corrosion agent.
|
|
6.
|
Fit the gearbox with the lifting tool on the column jack.
|
Important
|
|
Make sure the gear cables are positioned correctly when lifting the gearbox.
|
|
|
|
|
7.
|
Fit the rest of the gearbox. Turn the crankshaft if necessary to get the gearbox in place.
|
Important
|
|
The jack can tip over. Be careful.
|
|
|
|
|
8.
|
Fit the lower bolts between engine and gearbox in the sequence illustrated.
Tightening torque, M10 bolts 40 Nm (30 lbf ft)
Tightening torque, M12 bolts 70 Nm (52 lbf ft)

|
|
9.
|
Remove the lifting tool from the gearbox and move away the jack.
|
|
10.
|
Lower the car. Lift in place the power train with the lifting beam until it meets the engine mounting.
|
|
11.
|
Fit the bracket (A) for the engine mounting according to the marks made earlier.
Tightening torque 70 Nm +45° (52 lbf ft +45°)
|
|
12.
|
Remove the holder, lifting beam and lifting eyes.
|
|
13.
|
Fit the coolant reservoir.
|
|
14.
|
Fit the upper bolts from the gearbox (A).
Tightening torque 70 Nm (52 lbf ft)
|
|
15.
|
Fit the quick-release coupling (A) to the clutch slave cylinder. Remove the hose pinch-off pliers (B). Make sure the connection is secured in the correct position. Bleed the clutch. See
Bleeding the clutch hydraulic system in the car
.
|
|
16.
|
Plug in the reversing light switch.
|
|
17.
|
Fit the cables to the cable retainers by pulling back on the locking sleeves (B).
|
|
18.
|
Fit the gear cables (A) to the gear selector arms.
|
|
21.
|
Make sure that the drive shaft (B) is clean and then align it with the tool (A).
|
Important
|
|
Fit the driver in the gearbox until approx.20 mm are remaining and pull out the tool before the sealing surface of the shaft reaches the shaft seal.
|
|
|
|
|
22.
|
Push in the rest of the drive shaft into the gearbox until the circlip clicks in.
|
|
23.
|
Attach the ABS cable to the clip.
|
|
24.
|
Fit the front torque rod bracket to the gearbox.
Tightening torque 80 Nm (59 lbf ft)
|
|
27.
|
Fit the battery tray (A) and the bonnet switch connector.
|
|
28.
|
Fit the cooling pipe and the battery.
|
|
29.
|
Fit the battery cover.
|
|
30.
|
Fit the upper engine cover.
|
|
31.
|
Remove the wing covers.
|
|
33.
|
Test drive the car. Check the position of the steering wheel when driving straight ahead on a level road. Adjust if needed.
|


