PRE-RELEASE
Sunroof Sunshade Replacement
| Sunroof Sunshade Replacement |
| Removal Procedure |
| 1. |
Open the sunshade to the fully open position. |
|||||||
| 2. |
Remove the window. Refer to
Sunroof Window Replacement - Rear
.
|
|
| 3. |
It is only necessary to lower the headliner. Only do those steps in the headliner replacement procedure that will lower the headliner enough to gain access to the part. Refer to
Headlining Trim Panel Replacement (With C3U)
Headlining Trim Panel Replacement (Without C3U)
.
|
|
| 4. |
Remove the white plastic retainers by sliding them rearward and disengage them from the track.
|
|
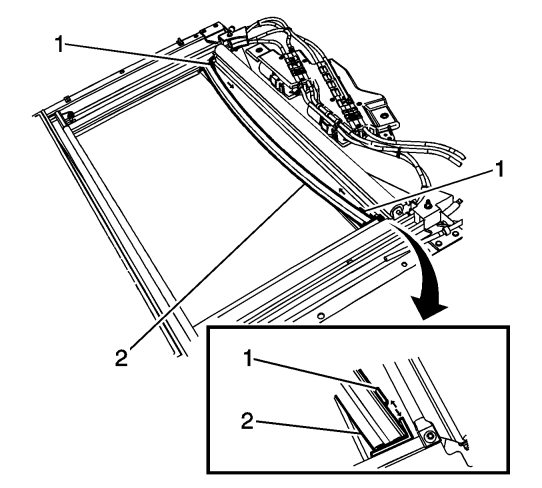
| 5. |
Release the cable guides tabs (1) located at each corner of the sunshade (2) .
|
|
| 6. |
Allow the sunshade to return to a hard stop and release the tension .
|
|
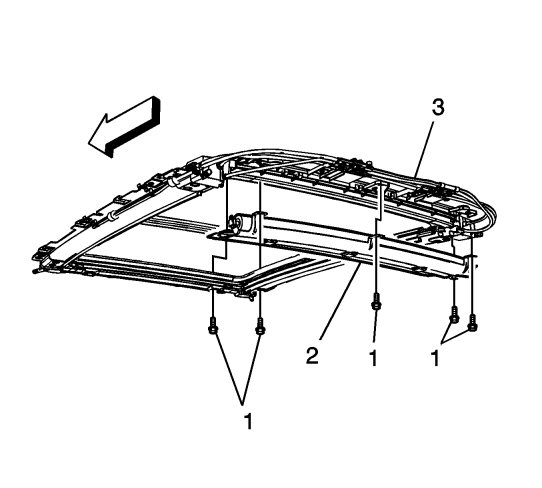
| 7. |
Remove the screws (1) that retain the sunshade bracket (2) to the sunroof assembly (3).
|
|
| 8. |
Remove the sunshade with the sunshade bracket from the vehicle as a assembly.
|
|
| 9. |
Move the sunshade (1) until the sunshade cam locking hole (2) come in to view. 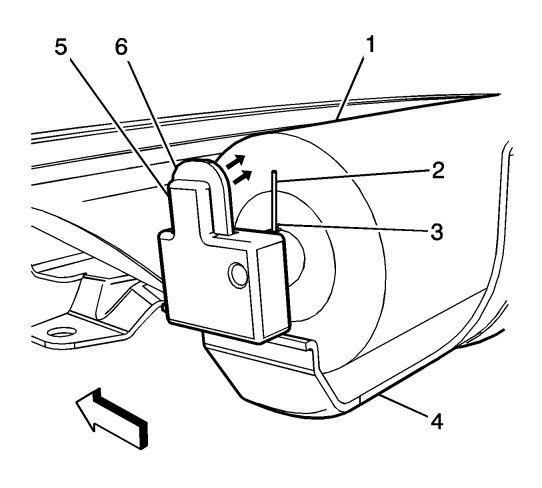
|
||||||||||
| 10. |
Insert a suitable tool (3) into the sunshade cam locking hole.
|
|
| 11. |
Push inward on the end tab (4) releasing the sunshade end lock (5) from the sunshade bracket (6).
|
|
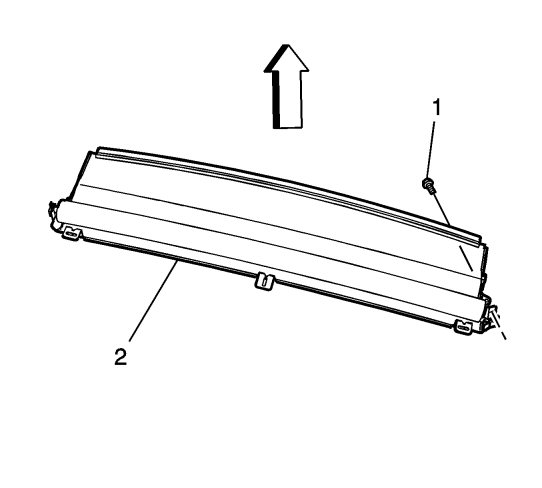
| 12. |
Remove the screw (1) from the passengers side of the sunshade bracket (2).
|
|
| 13. |
Remove the sunshade from sunshade bracket.
|
|
| Installation Procedure |
| 1. |
Install the sunshade to the sunshade bracket by insert the end of the sunshade (1) to the driver side sunshade bracket (2), press downward until it lock in place.
|
|||||||
| 2. |
Refer to
Fastener Caution
.
Install the sunshade bracket screw (1) to the passengers side of the sunshade bracket (2) and tighten to 9 Nm (80 lb in) .
|
|
| 3. |
Remove the suitable tool from the sunshade cam locking hole.
|
|
| 4. |
Install the screws (1) that retain the sunshade bracket (2) to the sunroof assembly (3) and tighten to
9 Nm (80 lb in)
|
|
| 5. |
Install the cable guides tabs (1) located at each corner of the sunshade, lock in place.
|
|
| 6. |
Install the white plastic retainers, sliding the retainer over sunshade, lock in place.
|
|
| 7. |
Ensure that the sunshade cam is fully seated in the sunshade bracket and the sunshade slides smoothly.
|
|
| 8. |
Install the sunroof window. Refer to
Sunroof Window Replacement - Rear
.
|
|
| 9. |
Install the headliner. Refer to
Headlining Trim Panel Replacement (With C3U)
Headlining Trim Panel Replacement (Without C3U)
.
|
|
| 10. |
Verify the operation of the sunshade.
|
|
