PRE-RELEASE
Piston
| Piston |
(in car)
| To remove |
| 1. |
Remove the lower engine cover.
|
|
| 2. |
Place a receptacle under the engine and drain the engine oil.
|
|
| 3. |
Disconnect the oil temperature sensor.
|
|
| 4. |
Remove the oil sump. Wipe off any dripping oil.
|
||||||||||
| 5. |
Remove the
Cylinder head
.
|
|
| 6. |
Lock the balancer shafts with
83 95 469 Setting tool, balancer shafts
and remove the cover over the balancer shaft timing chain.
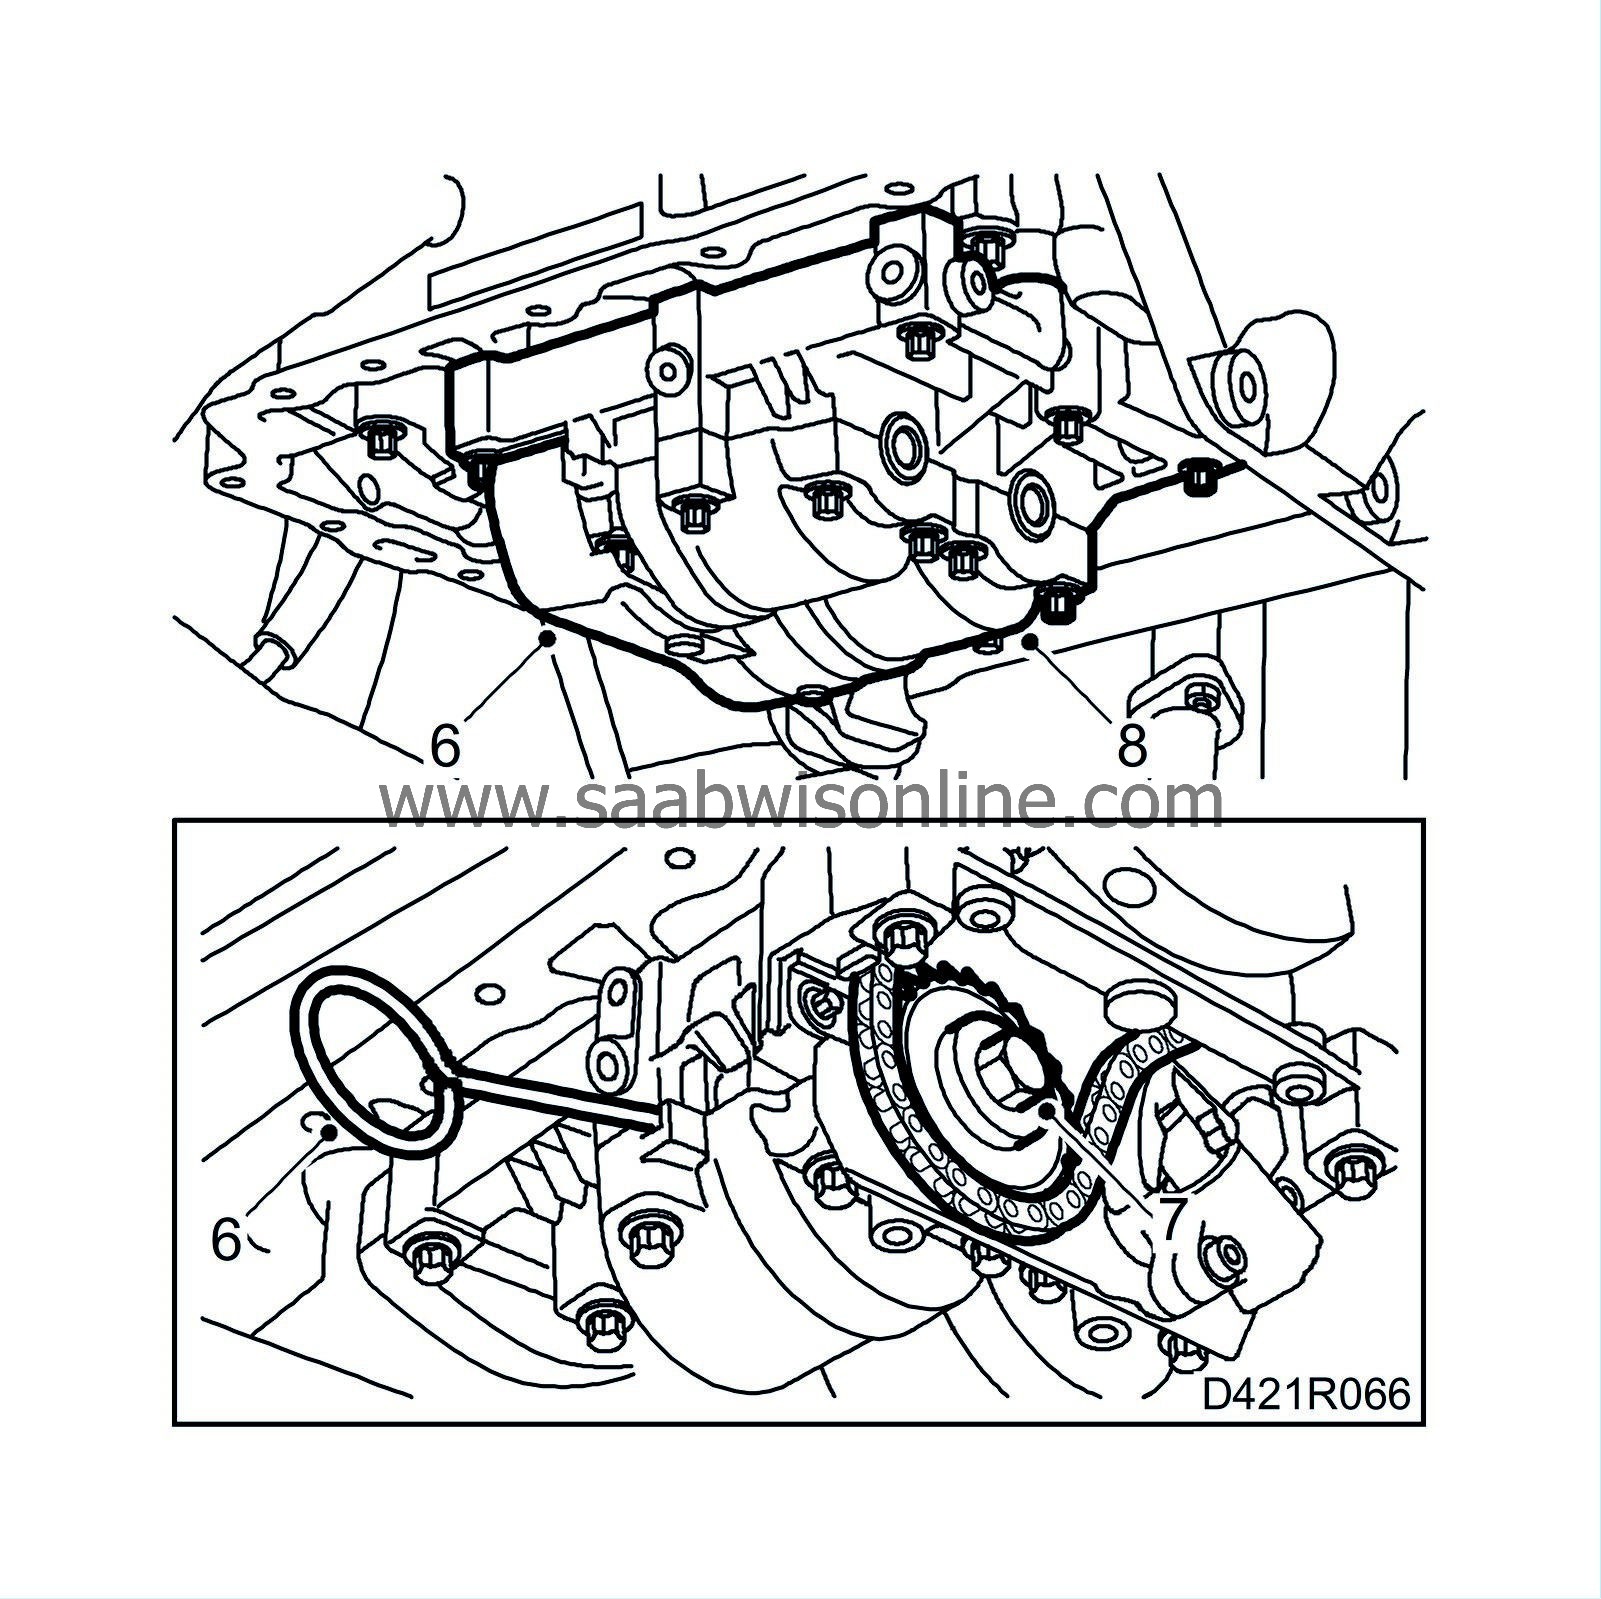
|
|
| 7. |
Move back and lock the balancer shaft chain tensioner and remove the pulley from the balancer shaft.
|
|
| 8. |
Undo the 7 outer bolts and remove the balancer shafts as one unit.
|
|
| 9. |
Mark the big-end caps to facilitate refitting.
|
||||||||||
| 11. |
Remove any burrs or carbon deposits from the tops of the cylinders.
|
|
| 12. |
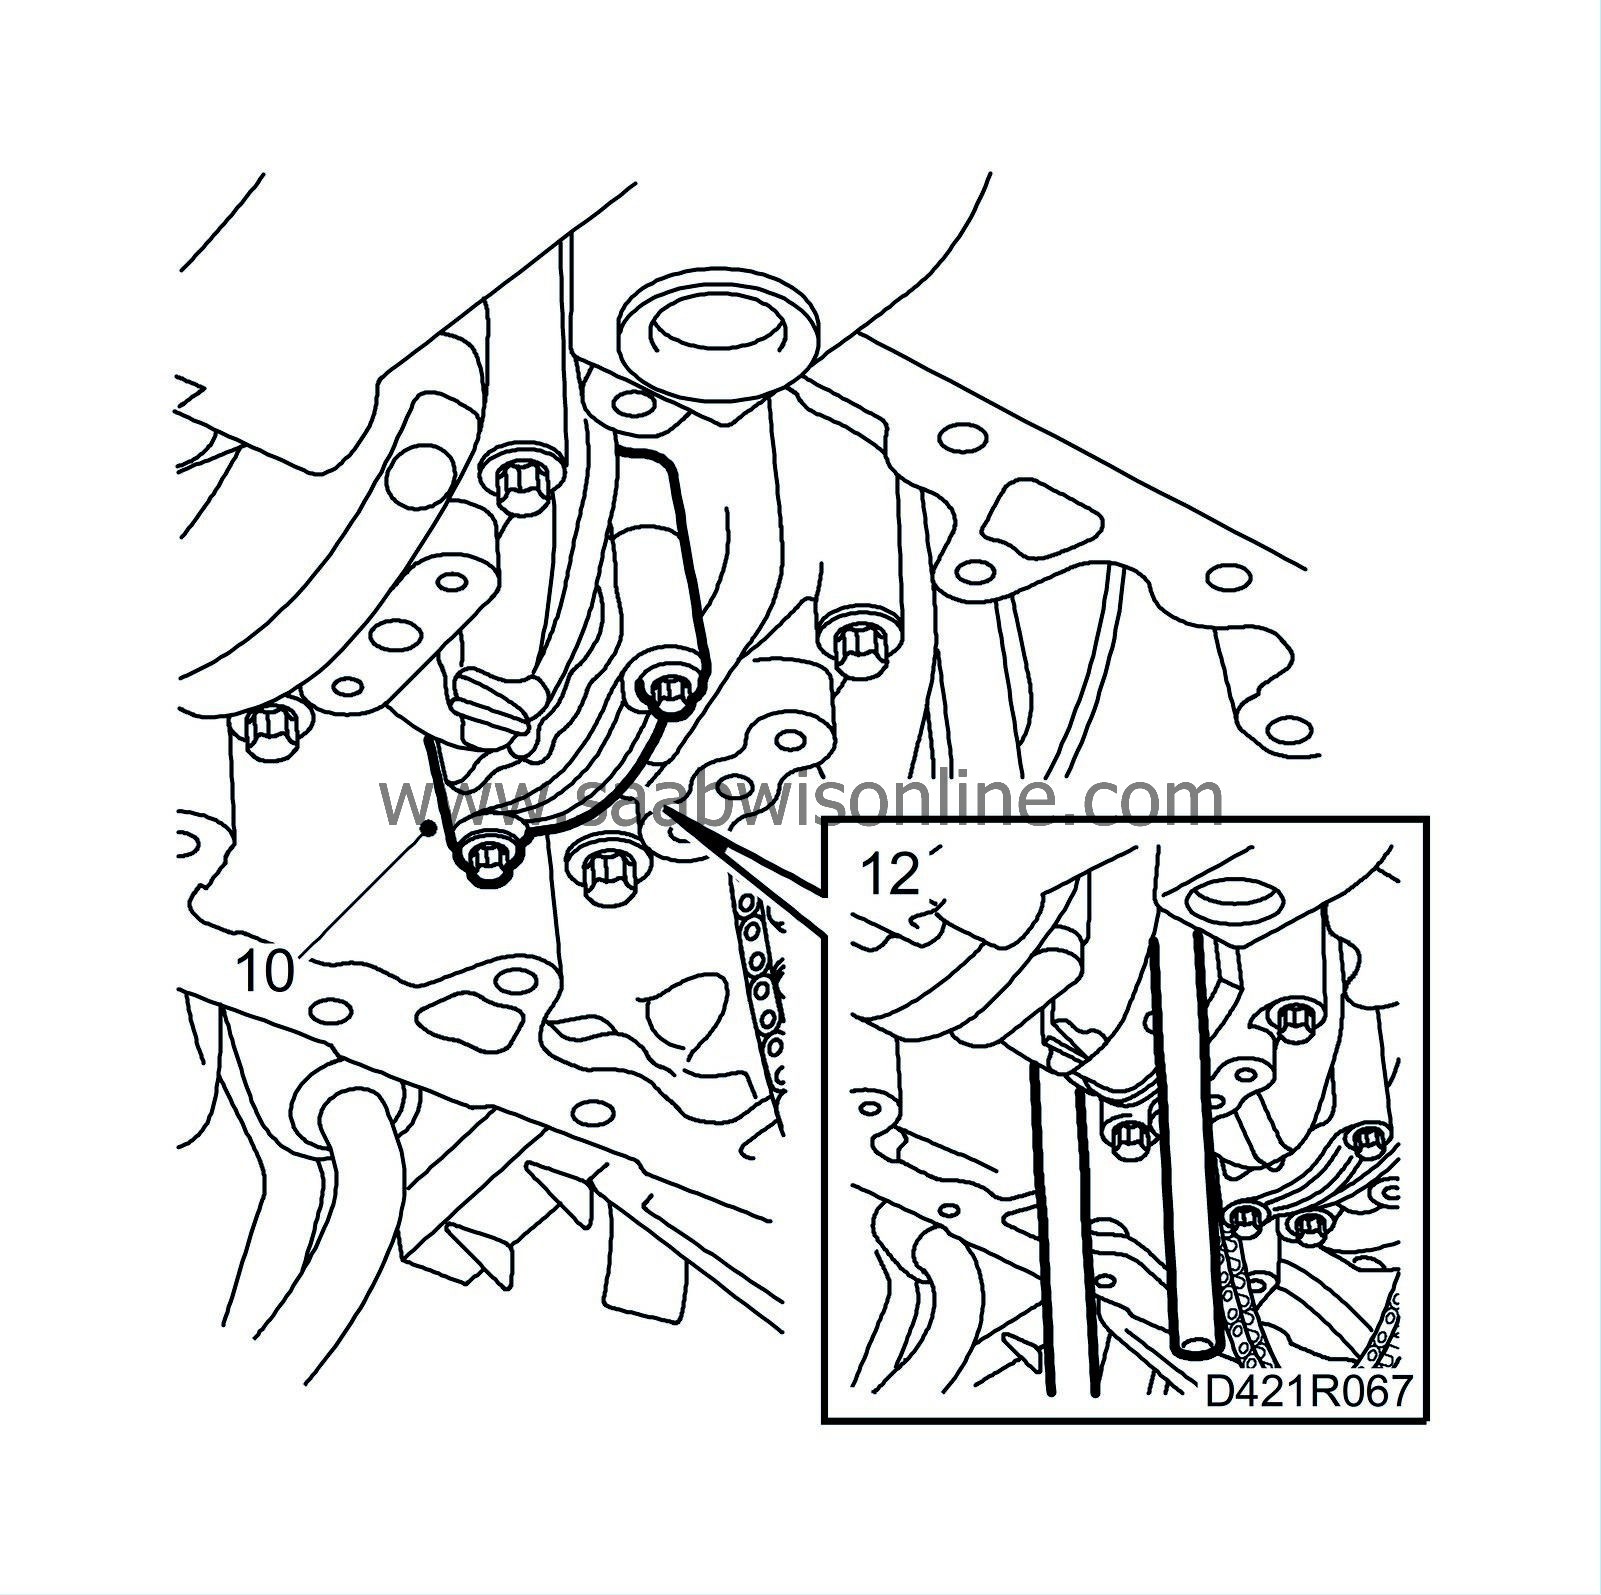
Screw the bolts into the connecting rods and fit
75 19 531 Protective collar (type 10)
onto the studs. Slide out the pistons and connecting rods from the cylinders. Note the marks on the pistons and connecting rods so they can be refitted in the same places. Fit the bearing shells and caps loosely on the connecting rods so that the parts do not get mixed up.
|
|
| 13. |
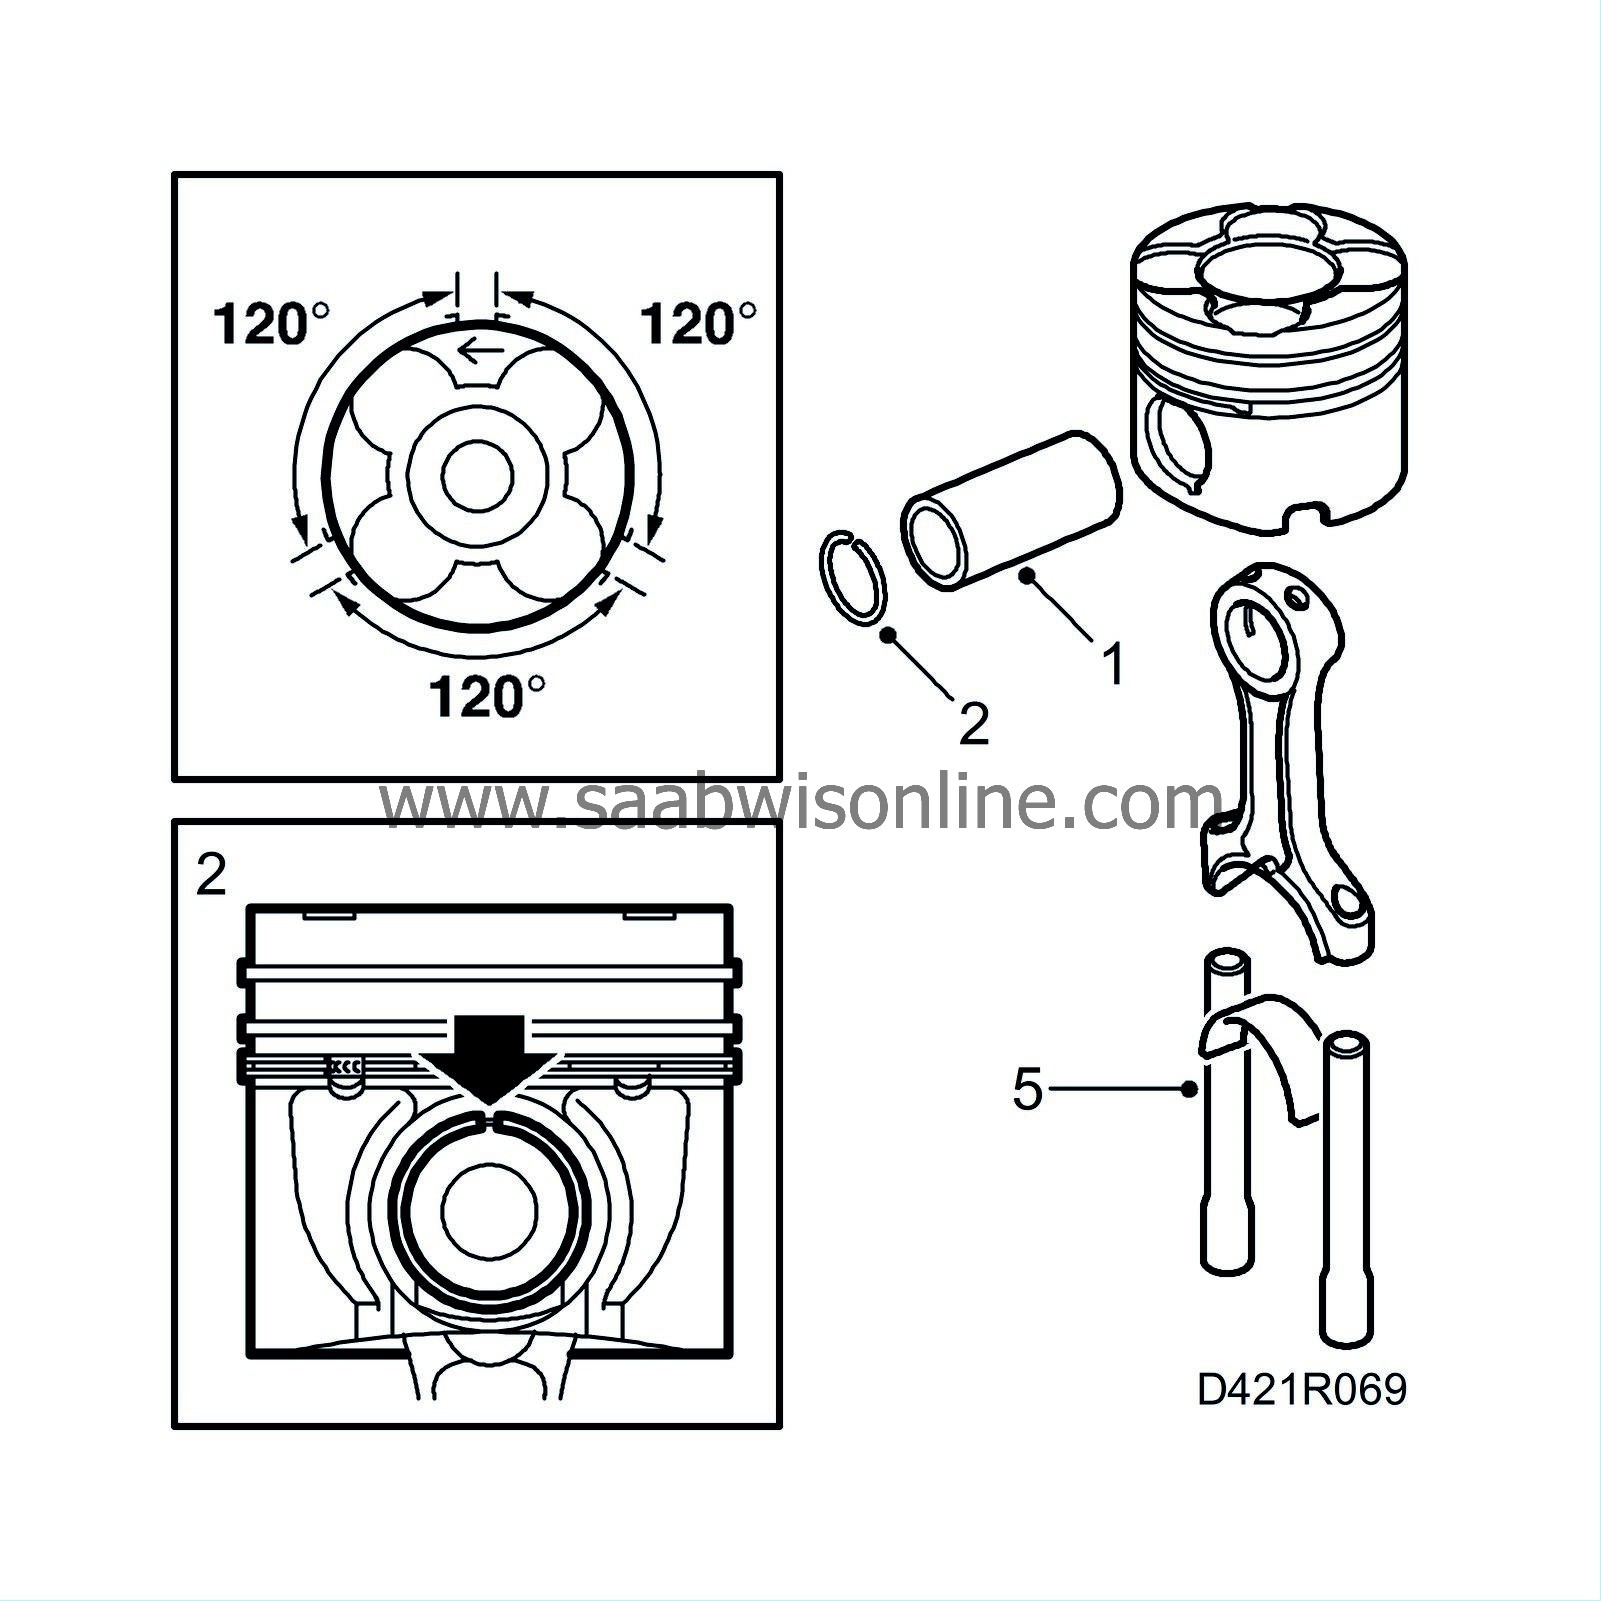
Note the positions of the connecting rods and pistons (the boss on the connecting rod must point in the opposite direction to the arrow on top of the piston). Remove the gudgeon pin circlip and press out the gudgeon pin by hand.

|
|
| To fit |
| 1. |
Lubricate the gudgeon pin with engine oil and press it in place in the piston and connecting rod by hand. Make sure the arrow on the piston and the boss on the connecting rod are pointing in opposite directions.
|
|
| 2. |
Fit the gudgeon pin circlip.
|
|||||||||
| 3. |
Make sure the piston ring gaps are offset 120° from each other.
|
|
| 4. |
Lubricate the piston rings and cylinder with engine oil.
|
|
| 5. |
Screw in the bolts in the connecting rod and press
75 19 531 Protective collar (type 10)
onto the bolt heads to facilitate assembly.
|
|
| 6. |
Turn the crankshaft so that it reaches the top of the stroke in the current cylinder.
|
|
| 7. |
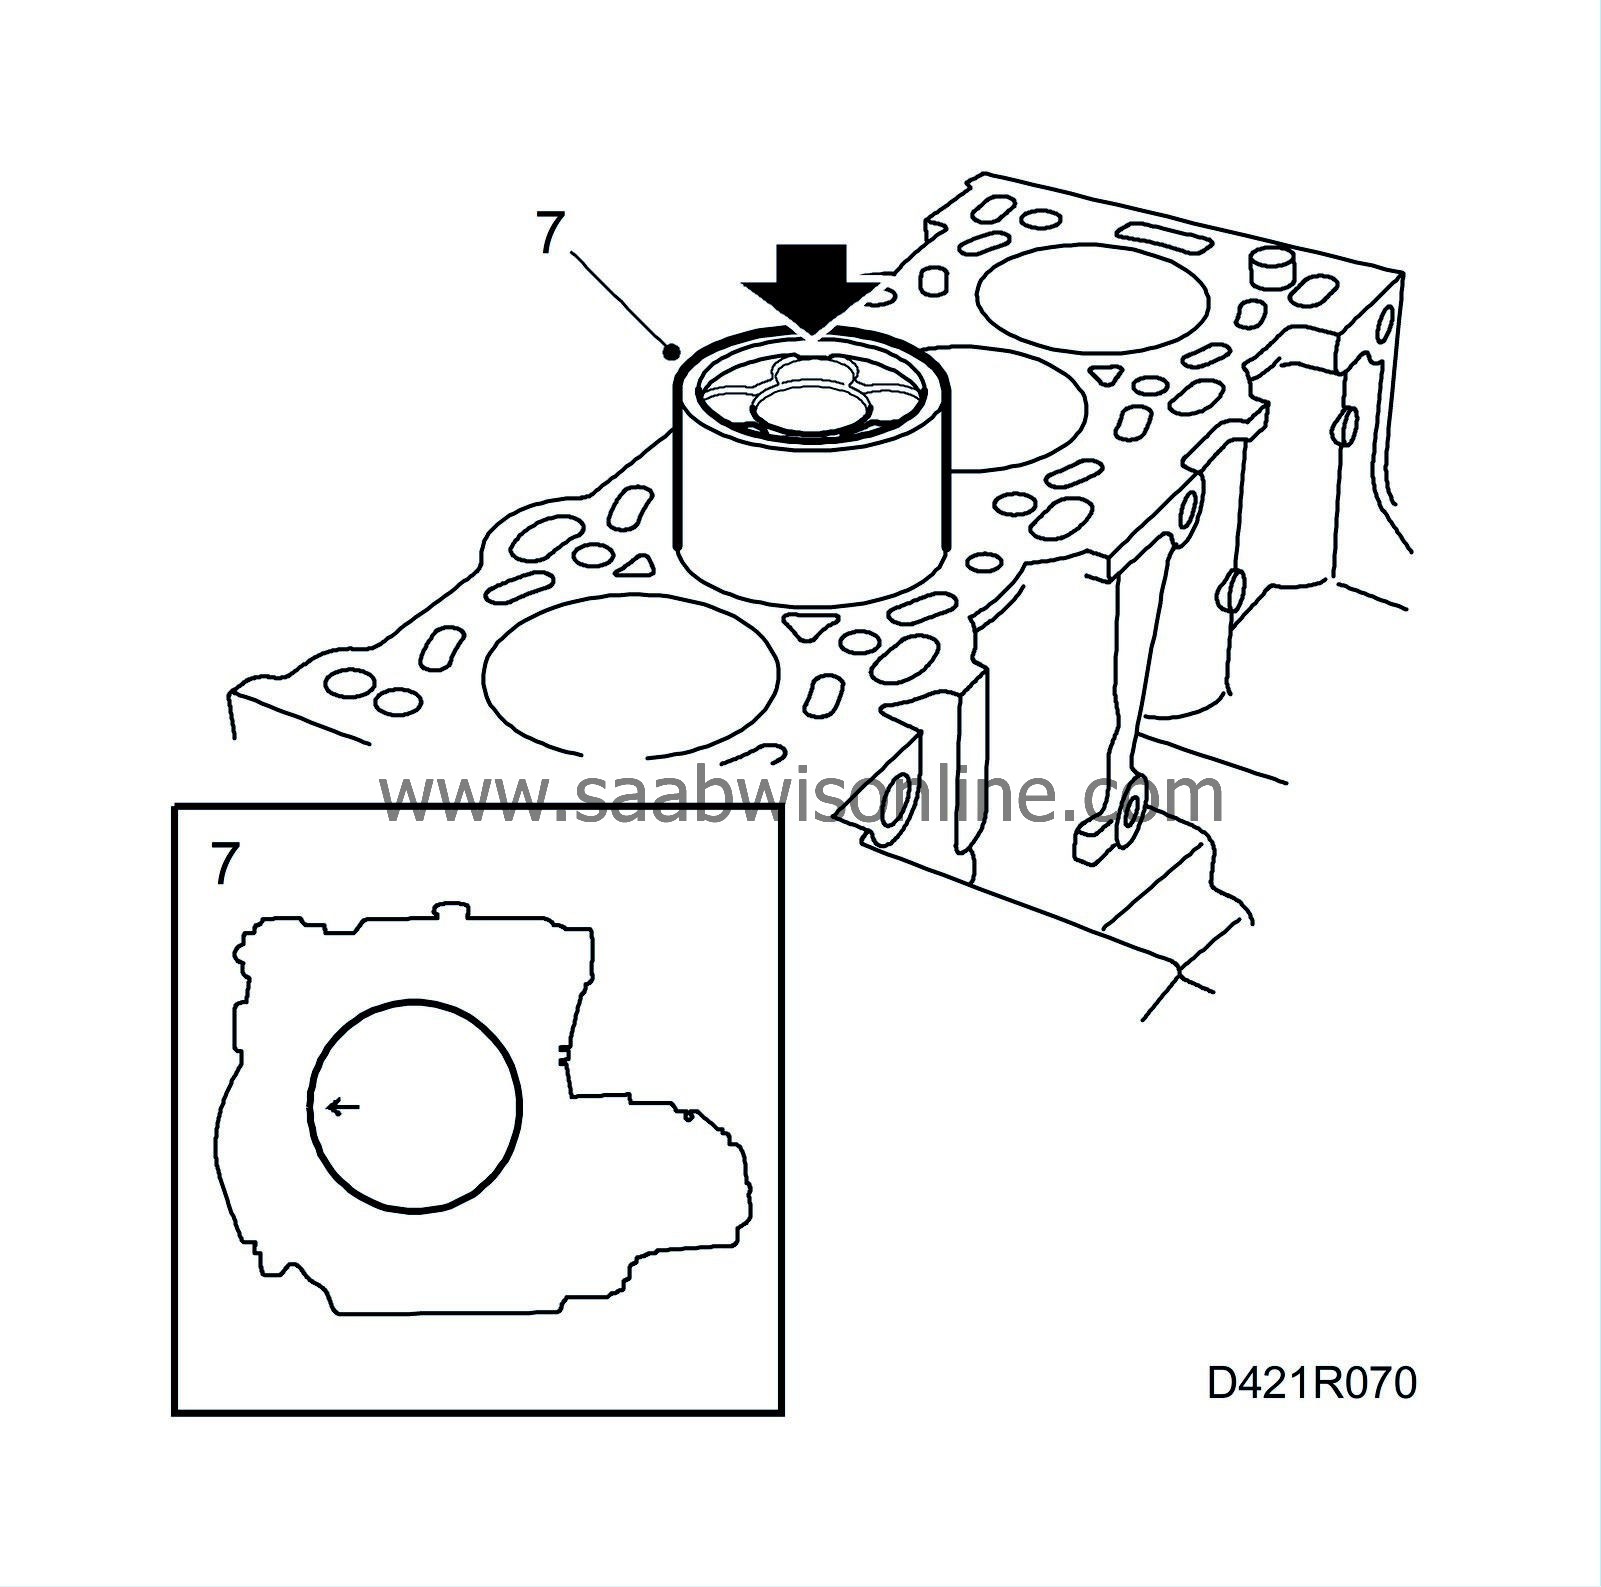
Fit the piston. The arrow on top of the piston must point towards the timing side.
|
|
| 8. |
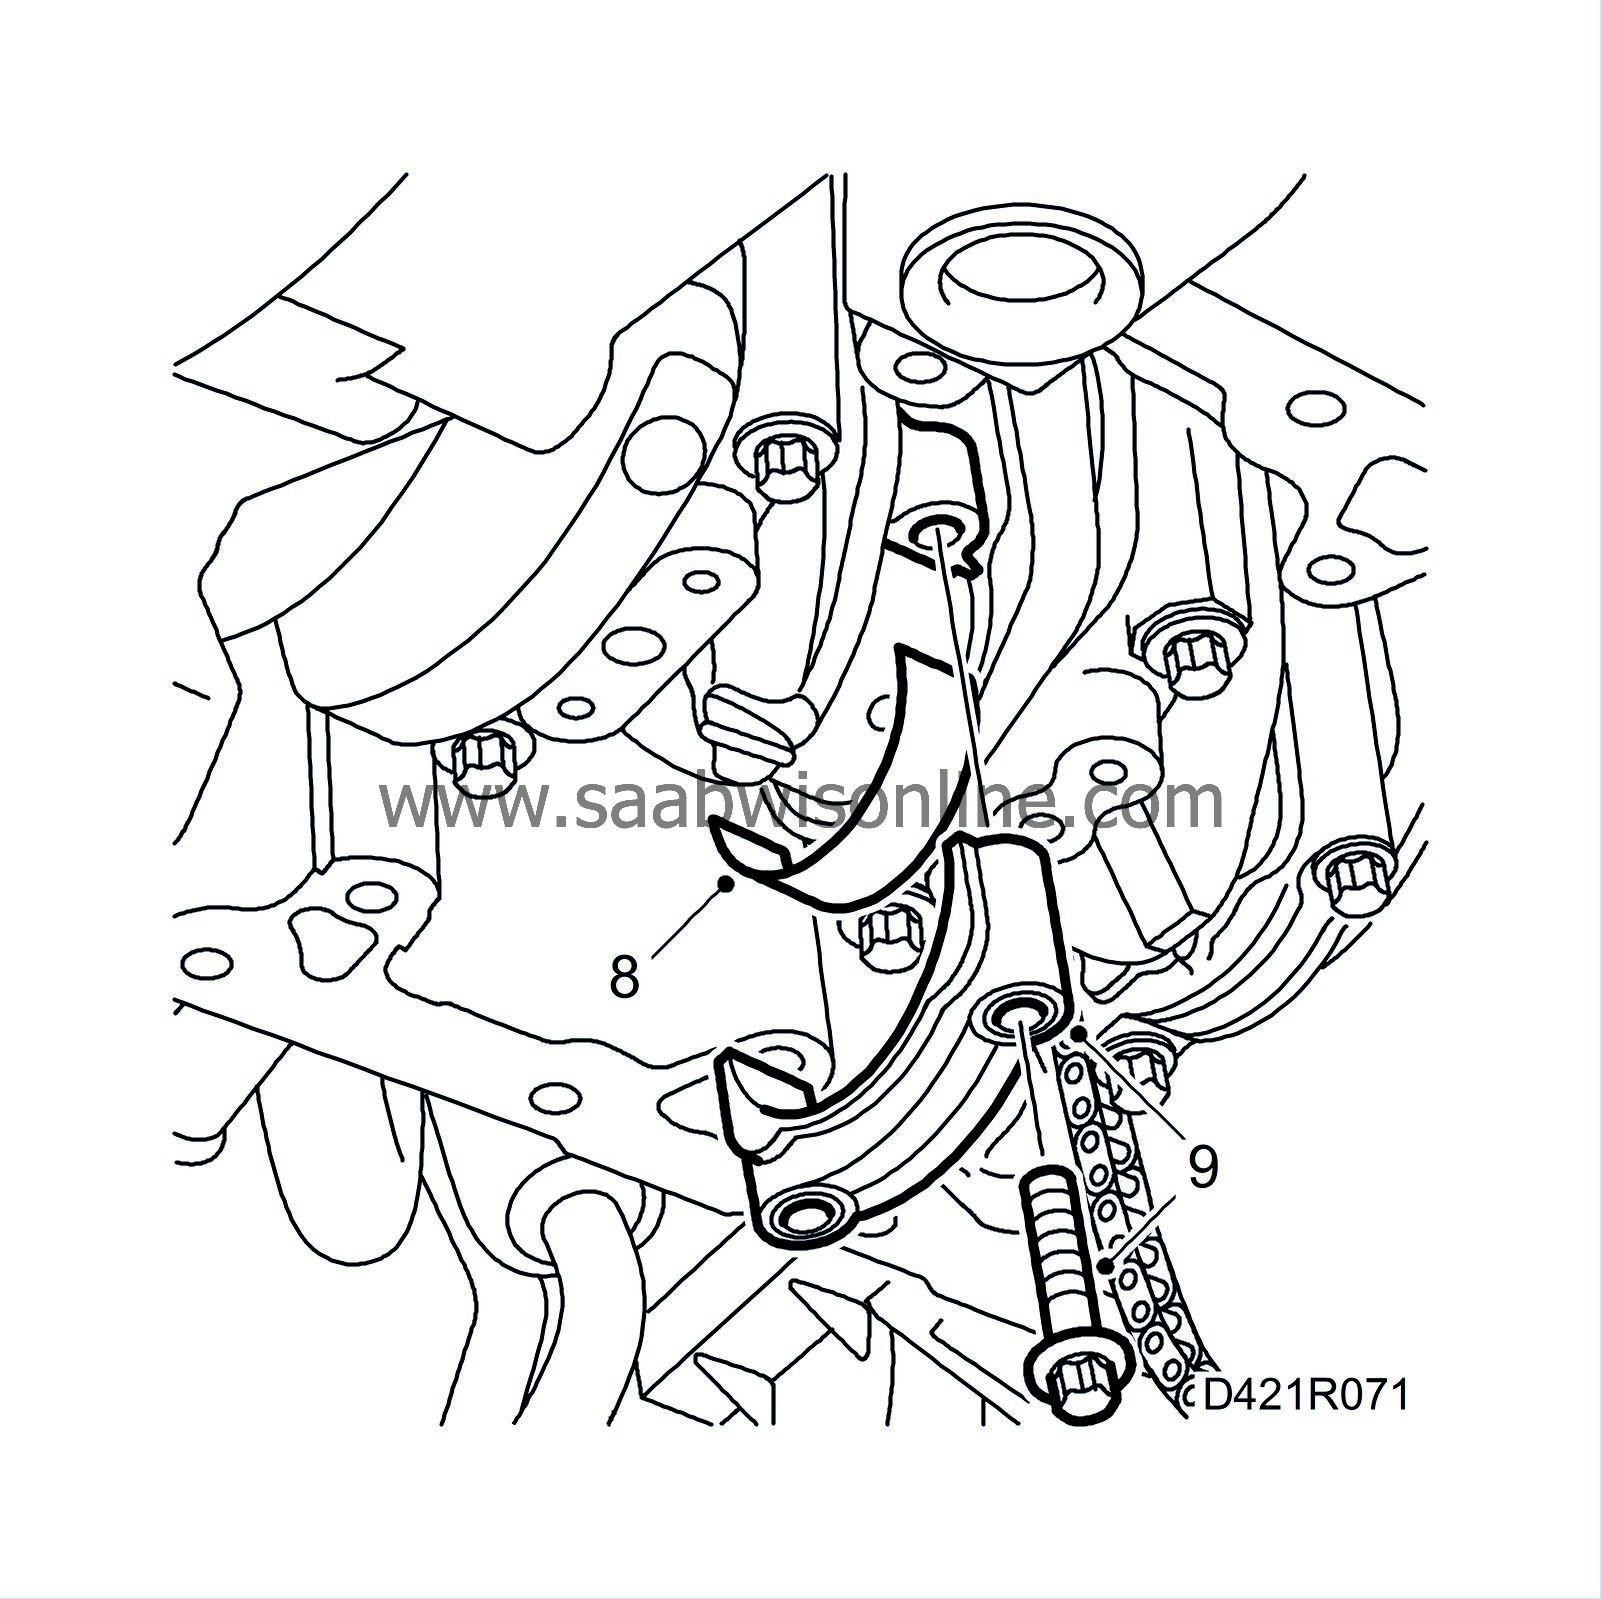
Lubricate the bearing halves with engine oil and put them in their respective places in the connecting rod and cap.
|
|
| 9. |
Note the position in which the big-end bearing caps are fitted (boss in cap pointing towards flywheel) and fit them with new bolts.
Tightening torque: 35 Nm + 45° (26 lbf ft + 45°) |
||||||||||
| 10. |
Fit the balancer shaft unit.
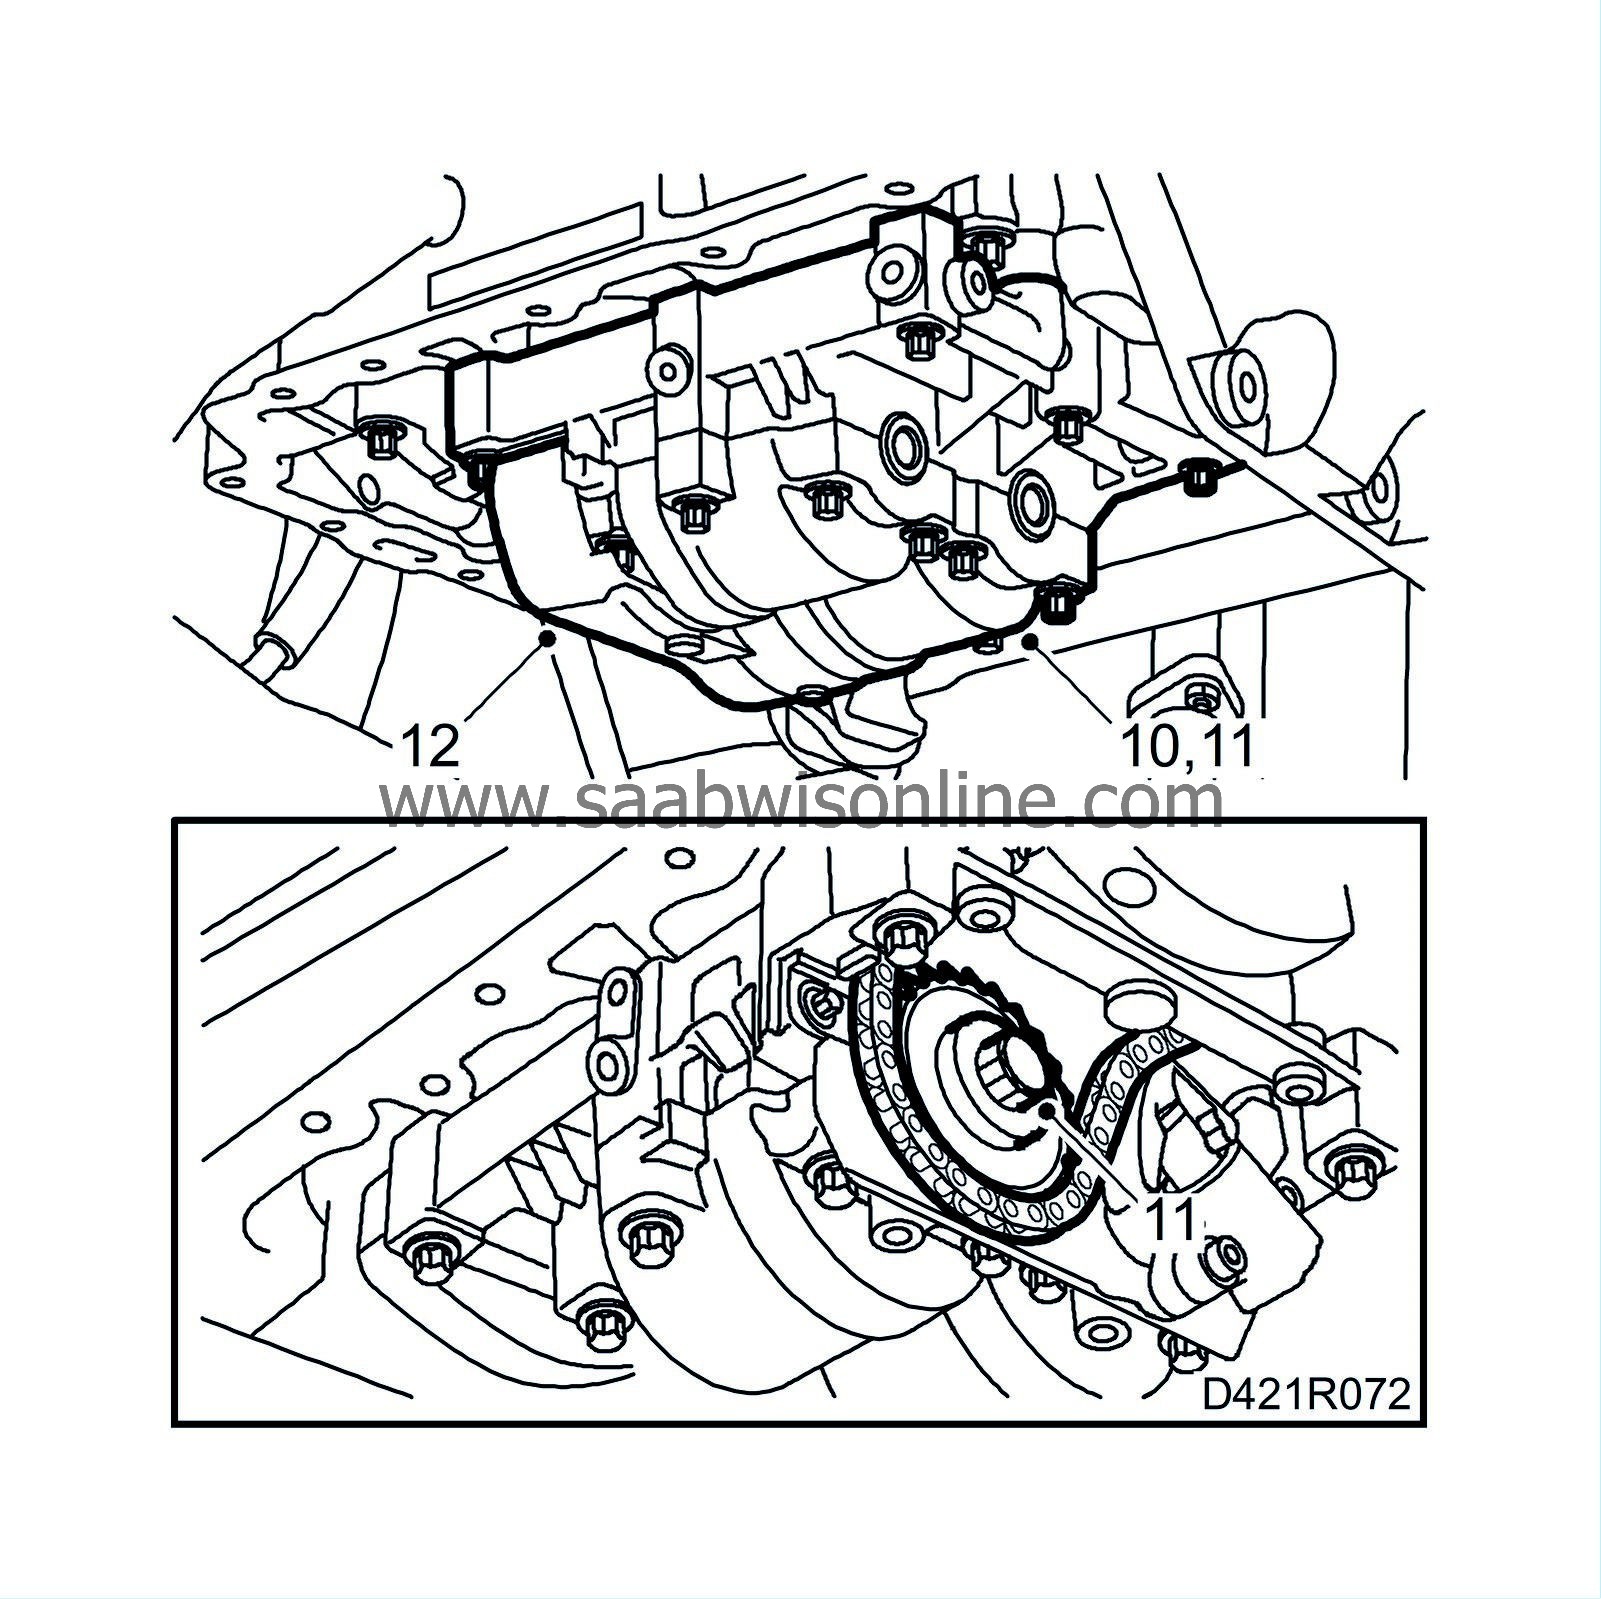
Tightening torque: 20 Nm (15 lbf ft) |
|
| 11. |
Position the pulley on the balancer shaft and tighten the bolt.
Tightening torque: 90 Nm + 30° (66 lbf ft + 30°) |
|
| 12. |
Release the chain tensioner and fit the cover plate.
|
|
| 13. |
Fit the
Cylinder head
.
|
|
| 14. |
Check that there are no impurities or other foreign matter in the sump and clean the sealing surfaces with benzine.
|
|
| 15. |
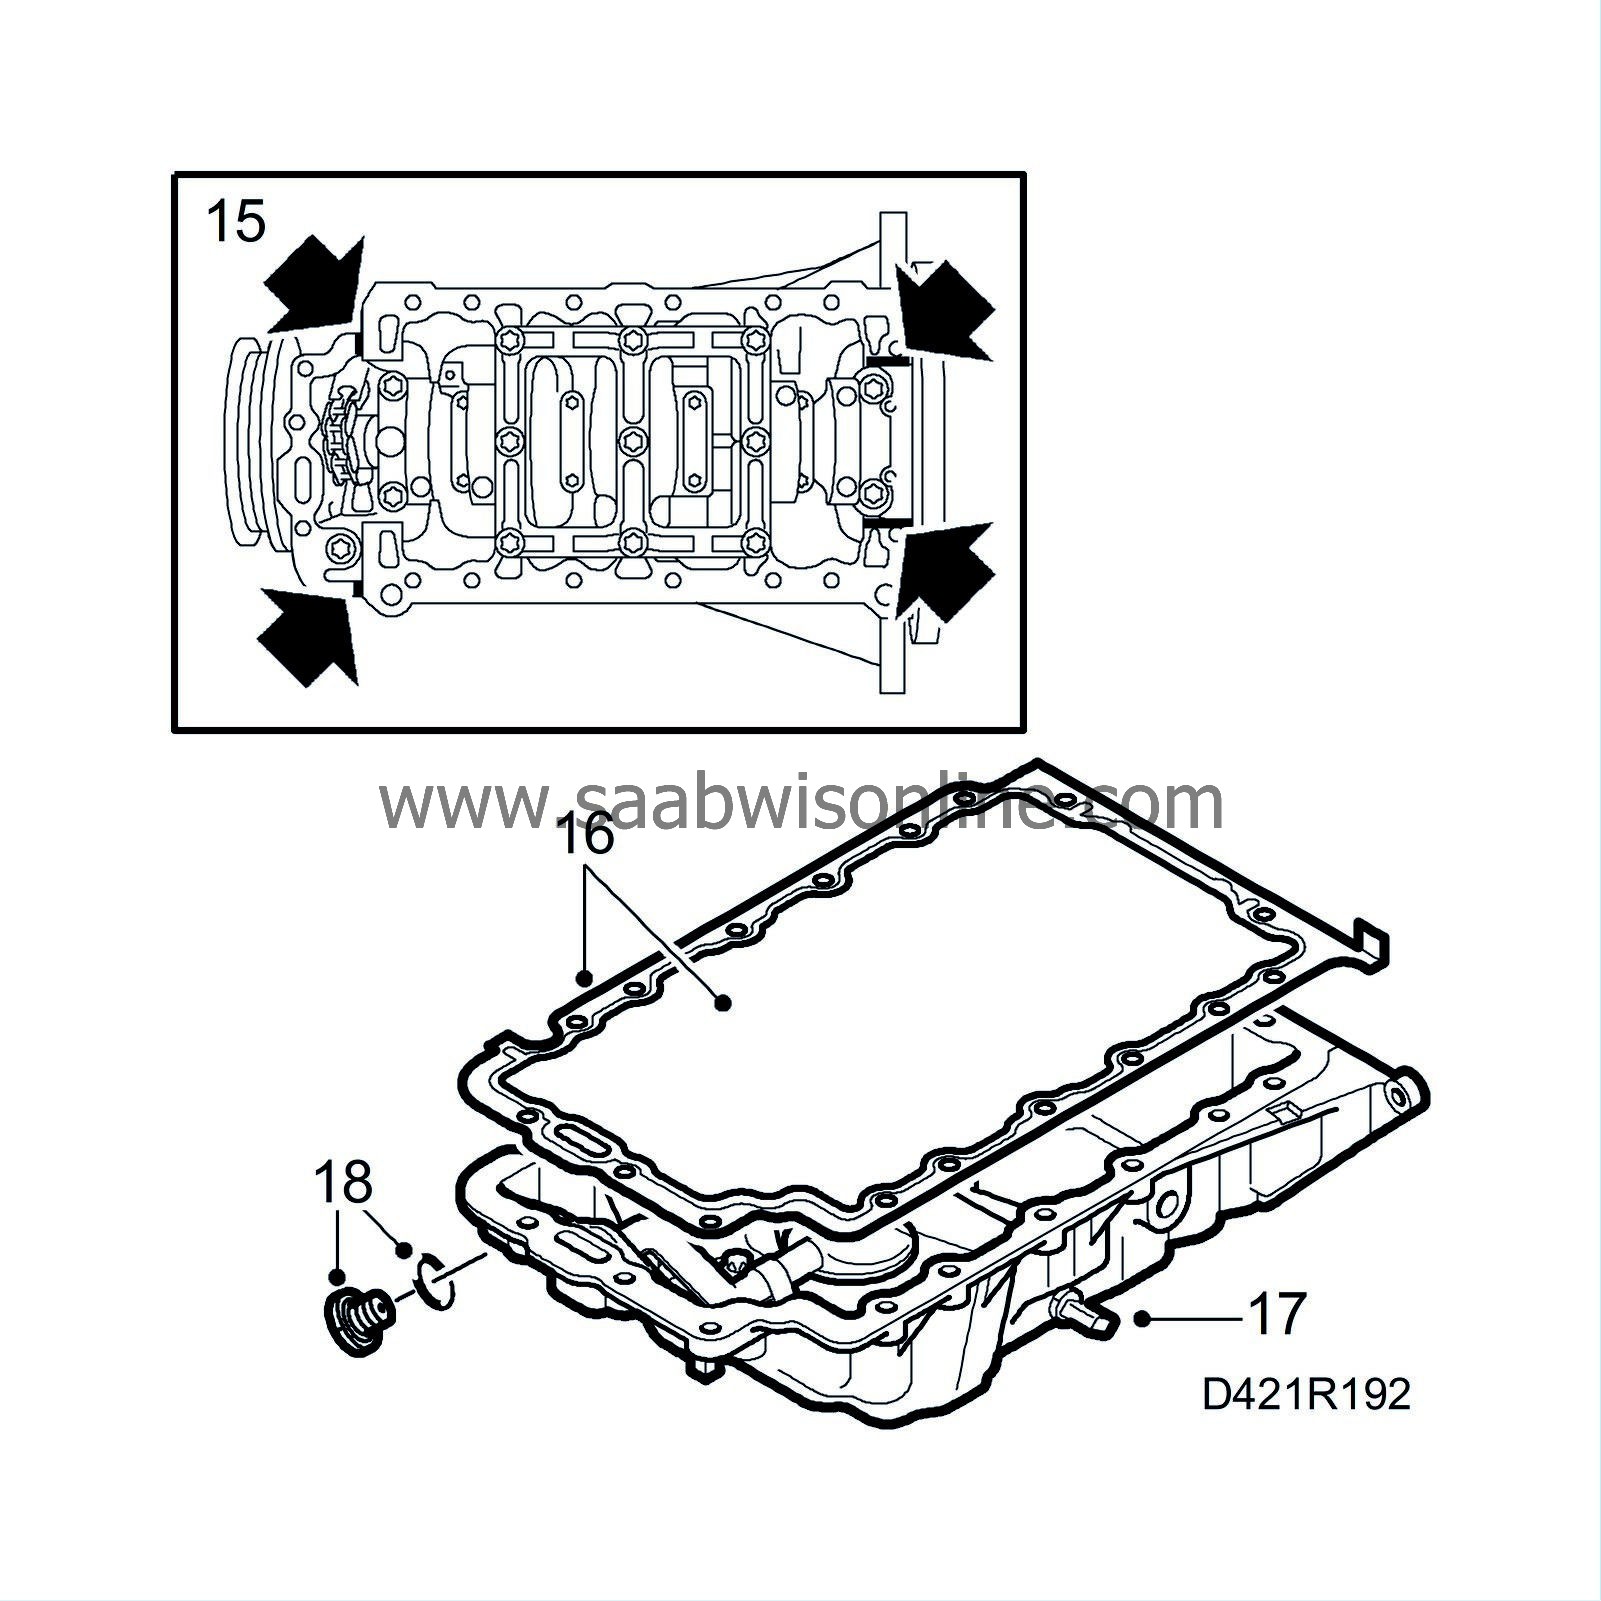
Apply
87 81 841 Silicon flange sealant
on the partition joints, see illustration.
|
|
| 16. |
Position the oil sump against the gearbox and fit it with new gaskets.
Tightening sequence: 1 Tighten all bolts by hand. 2 Tighten the bolts in the cylinder head and timing cover: 20 Nm (15 lbf ft). 3 Tighten the bolts in the gearbox: - 20 Nm (15 lbf ft) (M8) - 40 Nm (30 lbf ft) (M10) |
|
| 17. |
Connect the oil temperature sensor.
|
|
| 18. |
Refit the oil plug with a new seal.
Tightening torque: 18 Nm (13 lbf ft). |
|
| 19. |
Fit the lower engine cover.
|
|
| 20. |
Fill with engine oil as specified, see lubricating schedule, lubricants (link)
|
|

 Warning

