PRE-RELEASE
Brake servo, LHD
| Brake servo, LHD |
| To remove |
| 1. |
Remove the lower dashboard section on the driver's side.
|
|
| 2. |
Remove the battery.
|
|
| 3. |
Remove
Master cylinder, LHD
.
|
|
| 4. |
Remove
ESP unit with control module
.
|
|
| 5. |
Detach the vacuum hose from the brake servo.

|
|
| 6. |
Remove the connector cover.
|
|
| 7. |
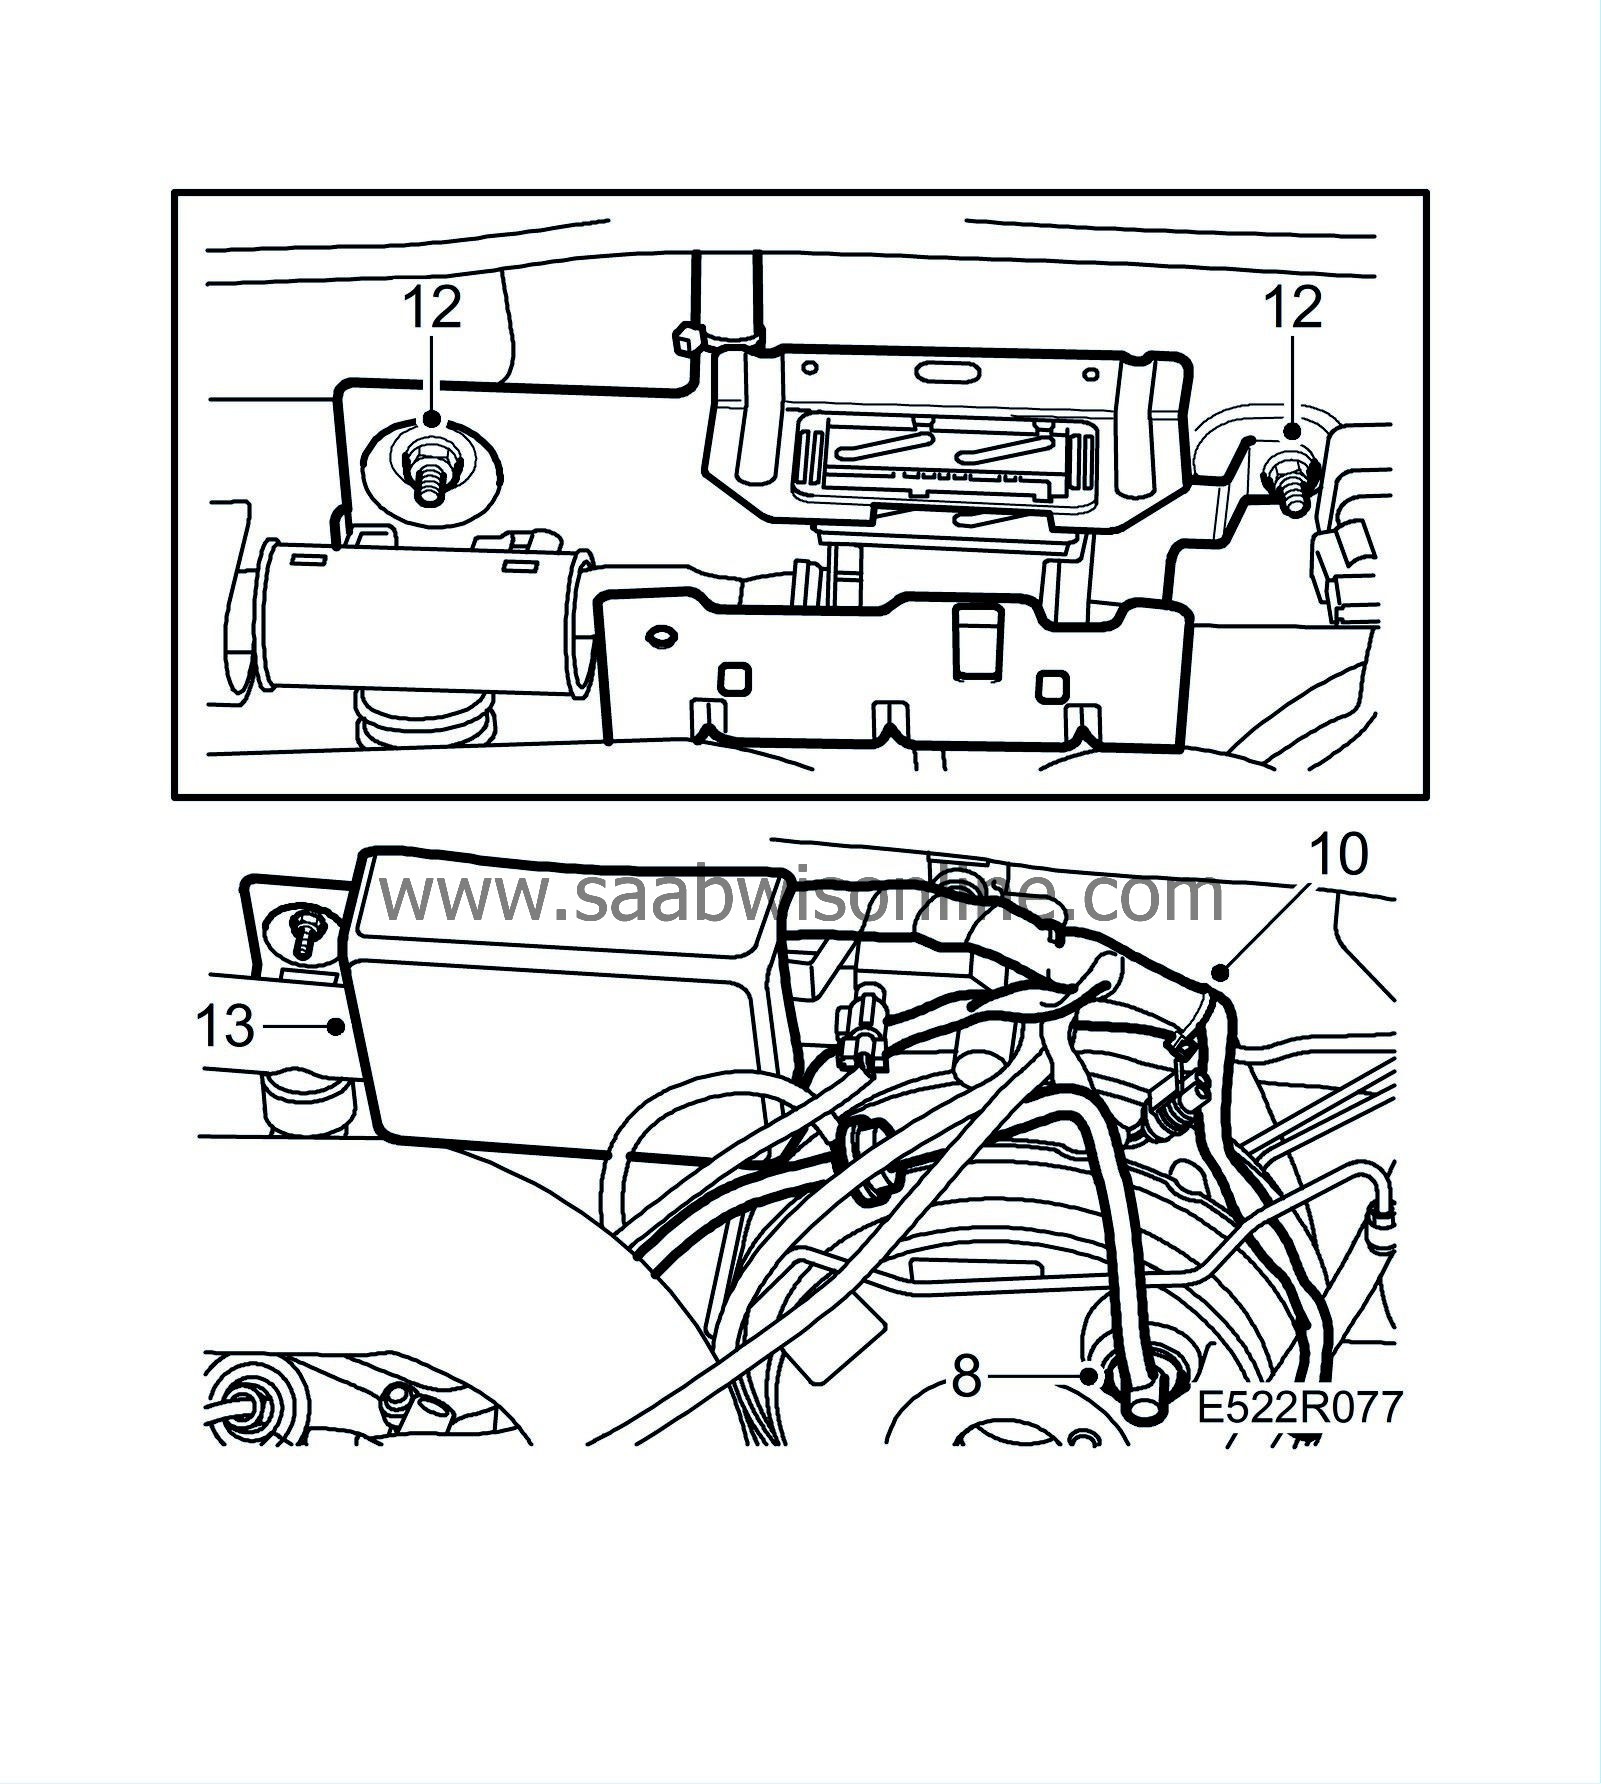
Unplug the connector of the engine harness.
|
|
| 8. |
Cut off the cable tie.
|
|
| 9. |
Remove the bonnet switch.
|
|
| 10. |
Cars with water valve
: Unplug the connector for the water valve. Take care not to break the connector.
|
|
| 11. |
Remove the bracket of the engine harness.
|
|
| 12. |
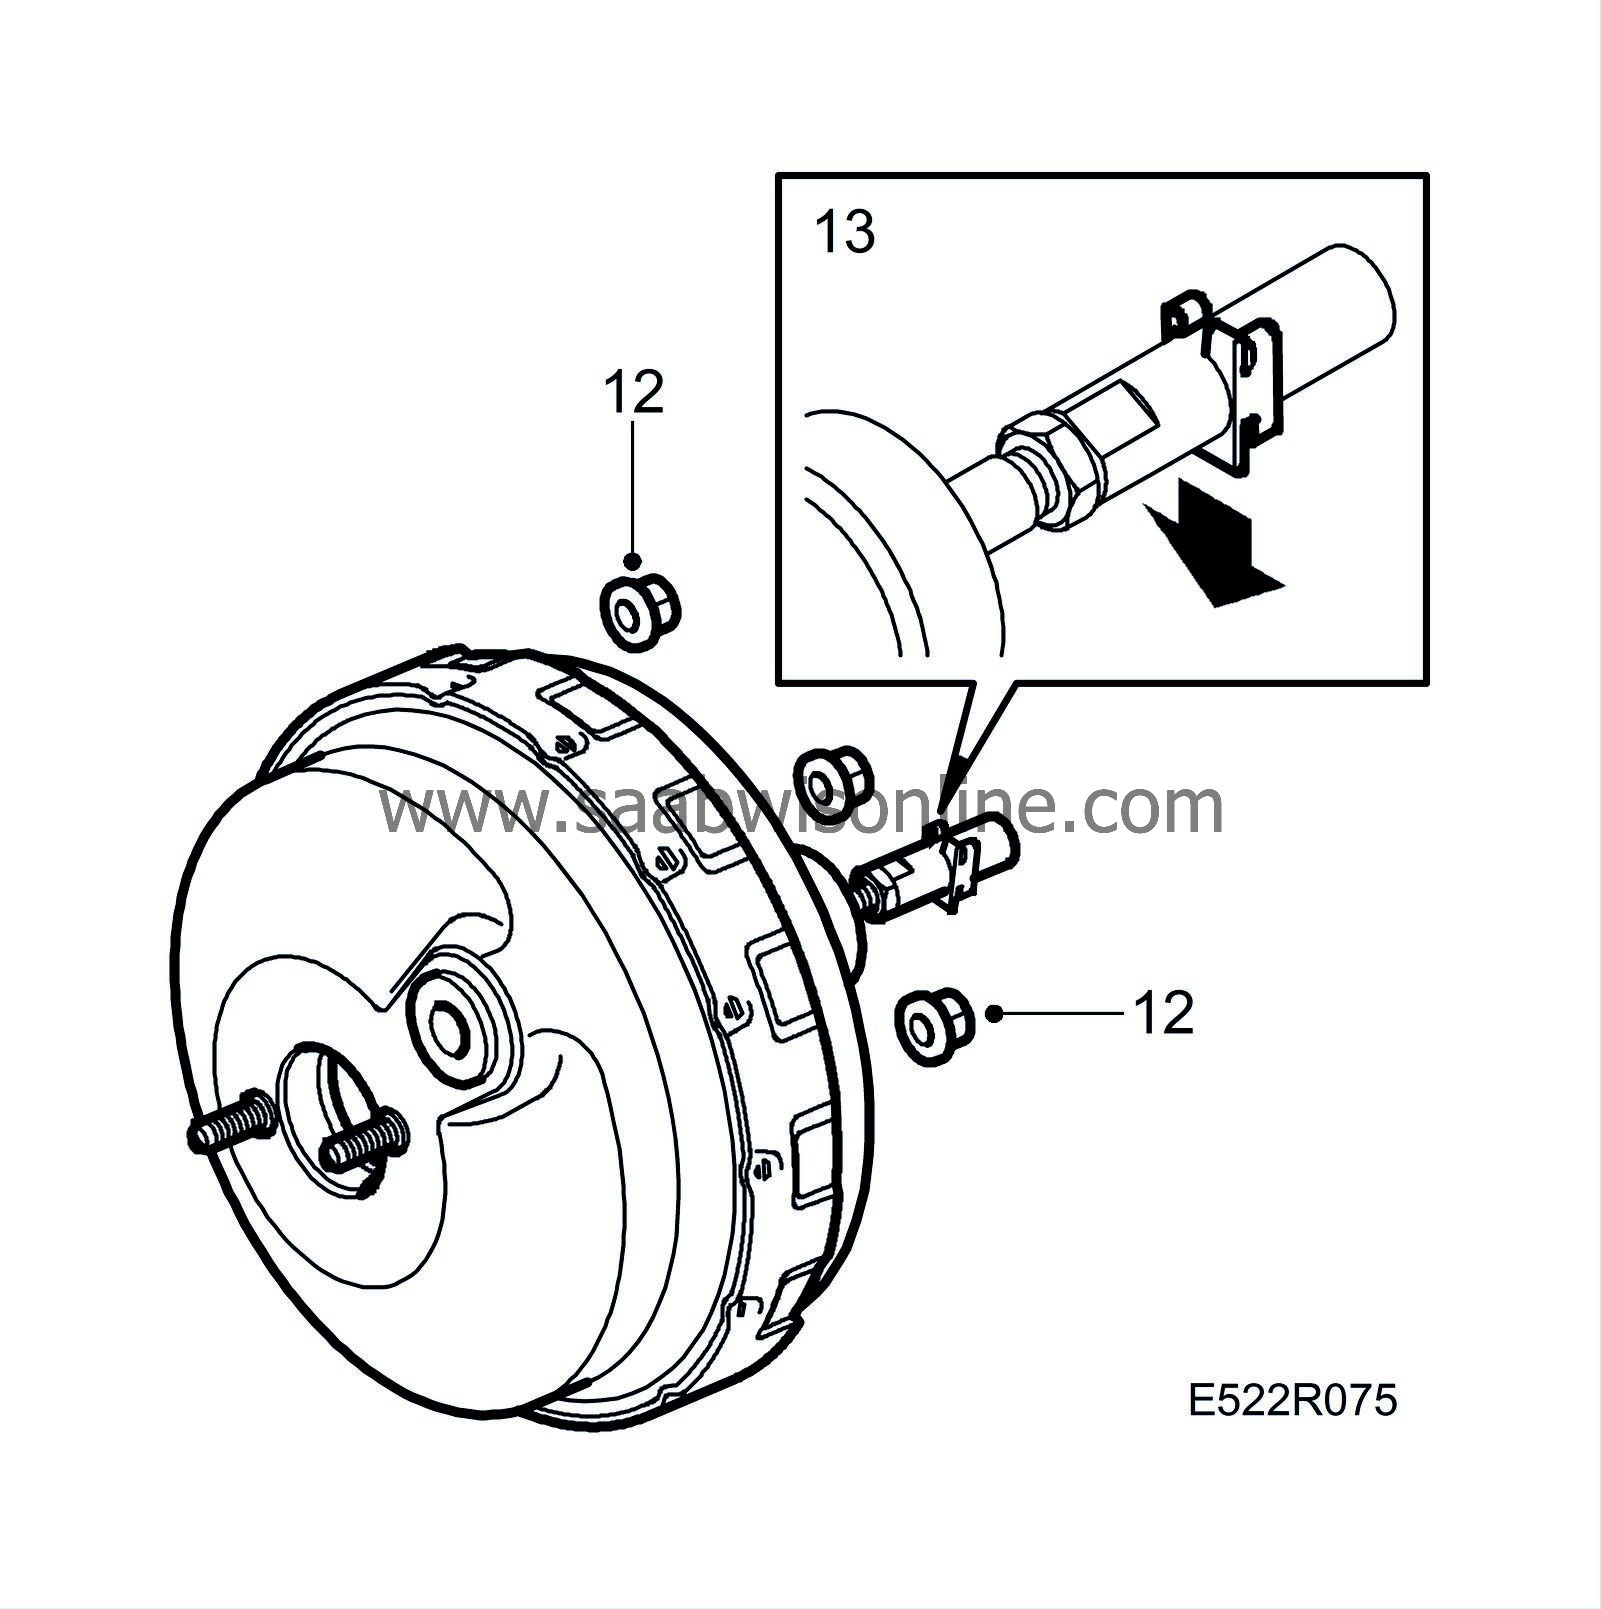
Remove the brake servo retaining nuts from the bracket.

|
|
| 13. |
Remove the clip on the pushrod and lift out the brake servo.
|
|
| To fit |
| 1. |
Depress the brake pedal by means of a brake pedal clamp.
|
|||||||
| 2. |
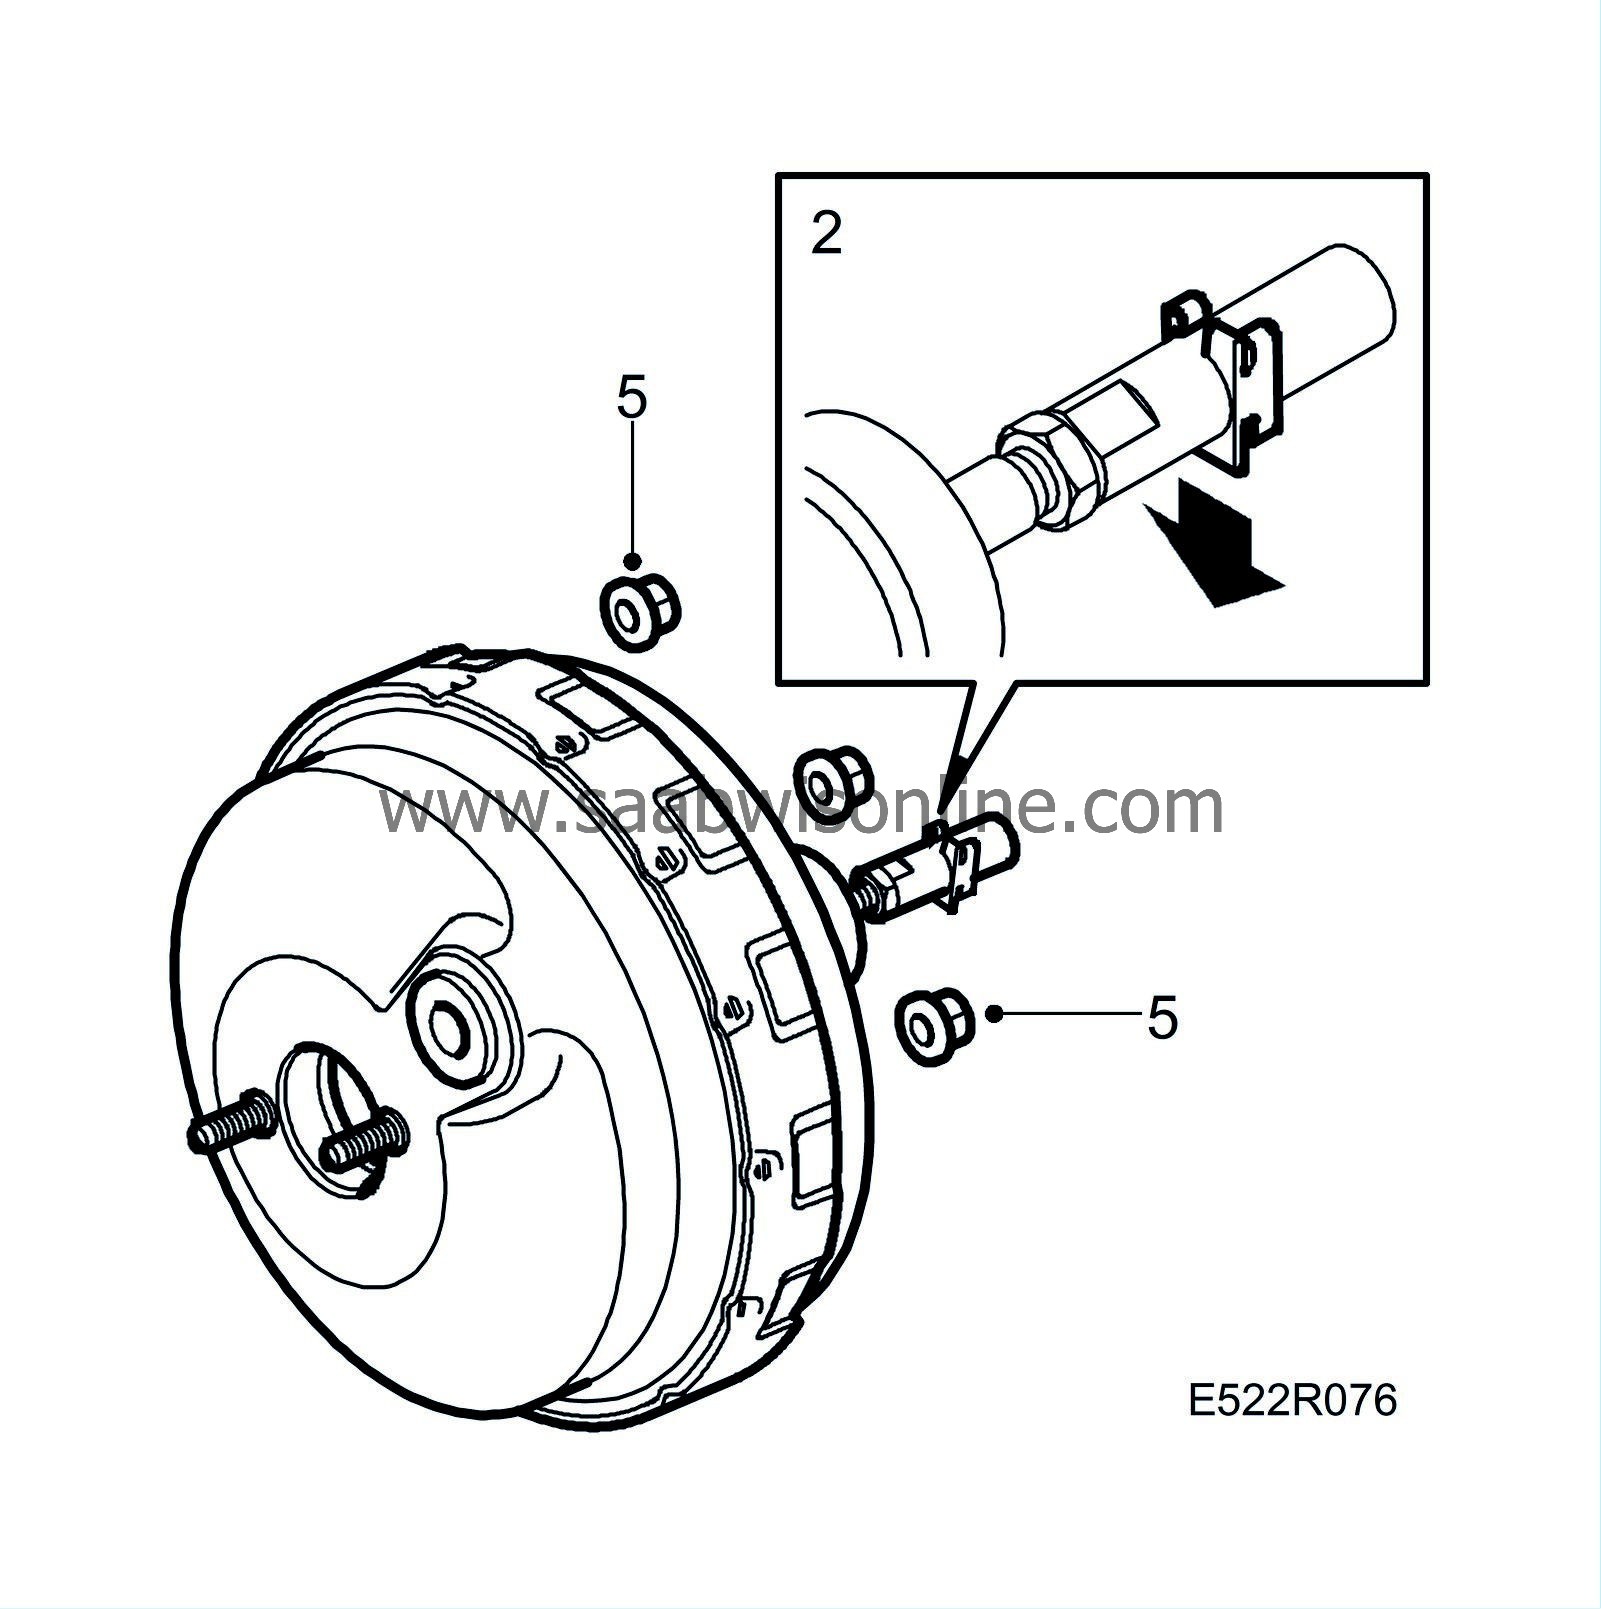
Connect the pedal and brake servo pushrods. Make sure that the brake pedal pushrod reaches far enough that it is secured by the clip.

|
|
| 3. |
Position the brake servo in the bracket.
|
|
| 4. |
Remove the brake pedal clamp.
|
|
| 5. |
Fit the brake servo nuts.
Tightening torque: 24 Nm (18 lbf ft) |
|
| 6. |
Depress the brake pedal and pull out the self adjustment mechanism for the pedal switches.
Check that the pushrod is positioned correctly by pulling the brake pedal rearward. The pedal should not move. |
|
| 7. |
Fit the lower dashboard section.
|
|
| 8. |
Attach the vacuum hose to the brake servo.

|
|
| 9. |
Fit the master cylinder; see
To fit
.
|
|
| 10. |
Attach a new cable tie.
|
|
| 11. |
Cars with water valve
: Plug in the connector to the water valve.
|
|
| 12. |
Fit the bracket of the engine harness.
|
|
| 13. |
Plug in the connector for the engine wiring harness and fit the cover.
|
|
| 14. |
Fit the bonnet switch.
|
|
| 15. |
Fit
ESP unit with control module
.
|
|
| 16. |
Manual gearbox:
Fit clutch hose to the brake fluid reservoir.
|
|
| 17. |
Fit the electrical distribution unit.
|
|
| 18. |
V6 diesel engine:
Fit the turbocharger heat shield.
|
|
| 19. |
Fit the battery and the battery cover.
|
|
| 20. |
Fill with brake fluid and bleed the brake system; see
Bleeding the brake system
.
|
|
| 21. |
Set the clock and enter the radio code (if applicable).
|
|


