Body Hinge Pillar Panel Reinforcement Replacement
|
|
Body Hinge Pillar Panel Reinforcement Replacement
|
Refer to
Approved Equipment for Collision Repair Warning
.
Refer to
Glass and Sheet Metal Handling Warning
.
|
4.
|
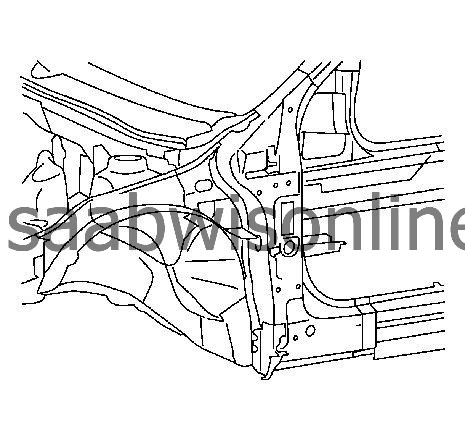
Visually inspect the damage. Repair as much of the damage as possible.
|
|
6.
|
|
Note
|
|
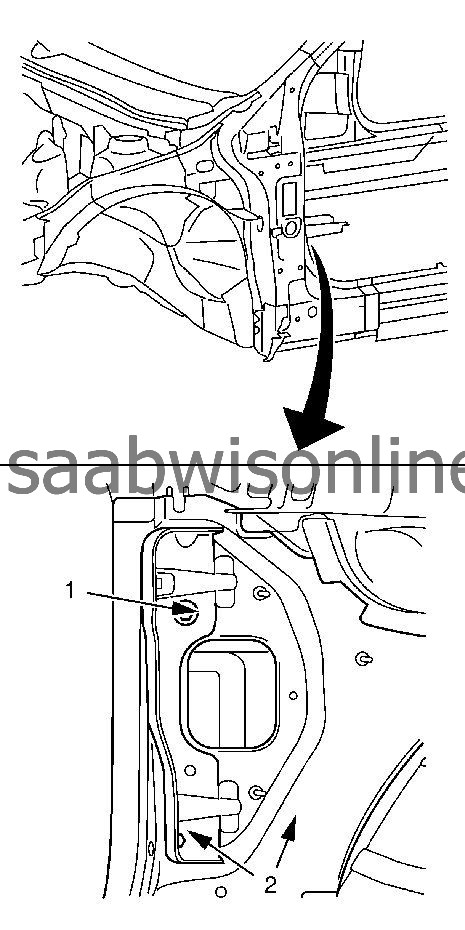
Do not damage any inner panels or reinforcements. Note the number and location of the welds for installations of the service part.
|
Locate and drill out all of the necessary factory welds.
|
|
7.
|
|
Note
|
|
Do not damage any inner panels or reinforcements. Note the number and location of the welds for installations of the service part.
|
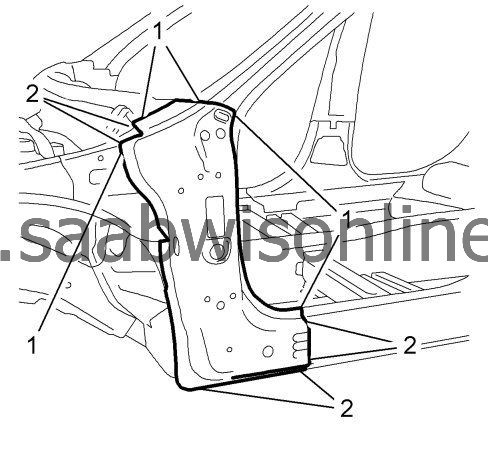
Drill out the necessary factory welds (2).
|
|
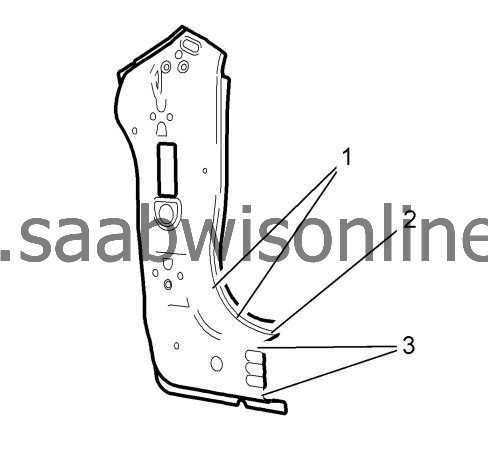
8.
|
Remove the fastener (1).
|
|
9.
|
|
Note
|
|
Do not damage any inner panels or reinforcements. Note the number and location of the welds for installations of the service part.
|
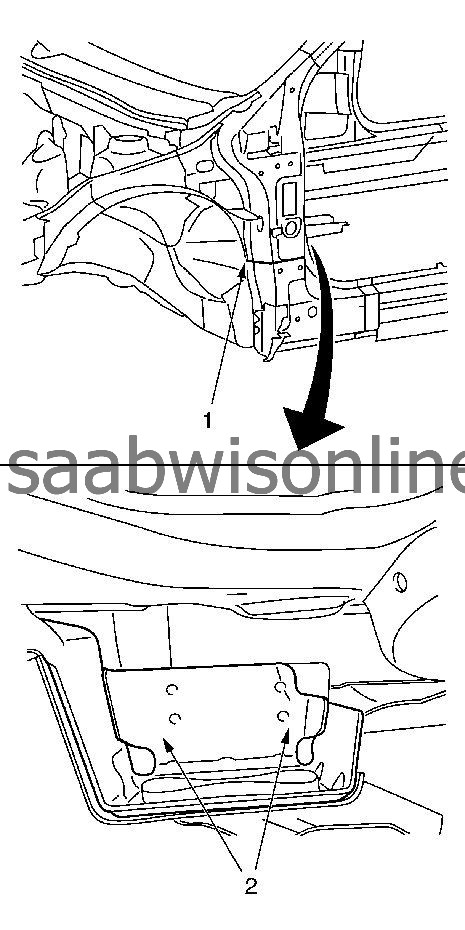
Cut out the body hinge pillar panel reinforcement (1) roughly.
|
|
10.
|
Drill out the necessary factory welds (2).
|
|
11.
|
Remove the damaged body hinge pillar panel reinforcement.
|
|
1.
|
|
Note
|
|
Refer SPP, PSO welding parameters for resistance spot welding. See TIS Newsletter for equipment recommendations.
|
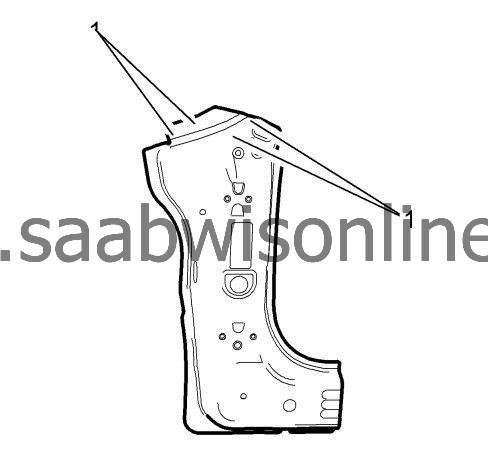
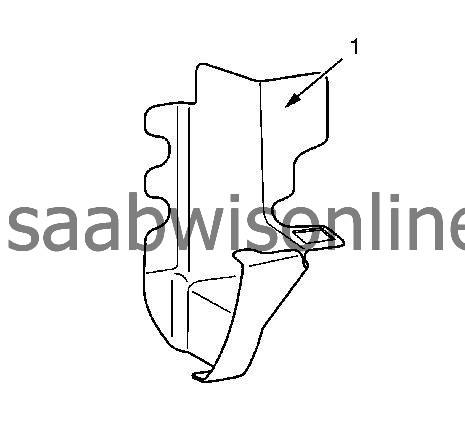
Prepare new body hinge pillar panel reinforcement in the area (1).
3 x slots (8 x 24 mm / 0.3 x 0.9 in)
|
|
2.
|
Prepare new body hinge pillar panel reinforcement in the area (2).
8 x slots (8 x 24 mm / 0.3 x 0.9 in)
|
|
3.
|
Prepare new body hinge pillar panel reinforcement in the area (1).
1 x slots (8 x 24 mm / 0.3 x 0.9 in)
|
|
4.
|
Prepare new body hinge pillar panel reinforcement in the area (2).
1 x slots (8 x 24 mm / 0.3 x 0.9 in)
|
|
5.
|
Prepare new body hinge pillar panel reinforcement in the area (3).
5 x slots (8 x 24 mm / 0.3 x 0.9 in)
|
|
6.
|
Prepare new body side outer panel lower filler in the area (1).
1 x slots (6 x 20 mm / 0.2 x 0.8 in)
|
|
7.
|
Prepare body hinge pillar panel in the area (1).
2 x slots (8 x 24 mm / 0.3 x 0.9 in)

|
|
8.
|
Clean and prepare the attaching surfaces for welding.
|
|
10.
|
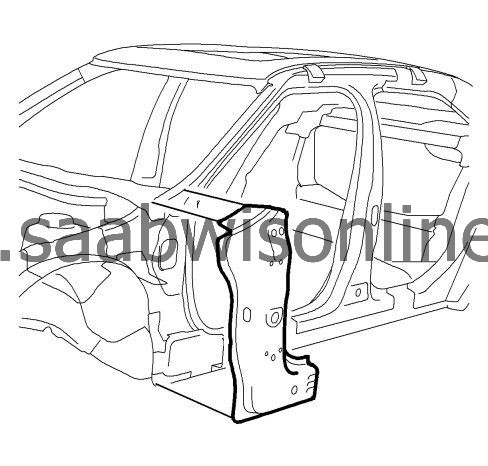
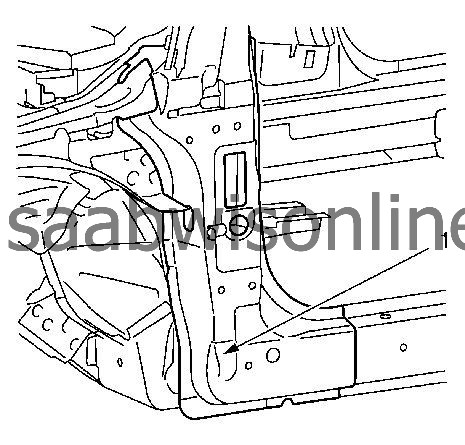
Position the body hinge pillar panel reinforcement on the vehicle.
|
|
11.
|
Verify the fit of the body hinge pillar panel reinforcement.
|
|
12.
|
Clamp the body hinge pillar panel reinforcement into position.
|
|
13.
|
Refer to
Fastener Caution
.
Install the fastener (1) and tighten to
22 Nm (16 lb ft)
.
|
|
14.
|
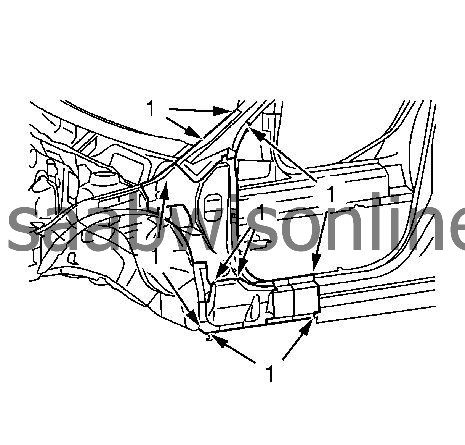
MIG-braze the body hinge pillar panel (1).
|
|
15.
|
Grind MIG brazed seams.
|
|
16.
|
Spot weld the body hinge pillar panel reinforcement (1) accordingly.
|
|
17.
|
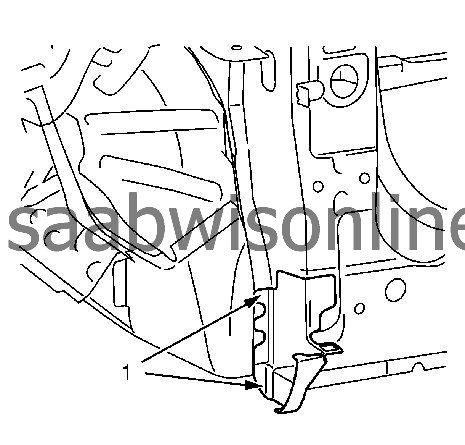
MIG-braze the body hinge pillar panel reinforcement (2).
|
|
18.
|
Grind MIG brazed seams.
|
|
19.
|
Clean and prepare the attaching surfaces.
|
|
20.
|
Apply bodywork repair through structural adhesive on the body in the area (1) for body side outer panel lower filler. Refer to
Volatile Memory Programming
.
|
|
21.
|
Position the body side outer panel lower filler on the vehicle.
|
|
22.
|
Verify the fit of the body side outer panel lower filler.
|
|
23.
|
Clamp the the body side outer panel lower filler into position.
|
|
24.
|
Spot weld the body side outer panel lower filler (1) accordingly.
|
