Quarter Outer Panel Replacement
|
|
Quarter Outer Panel Replacement
|
Refer to
Approved Equipment for Collision Repair Warning
.
Refer to
Glass and Sheet Metal Handling Warning
.
|
1.
|
|
Note
|
|
Section in specified areas only. Sectioning outside of these areas may compromise the structural integrity of the vehicle. The sectioning procedures have been developed as a more cost-effective alternative to complete replacement.
|
Disable the SIR system. Refer to
SIR Disabling and Enabling
.
|
|
3.
|
Remove all related panels and components.
|
|
5.
|
|
Note
|
|
Do not damage any inner panels or reinforcements.
|
|
Note
|
|
Note the number and location of the welds for installations of the service part.
|
Cut out the quarter outer panel.
|
|
6.
|
Locate and drill out all of the necessary factory welds.
|
|
7.
|
|
Note
|
|
Do not damage any inner panels or reinforcements.
|
|
Note
|
|
Note the number and location of the welds for installations of the service part.
|
Cut out the quarter outer panel.
|
|
8.
|
Locate and drill out all of the necessary factory welds.
|
|
9.
|
|
Note
|
|
Note the number and location of the welds for installations of the service part.
|
Locate and drill out all of the necessary factory welds.
|
|
10.
|
Remove the damaged quarter outer panel.
|
|
1.
|
|
Note
|
|
Refer SPP, PSO welding parameters for resistance spot welding. See TIS Newsletter for equipment recommendations.
|
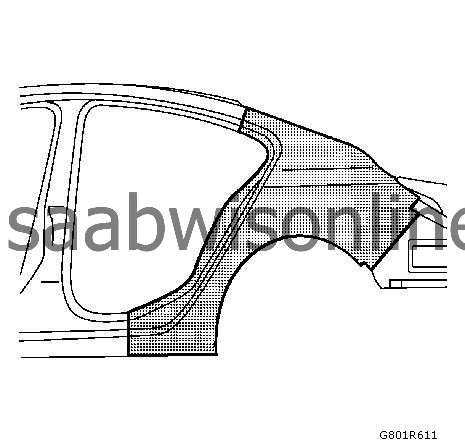
Cut the replacement quarter outer panel section in corresponding locations to fit the original panel. The sectioning joint should be trimmed to allow min. 1 times the metal thickness at the sectioning joint.
|
|
2.
|
|
Note
|
|
Pre-spot operation: The number of spots is specified in the documentation from the welding equipment manufacturer.
|
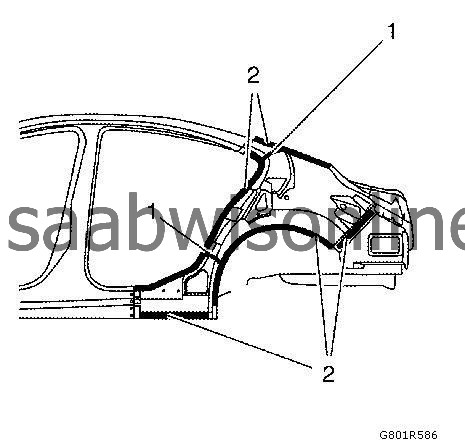
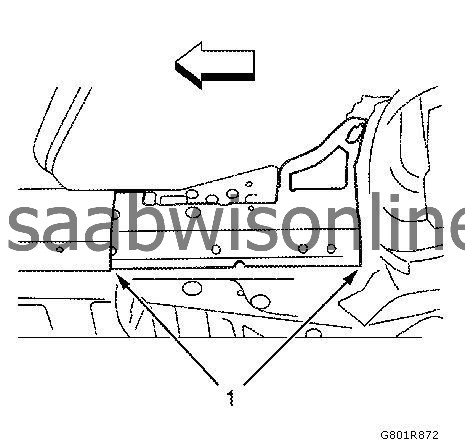
Prepare inner rocker panel (1) with reinforcement (PSO).
|
|
3.
|
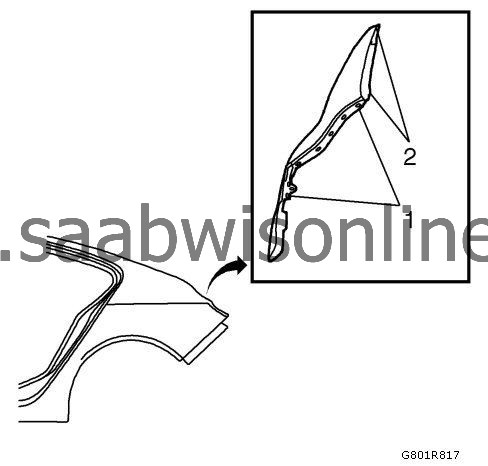
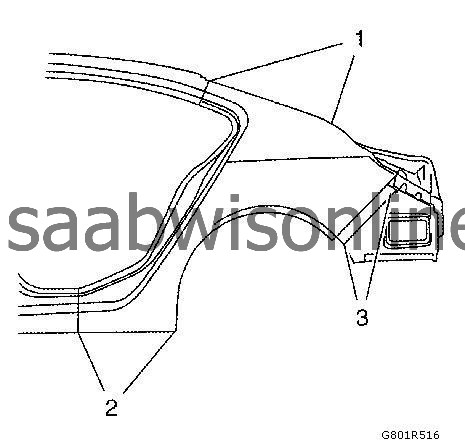
Prepare new quarter outer panel in the area (1).
7 slots (5x18 mm / 0.2x0.7 in)
|
|
4.
|
Prepare new quarter outer panel in the area (2).
6 slots (5x18 mm / 0.2x0.7 in)
|
|
5.
|
Position the new body side outer panel on the vehicle.

|
|
6.
|
Verify the fit of the new body side outer panel.
|
|
7.
|
Clamp the new body side outer panel into position.
|
|
8.
|
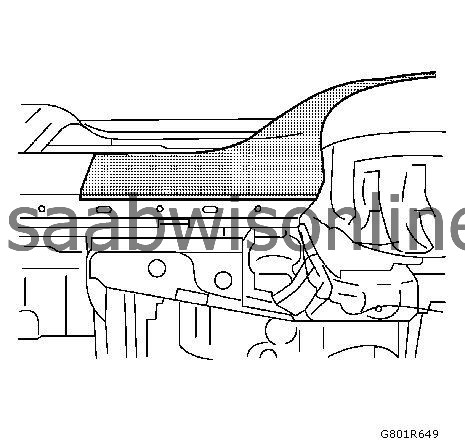
Drill fastening holes (1) for waterproof rivets.
4 holes
(4 mm / 0.16 in)
|
|
9.
|
Remove new quarter outer panel.
|
|
11.
|
Position the quarter outer panel on the vehicle.
|
|
12.
|
Verify the fit of the roof outer panel.
|
|
13.
|
Clamp the quarter outer panel into position.
|
|
14.
|
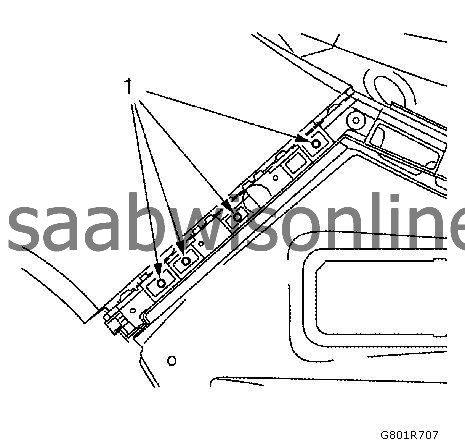
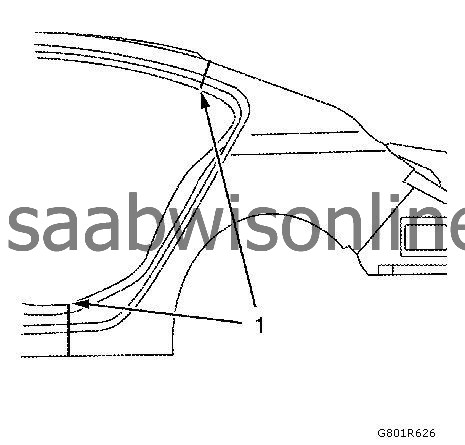
Spot weld (1) the quarter outer panel accordingly.
|
|
15.
|
Spot weld (SPP) the quarter outer panel (2) accordingly.
|
|
16.
|
MIG-braze (1) the quarter outer panel.
|
|
17.
|
Rivet (3) on the quarter outer panel.
|
|
18.
|
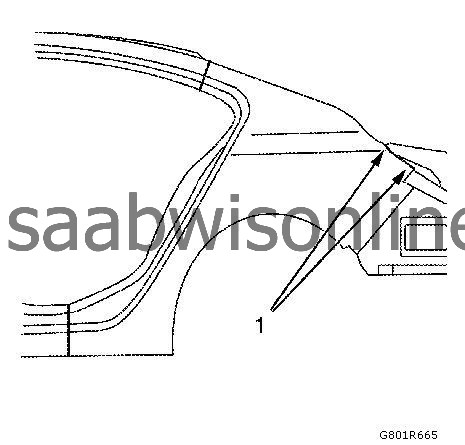
MIG-braze (1) the quarter outer panel.
|
|
19.
|
MIG-braze (1) the quarter outer panel.
|
|
20.
|
Grind MIG brazed seams.
|
|
21.
|
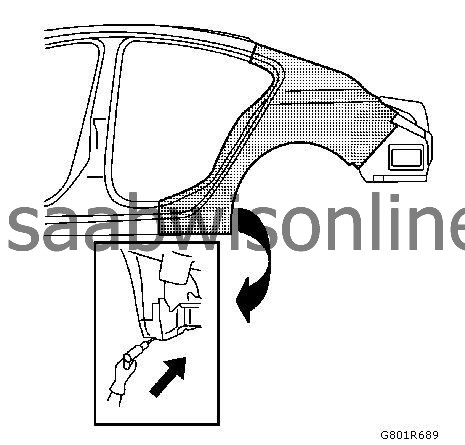
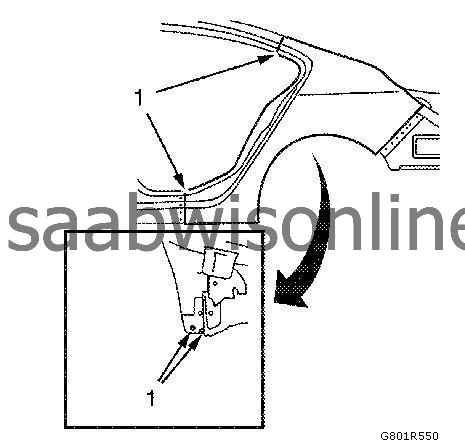
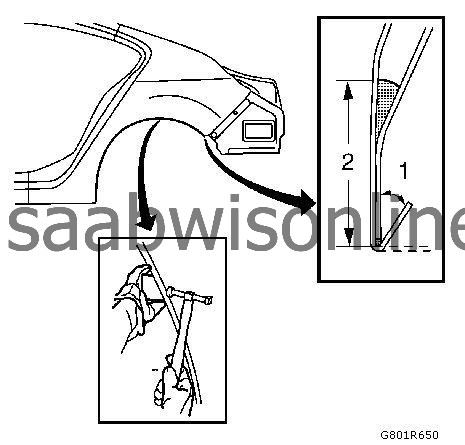
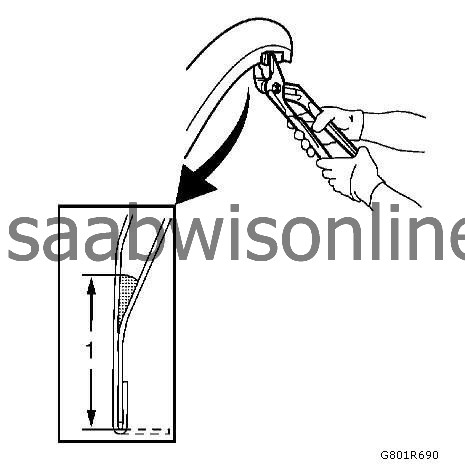
Pre-flange wheel housing.
Using a suitable hammer, bend over the flanged edge 45° (1), at the same time holding a small mallet or block against it. Use structural adhesive in the area (2).
|
|
22.
|
Bend the wheel arch.
|
|
|
22.1.
|
Apply excess adhesive as a seam seal and corrosion protection using a spatula or flat paintbrush. Use structural adhesive in area (1).
|
|
23.
|
Install all related panels and components.
|