Rocker Inner Panel Reinforcement Replacement
|
|
Rocker Inner Panel Reinforcement Replacement
|
|
3.
|
Remove all related panels and components.
|
|
5.
|
Restore as much of the damage as possible to factory specifications using 3-dimensional measuring equipment.
|
|
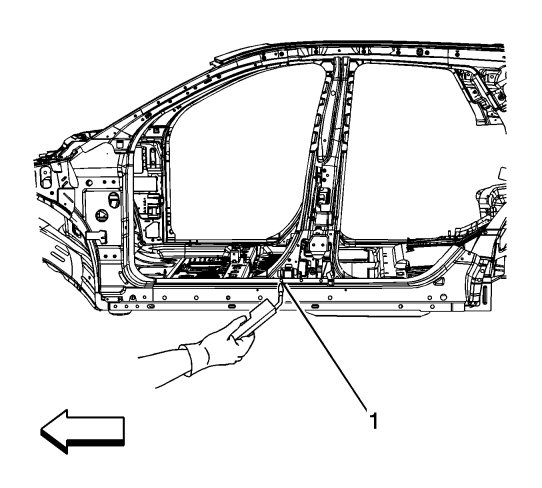
6.
|
Note the location and remove the sealers and anti-corrosion materials from the repair area, as necessary (1).
|
|
7.
|
|
Note
|
|
Do not damage any inner panels or reinforcements.
|
|
Note
|
|
The rocker inner panel is made of Ultra High Strength Steel and should be replaced only at factory joints. Sectioning or straightening are not recommended. Refer to
Ultra High Strength Steel
.
|
|
Note
|
|
Ultra High Steel is very difficult to drill. When possible drill spot welds from the back side of the panel.
|
|
Note
|
|
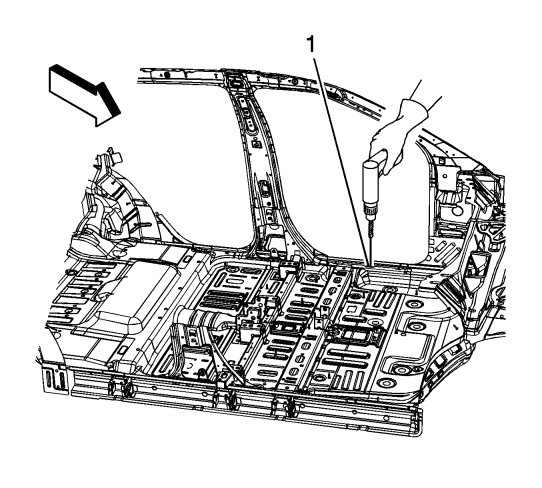
Record the number and location of the original welds for installation of the service part.
|
Locate and drill out all factory welds (1).
|
|
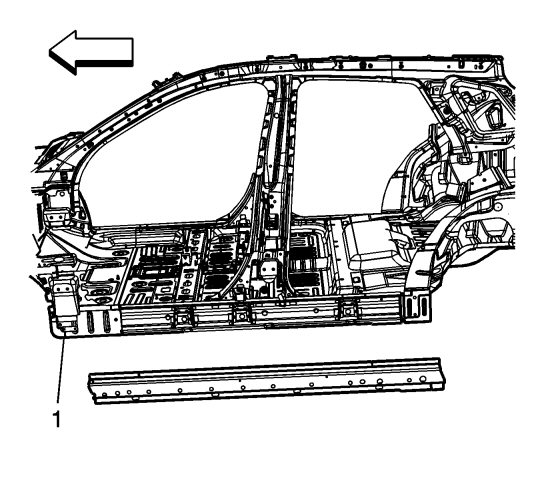
8.
|
Remove the damaged inner rocker panel (1).

|
|
1.
|
|
Note
|
|
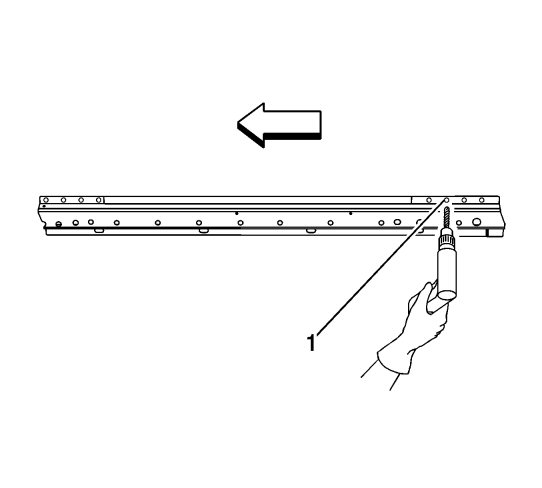
If the location of the original plug welds cannot be determined or structural weld- thru adhesive was present, space plug weld holes every 40 mm (1 1/2 in) apart.
|
Drill 8 mm (5/16 in) plug weld holes in the service part as necessary (1), in the locations noted from the original panel.
|
|
2.
|
Prepare all attachment surfaces as necessary.
|
|
3.
|
Apply GM-approved Weld-Thru Coating or equivalent to all mating surfaces.
|
|
4.
|
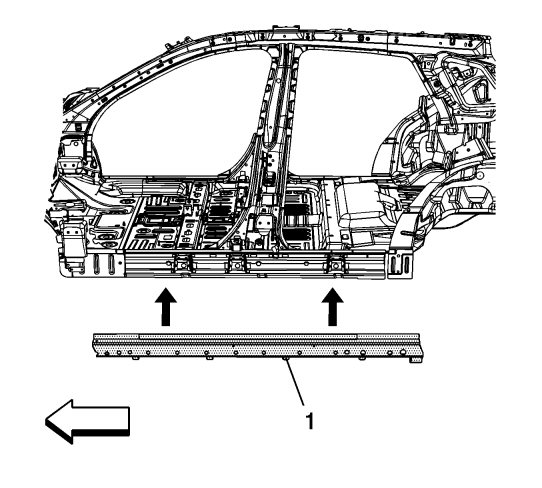
Position the inner rocker panel (1).
|
|
5.
|
Clamp service parts in position.
|
|
6.
|
Inspect the vehicle for proper dimensions using 3-dimensional equipment.
|
|
7.
|
Plug weld accordingly (1).
|
|
8.
|
Clean and prepare all welded surfaces.
|
|
9.
|
Apply the sealers and anti-corrosion materials to the repair area, as necessary.
|
|
11.
|
Install all related panels and components.
|
